- Vmware workstation как установить kali linux
- Vmware workstation как установить kali linux
- Preparation
- Download
- Setup
- Troubleshooting
- libaio missing
- Missing Packages
- Too Newer Kernel
- vmware-host-modules + Kernel Updates
- Still can’t start up VMware? vmware-modconfi
- Can’t Power on a Virtual Machine
- Vmware workstation как установить kali linux
- Wizard
- Edit Settings
Vmware workstation как установить kali linux

ЧАСТЬ 1, настройка машины.
Скачать и поставить Vmware.
Скачать Kali Linux (Все ссылки буду даны ниже)
Запускаем виртуалку и клацаем на «Создать новую виртуальную машину».
Открывается окошко, жмем «Обычный». Далее жмем «Файл образа установки (ISO)» и выбираем образ нашей ОС и жмем далее.
Выбираем: Гостевая ос — Linxu, Версия — Other Linux 3.x kernel
Пишете имя, и расположение где будут созданы файлы виртуалки и линукса.
Размер диска ставим не менее 30 GB, так как при меньшем значении возможны ошибки! И сохранить диск в одном файле.
(ВАЖНО! ДИСК БУДЕТ РАСШИРЯТЬСЯ ПО МЕРЕ ДОПОЛНЕНИЯ НОВЫХ ФАЙЛОВ!)
ЧАСТЬ 2 УСТАНОВКА ОС
Нажимаем «Включить виртуальную машину».
Выбираем «Graphical Install», потом язык, страну, и раскладку.
Имя компа, -имя домена- ничего не пишем и жмем продолжить.
Пароль суперюзера: ставим любой.
Авто — использовать весь диск. Все файлы в одном разделе, Закончить разметку и записать изменения.
Записать изменения на диск: Жмем «Да»
Ждем. (Обычно мин 10)
Использовать зеркало: Да
HTTP Proxy: Ничего не пишем и пропускаем.
Куда ставить grub: ничего не меняем (Должно быть: /dev/sda)
Далее идет процесс установки.
При завершение установки жмем продолжить.
Далее система перезагрузится и можно будет ее пользоваться.
При вхоже в систему у вас попросят логин пароль. По умолчанию это: Логин — root , Пароль — toor (Или же пароль от суперюзера!)
Вот и все, вы успешно поставили Kali Linux
Ссылки: Kali — https://www.kali.org | VMware — прога платная, найди и скачать с торрента, это не сложно))
В следующем гайде будет настройка и прочая лабуда. Ставь лайцкос)
Источник
Vmware workstation как установить kali linux
You can install VMware workstation or player on Kali Linux, allowing you to use Virtual Machines (VMs) inside of Kali Linux. However if you wish to use Kali Linux as a virtual machine, you will want our Kali Linux Guest VMware guide.
VMs are great, as there are many reasons why to use them. One of the being, able to run multiple Operating Systems at the same time. You can have your host machine “untouched”, and then only interact with the guest VMs. Another is when something is going right, take a snapshot. When something goes wrong, revert back.
VMware Workstation & Fusion is a commercial software (there is VMware Player which is free but it is limited in features). There are various free or open source solution (such as VirtualBox, QEMU, KVM/Xen with virt-manager).
Preparation
Before trying to install VMware, please make sure your version of Kali Linux is up-to-date, and if required, reboot the machine.
Download
To start with, you will need to download VMware. You can do this by going to VMware’s download page. At the time of writing, the latest version is 15.5.1-15018445 .
Alternatively, you can do the following command line method.
When everything is up-to-date, and ready to go, make sure the file is executable and then call it.
We can see we have installed VMware Workstation 15.5.1. The version number may be needed later on.
After the installer is installed, you should be able to just run vmware to continue setup.
At this point, you should be be straight forward, often just clicking through.
Setup
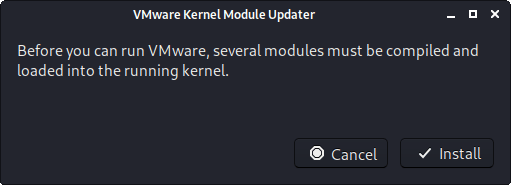
The first part may be VMware Kernel Modules.
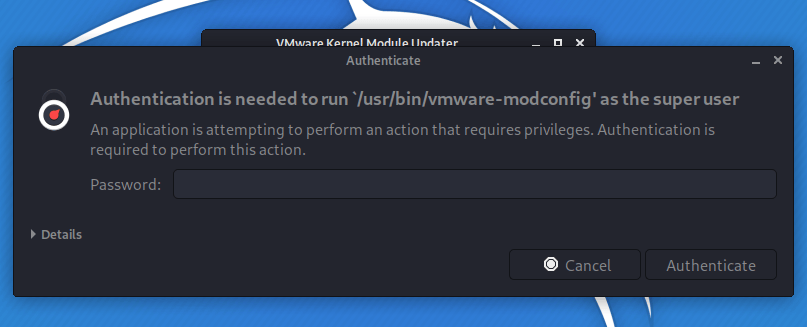
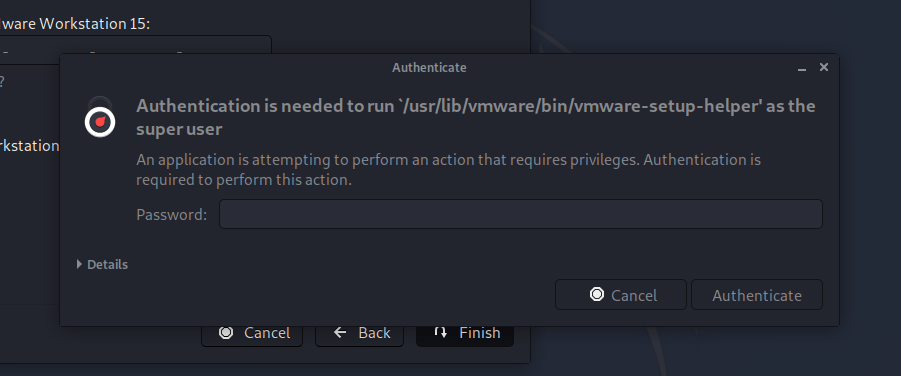
If vmware wasn’t called with superuser privileges, you may be prompted for a password.
At this point, it may not install correctly, and get the error message: Unable to install all modules. See log /tmp/vmware-kali/vmware-*.log for details. (Exit code 1) . This is often due to Kali’s kernel being newer than what VMware is expecting.
Looking at the log may help with troubleshooting the issue as well as the guide at the end of this post, vmware-host-modules .
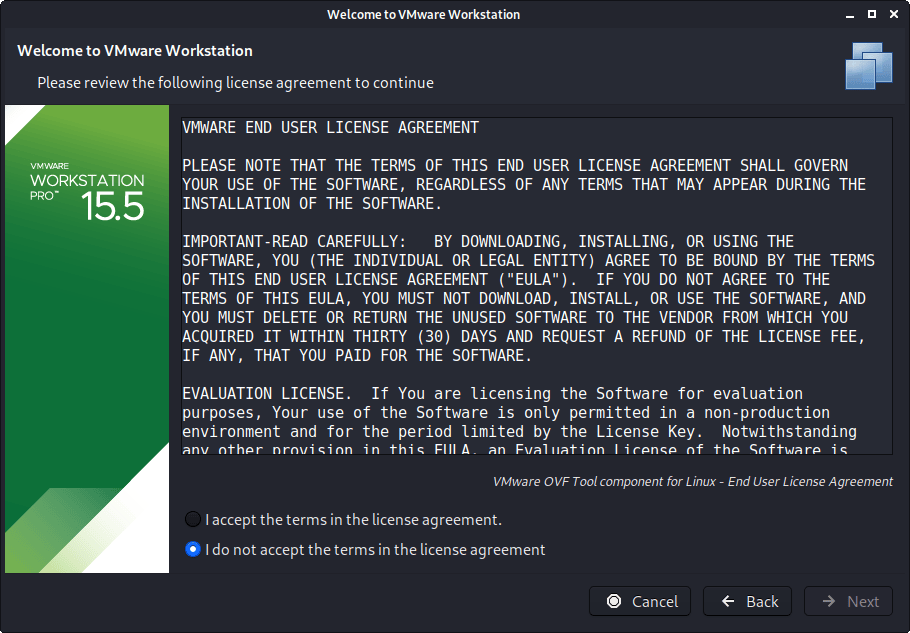
You will need to accept the legal agreement.
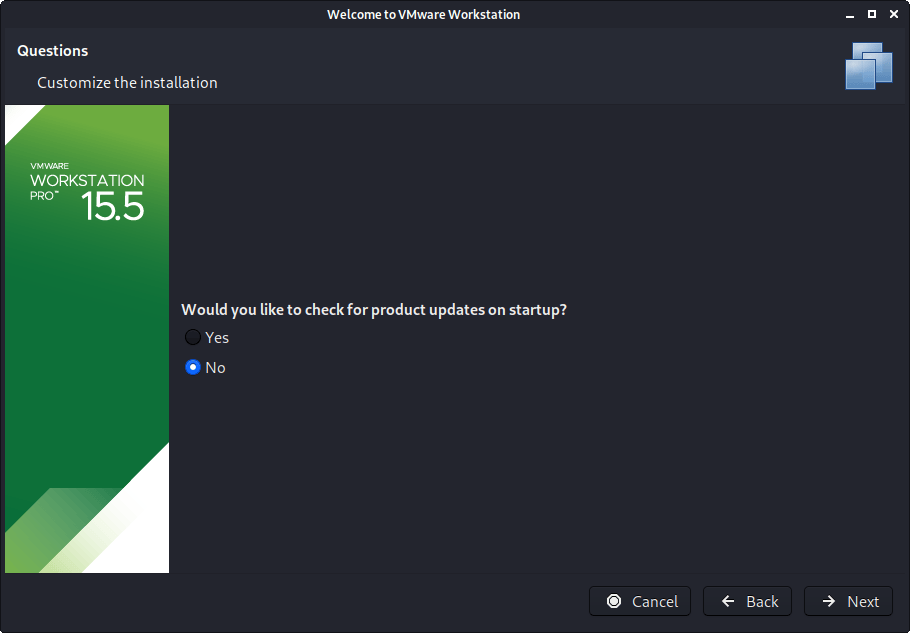
You may wish for it VMware to check for any updates.
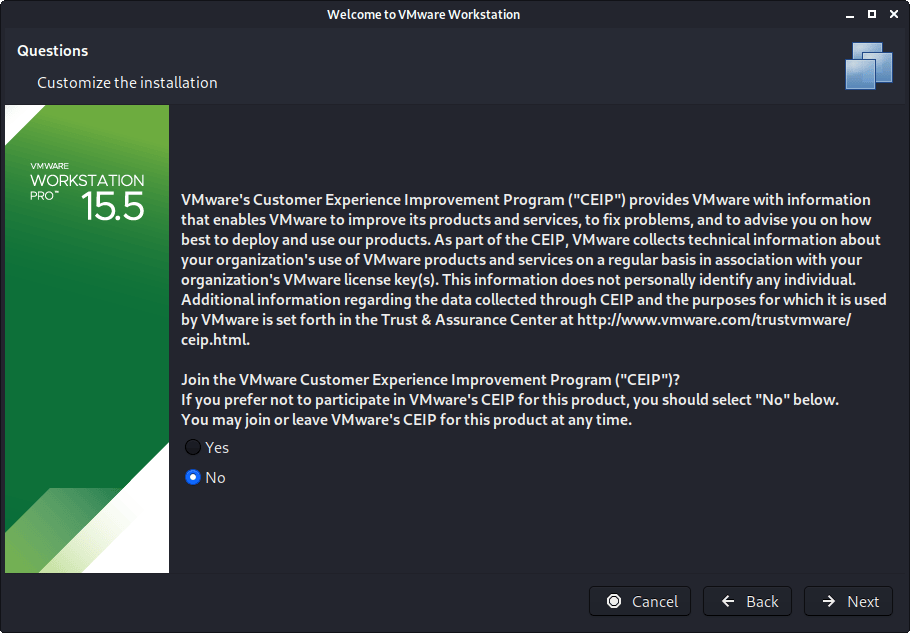
You may wish to join “VMware Customer Experience Improvement Program”.
Enter the current username.

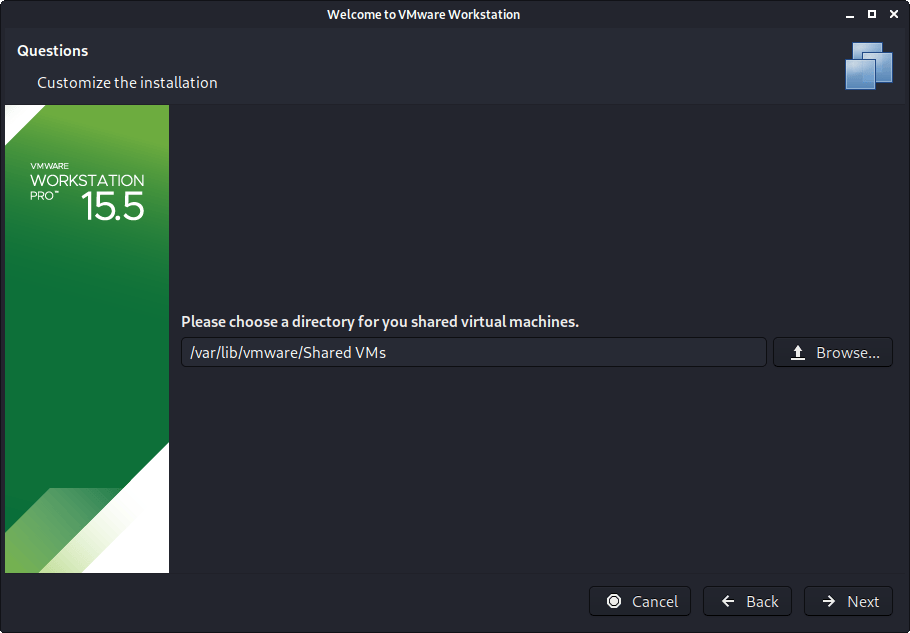
Enter a location for Shared VMs (this is different to each users own VMs).
Enter a port for HTTPS access

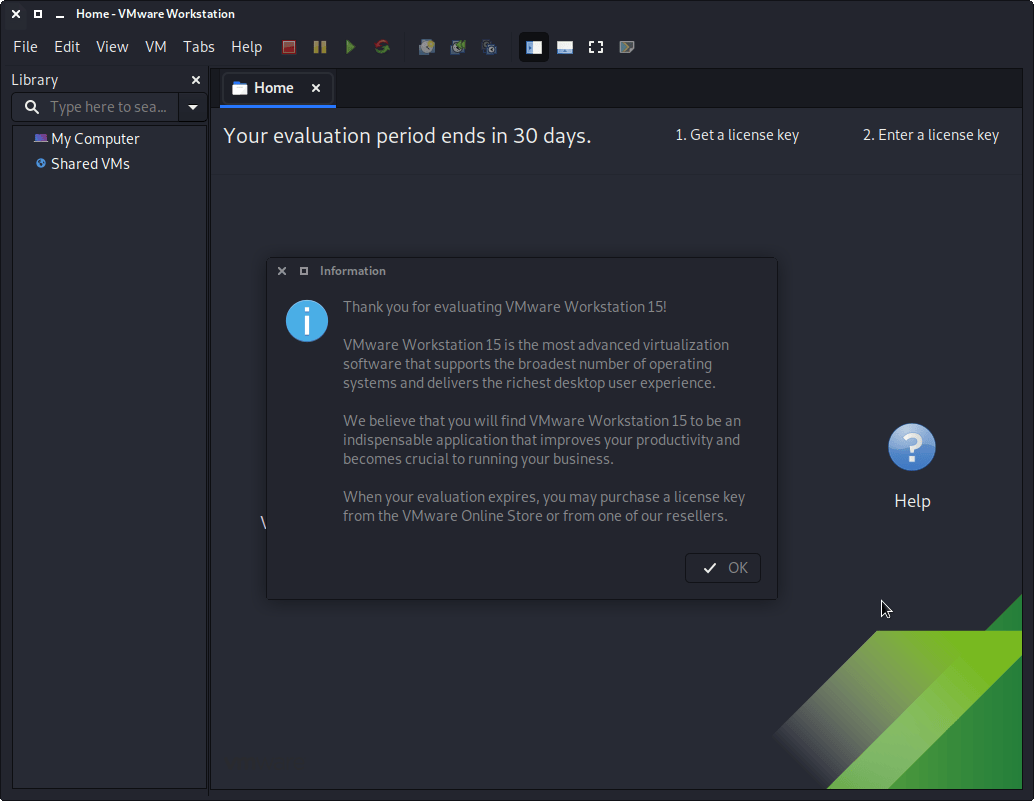
If you have a product key, you can enter it now, else it will be a trial for 30 days.

You may be once again prompt for superuser privileges if you didn’t execute the setup file with it.
The final screen should look like this.
If you now wish, you are able to install Kali Linux in a VMware VM (on Kali Linux).
Troubleshooting
libaio missing
If you see the following problem, upon trying to run vmware .
Try installing the libaio1 package.
Then the next time you start vmware , it should of gone away.
Missing Packages
From time to time, things may not go right. There could be a number of reasons why VMware may not install. The first thing to check would be you have all the necessary packages installed.
Try running vmware again, and see if now setup continues.
Too Newer Kernel
A common issue is because the setup file for VMware isn’t supporting the latest kernels, which could be an issue as Kali Linux is a rolling distribution and receives frequent updates. If this is the case, we can patch VMware modules to support this.
Try now to install VMware, by doing vmware.
If you are still having issues, you may need to restart your Kali Linux before trying one more final time.
vmware-host-modules + Kernel Updates
As VMware has various kernel modules, we need to make sure they are kept up-to-date and re-patched when Kali Linux’s kernel gets updated. This can be achieved by the steps in the following guide.
Still can’t start up VMware? vmware-modconfi
If VMware is unsuccessful, we can dig a little further by running the following.
Looking at the output, may either give us the exact issue, or at the very least something to search the Internet for.
Can’t Power on a Virtual Machine
You may also face the following issues, when trying to power on a VM.
- Failed to initialize monitor device
- Could not open /dev/vmmon: No such file or directory. Please make sure that kernel module ‘vmmon’ is loaded
- Unable to change virtual machine power state: Transport (VMDB) error -14: Pipe connection has been broken.
The quickest solution to fix these would be to reboot Kali Linux and try again.
Updated on: 2021-Sep-27
Author: g0tmi1k
Источник
Vmware workstation как установить kali linux
This guide is about virtualizing Kali Linux inside of VMware, allowing you to have a Kali VM. This is a great way to use Kali, as it is completely separate from the host, allows you to interact with other VMs (as well as the host, and other machines on the network), and allows you to revert to snapshots.
If you are trying to install VMware on Kali Linux (as a host), please see our guide.
The guide below is what we use to generate our pre-made Kali Linux VMware images. You may alter this to your needs. We always generate the images using the latest version of VMware Workstation, as Player and Fusion don’t have the same level of functionally and controls over settings.
You will need to enable virtualization in your BIOS/UEFI for (e.g. Intel VT-x/AMD-V)
Wizard
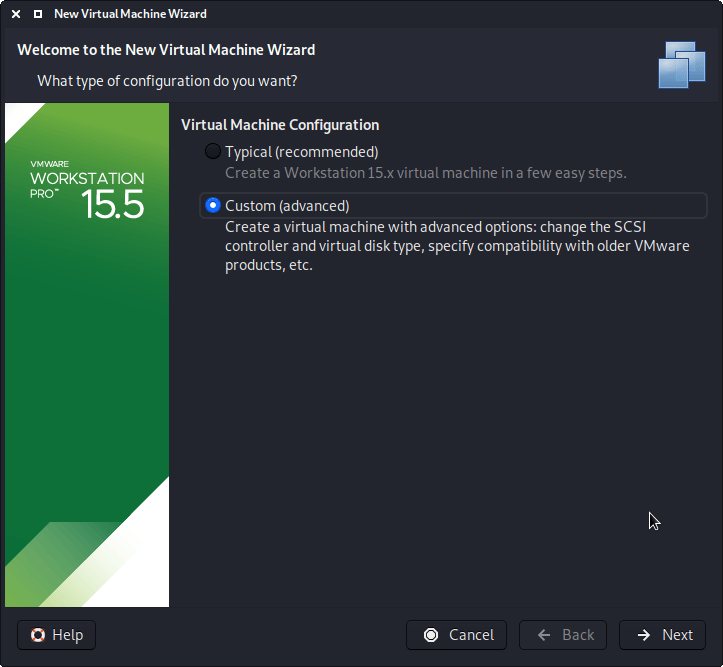
Upon starting up VMware Workstation, select “Create a New Virtual Machine”.

When you have the option, select “Custom (advanced)” for the Virtual Machine Configuration, as this will allow us to have more control over the creation of the VM.
The next screen is “Virtual Machine Hardware Compatibility”, which we use “Workstation 8.x”.
This allows for more users to benefit from Kali Linux out of the box (without having to edit the .vmx file to downgrade). If you are using a later version of VMware than v8, upon start up, VMware will prompt about upgrading the VM. This will remove any limitations caused by older VMware profiles. However, most users do not have their Kali Linux VM using all these extra resources (see screenshot below), so they wouldn’t benefit from having the latest profile, which is why we ship with a older profile.

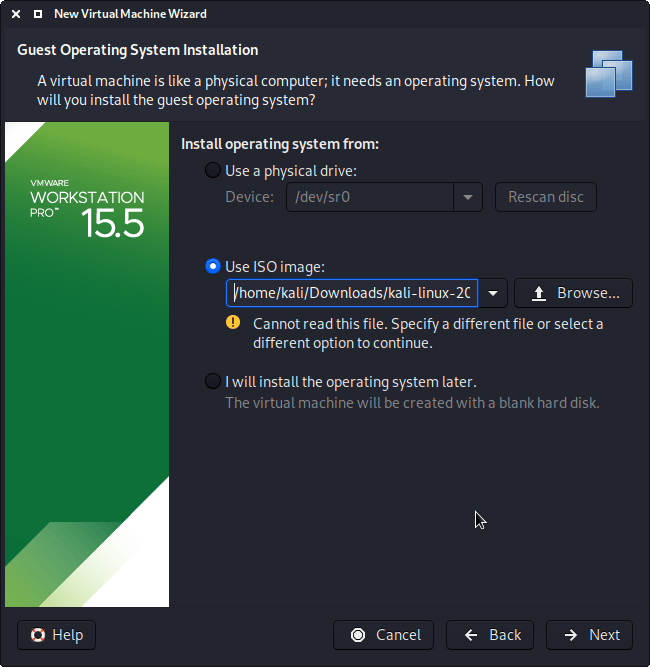
On this screen, we select the Kali Linux image to use to install from. We select “Browse”, and navigate to the location of the ISO that we downloaded. For more information on what image to download, we have written up a guide.
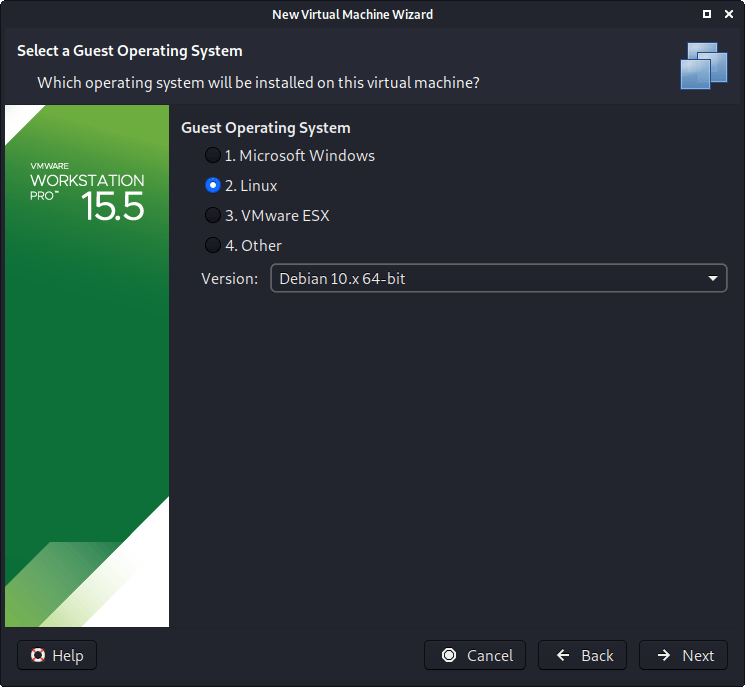
When you see the “Guest Operating System” screen, select “Linux”, and then the latest version of Debian for the version (as Kali is based on Debian). In this example, its Debian 10. We are going to be use the x64 image to install Kali, so we have selected 64-bit.
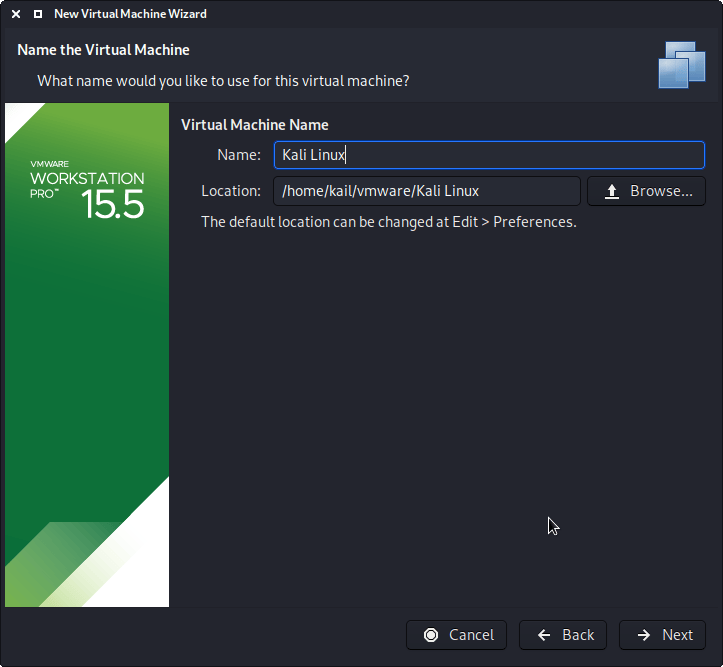
The next screen is “Virtual Machine Name”, which is where you name the VM. This name is also used as the filename (such as the configuration, hard disk and snapshot — which is not changed from this point).
We are keeping it generic in this guide, by using “Kali Linux” (as Kali Linux is a rolling distribution, and we update Kali Linux). However for our releases, we use the version number in the name as it is a fixed release ( kali-linux-YYYY.N-vmware-ARCH . Example: kali-linux-2021.3-vmware-amd64 ).
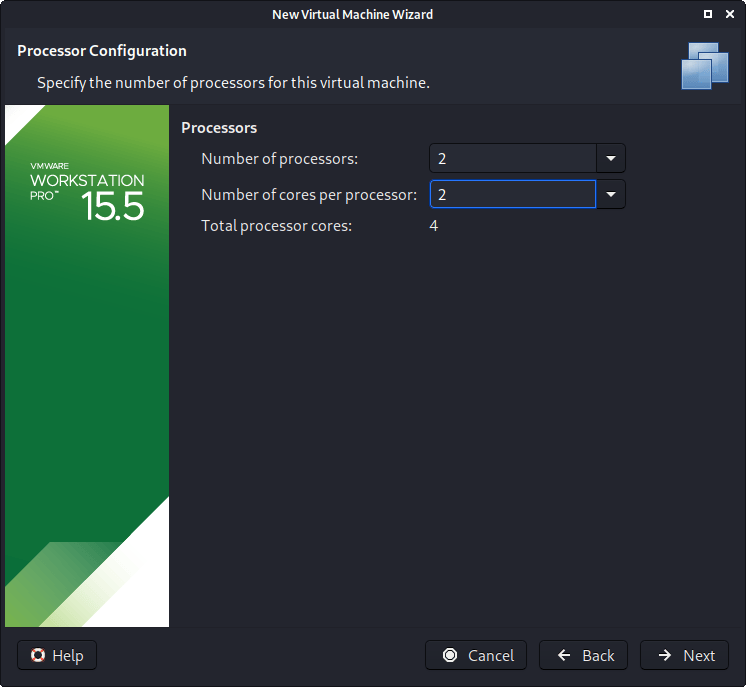
The next screen is “Processors”. Here we can start to define how many resources we give the VM. Kali will be able to perform more tasks simultaneously and quicker if it is allocated more resources. We select “2 processors” and “2 cores per processors”, giving a total of 4 cores. You may wish to use more or less depending on your system requirements.
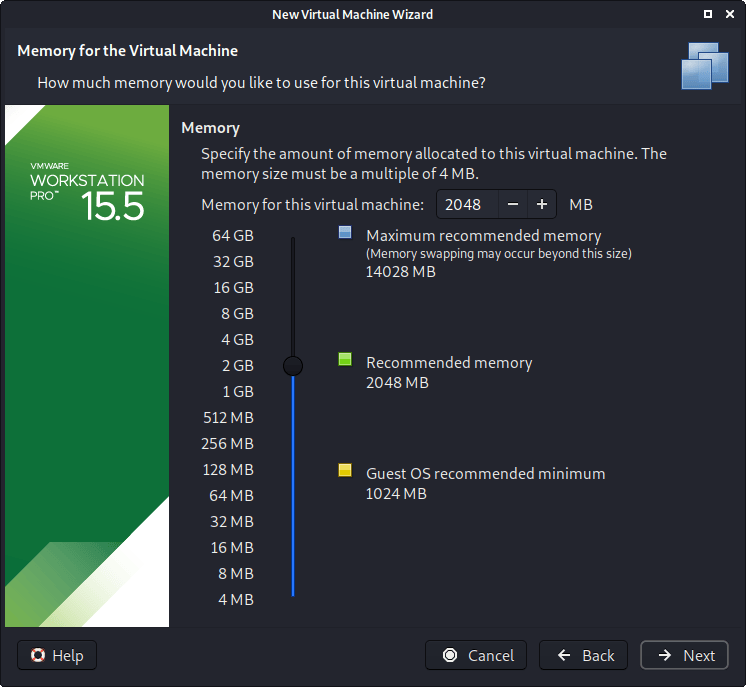
“Memory” is the next section, where we can define how much RAM to use. Again, the higher amount of RAM, the more applications can be open and at increased performance. Various tools inside of Kali can be demanding of resources. When we make the general VMs, we select 2GB (2048 MB) for RAM, but we often increase this for our personal machines as we have high-performing devices with spare RAM which Kali can utilize.
We are then presented with “Network Connection”. We default to using a NAT connection. However, this can easy be altered (even when the VM is powered on). This allows for Kali VM to talk to the Internet, as well as the rest of the LAN connection, without it taking up an additional IP address. The downside to this is it will not be able to receive reverse shells (without port forwarding inside of VMware).

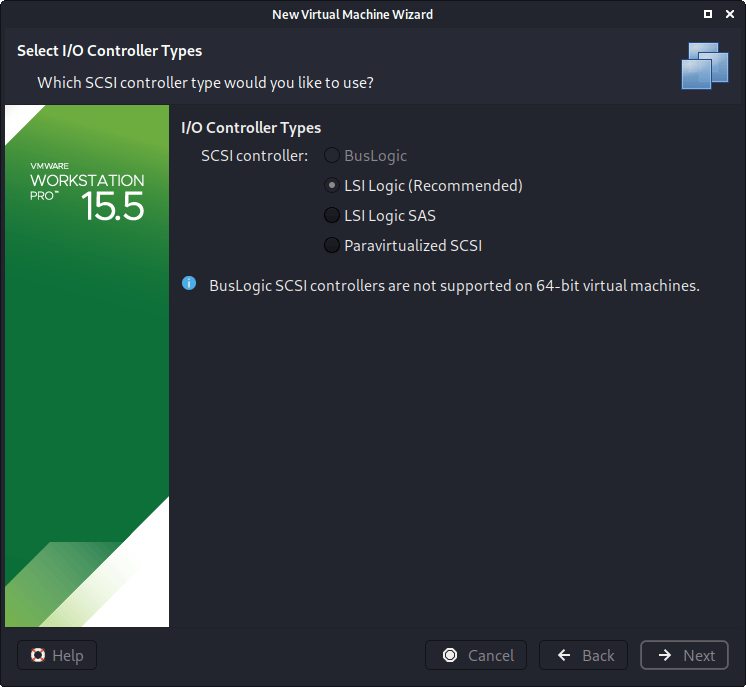
Next is “I/O Controller Types”. We accept the default value of “LSI Logic”.
Next is “Virtual Disk Type”. We accept the default value of “SCSI”

The following screen is “Disk”, which allows us to “create a new virtual disk”

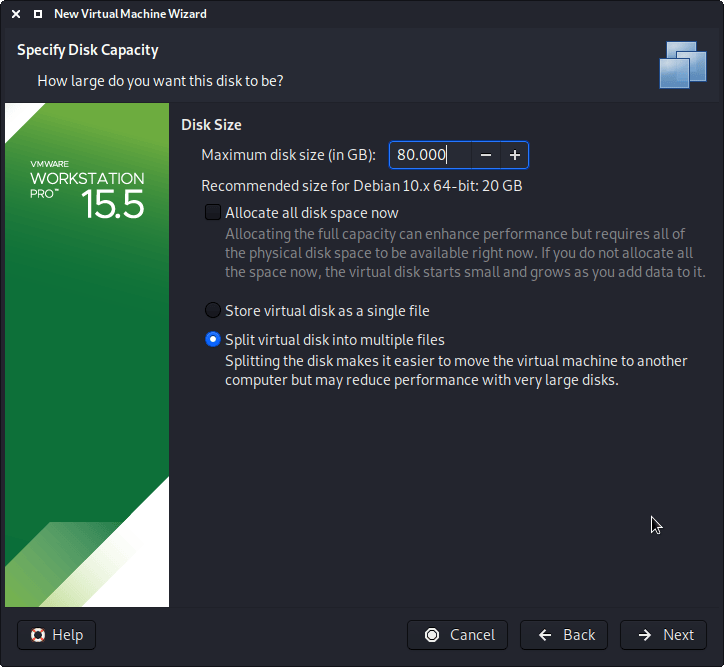
This screen below, “Disk Size”, allows us to define how large the virtual hard disk will be. We use “80 GB” for our VMs.
We also don’t have it in a single file, but instead “Split virtual disk into multiple files”. The VM hard disk will grow over time, to the maximum size, as we do not enable the “Allocate all disk space”.
It is possible to increase/decrease the hard disk after the VM has been created, however, if you have installed Kali, you’ll need to then also grow or shrink the partition for the space to reflect that.
When it comes to the “Disk File” screen, we accept the default value, which has been defined from our VM name earlier in the setup process.

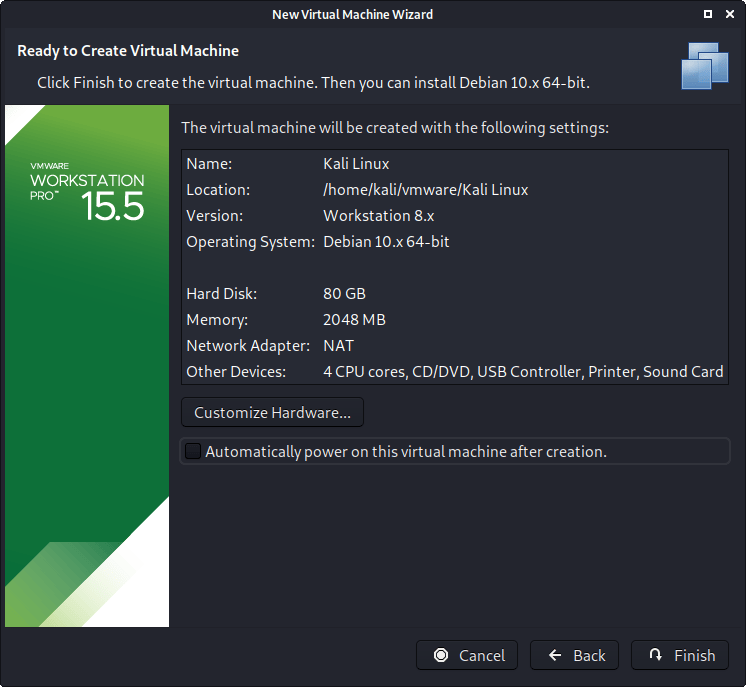
We are then presented the final screen for the VM setup wizard, which gives us an overview of the settings we picked.
We are happy with whats shown to us, so we then press “Finish”. If you try and “Customize Hardware” at this stage, before the VM is fully created, not every setting is visible.
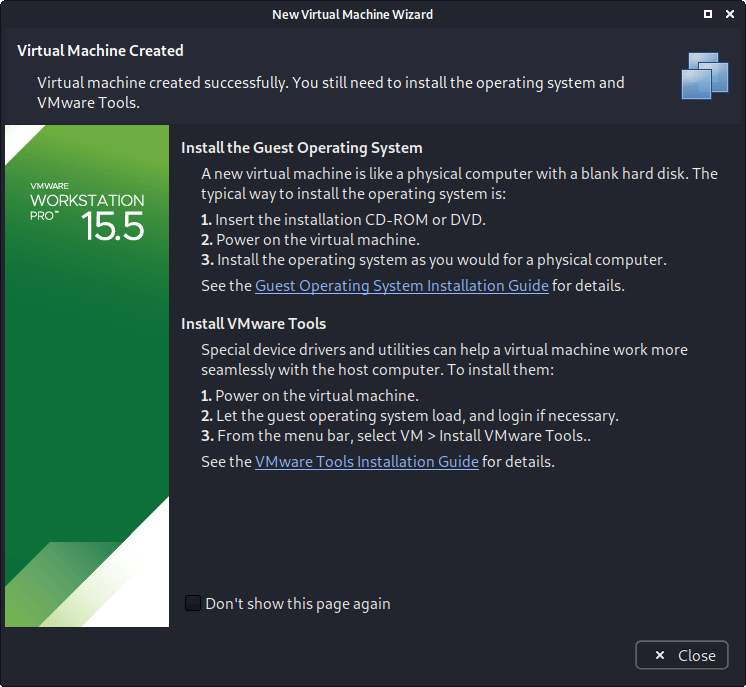
If this is the first time using the wizard, you may have the following prompt explaining how installing “VMware tools” will give you a better experience when using the VM.
After reading and understanding the page, you may wish to tick the “Don’t show this page again”, before pressing close.
Edit Settings
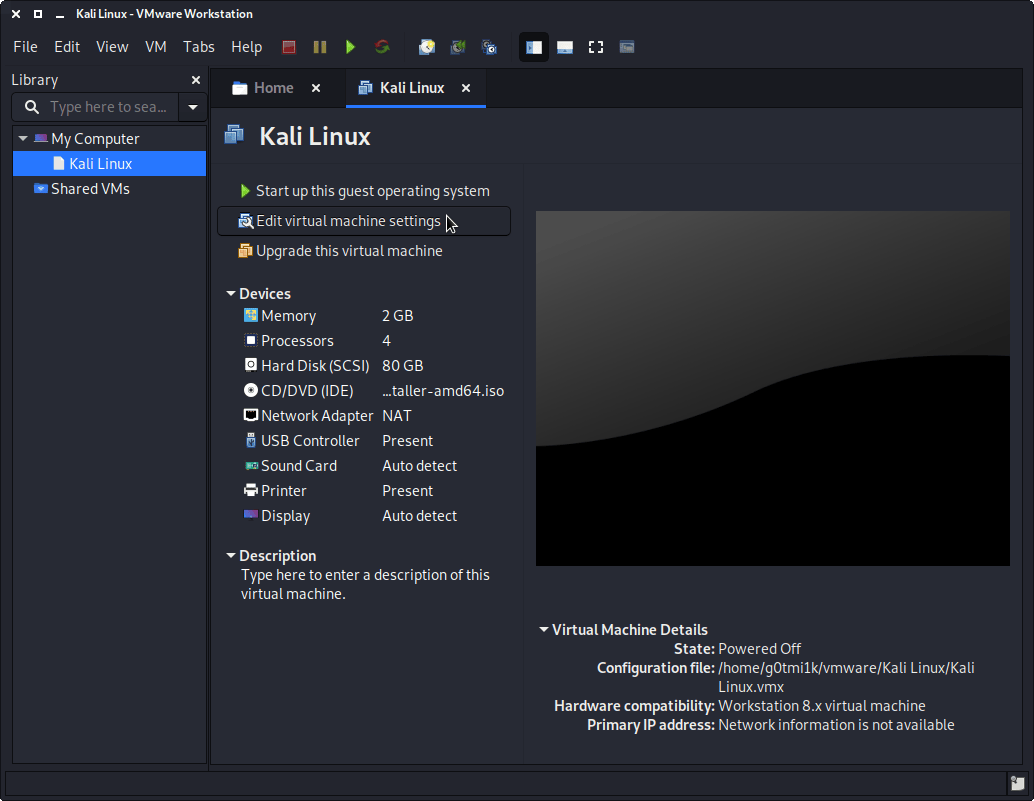
Before we start up the VM, we now edit its settings, by pressing “Edit virtual machine settings”.
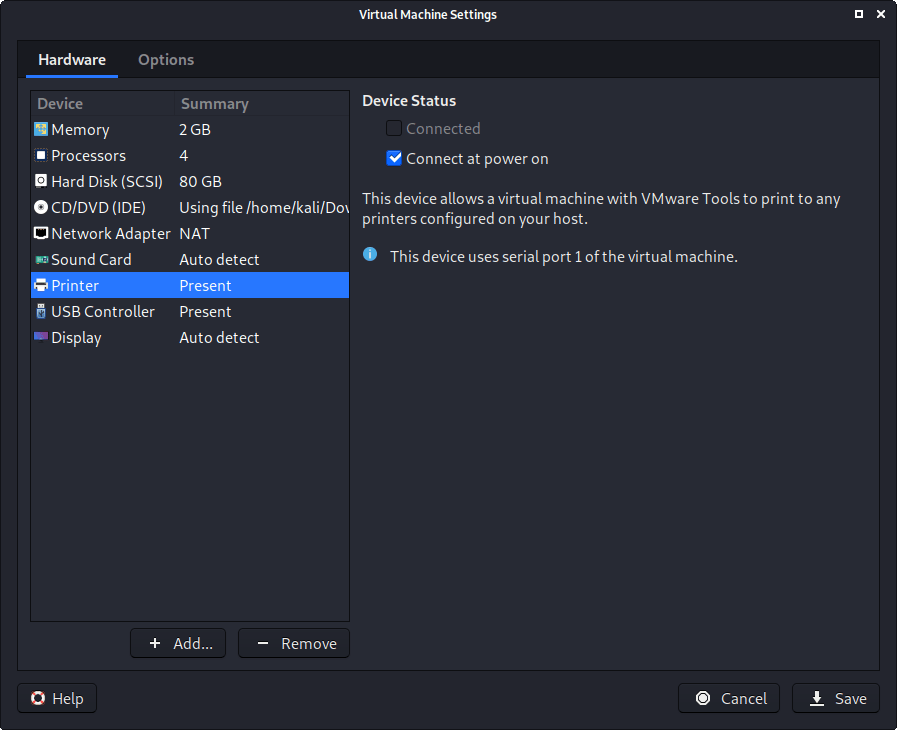
We do not have a use for a printer, so we remove it. Navigate to the “Printer” section, and then press “Remove”.
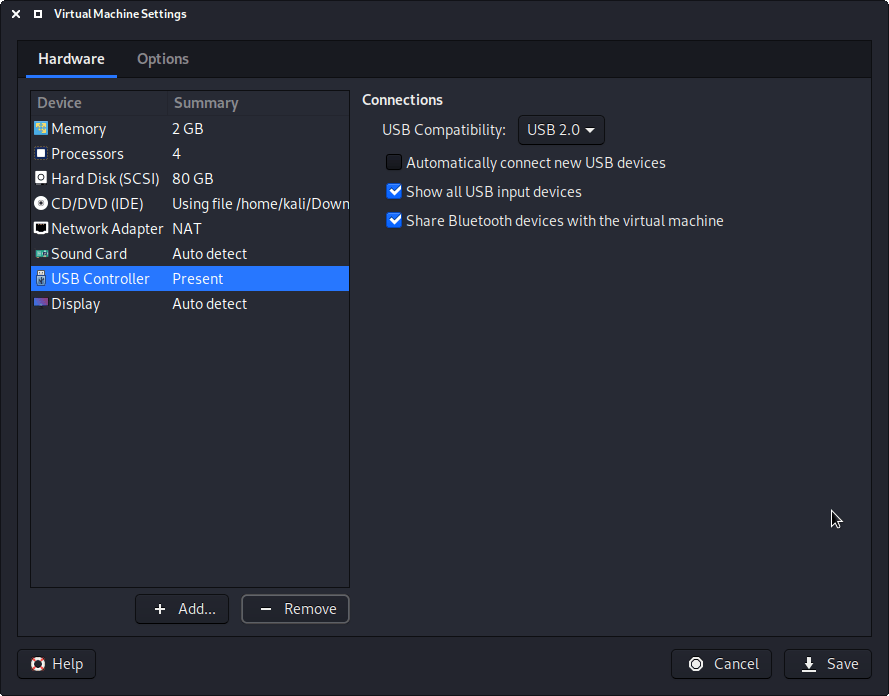
You may wish to edit the “USB” settings to alter how USB devices behave. Here we have disabled “Automatically connect new USB devices” (may not have the option depending on your VMware version) and enabled “Show all USB input devices”.
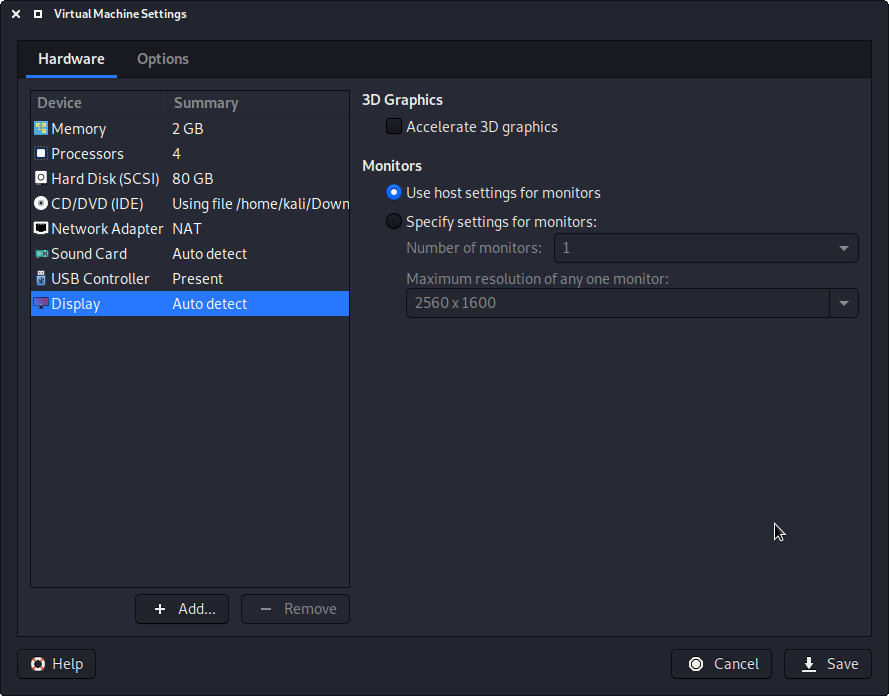
Another item to point out is in the “Display” section. Make sure that “Accelerated 3D graphics” is disabled, as people have reported that causes issues.
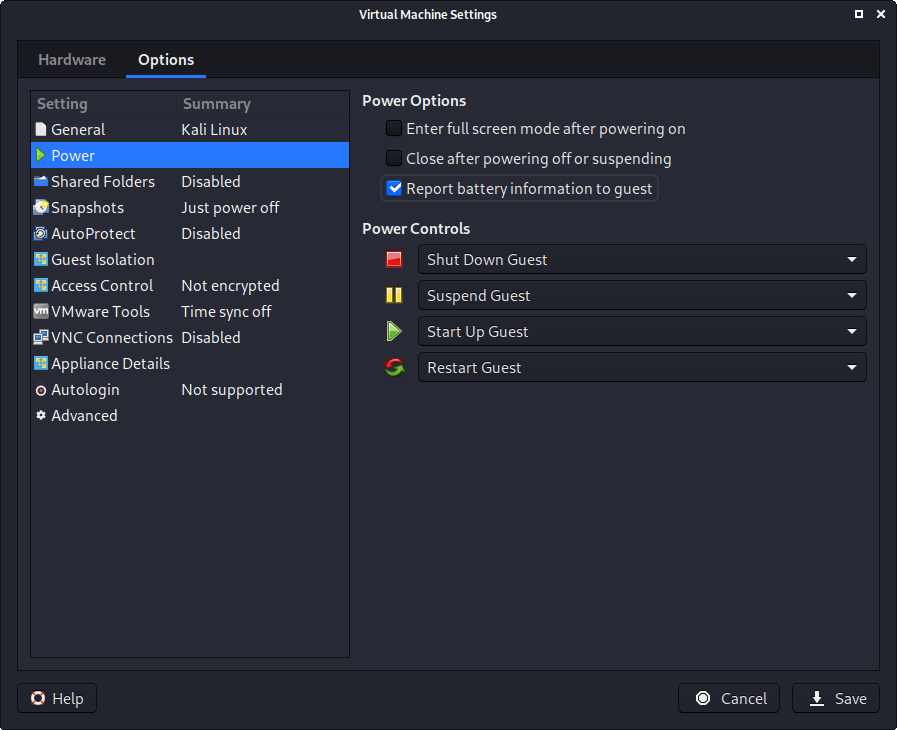
We then move over to the “Options” tab, and move down to “Power”. We choose to enable “Report battery information to guests”, as it is a handy thing for users who use Kali on a laptop/notebook.
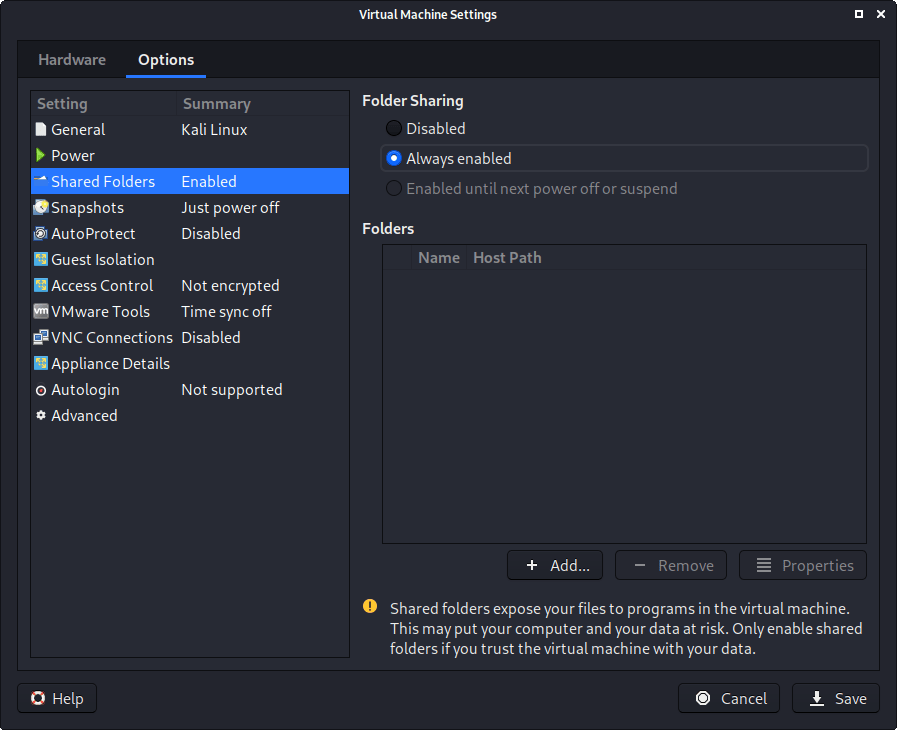
In “Shared folders”, we select “Always enable”. At this stage, do not share any paths, as some users may not wish for it.
The final option we alter is “VMware Tool”, where we enable “Synchronize guest time with host”.

After all this is done, we save, start up the VM, and then continue installing Kali Linux as we normally would for a bare metal install.
During Kali Linux setup process, the install wizard should detect if its inside a VM. If it is, should then automatically install any additional tools (such as open-vm-tools ) to give a better user experience. If you want to manually re-install it, you can see our VMware Guest Tools Guide.
Updated on: 2021-Sep-27
Author: g0tmi1k
Источник


