- Установка macOS на VMware Workstation
- Как разблокировать VMware для macOS
- Как создать виртуальную машину для macOS
- Как отредактировать файл .VMX
- Как установить macOS на VMware Workstation
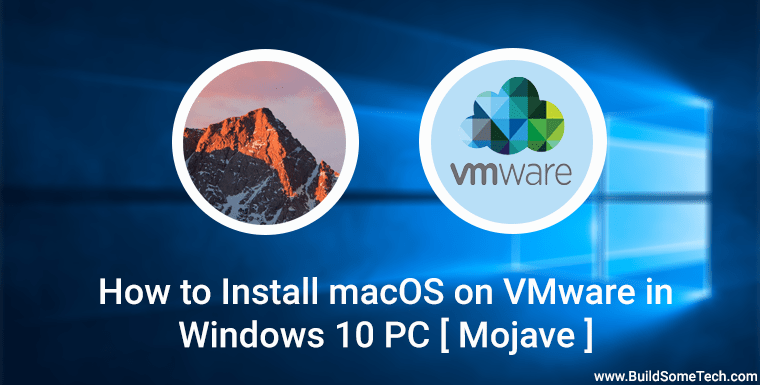
- How to Install macOS on VMware in Windows PC [Mojave]
- Install macOS Mojave on VMware in Windows PC
- 1. Install VMware Workstation Player Pro
- 2. Install VMware Unlocker Patch Tool
- 3. Create a new macOS Virtual Machine
- 4. Configure Virtual Machine
- 5. Add Config Key in VMX File
- How to Install macOS Mojave on VMware using VMDK – Windows 10 PC
- Requirements:
- Steps to Install macOS Mojave on VMware using VMDK
- Step 1: Download the prerequisites
- Step 2: Install the Prerequisites
- Step 3: Unlock VMware to Install macOS Mojave
- Step 4: Create a New Virtual Machine
- Step 5: Edit the new Virtual Machine
- Step 6: Edit macOS Mojave VMX File (Optional)
- Step 7: Wait for macOS Mojave Installation
- Step 8: Complete Basic macOS Account Settings
- Step 9: Install VMware Tools (Optional)
- Step 10: Update macOS Mojave to the Latest Version (Optional)
Установка macOS на VMware Workstation
В этой статье мы расскажем, как проходит установка macOS на компьютер через VMware Workstation Player. Для работы вам понадобится готовый ISO-образ операционной системы. На VMware mac OS устанавливается в 4 этапа:
- Установка патча для разблокировки возможностей работы VMware с macOS.
- Создание виртуальной машины.
- Редактирование конфигурационного файла для запуска на процессорах Intel или AMD.
- Установка macOS на виртуальную машину.
Как разблокировать VMware для macOS
Поскольку VMware Workstation официально не поддерживает MacOS в качестве гостевой ОС, для запуска macOS нужно установить неофициальный патч. Он подойдет как для Workstation Player, так и для Workstation Pro.
Чтобы установить патч для разблокировки macOS:
Готово, при создании виртуальной машины в списке поддерживаемых гостевых ОС появится Apple Mac OS X:
Как создать виртуальную машину для macOS
После установки патча можно приступить к установке macOS. Для работы вам понадобится готовый ISO-образ операционной системы.
Нажмите Create a New Virtual Machine, чтобы создать новую виртуальную машину:
Нажмите Browse и в локальной папке компьютера выберите ISO-образ Mac OS. После этого кликните Next:
Выберите «Apple Mac OS X». Выбор версии зависит от того, какую ОС вы хотите установить:
- Big Sur — macOS 11.1,
- Catalina — macOS 10.15,
- Mojave — macOS 10.14.
Затем нажмите Next:
Если вы хотите оставить название и директорию по умолчанию, нажмите Next. Если вы хотите изменить их, в поле «Virtual machine name» введите имя новой виртуальной машины. Затем нажмите Browse, чтобы выбрать папку, в которой будет храниться виртуальная машина. После этого нажмите Next:
«Maximum disk size» — это максимальный размер дискового пространства, которое будет выделено для гостевой операционной системы. Мы рекомендуем выбрать объём — 80 ГБ.
Если хотите, чтобы виртуальный диск хранился в одном файле, выберите Store virtual disk as a single file. Это не повлияет на производительность операционной системы.
Проверьте количество выделенных ресурсов. Для этого нажмите Customize hardware:
- Memory (оперативная память) — рекомендуемый объём составляет 4 ГБ. Если у вашего компьютера установлено 16 ГБ оперативной памяти, выделите 8 ГБ.
- Number of processor cores (количество ядер процессора) — минимальное рекомендуемое количество — 2. Если процессор вашего компьютера имеет 8 и более ядер, выделите минимум 4 ядра.
Кроме оперативной памяти и ядер процессора необходимо включить виртуализацию. Для этого нажмите Processors, отметьте галочкой пункт «Virtualize Intel VT-x/EPT or AMD-V/RVI» и кликните Close:
Готово, виртуальная машина создана.
Как отредактировать файл .VMX
Перед запуском гостевой ОС нужно внести изменения в файл с расширением .VMX.
Откройте директорию, в которой хранятся файлы виртуальной машины. Это директория, которую вы выбирали на 5 шаге. Если вы выбрали директорию по умолчанию, перейдите в Документы — Virtual Machine. Вам нужен файл с расширением .VMX:
Кликните по файлу правой кнопкой мыши и выберите Открыть с помощью — Блокнот.
В зависимости от процессора вашего компьютера вставьте в конец файла нужный текст:
Готово, виртуальная машина готова к запуску.
Теперь запустим виртуальную машину и установим операционную систему macOS.
Как установить macOS на VMware Workstation
В инструкции мы устанавливаем версию macOS Big Sur. Процедура установки версий macOS Mojave и Catalina практически не отличается.
Чтобы установить macOS на VMware Workstation:
Запустите созданную ранее виртуальную машину:
Дождитесь загрузки операционной системы с установочного диска:
Выберите язык и нажмите на стрелку в правом нижнем углу:
Отформатируйте виртуальный диск. Для этого выберите Дисковая утилита и нажмите Продолжить:
Выберите виртуальный жёсткий диск VMware Virtual SATA Hard Drive Media и нажмите Стереть:
Введите название диска и нажмите Стереть:
Дождитесь завершения процедуры и нажмите Готово.
После этого вверху страницы нажмите Дисковая утилита — Завершить дисковую утилиту:
Выберите Установка macOS Big Sur и кликните Продолжить:
Примите условия лицензионного соглашения:
Выберите диск, название которого вы указывали на 6 шаге, и нажмите Продолжить. На этот диск будет установлена ОС.
Дождитесь окончания установки. Гостевая операционная система перезагрузится несколько раз:
Выберите регион и продолжите установку. Следуйте подсказкам системы:
На этапе «Ассистент миграции» в левом нижнем углу нажмите Не сейчас:
Чтобы пропустить «Вход с Apple ID» нажмите Настроить позже в левом нижнем углу:
Заполните поля, задайте пароль и нажмите Продолжить:
Готово, вы установили macOS на виртуальную машину VMware Workstation Player.
Источник
How to Install macOS on VMware in Windows PC [Mojave]

Jun 24, 2020 · 6 min read
Want to install Mac OS X on Windows PC. Here is a guide on How to Install macOS Mojave on VMware Workstation Player in Windows 10, 7.
I know macOS Catalina Final is already out there.
And still, I am installing the Mojave version on Windows PC.
This is only because Mojave is the only latest Stable version that can be installed on Vmware Workstation right now.
In the recent post, I have already shown a step by step guide on installing macOS Mojave on Virtualbox Virtual machine.
And now I am showing it on the Vmware virtual machine.
S o without wasting any time let’s move to the installation process.
And follow this Step by Step guide.
Install macOS Mojave on VMware in Windows PC
But before dive in further.
Please make sure that you downloaded all the essential files mentioned below from the given link.
VMware Workstation Player: Download Link
Mac OS VMware Image: Download Link
Unlocker for VMware Patch Tool: Download Link
Now, After downloading all the files, Extract them one by one & Follow the Given Steps…
Note:- Please Enable VT-X or AMD-V Virtualization technology from your BIOS Settings.
So Let’s Get Started.
1. Install VMware Workstation Player Pro
Download and Install VMware Workstation from the given link.

Note:- Please do not run Vmware after installing it. First, install the VMware Unlocker & then launch it properly.
2. Install VMware Unlocker Patch Tool
Now Extract the VMware Unlocker tool and Open the Folder & Search for win-install. Now Right Click on it and select Run as administrator.

Now it will load some VMware files and will automatically close.
3. Create a new macOS Virtual Machine
Now Open the Vmware Workstation and Click on Create a New Virtual Machine.

Now Select “ Typical (recommended)” and click on Next.

Now in the Guest Operating System Installation section, select “ I will install the Operating System later” option and click on Next.

Now in the Guest operating system, select “Apple Mac OS X” and then in the Version select “macOS 10.14” and click on Next.

Now Type the Virtual Machine Name as “macOS Mojave” and then in the location, click on Browse & select the folder where you want to install the macOS Mojave on VMware and then click on Next.

Next step is to select the disk size as 100gb and the minimum recommended size is 40gb. And select “ Store virtual disk as a single file” and then click on Next.

Now your macOS Virtual machine is ready to create so click on Finish.

4. Configure Virtual Machine
Now its time to configure some advanced settings for the virtual machines to work properly. So, Open VMware workstation and then select “macOS Mojave” & then Click on Edit Virtual machine settings.

Now in the Virtual machine settings, click on the Memory tab and then adjust the 50% of your physical machine to it. Like I have set it to 8gb.
Note:- Minimum recommended memory is approx 4gb.

Similarly, Go to Processors and then assign a minimum of 2 processors to the virtual machine.

Next step, Go to CD/DVD (SATA) and then select “Use ISO image file” and click on Browse.

And then locate the macOS Mojave ISO file that you have downloaded earlier. And then Click on Open.

Now Go to USB Controller and then in USB compatibility select USB 3.0 from the dropdown menu. And Close the Vmware completely.

5. Add Config Key in VMX File
Note:- Please make sure, before doing this advanced configuration the Vmware workstation must be closed. Or I recommend you to please restart your PC before Adding Config Key in VMX File.
Now Open the folder where you have set up your virtual machine. And in that folder, you will find a white color file of the extension .vmx . Now Open that VMware virtual machine configuration file using Notepad.
Источник
How to Install macOS Mojave on VMware using VMDK – Windows 10 PC
Install macOS Mojave on VMware -VMDK
In this article, I’m going to show you how to install macOS Mojave on VMware using VMDK on Windows 10 PC. Apple in WWDC 2018 announced its new operating system which is macOS Mojave 10.14. At the moment, you can test macOS Mojave on virtualization software such as VMware and VirtualBox. It’s highly recommended to use VMware instead of VirtualBox because it works much better like smoother, quicker, and faster than Virtualbox. To Install macOS Mojave on VMware using a pre-made VMDK filled with only macOS Mojave setup then go through the step by step guide down below and do exactly as the guide is shown. We have another method also that shows how to install macOS Mojave on VMware on Windows 10 using an ISO image.
Newer versions of macOS are out, So check the guides below to install them:
Requirements:
- Minimum 2 GB memory
- Minimum 2 cores of processors
- Hard disk free space 20 GB
- Your system should support Intel or AMD VT (Virtualization Technology)
- Intel/AMD VT (Virtualization Technology) Should be enabled from BIOS setup
Required: If you haven’t already then you should enable Virtualization Technology (aka Intel VT or AMD-V).
Steps to Install macOS Mojave on VMware using VMDK
- Download the prerequisites
- Install the prerequisites
- Unlock VMware to Install macOS Mojave
- Create a New Virtual Machine
- Edit the New Virtual Machine
- Edit macOS Mojave VMX File (Optional)
- Wait for macOS Mojave Installation
- Complete Basic macOS Account Settings
- Install VMware Tools (Optional)
- Update macOS Mojave to the Latest Version (Optional)
Step 1: Download the prerequisites
To install macOS Mojave on VMware using VMDK, you need to download the virtualization software like VMware Workstation or VMware Player, macOS Mojave 10.14 VMDK file and macOS Unlocker for VMware. All the essential files are listed down below for download.
- Download VMware WorkstationPro 15.5.x or VMware Player 15.5.x.
- VMware Workstation 15 Pro or
- VMware Player 15
- Download the macOS Unlocker V3 for VMware
- Download – GitHub (latest Version)
- Direct Download – MediaFire (3.0.3)
- Download macOS Mojave VMDK
- macOS Mojave 10.14.6 (18G103) Latest
- macOS Mojave 10.14.5 (18F203)
- macOS Mojave 10.14 (18A293u) Beta
Step 2: Install the Prerequisites
Now install the following virtualization application, and if you already have it by any chance then you’re welcome to skip but make sure then it works properly and updated to the latest version.
- Install VMware WorkstationPro15.5.x or VMware Player 15.5.x
Run the VMware Workstation Pro/Player and follow the prompt leaving all the options as default.
Step 3: Unlock VMware to Install macOS Mojave
Firstly make sure VMware Workstation application is closed completely otherwise the VMware unlocker won’t work. You can do this by Clicking on File Tab > Exit.
Exit VMware Workstation
Exit VMware Workstation
You should have downloaded macOS Unlocker V3 for VMware Workstation from GitHub or the direct link. So now extract the macOS Unlocker V3.0 for VMware Workstation. Right-click on win-install.cmd and select Run as Administrator. This step is very important because you won’t see Apple Mac OS X on the Operating System list while creating a new VM unless you patch VMware with this tool.
Note: You may always uninstall the previous version of the Unlocker before using a new release. Failure to do this could render VMware unusable. – David Parsons
Run win-install.cmd As Administrator
Run win-install.cmd As Administrator
Unlocker 3.0.2 for VMware Workstation
Unlocker 3.0.3 for VMware Workstation
Step 4: Create a New Virtual Machine
#1. Open VMware and click on Create a New Virtual Machine (Ctrl+N) then select Typical (Recommended) and click Next.
» data-medium-file=»https://www.wikigain.com/wp-content/uploads/2020/06/Create-macOS-Big-Sur-VM-300×220.png» data-large-file=»https://www.wikigain.com/wp-content/uploads/2020/06/Create-macOS-Big-Sur-VM.png»/> Create a VM  How to Install macOS Big Sur on VMware on Windows – PC
Select Typical (recommended)
#2. Now select I will install the operating system later and click Next. Choose Apple Mac OS X from operating system list then select macOS 10.14 from version and click Next.
Select Install the Operating System Later
» data-medium-file=»https://www.wikigain.com/wp-content/uploads/2020/06/macOS-11-Select-Install-the-Operating-System-Later-300×300.png» data-large-file=»https://www.wikigain.com/wp-content/uploads/2020/06/macOS-11-Select-Install-the-Operating-System-Later.png»/> Select Install the Operating System Later  Install macOS Mojave on VMware using VMDK
macOS Mojave 10.14
#3. Name the virtual machine as you prefer like macOS Mojave. Click Browse to choose a location to save virtual machine files and click Next, or you may let it as default (recommended).
Name and Save macOS Mojave VM
Name and Save macOS Mojave VM
#4. Don’t Specify the disk space just select Store virtual disk as a single file and click Next. On Ready to Create Virtual Machine, Click Finish.
Specify Disk Capacity
» data-medium-file=»https://www.wikigain.com/wp-content/uploads/2020/07/Specify-Disk-Capacity-Catalina-300×300.png» data-large-file=»https://www.wikigain.com/wp-content/uploads/2020/07/Specify-Disk-Capacity-Catalina.png»/> Specify Disk Capacity  Install macOS Mojave on VMware using VMDK
Create the macOS Mojave VM
Step 5: Edit the new Virtual Machine
- Click on Edit Virtual Machine Settings.
Edit macOS Mojave VM Settings
Edit macOS Mojave VM Settings
Remove Hard Disk Mojave
Remove Hard Disk
Select SATA Disk Type
Select SATA Disk Type
Select Existing Virtual Disk
Select Existing Virtual Disk
Select macOS Mojave VMDK
Select macOS Mojave VMDK
Select macOS Mojave 10.14.6 VMDK
Select macOS Mojave 10.14.6 VMDK
Save Changes to macOS Mojave VM
Save Changes to macOS Mojave VM
Step 6: Edit macOS Mojave VMX File (Optional)
- Do these 2 steps only if you can’t boot into macOS or have other issues. Navigate to the virtual machine folder which you select in step #4.3 of this guide. If you didn’t specify a new location, then the default location is in Document > Virtual Machine. Right-click on macOS Mojave.vmx then open it via Notepad or any third-party text editor of your choice.
- Scroll down to the bottom of texts and add the following code; then click on File >Save. After that, you may close it as you don’t need it anymore.
Open macOS Mojave VMX File
» data-medium-file=»https://www.wikigain.com/wp-content/uploads/2020/07/Open-macOS-Mojave-VMX-File-300×234.png» data-large-file=»https://www.wikigain.com/wp-content/uploads/2020/07/Open-macOS-Mojave-VMX-File.png»/> Open macOS Mojave VMX File  Install macOS Mojave on VMware using VMDK
Save macOS Mojave VMX File
Step 7: Wait for macOS Mojave Installation
- Open VMware and on the macOS Mojave VM window Click Power on this Virtual Machine.
Power on macOS Mojave VM
Power on macOS Mojave VM
Booting macOS Mojave
» data-medium-file=»https://www.wikigain.com/wp-content/uploads/2020/07/Booting-macOS-Mojave-300×260.png» data-large-file=»https://www.wikigain.com/wp-content/uploads/2020/07/Booting-macOS-Mojave-1024×888.png»/> Booting macOS Mojave  Install macOS Mojave on VMware using VMDK
Installing macOS Mojave
Step 8: Complete Basic macOS Account Settings
Once the installation part complete, the VM will reboot, and after the reboot, you should see macOS Mojave Welcome page.
macOS Mojave Welcome VMware
macOS Mojave Welcome VMware
- Choose your Country and click on Continue.
- Choose a Keyboard Layout and click Continue.
- On the Data & Privacy page, click Continue.
- Select Don’t transfer any information now and click Continue.
- On Sign in with your Apple ID page, click Set up Later and click on Skip.
- Relate: How to create an Apple ID
- Agree to the Terms and Conditions.
- Fill out the Full name, Account name, Password, Hint and click on Continue to create your user account for macOS Mojave 10.14.
Create macOS Mojave User Account
Create macOS Mojave User Account
Choose macOS Mojave Look
Choose macOS Mojave Look
Successfully Installed macOS Mojave on VMware
Successfully Installed macOS Mojave on VMware
Step 9: Install VMware Tools (Optional)
So now you should have noticed that the resolution of macOS Mojave can’t be changed and it’s not working as smoothly as you expected. To fix macOS Mojave Resolution on VMware or Make it more responsive, you need to install something called VMware Tools. It’s quite easy and straightforward to work with any system. So to do that we have created a comprehensive guide. Please click the link below and follow the guide Step by step.
See this guide: How to install VMware Tools on macOS.
Step 10: Update macOS Mojave to the Latest Version (Optional)
You should do this step if your macOS Mojave is not updated and not the latest version . So, you can update it by following the instructions below.
- Click on the Apple logo at the top-left corner of your screen. Select System Preferences from the list. Under System Preferences, click on Software Update.
Источник


