- Класс MediaPlayer
- Player.uiMode
- Syntax
- Possible Values
- Remarks
- Examples
- AxWindowsMediaPlayer.uiMode property
- Syntax
- Property value
- Remarks
- Use Volume Leveling in WMP 12 to Solve Loudness Problems
- Normalize your music library so all songs play at the same volume.
- How to Automatically Normalize Your Music Library in WMP 12
- Points to Remember About WMP 12’s Auto-Leveling Feature
- How to Automatically Add Volume Leveling When Adding New Songs
- Why Does the Loudness Between Songs Vary So Much?
Класс MediaPlayer
Классы SoundPlayer, SoundPlayerAction и SystemSounds легко использовать, но все они относительно маломощные. В современном мире вместо исходного формата WAV намного более распространен сжатый формат звука МРЗ для всех целей, за исключением простейших звуков. Для воспроизведения МРЗ-аудио или MPEG-видео предназначены классы MediaPlayer и MediaElement. Оба они зависят от ключевых элементов технологии, предоставленной проигрывателем Windows Media.
Класс MediaPlayer (находящийся в специфичном для WPF пространстве имен System.Windows.Media) — это WPF-эквивалент класса SoundPlayer. Хотя ясно, что он не настолько легковесен, все же он работает примерно так же. Объект MediaPlayer создается, с помощью метода Open() загружается аудиофайл, а вызовом метода Рlау() запускается асинхронное воспроизведение. (Опция синхронного воспроизведения не предусмотрена.) Рассмотрим пример:
Существует несколько важных деталей, на которые следует обратить внимание в этом примере:
MediaPlayer создается вне обработчика событий, поэтому он существует на протяжении жизненного цикла окна. Причина в том, что метод MediaPlayer.Close() вызывается тогда, когда объект MediaPlayer удаляется из памяти. Если создать объект MediaPlayer в обработчике событий, то он будет удален из памяти почти немедленно и, вероятно, вскоре после этого будет удален сборщиком мусора, и тогда будет вызван метод Close() и воспроизведение прервется.
Обязательно должен быть создан обработчик события Window.Unloaded, в котором вызывается метод Close() для остановки любого воспроизводящегося в данный момент звука при закрытии окна.
Местоположение файла указывается в виде URI. К сожалению, это не синтаксис упакованных URI, так что встроить аудиофайл и воспроизвести его с использованием класса MediaPlayer не получится. Это ограничение объясняется тем, что класс MediaPlayer построен на функциональности, которая не является встроенной в WPF, а предоставлена отдельным, неуправляемым компонентом проигрывателя Windows Media.
Код обработки исключений отсутствует. Это возмутительно, но методы Open() и Play() не генерируют исключения (в некоторой степени тому виной процессы асинхронной загрузки и воспроизведения). Взамен предлагается самостоятельно обрабатывать события MediaOpened и MediaFailed, чтобы определить, было ли запущено воспроизведение аудио.
MediaPlayer достаточно прост, хотя обладает большими возможностями, чем SoundPlayer. Он предоставляет небольшой набор полезных методов, свойство и событий. Их полный перечень приведен ниже:
| Balance | Устанавливает баланс между левым и правым каналом как число от -1 (только левый канал) до 1 (только правый канал) |
| Volume | Устанавливает громкость в виде числе от 0 (полная тишина) до 1 (полная громкость). Значение по умолчанию равно 0.5 |
| SpeedRatio | Устанавливает повышенную скорость при воспроизведении звука (или видео). Значение по умолчанию равно 1, что означает нормальную скорость, в то время как 2 — двойную скорость, 10 — скорость, вдесятеро выше нормальной, 0.5 — половину нормальной скорости и т.д. Можно использовать любое положительное значение типа double |
| HasAudio и HasVideo | Указывает на то, содержит ли текущий загруженный медиафайл, соответственно, аудио- и видеосоставляющие. Для воспроизведения видео должен использоваться класс MediaElement, описанный в следующей статье |
| NaturalDuration, NaturalVideoHeight и NaturalVideoWidth | Указывают на то, идет ли воспроизведение на нормальной скорости, а также задают размер видео-окна. (Ниже будет показано, что допускается растягивать и сжимать видео для заполнения окон разного размера.) |
| Position | Объект TimeSpan, указывающий текущее местоположение в медиафайле. Это свойство можно устанавливать для пропуска части файла и продолжения воспроизведения с указанного места |
| DownloadProgress и BufferingProgress | Показывает процент загружаемого файла (удобно в тех случаях, когда источником является URL, указывающий на местоположение в Интернете или на другом компьютере). Процент представлен в виде числа от 0 до 1 |
| Clock | Получает или устанавливает часы MediaClock, ассоциированные с проигрывателем. MediaClock используется только тогда, когда аудио синхронизируется с временной шкалой (примерно так же, как это делалось при синхронизации анимации с временной шкалой). При использовании методов MediaPlayer для выполнения воспроизведения вручную это свойство равно null |
| Open() | Загружает новый медиафайл |
| Play() | Начинает воспроизведение. Не имеет никакого эффекта, если файл уже воспроизводится |
| Pause() | Временно приостанавливает воспроизведение, не меняя его позиции. Если вызвать Play() снова, то воспроизведение начнется с текущей позиции. Если воспроизведение не происходит, не дает никакого эффекта |
| Stop() | Останавливает воспроизведение и сбрасывает позицию на начало файла. Если снова вызвать Play(), то воспроизведение начнется с начала файла. Не имеет эффекта, если воспроизведение уже остановлено |
Используя эти члены класса, можно построить базовый полнофункциональный медиапроигрыватель. Однако программисты WPF обычно применяют другой, относительно более простой элемент, который рассматривается в следующей статье — MediaElement.
Player.uiMode
The uiMode property specifies or retrieves a value indicating which controls are shown in the user interface.
Syntax
player .uiMode
Possible Values
This property is a read/write String.
| Value | Description | Audio Example | Video Example |
|---|---|---|---|
| invisible | Windows Media Player is embedded without any visible user interface (controls, video or visualization window). | (Nothing is displayed.) | (Nothing is displayed.) |
| none | Windows Media Player is embedded without controls, and with only the video or visualization window displayed. |  |  |
| mini | Windows Media Player is embedded with the status window, play/pause, stop, mute, and volume controls shown in addition to the video or visualization window. |  | 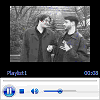 |
| full | Default. Windows Media Player is embedded with the status window, seek bar, play/pause, stop, mute, next, previous, fast forward, fast reverse, and volume controls in addition to the video or visualization window. | 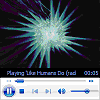 | 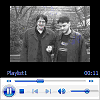 |
| custom | Windows Media Player is embedded with a custom user interface. Can only be used in C++ programs. | (Custom user interface is displayed.) | (Custom user interface is displayed.) |
Remarks
This property specifies the appearance of the embedded Windows Media Player. When uiMode is set to «none», «mini», or «full», a window is present for the display of video clips and audio visualizations. This window can be hidden in mini or full mode by setting the height attribute of the OBJECT tag to 40, which is measured from the bottom, and leaves the controls portion of the user interface visible. If no embedded interface is desired, set both the width and height attributes to zero.
If uiMode is set to «invisible», no user interface is displayed, but space is still reserved on the page as specified by width and height. This is useful for retaining page layout when uiMode can change. Additionally, the reserved space is transparent, so any elements layered behind the control will be visible.
If uiMode is set to «full» or «mini», Windows Media Player displays transport controls in full-screen mode. If uiMode is set to «none», no controls are displayed in full-screen mode.
If the window is visible and audio content is being played, the visualization displayed will be the one most recently used in Windows Media Player.
If uiMode is set to «custom» in a C++ program that implements IWMPRemoteMediaServices, the skin file indicated by IWMPRemoteMediaServices::GetCustomUIMode is displayed.
During full-screen playback, Windows Media Player hides the mouse cursor when enableContextMenu equals false and uiMode equals «none».
Examples
The following example creates an HTML SELECT element that allows the user to change the user interface for an embedded Player object. The Player object was created with .
Windows Media Player 10 Mobile: This property only accepts or returns values of «none» or «full». On Smartphone devices, only playback status and a counter are displayed when uiMode is set to «full».
AxWindowsMediaPlayer.uiMode property
The uiMode property gets or sets a value indicating which controls are shown in the user interface.
Syntax
Property value
A System.String that is one of the following values.
| Value | Description | Audio example | Video example |
|---|---|---|---|
| invisible | Windows Media Player is embedded without any visible user interface (controls, video or visualization window). | (Nothing is displayed.) | (Nothing is displayed.) |
| none | Windows Media Player is embedded without controls, and with only the video or visualization window displayed. | | |
| mini | Windows Media Player is embedded with the status window, play/pause, stop, mute, and volume controls shown in addition to the video or visualization window. | | |
| full | Default. Windows Media Player is embedded with the status window, seek bar, play/pause, stop, mute, next, previous, fast forward, rewind, and volume controls in addition to the video or visualization window. | | |
| custom | Windows Media Player is embedded with a custom user interface. Can only be used in C++ programs. | (Custom user interface is displayed.) | (Custom user interface is displayed.) |
Remarks
This property specifies the appearance of the embedded Windows Media Player. When uiMode is set to «none», «mini», or «full», a window is present for the display of video clips and audio visualizations. This window can be hidden in mini or full mode by setting the height attribute of the OBJECT tag to 40, which is measured from the bottom, and leaves the controls portion of the user interface visible. If no embedded interface is desired, set both the width and height attributes to zero.
If uiMode is set to «invisible», no user interface is displayed, but space is still reserved on the page as specified by width and height. This is useful for retaining page layout when uiMode can change. Additionally, the reserved space is transparent, so any elements layered behind the control will be visible.
If uiMode is set to «full» or «mini», Windows Media Player displays transport controls in full-screen mode. If uiMode is set to «none», no controls are displayed in full-screen mode.
If the window is visible and audio content is being played, the visualization displayed will be the one most recently used in Windows Media Player.
If uiMode is set to «custom» in a C++ program that implements IWMPRemoteMediaServices, the skin file indicated by IWMPRemoteMediaServices.GetCustomUIMode is displayed.
During full-screen playback, Windows Media Player hides the mouse cursor when enableContextMenu equals false and uiMode equals «none».
Use Volume Leveling in WMP 12 to Solve Loudness Problems
Normalize your music library so all songs play at the same volume.
To minimize differences in loudness between the songs in your music collection, Windows Media Player 12 offers a volume leveling option. This is another term for normalization and is very similar to the Sound Check feature in iTunes.
Rather than directly (and permanently) changing audio data, WMP’s volume leveling feature measures the differences between songs and calculates a standard volume level. This is a non-destructive process that ensures each song you play is normalized in relation to others. The information is then stored in each song’s metadata (much like ReplayGain), so that the levels are kept for all future listening.
In order to use volume leveling in WMP 12, audio files have to be in the WMA or MP3 audio format.
How to Automatically Normalize Your Music Library in WMP 12
If you want to eliminate or minimize major volume changes between songs in your Windows Media library, launch the WMP 12 application and follow these steps.
From the menu tab, select View followed by Now Playing.
Alternatively, you can use the CTRL+M keyboard shortcut to bring up the WMP main menu tab, or CTRL+3 to launch the Now Playing view mode.
Right-click anywhere on the Now Playing screen and select Enhancements > Crossfading and Auto Volume Leveling. You should now see this advanced options menu above the Now Playing screen.
Select Turn on Auto Volume Leveling.
Close the settings screen by selecting the X icon in the top right-hand corner of the window.
:max_bytes(150000):strip_icc()/001-use-volume-leveling-in-wmp-12-2438899-ff900471ed484621b092948a92f5fba6.jpg)
Points to Remember About WMP 12’s Auto-Leveling Feature
For the songs in your library that don’t already have a volume leveling value stored in their metadata, you will need to play them all the way through once. WMP 12 will only add a normalization value once it has analyzed the file during playback.
This is a slow process compared to the Sound Check feature in iTunes, which automatically scans all files in one go. If you already had a large library before turning on volume leveling, then you may want to set WMP to automatically level the volumes of all new songs added to your library.
How to Automatically Add Volume Leveling When Adding New Songs
To ensure all new files added to your WMP 12 library have volume leveling automatically applied, follow these steps:
From the main menu tab, select Tools followed by Options.
Select Library, then select the checkbox for Add Volume Leveling Information Values for New Files.
Select Apply > OK to save the setting.
Instead of slowly playing through all the songs in your library to normalize them, you may consider simply deleting the entire library and then re-uploading it. By turning on volume leveling for new files, and then re-importing all your music files you can save a lot of time. Just make sure you don’t accidentally delete the source files for the library.
Why Does the Loudness Between Songs Vary So Much?
There’s a good chance that the audio files you have on your computer or external storage device are not all from the same place. Many people’s media libraries come from the following sources:
- Purchased and downloaded songs from online music services.
- Ripped songs from audio CDs.
- Downloaded from legal file sharing sites.
- Recorded live performances.
- Digitized from analog sources like vinyl records or cassette tapes.
The problem with these is that loudness, sound quality, and other factors can vary greatly. Often the difference is so stark you’re forced to constantly change the volume yourself while listening. This is not an ideal way to listen to music, so enabling volume leveling is often worth the effort.


