- Настройка OpenVPN соединения в Tunnelblick на macOS
- Tunnelblick on macOS Catalina
- Setting up Tunnelblick
- Setting Up and Installing Configurations
- Converting OpenVPN Configurations to Tunnelblick VPN Configurations
- Creating and Installing a Tunnelblick VPN Configuration
- Modifying a Tunnelblick VPN Configuration
- Files Contained in a Tunnelblick VPN Configuration
- The «Set Nameserver» Check Box and DNS & WINS Settings
- The OpenVPN —user and —group options and openvpn-down-root.so
- Quick Start Guide
- Installing Tunnelblick and Getting it Set Up
- Launching Tunnelblick
- Using Tunnelblick
- Connecting to a VPN
- Disconnecting from a VPN
- Quitting Tunnelblick
- Starting Tunnelblick Automatically
- Settings
- The «Set Nameserver» Check Box and DNS & WINS Settings
Настройка OpenVPN соединения в Tunnelblick на macOS
Скачайте Stable версию Tunnelblick на ваш компьютер с официального сайта. Убедитесь, что скачиваете версию программы, которая подходит для вашей версии macOS.
Запустите установку. Затем дважды кликните на иконку Tunnelblick.app.

Разрешите открыть программу.

Введите Логин и Пароль от вашей учетной записи на macOS.

Tunnelblick установлен. Нажмите на кнопку У меня есть файлы конфигурации.


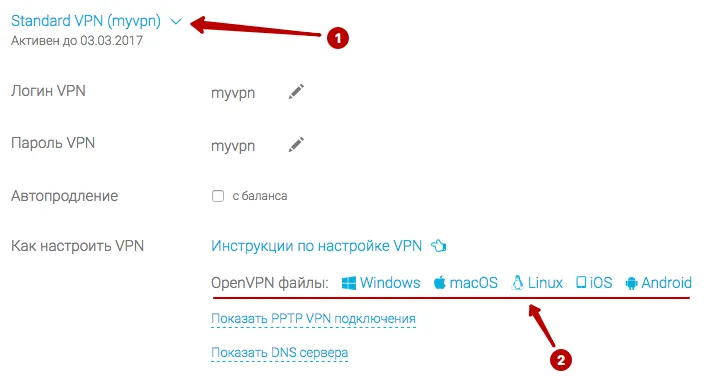
В разделе Подписки скачайте конфиги Tunnelblick и распакуйте Zip архив в любую папку.
В верхней строке macOS найдите иконку Tunnelblick и нажмите Детали VPN.

Для загрузки конфигурационных файлов необходимо перетащить эти файлы с окна Finder в раздел Конфигурации программы Tunnelblick.

Нажмите Применить ко всем, чтобы все файлы успешно загрузились. И выберите установку файлов только для вашей учетной записи или для всех Пользователей macOS.

Введите Логин и Пароль от учетной записи macOS.

Для подключения к OpenVPN нажмите на иконку Tunnelblick в верхнем меню и выберите желаемое подключение.

В следующем окне укажите:
- Логин VPN
- Отметьте, если нужно запомнить Логин
- Пароль VPN
- Отметьте, если нужно запомнить Пароль
Источник
Tunnelblick on macOS Catalina
Important: See The Future of Tun and Tap VPNs on macOS for information about changes to future versions of macOS.
If you are using macOS Catalina, you should use the latest version of Tunnelblick. You should allow Tunnelblick to automatically check for updates on the «Preferences» panel of Tunnelblick’s «VPN Details» window.
The following is the current status of issues that have been seen using the latest stable version of Tunnelblick on the latest version of macOS Catalina.
To report an issue, please follow the instructions at Tunnelblick Issues.
NEW macOS REQUIREMENT: Restarting the computer is required by macOS Catalina before connecting some configurations for the first time.
If a configuration requires a Tun or Tap system extension, the first time Tunnelblick asks macOS to load the appropriate system extension, macOS will tell the user that they must give permission to load system extensions signed by «Jonathan Bullard» in System Preferences : Security & Privacy : General. If the user gives such permission by clicking «Allow», macOS must restart the computer before the permission will be honored. After the permission has been given and the computer has been restarted, you may then connect all VPN configurations normally.
This only needs to be done one time. Once permission to load system extensions signed by «Jonathan Bullard» has been granted and the computer has been restarted, no further action is needed. Tunnelblick will be able to load Tun and Tap system extensions for any configuration without user interaction, and that ability will persist after computer restarts, «safe boots», and updates to Tunnelblick.
WON’T FIX: Sidecar does not work when a VPN is connected using Tunnelblick’s default for a configuration.
Sidecar does not work if IPv6 is disabled. By default, Tunnelblick disables IPv6 while a VPN is connected. This is done to prevent information leaks in common VPN setups (see A Glance through the VPN Looking Glass: IPv6 Leakage and DNS Hijacking in Commercial VPN clients).
Источник
Setting up Tunnelblick
Stop if you have a «Deployed» version of Tunnelblick. It comes already set up — you do no need to do anything more. Just start using it and enjoy!
Stop if you have purchased VPN service from a VPN service provider. They should provide you with configuration files and instructions on how to use them with Tunnelblick.
Stop if you have VPN service from a corporate or other network provided by your employer. Your network manager or IT department should provide you with configuration files and instructions on how to use them with Tunnelblick.
Stop if want details about the structure of a Tunnelblick VPN Configuration, see «.tblk» Details.
Setting Up and Installing Configurations
First, install Tunnelblick and launch it so it is running.
It is not enough to install Tunnelblick: you also need to tell Tunnelblick how to connect to a VPN.
You tell Tunnelblick how to connect to a VPN with a configuration file.
If you already have configuration files you can install them by dragging and dropping them onto the Tunnelblick icon in the menu bar.
After installing your configurations, continue with «Set Nameserver» Check Box and DNS & WINS Settings, below.
If you don’t have configuration files or you want more information about them continue reading.
Tunnelblick can use two types of configuration files:
Tunnelblick VPN Configurations. A Tunnelblick VPN Configuration contains all of the information Tunnelblick needs to connect to one or more VPNs. A Tunnelblick VPN Configuration contains one or more OpenVPN configuration files, and may contain key, certificate, and script files. Everything needed is contained within the Tunnelblick VPN Configuration. Tunnelblick VPN Configurations may also contain other information, including information about default preferences for the configuration and identification and version information for the configuration itself that make managing widespread distribution easier. For details, see Tunnelblick VPN Configurations Details.
OpenVPN configuration files. These are plain text files with extensions of .ovpn or .conf. These files usually contain only the configuration information; keys and certificates may be held in separate files. When installed, they are converted to Tunnelblick VPN Configurations. For more information about setting up Tunnelblick using OpenVPN configuration files, see Configuring OpenVPN.
Converting OpenVPN Configurations to Tunnelblick VPN Configurations
You can drag and drop OpenVPN configurations onto the Tunnelblick icon in the menu bar and they will be installed as Tunnelblick VPN Configurations.
Creating and Installing a Tunnelblick VPN Configuration
To create a Tunnelblick VPN Configuration:
- Create a folder anywhere (on your Desktop works well);
- If you have only one OpenVPN configuration file, name the folder with the name you want the configuration known by in Tunnelblick. (Otherwise, each configuration will be known in Tunnelblick by the name of the OpenVPN configuration file that it is based on);
- Copy all the files related to the configuration(s) into the folder (see Files Contained in a Tunnelblick VPN Configuration, below);
- Add an extension of «.tblk» at the end of the folder name. When you do this the icon for the folder will change to an icon for a Tunnelblick VPN Configuration.
- Drag and drop the folder’s new icon onto the Tunnelblick icon in the menu bar to install it.
When you install, you will be asked if you want each configuration to be private or shared. A private configuration may only be used when you are logged onto the computer. A shared configuration may be used by anyone who is logged into the computer. If the name you have given conflicts with the name of an existing installed configuration, you will be given the opportunity to change the name.
The process of installation will copy the .tblk to a special location on your computer (see File Locations) and make changes to it so it can be used securely. You can then delete the original .tblk you created, or move it somewhere convenient as a backup, or copy or move it to another computer and install it on that computer.
That’s it! You are done. The configuration(s) will be available immediately in Tunnelblick.
Modifying a Tunnelblick VPN Configuration
You can modify a Tunnelblick VPN Configuration two ways:
If you want to change the contents of an installed OpenVPN configuration file that is installed as a Private configuration, you should select the configuration in Tunnelblick’s VPN Details window, then click the «gear» button at the bottom of the list and select «Edit OpenVPN Configuration File. «. That will open the installed OpenVPN configuration file in TextEdit. Changes take effect as soon as the file is saved in TextEdit. Note that this does not modify your original .tblk; it modifies the installed copy only.
You can’t change the contents of an installed OpenVPN configuration file that is installed as a Shared configuration. (You can convert it to be a Private configuration, edit it, and then change it back to be Shared.)
- Modify your original .tblk to include the changes (rename it to not end in «.tblk», then make the changes, then rename it to end in «.tblk» again);
- Drag and drop the modified .tblk onto the Tunnelblick icon in the menu bar to install it.
Files Contained in a Tunnelblick VPN Configuration
The files that should be contained in a Tunnelblick VPN Configuration (the «files related to the connection» above) should all be «plain text» files:
- One or more OpenVPN configuration files (.ovpn or .conf files).
- Any certificate or key files for the configurations (.key, .crt, .pem, .cer, .der, .p12, .p7b, .p7c, and .pfx files); and
- Any script files for the configurations. Script files must must have a .sh extension so that Tunnelblick can secure them and use them properly.
The «Set Nameserver» Check Box and DNS & WINS Settings
If you are using DHCP, wish to use DNS and WINS servers at the far end of the tunnel when connected, and the VPN server you are connecting to «pushes» DNS and WINS settings to your client, select «Set nameserver». (This is the situation for most users.)
If you are using DHCP, wish to use your original DNS and WINS servers when connected, and the VPN server you are connecting to does not «push» DNS or WINS settings to your client, select «Do not set nameserver».
If you are using manual settings, different versions of macOS behave differently. This is due to a change in network behavior in Snow Leopard and is beyond the scope of this project to fix.
If you’re using Leopard (OS X 10.5) or Tiger (OS X 10.4), then it is possible to use the VPN-server-supplied DNS and WINS settings in addition to your manual settings by selecting «Set nameserver». However, your manual settings will always take precedence over any VPN server-supplied settings. If «Do not set nameserver» is selected, you will continue to use only your manually-configured settings and any VPN server-supplied settings will be ignored. «Take precedence» means that the manual DNS server will be used for all DNS queries unless it fails to answer, in which case the VPN server-supplied DNS server will be used.
If you are using Snow Leopard (OS X 10.6) or later, then your usual DNS and WINS settings will always be used, and no aggregation of configurations will be performed.
If you set your DNS servers manually, then regardless of the state of «Set nameserver», your manual DNS servers, Search Domains, and WINS servers will always be the only ones used unless you set the configuration to «Allow changes to manually-set network settings».
Each of these settings is independent of the others: if «Set nameserver» is selected, those settings not configured manually will be replaced by the settings obtained from the VPN server. If «Do not set nameserver» is selected, then as with Leopard/Tiger, no DNS/WINS settings will be applied unless you set the configuration to «Allow changes to manually-set network setttings».
If your situation is not described above (e.g., if you use manual DNS settings and wish to use DNS servers at the far end of a tunnel when connected, or you wish to use the macOS ability to use different nameservers for different domains), you must create your own up/down scripts and select «Set nameserver».
The OpenVPN —user and —group options and openvpn-down-root.so
When using «Set nameserver» or your own down script for OpenVPN, it is usually necessary to avoid using the OpenVPN «user» and «group» options in the configuration file. These options cause OpenVPN to drop root privileges and take the privileges of the specified user and group (usually, «nobody»). If this is done, then the down script that handles restarting connections when there is a transient problem fails, because it is run without root privileges. OpenVPN usually fails, too, if your configuration performs any routing (most configurations do).
However, Tunnelblick includes the «openvpn-down-root.so» plugin for OpenVPN. When this plugin is activated, OpenVPN still drops root privileges and runs as the specified user:group after a connection is made, but runs the down script run as root:wheel, so reconnecting after transient network problems can work if OpenVPN does not need to restore any routes.
When you connect with a configuration that includes the «user» and/or «group» options in the configuration file, Tunnelblick will ask if you wish to use the openvpn-down-root plugin. Answer «yes» and Tunnelblick will use the plugin each time it makes a connection. OpenVPN will still be unable to make route changes after the initial connection; they have to be made in the your own customized scripts.
Источник
Quick Start Guide
Special note for those who may have installed RaptorVPN or Urban Shield VPN or other VPN software: These installations have backups that must be removed before installing Tunnelblick. See this Discussion Group thread.
Installing Tunnelblick and Getting it Set Up
Here is what you need to get started using Tunnelblick:
- Access to a VPN server — your computer is one end of the tunnel and the VPN server is the other end. For more information, see Getting VPN Service.
- A copy of the Tunnelblick installation disk image. You can get one from the Downloads page.
- A Tunnelblick VPN Configuration or an OpenVPN configuration file together with key and certificate files for encryption. You get these from whoever set up your VPN — usually your company or a VPN service provider (see Getting VPN Service).
- The username and password of an administrator for your computer.
To get started, double-click the disk image.
You may see a message saying that «‘Tunnelblick.app’ is an application downloaded from the Internet. Are you sure you want to open it?». Click «Open».
A window will open. Control-click the Tunnelblick icon in the window and click «Open» to start the installation process.
You will be asked if you want to install/reinstall/upgrade/downgrade Tunnelblick. Enter an administrator username and password and click «Install» to install Tunnelblick to your Applications folder. If you are reinstalling, upgrading, or downgrading, your current copy of Tunnelblick will be put in the Trash before it is replaced.
After a few seconds, a new window will appear asking if you wish to launch Tunnelblick. Click the «Launch» button to launch Tunnelblick.
If your computer is already running Tunnelblick, you will be asked if you wish to close all connections and quit the current copy. Click the button to do so.
You may see a window asking if you wish to check for updates automatically. Click a button to indicate your selection.
When there are no configurations (which is usually the case the first time Tunnelblick is run), the «Welcome to Tunnelblick» window will appear. Follow the instructions to add configurations.
Launching Tunnelblick
To launch Tunnelblick, double-click Tunnelblick in the Applications folder.
If Tunnelblick is running when you log out, shut down, or restart your computer, it will automatically be launched when you log in.
Using Tunnelblick
Once Tunnelblick has been launched, you control it from the Tunnelblick icon in the Status Bar at the top of your screen. The Tunnelblick icon is usually placed between the time and the Spotlight icon. When no VPN connection is active, the icon is dim.
If you click on the icon, you’ll see a drop down menu. The menu has
- A line showing the status your VPN connections and allows you go quickly disconnect all VPNs.
- A «VPN Details» item which will open a window with details and an OpenVPN log for each connection
- A «Connect” item for each configuration that has been set up. If there are no configurations, an «Add a configuration. » item will appear instead.
- A «Quit» item
If you click on «Details», a new window will appear with a tab for each configuration. Each tab includes preferences, the OpenVPN log, and several buttons.
You may use the standard keyboard shortcuts in the «Details» window: Command-C, Command-X, and Command-V for copy, cut, and paste; and Command-A, Command-M, Command-W, and Command-Q to select all the text in the log that is currently being displayed, minimize the window to the dock, close the window, and quit the program.
Connecting to a VPN
To connect to a VPN, either
- Click on the «Connect» menu item for it’s configuration, or
- Select the configuration in the list on the left of the «VPN Details» window, then click on the «Connect» button.
To illustrate the connection being established, three dots will appear in the menu item, and the Tunnelblick icon will darken and lighten repeatedly. If the connection is successfully established, the Tunnelblick icon will be dark to show an open tunnel, and the «Connect. » menu item for the connection will change to «Disconnect. «.
Depending on your setup, you may be asked for a passphrase or username/password combination before the connection can be established. You can save your passphrase, username, and/or password in Apple’s Keychain by checking the appropriate checkbox.
The connection will be active as long as you do not end it or log out. Putting your computer to sleep will close the connection but upon waking up from sleep Tunnelblick will attempt to reestablish the connection.
Disconnecting from a VPN
To disconnect from a VPN, either
- Click on the «Disconnect» menu item for it’s configuration, or
- Select the configuration in the list on the left of the «VPN Details» window, then click on the «Disconnect» button.
- Quit Tunnelblick. All connections that are not marked «automatically connect when the computer starts» will be disconnected before Tunnelblick quits.
Quitting Tunnelblick
You can quit Tunnelblick by:
- Clicking on the Tunnelblick icon, then on «Quit»
- Typing Command-Q (also known as Apple-Q) from any open Tunnelblick window.
Tunnelblick will close all connections that are not marked «automatically connect when the computer starts» before it quits.
Starting Tunnelblick Automatically
If you don’t quit Tunnelblick before logging out, it will be started automatically upon login. Don’t confuse this automatic launch of Tunnelblick upon login with the «automatically connect” options, which cause a connection to be established when Tunnelblick is launched or when the computer is started or restarted.
If you have configurations that are marked «automatically connect when the computer starts», they will be connected whenever your computer starts or restarts. When Tunnelblick is running, it will show the status of, and you will be able to control, any connections that were established when the computer started.
Settings
The «Details» window allows you to control several settings for configurations. Select one or more configurations in the list on the left of the window, then change the settings as you wish. Four commonly changed settings are:
- Connect: Set Tunnelblick to be launched manually, when you log in, or when the computer is started.
- Set DNS/WINS: If set to «Set nameserver», Tunnelblick will use its standard scripts before and after a connection is made to save and restore the computer’s DNS and WINS settings, and allow DNS and WINS settings to be «pushed» from the VPN server.
- Monitor network settings: (Only available if «Set nameserver» is selected.) If checked, Tunnelblick will monitor the network settings and restore settings or restart the connection if changes to the network DNS or WINS configurations are detected.
- **Keep connected»: If checked, Tunnelblick will attempt to restart the VPN connection whenever it becomes disconnected.
For more details on «Set nameserver» see the following section.
There are many other settings that control Tunnelblick’s behavior. Click on the ‘Advanced’ button’ or see Preferences for more details.
The «Set Nameserver» Check Box and DNS & WINS Settings
If you are using DHCP, wish to use DNS and WINS servers at the far end of the tunnel when connected, and the VPN server you are connecting to «pushes» DNS and WINS settings to your client, select «Set nameserver». (This is the situation for most users.)
If you are using DHCP, wish to use your original DNS and WINS servers when connected, and the VPN server you are connecting to does not «push» DNS or WINS settings to your client, select «Do not set nameserver».
If you are using manual settings:
If you set your DNS servers manually, then regardless of the state of «Set nameserver», your manual DNS servers will always be the only ones used.
If you set your Search Domain(s) manually, then regardless of the state of «Set nameserver», your manual Search Domains will always be the only ones used.
If you set your WINS servers manually, then regardless of the state of «Set nameserver», your manual WINS servers will always be the only ones used.
Источник


