- V-ray 5.10.22 Cinema 4D R20-S24 + 3.70.01 MacOS
- V-ray 5.00.42 for Cinema 4D R20-R23 [En] скачать торрент
- Cinema 4D Downloads21
- Installation of Cinema 4D Exchange Add-On for Archicad 21
- Limitations
- Installation
- Overview
- Installing V-Ray for Cinema 4D
- Windows
- Advanced Installation Options
- macOS
- Advanced Installation Options
V-ray 5.10.22 Cinema 4D R20-S24 + 3.70.01 MacOS
V-Ray для Cinema 4D предоставляет стандарт в отрасли технологии фотореалистичного 3D-рендеринга в руках художников и дизайнеров Cinema 4D. Благодаря интеллектуальным инструментам и мощным возможностям рендеринга сочетание скорости и творческого контроля V-Ray идеально подходит для любого проекта.
ВОПЛОЩАЙТЕ ИДЕИ В ЖИЗНЬ
С полным набором инструментов освещения, затенения и визуализации V-Ray, отмеченных наградами, вы можете воплотить в жизнь любую идею.
СОЗДАН, ЧТОБЫ СПРАВИТЬСЯ СО ВСЕМ ЭТИМ
Создан для обработки ваших крупнейших проектов, включая сцены с огромным количеством геометрии и тысячами источников света.
ВЫПОЛНЯЙТЕ РАБОТУ С ЛЕГКОСТЬЮ
Удобные для художников инструменты и интуитивно понятный интерфейс помогут вам работать эффективнее, облегчая выполнение работы.
РЕНДЕРИНГ БЫСТРО
Возможности рендеринга с помощью графического процессора и процессора V-Ray повышают скорость любого производства. Благодаря быстрому интерактивному рендерингу вы увидите, как изменения в вашей сцене отображаются на лету.
ГОТОВ К МАСШТАБИРОВАНИЮ
Используйте возможности нескольких компьютеров для рендеринга изображений с высоким разрешением с помощью распределенного рендеринга V-Ray. Или перенесите свой рендеринг в облако с прямым доступом к Chaos Cloud.
ВЫЙТИ ЗА РАМКИ РЕНДЕРИНГА
V-Ray 5 — это больше, чем средство визуализации. Встроенный композитинг и интерактивное смешивание света позволяют вам точно настраивать и завершать рендеринг в буфере кадров V-Ray, не переходя в отдельное приложение.
Все желающие могут по ссылке ниже скачать программу V-ray для Cinema 4D даром то есть бесплатно, никаких торрент раздач и прочей ерунды, постоянная ссылка, только последние версии программы вам доступны в этой новости, следите за обновлениями!
Лицензия: ShareWare — у нас вы можете скачать бесплатно
Язык: English — Русская версия и Русификатор отсутствуют
Размер: 1.61 GB
Софт: Windows 7+ x64
Версия: 5.10.22
Скачать: V-ray для Cinema 4D R20-S24 последняя версия на ПК с ключом+кряком / 3.70.01 MacOS


 [/not-group]
 —>
—> 
Источник
V-ray 5.00.42 for Cinema 4D R20-R23 [En] скачать торрент
1st Gen Intel Core or compatible processor with SSE4.2 support (x64)
8 GB RAM or 8 GB swap minimum;
NVIDIA CUDA: Maxwell-, Pascal-, Volta- and Turing-based NVIDIA card(s) with with latest recommended video driver or at least version 441.20;
NVIDIA RTX: RTX cards with latest recommended video driver or at least version 441.28;
V-Ray Production Denoiser: AMD or NVIDIA GPU supporting OpenCL 1.2;
NVIDIA AI Denoiser: Maxwell, Pascal, Volta or Turing-based NVIDIA card with latest recommended video driver or at least version 441.20
The minimum required compute capability is 5.2
Описание: V-Ray для Cinema 4D предоставляет стандарт в отрасли технологии фотореалистичного 3D-рендеринга в руках художников и дизайнеров Cinema 4D. Благодаря интеллектуальным инструментам и мощным возможностям рендеринга сочетание скорости и творческого контроля V-Ray идеально подходит для любого проекта. Единственный на сегодняшний день визуализатор способный рендерить GPU и CPU одновременно. Либо можете выбирать отдельно на чём ему работать.
Дополнительная информация:
В раздаче маленькое видео о том как рендерить GPU и CPU одновременно либо по отдельности.
Источник
Cinema 4D Downloads21
The CINEMA 4D product family has everything to satisfy your professional 3D modeling, texturing, animating and rendering needs. CINEMA 4D is a robust, professional, easy to use 3D Animation software that offers customizable configuration suitable for any industry and all skill levels.
Note: For architectural visualization, CineRender, the built-in rendering engine of Archicad, provides most of the rendering capabilities of the CINEMA 4D R18 version. For professional purposes and to further exploit the texture mapping, rendering and animating capabilities of CINEMA 4D, please use the built-in export command in Archicad. The export feature lets you precisely export the Archicad model, together with the surface- and the rendering settings, into CINEMA 4D with one click. You can learn more about the Add-On on HelpCenter.
Installation of Cinema 4D Exchange Add-On for Archicad 21
Locate the desired language and OS version in the list below and download the installer. Further language versions are uploaded continually.
| Download | Language | Windows | Mac OSX | User Guide | Last modified |
| Cinema 4D Exchange add-on for Archicad 21 | INT | Jun 14, 2017 | |||
| Cinema 4D Exchange add-on for Archicad 21 | GER | Jun 14, 2017 | |||
| Cinema 4D Exchange add-on for Archicad 21 | SPA | Aug 18, 2017 | |||
| Cinema 4D Exchange add-on for Archicad 21 | JPN | Sept 26, 2017 |
Important: When installing Cinema 4D Add-On, you must be logged on as a member of the Administrator Group.
Windows:
Double-click the downloaded executable file, which will open the unpacker application. Specify a temporary location for the installer files, then click Extract. After files are extracted, the installer wizard will automatically start and guide you through the rest of the installation.
Mac OS X:
Double-click on the downloaded image file to be automatically mounted by the system. Then double-click on the Cinema 4D Add-On Installer application in the mounted volume’s root directory. The installer wizard will automatically start and guide you through the rest of the installation.
User Guide:
After installing CINEMA 4D add-on properly, you can find an electronic version of the CINEMA 4D add-on User Guide in the Archicad/Documentation folder.
Notes on Uninstalling:
Windows:
Go to the Windows “Control Panel” and select “Programs and Features” to remove all Cinema 4D Add-On components from your computer. You can also browse to your Archicad 20 folder and execute the uninstaller in the Uninstall.C4D subfolder.
Mac OS X:
Browse to your Archicad 20 folder and execute the uninstaller in the Uninstall.C4D subfolder. This will start the uninstaller, which will remove all Cinema 4D components from your computer.
Limitations
Limitations at importing CINEMA 4D models into Archicad by loading, merging c4d type files and by freeform modeling:
- During the import process only the material and geometry data is being converted.
- CINEMA 4D offers much more material setting possibilities than Archicad does. There are a large number of parameters for setting the materials’ visual behavior when affected by direct or indirect light or like glowing, transparency, etc. Some of these parameters have according material settings with exactly the same functionality in Archicad, some others can be converted, but there are some that cannot be interpreted by the rendering engine of Archicad, these are simply ignored.
- CINEMA 4D also offers textures that are based on singular algorithms that are computed during rendering. These cannot be converted, while these algorithms are not implemented in Archicad. The only textures one can convert are the bitmaps loaded from image files (jpg/png/bmp). While in CINEMA 4D textures can be applied to many kinds of settings (like luminance, transparency), Archicad use textures only for determining object colors, so even the bitmap textures are ignored during the conversion when applied to non color material properties.
- Beside the default material model structure there is the possibility in CINEMA 4D to create materials based on different lighting model. In these cases parameters and parameter categories are used that are not known by the converter, so these settings are ignored, and if there is not any parameter among the material’s settings that could be converted, the whole material conversion is skipped, and no material is assigned to the converted object in Archicad. One should use the default material model for creating materials for conversion.
- There are differences in the texture projection algorithms of Archicad and CINEMA 4D, and CINEMA 4D also offers more projection methods than Archicad. Those projections for that it is possible will be converted into the corresponding projections in Archicad, in other cases UV mappings are computed from the projections, and these mappings are used in Archicad. As UV mapping cannot be used for solid models in Archicad, one should use convertible projections for objects that should take part in solid operations, and for the other situations, one should set the resulted GDL objects’ model behavior parameter to ‘Preserve textures’.
Limitations at exporting Archicad models to CINEMA 4D by saving 3D view and freeform modeling:
- During the export process only the 3D geometry data, materials, lights and the 3D view are being converted.
- When using the ‘by Class’ option for element grouping in the CINEMA 4D Settings of the Add-on, all texture projections are converted during the export, but because of the differences in texture projections algorithms of the two programs, some projections in CINEMA 4D do not get displayed the same as in Archicad. To avoid this situation, the UV mapping information should be used, which is also exported. When using the ‘by Material’ option, only the UV data is being exported, because of the object hierarchy, so this option is recommended to be used only for quick rendering tasks.
Источник
Installation
This page provides information of the installation process of V-Ray for Cinema 4D.
Make sure to always have the latest Cinema 4D updates for V-Ray to load.
Overview
This guide is to serve as a reference for installation of V-Ray for Cinema 4D.
A complete installation of V-Ray for Cinema 4D consists of:
Installing V-Ray for Cinema 4D
This section describes the installation of V-Ray for Cinema 4D using the provided installer.
Windows
To complete the installation follow these steps:
1. You will be presented with the V-Ray licensing agreement. Please take a moment to review the agreement. Check the I accept the Agreement checkbox and click Install to proceed with standard installation.
If you need to customize your V-Ray installation, press the Advanced button.

Advanced Installation Options
V-Ray type
The available installation types are:
Workstation – A full installation that includes V-Ray for Cinema 4D, IPR for Cinema 4D, V-Ray Standalone, V-Ray Tools.
Standalone – An installation which includes V-Ray Standalone and IPR render server. Please choose this option if you plan to use this machine only for Distributed Rendering with V-Ray Standalone and an IPR render server.
Add firewall exception – Enabling this option allows the default licensing port (TCP 30304) in the firewall. If you disable it at this step, you will need to manually add firewall exceptions later.
Install Chaos Cloud Client – Enable this checkbox to install the Chaos Cloud client application. Chaos Cloud is a software as a service (SaaS) which allows you to submit and render scenes with cloud-based V-Ray. See more information on the Chaos Cloud page.

Directories
Here you can specify the installation paths. Please check if the default folders are correct.
Help make V-Ray even better – Participate in the improvement decisions for future version of V-Ray. No intelligence property is violated when agreeing to participate in the feedback program. We do not gather scenes, assets, materials, etc. What we receive is user preferences on just a few key render settings and the resulting render times. The point of this feature is to improve V-Ray’s performance and the user experience. For more information, see the Chaos Group Telemetry page.

Licensing
In this step, you can specify whether the V-Ray license server will run locally or on another machine.
If you select the option Remote you will have to fill in the IP address of your V-Ray license server in the field Primary License Server. Please leave the port 30304 unchanged! An Alternate License Server is used when the primary one does not respond.

2. If you choose the Local Licensing Option, you are presented with the License Server installation.
Chaos License Server Options
At this step you can choose the license server directory.
Migrate data during installation – When enabled, transfers all of your settings made with older versions of the License Server, such as enabled dongle subsystem, proxy settings, etc. Disabling this option will install License Server with all settings at their defaults and any custom settings from the previous installation will be lost.
Add firewall exception – Enabling this option allows the default licensing port (TCP 30304) in the firewall. If you disable it at this step, you will need to manually add firewall exceptions later.

3. After you click the Install button, the installer will proceed to uninstall any previous versions and install V-Ray on your machine.
If the installer detects any applications that need to be closed, they will be listed before being able to continue. Please close them and click Continue.

4. If the installation was successful, you will get the final screen.

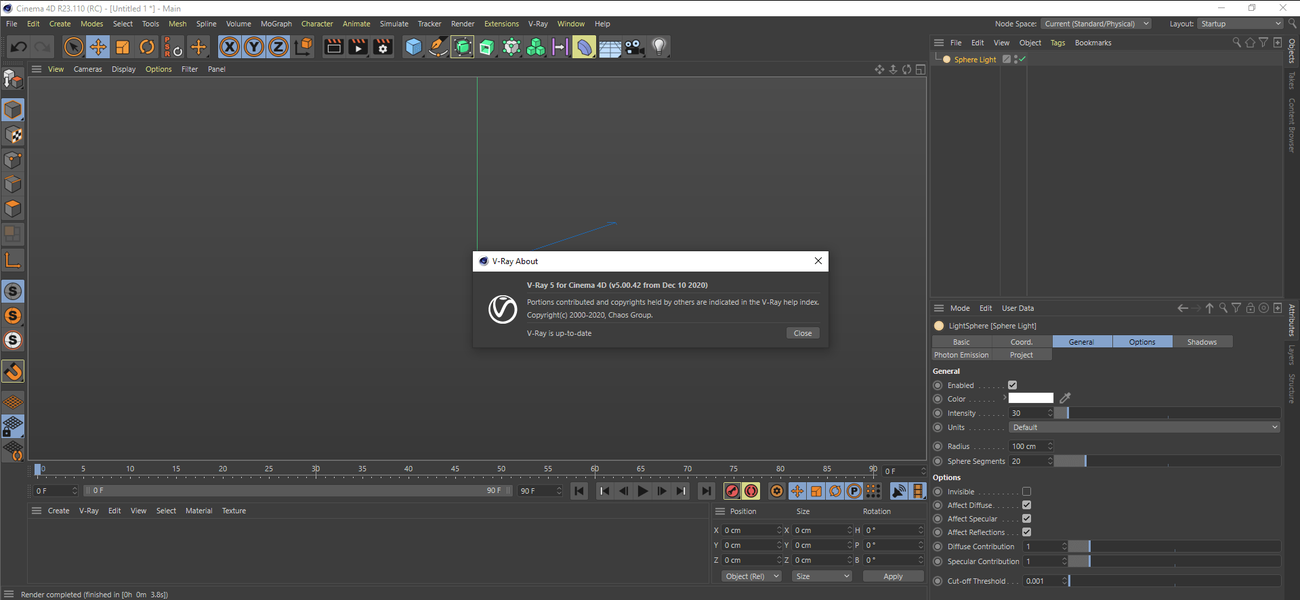
5. Now V-Ray 5 is ready to render!
macOS
On some macOS versions you might be presented with a security message by the OS that prevents you from installing. In such cases, right-click on the installer app and select Open which will allow the installation to continue. An example and further information can be found on the Installation of Chaos Cloud Client App page or in Apple’s How to open an app that hasn’t been notarized or is from an unidentified developer article.
To complete the installation follow these steps:
1. You will be presented with the V-Ray licensing agreement. Please take a moment to review the agreement. Check the I accept the Agreement checkbox and click Install to proceed with standard installation.
If you need to customize your V-Ray installation, press the Advanced button.

Advanced Installation Options
V-Ray type
The available installation types are:
Workstation – A full installation that includes V-Ray for Cinema 4D, IPR for Cinema 4D, V-Ray Standalone, V-Ray Tools.
Standalone – An installation which includes V-Ray Standalone and IPR render server. Please choose this option if you plan to use this machine only for Distributed Rendering with V-Ray Standalone and an IPR render server.
Add firewall exception – Enabling this option allows the default licensing port (TCP 30304) in the firewall. If you disable it at this step, you will need to manually add firewall exceptions later.
Directories
Here you can specify the installation paths. Please check if the default folders are correct.
Help make V-Ray even better – Participate in the improvement decisions for future version of V-Ray. No intelligence property is violated when agreeing to participate in the feedback program. We do not gather scenes, assets, materials, etc. What we receive is user preferences on just a few key render settings and the resulting render times. The point of this feature is to improve V-Ray’s performance and the user experience. For more information, see the Chaos Group Telemetry page.

Licensing
In this step, you can specify whether the V-Ray license server will run locally or on another machine.
If you select the option Remote you will have to fill in the IP address of your V-Ray license server in the field Primary License Server. Please leave the port 30304 unchanged! An Alternate License Server is used when the primary one does not respond.

2. If you choose the Local Licensing Option, you are presented with the License Server installation.
Chaos License Server Options
At this step you can choose the license server directory.
Migrate data during installation – When enabled, transfers all of your settings made with older versions of the License Server, such as enabled dongle subsystem, proxy settings, etc. Disabling this option will install License Server with all settings at their defaults and any custom settings from the previous installation will be lost.
Add firewall exception – Enabling this option allows the default licensing port (TCP 30304) in the firewall. If you disable it at this step, you will need to manually add firewall exceptions later.

3. After you click the Install button, the installer will proceed to uninstall any previous versions and install V-Ray on your machine. If the installation was successful, you will get the final screen.
Источник


