- How to install Linux step-by-step
- How to install Linux?
- Installation
- Contents
- Getting Started
- Installation
- Keyboard
- Network
- Source
- Hostname
- Locale
- Timezone
- Root Password
- User Account
- BootLoader
- Partition
- Filesystems
- Review Settings
- Install
- Post-Installation
- Notes/Issues
- Notes on Grub2 EFI Loader installation.
- Notes on Partitioning
- Cfdisk does not give me a choice of partition table type.
- Multiple Partitions
- Platform-specific notes
- Working Platforms
- Less-than-working Platforms
- 32-bit Firmware
How to install Linux step-by-step
How to install Linux?
After you’ve chosen the Best Linux Distro, now it’s time to know how to install Linux.
If you want to install Linux, there are two ways to do that:
The first way is to download the Linux distribution you want and burn it into a DVD or USB stick and boot your machine with it and complete the installation process.
The second way is to install it virtually on a virtual machine like VirtualBox or VMware without touching your Windows or Mac system, so your Linux system will be contained in a window you can minimize and continue working on your real system.
For me, I prefer VirtualBox, it’s free and runs very fast on my PC than VMware, and support installing Windows, Linux and Mac OS with all versions.
Let’s choose any Linux distro and install it using both two ways.
I’m going to choose Linux mint; they call it the Mac OS of Linux. It is a good distro for personal use.
The version we are going to install is 18.1 “Serena” at the time of writing that article.
Go to this link and download it:
I prefer the Cinnamon desktop version; it is promising and elegant.
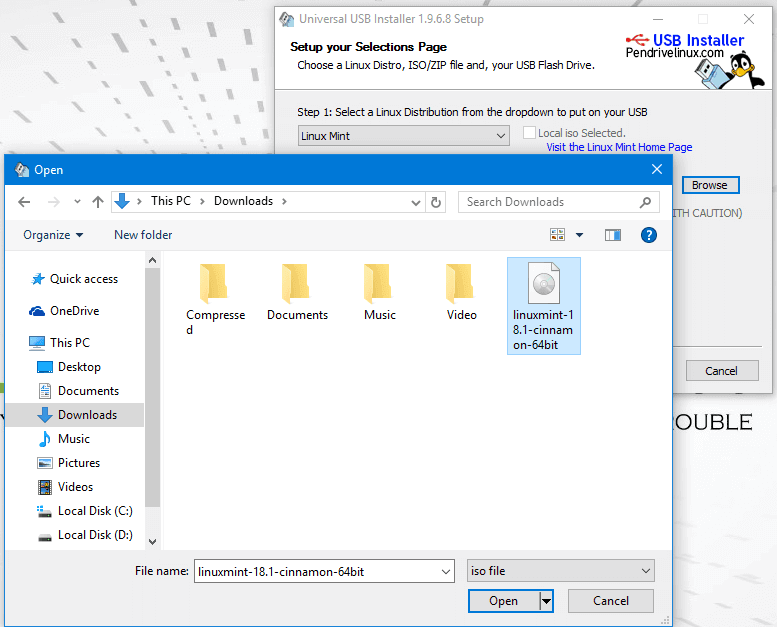
Once you download the ISO file, you will have to burn it on DVD or the easy way, copying it on a USB stick using a program called Universal USB installer, you can download this program from this link:
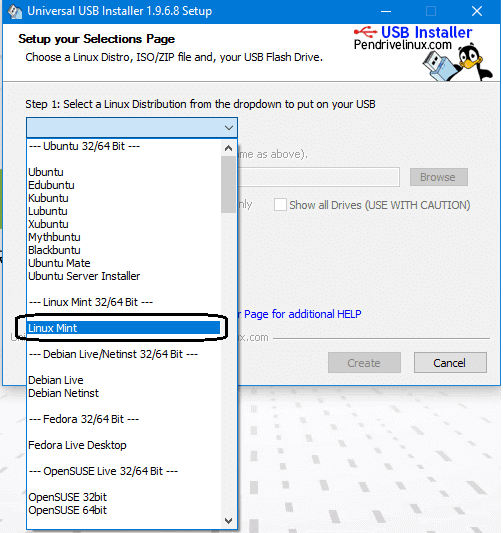
After downloading the application, open it and choose from the list the distro you want to install; in our case, we will select Linux mint.
Make sure that you put your memory stick on the computer and click next and wait till the copying process is finished.
Now Finally we click create to create bootable USB
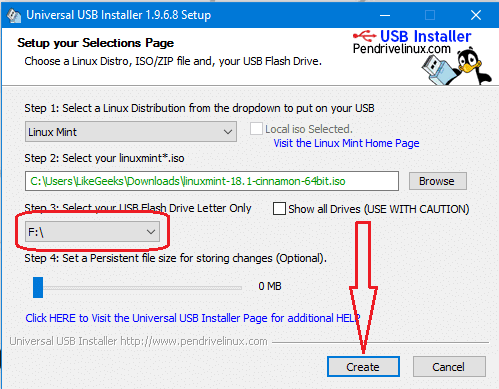
And now you can boot with this memory stick.
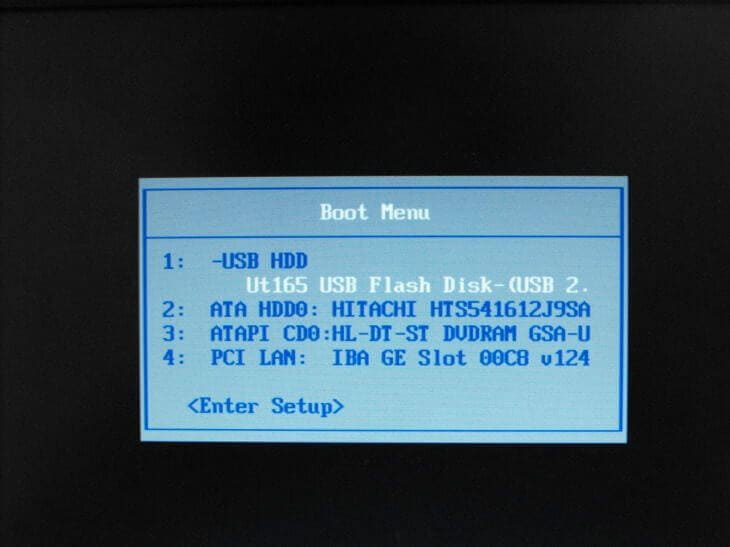
Then Restart your PC and go to BIOS settings and select boot options and make sure that the USB is the first option, then save your BIOS settings and reboot.
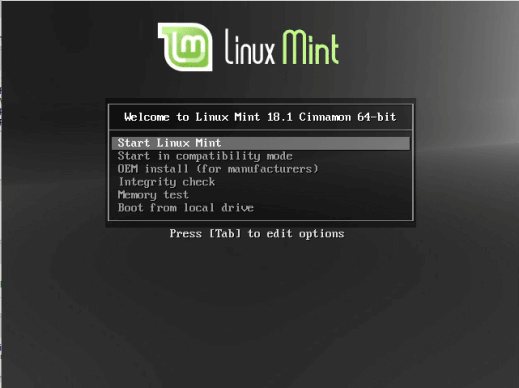
Then it will show the installation screen, press Enter, and it will load the live CD content.
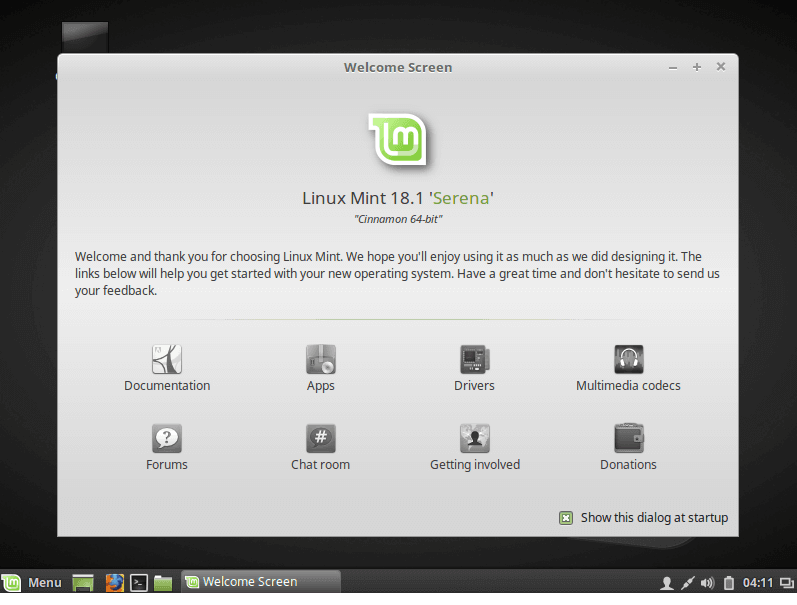
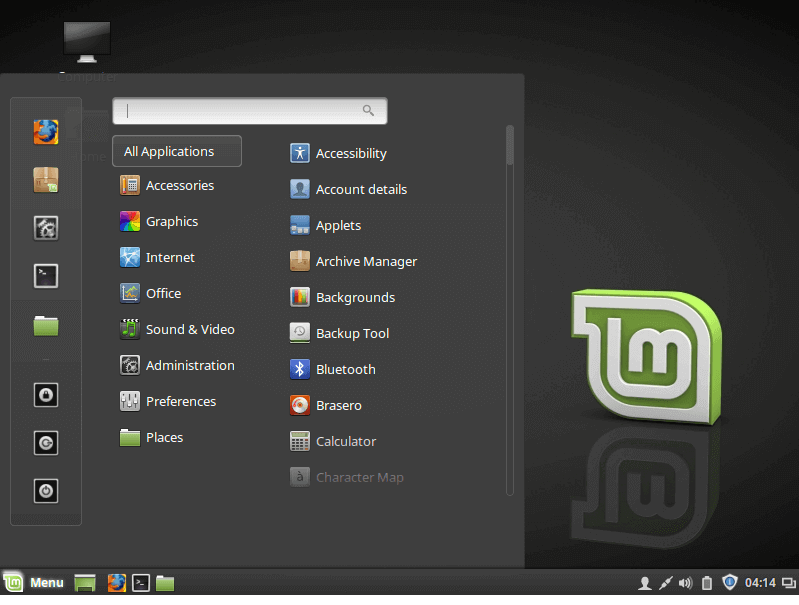
Now the desktop should appear like that:
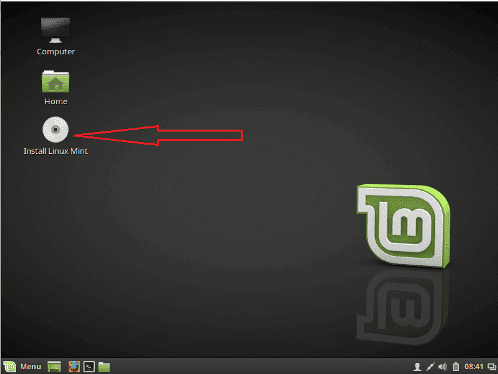
Click install Linux Mint.
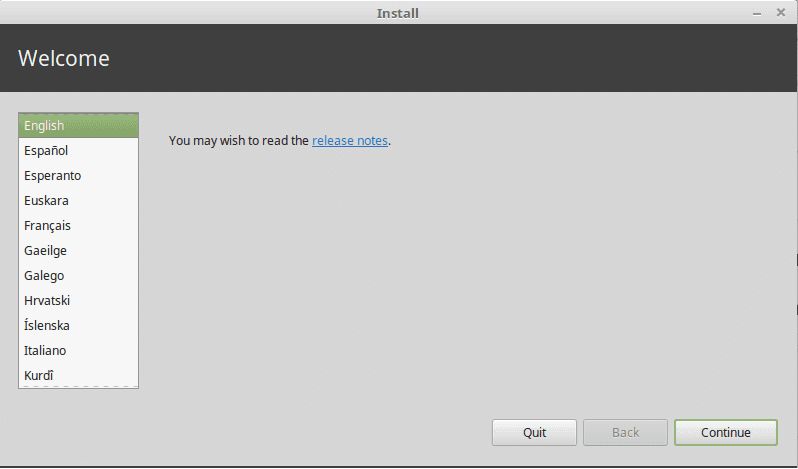
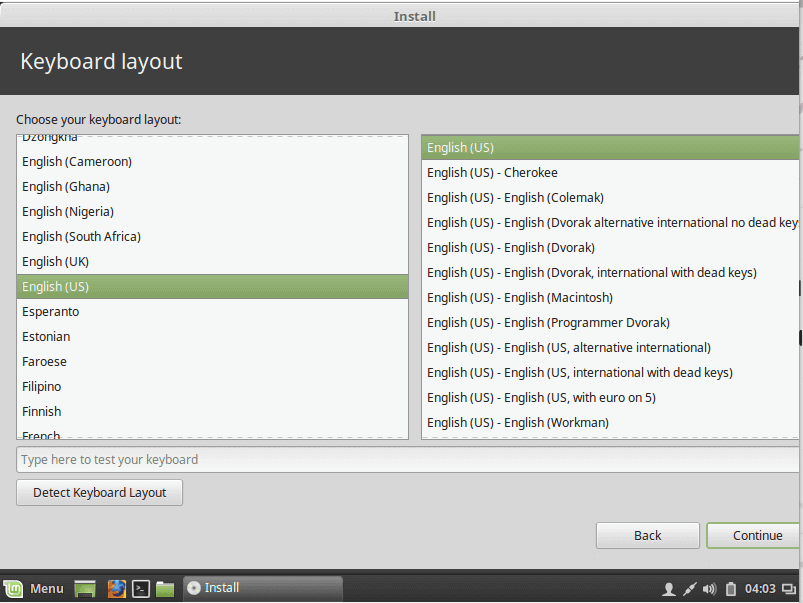
Then choose the language used for installation.
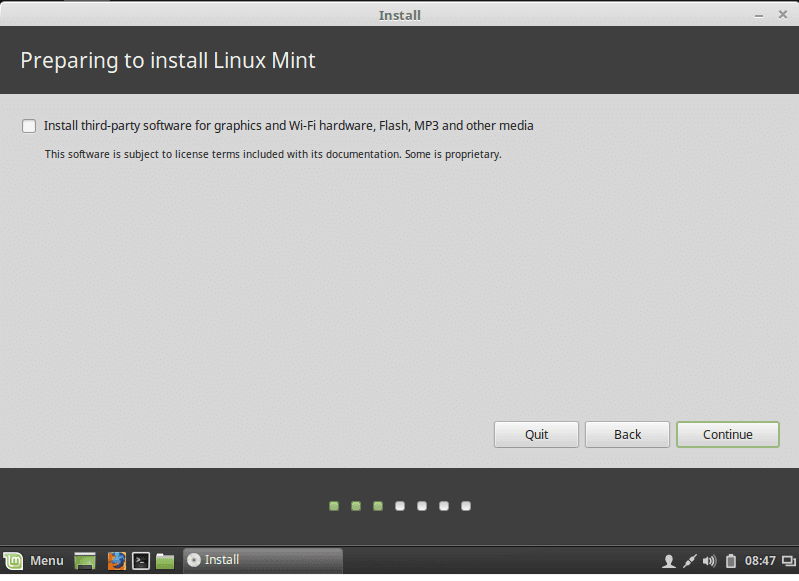
Then choose the installation type, and TAKE CARE if you are installing Linux on a disk that contains other operating systems, you MUST select the option called something else.
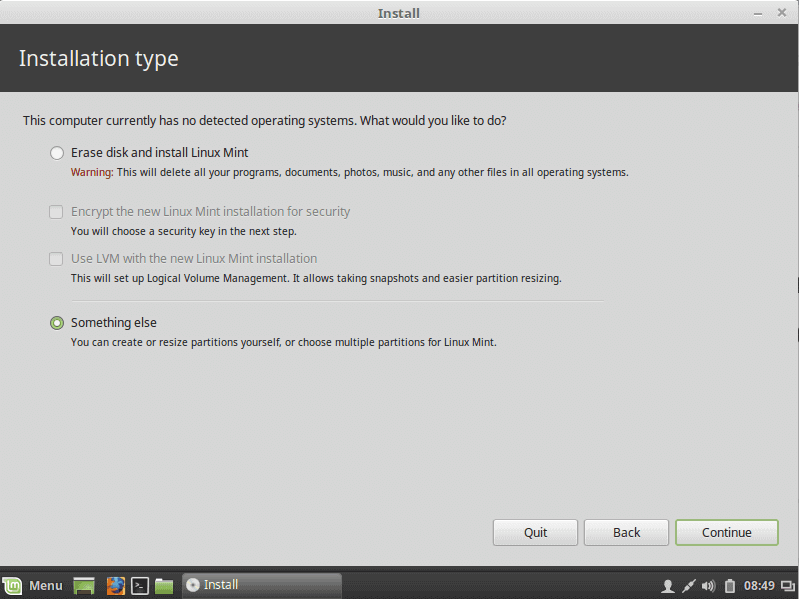
If you are installing it on a new disk, choose the option Erase disk.
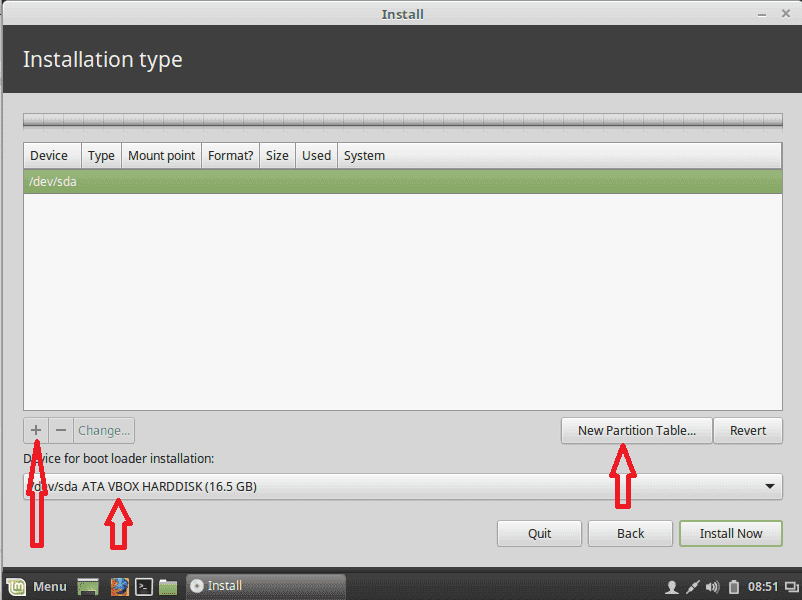
Linux requires two partitions to work, the root partition and the swap partition.
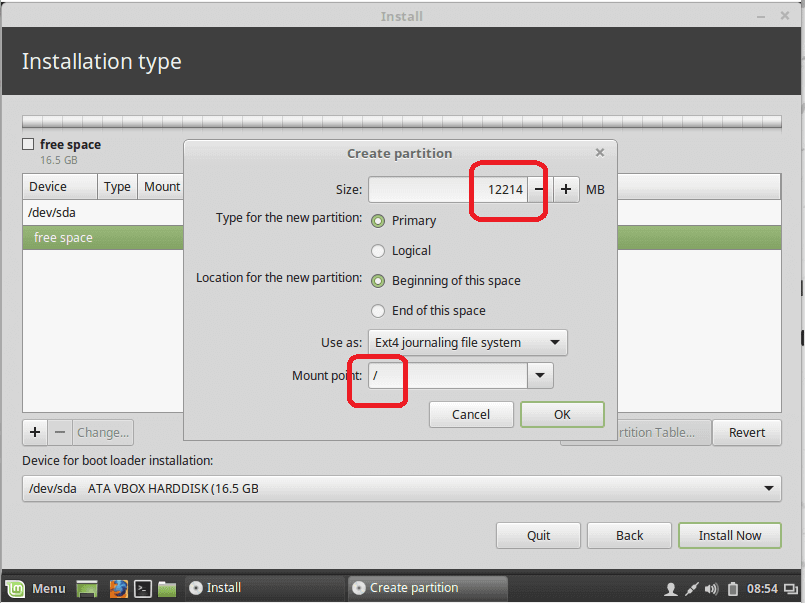
Now we will create them by clicking the plus button and choose about 12 GB or more as you need but not less than that for the root partition and choose mount type as / which stands for root and of course format will be Ext4.
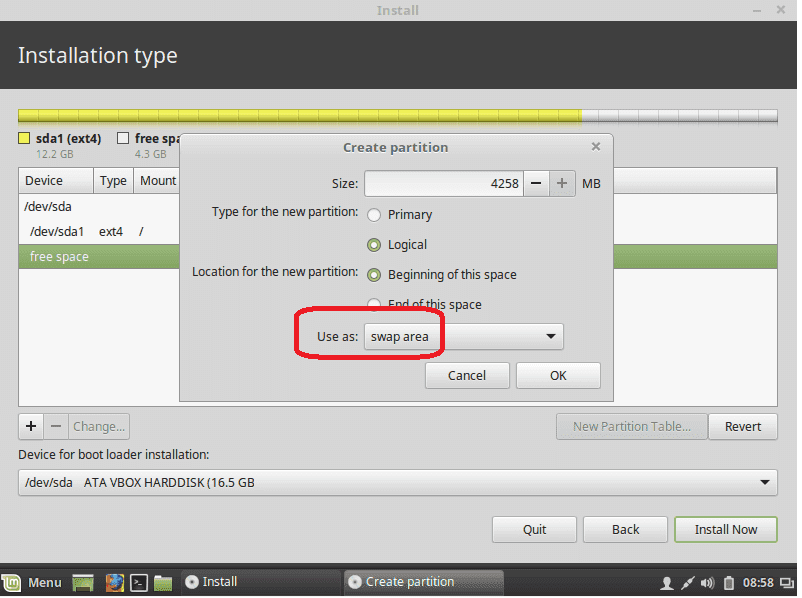
Now we create a swap partition, choose the remaining free space and click the plus button and choose the swap area as shown:
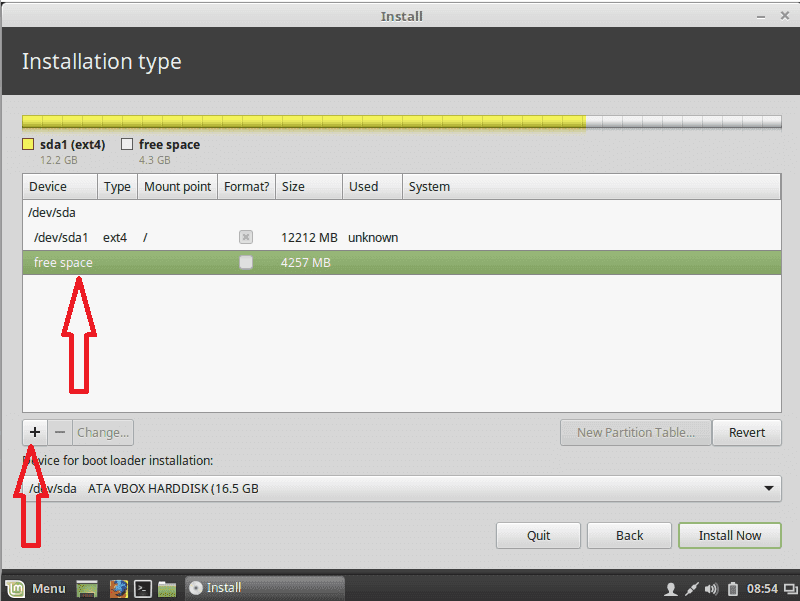
Then Create the swap area:
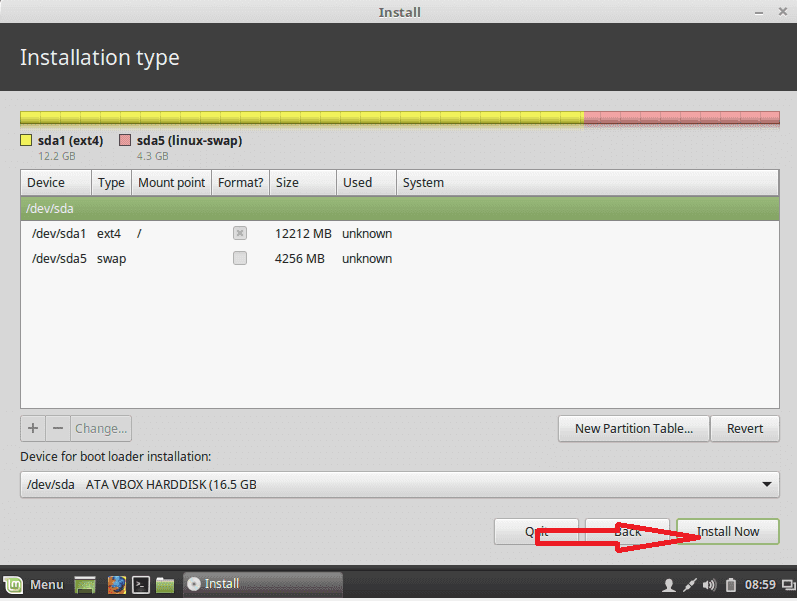
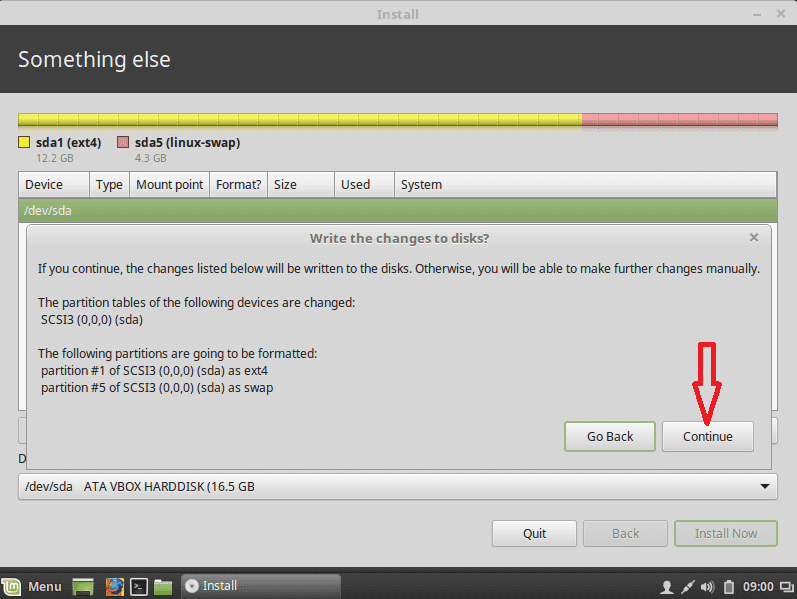
Then click install now and agree about writing changes to disk:
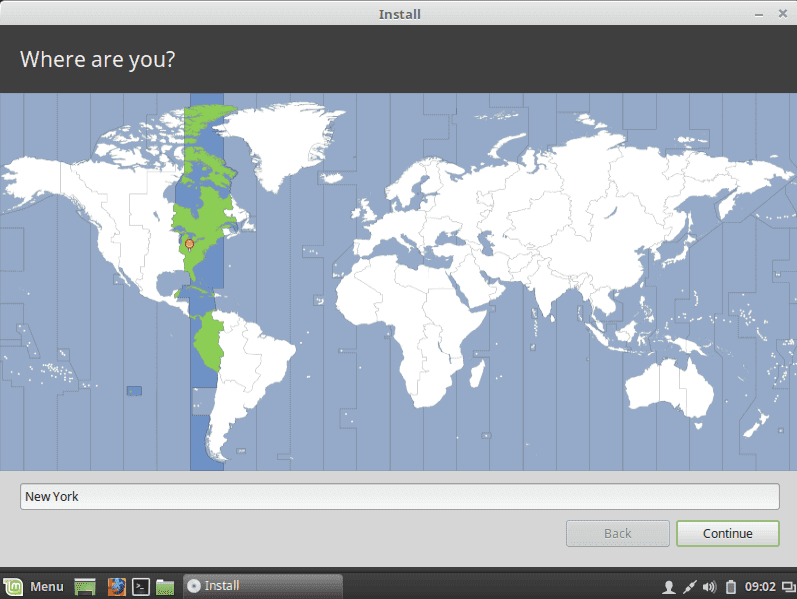
Now you choose the time zone and click continue the choose the language:
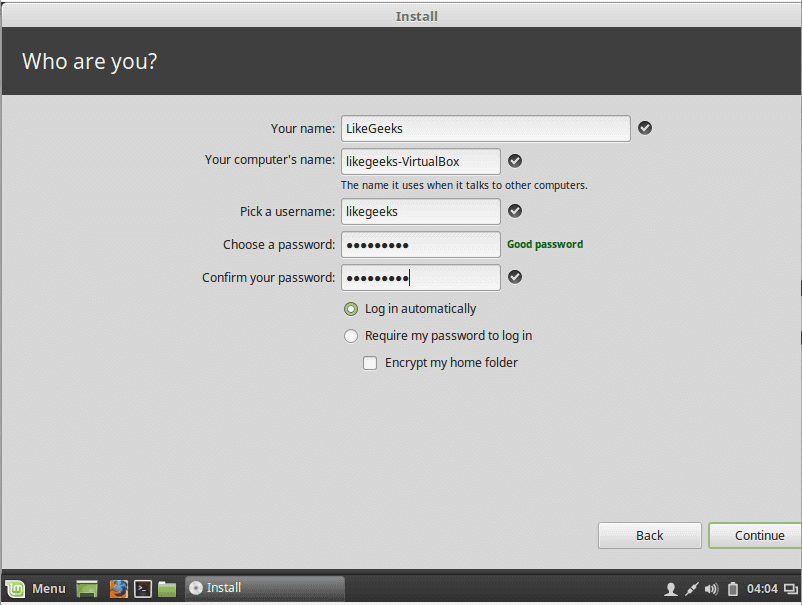
Now you write your username and password and click continue:
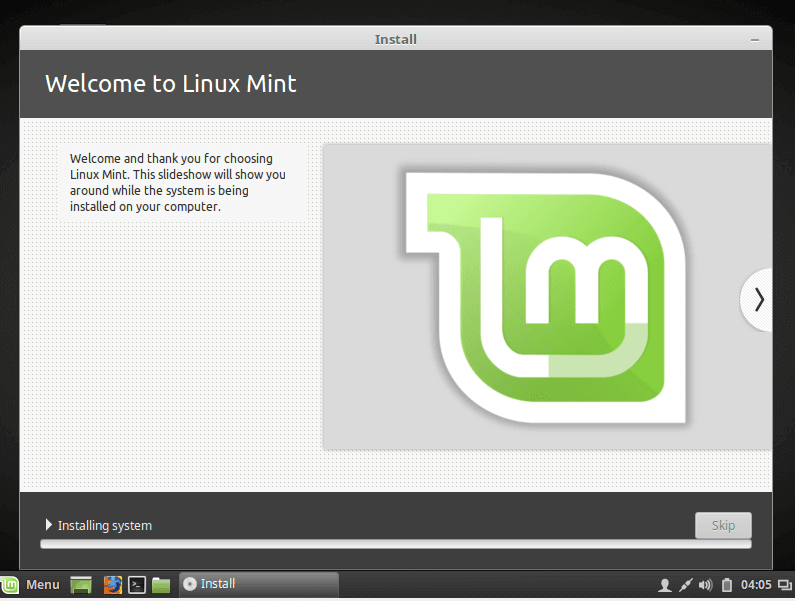
Finally, the installation started:
After finishing the installation, it will prompt you to reboot the machine and remove the installation media, whether it is a DVD or USB.

And yes, this is how to install Linux on Physical machine.
The second way it to install Linux is to install it on VirtualBox First download VirtualBox from here:
There are two ways to use Linux on VirtualBox:
- Install it from the ISO file we downloaded above
- Download a ready to use VirtualBox image that contains the system and run it without effort from here: http://www.osboxes.org/virtualbox-images/
The first way is easy, it like the normal installation process
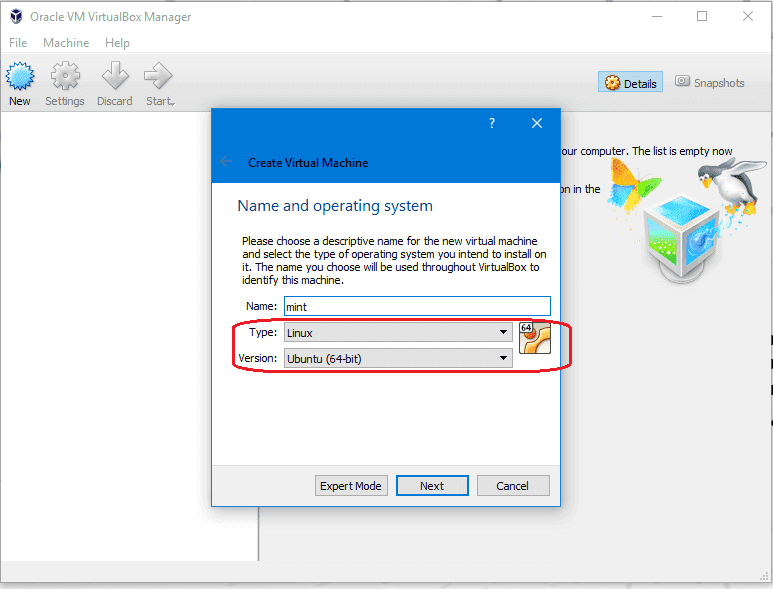
Open VirtualBox and click new and choose Linux and Ubuntu 64:
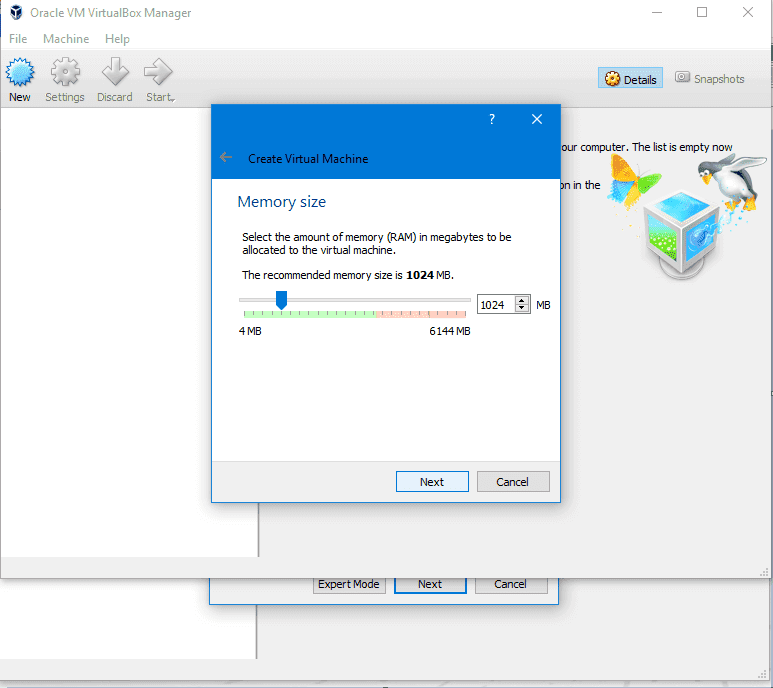
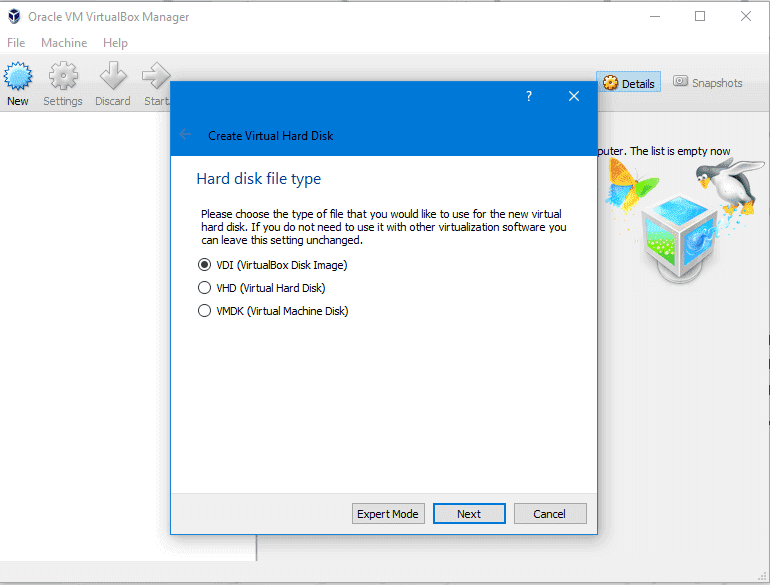
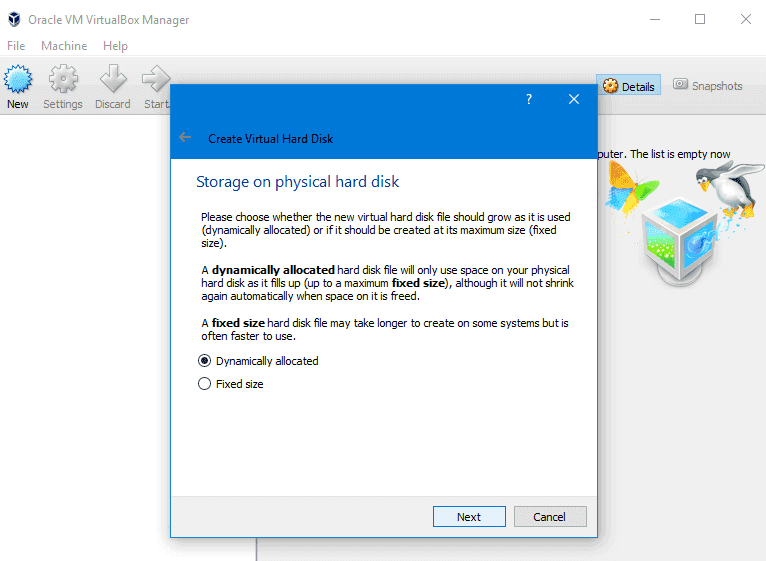
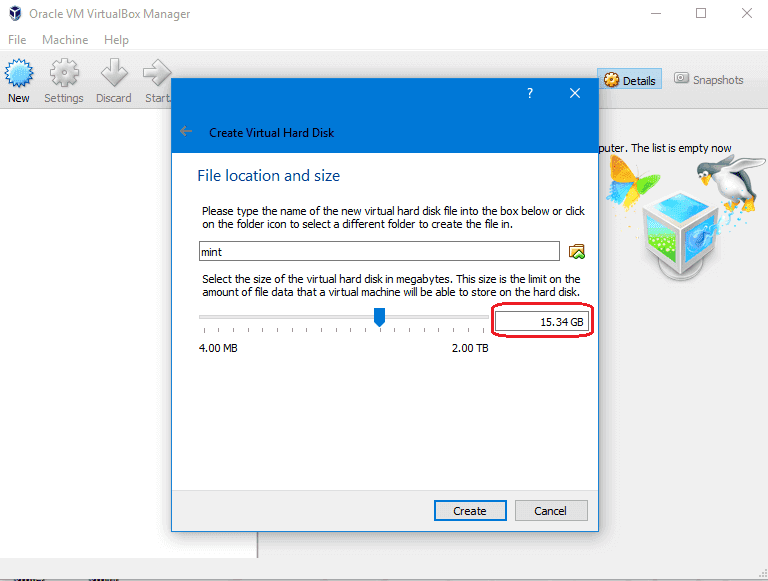
Then select the RAM required not less than 1 GB and select the disk file type or leave it as VDI and dynamically allocated, and the size not less than 12 GB and hit OK.
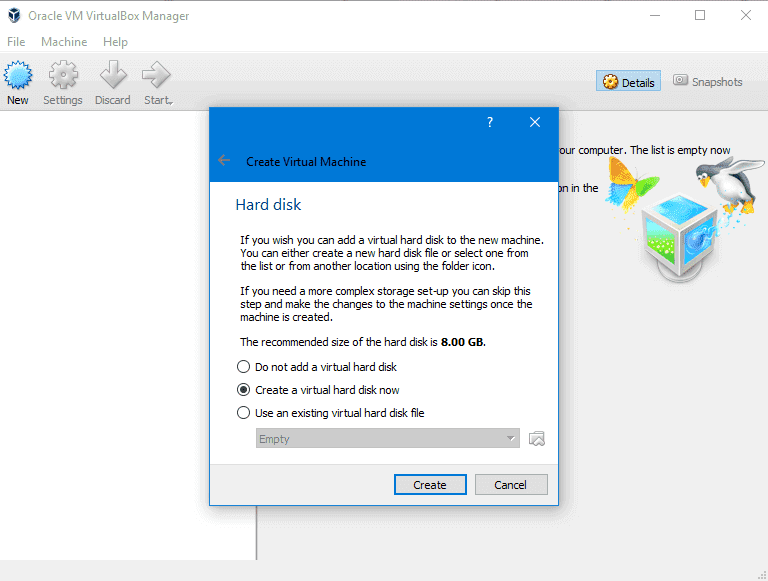
 Then file location for the disk to be used.
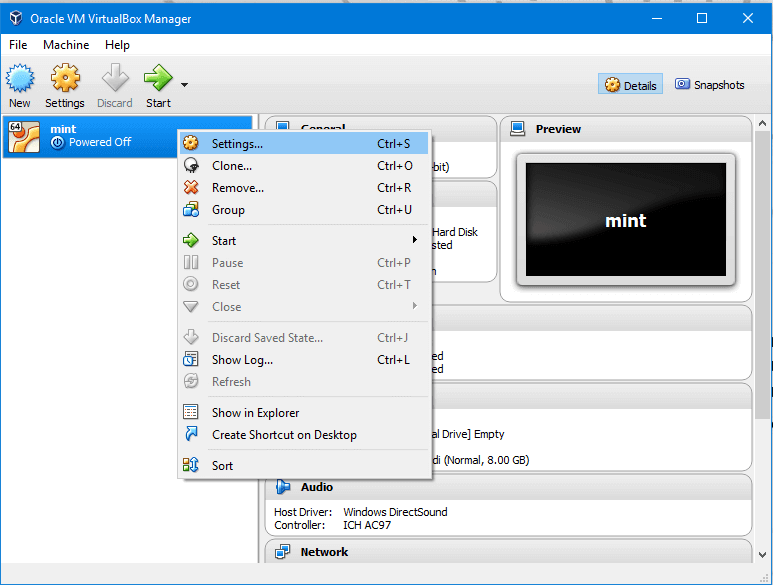
So now the VirtualBox is created, we just need to make it boot from the DVD that we’ve downloaded.
Choose from settings > Storage and choose the ISO image and click OK.
 Then choose the iso image
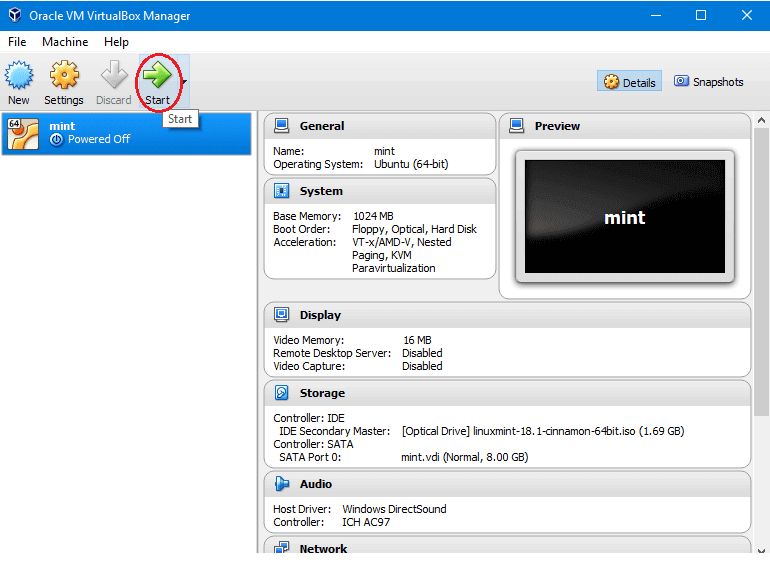
 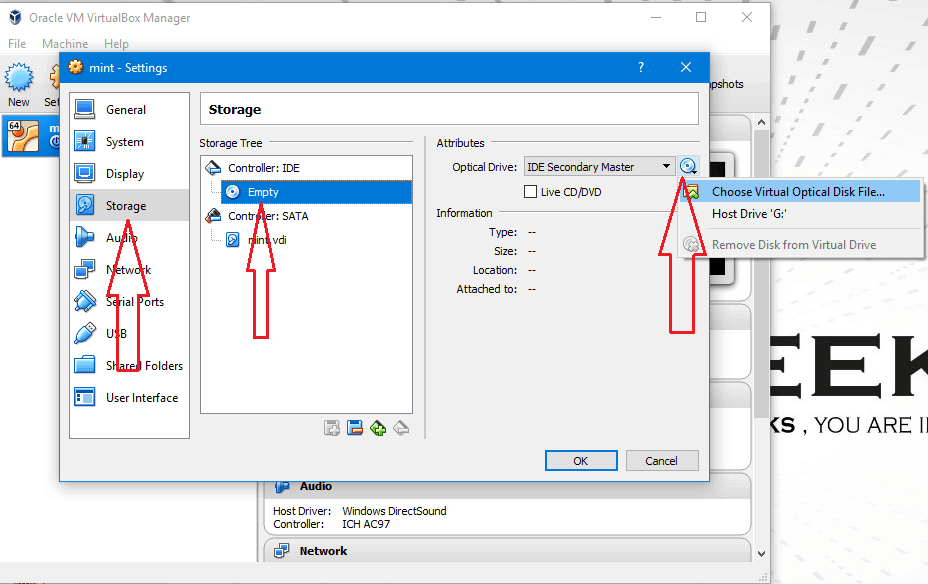 Then Click start
After loading the desktop, click install Linux mint, and the rest of the steps are the same as the above mentioned without any change, And this is how to install Linux on a virtual machine.
Источник
Installation
This entry attempts to walk through the basic steps required to perform a minimal Void Linux installation via a Void live image . It does not attempt to go into fine detail for every step but additional documentation may be found linked throughout this document, as well as via man pages, additional resources in the Guides section etc.
If you are installing on a UEFI system, and wish to do so in UEFI mode, then you should read the notes in the green boxes that specify instructions for UEFI systems,If you encounter any issues please refer to troubleshooting for basic troubleshooting.
Contents
Getting Started
Download the Void live image ISO from https://alpha.de.repo.voidlinux.org/live/current/ and create an installation medium.
For further information regarding the live images and system requirements, see Live Images.
Installation
Boot your machine using the previously-created installation medium. You can choose to run the live image from the media, or, if you have the resources available, you can load the contents of the image into RAM. This option takes some time at the beginning but provides a quicker-overall installation procedure.
Once the live image has booted to a login prompt, log in as root using password voidlinux and then run:
Keyboard
Select the keymap for your keyboard; standard «qwerty» keyboards will generally use the «us» keymap.
Network
Select your primary network interface. If you use DHCP on your network, select that option, otherwise the installer will prompt for IP Address, Netmask, and Gateway.
If you intend to use a wireless connection during the installation, you might have to configure it manually using wpa_supplicant and dhcpcd before running void-installer. Simply follow the instructions given here.
Source
Choose whether you want to install from a local source (the packages that are included in the ISO) or from the network (in which case packages are downloaded from the Void remote repositories). Installing from the network allows you to install the most up-to-date packages available from the official repositories. Note that installing from local will also install any desktop included in the ISO (eg xfce)
Hostname
Set a hostname for your computer remembering that hostnames should be all lower case, with no spaces.
Locale
Configure your default locale settings, this will be used to set the libc locale in a glibc environment.
The locale setting does not currently respond with the musl installer. Locales are not currently supported natively in musl.
Timezone
Set your timezone based on standard timezone options.
Root Password
Enter and confirm the password used for the root account on your new Void installation. The password will not be shown on screen.
User Account
Choose a login (default void ) and a descriptive name for that login (default Void User ). Then enter and confirm the password for this default user. Finally you may choose to modify the group memberships for the user or go with the defaults.
BootLoader
Determine whether you’d like to use the installer to automatically install GRUB2 to the disk, or choose none if you’d like to install/configure a bootloader manually after completing the installation process.
Partition
Void does not provide an automatic/preset partition scheme, so you will need to create this manually using cfdisk . Please be sure to read the disclaimer regarding partition table formatting information if you are unfamiliar with the differences between BIOS/UEFI and MBR/GPT. Upon completion of your partitioning, choose ‘Write’ in cfdisk, type the word ‘yes’ to confirm, and select ‘Quit’ to return to the Void installer. See Disks for further information.
First, while UEFI systems are supposed to support MBR-based partition tables, the reality may be less predictable and the newer GPT scheme is going to be a better choice, especially if you have one of the larger Advanced Format disks. Use GPT.
Second, you need to create an EFI system partition, generally the first one. It does not need to be large; it is common to create one between 200MB and 1GB. When you create this partition in cfdisk, you need to change the type from the default «Linux» to the type appropriate to the ESP:
- For GPT disks, change the type to EFI System .
- For MBR (DOS) disks, create a primary partition and change the type to ef (EFI). [Not recommended]
Filesystems
Create the filesystems used to populate the partitions you just created. Choose your filesystem type, specify the mountpoint and create the filesystem, if necessary, for each partition you mean to modify. Once finished, select Back to return to the main installer menu. See Filesystems.
Once finished, select Back to return to the main installer menu. For additional information, see Disks#Filesystems.
Review Settings
Before installing, it is generally a good idea to review the installation settings. Arrow right from the main menu to select settings and use to review.
Install
This step of the installer creates the filesystems specified in the previous step, then downloads all of the base packages (if configured to install via Network) and copies them to the target partition/partitions configured in the previous steps. After that, the installer generates an initramfs and installs GRUB2 to the bootable partition.
After the installation is successfully completed, you can reboot into your new Void Linux install!
Post-Installation
Once you boot into your new Void installation, continue to Post-installation for further configuration tips.
Notes/Issues
Notes on Grub2 EFI Loader installation.
Grub2 possesses the ability to install an EFI loader to the EFI System Partition, as well as to modify the BootOrder variable in the system firmware. This works on most well-behaved UEFI imlementations. However, there are reports of a couple of issues on some systems/motherboards:
- The BootOrder variable is not updated.
- The BootOrder is not saved/followed by the system.
If the BootOrder variable fails to be updated, then the system will not boot the newly-installed Void system without some extra configuration.
To confirm that BootOrder has been updated before your final reboot, you can run the command efibootmgr with no arguments. The output should include something like this:
See the man page for efibootmgr for more information on the capabilities and use of this program. If you see the option «void_grub» and it is listed first in BootOrder, then the variables have been successfully updated, and you can try to reboot. If not, keep reading.
In cases where BootOrder is either not updated, or not saved/followed after you reboot, then you should try copying grubx64.efi to the common default EFI loader location. You’ll need to mount your EFI partition, and we’ll assume it’s on /mnt/. (In your installed Void system, the mount point would normally be /boot/efi/)
On 32-bit firmware it should be
You may then need to set the default boot disk in your computer’s setup utility, but Void/Grub2 should boot correctly after this.
Note that you can boot your system back into the LiveCD to perform this operation if you were unable to boot to your Void Installation.
Notes on Partitioning
Cfdisk does not give me a choice of partition table type.
If the disk has already been initialized, cfdisk will continue with the partition table layout already present.
If your disk was previously partitioned with the MBR scheme, you will see the text «label: dos» near the top of the cfdisk screen. At this point, you will want to back out of the installer and run cfdisk manually with the «-z» option to start with an uninitialized disk layout, where you will then be prompted for the label type and continue with a new partition layout.
If the disk was previously using GPT, then you will see the text «Label: gpt» near the top of the cfdisk screen.
Multiple Partitions
It is common practice to put various subdirectories of / onto their own mounted partition, and there often good reasons for doing so.
However, it is important to note, because of Void’s adoption of a more modern method for laying out the file system (known as the «/usr merge»), you must not try to place /usr on a separate partition. When you attempt to do so, the installer will inform you that this is not supported in Void. For information as to the «whats» and «whys» of the /usr merge, please see https://www.freedesktop.org/wiki/Software/systemd/TheCaseForTheUsrMerge/.
Separate Boot Partition: While there are very few cases where this would be useful today, some people will opt to create a separate /boot partition, creating a nested mount scenario, where you have one partition mounted at /boot/ and a second partition mounted at /boot/efi.
This creates a problem in the installer where it may fail at grub-install, as the /boot/efi directory isn’t created on the /boot/ partition. To avoid this particular failure the options are as follows:
- In the Filesystems stage, make sure to assign the EFI System Partition last. As long as /boot is assigned before /boot/efi, then it will be mounted before the creation of the /boot/efi/ mountpoint, and no trouble will arise.
- Don’t use a separate /boot/ partition. One of the few cases where it might be desirable would be when having an encrypted root, but unencrypted /boot. Various ways of booting encrypted systems and the reasoning behind each is a rather large discussion of its own.
- To the author’s knowledge, Grub is the only EFI loader that, at the time of this writing, can open LUKS/LVM containers itself, so the use of other loaders would require the kernel and initrd to be on an unencrypted filesystem.
- Another way to deal with this would be to use the ESP as /boot/ itself, but there are issues. Grub will need to be installed manually, as the installer assumes the ESP exists at /boot/efi/ and you will have to override this.
- Lastly, you could use your preferred EFI loader to control all boot options, but allow it to chainload Grub which can handle booting your encrypted Linux installation. Obviously this does not avoid the use of Grub, so if that is one’s goal, then this is not a satisfying option.
This can actually be an issue for any nested mount scenario, though such schemes aren’t that common, and may not need to be configured at install-time.
Platform-specific notes
Bitness — Note that UEFI loader bitness (i.e. 32-bit or 64-bit) must match that of the firmware. So 64-bit firmware only runs a 64-bit loader (bootx64.efi), while 32-bit firmware only runs a 32-bit loader (bootia32.efi).
However, the loader can switch the CPU mode, so it is possible to boot a 64-bit kernel from a 32-bit EFI loader (given support in the loader), provided the CPU is actually x86_64 architecture. The reverse is also true (32-bit EFI kernel booted by a 64-bit EFI loader).
This applies only to firmware bitness. It is still not possible, for obvious reasons, to load a 64-bit OS on a 32-bit CPU.
Working Platforms
This procedure has been tested on the following systems: (Please add any systems/motherboards where this procedure has been successfully followed)
QEMU/KVM virtual machine on 64-bit OVMF firmware image (64-bit guest, 64-bit host) — x86_64 Void Install CD. BootOrder updated successfully, BootOrder obeyed by system.
QEMU/KVM virtual machine on 32-bit OVMF firmware image (32/64-bit guests, 64-bit host) — i686 and x86_64 Void Install CD. BootOrder updated successfully, BootOrder obeyed by system.
ASROCK Z77 Extreme4 (Intel Z77 chipset, 64-bit firmware) — x86_64 Void Install CD. BootOrder updated successfully, BootOrder obeyed by system.
Less-than-working Platforms
The following platforms have had issues with this procedure: (Please add any systems/motherboards that have issues related to EFI installation, as well as workarounds, if any.)
32-bit Firmware
Current ISOs have full support for loading both 32- and 64-bit OSes on both 32- and 64-bit firmwares. Tweaking the install script or adding packages to the install environment should no longer be necessary.
Источник


