- Moving to a Windows 10 PC
- Step 1: Learn the benefits of a modern Windows 10 PC
- Step 2: Purchase your new PC
- Step 3: Sign in with Microsoft to streamline your experience
- Step 4: Bring your files and favorites with you
- How to move desktop Windows without a mouse?
- MoveWindow function (winuser.h)
- Syntax
- Parameters
- Return value
- Remarks
- Move a Window with the Keyboard in Windows 7/8/10
- Method 1 – Incremental Move
- Method 2 – Windows Snap
- Method 3 – Multi-Monitor Setups
- Скачать Муви Мейкер
- Обзор Windows Movie Maker
- Особенности
- Поле для творчества
- Набор эффектов
- Разделение на фрагменты
- Бесплатность
- Step by Step
- Windows Movie Maker в рейтинге «Программы для монтажа видео»
- Скачать Муви Мейкер бесплатно
- Скачать Киностудия Movie Maker для Windows 10, 7, 8, XP
Moving to a Windows 10 PC
Making the move to a new Windows 10 PC? We’re happy you’re here and we’ve got you covered.
This guide will help you discover the best Microsoft has to offer and help you transfer your favorite files and apps to your new device so you can get up and running quickly, and get back to doing what you love.
If you’re on a Windows 7 device, note that support has ended and we recommend you move to a Windows 10 PC to stay secure. Learn more about the Windows 7 end of support and how to get Windows 10.
Step 1: Learn the benefits of a modern Windows 10 PC
Shopping for a new PC? Watch videos about common device-related terms you might come across in your research, including storage types, graphics processing units, and more.
Regular updates are built in to Windows 10, meaning you’ll always have the latest features. Explore what‘s new in the latest Windows 10 updates.
Get customized info about your current Windows 7 PC health and performance with the Guide to Windows 10 app (for Windows 7 devices).
Step 2: Purchase your new PC
For quicker startup times, longer battery life, and more responsive apps, a new PC has you covered. Find a new PC that fits your needs.
Step 3: Sign in with Microsoft to streamline your experience

Never forget a password again. Get personal access to all things Microsoft with a single, secure sign-on, plus get free OneDrive storage to help you move your files to your new PC. Good news—if you have an Xbox or Office account, you may already have a Microsoft account. You can also sign in with any email to get started.
Step 4: Bring your files and favorites with you

There’s no need to leave your files or browser favorites behind. Bring them with you to your new PC using one of the following options. We recommend using OneDrive so your files are backed up and protected in the cloud.
Select your current version of Windows to find instructions on how to move your files.
How to move desktop Windows without a mouse?
the parameters on my desktop have changed. my window for Outlook open outside the parameter.
You can use an old school keystroke technique to regain control of a window that is outside your current desktop.
- Close all programs so that you can start with a clean desktop.
- Open Outlook from the same way you always do (desktop shortcut, pinned from taskbar or start menu, etc)
- Since it is Outlook, just leave it alone for a minute so it completes its startup Send/Receive actions.
- Press ALT+ together, then release and press m. You are now in Move mode.
- Press one of the four directional arrow keys (up, down, right, or left) repeatedly to move the Outlook application window back to the visible area of your desktop.
- When you can see the Outlook application window again (or at least the top left section of the title bar), press to exit Move mode.
If you want to practice this method, open any program onto a blank clean desktop (e.g. Notepad) and start at step 4.
- «Have you tried turning it off and then on again?» — Roy from ‘The IT Crowd’ (Emmy award-winning British comedy)
21 people found this reply helpful
Was this reply helpful?
Sorry this didn’t help.
Great! Thanks for your feedback.
How satisfied are you with this reply?
Thanks for your feedback, it helps us improve the site.
MoveWindow function (winuser.h)
Changes the position and dimensions of the specified window. For a top-level window, the position and dimensions are relative to the upper-left corner of the screen. For a child window, they are relative to the upper-left corner of the parent window’s client area.
Syntax
Parameters
A handle to the window.
The new position of the left side of the window.
The new position of the top of the window.
The new width of the window.
The new height of the window.
Indicates whether the window is to be repainted. If this parameter is TRUE, the window receives a message. If the parameter is FALSE, no repainting of any kind occurs. This applies to the client area, the nonclient area (including the title bar and scroll bars), and any part of the parent window uncovered as a result of moving a child window.
Return value
If the function succeeds, the return value is nonzero.
If the function fails, the return value is zero. To get extended error information, call GetLastError.
Remarks
If the bRepaint parameter is TRUE, the system sends the WM_PAINT message to the window procedure immediately after moving the window (that is, the MoveWindow function calls the UpdateWindow function). If bRepaint is FALSE, the application must explicitly invalidate or redraw any parts of the window and parent window that need redrawing.
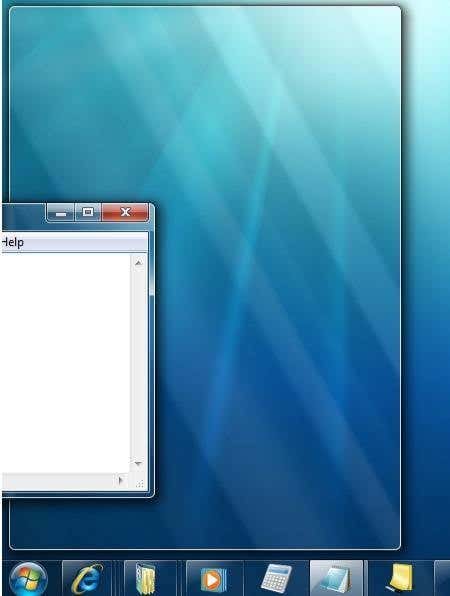
Move a Window with the Keyboard in Windows 7/8/10
Comes in handy once in a blue moon
So for those of you who do not like to use a mouse, it would be pretty cool if you could move a window using just the keyboard in Windows 7 right? Well, there are a couple of ways to do this and even though you may not need to do it very often, it does come in handy on the rare occasion!
In this article, I’ll tell you how to move a window in small increments to the exact position you want, how to snap a window to the left or right and how to move a window between monitors on a multi-monitor setup, all by just using the keyboard!
Method 1 – Incremental Move
For exact positioning, you first need to click on the window. Now this is obviously going to only work for windows that are not fully maximized. If it’s fully maximized, there is really nowhere to move the window.
Step 1: Either click on the window or if you want to use the keyboard, press ALT+TAB and make the window you want to move active.
Step 2: Now go ahead and press ALT+SPACEBAR and you’ll see a small menu appear in the window.
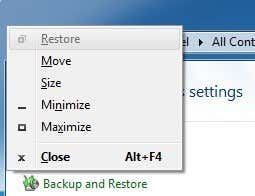
Step 3: Now press M, which will basically choose the Move option in the menu.
Step 4: Now use the arrow keys on your keyboard to move the window to the new position that you desire.
Step 5: Press the Enter key to get out of the move mode. Also, if you want to have the window go back to the original position before you started the move, press the Esc key instead.
Method 2 – Windows Snap
Windows has a nifty feature that lets you snap windows to the left-hand or right-hand side of the screen. If you drag a window to the right or left, it will automatically resize and snap to the side.
To do this using the keyboard, press the Windows Key + the right or left arrow. Make sure to hold down the Windows key while pressing the left and right arrow keys. It’s actually pretty neat and much faster than dragging the window around the screen.
Method 3 – Multi-Monitor Setups
Lastly, for moving between multiple monitors, all you have to do is add SHIFT to the above key combo, so it would simply be Windows Key + Shift + right or left arrow.
For the power users who really want to control their windows, moving may not be enough. So here’s a few other shortcuts that could come in handy if you are left with nothing but a keyboard and Windows:
End – Will display the bottom of the active window (in case you need to scroll using the keyboard)
Home – Will display the top of the active window
F11 – Will either maximize or minimize the active window
Ctrl + Tab – If you have a window with tabs, then this will move you forward through the tabs
Ctrl + Shift + Tab – Will move you back through the tabs
Windows Key + Shift + Up Arrow – This will stretch a window to the top and bottom of the screen.
Founder of Help Desk Geek and managing editor. He began blogging in 2007 and quit his job in 2010 to blog full-time. He has over 15 years of industry experience in IT and holds several technical certifications. Read Aseem’s Full Bio
Скачать Муви Мейкер
Обзор Windows Movie Maker
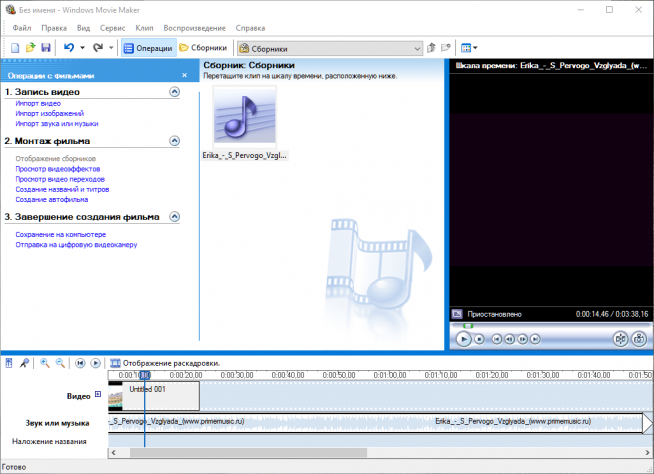
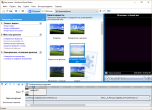
Киностудия Windows или Movie Maker – простая программа для редактирования видео с базовым набором опций. С ее помощью можно разделить ролик на части, сделать слайд-шоу из изображений и добавить звуковой ряд к имеющейся записи. В роли источника контента могут выступать изображения, аудиодорожки и видео в форматах AVI и WMV. Интегрированная библиотека эффектов состоит из двух разделов – стандартные эффекты вроде замедления воспроизведения и пакет переходов. Его компоненты можно накладывать во время смены кадра одного фрагмента видео на другой. При желании на определенную область экрана можно добавить текстовые блоки, в том числе и титры. В Movie Maker есть специальный режим автоматического создания клипа из загруженных файлов.
Готовый проект можно сохранить в формате WMV или передать на подключенную цифровую камеру.
Movie Maker подойдет для Windows 7 с архитектурой 32/64 bit — также его скачать бесплатно можно для Виндовс XP, 10, 8, Vista.
Особенности
Простой редактор видео, позволяющий создавать проекты начального уровня и презентационные видеоролики. Программа Windows Movie Maker отличается удобным интерфейсом – в ней все задачи назначаются с помощью пошагового алгоритма. Приложение не требовательно к ресурсам компьютера. Оно рекомендуется обладателям офисных машин и пользователям, которые ранее не занимались монтажом видеороликов. Все возможности редактора доступны бесплатно.
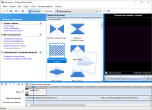
Поле для творчества
Монтаж оригинальных роликов или видеопрезентаций
Набор эффектов
Добавляйте эффекты из встроенного набора
Разделение на фрагменты
Автоматическая разбивка длинных клипов на отрезки
Бесплатность
Movie Maker скачивается бесплатно на компьютер и при этом изначально содержит русскую версию меню
Step by Step
Операции по работе с клипами задаются с помощью пошагового интерфейса
Windows Movie Maker в рейтинге «Программы для монтажа видео»
| ТОП | Скриншоты | Разработчик | Платформа | Лицензия | Видеозахват | Мультитрек | Число дорожек | Поддержка 4К | Плагины | Русский язык |
|---|---|---|---|---|---|---|---|---|---|---|
1 Adobe Premiere Pro  |  | Adobe Systems | Пробная $9.99/мес. | Да | Да | Без ограничений | Да | Да | Да | |
2  Sony Vegas Pro Sony Vegas Pro  |  | Magix Software GmbH | Пробная $599 | Да | Да | Без ограничений | Да | Да | Нет | |
| 3 Movavi Video Editor |  | Movavi | Пробная 39.95$ | Да | Нет | 1 | Да | Нет | Да | |
| 4 ВидеоМОНТАЖ |  | AMS Software | Пробная 15$ | Нет | Нет | 1 | Да | Нет | Да | |
10 Windows Movie Maker  |  | Microsoft | Бесплатная | Нет | Нет | 1 | Нет | Нет | Да |
Скачать Муви Мейкер бесплатно
Скачать Киностудия Movie Maker
для Windows 10, 7, 8, XP
Бесплатная версия: 2012 16.4.3528.0331
| Рекомендуем! InstallPack | Стандартный установщик | Официальный дистрибутив Windows Movie Maker | Тихая установка без диалоговых окон | Рекомендации по установке необходимых программ | Пакетная установка нескольких программ |
|---|
SoftOK рекомендует InstallPack, с его помощью вы сможете быстро установить программы на компьютер, подробнее на сайте.


