- WebDAV File System
- Overview
- Compatibility
- Setup
- Windows Server 2012 or Windows Server 2012 R2
- Windows 8 or Windows 8.1
- Windows Server 2008 R2
- Windows 7
- Windows Server 2008 or Windows Vista
- How To
- How to allow hidden files to be listed in WebDAV responses
- Configuration
- Attributes
- Child Elements
- Configuration Sample
- Sample Code
- Установка и настройка WebDAV на IIS в Windows
- Установка WebDAV на IIS 7.5 в Windows Server 2008 R2
- Установка WebDAV на IIS 7.5 в Windows 7
- Настраиваем публикацию WebDAV в менеджере IIS
WebDAV File System
Overview
Compatibility
| Version | Notes |
|---|---|
| IIS 10.0 | The element was not modified in IIS 10.0. |
| IIS 8.5 | The element was not modified in IIS 8.5. |
| IIS 8.0 | The element was not modified in IIS 8.0. |
| IIS 7.5 | The element of the element ships as a feature of IIS 7.5. |
| IIS 7.0 | The element of the element was introduced in WebDAV 7.0, which was a separate download for IIS 7.0. |
| IIS 6.0 | N/A |
The WebDAV 7.0 and WebDAV 7.5 modules shipped out-of-band for IIS 7.0, which required downloading and installing the modules from the following URL:
With Windows 7 and Windows Server 2008 R2, the WebDAV 7.5 module ships as a feature for IIS 7.5, so downloading WebDAV is no longer necessary.
Setup
To support WebDAV publishing for your Web server, you must install the WebDAV module. To do so, use the following steps.
Windows Server 2012 or Windows Server 2012 R2
- On the taskbar, click Server Manager.
- In Server Manager, click the Manage menu, and then click Add Roles and Features.
- In the Add Roles and Features wizard, click Next. Select the installation type and click Next. Select the destination server and click Next.
- On the Server Roles page, expand Web Server (IIS), expand Web Server, expand Common HTTP Features, and then select WebDAV Publishing. Click Next.

- On the Select features page, click Next.
- On the Confirm installation selections page, click Install.
- On the Results page, click Close.

Windows 8 or Windows 8.1
- On the Start screen, move the pointer all the way to the lower left corner, right-click the Start button, and then click Control Panel.
- In Control Panel, click Programs and Features, and then click Turn Windows features on or off.
- Expand Internet Information Services, expand World Wide Web Services, expand Common HTTP Features, and then select WebDAV Publishing.
- Click OK.
- Click Close.

Windows Server 2008 R2
- On the taskbar, click Start, point to Administrative Tools, and then click Server Manager.
- In the Server Manager hierarchy pane, expand Roles, and then click Web Server (IIS).
- In the Web Server (IIS) pane, scroll to the Role Services section, and then click Add Role Services.
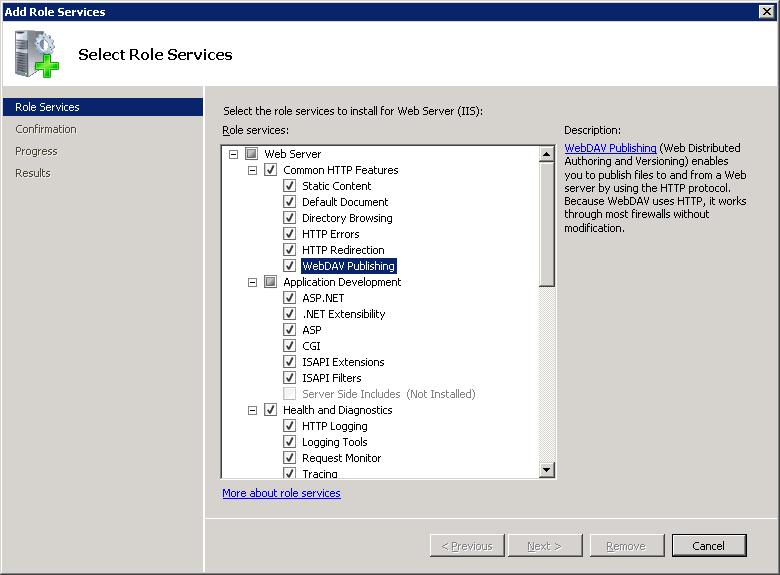
- On the Select Role Services page of the Add Role Services Wizard, expand Common HTTP Features, select WebDAV Publishing, and then click Next.
- On the Confirm Installation Selections page, click Install.
- On the Results page, click Close.

Windows 7
- On the taskbar, click Start, and then click Control Panel.
- In Control Panel, click Programs and Features, and then click Turn Windows Features on or off.
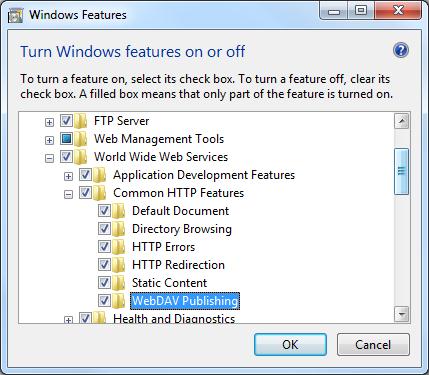
- Expand Internet Information Services, then World Wide Web Services, and then Common HTTP Features.
- Select WebDAV Publishing, and then click OK.

Windows Server 2008 or Windows Vista
Download the installation package from the following URL:
Follow the instructions in the following walkthrough to install the WebDAV module:
How To
How to allow hidden files to be listed in WebDAV responses
Open Internet Information Services (IIS) Manager:
If you are using Windows Server 2012 or Windows Server 2012 R2:
- On the taskbar, click Server Manager, click Tools, and then click Internet Information Services (IIS) Manager.
If you are using Windows 8 or Windows 8.1:
- Hold down the Windows key, press the letter X, and then click Control Panel.
- Click Administrative Tools, and then double-click Internet Information Services (IIS) Manager.
If you are using Windows Server 2008 or Windows Server 2008 R2:
- On the taskbar, click Start, point to Administrative Tools, and then click Internet Information Services (IIS) Manager.
If you are using Windows Vista or Windows 7:
- On the taskbar, click Start, and then click Control Panel.
- Double-click Administrative Tools, and then double-click Internet Information Services (IIS) Manager.
In the Connections pane, expand the server name, and then go to the site, application, or directory where you want to enable WebDAV publishing.
In the Home pane, double-click WebDAV Authoring Rules. 
In the Actions pane, click WebDAV Settings.
In the WebDAV Settings pane, choose select True for Allow Hidden Files to be Listed if you want properties for hidden files to be returned in property responses; otherwise, choose False. 
Click Apply in the Actions pane.
Configuration
The element is configurable only at the site level in the ApplicationHost.config file. Any elements at other levels or in Web.config files are ignored.
Attributes
| Attribute | Description |
|---|---|
| allowHiddenFiles | Optional Boolean attribute. true if WebDAV will display hidden files in the responses to property requests; otherwise, false. |
Note: Even though files may be hidden from property requests, they can still be requested directly. For example, if you hid the Web.config file for your Web site, it would not be displayed in directory listings, but you could still open the file in a WebDAV-based editor if you knew that the path existed. The default value is false .
When set to false, the WebDAV module will not enforce any form of transactional processing. When set to true, the WebDAV module will enforce transactional processing by failing the operation if the base file system cannot transactions. The default value is false .
true if virtual directories are hidden from WebDAV requests; otherwise, false.
Note: This attribute was added in WebDAV 7.5 and IIS 7.5.
The default value is false .
Child Elements
Configuration Sample
The following example lists a sample element for the Default Web Site. This example clears any existing authoring rules, adds a single rule for the administrators group, enables WebDAV authoring, specifies that hidden files are allowed, enables WebDAV locks and specifies the lock provider, and enables WebDAV properties and specifies the default XML namespace for property mapping.
Sample Code
The following examples configure the WebDAV file system settings so that hidden files and virtual directories will be returned in property query responses.
Установка и настройка WebDAV на IIS в Windows
В этой заметке мы поговорим о замечательной надстройке над службой Internet Information Services (IIS) под названием WebDAV. WebDAV это протокол для доступа к общим файлам и папкам через интернет, чем то похожий на FTP. Передача файлов по протоколу WebDAV может быть осуществлена через различные межсетевые экраны и брандмауэры, передаваемую информацию можно шифровать, да и работа с файлами и папками реализована намного удобнее, полностью напоминая работу службы общего доступа к фалам и папкам в Windows.
Вместе с выходом Windows Server 2008 Microsoft презентовала обновленную версию модуля WebDAV для IIS 7. Данный модуль существенно расширил возможности, удобство и безопасность использования WebDAV для доступа к файлам в Интернет, кроме того теперь он стал поддерживать многопользовательскую работу и блокировку файлов.
В этой статье мы поговорим о том, как установить WebDAV на ОС Windows 7 и Windows Server 2008 R2, как его настроить и каким образом можно получить доступ к файлам и папкам, к которым открыт общий сетевой доступ по WebDAV .
Еще раз напомню, что WebDAV это расширение службы IIS, поэтому, если у вас еще не установлен IIS, сделайте это (как вы, наверное, помните и в Windows 7 и в Windows Server 2008 R2, IIS идет по умолчанию, но в целях безопасности этот компонент нужно включать отдельно). Установка WebDAV в Windows 7 и в Windows 2008 R2 немного отличается.
Установка WebDAV на IIS 7.5 в Windows Server 2008 R2
- Откройте меню Start-> Administrative Tools-> Server Manager.
- В окне управления сервером выберите Roles и отметьте Web Server (IIS).
- В окне Web Server (IIS), найдите секцию Role Services и добавьте новую роль Add Role Services.
- В списке служб разверните элемент Common HTTP Features, выберите опцию WebDAV Publishing и нажмите Next.
- Затем нажмите Install.
- После установки расширения WebDAV, закройте окно установки кнопкой Close.
Установка WebDAV на IIS 7.5 в Windows 7
- Перейдите в панель управления.
- В панели управления откройте элемент Programs and Features, и перейдите в режим установки функций Windows (Turn Windows Features on or off).
- Разверните узел Internet Information Services, затем World Wide Web Services, и Common HTTP Features.
- Отметьте WebDAV Publishing и нажмите OK.
Настраиваем публикацию WebDAV в менеджере IIS
На этом этапе мы включим WebDAV для сайта IIS и дадим права на редактирование содержимого локальному администратору.
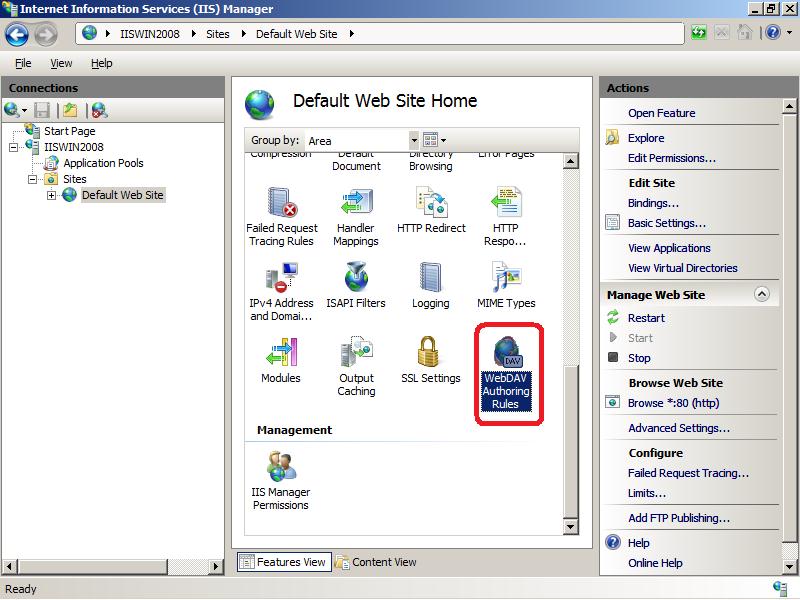
- В менеджере IIS Manager, разверните дерево сайтов и выберите DefaultWebSite.
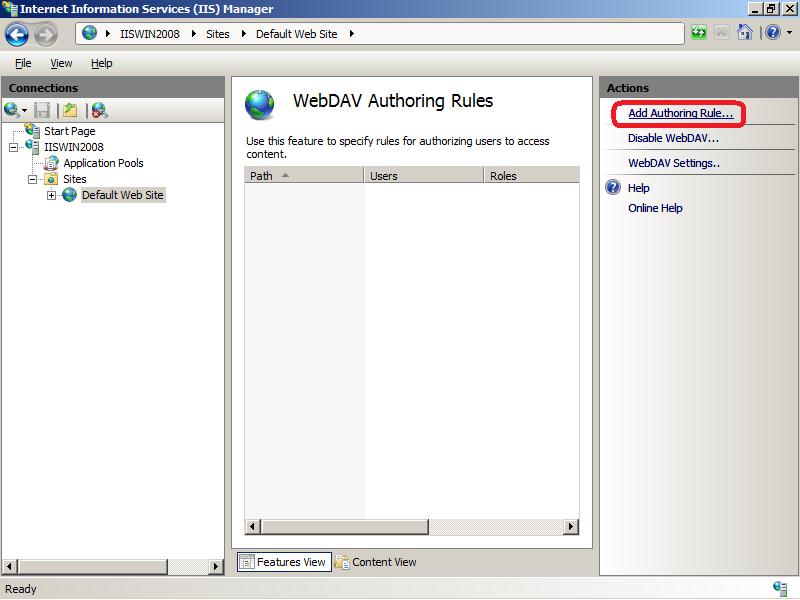
- Как показано на рисунке, щелкните по элементу WebDAVAuthoringRules.
- На странице WebDAV Authoring Rules щелкните в правой колонке(Actions) по сслыке EnableWebDAV
- После включения WebDAV, создадим правила доступа к содержимому, нажав кнопку AddAuthoringRule.
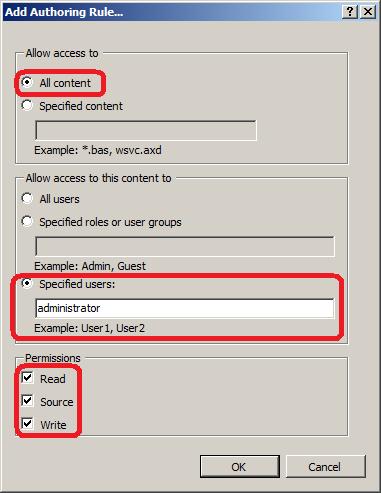
- В окне Add Authoring Rule укажем:
- All content – значит, что правило будет применяться для контента всех типов.
- Выберите «Specified users»и введте имя пользователя «administrator»
- Права доступа: Read, Source и Write.
- После настройки, жмите OK.
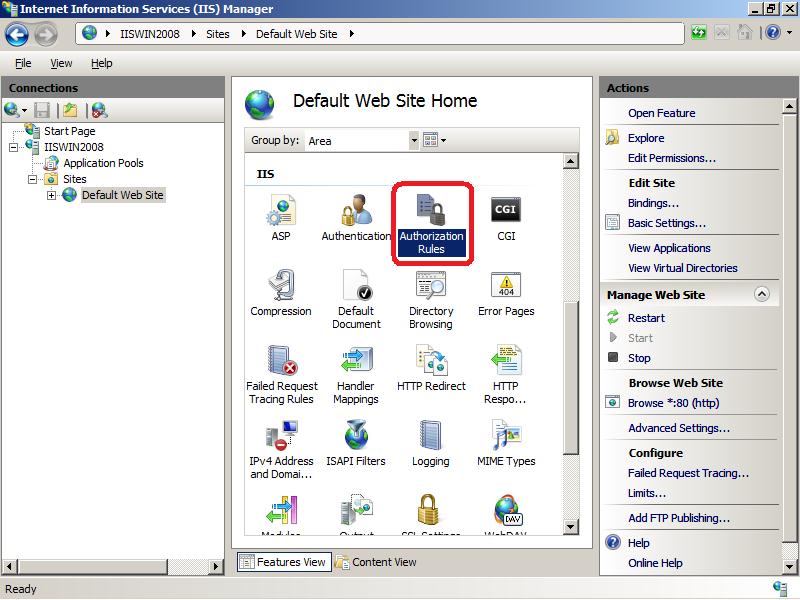
- В панели управления IIS выберите опцию Authentication.
- В окне аутентификации активируйте аутентификацию Windows (WindowsAuthentication), если IIS будет работать только в качестве сервера WebDAV, анонимную аутентификацию можно отключить.
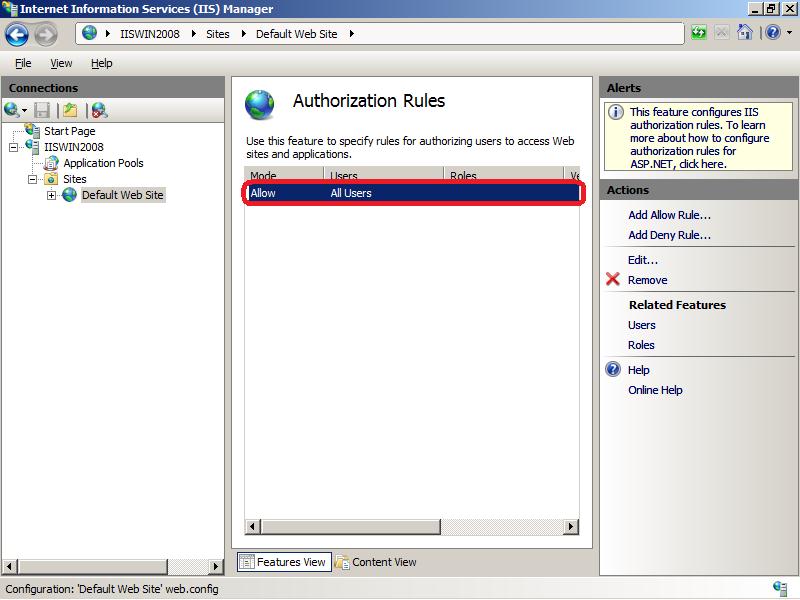
- Вернитесь на уровень сайта Default Web Site и выберите AuthorizationRules (либо .Net Authorization Rules)
- Создайте Allow правило (либо убедитесь, что оно уже существует), в котором администратору было бы разрешено получать доступ к серверу (в моем случае, такое правило уже было, и всем пользователям — All Users, в том числе администратору был разрешен доступ к IIS).


Попробуем теперь подключиться к сайту WebDAV c учетной записью администратора, для чего в командной строке наберите:
В результате в системе появиться новый сетевой диск, подключенный с сервера с помощью WebDAV.
Если же нужно расшарить определенную папку на диске, необходимо создать виртуальный каталог IIS. Для этого щелкните правой кнопкой мыши по сайту и выберите ‘Add New Virtual Directory’: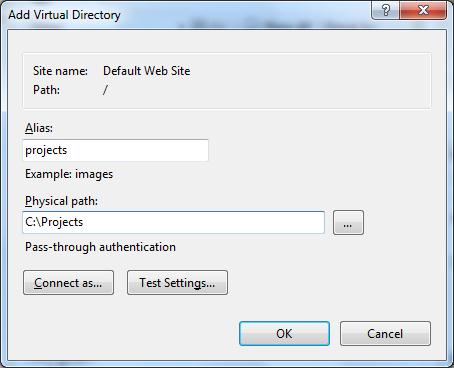
Укажите алиас (имя виртуального каталога IIS) и путь к папке, к которой необходимо открыть доступ и нажмите OK.
Теперь, чтобы подключить данный каталог, нужно воспользоваться командой:
Сетевой диск, подключенный по WebDAV выглядит так: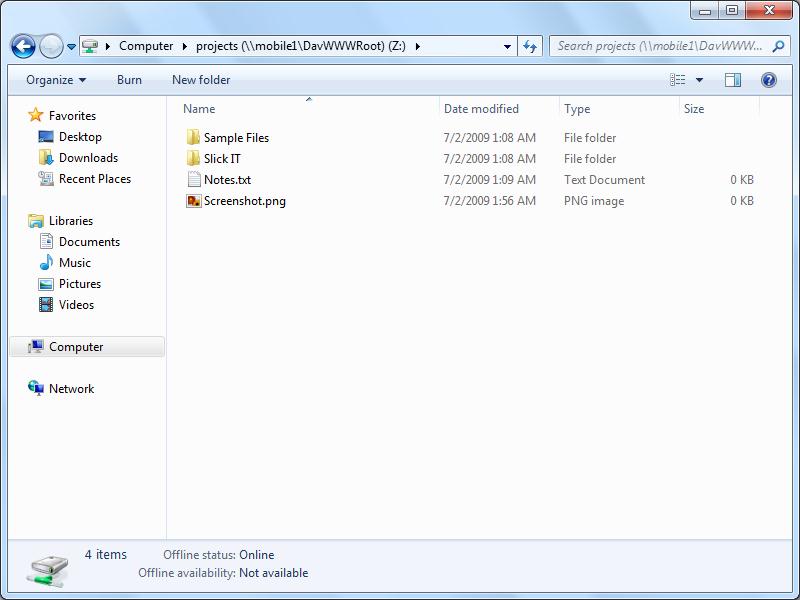
Как вы видите WebDAV — это отличное средство для удаленного доступа к файлам и папкам в Windows поверх протокола HTTP, которое можно использовать, даже через межсетевой экран. Кроме того, так как WebDAV базируется на службе IIS, это означает, что в такой архитектуре мы можем использовать различные технологии обеспечения безопасности и средства управления IIS, в том числе HTTPS для шифрования передаваемых данных (при использовании обычного HTTP вся информация передается в открытом виде, кроме пароля, который при использовании Windows Authentication шифруется).
Опишем еще несколько аспектов использования WebDAV
- Если вы используете Basic authentication вместе с HTTP, это означит, что ваш пароль будет пересылаться в открытом виде, поэтому лучше использовать протокол HTTPS или все-таки включить аутентификацию Windows.
- Не забудьте, что IIS работает из под учетной записи, у которой нет доступа к большинству каталогов и файлам, поэтому придется назначить NTFS права этой учетной записи вручную.
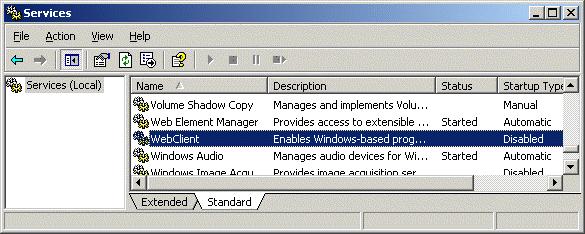
- Для того, чтобы подключить диск по WebDAV с клиента Windows XP, необходимо убедится, что запущена служба WebClient
- Чтобы подключить каталог WebDAV по HTTPS, воспользуйтесь командой: