- Accessing WebDAV with Windows
- Overview
- Windows 7
- Windows 8 & 10
- Windows troubleshooting
- Using the WebDAV Redirector
- Installing the WebDAV Redirector
- Prerequisites
- Windows Vista, Windows 7, Windows 8, or Windows 8.1
- Windows Server 2008, Windows Server 2008 R2, Windows Server 2012, or Windows Server 2012 R2
- Mapping Drives using the WebDAV Redirector
- Method 1: Mapping Drives using the Map Network Drive Wizard
- Method 2: Mapping Drives from a Command Prompt
- Troubleshooting the WebDAV Redirector
- WebDAV Redirector Registry Settings
Accessing WebDAV with Windows
Overview
Connecting to your WebDAV directory can be accomplished through Microsoft’s Windows Explorer. This mounts the WebDAV folder as a mapped drive and allows you to view, edit, and delete files from the remote web server from your computer.
Windows 7
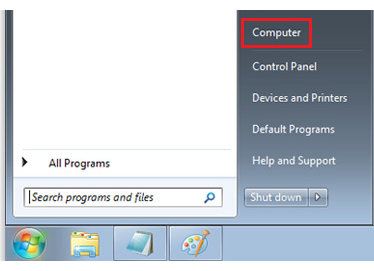
- Click the Start button.

- Select ‘Computer’.
- Click Map network drive.
- From this point on, the steps are the same for Windows 8.
- View the instructions below (starting at step #4) to connect to WebDAV.
Windows 8 & 10
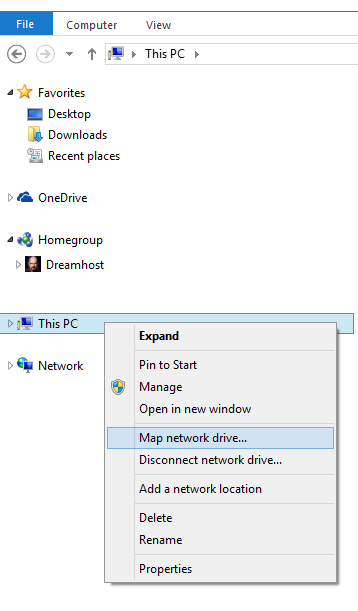
- Open Windows File Explorer. In Windows 8, My Computer is named ‘This PC’:
- Right click ‘This PC’.
- From the dropdown, select Map network drive. .
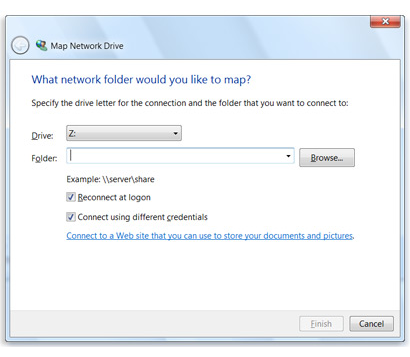
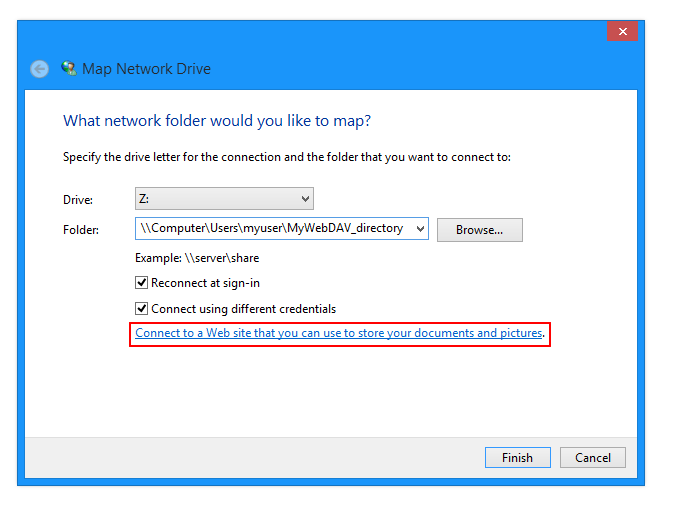
- Enter the following:
- Drive: Select the drive letter you want to map your WebDAV connection to.
- Folder: This is the folder on your local computer where you’ll add/edit WebDAV files.
- Check the boxes:
- Reconnect at sign-in – This allows the connection to your WebDAV to be restored if you restart your computer.
- Connect using different credentials
- Click the Connect to a Web site that you can use to store your documents and pictures link.
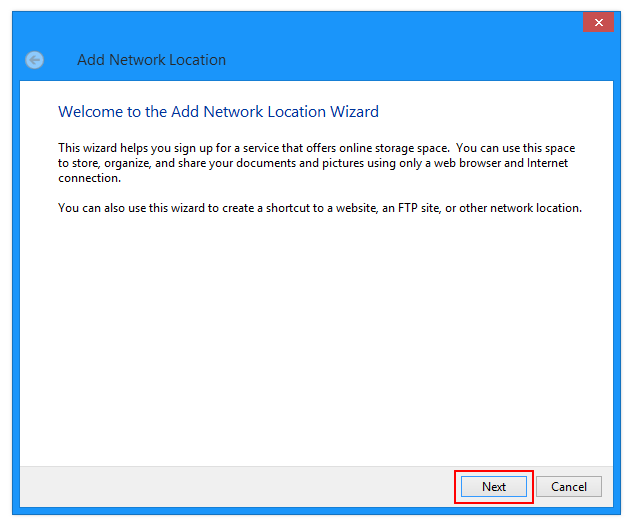
- Click the Next button.
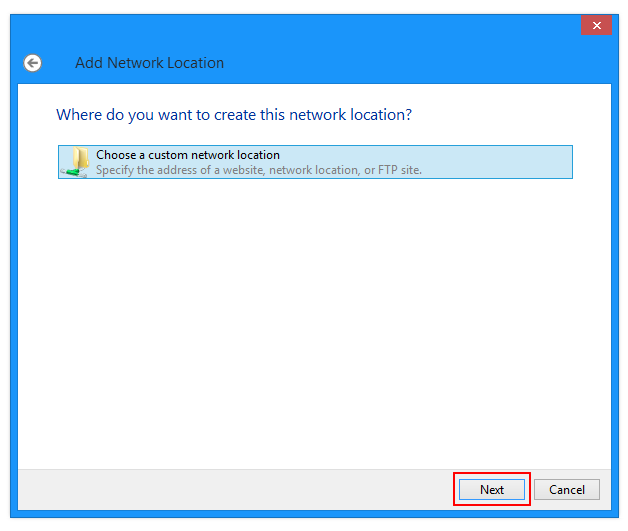
- Click Choose a custom network location and then click the Next button.
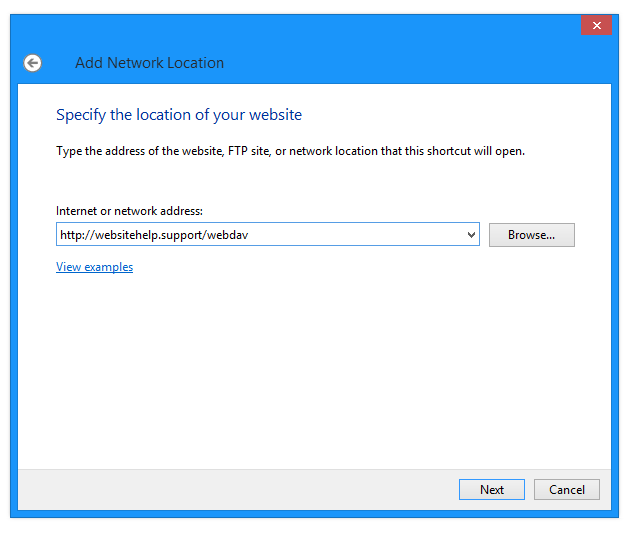
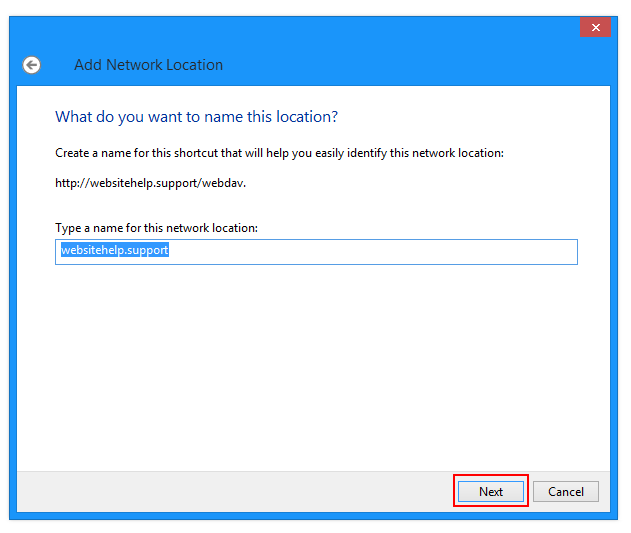
- In the ‘Internet or network address’ field, enter your domain’s URL with the WebDAV directory at the end of it.
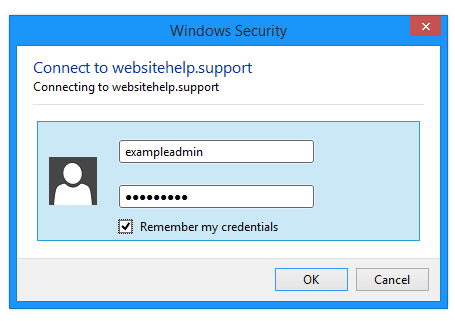
- Enter your WebDAV username and password in the pop-up box, and then the OK button. The box titled ‘Type a name for this network location’ is already populated, and you can change this if you like:
- Click the Next button.
- Click the Finish button.
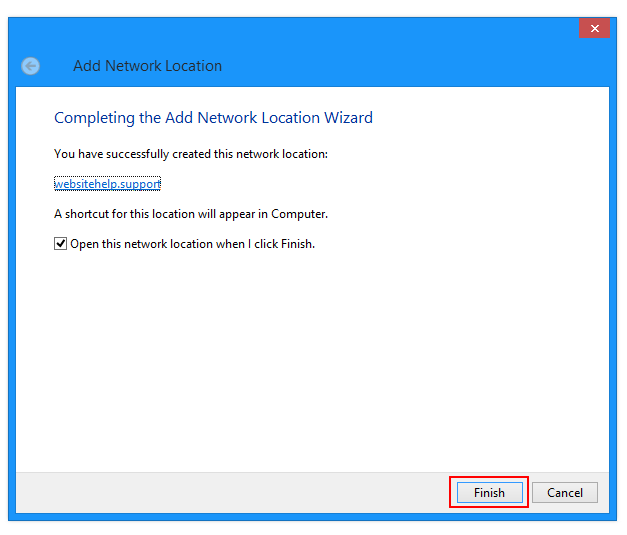
Your WebDAV folder appears as a mapped drive in Windows Explorer, and you can immediately add, edit, or delete files and directories using the Windows File Explorer.
Windows troubleshooting
If you still have trouble connecting to your WebDAV directory, you may have to update the Basic Authentication Level in the registry. View the following page for further information on how to access the registry:
To change the Basic Authentication Level:
- Locate the following directory:
Using the WebDAV Redirector
Microsoft has created a new WebDAV extension module that has been completely rewritten for Windows Server 2008 and Windows Server 2012. This new WebDAV extension module incorporates many new features that enable web authors to publish content better than before.
This document walks you through using the WebDAV redirector to publish content to an existing web site that has the new WebDAV module installed.
Installing the WebDAV Redirector
Prerequisites
You must be running one of the following operating systems:
- Windows Vista, Windows 7, or Windows 8
- Windows Server 2008, Windows Server 2008 R2, or Windows Server 2012
You must be connecting to a web server that already has the WebDAV module installed.
Windows Vista, Windows 7, Windows 8, or Windows 8.1
If you are using a desktop operating system like Windows Vista, Windows 7, Windows 8, or Windows 8.1, the WebDAV redirector is already installed.
Windows Server 2008, Windows Server 2008 R2, Windows Server 2012, or Windows Server 2012 R2
If you are using a server operating system like Windows Server 2008 or later, you need to install the Desktop Experience feature. To do so, use the following steps:
- Start the Windows Server Manager.
- In the tree view, highlight the Features node.
- In the details pane, click Add Features.
- In the Add Features Wizard, check the Desktop Experience box, and then click Next.
- Click Install.
- When the Add Features Wizard has finished, click Close.
- Click Yes when promoted to restart the computer.
Mapping Drives using the WebDAV Redirector
Once the WebDAV Redirector has been installed, you can map drives to your web site using WebDAV. There are two ways to accomplish this:
Method 1: Mapping Drives using the Map Network Drive Wizard
To map a drive using the Map Network Drive Wizard, use the following steps:
Open the Map Network Drive wizard. This can be accomplished by using one of the following methods:
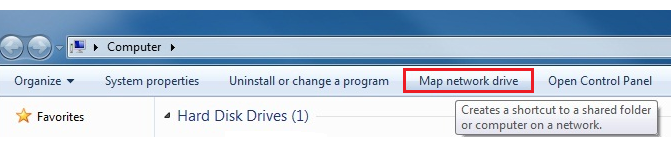
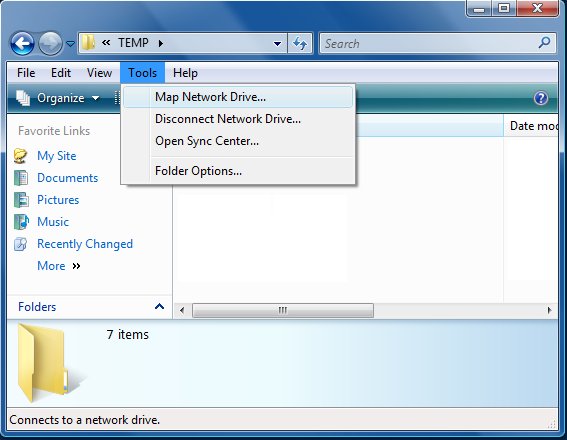
- Opening a folder in Windows Explorer and clicking Tools, then Map Network Drive:
- Opening the Network and Sharing Center in the Windows Control Panel and clicking Tools, then Map Network Drive:
- Right-clicking on the desktop icons for Computer or Network, then clicking Map Network Drive:

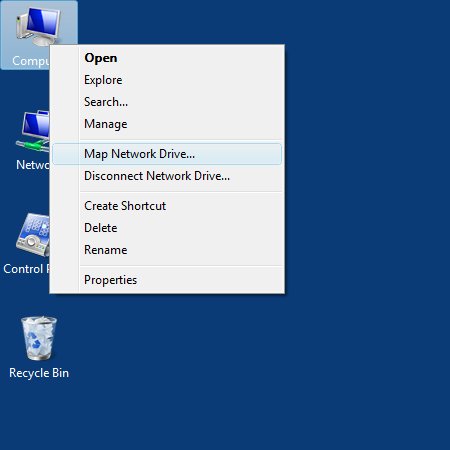
When the Map Network Drive Wizard appears, enter the URL for your web site then click Finish: 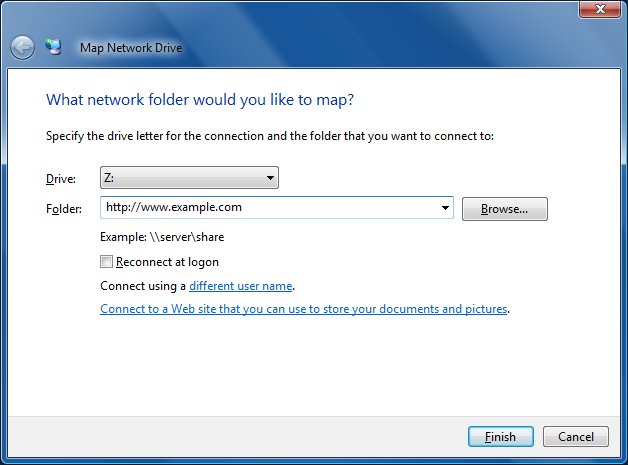
If prompted for credentials, enter your user name and password, then click OK. 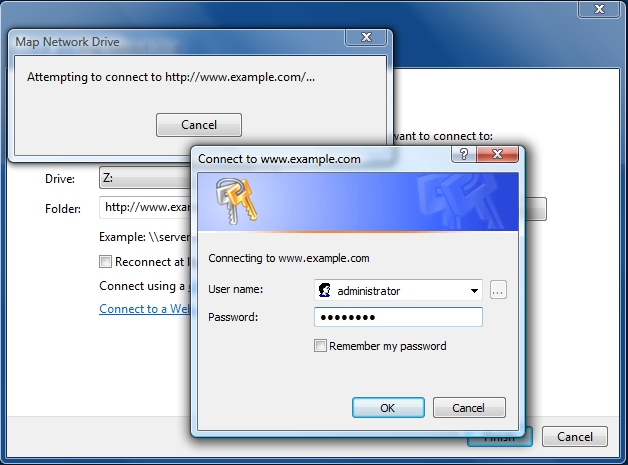
Once these steps have been completed, the networked drive should open in Windows Explorer: 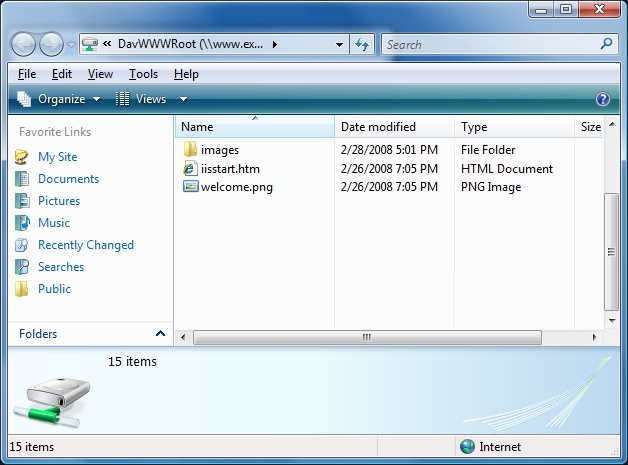
If you receive an error, please see the Troubleshooting the WebDAV Redirector section for more information.
Method 2: Mapping Drives from a Command Prompt
To map a drive from a command prompt, use the following steps:
Click the Windows Start icon.
Click All Programs.
Click Accessories.
Click Command Prompt.
When the command prompt opens, type the following command:
Where www.example.com is the URL for your server.
Once completed, you should have the next available drive letter mapped to your web site.
The following image shows what this might look like:

If you receive an error, please see the Troubleshooting the WebDAV Redirector section for more information.
Troubleshooting the WebDAV Redirector
The following list of error conditions is designed to help troubleshoot situations that you might see when working with WebDAV.
When attempting to map a drive to a WebDAV site, you receive the following error:
System error 67 has occurred.
The network name cannot be found.
This can be caused by one of the following conditions:
- IIS is not installed or is not running on the server that you are attempting to connect to.
- You have not installed the WebDAV Redirector on your client system.
- The WebClient service is not running on your client system.
- You have not enabled WebDAV on your web site.
- You are using Basic Authentication and connecting to your web site using HTTP instead of HTTPS.
- You are connecting to a web site on your local network that is using Fully-Qualified Domain Names (FQDNs) for name resolution, your web site uses Windows Authentication, and you have not added the web site’s FQDN to the proxy server bypass list on your client.
When attempting to map a drive to a WebDAV site, you receive the following error:
System error 1920 has occurred.
The file cannot be accessed by the system.
This error occurs when the account that you are using does not have an authoring rule created for it.
When attempting to map a drive to a WebDAV site, you receive the following error:
System error 5 has occurred.
Access is denied.
This can be caused by one of the following conditions:
- The account that you are attempting to use does not exist.
- You entered the incorrect password for the account that you are using.
- The account that you are using does not have sufficient permissions for your web site’s content.
- You have not enabled any authentication methods for your web site.
When attempting to map a drive to a WebDAV site using HTTPS, you are prompted with the following dialog:
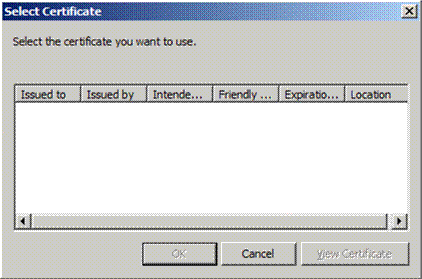
This occurs when the SSL certificate for the site that you are using does not match the name of the address that you used. For example, you are connecting to a site named www.contoso.com , but your SSL certificate was issued to shopping.contoso.com .
When attempting to map a drive to a WebDAV site, you receive the following error:
System Error 1244 has occurred.
The operation being request was not performed because the user has not been authenticated.
This can be caused by one of the following conditions:
- The server that you are connecting to does not have any authentication methods enabled.
- The WebDAV client is running into the problems that are described in KB941050 or KB943280.
- The logon type for content on a UNC share is incorrect; this setting is configured in the Physical Path Credentials Logon Type option in the Advanced Settings for a website or application, and is defined by the logonMethod attribute for the virtualDirectory settings for a website or virtual directory. For example: if the directory for your website’s content is on a network share, you may need to change your settings from Clear Text to Network depending on your network configuration.
When attempting to map a drive to a WebDAV site, you receive the following error:
System error 59 has occurred.
An unexpected network error occurred.
This can be caused by one of the following conditions:
- The web site that you are attempting to connect to has been stopped.
- The application pool for the web site that you are attempting to connect to has been stopped.
When attempting to map a drive to a WebDAV site, you receive the following error:
System error 1397 has occurred.
Mutual Authentication failed. The server’s password is out of date at the domain controller.
This error occurs when the WebDAV client is running into the problems that are described in KB941298.
When attempting to map a drive to a WebDAV site, you receive the following error:
System error 58 has occurred.
The specified server cannot perform the requested operation.
This error occurs when the WebDAV server does not have the correct host name in its bindings. For example, if you have DNS entries for contoso.com and www.contoso.com , but you only have an IIS binding for contoso.com , you will see the error when you attempt to map a drive to www.contoso.com .
When attempting to map a drive to a WebDAV site, you receive the following error:
System error 224 has occurred.
Access Denied. Before opening files in this location, you must first add the web site to your trusted sites list, browse to the web site, and select the option to login automatically.
This error occurs when the WebDAV site is not trusted by the WebDAV redirector. To resolve this issue, you need to add the website’s URL to the list of trsuted sites. To do so, use the following steps:
- Open the Windows Control Panel.
- Open Internet Options.
- Click the Security tab.
- Click the Trusted sites icon.
- Click the Sites button.
- Type your website’s URL in the Add this website to the zone text box, and then click the Add button.
(Note: You may need to uncheck the Require server verification (https:) for all sites in this zone checkbox if your website uses an HTTP URL.) - Click the Close button.
- Click the OK button.
WebDAV Redirector Registry Settings
There are several settings that control the behavior of the WebDAV redirector that can be configured in the following registry key:
The following table details the various settings and values that are available.
After changing any of these values, the Web Client will need to be restarted or your computer will need to be rebooted.
WARNING: If you use Registry Editor incorrectly, you may cause serious problems that may require you to reinstall your operating system. Microsoft cannot guarantee that you can solve problems that result from using Registry Editor incorrectly. Use Registry Editor at your own risk.


