- Ubuntu Linux — установка WebStorm
- April 04, 2016
- WebStorm темы
- TypeScript — размеченные объединения
- Install webstorm on Linux Mint
- webstorm
- WebStorm
- Details for webstorm
- Enable snaps on Linux Mint and install webstorm
- Enable snapd
- Install webstorm
- Install WebStorm
- System requirements
- Install using the Toolbox App
- Install the Toolbox App
- Install the Toolbox App
- Install the Toolbox App
- Standalone installation
- Silent installation on Windows
- Silent configuration file
- Install as a snap package on Linux
Ubuntu Linux — установка WebStorm
April 04, 2016
С недавних пор на практике оценил преимущества использования профессиональных IDE для задач кодинга. К таким IDE я отношу WebStorm, Visual Studio Code, Aptana Studio.
До недавнего времени я пользовался отличным Sublime Text (к поклонникам Atom я себя не отношу) и все меня устраивало. Но в последнее время я все больше и больше начинаю заниматься с JavaScript (надо сказать — не без удовольствия, особенно впечатлил Canvas).
И вот тут произошло так, что в один прекрасный день я просто попробовал поработать в WebStorm с JavaScript. И все! Я уже не мог вернуться на Sublime Text!
Описать конкретно, что именно мне понравилось в WebStorm vs Sublime Text, я так вот в двух словах и не могу. Но скажу только одно — работа в WebStorm действительно удобная; в этом IDE есть много продуманных и отшлифованных вещей, которые сильно облегчают жизнь кодера.
После того, как я оценил работу в WebStorm на Mac OS X, мне захотелось иметь этот IDE и на ноутбуке с Linux Mint 17.2 Cinnamon. Не могу сказать точно, почему так, но мне работать под Linux как-то комфортнее, чем под Mac OS X. Наверное, просто сказывается сила привычки — я linuxoid со стажем.
Но вот незадача — под Linux я привык пользоваться супер-удобными менеджерами пакетов, такими как apt-get или pacman .
А вот что касается Visual Studio Code, Aptana Studio или WebStorm — то официальных портов этих IDE в Debian \ Ubuntu-репозиториях нет (поправьте меня, если я ошибаюсь).
На официальных сайтах этих IDE описывается только процесс установки под операционную систему Linux вручную. Не сказать, что там плохо описан этот процесс, но мне он не помог совсем.
Как результат, я решил вкратце описать процесс ручной установки IDE WebStorm под Linux Mint 17.2 Cinnamon \ Xfce. Две другие IDE — Aptana Studio и Visual Studio Code устанавливаются абсолютно аналогично.
Шаг первый — с официального сайта скачивается пакет под Linux (32 или 64 бита — на выбор)
Шаг второй — делается копия скачанного архива с IDE WebStorm и помещается в любое удобное место (например, пусть это будет Desktop)
Шаг третий — распаковывается архив с IDE WebStorm (который в Desktop)
Шаг четвертый — в терминале запускается Midnight Commander с правами root: sudo mc ; если вы вдруг не знаете, что такое Midnight Commander — то в самое время узнать о нем, так как это программа из разряда must have под системой Linux
Шаг пятый — в Midnight Commander копируем распакованный архив WebStorm по пути
/opt/ должна появиться папка примерно такого вида — “WebStorm-141.456” (
Шаг шестой — на любом пустом месте Desktop делаем правый клик мыши (ПКМ), чтобы вызвать контекстное меню
Шаг седьмой — в контекстном меню находим строку “Create Launcher”; текст строки может отличаться в зависимости от того, что именно используется на конкретном Linux — Cinnamon или Xfce; тут главное — увидеть знакомое слово “Launcher”; в результате должно открыться примерно такое окно (в данном случае это Xfce):
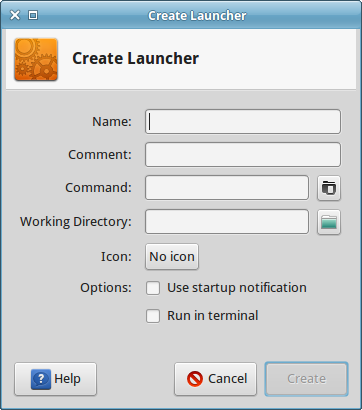
Шаг восьмой — вводим значения в поля этого окна; во все поля вводить данные необязательно; нужно ввести только имя приложения в поле “Name” — WebStorm; в поле “Command” вручную вводить путь к исполняемому файлу приложения нет необходимости — достаточно нажать на значок рядом с полем и откроется диалоговое окно “Select an Application”; дальше можно легко и удобно найти IDE WebStorm по пути:
Шаг девятый — в поле “Icon” добавляем фирменную иконку приложения WebStorm (чтобы легко углядеть WebStorm на Desktop); снова жмем на значок (уже в поле “Icon”); откроется диалоговое окно “Select an Icon”; в этом окне в выпадающем списке поля “Select icon from” выбираем самую нижнюю строку — “Image Files”; снова идем по пути
Если все шаги выполнены правильно, то в результате должно получиться примерно такое окно с заполненными полями:

Это минимальная конфигурация, достаточная для нормального запуска приложения из Desktop. При первом запуске WebStorm-приложения Linux-система задаст вопрос — сделать ли запускаемый файл исполняемым. Естественно, соглашаемся — ведь нам нужно запустить и работать в WebStorm-приложении.
Как я уже упоминал ранее, установка двух других IDE — Aptana Studio и Visual Studio Code ничем не отличается от установки WebStorm. Единственный момент — для Visual Studio Code нужно покопаться с поисках фирменной иконки, которая расположена по пути:
/opt/VSCode-linux-x64/resources/app/resources/linux/code.png , а исполняемый файл приложения — по пути:
К слову сказать, лично я был приятно удивлен Visual Studio Code и разочарован Aptana Studio. WebStorm — вне конкуренции!
WebStorm темы
Хочу немного отклониться в сторону выбора темы оформления под IDE WebStorm. В Sublime Text это была однозначно — Material Theme.
Под WebStorm есть порт этой темы — Material Theme JetBrains.
Документация хорошо расписана и автор даже постарался создать возможность легкой и “кошерной” установки темы — через репозиторий JetBrains, из самого WebStorm.
Но, как мне кажется, эта тема заметно уступает своему “оригиналу” из-под Sublime Text (автор сам об этом упоминает).
Хорошая коллекция тем под WebStorm расположена по этим адресам:
В дополнение можно еще установить модный шрифт Hack (на любителя). Или покопаться здесь — Top 11 Programming Fonts, чтобы выбрать что-то подходящее.
К примеру, автор блога WesBos долго пользовался OpenSource-шрифтом Inconsolata, а потом взял и купил шрифт Operator Mono за $200.
Еще в тему установки программных пакетов для разработки под системой Linux стоит сказать, что под Ubuntu существует удобный пакет Ubuntu Make (он же Ubuntu Developer Tools Center в прошлом).
Задача пакета Ubuntu Make — быстрая и легкая установка общих потребностей разработчика в Ubuntu. Ubuntu Make может устанавливать:
На Хабрахабр есть небольшая обзорная статья об этом пакете — Ubuntu Make — разработчику в помощь.
Лично от себя могу сказать, что первый раз установка WebStorm при помощи Ubuntu Make на моем ноутбуке с Linux Mint 17.2 прошла “на ура”.
А вот во-второй раз что-то не заладилось и Ubuntu Make “не хочет” ставить WebStorm — выдает какую-то ошибку, с которой мне нет желания разбираться.
TypeScript — размеченные объединения
> Пользовательское объединение типов — что это и как можно использоватьПомимо объединения **примитивных** типов данных (например):<% high. … Continue reading
Источник
Install webstorm
on Linux Mint

webstorm
- jetbrains
 Verified account
 - Development
 Verified account
WebStorm
Use the full power of the modern JavaScript ecosystem – WebStorm’s got you covered! Enjoy the intelligent code completion, on-the-fly error detection, powerful navigation and refactoring for JavaScript, TypeScript, stylesheet languages, and the most popular frameworks.
Details for webstorm
Enable snaps on Linux Mint and install webstorm
Snaps are applications packaged with all their dependencies to run on all popular Linux distributions from a single build. They update automatically and roll back gracefully.
Snaps are discoverable and installable from the Snap Store, an app store with an audience of millions.
Enable snapd
Snap is available for Linux Mint 18.2 (Sonya), Linux Mint 18.3 (Sylvia), Linux Mint 19 (Tara), Linux Mint 19.1 (Tessa) and the latest release, Linux Mint 20 (Ulyana). You can find out which version of Linux Mint you’re running by opening System info from the Preferences menu.
On Linux Mint 20, /etc/apt/preferences.d/nosnap.pref needs to be removed before Snap can be installed. This can be accomplished from the command line:
To install snap from the Software Manager application, search for snapd and click Install. Alternatively, snapd can be installed from the command line:
Either restart your machine, or log out and in again, to complete the installation.
Install webstorm
To install webstorm, simply use the following command:
Источник
Install WebStorm
WebStorm is a cross-platform IDE that provides consistent experience on the Windows, macOS, and Linux operating systems.
System requirements
| Requirement | Minimum | Recommended |
|---|---|---|
| RAM | 2 GB of free RAM | 8 GB of total system RAM |
| CPU | Any modern CPU | Multi-core CPU. WebStorm supports multithreading for different operations and processes making it faster the more CPU cores it can use. |
| Disk space | 2.5 GB and another 1 GB for caches | SSD drive with at least 5 GB of free space |
| Monitor resolution | 1024×768 | 1920×1080 |
| Operating system | Latest 64-bit version of Windows, macOS, or Linux (for example, Debian, Ubuntu, or RHEL) |
You do not need to install Java to run WebStorm because JetBrains Runtime is bundled with the IDE (based on JRE 11).
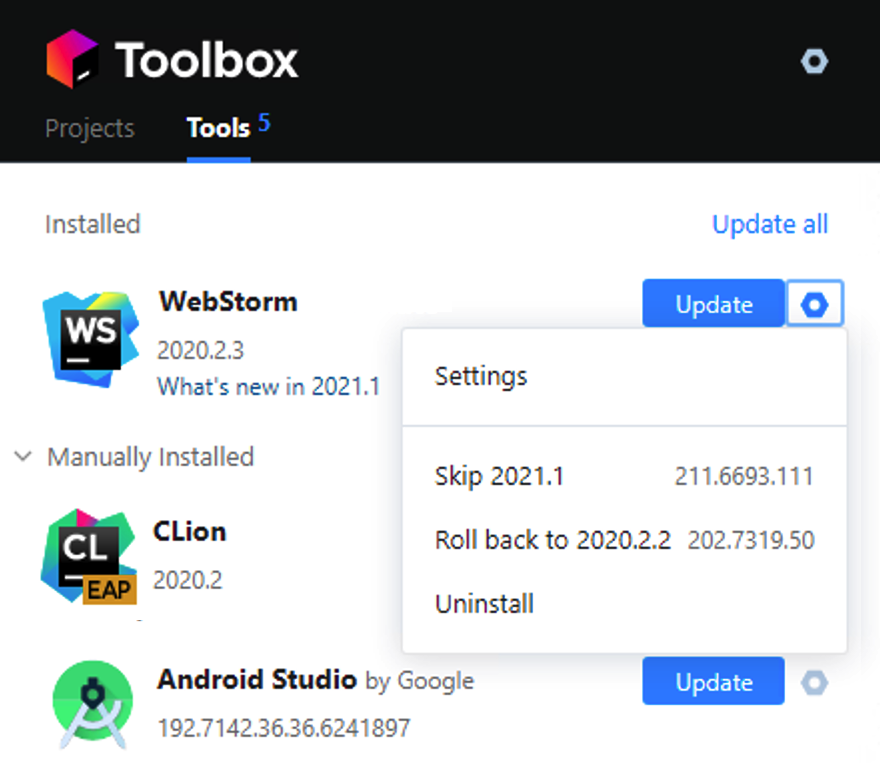
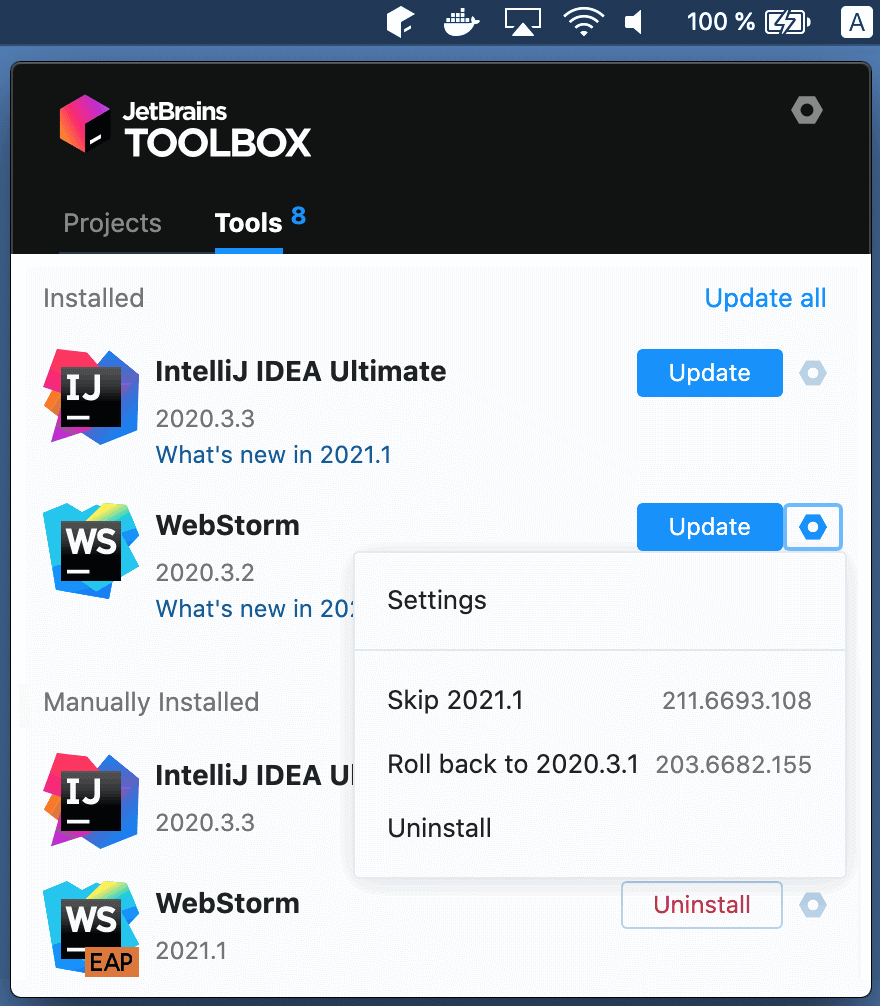
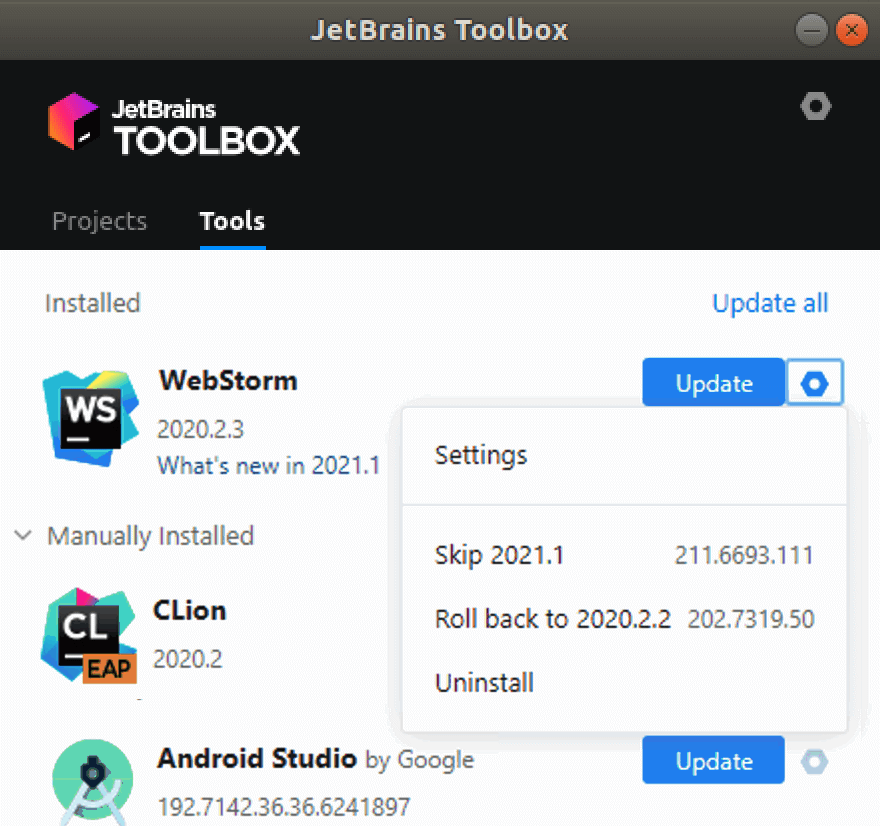
Install using the Toolbox App
The JetBrains Toolbox App is the recommended tool to install JetBrains products. Use it to install and manage different products or several versions of the same product, including Early Access Program (EAP) and Nightly releases, update and roll back when necessary, and easily remove any tool. The Toolbox App maintains a list of all your projects to quickly open any project in the right IDE and version.
Install the Toolbox App
Download the installer .exe from the Toolbox App web page.
Run the installer and follow the wizard steps.
After you run the Toolbox App, click its icon in the notification area and select which product and version you want to install.
Log in to your JetBrains Account from the Toolbox App and it will automatically activate the available licenses for any IDE that you install.
Install the Toolbox App
Download the disk image .dmg from the Toolbox App web page.
There are separate disk images for Intel and Apple Silicon processors.
Mount the image and drag the JetBrains Toolbox app to the Applications folder.
After you run the Toolbox App, click its icon in the main menu and select which product and version you want to install.
Log in to your JetBrains Account from the Toolbox App and it will automatically activate the available licenses for any IDE that you install.
Install the Toolbox App
Download the tarball .tar.gz from the Toolbox App web page.
Extract the tarball to a directory that supports file execution.
For example, if the downloaded version is 1.17.7391, you can extract it to the recommended /opt directory using the following command:
Execute the jetbrains-toolbox binary from the extracted directory to run the Toolbox App and select which product and version you want to install. After you run the Toolbox App for the first time, it will automatically add the Toolbox App icon to the main menu.
Log in to your JetBrains Account from the Toolbox App and it will automatically activate the available licenses for any IDE that you install.
You can use this shell script that automatically downloads the tarball with the latest version of the Toolbox App, extracts it to the recommended /opt directory, and creates a symbolic link in the /usr/local/bin directory.
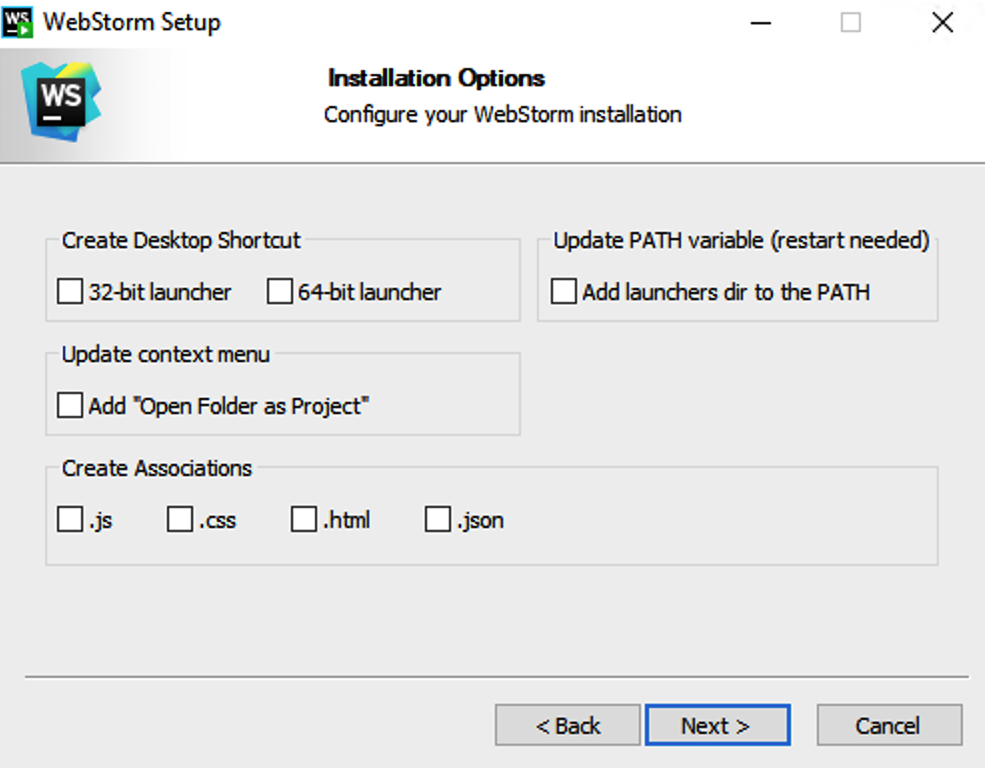
Standalone installation
Install WebStorm manually to manage the location of every instance and all the configuration files. For example, if you have a policy that requires specific install locations.
Run the installer and follow the wizard steps.
On the Installation Options step, you can configure the following:
Create a desktop shortcut for launching WebStorm.
Add the directory with WebStorm command-line launchers to the PATH environment variable to be able to run them from any working directory in the Command Prompt.
Add the Open Folder as Project action to the system context menu (when you right-click a folder).
Associate specific file extensions with WebStorm to open them with a double-click.
To run WebStorm, find it in the Windows Start menu or use the desktop shortcut. You can also run the launcher batch script or executable in the installation directory under bin .
There are separate disk images for Intel and Apple Silicon processors.
Mount the image and drag the WebStorm app to the Applications folder.
Run the WebStorm app from the Applications directory, Launchpad, or Spotlight.
Extract the tarball to a directory that supports file execution.
For example, to extract it to the recommended /opt directory, run the following command:
Do not extract the tarball over an existing installation to avoid conflicts. Always extract it to a clean directory.
Execute the WebStorm.sh script from the extracted directory to run WebStorm.
To create a desktop entry, do one of the following:
On the Welcome screen, click Configure | Create Desktop Entry
From the main menu, click Tools | Create Desktop Entry
For information about the location of the default IDE directories with user-specific files, see Directories used by the IDE.
Silent installation on Windows
Silent installation is performed without any user interface. It can be used by network administrators to install WebStorm on a number of machines and avoid interrupting other users.
To perform silent install, run the installer with the following switches:
/S : Enable silent install
/CONFIG : Specify the path to the silent configuration file
/D : Specify the path to the installation directory
This parameter must be the last in the command line and it should not contain any quotes even if the path contains blank spaces.
To check for issues during the installation process, add the /LOG switch with the log file path and name between the /S and /D parameters. The installer will generate the specified log file. For example:
Silent configuration file
You can download the default silent configuration file for WebStorm at https://download.jetbrains.com/webstorm/silent.config
The silent configuration file defines the options for installing WebStorm. With the default options, silent installation is performed only for the current user: mode=user . If you want to install WebStorm for all users, change the value of the installation mode option to mode=admin and run the installer as an administrator.
The default silent configuration file is unique for each JetBrains product. You can modify it to enable or disable various installation options as necessary.
It is possible to perform silent installation without the configuration file. In this case, omit the /CONFIG switch and run the installer as an administrator. Without the silent configuration file, the installer will ignore all additional options: it will not create desktop shortcuts, add associations, or update the PATH variable. However, it will still create a shortcut in the Start menu under JetBrains .
Install as a snap package on Linux
You can install WebStorm as a self-contained snap package. Since snaps update automatically, your WebStorm installation will always be up to date.
To use snaps, install and run the snapd service as described in the installation guide.
On Ubuntu 16.04 LTS and later, this service is pre-installed.
WebStorm is distributed via two channels:
The stable channel includes only stable versions. To install the latest stable release of WebStorm, run the following command:
The —classic option is required because the WebStorm snap requires full access to the system, like a traditionally packaged application.
The edge channel includes EAP builds. To install the latest EAP build of WebStorm, run the following command:
When the snap is installed, you can launch it by running the webstorm command.
To list all installed snaps, you can run sudo snap list . For information about other snap commands, see the Snapcraft documentation.
Источник


