- Создание software RAID внутри ОС Windows Server
- What is the software Raid 1?
- What is the software Raid 1?
- How to create software raid 1
- Windows 10 RAID software: Here are our top 4 picks
- What’s the best RAID software for Windows 10?
- AOMEI Partition Assistant Professional
- AOMEI Partition Assistant Profesisonal
- Paragon Hard Disk Manager
- Paragon Hard Disk Manager
- SnapRAID
- Storage Space
- How do setup software RAID in Windows
- Content:
- Create software RAID with built-in Windows 8 or Windows 10 tools
- How to add a disk in an already existing RAID array
- How to remove a disk from already existing RAID array
- Create a software RAID using command prompt.
- RAID 0
- RAID 1
- Software RAID creation in Windows 7
- What to do if you lose important data from the RAID array.
Создание software RAID внутри ОС Windows Server
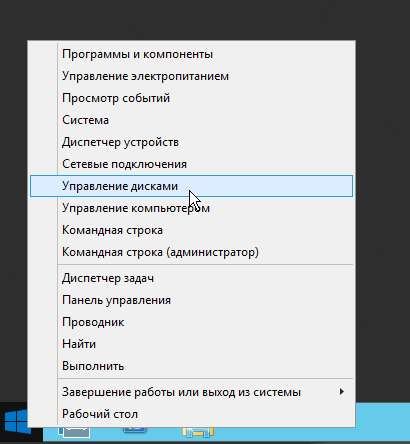
1. Для начала необходимо зайти в панель «Управление дисками». Сделать это можно кликнуть правой кнопкой мыши по кнопке «Пуск» и выбрав там «Управление дисками»:
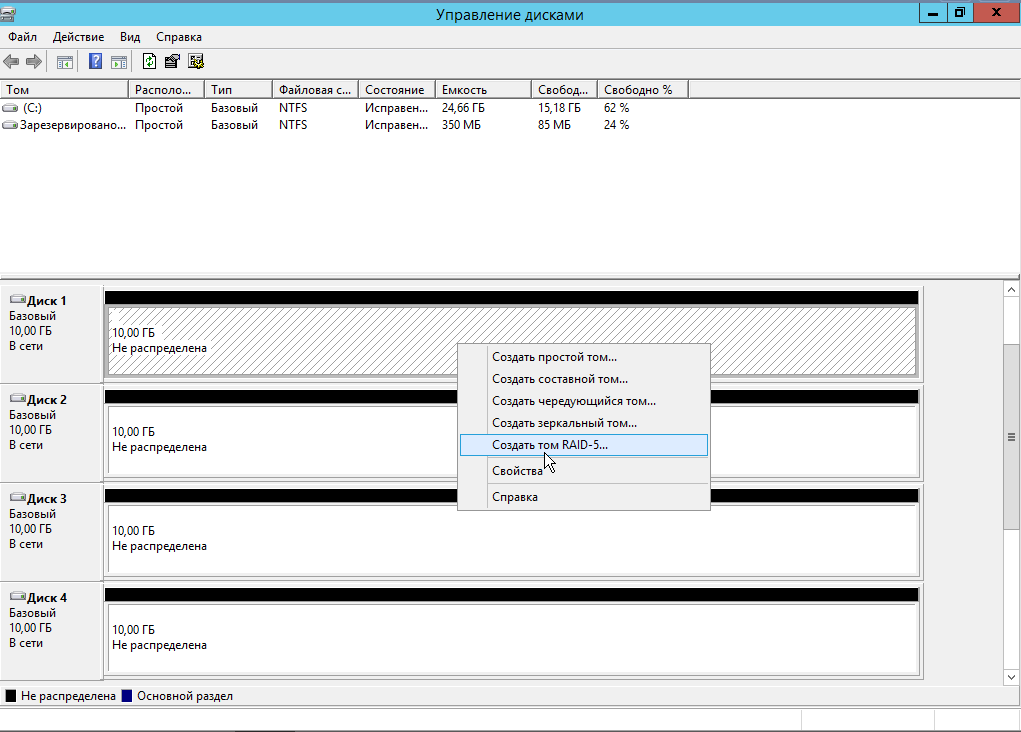
Доступными типами RAID, по умолчанию, являются RAID Ø (чередующийся том), RAID 1 (зеркальный том), RAID 5 и JBOD (составной том). В этой статье мы разберем, как создавать RAID 5, поскольку создание остальных типов RAID (томов) отличается незначительно.
2. Внутри программы «Управление дисками» необходимо кликнуть правой кнопкой мыши по одному из доступных нам неразмеченных дисков и выбрать необходимый тип RAID.
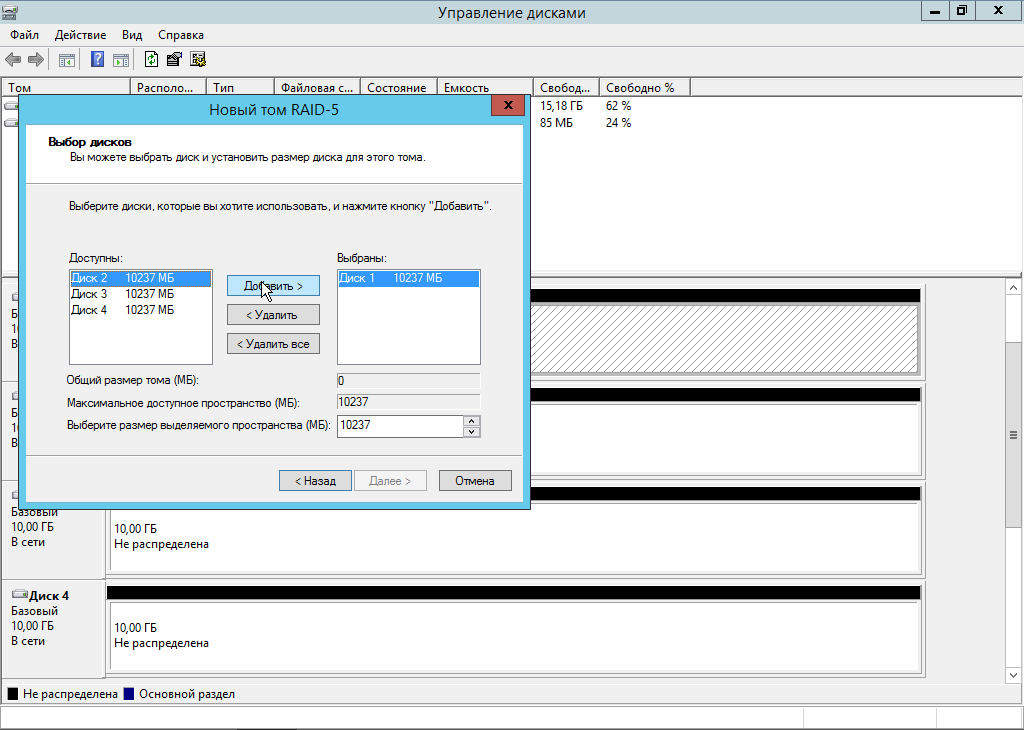
3. Следуя указаниям мастера, добавим все наши 4 диска в один RAID.
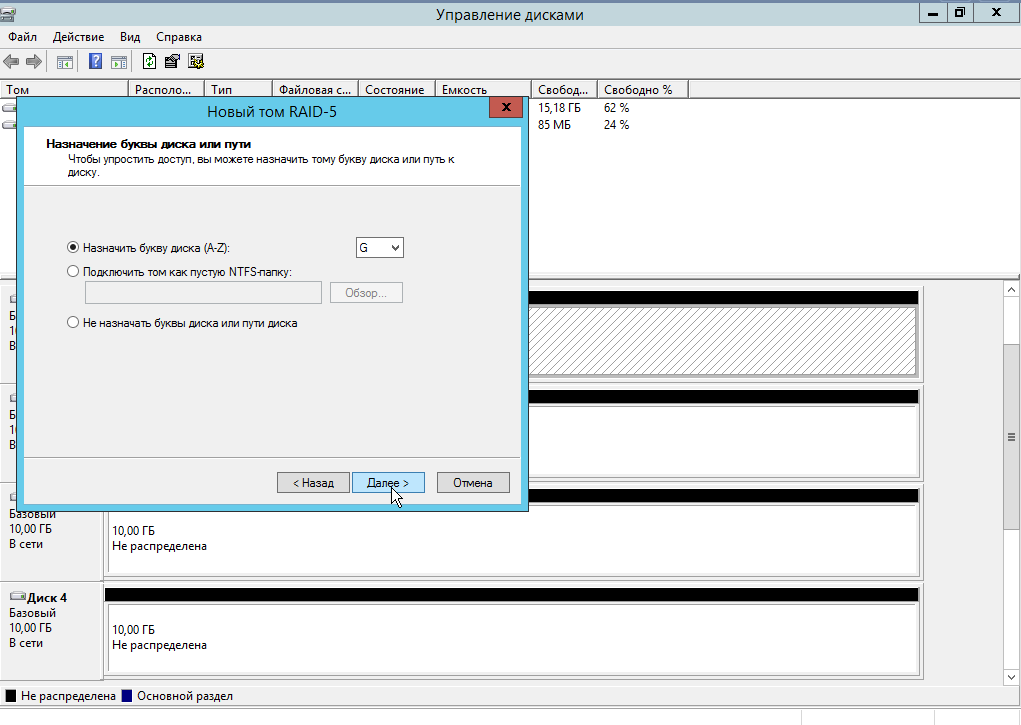
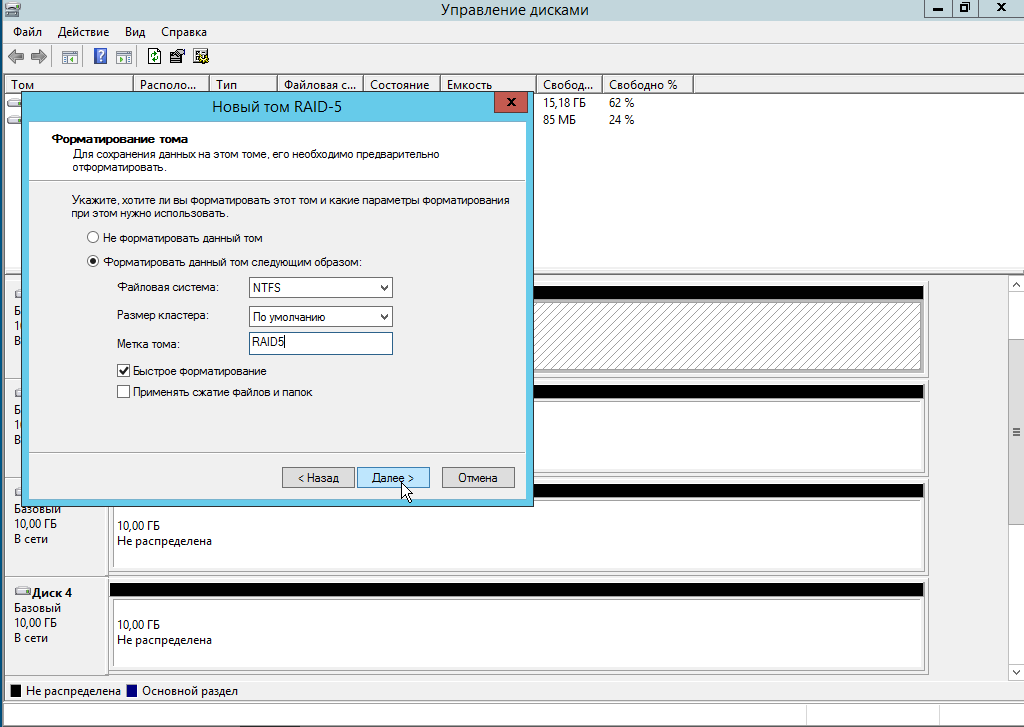
5. Назначим букву новому тому и название, а также файловую систему:
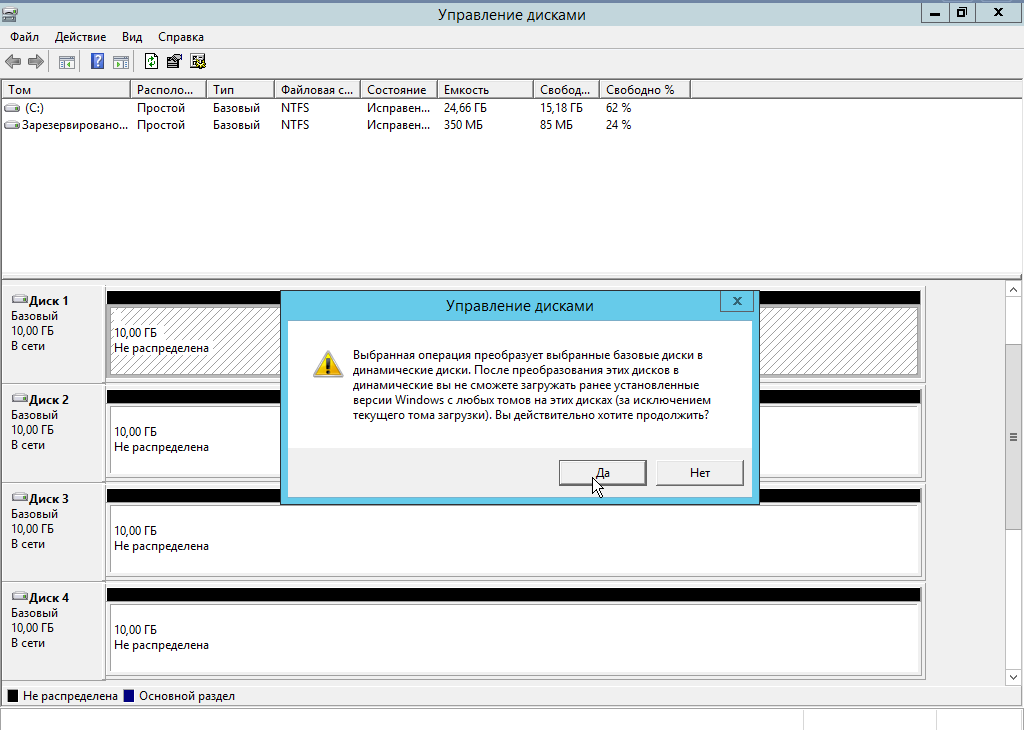
6. После закрытия мастера появится сообщение, что необходимо преобразовать диски и что вся информация будет безвозвратно удалена. Поскольку в нашем примере диски пустые, нажимаем «Да».
Важно! Если у вас на дисках хранится нужная вам информация, её необходимо предварительно сохранить где-то в другом месте.
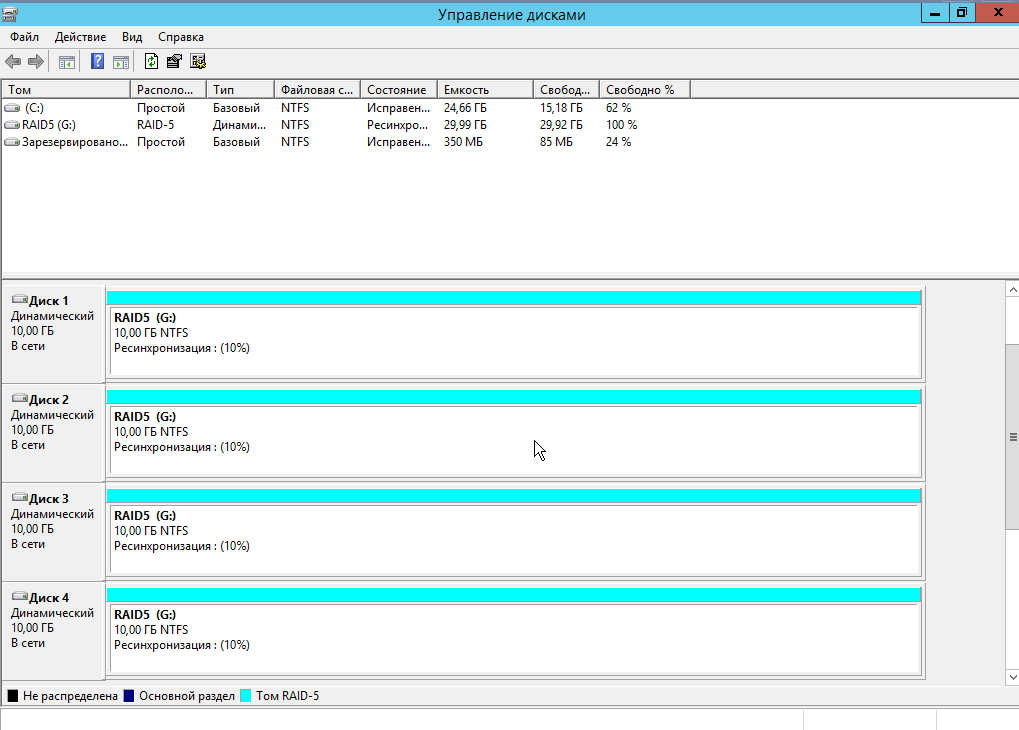
После преобразования и создания RAID 5 на дисках запустится процесс ресинхронизации. Продолжительность этого процесса зависит от объема дисков:
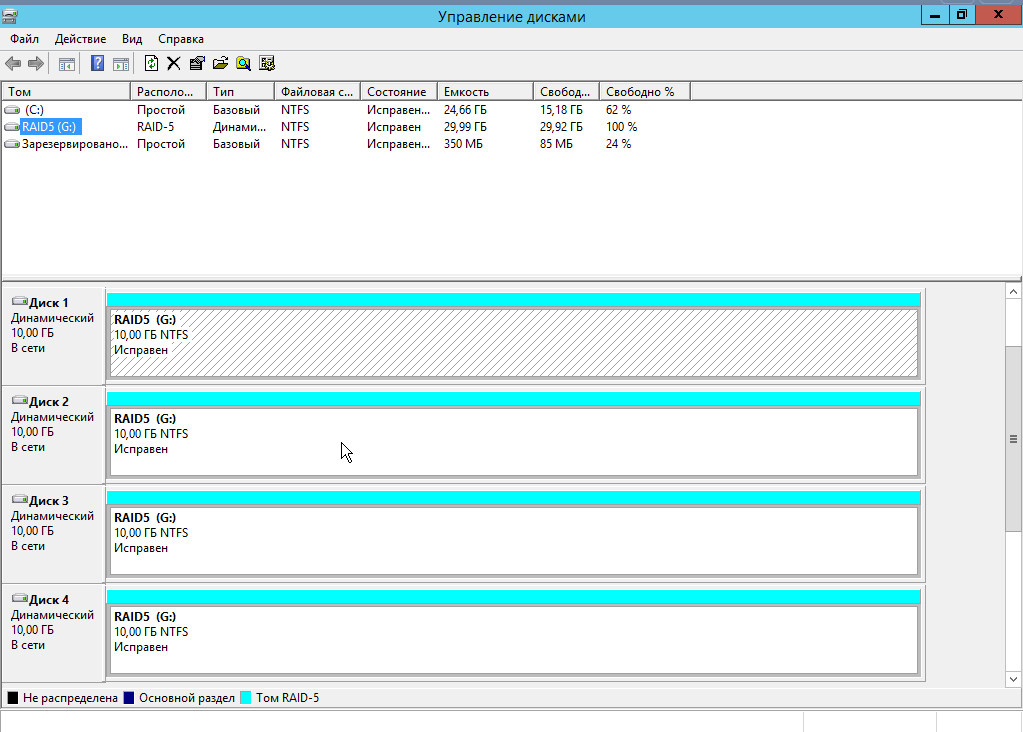
По окончании ресинхронизации мы получаем наш новый том типа RAID-5:
Вы можете использовать эти знания самостоятельно,
обратиться в нашу службу техподдержки (необходима авторизация)
What is the software Raid 1?
what is software raid 1? How to create mirrored volume in Windows Vista/2003/2008/2011/2012/7? This article will introduce you more information about software raid 1 which you may not know.

By AOMEI  / Last Updated February 25, 2020
What is the software Raid 1?
With the introduction of dynamic disk, software Raid as the new concept has been also introduced into Windows OS. As same as hardware Raid, software raid contains the high performance on data I/O and protecting. There are three different software raid array: Striped Volume (Raid 0), Mirrored Volume (Raid1) and Raid 5. Today we will introduce software RAID 1.
Software Raid 1 Performance
Mirrored Volume (Raid 1)
Do not support improving I/O performance
Data is duplicated on two dynamic disks
Each data on both disks are not affected
Prerequisites for building Software Raid 1- Two dynamic disks.
Support Windows Server 2000, Windows Server 2003/2008/2011/2012, Windows 7/8/VISTA
Please notice to the third characteristic “Data is duplicated on two dynamic disks”. This characteristic shows that when you add mirror to one volume, it could be seems to do a complete data backup or data clone.
As this nice ability most IT manager prefers to use software raid1 because it could cost the least hard disk and give the data biggest protection. They always add a raid mirroring to their system partition when there sever OS setting up.
How to create software raid 1
Create software raid 1 is an easy task; it could be completed with the built-in disk management easily.
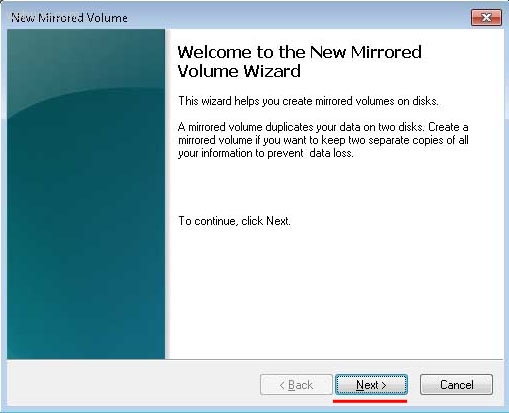
Step1. Enter the Disk Management, right-click unallocated space, selects “new volume”. Then it will pop up a window about “create volume wizard”. Click “Next”.
Step2. In the next window, select “Mirrored”. And click “Next”.

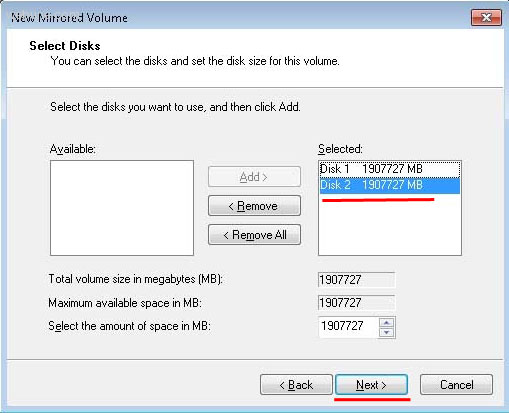
Step3. Select the hard disk where you want to add mirroring.
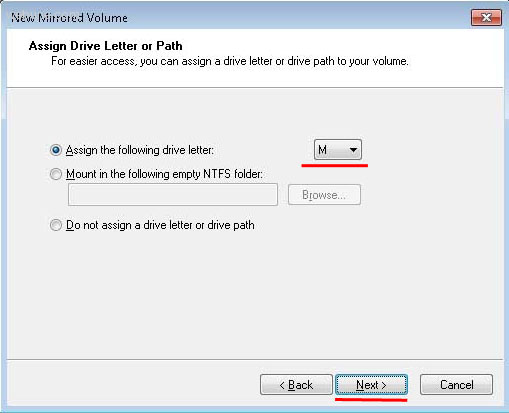
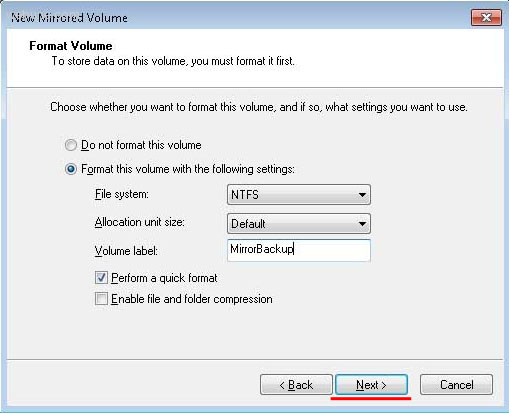
Then keep clicking “Next” to complete create software raid 1.
After the software raid 1 setting up, you could write new data into it, every data you write in will be backed up automatic in another hard disk. When the software raid 1 is running out of space, please refer to “Extend software raid 1 volume safely.”
Windows 10 RAID software: Here are our top 4 picks

- You can protect your data, improve performance, and also balance your input and output operations using RAID.
- In this article, we will give you more details about the best RAID software that you can use.
- Don’t forget to bookmark our Troubleshooting Hub for more helpful articles and guides.
- You can find more related articles in our Software Hub, so make sure to check it out.
- Marvel
- Starwars
- National Geographic
- Pixar
RAID is a very useful way to protect your data, improve performance, and also balance your input and output operations.
RAID can be used either in the form of software, or hardware, depending on where you need to process to happen.
When it comes to hardware RAID, the process is performed by utilizing your computer’s internal motherboard
Paragon Partition Manager has both free and paid versions. Logically, the paid version offers more features, while the regular version is more basic. With the free version of this software, you can create, resize, copy or delete partitions, and that’s pretty much it.
The program has a very clean, Metro-like user interface, so users should have no problems getting around. It also comes with one handy feature called Automatic partition alignment, which automatically aligns partitions to boost performance of the storage device. Additionally, you can assign uallocated space to another partition, for more more practical use of the disk space.
, or, in some cases, a separate RAID card, making it a more powerful option, but that involves investing in specific hardware.
In order to manage every aspect of your RAID, you will need to use specialized software that allows dynamic disk management and also partition management.
In this article, we will explore some of the best software options that allow you to do that, and also a built-into-Windows alternative. Read on to find out more.
What’s the best RAID software for Windows 10?
AOMEI Partition Assistant Professional

There are also various third-party utilities that you can format flash drives with. If you can’t format a storage drive with File Explorer, check out software such as
AOMEI Partition Assistant Professional is a great software that allows you to format your hard drive and partitions without losing any data.
Although Windows already comes with a built-in partitioner it can take a lot more time than simply using a dedicated tool.
Let’s have a look at the key features of this software:
- Performs multiple disk/partition operations.
- Comes with additional features, such as bootable media creation, or Windows PE.
- Data recovery tool.

AOMEI Partition Assistant Profesisonal
Paragon Hard Disk Manager

Paragon Partition Manager allows you to create, resize, copy, or delete partitions. The interface is easy to use and very clean. You should have no problem quickly finding your way around it.
The performance of the storage device can be enhanced as well, due to its amazing feature called Automatic partition alignment.
If you have any free space, then you can allocate it to another partition in order to ensure more practical use of the disk space.

Paragon Hard Disk Manager
SnapRAID
SnapRAID is another very useful RAID tool that allows you to manage every aspect of your disks and stores the entire range of information locally.
This software can recover from up to six disk failures, without compromising the data.
Here are some of the best features found in SnapRAID:
- Automatically hashes your data keeping it safe from silent corruption.
- In case the failed disks are not recoverable, it isolates them assuring the other disks don’t become corrupted.
- Recovery for accidental file deletion.
- Allows you to use different sized disks with the ability to add new ones at any time.
- If you stop using SnapRAID at any point in time, you don’t need to reformat or move your data.
- Optimizes the way your disks are used by only using the needed ones.
Pros:
- Requires very low system requirements to run at full power.
- Lower power usage and noise.
- Easily scalable.
Cons:
- Doesn’t run automatically.
- No built-in storage pooling.
- Limited when dealing with multiple users.
Storage Space
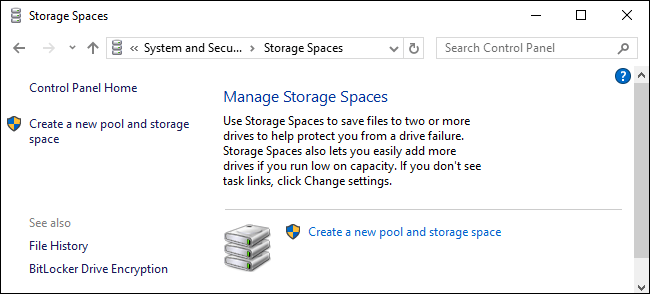
This built-in tool found in Windows 10 protects the entire range of data stored on your hard drive, and it can customize the way the storage is used.
You can set custom rules that allow you to group more drives in one storage pool, and then create virtual drives.
These drives store two copies of your data, allowing you not to worry about losing data even when one of the copies becomes corrupted.
Pros:
- No need to install anything to use it
- Efficient disk management
Cons:
- Limited range of features
- Not a very good looking interface
In this article, we explored some of the best software options that allow you to manage all your RAID hard disks with ease.
The software presented in this list covers all the tools you need to manage your hard disks creation, usage, and statistical gathering.
We also presented you with a built-in option that is almost as efficient as the software found in this article.
Please feel free to let us know what options you chose and how it worked out for you, by using the comment section below.
How do setup software RAID in Windows
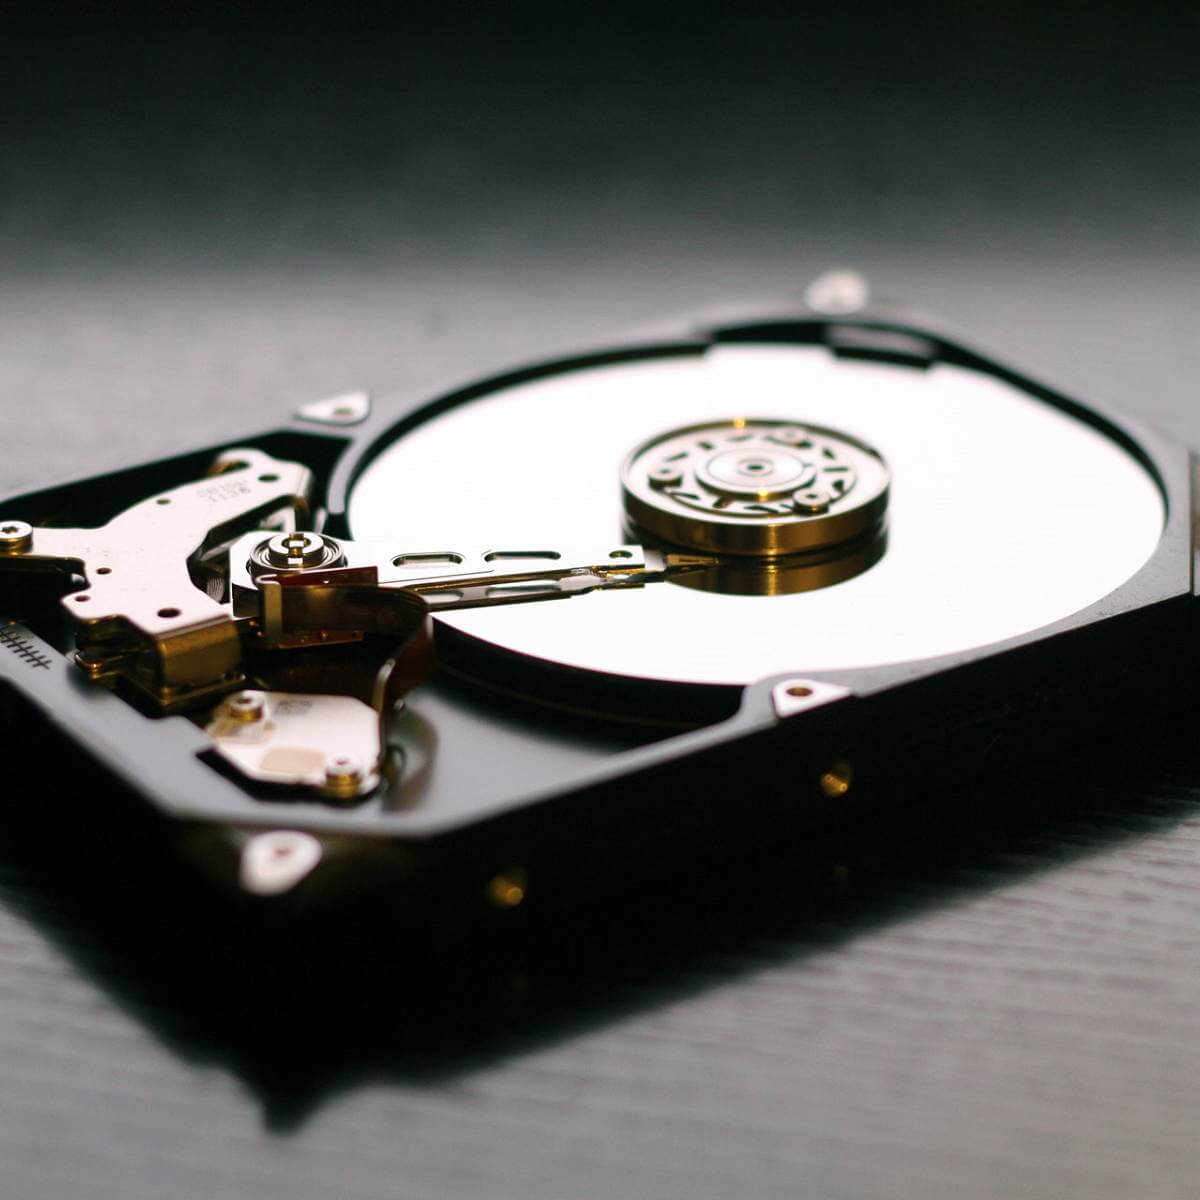
No matter how powerful your computer is, it still has one weak point: the hard disk. It is responsible for your data integrity and security, and it has a significant impact on the performance of your PC. Besides, the hard drive is the only device in the system unit that has moving mechanical parts inside, and that is why it is a weak link that can wipe out all the power of your PC.

Today there are two ways to speed up your computer: the first is to buy an expensive SSD, and the second is to use your motherboard to the maximum extent possible, namely, to configure a RAID 0 array of two hard drives. Besides, a RAID array can also be used to increase the security of your important data.
In this article, we will see how to create a software RAID with the built-in tools of Windows.
Content:
Modern motherboards allow you to create disk RAID arrays without having to buy hardware. It allows you to save a lot of money when you want to increase data security or speed up your computer.
Create software RAID with built-in Windows 8 or Windows 10 tools
Windows 10 has a built-in “Storage Spaces” feature that allows you to combine hard drives or SSDs into a single disk array called RAID. This feature was first introduced in Windows 8, and in Windows 10 it was much improved, making it easier to create a RAID array.
To create a RAID array, you can use both “Storage Spaces” and the command prompt or “Windows PowerShell”.
Before creating a software RAID, you should define its type and what it will be used for. Today Windows 10 supports three types of software RAID: RAID 0, RAID 1, RAID 5.
You can read about which RAID types exist and which RAID is best used in the article “RAID types and which RAID is best used“
So, we have decided on the RAID type. Then to create a disk array, we connect all disks to the computer and boot the operating system.
It should be noted that all disks of the future RAID should be the same, not only in memory size, but preferably in terms of all parameters. It will help to avoid many troubles in the future.
Next, to create a software RAID array, perform the following steps:
Step 1: Open the “Control Panel” by right-clicking on “Start”, and selecting “Control Panel”
Step 2: In the opened window select “Storage Spaces”
Step 3: Next, choose “Create a new pool and storage space”
Step 4: Select the drives you want to add to the RAID array and then click “Create pool”
Important : All data on the disks from which a RAID array is created will be deleted. Therefore, save all important files to another drive or external storage medium in advance.
After you have configured the array, you should name it and configure it correctly.
Step 5: In the “Name” field, enter the name of our RAID array, choose a letter and file system for the future RAID
This name and letter will be displayed on a Windows system
Step 6: Now you should select Resiliency type.
- Simple (no resiliency) is a RAID 0;
- Two-way mirror is RAID 1;
- The Three-way mirror is also RAID 1 (with only difference in the number of copies of the main hard drive);
- Parity is RAID 5;
Depending on the selected RAID type – the wizard will automatically set the maximum available disk array capacity.
Usually, this value is a little lower than the actual amount of data available, and you can set a larger disk space size as well. However, keep in mind that it is done to allow you to install additional hard disks when the array is full without having to rebuild the RAID array.
Step 7: Press “Create storage space”
Once the wizard has configured your new RAID, it will be available as a separate disk in the “This PC” window.
The new disk will be no different from an ordinary hard disk, and you can perform any operation with it, even encrypt it with BitLocker.
You can read about using the BitLocker in the article “How to encrypt data on a hard disk using BitLocker“.
You can create another software RAID. Only the number of hard drives connected to the PC limits the number of created RAID arrays.
How to add a disk in an already existing RAID array
Suppose you already have a software RAID created, and you are using it. One day a situation may arise when you begin to lack disk space. Fortunately, Windows 10 allows you to add one more disk to an already existing array using built-in tools.
To add the disk, you should open the “Storage Spaces” utility using the method described above and select “Add Disks”.
In the menu that opens, select the disk you want to add and click “Add disk”. The hard drive will be added to an already existing RAID array.
How to remove a disk from already existing RAID array
To remove a disk from a RAID array you should:
Step 1: Open the “Storage Spaces” utility as described above and click the “Change settings” button.
Step 2: Open an existing RAID array and select “Physical Drives”.
Step 3: From the pop-up list, select the drive you want to remove and click “Prepare for removal“
Windows will automatically transfer data to the other drives, and the “Prepare for removal” button will change to “Remove”.
After that, you should press “Remove”. The system will remove the drive from the RAID. For further work with this drive, you will need to create a new partition on it. You can use the built-in “diskpart” utility or the “Disk Management” utility to do this.
You can read about how to use the “diskpart” utility in the article: “Using Diskpart to manage and recover a hard drive, memory card or USB flash drive“
Create a software RAID using command prompt.
Another way to create software RAID is to use the command prompt or Windows PowerShell.
To create a software RAID using the command prompt, you should:
Step 1: Right-click on “Start” and select “Command Prompt (Admin)” or “Windows PowerShell (Admin)”
Step 2: In the window that opens, type the command “diskpart” and press “Enter”
Step 3: To display the list of disks, enter “list disk”.
The Diskpart utility will display all drives connected to your PC.
Step 4: Select the drives you want to add to the RAID array one by one and turn them into dynamic drives using commands:
- select disk 1 – where 1 is the number of the desired disk;
- convert dynamic – convert it to dynamic;
- select disk 2
- convert dynamic
- select disk 3
- convert dynamic
Now that we have converted our disks, we can create a RAID volume by entering the following commands:
- select disk 1
- Create Volume RAID Disk 1, 2, 3
After that, you should make sure that the array was created.
To do this, enter the command “list volume”.
All disks will be combined into one disk.

Step 5: Now all you have to do is format the disk and assign it a letter. To do this, enter the following commands:
- select volume 2
- Format FS=NTFS Label=MyNewVolume
- Assign Letter=F
Step 6: Type “exit” and press Enter
After that, the selected drives will be combined into a RAID array.
It should be noted that using this method, RAID 5 will be created.
RAID 0
If you want to create a RAID 0, then enter it in the Diskpart utility:
- list disk;
- create volume stripe size=n disk=1,2,3 – where n is the size in Mb and 1,2,3 are the numbers of the disks to be included in the RAID 0 array.
RAID 1
To create RAID 1, you need to enter the following commands one by one:
- list disk – to display the connected disks;
- select disk 0 — disk number for which the mirror is created;
- convert dynamic – we convert the disk to a dynamic one;
Be careful. Sometimes the message “You should reboot your computer to complete this operation” may appear. If it appears – restart your PC. If there is only a message about successful conversion – continue the work and enter:
- select volume 0 – select the desired disk;
- add disk=1 – add the required disk for mirroring;
After that, RAID 1 array will be created.
Software RAID creation in Windows 7
In Windows 7, you can use the “Disk management” utility to create a software RAID. It should be noted that the drive from which the system is booting cannot be used in a RAID, as it will be converted into a dynamic. You can use any drives except the system.
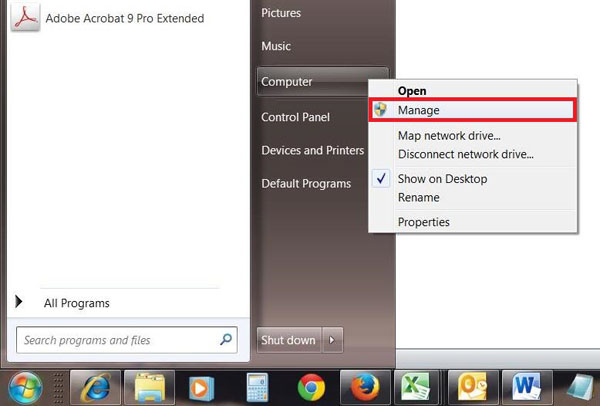
Step 1: Open “Start”, right-click on the “Computer” and select “Manage”
Step 2: In the appeared wizard, click “Next”
Step 3: In the menu that opens, you should select the drives you want to combine into a RAID array and click “Next”
Step 4: Choose a letter for the created RAID array and click “Next”
- S (Striping) – corresponds to RAID 0;
- M (Mirroring) – corresponds to RAID 1;
- P (Parity) – corresponds to RAID 5;
Step 5: In the next window, select the file system type (NTFS), specify the block size and specify the volume name. After that click “Next”.
Step 6: After the system creates a new RAID array, click the “Finish” button.

After clicking the “Finish” button, a window will appear warning that converting the base disc to a dynamic one will be performed and that booting the OS from the dynamic disc will be impossible. Just click “OK”.
After that, the created RAID array will be displayed in the window “My Computer” as an ordinary hard disk drive with which you can perform any operations.
What to do if you lose important data from the RAID array.
Using RAID arrays can significantly improve data security, which is very important in today’s world. However, the human factor cannot be excluded.
The loss of important files is possible due to accidental deletion, formatting, changes in the file system’s logical structure, and many other reasons. Besides, the RAID failure should not be excluded.
What to do if important data is still lost?
In this situation, it is best not to make hasty decisions. The best option is to contact specialists or use professional software for data recovery.
The best solution on the market today is RS Partition Recovery – a program that allows you to restore photos, documents, videos, and other files in the most challenging situations.

All-in-one data recovery software
RS Partition Recovery does not require any computer resources, supports all file systems used in modern operating systems, and is excellent for data recovery from RAID arrays.
Besides, the program has two types of scanning: quick scan and full analysis.
With the full scan function, you can recover data that was lost even a few months ago.


