- На Mac, как я могу дать себе постоянные привилегии sudo?
- 5 ответов 5
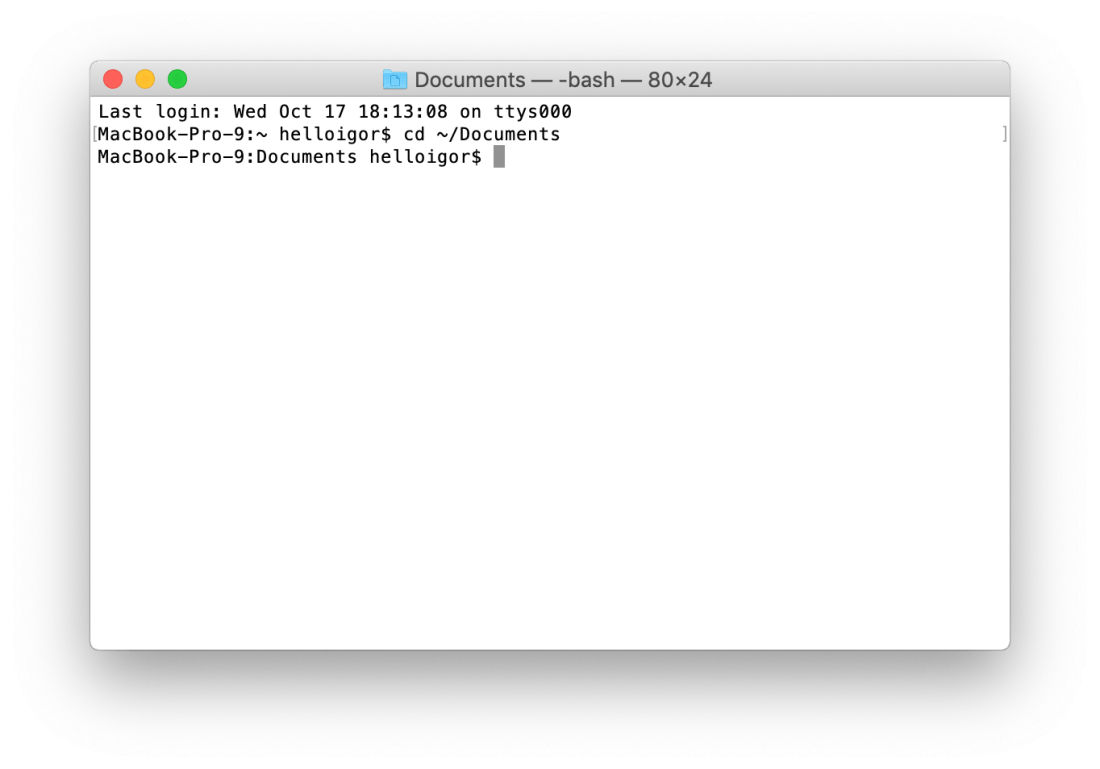
- Ввод команд администратора в Терминале на Mac
- Терминал на Mac (macOS): что это, команды, синтаксис – понятный гид для начинающих
- Что такое «Терминал»?
- Общие команды для Mac
- Основной синтаксис
- Пробелы
- Команды Терминала для улучшения продуктивности
- mkdir
- Mac Terminal commands to improve your workflow
- What is a Terminal on Mac
- How to open Terminal on Mac
- 1. How to open Command Line on Mac via the Dock
- 2. Opening Terminal through the Finder
- 3. Opening Terminal on Mac through the Spotlight search bar
- 4. Basic Terminal Mac shortcuts
- Mac Terminal tricks you should know
- 1. Enable showing hidden files and folders
- 2. View the contents of any files
- 3. Copy the contents of a folder from one location to another
- 4. Changing the file format of screenshots
- 5. Disable shadows in screenshots
- 6. New names for screenshots
- 7. New folder for screenshots
- 8. Your own greeting in the login window
- 9. How long has my Mac been on?
- 10. Disable sleep mode
- 11. Start auto-restart when the Mac completely freezes
- Terminal Mac Commands List to improve productivity
- find
- du
- mv
- ls
- mkdir
- rm
На Mac, как я могу дать себе постоянные привилегии sudo?
В Mac OS X 10.6 как я могу получить постоянные привилегии sudo? это как linux в файле «/etc/sudoers»?
5 ответов 5
Не совсем опытный в OSX, но, кажется, находится в одном из следующих:
Рекомендуется использовать Visudo для редактирования файла, но вы можете использовать другой текстовый редактор.
Под строкой с надписью root ALL=(ALL) ALL
Вы добавляете имя пользователя и user ALL=(ALL) ALL чтобы предоставить себе постоянные привилегии sudo.
Вы можете, конечно, отредактировать /etc/sudoers вручную, чтобы сделать это.
Но в системных настройках Mac OS X есть встроенный метод для достижения того же: предоставьте пользователю учетную запись администратора вместо стандартной , и она будет автоматически добавлена в /etc/sudoers как sudoer (через членство в группе wheel ).
Тем не менее, пользователям все равно нужно будет вводить свой собственный пароль, что очень хорошо (тм) .
sudo в OSX точно так же, как в Linux, и как Linux, man sudo показывает детали
sudo определяет, кто является авторизованным пользователем, обращаясь к файлу /private /etc //sudoers.
/etc — это символическая ссылка на /private /etc, поэтому ваше предложение для /etc /sudoers будет работать.
Вы могли бы также запустить sudo -s
Это даст вам права суперпользователя для этого сеанса.
Чтобы вернуться к обычным разрешениям, просто введите exit
Разблокируйте учетную запись root.
Шаги, чтобы разблокировать «root» в Mac:
• 1.Open Directory Utility (/ Приложения / Утилиты / Справочник Utility.app)
• 2.Перейдите в Edit> Enable Root User
• Будет запрошен пароль, нажмите ОК, чтобы ввести ПУСТОЙ пароль.
Выйдите из системы, затем введите root в Имя пользователя и ваш IN . (Примечание. Убедитесь, что ИМЯ И ПАРОЛЬ ПРОВЕРЕНЫ В ПАРАМЕТРАХ ВХОДА.)
Источник
Ввод команд администратора в Терминале на Mac
Для выполнения многих команд управления сервером требуются права администратора или корневого пользователя, также называемого суперпользователем.
Например, если Вы не являетесь администратором или корневым пользователем, при вводе команды shutdown будет выдана следующая ошибка:
Причина заключается в том, что команду shutdown может выполнить только корневой пользователь или администратор с правами корневого пользователя.
Чтобы выполнить команды с правами суперпользователя, используйте команду sudo . sudo обозначает superuser do (выполняется суперпользователем).
Следующий пример работает на компьютерах с установленной macOS. Не выполняйте его, если не хотите перезагружать компьютер.
Потребуется ввести пароль текущего пользователя.
Команду sudo может использовать только администратор. Если Вы еще не вошли в систему как администратор, Вы можете сделать это с помощью следующей команды, где adminUsername — это имя администратора:
Потребуется ввести пароль adminUsername, после чего будет открыта новая shell для этого пользователя.
Если это необходимо для выполнения команды, Вы можете переключиться на корневого пользователя с помощью команды su . В обычных обстоятельствах не рекомендуется входить в систему в качестве корневого пользователя.
Важно! Если Вы использовали команду su для входа в систему в качестве корневого пользователя, соблюдайте особую осторожность, поскольку Ваших прав хватит для внесения серьезных изменений и остановки работы компьютера.
Источник
Терминал на Mac (macOS): что это, команды, синтаксис – понятный гид для начинающих
Сегодня все мы в 99% случаев работаем с Mac через приятный, понятный и удобный графический интерфейс пользователя. Но при решении ряда специфических задач даже Finder не справится с тем, что сделает старая добрая командная строка…
Например, с её помощью гораздо проще – и быстрее! – искать затерявшийся где-то в недрах системы 5-гигабайтный файл или путь к приложению, которое, как вы думали, уже давно удалено.
Что такое «Терминал»?
Терминал – стандартная системная утилита для взаимодействия с Mac при помощи командной строки. В Linux есть похожий инструмент управления, т.к. обе ОС являются Unix-подобными.
Интерфейс командной строки (command line interface или сокращенно CLI) – он же язык общения с Терминалом – называется bash. Всё, о чем мы расскажем ниже – это bash-команды.
Общие команды для Mac
Основной синтаксис
Bash-команда обычно строится так:
[Команда] [Опции] [Ввод или путь к файлу или директории]
ls – это команда, -la – это соединение двух опций (-l и -a), а /Applications – это путь к списку.
Если вы поймете путь, то поймете и то, как macOS в действительности видит ваши файлы. Как? Да как в матрешке – одна за другой. Например, вот путь к файлу под названием «Мои секреты», лежащему на Рабочем столе: /Users/Yablykworld/Desktop/My Secrets.
Пробелы
С пробелами действует простое правило – ничего лишнего!
Почему? Дело в том, что bash считает пробел концом команды!
Если у вас есть папка с пробелами в названии – например, Yablyk Folder, и вы пытаетесь вывести её содержимое с помощью команды ls /Applications/Yablyk Folder, то соответствующий файл не будет найден, и на выходе появится ошибка:
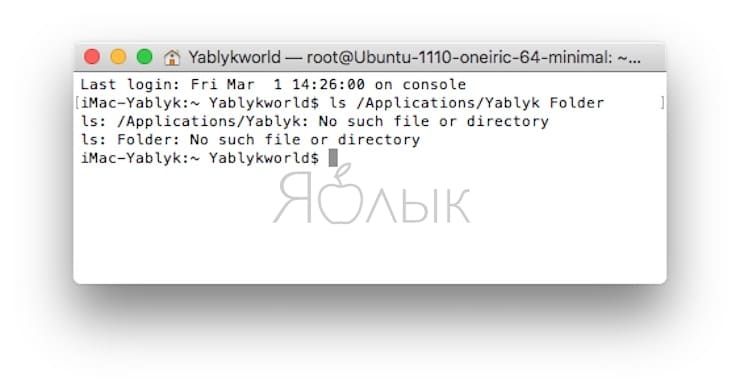
Чтобы решить эту проблему, понадобятся кавычки или обратный слэш. Вот теперь всё будет правильно:
ls /Applications/»Yablyk Folder» , или
ls /Applications/Yablyk\ Folder
Многим командам требуется доступ с уровня администратора. Если вы сейчас пользуетесь Mac не под аккаунтом его «админа», но знаете пароль, введите в командную строку перед текстом самой команды sudo – (что означает «single user do», «делает один пользователь»). Так вы временно получите привилегии администратора и возможность произвести необходимые операции без смены аккаунта.
Команды Терминала для улучшения продуктивности
- Заменяет: Spotlight
- Почему лучше: работает быстрее, осуществляет поиск и по системным папкам (тогда как Spotlight в них не ищет или плохо индексирует их содержимое).
Синтаксис find состоит из четырех частей:
2. путь к директории, в которой вы хотите искать информацию (например, /Applications);
3. опции (например, -name дает find возможность искать файлы, которые подходят к заданному названию);
4. непосредственно сам поисковый запрос (например, Google Chrome).
Вот как выглядит вся команда в целом:
find /Applications -d 1 -name «*Google Chrome*»
Примечание: «звездочки» (*) указывают на то, что используется regex (регулярные выражения).
- Заменяет:⌘Cmd + I, т.е. команды для отображения информации;
- Почему лучше: может показать сразу несколько папок за один раз, и обычно выполняется быстрее.
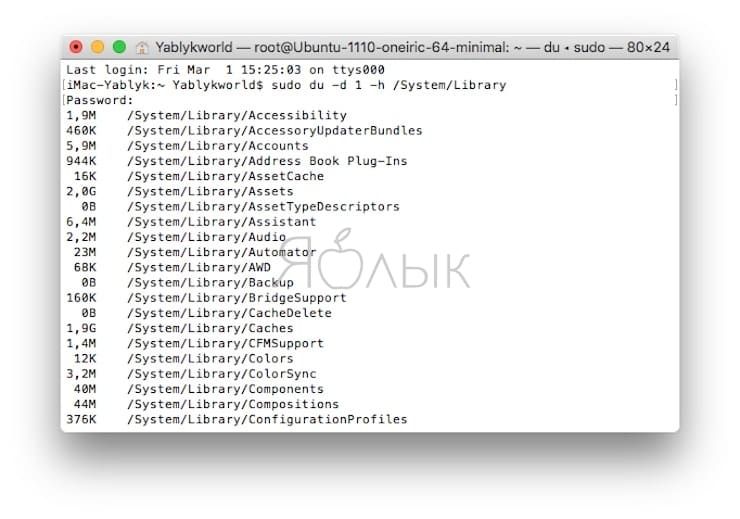
du – это сокращение от «disk usage». Команда поможет быстро узнать размер конкретного файла или папки, или даже списка файлов внутри папки.
Лучшие опции для du:
-d («глубина», или depth): если за этой буквой стоит цифра, то find ограничит поиск по директории соответствующим количеством уровней. Например, если вы отдадите вашему Mac команду du:
Терминал выдаст вам информацию только об общем «весе» папок и файлов в папке Applications, без данных о размере подпапок, вложенных в эти папки.
-h (human readable, или «человеко-читаемые»). Выводит размеры файлов в привычных людям величинах – K (килобайтах), М (мегабайтах) или G (гигабайтах).
Команда du в действии:
- Заменяет: ручной перенос папок и файлов в нужное место.
- Почему лучше: быстрее и не требует много ручного труда.
Синтаксис mv очень прост – старый путь меняется на новый:
mv /Users/Yablykworld/Documents/file1 /Users/Yablykworld/Desktop/file1
Эта команда переносит file1 из папки Документы на Рабочий стол.
- Заменяет:⌘Cmd + I (показать информацию).
- Почему лучше: быстрее, умеет отображать информацию о нескольким файлах сразу и имеет богатую палитру настроек.
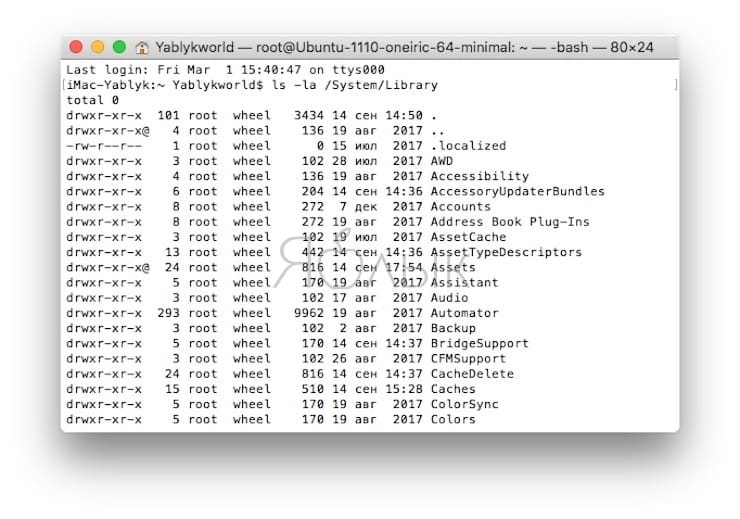
ls – невероятно мощная. команда для отображения того, что находится в ваших папках. Также она выдает информацию о том, кто имеет право видеть их, есть ли на вашем Mac скрытые файлы или папки, и многое другое.
Лучшие опции для ls:
-l – отображает права для каждого файла в папке, время последнего изменения, владельца файла и его (файла) название.
-a – показывает все файлы в папке, включая скрытые (отличный вариант для библиотеки пользователя, которая в macOS по умолчанию скрыта).
Вот как всё работает:
ls -la /System/Library
mkdir
- Заменяет действие:Finder → Файл → Новая папка.
- Почему лучше: работает быстрее, и задать имя новой папочке можно сразу в командной строке (нет необходимости кликать два раза, как это имеет место быть в графическом интерфейсе).
Создает новые папки в мгновение ока.
- Заменяет: процедуру отправки файлов в Корзину и её очистки;
- Почему лучше: быстрее, плюс удаляются даже те файлы, от которых обычно не получается избавиться с помощью Корзины.
Эта команда раз и навсегда удаляет абсолютно любой файл, который вы поместите в команду. Что, разумеется, требует повышенного внимания – в отличие от Корзины, rm не будет спрашивать «а Вы точно уверены?». Предполагается, что вы знаете, что делаете…
По умолчанию rm удаляет только файлы, папки остаются. Для того, чтобы сразу удалять и их, используйте опцию -R (рекурсивно).
rm -R /Users/Yablykworld/Desktop/Yablyk_Folder
Источник
Mac Terminal commands to improve your workflow
If you want to take control over your computer, learn how to open Terminal on Mac as well as how to execute commands in Mac Terminal then this article is right what you have been looking for.
We will try to provide you with all the necessary information about useful Mac Terminal commands, how to use Terminal on Mac, different tips and tricks when working with it as well as the best Terminal replacement Commander One.
What is a Terminal on Mac
As it turned out, huge amounts of search queries concerning the topic “Terminal on Mac”, “Mac hacks Terminal” appear on the Internet almost every day. Moreover, many people want to find out how to run Terminal in the Apple operating system. As it is well known, a regular user has no reason to use or even open Terminal, an Apple Command Line interface application, but it’s worth a try because, in fact, it gives access to many tricks and shortcuts. So, let’s start.
It is a well — known fact that Apple has its own Mac Command Line interface, in which you can easily and quickly manage tasks than perform a normal and long process. However, its interface looks rather specific, especially if you do not have the technical knowledge or any clue how to use the Terminal on Mac. However, once you take a look at this useful application, you will surely like it. Who knows?
Terminal is a standard system utility for interacting with Mac using the Command Line. Linux has a similar management tool because both operating systems are Unix-like. In brief, all you need to know about the Terminal is that it is an application that allows you to control your computer using commands, besides that opens the possibility to work with locked functions, etc.
How to open Terminal on Mac
For the record, there are several ways to open Mac Terminal. Choose the one that meets your requirements the most.
1. How to open Command Line on Mac via the Dock
There is usually “Applications” shortcut on the Dock panel on macOS. Click on it and a list of all installed programs on your Mac will be open. Find and open the “Utilities” folder, inside you will find the “Terminal” app. Run it. Please note that in recent versions of Mac OS X, this shortcut is called Launchpad.
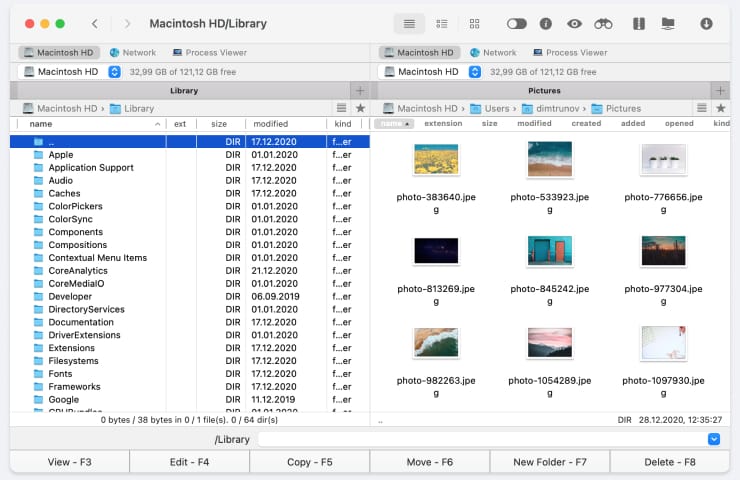
2. Opening Terminal through the Finder
Open Finder (in the Dock it is always on the left). In the left menu, select «Applications» and in the list of all programs that open, find the directory/folder «Utilities». Click on it and search for the application «Terminal.app» in it. Double-click the Terminal.
3. Opening Terminal on Mac through the Spotlight search bar
Hold down the Ctrl + Spacebar key combination at the same time. In the pop-up window, enter the word «Terminal». Once you have typed you will see the application you need, all you need is just click it.
4. Basic Terminal Mac shortcuts
- Command (⌘) + T is used in order to open a new terminal window.
- Command (⌘) + N is used in order to open a new tab in the terminal.
- Command (⌘) + Shift + [ and Command (⌘) + Shift + ] are used to switch tabs back and forth.
Mac Terminal tricks you should know
Mac OS Terminal can do a lot, from moving a lot of files to changing preferences that we couldn’t even think of. To demonstrate what Terminal can do, we have put together 11 really excellent tips and tricks that you might find useful.
1. Enable showing hidden files and folders
If you want to see all the folders and files hidden by the system, then run the following command in the Terminal: defaults write com.apple.finder AppleShowAllFiles -bool TRUE killall finder
Tip: To hide them back, change the value from TRUE to FALSE.
2. View the contents of any files
If you have a damaged file or you suspect that something else is hidden inside it, then you can force the Terminal to open it, despite the failure of normal applications, with the corresponding command: cat
/ path / to / file
Be careful, if you try to open a photo or any other non-text document, you will see a wall of illegible characters.
3. Copy the contents of a folder from one location to another
Of course, you can just copy-paste the entire contents of the folder, but in cases where you need to simplify and / or automate this process, the following Mac Terminal command will help you: ditto -V
4. Changing the file format of screenshots
While using Terminal on Mac, you can change the format of screenshots from .PNG to any other, including PDF and JPG. defaults write com.apple.screencapture type jpg
5. Disable shadows in screenshots
Those who take a lot of screenshots and want nothing extra on them can turn off the drop shadow effect and leave only the window itself being shot. defaults write com.apple.screencapture disable-shadow -bool TRUE killall SystemUIServer
6. New names for screenshots
I absolutely do not like that boring and inconvenient format for the names of screenshots (“Screenshot date-time”), so below there will be a command that allows you to replace the word “Screenshot” with something more appropriate. defaults write com.apple.screencapture name «New name» killall SystemUIServer
By the way, to return the setting to the original name, you need to enter this: defaults write com.apple.screencapture name «» killall SystemUIServer
7. New folder for screenshots
By default, all screenshots are saved to your desktop, clogging up valuable space. To change this, simply enter the following command from the list of Useful Terminal commands: defaults write com.apple.screencapture location
/ your / location / here killall SystemUIServer
8. Your own greeting in the login window
Using a special command, you can place your own message on the login screen. You might want to write something funny and original, or leave your phone number in case your Mac goes missing. sudo defaults write /Library/Preferences/com.apple.loginwindow LoginwindowText «Somebody told me there is a place where everything is better and everything’s safe.»
9. How long has my Mac been on?
When was the last time you have rebooted your computer? You can check this with a command in the Terminal: uptime
10. Disable sleep mode
Sometimes it becomes necessary to keep the Mac awake, for example, when downloading a torrent or creating a backup. While using Mac Terminal you can disable hibernation on your Mac by typing: caffeinate
Now your Mac will not fall asleep under any pretext.
Tip: For this command, you can specify the time (in seconds) after which the Mac will automatically go to sleep if it is inactive. caffeinate -u -t 5400
11. Start auto-restart when the Mac completely freezes
Of course, it also happens: for no reason at all, the Mac freezes and you have nothing left but a forced reboot. The following command forces OS X to reboot if it realizes that the system is not responding:
sudo systemsetup -setrestartfreeze on
Terminal Mac Commands List to improve productivity
find
Replaces: Spotlight. Why it is better: works faster, searches for system folders (while Spotlight does not search or index their content poorly) So if you want to know how to navigate to a folder in Terminal Mac, this command can help you:
find / Applications -d 1 -name «* Google Chrome *»
The find syntax consists of four parts:
- find;
- the path to the directory in which you want to look for information;
- options;
- search itself.
du
Replaces: ⌘Cmd + I. Why it is better: can show multiple folders at once, and usually run faster.
du is a reduction from «disk usage». This Mac Terminal command will help you quickly find out the size of a specific file or folder, or even a list of files inside a folder. The best options for du:
-d (depth): if there is a number behind that letter, then find will limit the search to the directory by the appropriate number of levels. For example:
-d 1 / Applications
Terminal will only give you information about the general size of folders and files in the Applications folder, without the data on the size of subfolders embedded in those folders.
-h (human readable). Displays the size of files in common values - K (kilobytes), M (megabytes) or G (gigabytes).
mv
Replaces: manual transfer of folders and files in the right place. Why it is better: faster and does not require a lot of manual work.
The mv syntax is very simple — the old path changes to a new one: mv / Users / Maria / Documents / file1 / Users / Maria/ Desktop / file1
This Terminal Mac command transfers file1 from the Documents folder to the Desktop.
ls
Replaces: ⌘Cmd + I. Why it is better: faster, able to display information about several files at once, and has a rich palette of settings.
ls -la / System / Library
ls provides information about who has the right to see files, whether there are hidden files or folders on your Mac, etc. The best options for ls:
- -l — displays the rights for each file in the folder, the last modification time, the owner of the file, and its (file) name.
- -a — shows all files in the folder, including hidden ones.
mkdir
Replaces the action: Finder → File → New folder. Why it is better: it works faster, and you can immediately enter the name of the new folder on the command line.
Creates new folders in no time. Example: mkdir / Users / Maria/ Desktop / Maria_Folder
rm
Replaces: the procedure for sending files to the Trash and cleaning it. Why it is better: faster, plus even those files are deleted that you usually cannot get rid of using the Trash.
This Mac Terminal command deletes absolutely any file that you put in the Command Line. By default, rm only deletes files, folders remain. To remove them immediately, use the -R option. Example: rm -R / Users / Maria / Desktop / Maria_Folder
Источник


