- Windows 10 Startup Folder [Location, Access, Items]
- Where is the Startup folder in Windows 10?
- How to Open the Startup Folder With Run
- How to Add Software to the Startup Folder
- How to Remove Software From the Startup Folder
- How to Access the Windows 10 Startup Folder
- How to Access the Windows 10 Startup Folder
- The Startup Folder In The Start Menu
- Two Windows 10 Startup Folders
- Accessing The Windows 10 Startup Folder
- Enabling and Disabling Startup Programs
- To access Startup using the Task Manager:
- To access Startup using via Windows Settings:
- The Launch Order For The Windows 10 Startup Folder
Windows 10 Startup Folder [Location, Access, Items]

- The Task Manager’s Startup tab provides you enough insights on what exactly are the apps that launch at startup. But this tool comes in handy for inspection purposes only and you’ll need to find other ways to add programs for example.
- You can do this by adding software directly to the Startup folder. If you’re wondering how to find it, look no further, we have it sorted out for you right here.
- Check out more handy fixes on our Windows 10 Guides.
- Don’t be shy to explore the Tutorials Hub as well for more tech tricks and tips.
Windows 10’s Task Manager utility includes a Startup tab. That is Windows 10’s default startup manager with which users can disable startup software.
However, the Task Manager’s tab doesn’t include any options for users to add programs to the startup. So, some users might look for startup settings on software windows to add new programs to the system startup.
Yet, Windows 10 includes a Startup folder to which users can add programs and files. All software and programs within that folder will run automatically when Windows starts. That folder is buried within a series of subfolders.
Consequently, some users might wonder found to find it exactly.
Where is the Startup folder in Windows 10?
For most users, the Startup folder is located at this address:
There is also a second All Users Startup folder that should be located under:
How to Open the Startup Folder With Run
As you can see, the full path for the Startup folder is this:
Users will need to replace USERNAME with their actual user account name, and then enter that path in File Explorer. That path will open the folder shown in the snapshot directly below.
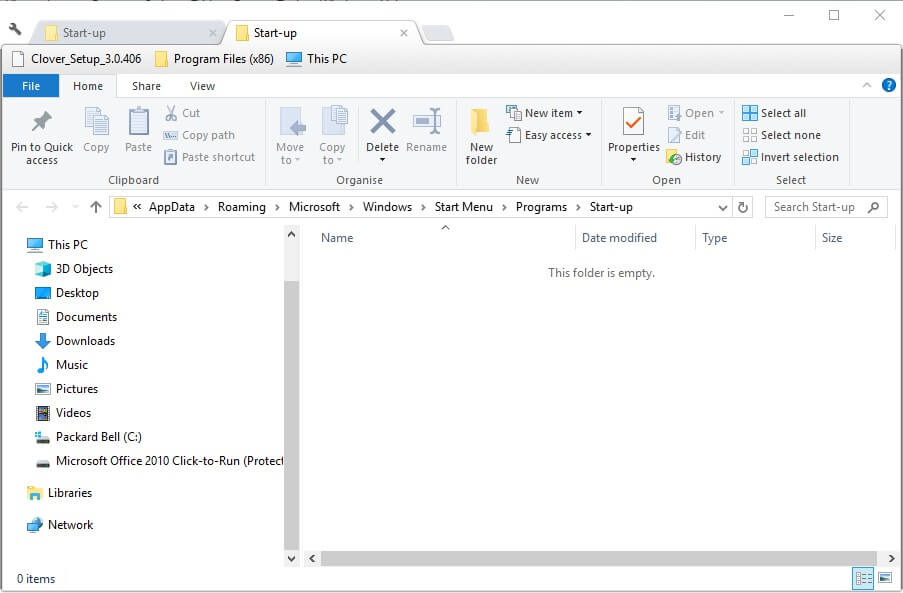
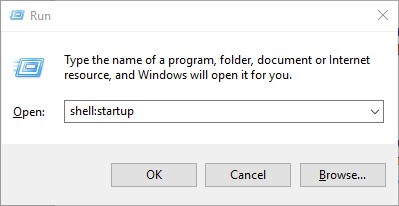
However, it’s better to open the Startup folder with Run. To do that, press the Windows key + R hotkey. Then enter shell:startup in the Run text box. That will open the Startup folder when users press the OK button.
To open the all user Startup folder, enter shell:common startup in Run and click OK.
How to Add Software to the Startup Folder
With the Startup folder open in File Explorer, users can now add new program shortcuts to the system startup. In addition, users can also include file shortcuts within that folder.
Then the files the Startup folder includes will usually open with their default software. This is how users can add shortcuts to the Windows Startup folder.
- Right-click an empty space within the Startup folder and select New >Shortcut.
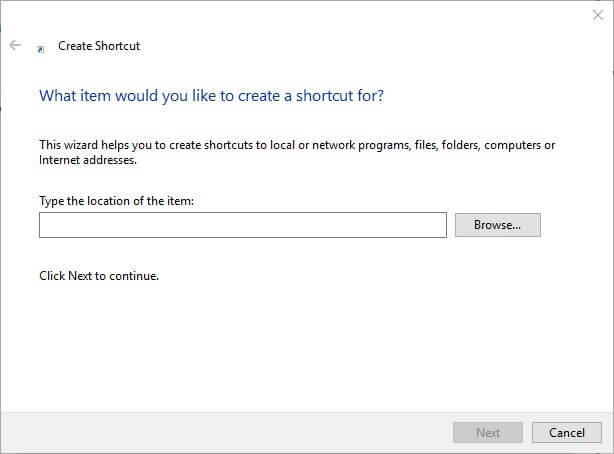
- Click the Browse button to open the window in the snapshot directly below.
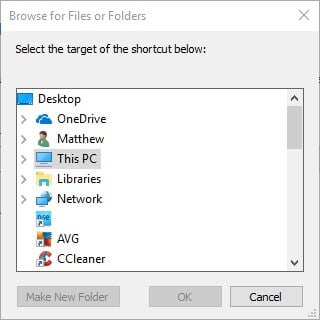
- Select a program or document to include in the startup, and press the OK button.
- Press the Next button.
- Then press the Finish button. The Startup folder will now include the selected software or file.
- The software in the Startup folder will open after you’ve restarted Windows.
How to Remove Software From the Startup Folder
Users can remove programs in the Startup folder by deleting them. To do that, select a program in that folder and click the Delete button. That will probably erase the shortcut to the Recycle Bin.
Users can also press the Ctrl + A keyboard shortcut to select all shortcuts within the Startup folder. Then press File Explorer’s Delete button to erase them. Task Manager’s Start-up tab in Windows 10 will also list the programs that users have added to the Startup folder.
Therefore, users can disable the programs with that utility by right-clicking the taskbar and selecting Task Manager.
Click the Start-up tab on that utility’s window. Then users can select the required program and click Disable. 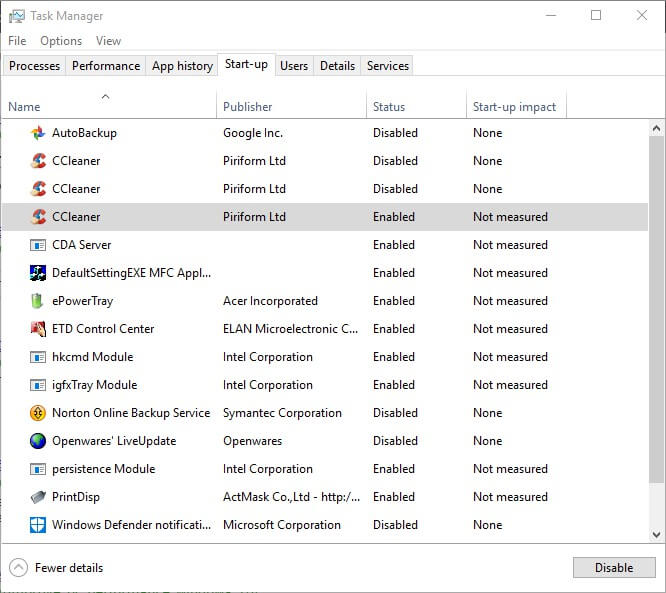
Note: Task Manager doesn’t include a Start-up tab in Windows 7. However, Win 7 users can open the startup manager by entering msconfig in Run and clicking OK. Then select the Startup tab on the System Configuration window.
Windows 7 users can uncheck the item checkboxes on that tab to disable programs starting during startup. So, that’s how users can add new software and files to Windows’ Startup folder.
However, filling that folder up will slow down the system startup. Lots of startup software will also drain system resources. Therefore, don’t add too many things to the folder.
There you go, these solutions should help you manage the startup folder adequately. Let us know if you found them useful by hitting the comments section below.
Note: You will need to replace the USERNAME value with your actual user account name.
- What is Startup folder?
The Startup folder is an in-built Windows feature (first introduced in Windows 95) that allows users to set up those particular apps and programs that will automatically run when Windows starts.
How to Access the Windows 10 Startup Folder
Plus how to disable or enable programs
The Windows Startup Folder was an important folder that was easily discoverable via the Start Menu in Windows versions past. It began as far back as Windows 95 and any programs located within the Startup Folder would boot up and run anytime the computer was powered on.
It used to be that whenever you booted up your Windows operated computer, it would seek out and execute a batch script called autoexec.bat. Anyone with knowledge of Power DOS could use a text editor to modify this script in order to add their favorite programs to boot up, along with the Windows operating system. This made it so that everything you wanted to use was already loaded once the computer booted.

The use of autoexec.bat continued all the way through the Windows NT years, but Microsoft was intent on moving users away from a scripted, command-line environment. It instead wanted to encourage the use of the graphical interface model with windows, files, and folders, and, in doing so, made all subsequent versions of their operating systems not require autoexec.bat.
They would eventually do away with it entirely, however, the Windows 10 Startup Folder can still be found today.
How to Access the Windows 10 Startup Folder
Back before Windows 95, batch scripts and command-line interfaces were essential in getting your computer to do anything at all. All of the clickable icons you take for granted today didn’t exist. Instead, to run something like Microsoft Word, it required that you opened a command-line interpreter and typed winword.exe.

Windows 95, though it still allowed for users to perform nearly every important task using a command line, such actions were easier through the graphical user interface. You could click on the Program Files folder and find icons labeled with the program you wanted to run. All that was needed was a quick double-click and the program was launched.
Windows 95 was the first step in changing how we access programs. Today, clicking a program to have it launch is commonplace. It feels as if this is how it has always been. Barely anyone uses commands to open programs anymore. However, interestingly enough with Windows 10, we’ve actually seen a small surge in the revival of command line access via the use of PowerShell.
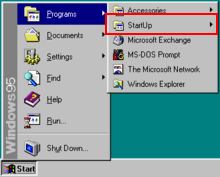
The Startup Folder In The Start Menu

The Start Menu was first created in Windows 95 and slightly resembles the Start Menu we have today in Windows 10. It’s that little flyout menu that pops out when you click the Start or Windows icon in the lower-left corner of your desktop. In Windows 95, this is where you’d find the Startup Folder.
When Windows 8 was launched, Microsoft decided to eliminate the Start Menu. Even though all of the functionality was still present in the operating system, it was much harder to locate everything. Microsoft wanted users to go a different way with scheduling programs for automatic execution.
Much to Microsoft’s dismay, the pushback from the user community was so great that the Start Menu was quietly brought back in with Windows 10.
The Windows 10 Startup Folder is similar to the one found in Windows 7. However, it’s no longer accessible the same way. The Windows 10 Startup Folder no longer pops up in the Start Menu as it once did. The functions are still there, although some of the operational details have changed. Now, accessing the Windows 10 Startup Folder takes a bit of navigation.
Two Windows 10 Startup Folders

When it comes to the Windows 10 Startup folder, it can be found in two different locations. One Windows 10 Startup folder operates at the system level and is shared among all user accounts (All Users folder), while the other operates at a user level and is unique to that user’s account (Current User folder).
The second one only really matters if you have multiple accounts on your Windows 10 computer. Each account will contain a unique Startup Folder in addition to the universal Startup Folder.
Understanding the distinction between the All Users and Current User Startup Folders is important when it comes to troubleshooting. Attempting to understand why a certain application isn’t opening, or when working with applications that feature user-based licensing or access restrictions will require you know which Startup Folder to configure.
There is one area that enables you to interact with the Startup function, which contains all of the programs found inside of the folder. The only difference is that programs cannot be added or removed. You can only enable or disable those currently inside of the Startup folder. This location is the Windows Task Manager.

Accessing The Windows 10 Startup Folder
There are a few ways in which to access the Windows 10 Startup folder. To access the Windows 10 Startup folder, the first option is through File Explorer.
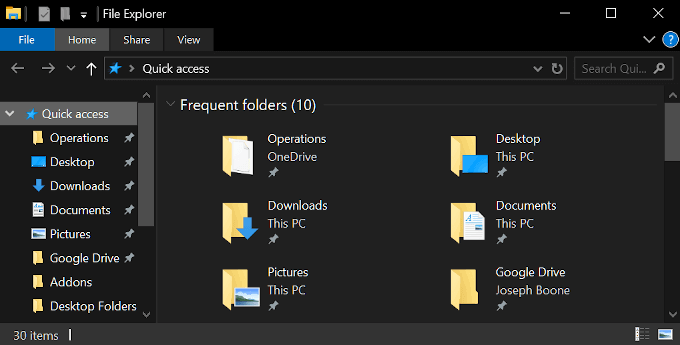
You’ll need to enable the “Show Hidden Files” option in order to see certain folders in the path. Open the File Explorer and drop one of the following paths into the Quick access bar.
- The All Users Startup Folder is located at the following path:
- C:\ProgramData\Microsoft\Windows\Start Menu\Programs\StartUp
- The Current User Startup Folder is located here:
- C:\Users\[User Name]\AppData\Roaming\Microsoft\Windows\Start Menu\Programs\Startup
From these locations, you can add or remove programs that you want executed whenever you boot up your Windows 10 computer.
An alternative way to do this is to jump directly to each folder with a Run command.
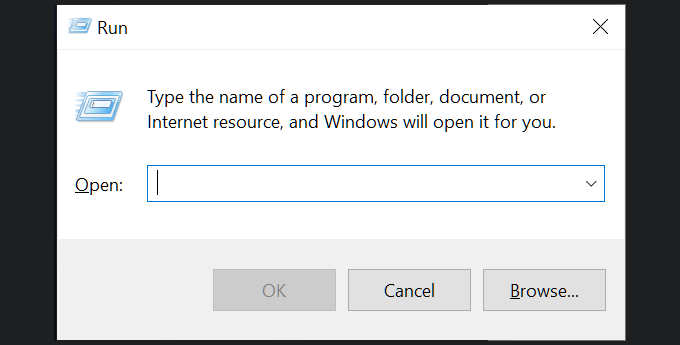
Open the Run function dialog box by pressing the Windows key + R key simultaneously.
- The All Users Startup Folder requires the following path:
- Shell:common startup
- The Current User Startup Folder requires:
- Shell:startup
These will take you directly to the folder containing the startup programs pertaining to the specified folder.
Enabling and Disabling Startup Programs

If all you want to do is enable or disable certain programs within the Windows 10 Startup folder, you can access this functionality through both the Windows Task Manager or Settings window.
To access Startup using the Task Manager:
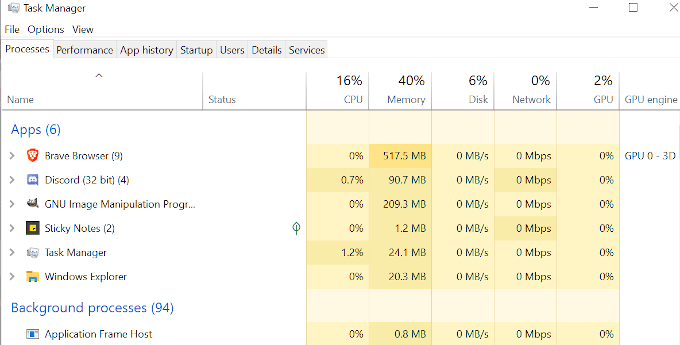
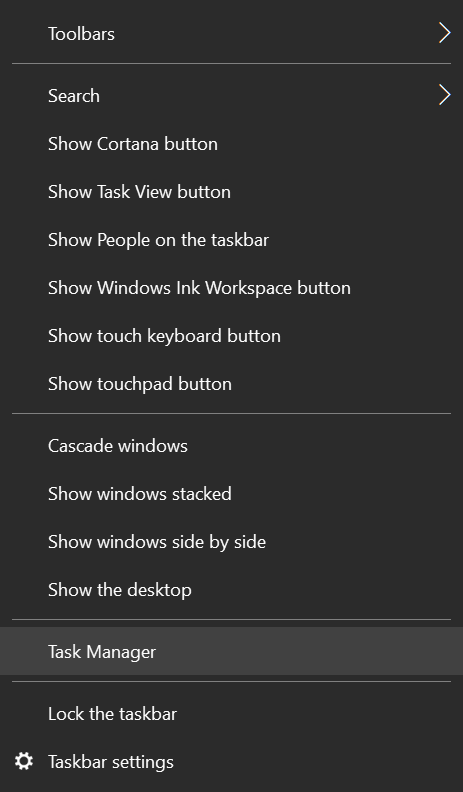
- Right-click the Taskbar and from the menu that pops up, select Task Manager.
- In the Task Manager window, click over to the Startup tab to see the programs.
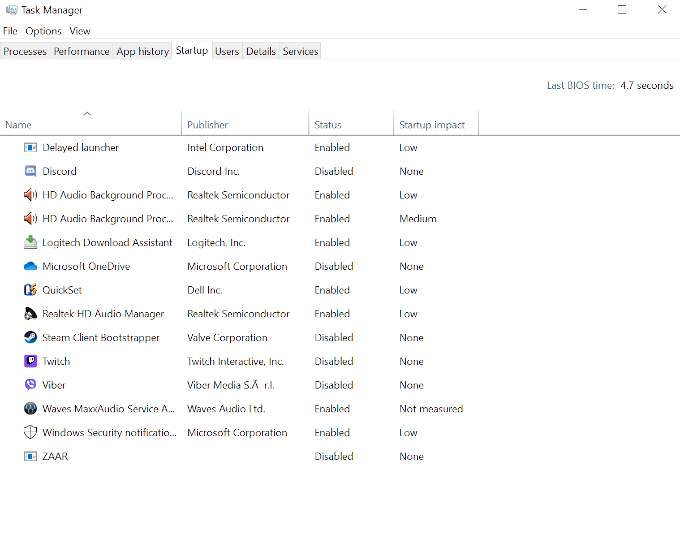
- Right-click a program. In the pop-up, select either enable or disable.
- The program will now adhere to the status set on your next boot up.
To access Startup using via Windows Settings:
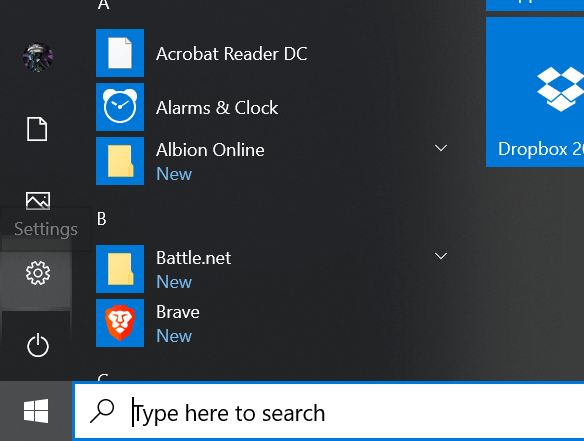
- Open the Start Menu by clicking the Windows icon in the lower-left portion of your desktop.
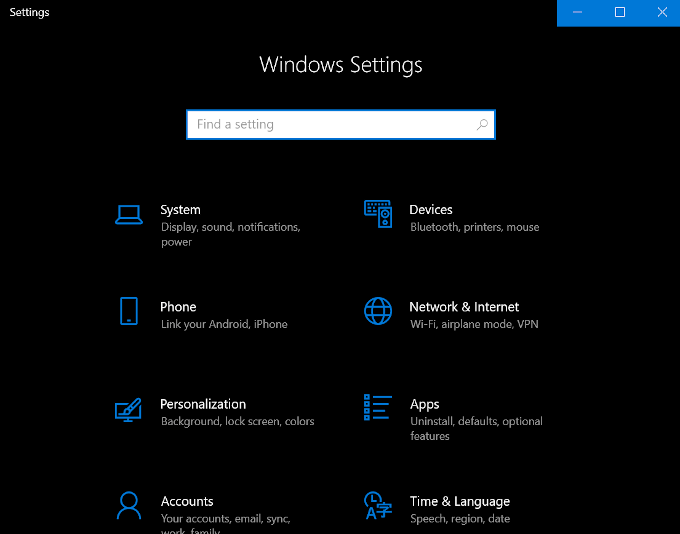
- From the menu, select Settings (Cogwheel icon).
- Choose Apps.
- On the left side menu, select Startup.
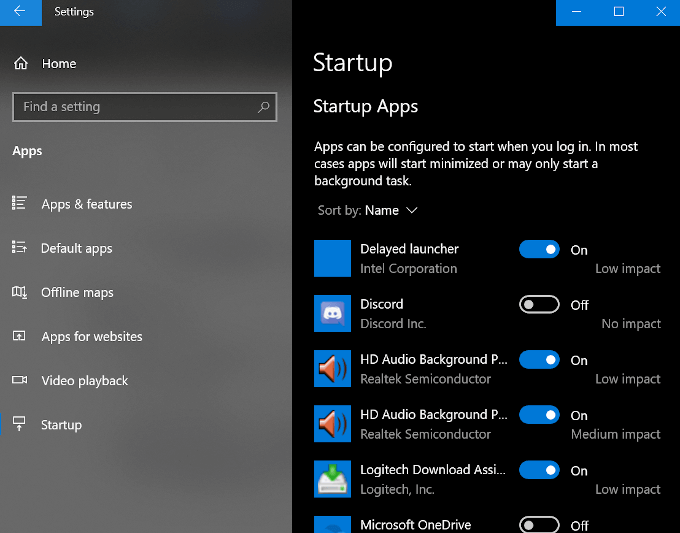
- In the main menu, click the toggles of those programs you want to enable or disable, to On or Off.
The Launch Order For The Windows 10 Startup Folder

Any item placed in either of the Startup Folders will not launch immediately upon login as it did back in the days of Windows 95. Instead, Windows 10 launches programs in a very specific order beginning with necessary system processes and any items in the Task Manager’s Startup tab. The programs you’ve added to the Startup Folders will follow after.
This usually doesn’t take long, but if you have lots of first- and third-party applications and services already configured to launch at boot, it could take a few minutes depending on the processing speed of your computer.
Too many programs in the Windows 10 Startup folder may run the risk of extensive downtime, slowing your computer to unworkable speeds while it attempts to launch each program. It’s a good idea to ensure that you only place necessary programs in these folders and keep the overall count to a minimum.
Former US Army IT communications specialist who began his online blogging career in 2016. Joseph has over 10 years experience in the IT industry as both an analyst and communications expert. He’s a night owl and an avid Red Bull consumer who spends most of his downtime enthralled by online gaming and website building. Read Joseph’s Full Bio


