- Как настроить экран блокировки (Lock Screen) в Windows 10
- What are the Windows 10 Lock Screen Photos of?
- Replies (3)
- 4 Ways to Lock the Screen in Windows 10
- Option 1 – Ctrl + Alt + Delete then Enter
- Option 2 – Windows Key + L
- Option 3 – Start Menu
- Option 4 – Create Shortcut
- You Might Also Like
- How to Disable or Turn Off Windows 10 Lock Screen
- Disable or Turn Off Windows 10 Lock Screen
- 1] From Accounts Settings
- 2] Through User accounts
- 3] Via Screen saver settings
- 4] By Regedit or Registry Editor Turn Off Windows 10 Lock Screen
- 5] With help of Gpedit or Group Policy Editor
- 6] Turn Off Windows 10 Lock Screen using Task Scheduler
Как настроить экран блокировки (Lock Screen) в Windows 10
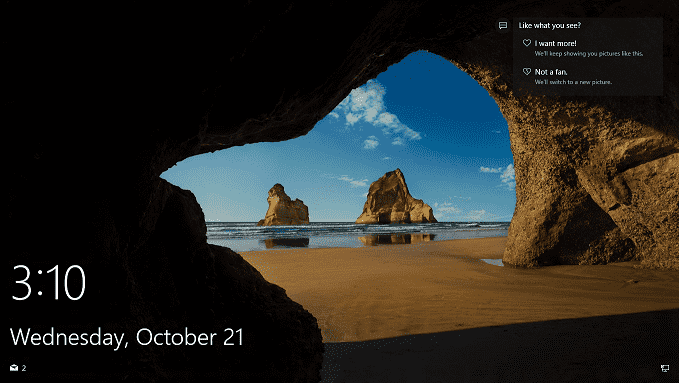
Первое, что вы видите на дисплее после загрузки операционной системы Windows 10 — это её экран блокировки (Lock Screen). Многие считают его бесполезным… но только до тех пор, пока не доберутся до его настроек и не увидят несколько полезных функций. О них мы и расскажем.

Чем может быть полезен Lock Screen?
1. На него выводится полезная информация из некоторых приложений,
2. Голосовой помощник Microsoft Cortana живет в том числе и здесь,
3. Есть возможности для кастомизации — вывод любимого изображения или слайд-шоу.
Чтобы перейти к настройке экрана блокировки в Windows 10, нажмите на кнопку Пуск, в появившемся меню кликните по иконке в виде «шестеренки», выберите раздел Персонализация и пункт Экран блокировки.
 Обратите внимание: для персонализации компьютера Windows 10 должна быть активирована.
Первым делом определимся с заставкой. Кликните по выпадающему меню под надписью Фон. Доступны три варианта — лучшие заставки по версии разработчиков Windows («Windows: интересное»), возможность задать изображение и создать слайд-шоу.
 В первом случае Windows 10 будет периодически выводить на экран блокировки разные изображения и предложит вам выставить им «лайк» или «дизлайк», чтобы лучше понять ваши вкусы и в будущем показывать только то, что вам нравится. Второй вариант подразумевает выбор понравившейся картинки из базы Microsoft или из собственной коллекции в папке на компьютере. Наконец, опция со слайд-шоу позволяет собрать лучшие картинки и воспроизводить их на экране блокировки друг за другом.
Следующая настройка позволяет вывести на Lock Screen полезные советы о Windows и Cortana. Она доступна только при выборе в качестве заставки фонового изображения.
 Далее предлагается выбрать приложение, которые выведет на экран блокировки подробную информацию. По умолчанию это Календарь, но вы также можете выбрать Погоду, Сообщения, Почту и другие приложения. Календарь выводит на Lock Screen информацию о делах на сегодня, Погода — актуальную погоду во всех деталях, и так далее.
 Ниже доступны 7 позиций для вывода информации из других приложений. Данных они, конечно, на Lock Screen будут отправлять меньше, но о самом важном вы обязательно узнаете. В числе программ, которые можно добавить — Будильник, Магазин и другие. Информация на экране блокировки появится после того, как вы выйдете на него в следующий раз.

Если изображение с Lock Screen вам пришлось по душе, почему бы не наслаждаться им и на других экранах Windows 10? Для этого активируйте опцию Показывать на экране входа фоновый рисунок экрана блокировки.
 Наконец, пожалуй, самая интересная опция (к сожалению, для русской версии Windows 10 пока недоступная) — взаимодействие с Cortana прямо на экране блокировки без необходимости входить в систему. Чтобы получить доступ к ней, нажмите на ссылку с надписью Cortana lock screen settings (настройки экрана блокировки для Cortana) и выберите опцию Use Cortana even when my device is locked (использовать Cortana даже на заблокированном устройстве).
Теперь достаточно сказать Hey Cortana, и голосовой помощник Microsoft приступит к работе. Кстати, чуть ниже находится ещё одна интересная опция «на тему» — Let Cortana manage my calendar, email, messages, and Power BI data when my device is locked (Разрешить Cortana управлять календарем, почтой, сообщениями и данными Power BI даже на заблокированном устройстве).

Готово — теперь вы можете видеть и делать много интересных вещей прямо с экрана блокировки Windows 10 даже без необходимости входить в систему.
What are the Windows 10 Lock Screen Photos of?
I can see my question has already been asked several times (links at the end of my question).
The answer from Microsoft is, bizarrely, that they can’t include something as basic as «File Info», «File Name», or, like every picture everywhere has, a caption! If such basic info can’t be included, I will remove this feature entirely. Even a blank screen is preferable to goodies with no info.
Since the time those questions were asked, has MS changed the users’ access to that information?
Replies (3)
First of all what you are looking for really isn’t that hard to find but more on that later.
A Lock Screen is just that, locked, no usage allowed until after a successful login.
If you prefer to not be tempted with «goodies» there is no reason to remove anything, you can easily set any image that you like (even a solid color image if that is your preference) as a permanent Lock Screen image that never changes unless you change it (yes this was new for the WAU (v.1607)).
Now as promised, follow the link below, from this link you can view a large library of known Lock Screen images as well as save them (metadata intact) and/or go to the web source of origin for more. Also from this link you will find sources for a plethora of information related, such as, where and how to find the images that have been displayed on your device in the past, within your devices OS file structure itself.
Any way I hope that this helps, If you have more questions let me know.
4 Ways to Lock the Screen in Windows 10
By Mitch Bartlett 2 Comments
Locking your Microsoft Windows 10 computer screen is important for protecting your data from wandering eyes. This is especially true in the workplace. Nobody you work with needs to see that photo from when you dressed as Ulala from Space Channel 5 for Halloween 2000. Most of us already lock our screens whenever we leave our cubicle to attend a meeting or gossip about the awful dress Trisha is wearing today. But did you know there are 4 different ways you can lock your Windows 10 screen?
Option 1 – Ctrl + Alt + Delete then Enter
This is the common one most people already know about. Hold “Ctrl” and “Alt“, then press “Delete“. After options appear on the screen, press “Enter“.
Option 2 – Windows Key + L
Since the Windows Key has been introduced, it has largely been ignored. Hold down Windows Key and press “L” for a quicker way of locking your screen.
Option 3 – Start Menu
- Select the “Start” button.
- Select your Windows Account profile picture icon, then choose “Lock Screen“.
Option 4 – Create Shortcut
If keystrokes are way too much for you to handle, you can make an icon that will lock your screen.
- Right-click any blank area of the Desktop.
- Select “New” > “Shortcut“.

- For the location of the item type “C:\Windows\System32\rundll32.exe user32.dll,LockWorkStation” and click “Next“.
- Give the icon a name, like “Lock Screen“, then click “Finish“.
Now you have a Screen Lock icon you can double-click whenever you leave your desk.You can even take it a step further and pin it to your taskbar. Click it once and lock your screen.

You Might Also Like
Filed Under: Windows Tagged With: Windows 10
How to Disable or Turn Off Windows 10 Lock Screen
7 ways to Disable / Turn Off Windows 10 Lock Screen – using Settings, regedit, gpedit, task scheduler, secpol, and other.
Windows 10 Lock Screen is the first screen you find after powering on the PC. This greets you with an awesome high-quality image but at the same time, it becomes a hindrance to reaching the desktop quickly. As you click the lock screen, the sign-in screen appears that requires username and password or PIN to allow you to access the desktop. This is somewhat a bothersome process so there are users who don’t like the concept of the Lock Screen. By default, the version does not provide any method to Turn Off Windows 10 Lock Screen.
To unlock the Lock Screen is again a process in itself and may be due to this reason, some users avoid this in Windows 10. This article will help those who want to Disable or Turn Off Windows 10 Lock Screen. Here are 7 ways and applying anyone will help you with this work.
Disable or Turn Off Windows 10 Lock Screen
Here is How to Disable or Turn Off Windows 10 Lock Screen –
1] From Accounts Settings
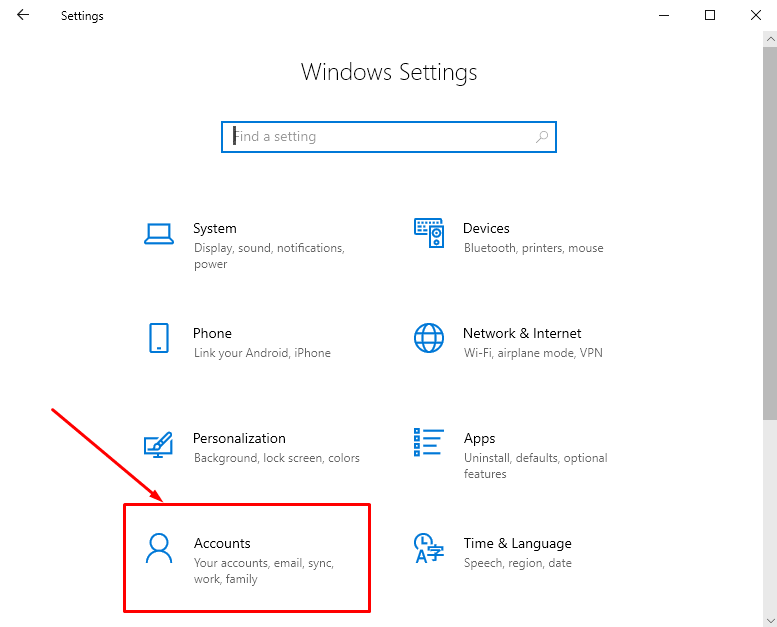
- First of all, press – Win+I.
- Select the – Accounts.
- Click the – Sign-in options.
- Next, click the dropdown under – Require Sign-in.
- Select – Never.

2] Through User accounts
- Click the Search on the taskbar.
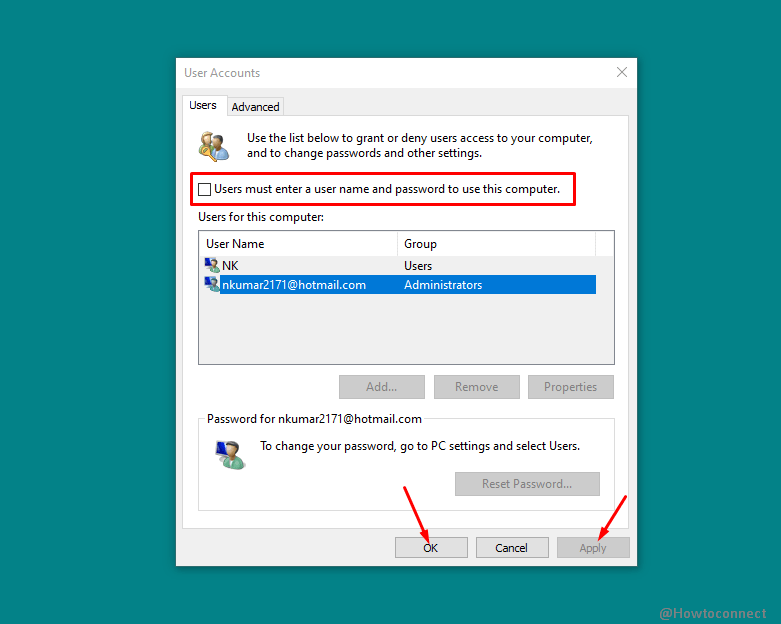
- Type – control userpasswords2.
- Press the – Enter.
- Uncheck the box for – Users must enter a user name and password to use this computer.
- Hit the – Apply and then OK.
3] Via Screen saver settings
The method is applicable to the whom who use Screensaver.
- Press the – Windows key.
- Type – lock screen.
- Hit – Enter.
- Select – Screen saver settings.
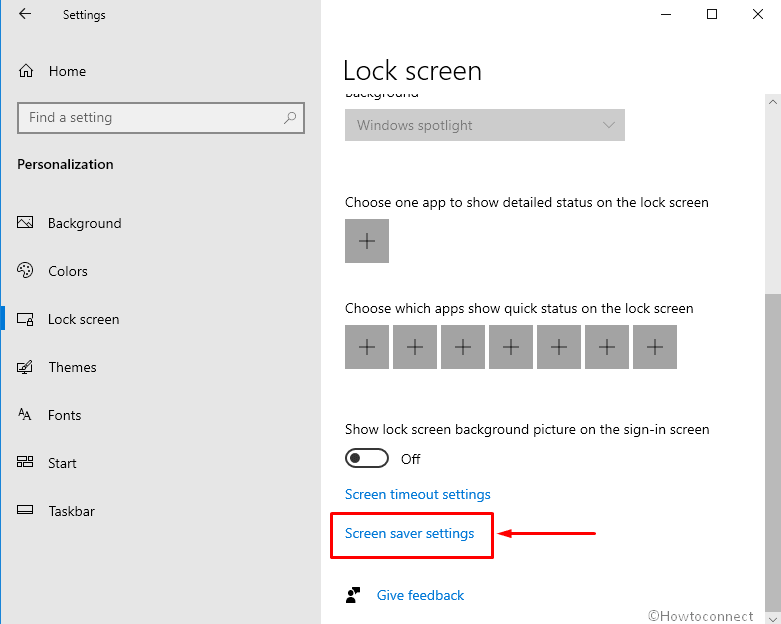
- Next, uncheck the box before – On resume, display logon screen.
4] By Regedit or Registry Editor Turn Off Windows 10 Lock Screen
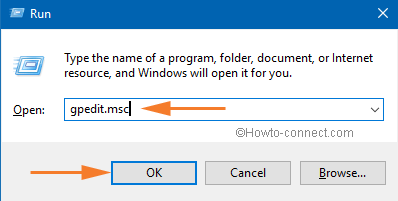
- To open the Registry Editor, first, you have to open the Run Command.
- And to do so jointly press Windows and R keys on your keyboard.
- Type regedit on the text field provided.
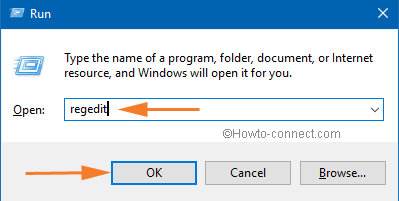
- Click Ok to go to the next step.
- A User Account Control will prompt up asking for your permission.
- Click Yes and allow the Registry Editor to appear on your screen.
- Now you have to navigate the path below to do the changes –
HKEY_LOCAL_MACHINE \ SOFTWARE \ Policies \ Microsoft \ Windows \ Personalization
- Now on the right pane of the Personalization key, create a new DWORD value.
- To do so go to the right pane and right click on the empty area.
- Select the option – DWORD (32-bit) value.
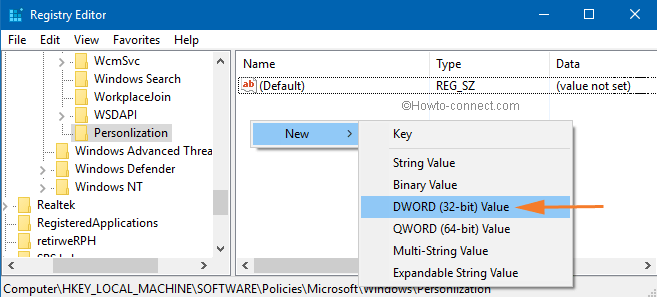
- And name it – NoLockScreen.
- Double click it and on the Edit DWORDValue window set its value data 1.
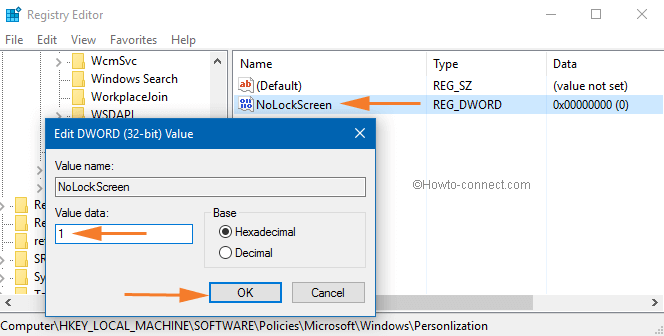
- Click Ok to save the changes.
- Follow the string –
HKEY_LOCAL_MACHINE\SOFTWARE\Microsoft\Windows\CurrentVersion\Authentication\LogonUI\SessionData
- Double click – AllowLockScreen.
- Put in 0 to disable or turn off Windows 10 Lock Screen.
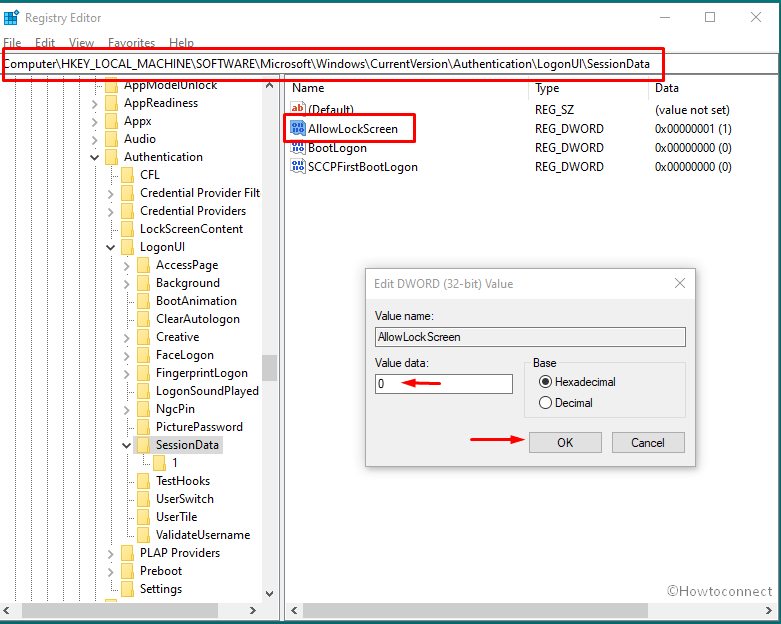
- Exit the Registry Editor.
- Restart the system.
- Lock Screen will be totally disabled now.
5] With help of Gpedit or Group Policy Editor
- Open the Run Command window using the shortcut keys as mentioned above.
- Type gpedit.msc in the command field and click Ok to proceed.
- Local Group Policy Editor window is now in front of you.
- Follow this path –
Computer Configuration \ Administrative Templates \ Control Panel \ Personalization
- Now on the right pane, you can see an option that says – Do not display the lock screen.
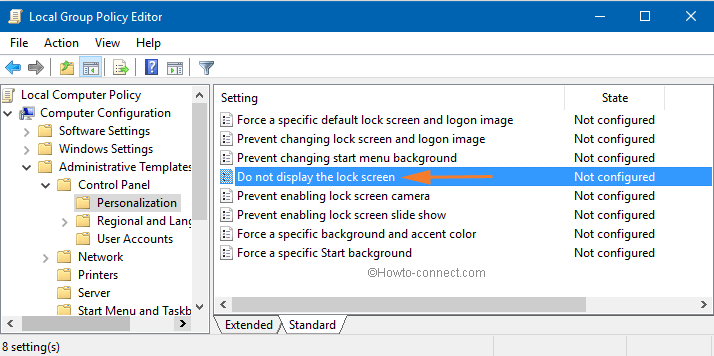
- Double click that option.
- Check – Enabled.
- Click – Apply then – Ok.
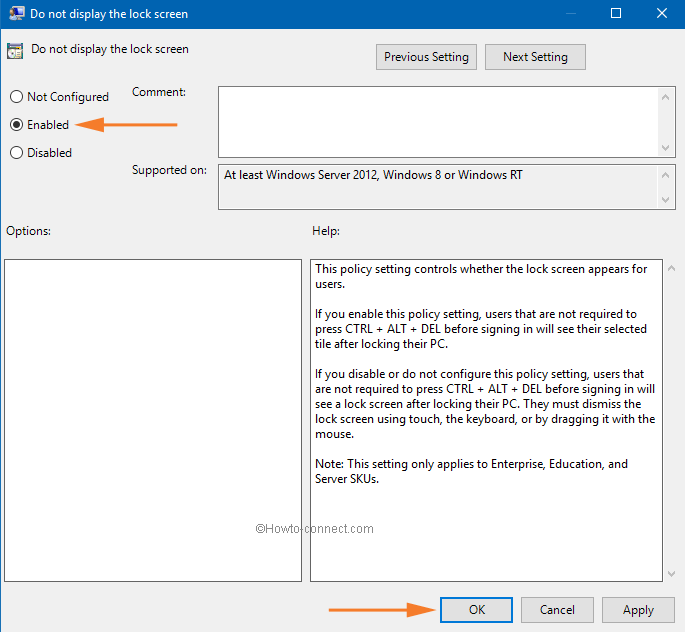
- Restart the system to see the result.
6] Turn Off Windows 10 Lock Screen using Task Scheduler
- Click the start and type in – taskschd.
- Press Enter to open Task Scheduler.
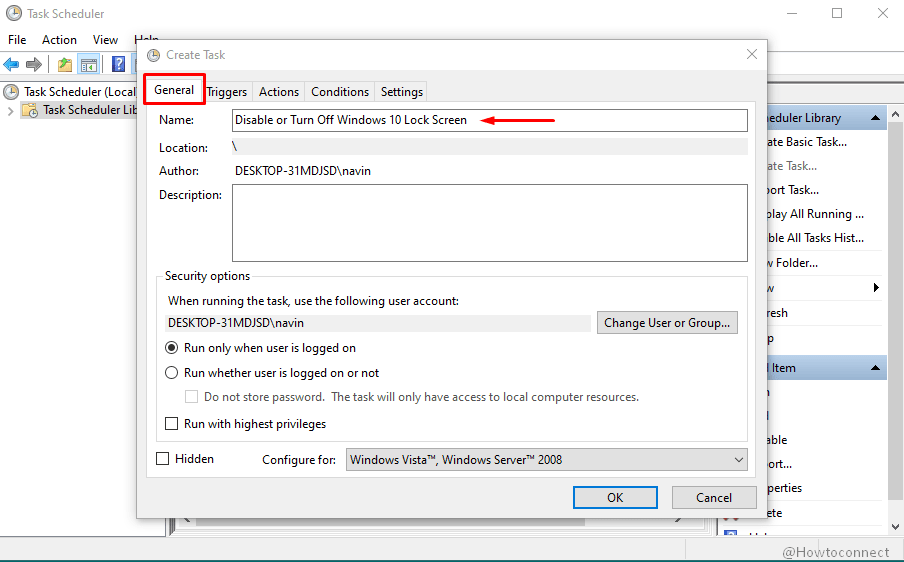
- Select – Create Task from the right pane.
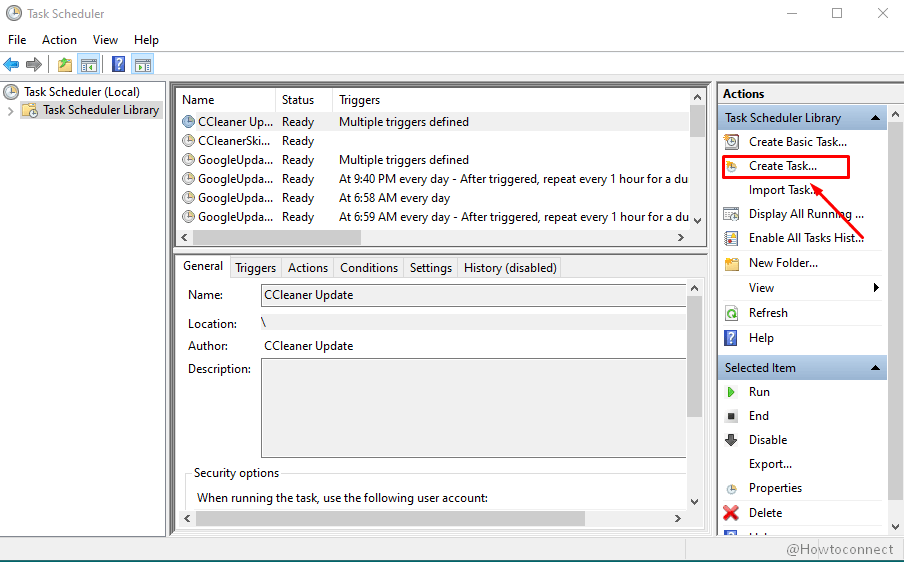
- Name the task – Disable or Turn Off Windows 10 Lock Screen.
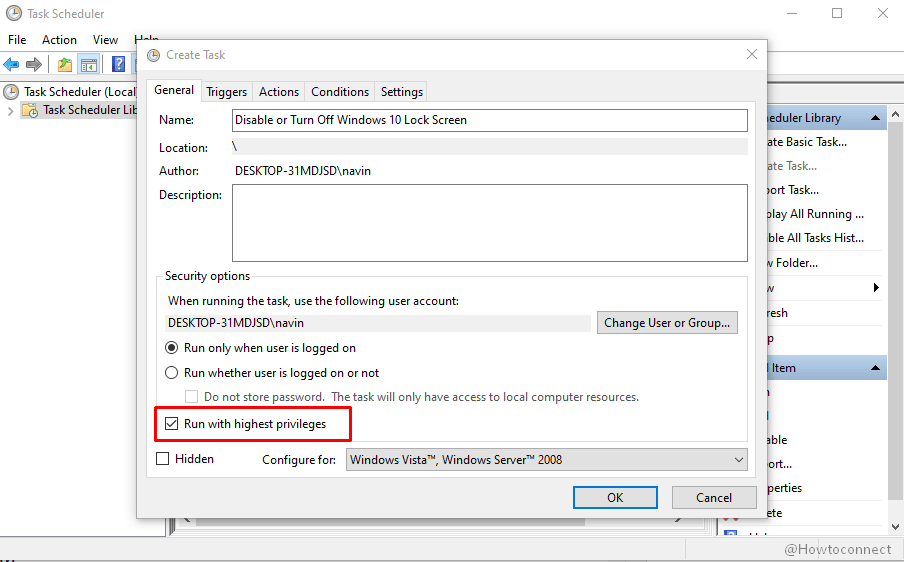
- Check – Run with highest privileges.
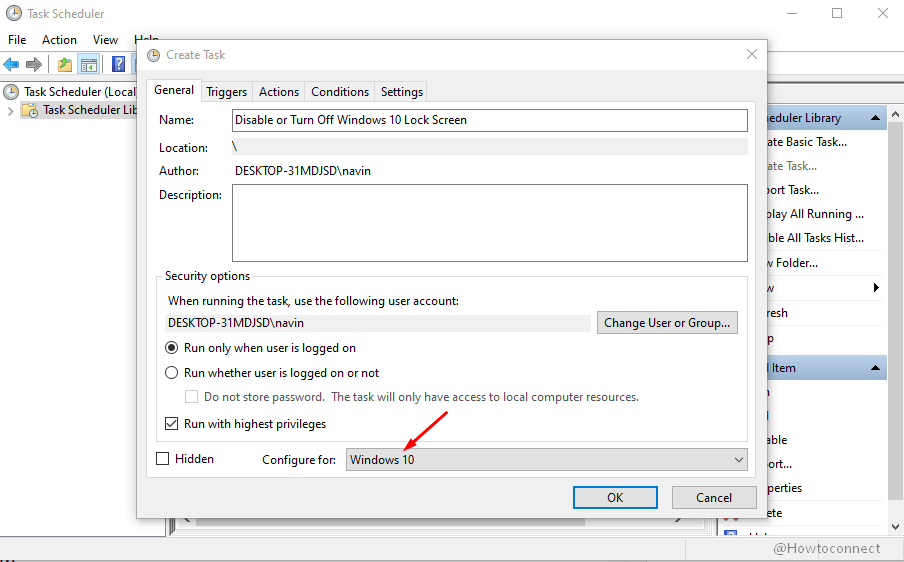
- Click the drop-down after – Configure for: and select – Windows 10.
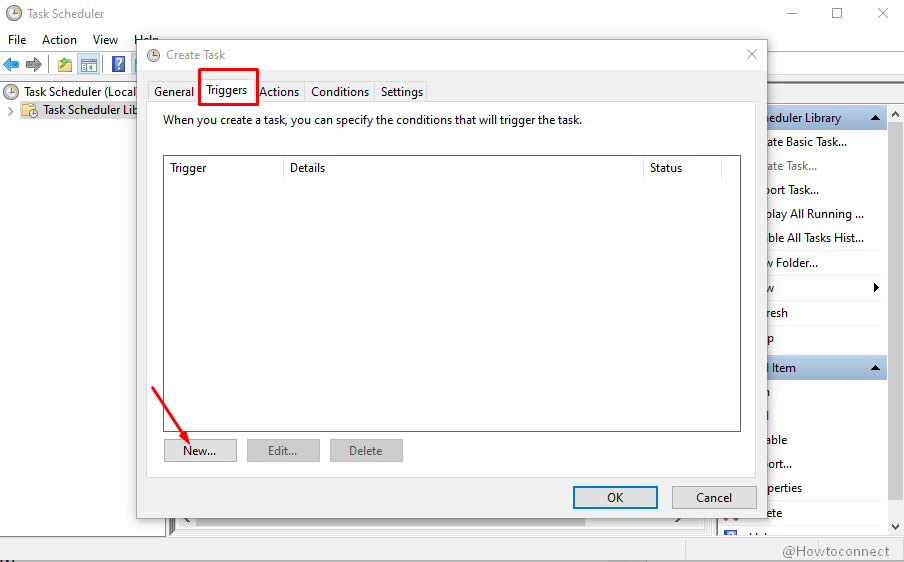
- Next, click the – Triggers tab.
- Select – New.
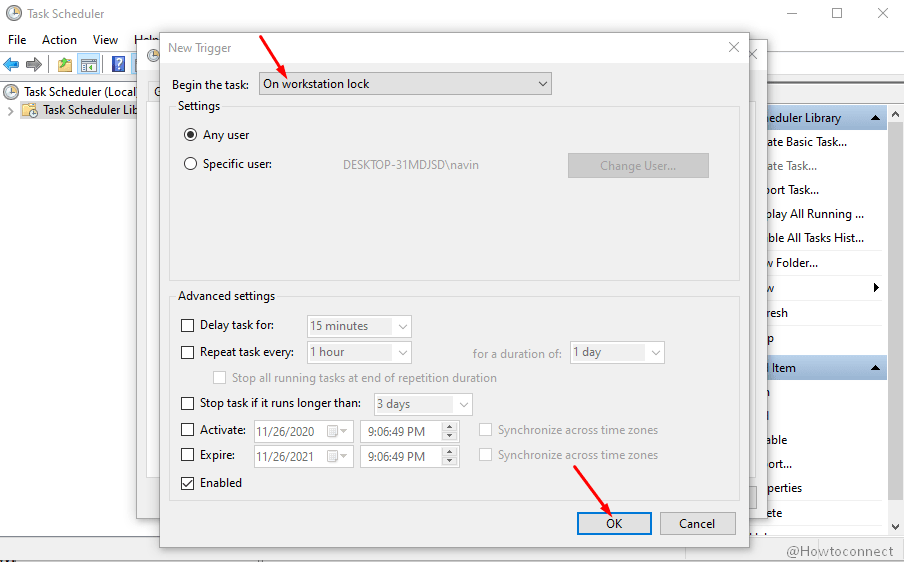
- On the New Trigger window click the dropdown for – Begin the task.
- Select – At logon.
- Click – OK.
- Again, click – New.
- Next, click the dropdown beside – Begin the task:.
- Choose – On workstation lock.
- Select – OK.
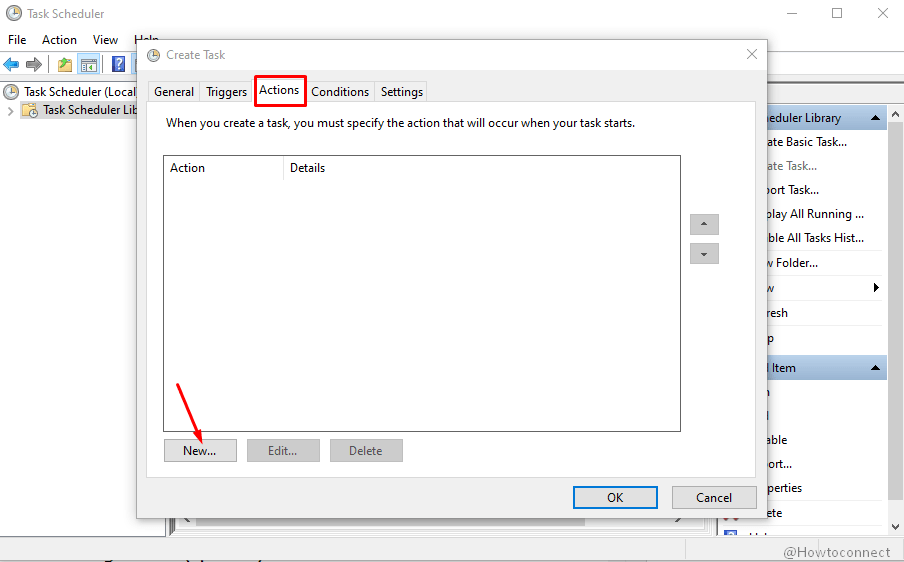
- Click – Actions tab.
- Hit – New.
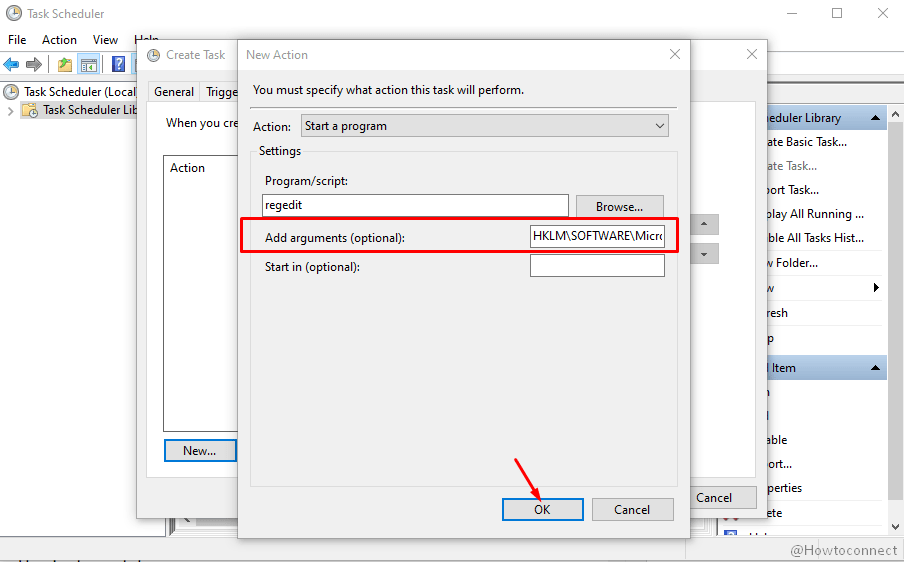
- In the box for Program/script, type – regedit.
- Copy the following path –
add HKLM\SOFTWARE\Microsoft\Windows\CurrentVersion\Authentication\LogonUI\SessionData /t REG_DWORD /v AllowLockScreen /d 0 /f
- Paste in the field for – Add arguement (optional):.
- Click – OK.
- Select – Conditions tab.
- Unselect the box for – Start the task only if the computer is on AC power.
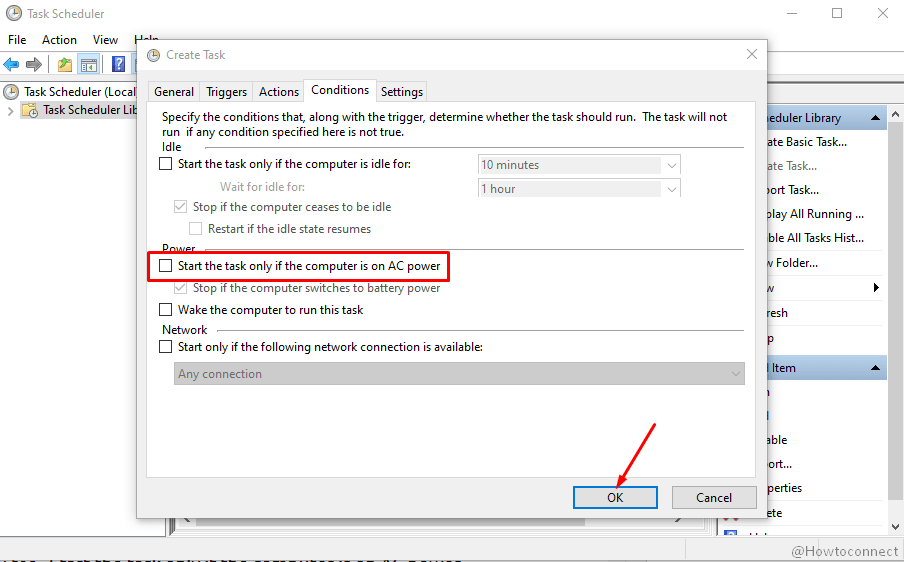
- Hit – OK and close the Task scheduler.
- Restart your system and the method will be effective.


