- What is tiling windows
- What is the difference between tiling and snapping windows on Linux Mint cinnamon
- 1 Answer 1
- 5 Great Tiling Window Managers for Linux
- 2. Ratpoison
- 3. Awesome
- 4. DWM
- 5. Xmonad
- Conclusion
- What Tiling Window Manager for Windows do you recommend? [closed]
- 3 Answers 3
- Windows tiles: What are they? What do they do?
- A brief history of Windows tiles
- What are tiles in Windows?
- How to create a tile in Windows 10
- What do tiles do in Windows?
- Still confused? The differences between a tile and a shortcut
- What do you see in the future of Windows tiles?
What is tiling windows
bug.n – Tiling Window Management
bug.n is a tiling window manager add-on for the Explorer shell of Microsoft Windows. It is written in the scripting language AutoHotkey.
- Provide layouts for resizing and moving windows, utilizing all available screen estate and customizable to your specific needs and workflow
- Provide views (i. e. virtual desktops) for showing only those windows, which you need to do your work.
- Dynamically resize and move your windows, applying a specified layout, without you having to care about moving them all by mouse
- Increase the available screen estate by hiding and therewith freeing up the space occupied by the Microsoft Windows Taskbar and the title bar for every single window and replacing all with a single slim status bar (— but bug.n is not a shell replacement)
- Show window management information in the status bar: active window title, active layout, overview of the views used
- Show system information in the status bar: time and date, CPU and memory usage, disk and network load, battery and volume level
- Store your settings, i. e. which windows and layout were set on a specific view
- Support multiple monitors
What it enables you to do
- You can resize and move windows specified by the active layout and initialized by hotkey.
- You can toggle the visibility of the Windows Taskbar.
- You can toggle the visibility of the Windows title bar of the active window.
- You can change the layout for the tiling window management suitable to your needs.
- Tile: Lay out all windows like tiles on a master area, which can be further split up, and a stacking area, where remaining windows can be stacked or shown side by side.
- Monocle: All windows are maximized and only one is shown at any time.
- Floating: Windows are not dynamically tiled.
- You can further customize the layouts for each view.
- You can move windows to another view (virtual desktop) by tagging them with a number.
- You can share windows between views by tagging them with more than one number.
- You can move between views, hiding the windows, you do not want to see, and showing those, you want to see, by pressing a simple hotkey.
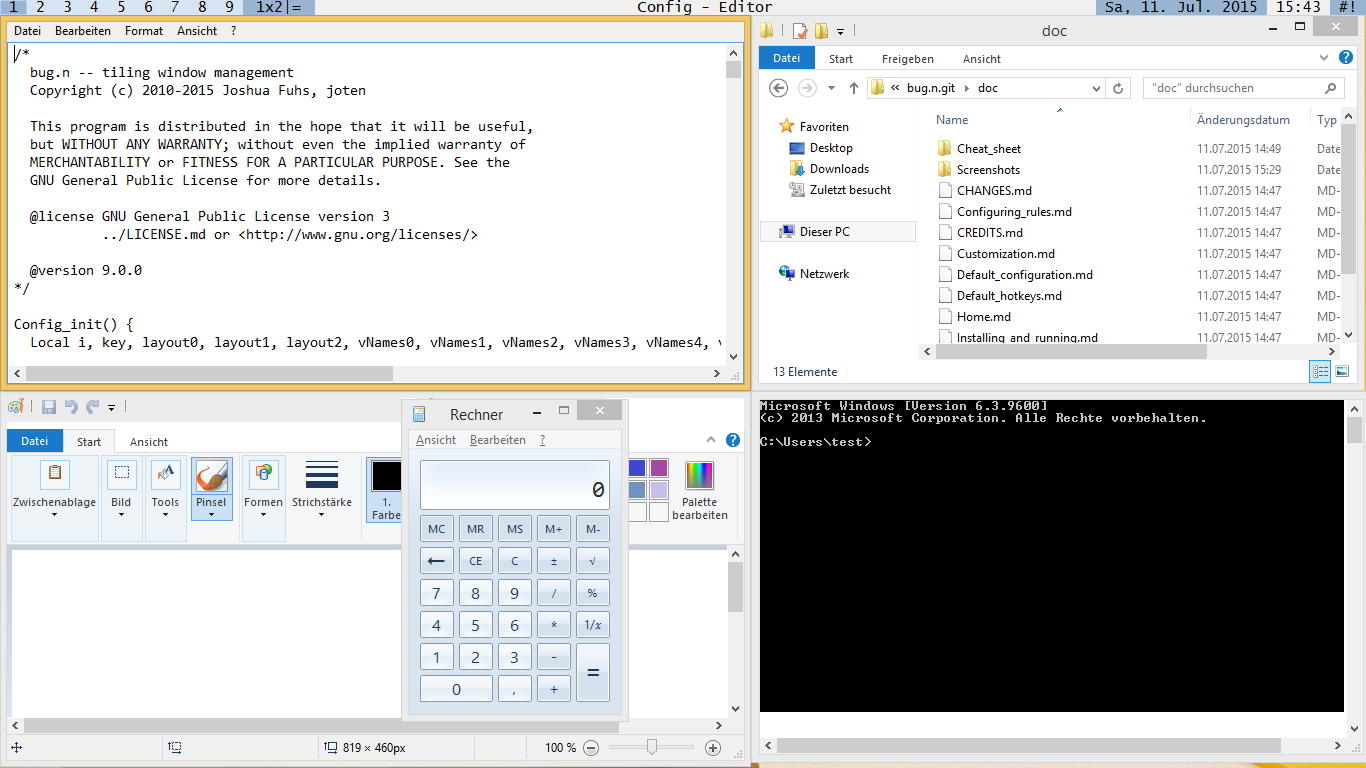
What it can look like
Installing and running bug.n
- Microsoft Windows 2000 or higher
- AutoHotkey 1.1.10 or higher (if running bug.n from source as a script)
You may either download the stable version of bug.n from the repository, or download the current development version as the repository itself. Either way, you will have a zip file including an executable ( bugn.exe ), the source ( src\* ) and documentation ( doc\* ) files.
There is no installation process for bug.n. Unpack the zip file, and you should be able to run either the executable as it is or the main script ( src\Main.ahk ) with AutoHotkey.
Please see the documentation for more information on installing and running, customizing and using bug.n and for a list of changes made with the current version, in particular the changes in the user interface (configuration variables and hotkeys).
Please see the CREDITS file for a list of people and projects, which contributed to bug.n.
bug.n is licensed under the GNU General Public License version 3. Please see the LICENSE file for the full license text.
Currently, there are two branches:
- master , the current stable version (v9), which is no longer actively developed or maintained;
- X , a development version (v10), which is a rewrite of bug.n and in alpha stage, but development is dormant.
What is the difference between tiling and snapping windows on Linux Mint cinnamon
I am using Linux Mint 19.1.
When I enter window tiling settings it is described as.
Enable Window Tiling and Snapping
In addition is has the settings.
Show tile heads-up-display
As well, when I hover the window near the edge is says.
Hold ctrl to enter snap mode
But I can not for the life of me figure out what is different between these two concepts. Holding ctrl to enter snap mode just turns the tiling boxes green.
Then only behaviour I see is windows being tiled to full, half and quarter sizes.
1 Answer 1
I was wondering the same thing and finally found the answer:
Visually, the two modes have nearly identical behavior, which is why it’s confusing. As you noticed in both modes, the window you’re dragging will take up the full, half, or quarter of the screen.
But when you use the modifier key (Ctrl by default) to switch to snapping mode, the window you snapped will be considered «part of the screen real estate.» That means other windows you maximize will try to avoid the space occupied by the snapped window. If you tile rather than snap (i.e. the default if you don’t use ctrl), maximized windows will simply cover it.
So the difference between the two modes is not really with the behavior of the current window you’re snapping, but with the behavior of other windows that you maximize later on.
You can hold a modifier key (defaults to Control) to toggle into “snap” mode – this is unique in that a snapped window will be considered part of the screen real estate, and maximized windows will avoid snapped windows. Tiled windows (unmodified) are treated just as before – they are ‘stuck’ to the screen edge, but don’t receive any special treatment.
5 Great Tiling Window Managers for Linux

Desktop environments are great, but they’re not for everyone. Some people just can’t stand the bloat that these desktops bring. That’s where tiling window managers come in. Tiling window managers are usually the most favored out of all the window managers out there. They’re usually great when it comes to memory usage (which is a great option if you don’t have a lot of ram on your machine) and are almost always customizable. Tiling WMs don’t require a panel or anything fancy like that. Just install and start getting stuff done!
If you’re looking for a way to use Linux that is bloat free, tiling window managers might just be what you’ve been looking for.
i3 is a dynamic tiling window manager. It has clean and fully documented code that makes it real simple to modify and tinker with. It supports xinerama and makes use of libxcb instead of xlib. With extremely easy to remember keybindings, using i3 is extremely enjoyable, even without the need for a mouse.

2. Ratpoison
Ratpoison is a simple window manager that has “no fat library dependencies”. The developers boast that it has no “fancy graphics” or “decorations” of any kind, just a straight-up tiling window setup. Ratpoison is easy to get around in. All of the interactions with your windows are done with keyboard shortcuts.

3. Awesome
Awesome has a unique take on the concept of a tiling window manager. It is probably the most user-friendly on the list. Much like i3, it claims to have well-documented code to make it very easy to dig right into for modifications. It adheres to FreeDesktop standards (Desktop notifications system, system tray, etc.) and has great keybindings which make navigating with it effortless.

4. DWM
DWM is, well, a dynamic window manager. Tiling isn’t the only way you can manage your windows. It’s also possible to lay the windows out in a floating or monocle style. All modifications to DWM can be done within its source code. Easy keyboard shortcuts allow for a great navigation experience while managing windows.

5. Xmonad
Xmonad is a tiling window manager written in Haskell. Like most (if not all) window managers, it comes with no frills or window decorations. The keyboard shortcuts are top notch. It works out-of-the-box and is very user friendly. On top of all that, Xmonad sports a fairly big extension library (which can add on even more functionality).

Conclusion
Tiling window managers are very cool. Admittedly, they do have a bit of a barrier to entry. Seeing as how (with most) you can’t just learn everything by exploring, you have to crack open the manual and learn how it works. For the most part, it’s great, but it takes a special kind of person to want to do that.
This way of using a computer is definitely niche. Still, it is by no means inferior. What these window managers lack in visual beauty,they make up for in functionality. Some users don’t want pretty. They want functional. Every single WM on this list delivers in that department.
Is your favorite Tiling WM not on this list? Tell us your favorite in the comments below!
Derrik Diener is a freelance technology blogger.
What Tiling Window Manager for Windows do you recommend? [closed]
What is the best tiling window manager for Windows?
I’m looking for something like awesome .
It would be nice if it removes the title bar and has «comfortable» shortcut keys (for me that’s vi keys, but feel free to use your own reference). Open source would be a plus.
3 Answers 3
bug.n is nice, and Open Source. 🙂

joten for bug.n – Ed Brannin Jun 22 ’10 at 14:11
It doesn’t remove title bars, but you can use Winsplit Revolution to use create keyboard shortcuts for regions («tiles») on your screen.

- WindowSizer — Tiles windows (shareware)
- WinSplit — Tiles windows using keyboard shortcuts (freeware)
- HashTWM — Tiling window manager with automatic tiling (MIT/X11)
- GridMove — Tiles and arranges windows on sophisticated layouts with hotkeys and multi-monitor support (freeware/donationware)
- bug.n — Dynamic, tiling window manager, which tries to clone the functionality of dwm (see list of X window managers) (GPL)
- MaxTo — Tiles windows on user-defined grid by intercepting windows that are maximized or using hotkeys. Supports multi-monitor setups (shareware)
- Twinsplay — Tiles windows using keyboard shortcuts (trial/closed source)
Windows tiles: What are they? What do they do?
While the old and familiar desktop shortcuts continue to be reliable, the Windows 10 Start Menu includes a different way of launching and organizing things, using a concept called Windows tiles. Everyone has an opinion about Windows tiles. In spite of Windows 10 being one of the most customizable operating systems to date, the debate rages on between Team Tiles and Team Tiles Suck (also known as hardcore Windows 7 fans). Love them or hate them, tiles are here to stay in the Windows 10 Start Menu, so let’s learn more about what Windows tiles are and what they can do for us:
A brief history of Windows tiles
The arrival of Windows 8 was the first time Microsoft inflicted the tiles feature on average, unsuspecting computer users. Considering that the Start Menu has always been a vital part of the Windows operating system, a vast majority of users were dismayed to see this pillar-feature of the operating system being replaced by tiles and by the Start screen in Windows 8 and Windows 8.1. There was a huge screen instead of a Start Menu, and it was filled with a concept that they weren’t familiar with: tiles.
After the initial shock wore off and as tiles became more popular (also thanks to Windows Phones, the first devices introducing tiles), some users recognized the advantages they had to offer. In direct contrast with its predecessor, the Windows 10 Start Menu appears to have evolved as a compromise between the classic Windows 7 Start Menu and the informative tiles of Windows 8, resulting in something more useful to desktop and tablet users alike. The picture below shows this evolution.
Still controversial, the tiles of Windows 10 are better received than they were in Windows 8, because more users are familiar with the concept, and recognize the improvement they bring to the Start Menu. For those of you who do not know what they are, and why they are an improvement over traditional shortcuts, read on.
What are tiles in Windows?
A tile is a type of shortcut you can only find in a grid, on the right side of your Windows 10 Start Menu. Colorful, sometimes animated, and larger than the regular sized icons used for desktop shortcuts, Windows tiles come in four different sizes. You can learn how to resize tiles in Windows 10 and manage groups of tiles, organizing the Start Menu according to your needs and preferences. Depending on their size, Windows tiles can display plenty of information from the apps they represent, or they can be as small as a simple medium-sized icon. In the screenshot below, you see all the sizes that tiles can have in Windows 10: large, wide, medium, and small.
Simply put, Windows tiles are the next step in the evolution of the Start Menu shortcuts.
How to create a tile in Windows 10
It’s easy to create a tile in Windows 10. First, open the Start Menu either by pressing the Windows button on your keyboard or by clicking or tapping Start. By default, the Start Menu shows shortcuts for all the apps on your Windows 10 computer or device, displayed in alphabetical order. Scroll until you find the app you want to add as a Windows tile and right-click or press-and-hold on it – we are using the Alarms & Clock app. From the contextual menu, click or tap on “Pin to Start.“
You can also click or tap on the Start Menu shortcut of an app to grab it, and then continue holding down the mouse button while dragging the app into the tile section. Drop the tile to a convenient position in the Start Menu grid.
Another way to create a tile is by using your taskbar’s search field. Type in the name of your app. Then, from the options on the right-hand side of the flyout, click or tap on “Pin to Start.“
Your new tile is added. You can keep an eye on it to see your upcoming alarms in the Start Menu, or you can use it to access the Alarms & Clock app.
TIP: Alarms & Clock is one of our favorite built-in apps. You can use it to create alarms and set timers on your Windows 10 computer or device.
What do tiles do in Windows?
Tiles are shortcuts for Windows 10 apps available in the Microsoft Store. If you click or tap on a Windows tile, the respective app is launched. If you want to open the Weather app, for instance, all you have to do is click or tap on its tile, and you get a detailed weather forecast. Windows tiles can be designed to display information in real time, from the app they point to. This is what makes them different and more useful than traditional shortcuts, as they help users see relevant information and content without having to open the apps they point to. The Weather app and the Calendar app are perfect examples of this. One look at the Windows 10 Start Menu below and you can see the (disappointing) weather forecast and my (intricate and busy) schedule, without actually opening any app, just from the information displayed by their tiles.
The information that tiles display can be presented in various forms, depending on how the Windows tile is designed, ranging from simple text to an image or even a set of images. The Mail app, for instance, sequentially displays your newest emails, and, in the bottom right corner, it shows the number of unread messages in your Inbox. Another example is the Sports app (highlighted below) that shows you the title of the latest sports news, and a picture relevant to each story shown on its Windows tile.
You decide which Windows tiles to use, if any, and the amount of information they display. Because live tiles can provide live updates to the user, in many cases, their ongoing notification state creates an animation effect that toggles between different sets of information, causing some users to find them too flashy and distracting. This explains why some desire a functional, simple Start Menu. Windows 10 allows you to turn live tiles off, converting them into static tiles, which only display the name and logo of the app.
On the other hand, if you can’t get enough tiles in your Start Menu, consider looking into how to show more tiles on Start, in Windows 10.
Still confused? The differences between a tile and a shortcut
Although Windows tiles are a type of shortcuts, they should not be confused with regular Start Menu shortcuts for desktop apps like Firefox, Google Chrome, Adobe Reader, and others. Here are the differences between tiles in Windows 10, and traditional shortcuts:
Let’s discuss these differences in more detail:
- If an app is not distributed through the Microsoft Store, then a Windows tile for that app is not available, only a traditional shortcut. That’s because only traditional desktop apps, like those from Windows 7, can be distributed outside of the Microsoft Store. Yes, you can pin shortcuts for desktop apps to your Start Menu, but it is essential to acknowledge that, although these shortcuts are shown inside squares that look just like Windows tiles, they are not tiles. To make things even more confusing, the Microsoft Store contains some desktop apps like iTunes, that do not use tiles, but traditional shortcuts. Therefore, tiles can only point to Windows 10 apps from the Microsoft Store, and not to desktop apps that also run on older Windows versions such as Windows 7.
- Tiles can display live data from their apps. However, not all Windows tiles are animated all the time. Users can turn off the display of live data if they want to.
- Tiles can be a lot larger than shortcuts. You can resize them using the four available sizes, while traditional shortcuts only support two sizes.
- When you right-click (or press and hold) a Windows tile, you get access to options that are not available for shortcuts: you can turn the live data display on or off, you can go directly to the app’s settings, rate and review the app in the Microsoft Store, and share it with others. Shortcuts, unlike Windows tiles, offer you the option to run their apps as administrator. Tiles do not, because Windows apps that have tiles are limited by Microsoft, so running them with administrator permissions is not an option.
To illustrate, we have Mozilla Firefox “playing the part” of the shortcut and Skype in the role of the static tile. While the app tiles can usually be Small, Medium, Wide and Large, shortcuts only come in Small and Medium. To see the available sizes, right-click the tile, or tap and hold (if you have a touchscreen) and then access the Resize menu.
The More menu is also a reliable way to tell Windows tiles from shortcuts. Tiles usually offer the options to “Turn Live Tile off,” “Rate and review,” and Share, also allowing the user to access App settings. As you can see, Mozilla Firefox, being a desktop app with a traditional shortcut, does not offer these options. However, you do get the option to “Run as administrator,” which is not available for Windows apps with tiles.
What do you see in the future of Windows tiles?
We hope this guide helps you get a better perspective of Windows tiles and how they can help you create a balanced and efficient Start Menu. We believe this is not the end of the road for Windows tiles and we are going to see more of them in the future. Maybe we will be able to drag them all around the screen and use them as live tiles on the desktop, or perhaps we will get to further customize the content they display. Before you close this article, let us know in a comment below how you would like the tiles to evolve in Windows 10. How would you make them better?


