- Ubuntu Wiki
- VPN setup in Ubuntu – General introduction
- PPTP (Microsoft VPN)
- Cisco VPN
- OpenVPN
- IPSec VPN
- Usage
- VPN setup in Kubuntu Feisty (7.04)
- VPN setup using the command line
- VPN setup in Ubuntu 8.10
- VPN setup in Ubuntu 9.04
- VPN setup in Ubuntu 9.10
- VPN setup in Ubuntu 10.04
- Set up a Linux VPN Server using OpenVPN – Step-by-Step Guide
- Why Use a Linux VPN Server
- Prerequisites:
- Set Up a Linux VPN Server with OpenVPN Access Server
- Set up a Linux VPS Server with OpenVPN for Tunnelling
- How to Connect Your Linux VPN Server to Other Devices with OpenVPN
- How to Install and Connect the OpenVPN Client for Windows
- How to Install and Connect the OpenVPN Client for MacOS
- How to Install and Connect the OpenVPN Client for Linux
- How to Install and Connect the OpenVPN Client for Android
- How to Install and Connect the OpenVPN Client for iOS
- Linux VPN Server Compression Settings
- Add Users to a Linux VPN Server Running OpenVPN
- Set Up Auto-login Profiles for a Linux VPN Server with OpenVPN
- How to Test a Linux VPN Server running OpenVPN
- Wrap Up
Ubuntu Wiki
VPN setup in Ubuntu – General introduction
VPN (Virtual Private Network) lets you establish a secure connection over the non-secure Internet, e.g. from a notebook to an office server.
Getting a VPN to work requires general knowledge on networks, and it may require some specific knowledge on routers, firewalls and VPN protocols.
In order to use VPN on Ubuntu, you need to make sure that support for the required VPN protocol is installed. Several VPN protocols exist:
PPTP (Microsoft VPN)
Cisco VPN
OpenVPN
IPSec VPN
Not covered on this page, so far
Usage
- Click on the network-manager in the system tray
Choose VPN Connections -> Configure VPN
Click Add
You might have to restart the network-manager to get the added VPN connection on the list (killall nm-applet; nm-applet &)
VPN setup in Kubuntu Feisty (7.04)
You have to install the additional package
Please refer to WifiDocs/NetworkManager under VPN support for more information.
VPN setup using the command line
Run the following:
Create file /etc/ppp/peers/YOUR_COMPANY with this content:
Add to /etc/ppp/chap-secrets:
Create file /etc/ppp/ip-up.d/add-subnet with content similar to:
In the above line, adjust subnet values (192.168.100.0/24) if needed
— Connect to VPN: sudo pon YOUR_COMPANY To disconnect, press Ctrl+C or close the terminal.
— If you do not want to see VPN connection debug output, in file /etc/ppp/peers/YOUR_COMPANY delete 3 lines: debug nodetach logfd 2
In this case, “pon YOUR_COMPANY” will run as a background process. Use “poff YOUR_COMPANY” to disconnect.
VPN setup in Ubuntu 8.10
I stole these instructions written by mgmiller from http://ubuntuforums.org/showpost.php?p=7089396&postcount=196. This is for connecting to a Microsoft VPN.
- You need to install 2 packages:
- network-manager-pptp
- pptp-linux
If you do the first, it will install the second as a dependency. Open Network Configuration (System, Preferences, Network Configuration). Highlight your VPN connection, hit Edit. At IPv4 Settings Tab: choose method Automatic (VPN). At VPN Tab:
- input the IP address of the target computer.
- input your user name. Leave all else blank, unless you are tunneling to a domain, then enter the domain name where indicated.
- hit Advanced button.
At Authentication:
- UNcheck PAP (because PAP means to allow unsecured passage — this is the source of «no shared shared secrets»)
- Check CHAP, MSCHAP and MSCHAPv2.
At Security and Compression:
- Check Use Point-to-point encryption (MPPE)
- Select 128-bit (most secure).
- Check Allow stateful encryption.
At Echo: check Allow PPP echo packets. Leave all else blank. Hit OK, OK to save and get out.
VPN setup in Ubuntu 9.04
I could not get any VPN working on 9.04. There appears to be some bugs in the configuration tools, you may be able to get things to work via the command line.
VPN setup in Ubuntu 9.10
The following instructions were originally written by sweisler at http://ubuntuforums.org/showpost.php?p=8261958&postcount=6. They have been additionally tested for PPTP to an MS VPN:
- Here’s a synopsis of my VPN setups. I have proven this to work on both x86 and x64 for all 3 VPN types. Important note/disclaimer: I tested these configurations on VMware Workstation 7 VM’s and a Dell Vostro 220. All installations were fresh installs, not upgrades. Also, please notice that I detail what type of firewall/VPN I am connecting to for each VPN type. There are so many variations on these VPN implementations that it is extremely difficult to generalize a known-good configuration for each.
- Install various VPN components
- PPTP
- pptp-linux
- network-manager-pptp
b. VPNC
- vpnc
- network-manager-vpnc
c. OpenConnect
- openconnect
- network-manager-openconnect
- PPTP
- Reboot
- PPTP VPN Configuration — This setup works for connecting to ISA 2004/2006 PPTP VPNs. It should work for connecting to MS PPTP VPN implementations in general. I can’t speak for other PPTP VPN implementations.
- Create new PPTP connection
- VPN Tab Settings
- Set Connection name
- Set Gateway
- Set username (for domain-based user accounts, use domain\username)
- DO NOT SET PASSWORD
- DO NOT SET NT DOMAIN
- PPTP Advanced Options (Advanced button)
- uncheck all auth methods EXCEPT MSCHAPv2
- check «Use Point-to-Point encryption (MPPE)»
- leave Security set at «All Available (Default)»
- trying to force encryption level causes this option to become unset
- check «Allow stateful inspection»
- uncheck «Allow BSD Data Compression»
- uncheck «Allow Deflate Data Compression»
- uncheck «Use TCP Header Compression»
- uncheck «Send PPP Echo Packets» (although connection works either checked or unchecked)
- save configuration
b. Initial Connection attempt
- enter password in login box
- DO NOT check either password save box at this time
- once connection establishes, verify remote connectivity — ping, rdp, ssh, etc.
- disconnect VPN session
c. 2nd connection attempt
- enter password in login box
- check both password save option boxes
- once again verify remote connectivity
- disconnect VPN session
d. Subsequent connection attempts
- VPN session should automatically connect using saved auth credentials
- Create new PPTP connection
- VPNC VPN Configuration — This setup works connecting to an ASA5510 — software version 8.2(1). I didn’t have any other Cisco devices to test against.
- Create new VPNC connection
- set connection name
- set Gateway
- set Group Name
- set User Password to «Saved» and enter password
- set Group Password to «Saved» and enter password
- set username
- set domain (if applicable)
- leave Encryption Method at «Secure (Default)»
- set NAT traversal to «NAT-T»
- save configuration
b. Initial Connection attempt
- open VPNC connection
- if prompted, select «Always Allow» if you want connection to be automatic
- verify remote connectivity — ping, rdp, ssh, etc.
- disconnect VPN session
c. Subsequent connection attempts
- open VPNC connection — session should automatically connect
OpenConnect VPN Configuration — This setup works connecting to an ASA5510 — software version 8.2(1). I didn’t have any other Cisco devices to test against.
Create new OpenConnect connection
- set connection name
- set Gateway
- set Authentication type to «Password/SecurID»
no need to set username, OpenConnect won’t store it yet
- Create new VPNC connection
- save configuration
b. Initial connection attempt
- open VPN connection
- check «Automatically start connecting next time»
- click Close
- you will get the «No Valid VPN Secrets» VPN failure message
c. 2nd connection attempt
- open VPN connection
- accept certificate (if prompted)
- change Group (if necessary)
- enter username (may need to be domain\username)
- enter password
- click Login
- if VPN connection fails, see note below
- verify remote connectivity — ping, rdp, ssh, etc.
- disconnect session
d. Subsequent connection attempts
- open VPN connection
- enter password
- session should connect
Note: If you get the «Login Failed» message, cancel and wait 15-30 minutes before attempting to connect again. Also, I ended up having to use the NT style domain\username pair for authentication, even though a Cisco AnyConnect client connecting to the same ASA only requires username.
More Detail: OpenConnect has been brutal to get connected. I got failed attempt after failed attempt. When I checked the NPS (IAS) log and the Security Event log on the W2K8 domain controller, I could see my user account authenticating properly via RADIUS from the ASA. Yet the OpenConnect client came back with a «Login Failed» message. I’m not an ASA expert, so I have no idea what to check in the ASA configuration to troubleshoot this problem, other than the basic AAA configuration. But I believe the problem lies in the ASA configuration because when I get the OpenConnect «Login Failed» message, the AnyConnect client from my Windows laptop fails as well. I think it may be a ridiculously short timeout or max failure setting. Whatever the issue is, I have to wait for some length of time (
15-30 minutes) for whatever the problem is to reset.
However, once I finally get the OpenConnect client to successfully connect, it worked from then on. (Just don’t mess with the connection configuration, or you will get to go thru this whole process again.)
VPN setup in Ubuntu 10.04
Ubuntu 10.04 comes preinstalled with VPN support.
This features is available under the networks connections tab.
Источник
Set up a Linux VPN Server using OpenVPN – Step-by-Step Guide
VPN stands for Virtual Private Network. One such open source VPN software is OpenVPN and it can work as a Linux VPN server. At a basic level, a VPN secures connections by creating a point to point secured connection. Using a good VPN for Linux is one of the best ways to remain secure over the Internet or an open network. In this tutorial, we’ll show you how to set up your very own Linux VPN server using OpenVPN. Turn your VPS into an amazing security measure!
Why Use a Linux VPN Server
VPN comes with certain benefits. Few of these are highlighted below:
- Security – VPN provides better and stronger protection since all data is encrypted. This provides additional security as compared to Firewalls.
- Remote Access – to ensure high security, many organizations, government and defense offices allow remote access only through their VPN
- ISP encryption – ISP stands for Internet service provider. If you use a public Wi-Fi connection, the ISP can read all your unencrypted data. By using a VPN, you can keep your data secure and encrypted by not allowing even the ISP to read it.
- Anonymity – a VPN lets users maintain anonymity while browsing over the Internet. The IPs are not traceable.
- IP Change – VPN allows users to change their IPs and browse safely. This in certain cases is used in regions that have location-based restrictions
- Unblock websites – certain websites are blocked in a few geographical regions. A VPN maintains anonymity and hence is commonly used to bypass Internet censorship to unblock websites
- Throttling – certain ISPs throttle user bandwidth based on the content. Such throttling can be avoided by using a VPN
At a higher level, a VPN makes your transactions secure by using encryption.
Having showed you the benefits of a VPN, here we will demonstrate how to set up and install OpenVPN software on Linux. We’ll cover the setup of a Linux VPN server using OpenVPN and how to connect it to Windows, Android and other devices. And if you want to learn more about the OpenVPN protocol, I suggest you reading this OpenVPN review.
Prerequisites:
- You should have root access or sudo privileges
- Should not have OpenVPN pre-installed
- The firewall should allow TCP traffic over port 943 and UDP traffic over port 1194. We recommend using UFW. Check out our UFW tutorial to learn everything you need to know
Set Up a Linux VPN Server with OpenVPN Access Server
First, let’s update the system. For CentOS use:
For Ubuntu and Debian update the indexes using:
To install OpenVPN you will require a net-tools package. Install this if you do not have it preinstalled. The net-tools package contains ifcfg which is needed for OpenVPN server installation.
You can install this for CentOS using:
For Ubuntu and Debian, you can use the below command:
You can download an OpenVPN client for your distribution from the OpenVPN website. You can get the link from here and use it along with the curl command. A sample curl command for Ubuntu is as shown below:
For CentOS the curl command will be:
Here you can add the URL to your distribution. To validate that the correct installation is downloaded, print the SHA256 checksum. You can use the below command:
This will print the checksum as shown below:
You can compare this downloaded binary’s checksum with the one provided on the website. If the checksum matches install the previously downloaded binary.
To install in CentOS use:
Similarly, in Ubuntu and Debian you can use the below command in the command line:
This will take some time to install. Once the installation is complete you will be shown the Admin UI and the Client UI details. By default, an openvpn user will be created during this installation. You can set the password for this user using:
This will set your new password. Remember the password since it will be used to log in. Use the admin URL to login and finish the installation process. In our case, the admin URL is – https://31.220.111.160:943/admin. Normally the URL is simply your VPS address, the :943 port with /admin at the end, as in the example.
You will be able to see a screen as shown below:
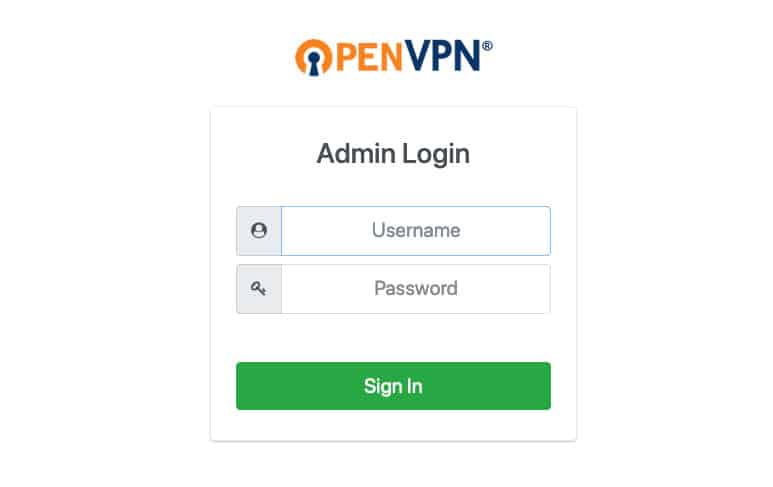
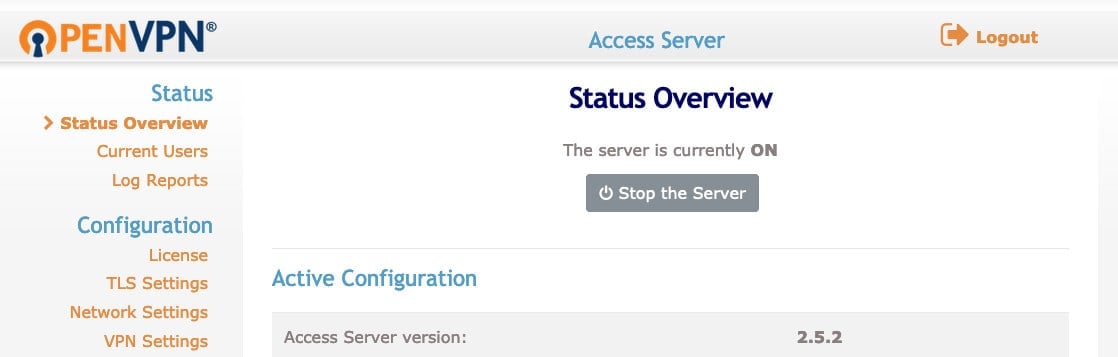
The username – as mentioned before – is openvpn and the password is the one you just set for this user. Once you login you will be able to see a Terms and Conditions page. Read it and press the Agree button to proceed. The next page will provide you with configuration details and indicate that the server is status.
The default settings are good enough and can allow MacOS, Linux, Windows, Android, and iOS to connect to the Linux VPN server. In case you want to change any settings, make sure to click Apply and Update Running Server to enable the changes.
This completes the default installation. Next, we will set up the OpenVPN tunnel.
Set up a Linux VPS Server with OpenVPN for Tunnelling
Enable IP forwarding in your kernel by using the below command:
This enables traffic forwarding over IPv4. To apply these changes, use the below command:
OpenVPN does not support simultaneous tunnels over IPv6 and IPv4, so you can disable IPv6 using:
To disable IPv6 manually, add the below parameters to be set on boot. These parameters should be added to the 99-sysctl.conf file located at /etc/sysctl.d/. Simply use the cd command to access the folder, and use your preferred text editor to edit the file. Remember to save the changes made!
Next, you can activate the new settings by using:
Next, in the file hosts located at /etc/ comment the IPv6 resolution line as shown below:
With this, we have disabled IPv6. Next login again to the Admin server URL and go to the VPN settings.

In the Routing section, the option Should VPN clients have access to private subnets (non-public networks on the server side)? should be set as No:

The option Should client Internet traffic be routed through the VPN? should be set to Yes.

To avoid any DNS leak, alter the DNS resolver settings. Select the Have clients to use the same DNS servers as the Access Server host

Save these settings and don’t forget to click Update Running Server. You can restart the OpenVPN server by using the Status tab from the Admin console. From here, you can stop the server and then start it again.
This completes our set up for OpenVPN server. Next, we can check the client installations.
How to Connect Your Linux VPN Server to Other Devices with OpenVPN
Now that your server is up and running, we can connect some devices to it! We’ll cover the most popular operating system options:
How to Install and Connect the OpenVPN Client for Windows
Open the OpenVPN client URL, you will be able shown links to client downloads for different operating systems.
Choose the Windows version and run the installation.
Once the installation is complete, you will be prompted for the OpenVPN username and password. The server IP will be auto-populated.
You can use the OpenVPN icon from your Windows taskbar to disconnect, reconnect and view connection status.
How to Install and Connect the OpenVPN Client for MacOS
Connect to the OpenVPN Client UI and click the link to download the OpenVPN software for MacOS. Once this package is downloaded, a window will open with the installer package icon.
Follow the standard procedure of MacOS application installation.
Double click on this installer icon and click Open to run the installation.
Once the installation is complete, you will be able to see the OpenVPN icon on your macOS taskbar. You can right click on this icon to see the different options. From here you can connect to OpenVPN.
Once you click the Connect to option, you will see a popup prompting for the OpenVPN username and password. Here you should enter the credentials and click on Connect to establish the Linux VPN server connection.
How to Install and Connect the OpenVPN Client for Linux
The client installation for Linux is slightly different. Download and install the OpenVPN client software on CentOS using the below command:
Similarly, you can install the OpenVPN client software on Debian or Ubuntu using the below command:
Open the OpenVPN client UI and download the appropriate profile for your OS. Alternatively, you can use wget or curl command and provide the URL to download the software.
Copy the downloaded profile to location /etc/openvpn and rename it to client.conf. You can start the OpenVPN Tunnel service where you will be prompted for the username and password. You can start the operation by using:
You can use ipconfig or ip addr to view the network connections. Once the VPN interface is available, you will see a tun0 interface added to the existing list shown in the output.
How to Install and Connect the OpenVPN Client for Android
First, go to the Google Play store and search for OpenVPN Connect. Install the OpenVPN Connect app.
Once opened, it will display three options – Private Tunnel, Access Server, and OVPN Profile.
Select Access Server and fill in all the details manually:
- Title – set your preferred name for the connection
- Access Server Hostname – the IP of your Linux VPN server
- Port – the port 934 of your Linux VPN server
- Username – the username set on your server – openvpn by default
- Password – the password you set in the console while setting up the Linux VPN Server in the terminal environment
Or alternatively, you can import the .ovpn file for the profile. You can get the connection profile from the client UI.
How to Install and Connect the OpenVPN Client for iOS
Similar to Android devices you can install OpenVPN software from the App Store.
Complete the installation and open the newly installed app. It will ask you to fill in the profile information, or upload the profile file same as the Android version.
Once they are added, you can start using OpenVPN on your iPhone or iPad.
Linux VPN Server Compression Settings
In case you are connected to the VPN and are not able to browse the Internet, you can check the OpenVPN logs at /var/log/openvpnas.log in your VPS. In case you find entries similar to the one shown below, you’re most likely experiencing compression issues:
To resolve this, you can disable compression. This can be done from the Admin UI. Open the Admin UI and click Advanced VPN.
Go to Default Compression Settings. Here turn off the option Support compression on client VPN connections.
Apply the changes, and click on the Update Running Server option. The issue should be solved.
Add Users to a Linux VPN Server Running OpenVPN
The free OpenVPN client supports two users. To create more users, you would need to select any of the paid plans. You can add additional users from the admin UI. Navigate to the User Management tab, and click the User Permissions link.
Enter the new username as shown below:
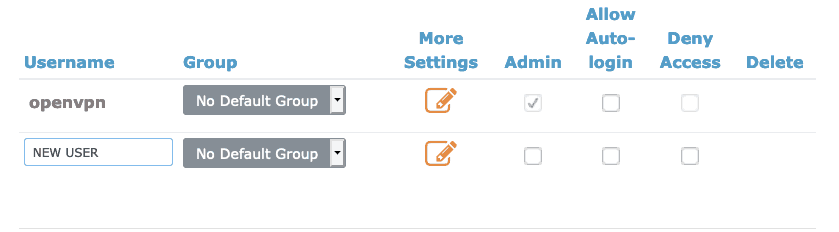
For this new user configure additional settings by clicking the More Settings link. Here you can provide the password and other details.

Save these settings and click on Update Running Server option.
Set Up Auto-login Profiles for a Linux VPN Server with OpenVPN
With OpenVPN, you can also configure auto-login profiles. This will cause all your non-local traffic to be routed via a VPN automatically. In case you want to manually enable or disable the VPN you can use User or Server locked profiles.
To set the auto-login, open the Admin UI, then select the User Permissions link. Here you can select the checkbox for Allow Auto-login.
How to Test a Linux VPN Server running OpenVPN
To test if OpenVPN works as expected, connect the VPN client and check your IP address. You can use the DNS leak test website from the browser. It should show you the OpenVPN server’s IPv4 address.
Next, you can choose Extended test. The test should output the IPs for the DNS resolver you chose for your client device.
You can also confirm the traffic is not using IPv6. To check this, you can use the IPv6 test website. This should again display the server IP and will show a message stating that no IPv6 address was detected.
Wrap Up
In this tutorial, you learned how to set up a Linux VPN server running OpenVPN and how to connect it using various clients like Windows, Linux, Android, iPhone or iPad, and MacOS.
Now that you know all the basic ins and outs, you can browse the internet safely with your brand new Linux VPN server. To learn more you can read through the official manual of OpenVPN, that can be found in the admin UI. This completes your first ever server-client OpenVPN configuration. Go ahead and enjoy secure browsing using OpenVPN.
In case you don’t want to bother setting up your own VPN server, you should use a reputable VPN client, such as NordVPN.
Edward is an expert communicator with years of experience in IT as a writer, marketer, and Linux enthusiast. IT is a core pillar of his life, personal and professional. Edward’s goal is to encourage millions to achieve an impactful online presence. He also really loves dogs, guitars, and everything related to space.
Источник


