- 16 Top Command Examples in Linux [Monitor Linux Processes]
- 1. List All Running Linux Processes
- 2. Sort Linux Processes by PID
- 3. Sort Linux Processes by Memory and CPU Usage
- 4. Sort Linux Processes by Running Time
- 5. Display Linux Processes By Specific User
- 6. Highlight Running Process in Top
- 7. List Absolute Path of Running Linux Processes
- 8. Set Refresh Interval for Top Command
- 9. Kill Running Linux Process Using Top Command
- 10. Sort Linux Processes by CPU Utilisation
- 11. Renice a Linux Process
- 12. Check Linux CPU Cores
- 13. Save Top Command Results in File
- 14. List Linux Idle Processes
- 15. Getting Top Command Help
- 16. Exit Top Command After Specific Repetition
- If You Appreciate What We Do Here On TecMint, You Should Consider:
- Related Posts
- 80 thoughts on “16 Top Command Examples in Linux [Monitor Linux Processes]”
- Got something to say? Join the discussion. Cancel reply
- top command in Linux with Examples
- Top Command in Linux
- Top command usage
- Check top version
- Default window
- Scrolling
- Change numeric unit
- Change summary content
- Highlighting
- Full command line
- Filter output by the user
- Active tasks
- Number of processes to display
- Change process priority
- Kill process
- Miscellaneous shortcuts
- Final thoughts
- About the author
- Sidratul Muntaha
16 Top Command Examples in Linux [Monitor Linux Processes]
In our previous articles, we have covered the basics of ls command and cat command. In this article, we are trying to explore the top command which is one of the most frequently used commands in our daily system administrative jobs.
The top command (table of processes) displays the processor activity of your Linux box and also displays tasks managed by the kernel in real-time. It also shows information about CPU and memory utilization of a list of running processes.
You might also be interested in the following tutorials :
1. List All Running Linux Processes
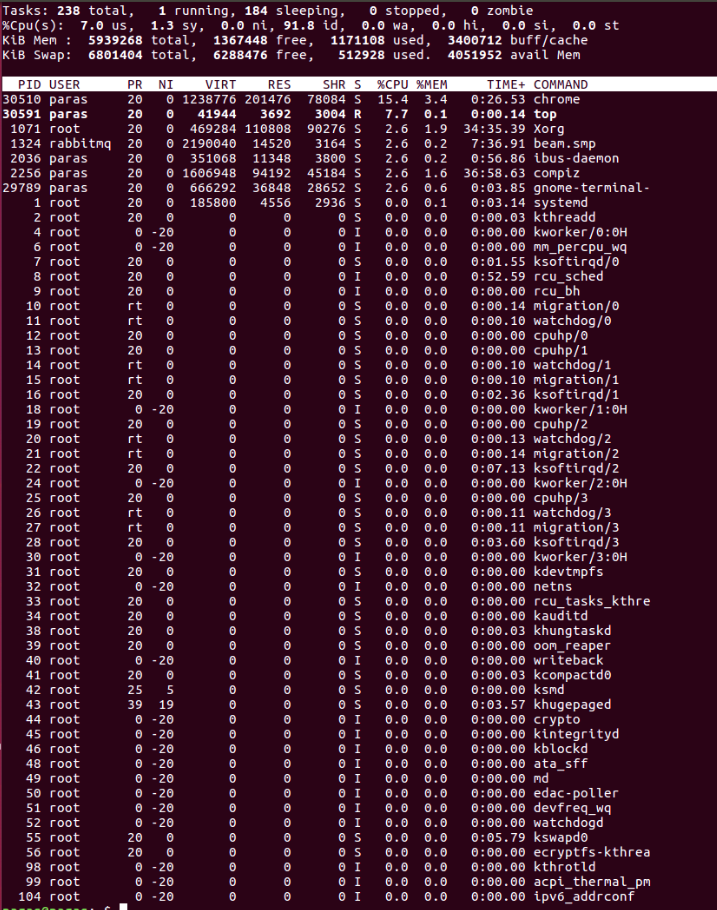
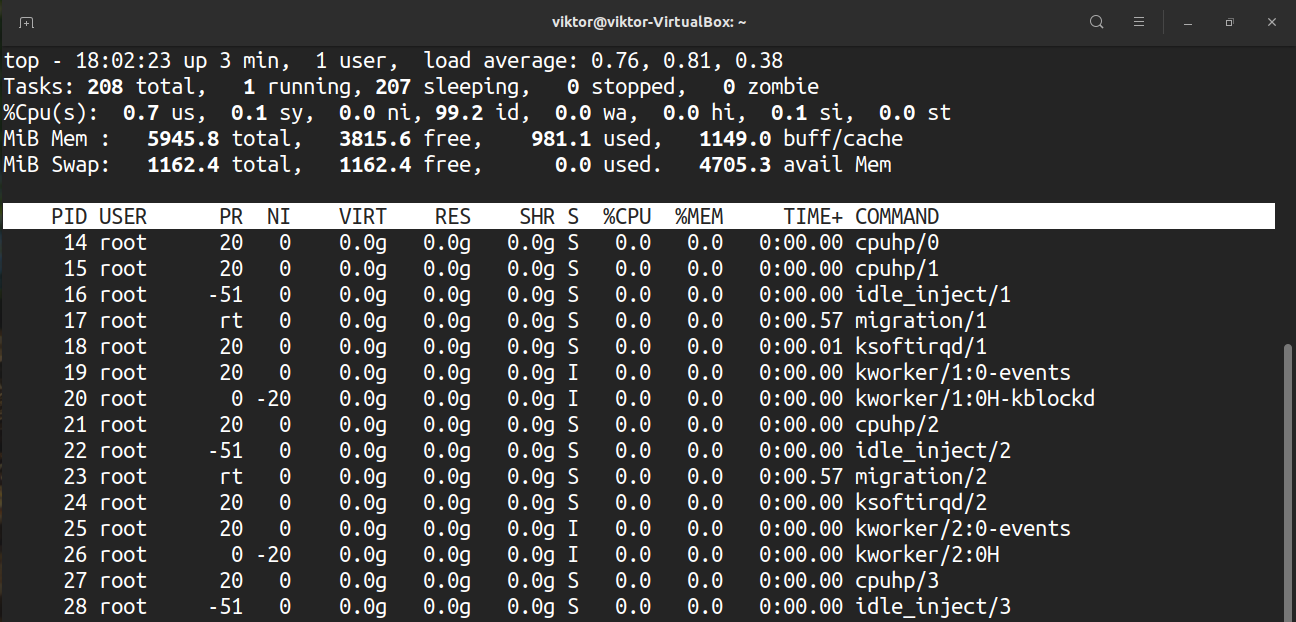
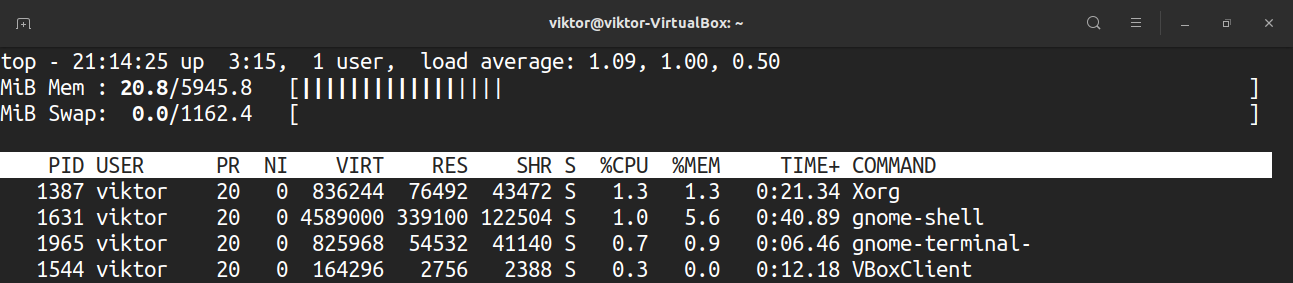
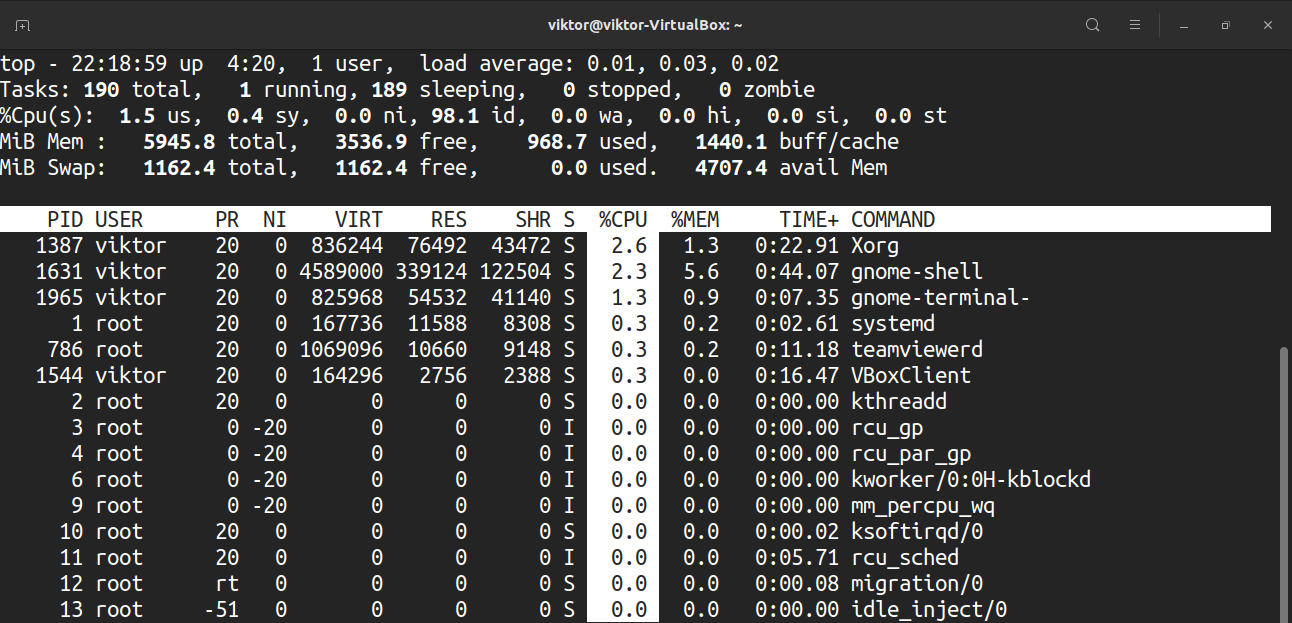
To list all running Linux Processes, simply type top on the command line to get the information of running tasks, memory, cpu, and swap. Press ‘ q ‘ to quit window.
![]() View Linux Running Processes
View Linux Running Processes
2. Sort Linux Processes by PID
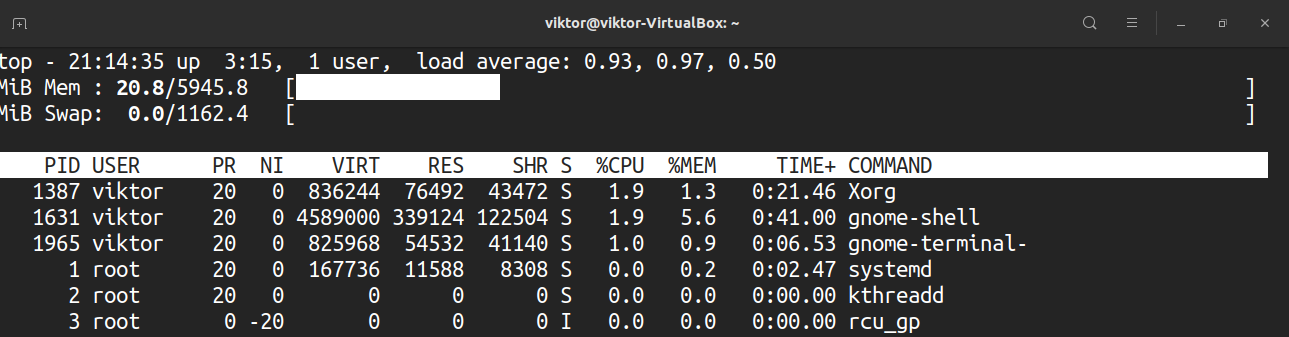
To sort all Linux running processes by Process ID, press M and T keys.
![]() List of Linux Processes by PID
List of Linux Processes by PID
3. Sort Linux Processes by Memory and CPU Usage
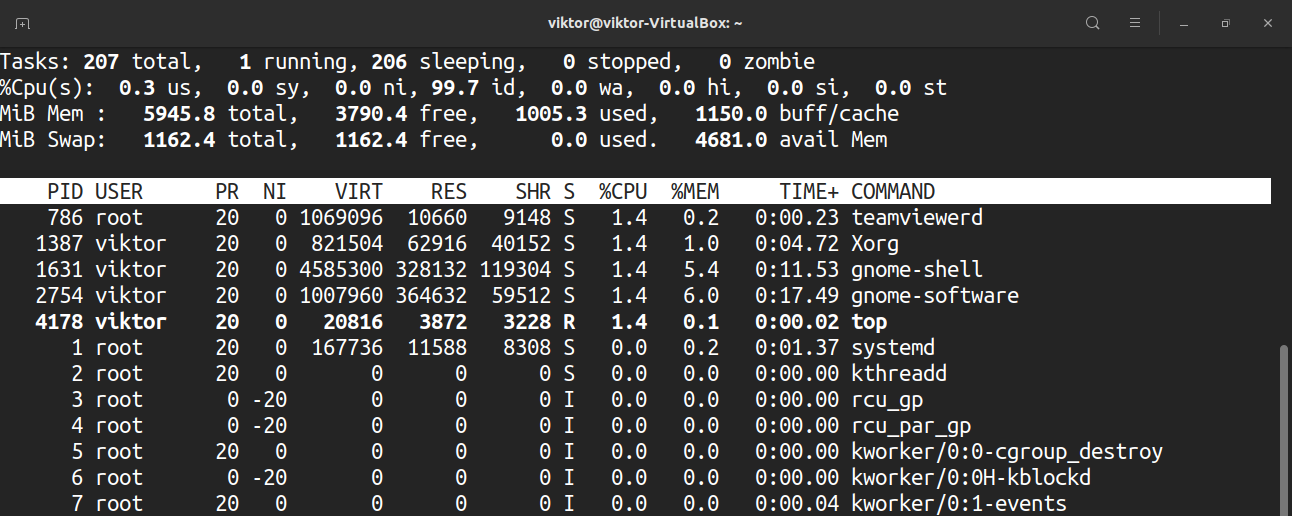
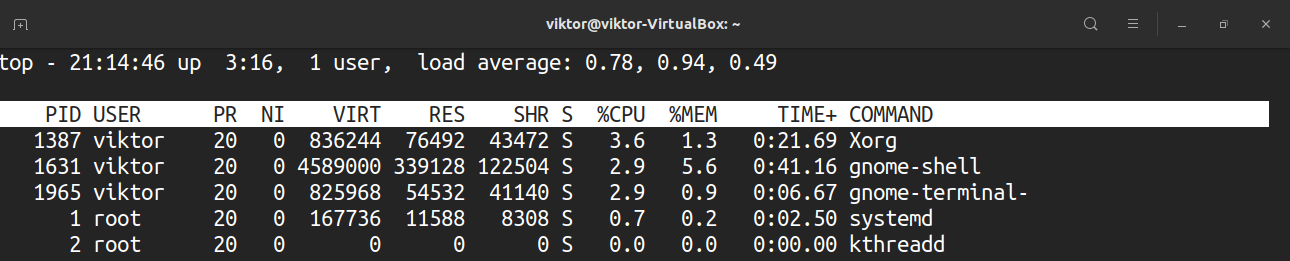
To sort all Linux running processes by Memory usage, press M and P keys.
![]() Sort Linux Processes by Memory CPU Usage
Sort Linux Processes by Memory CPU Usage
4. Sort Linux Processes by Running Time
To sort all Linux running processes by running time, press M and T keys.
![]() Sort Linux Processes by Running Time
Sort Linux Processes by Running Time
5. Display Linux Processes By Specific User
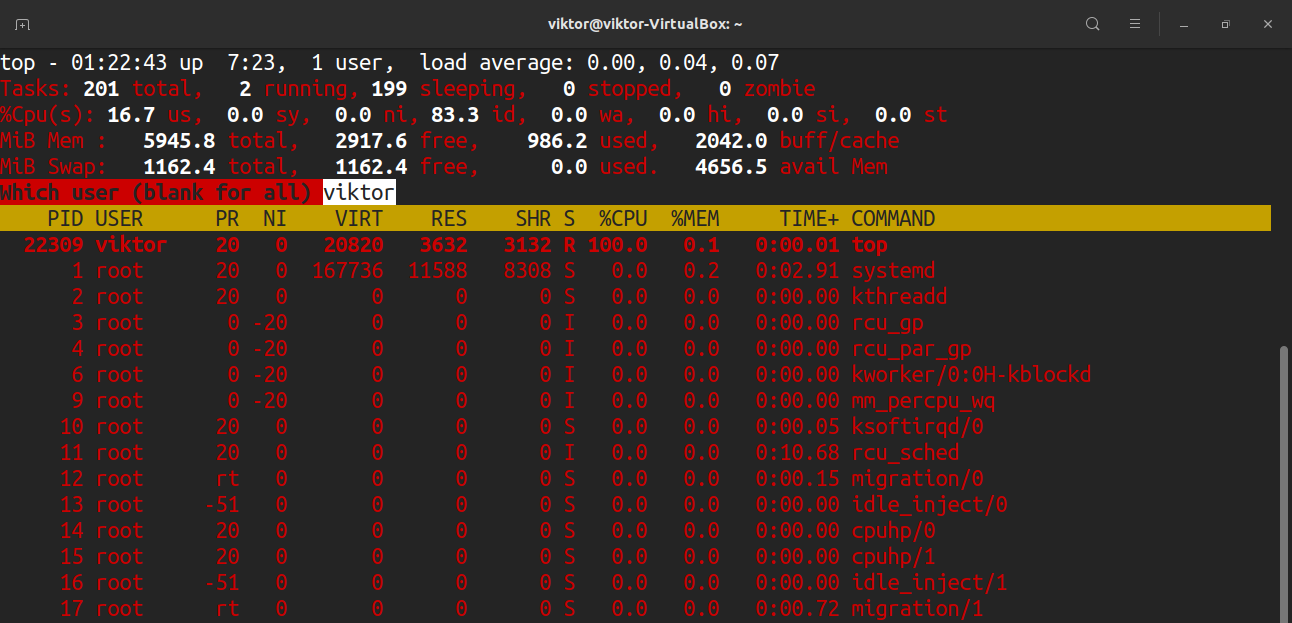
To display all user-specific running processes information, use the -u option will list specific User process details.
![]() List Linux Processes By Specific User
List Linux Processes By Specific User
6. Highlight Running Process in Top
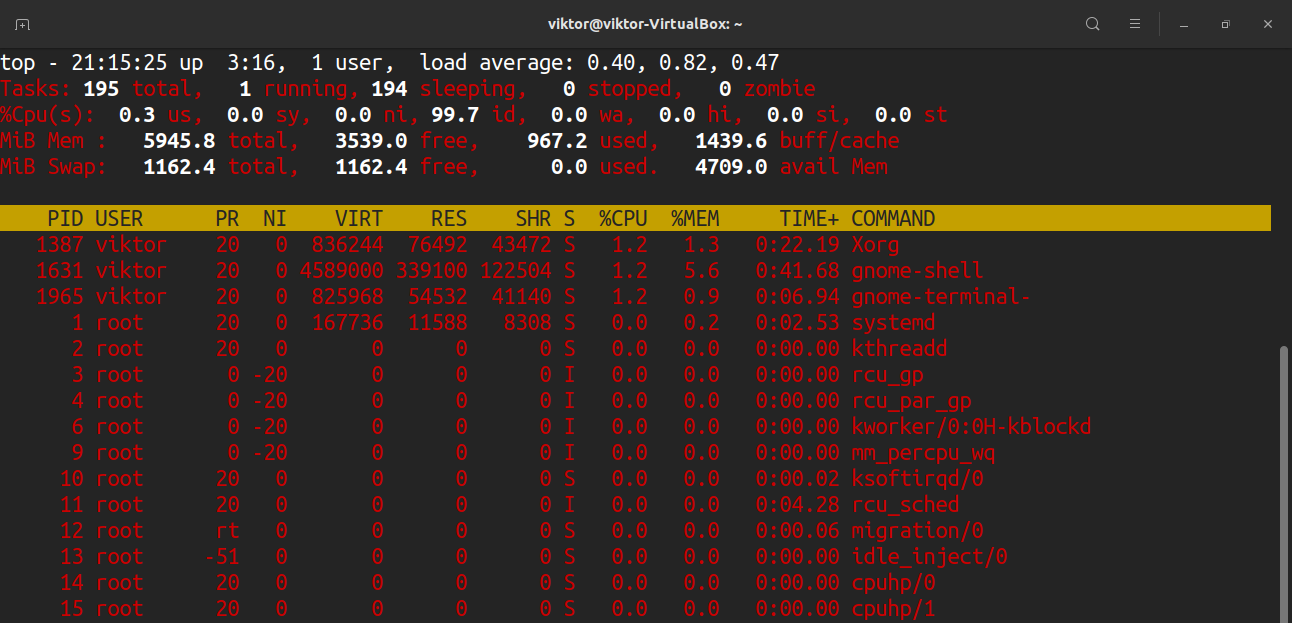
Press ‘ z ‘ option will display the running process in color which may help you to identify the running process easily.
![]() Highlight Linux Process
Highlight Linux Process
7. List Absolute Path of Running Linux Processes
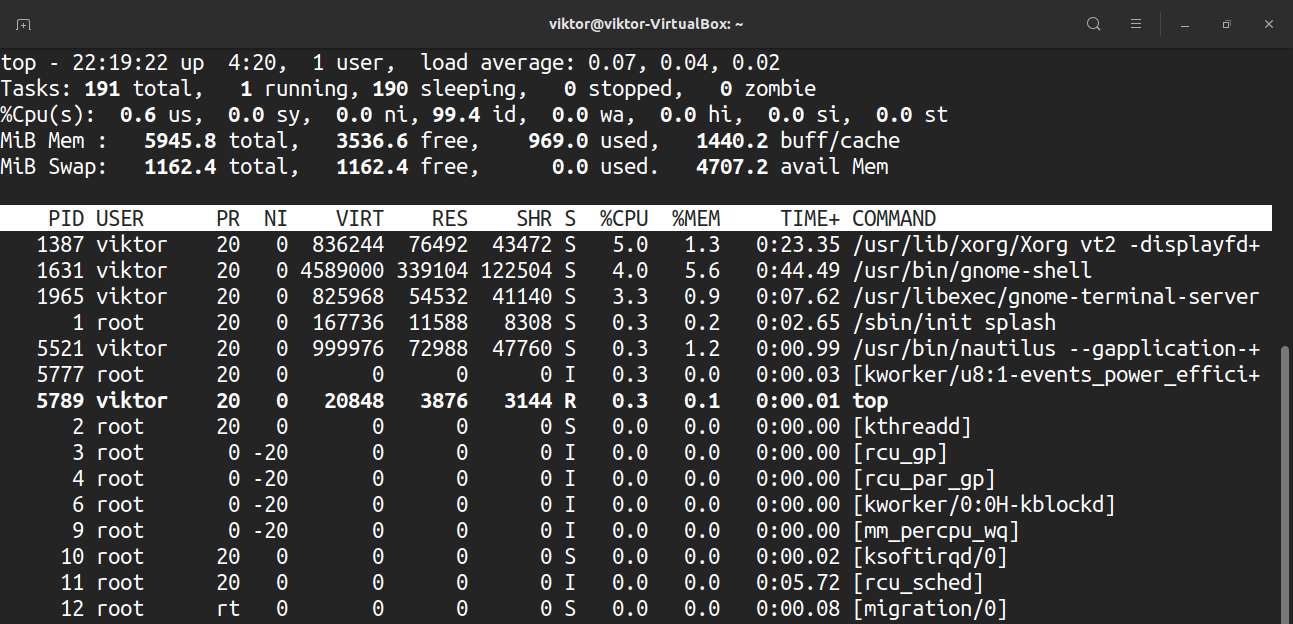
Press ‘ c ‘ option in running top command will display the absolute path of the running process.
![]() List Linux Processes by Path
List Linux Processes by Path
8. Set Refresh Interval for Top Command
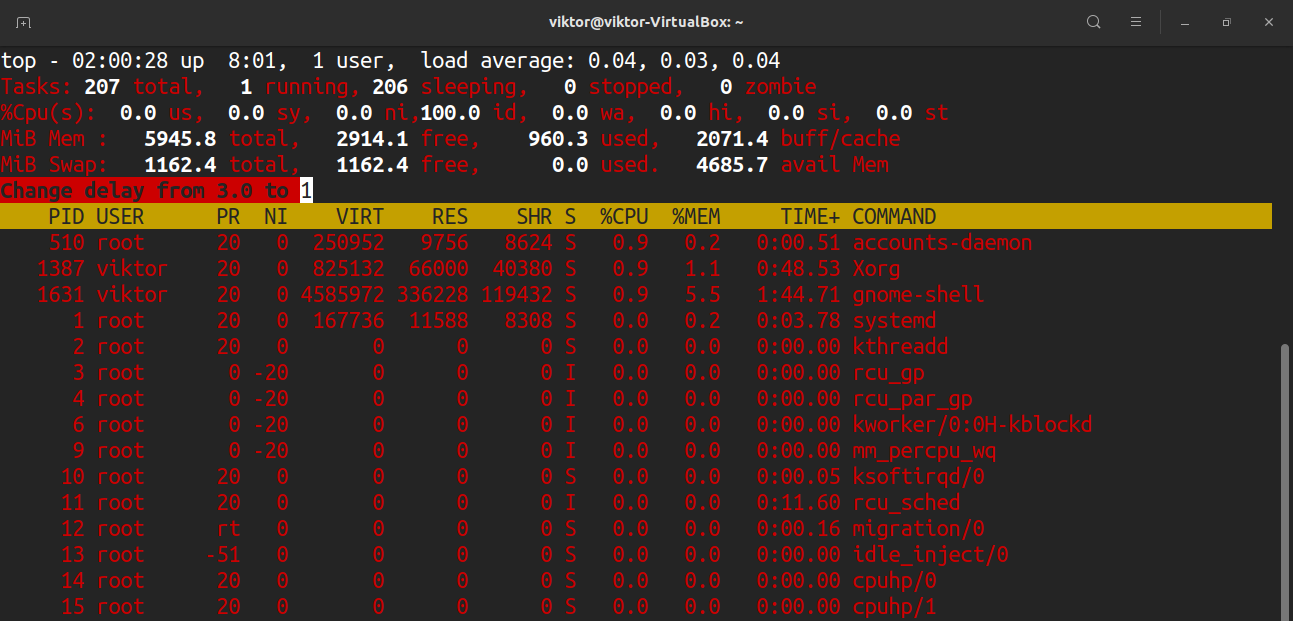
By default screen refresh interval is set to 3.0 seconds, the same can be changed by pressing the ‘ d ‘ option in running the top command to set desired interval time.
![]() Set Top Command Refresh Time
Set Top Command Refresh Time
9. Kill Running Linux Process Using Top Command
You can kill a process after finding the PID of the process by pressing the ‘ k ‘ option in running the top command without closing the top window as shown below.
![]() Kill Linux Process Using PID
Kill Linux Process Using PID
10. Sort Linux Processes by CPU Utilisation
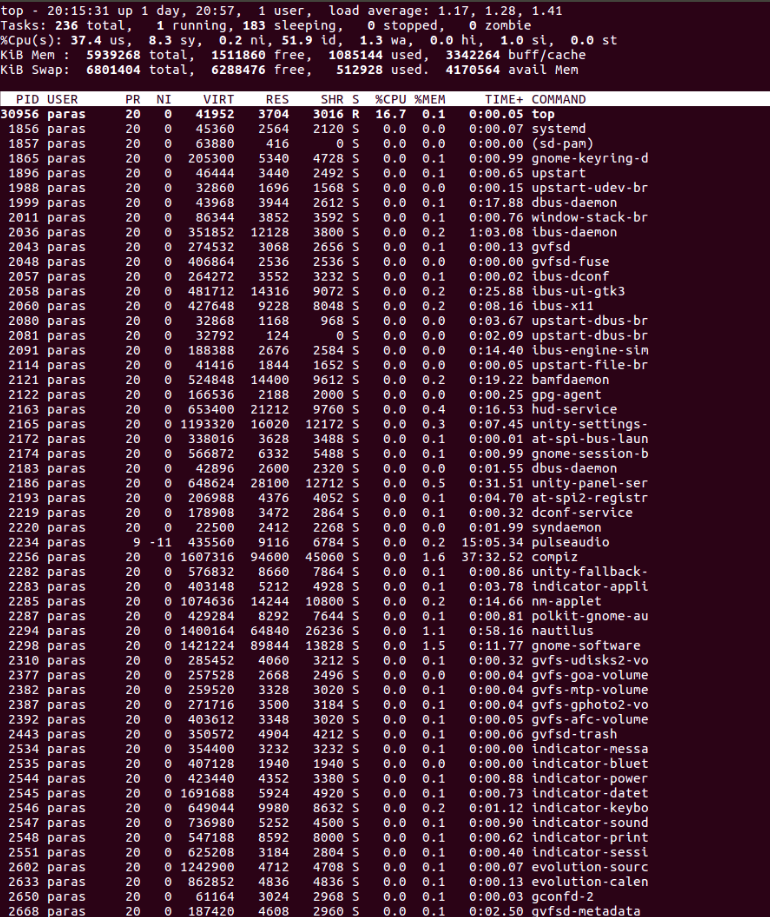
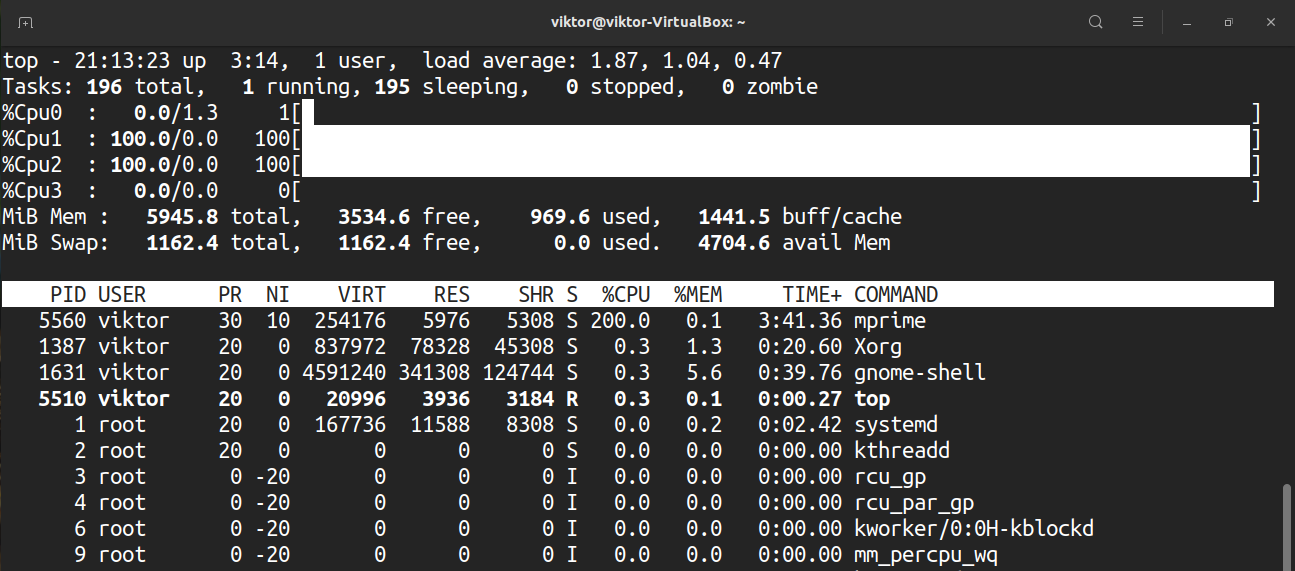
To sort all running processes by CPU utilization, simply press Shift+P key.
![]() Sort Linux Processes by CPU Usage
Sort Linux Processes by CPU Usage
11. Renice a Linux Process
You can use the ‘ r ‘ option to change the priority of the process also called Renice.
![]() Renice Linux Process
Renice Linux Process
12. Check Linux CPU Cores
To list the load information of your CPU cores, simply press 1 to list the CPU core details.
![]() List Linux CPU Cores
List Linux CPU Cores
13. Save Top Command Results in File
To save the running top command results output to a file /root/.toprc use the following command.
14. List Linux Idle Processes
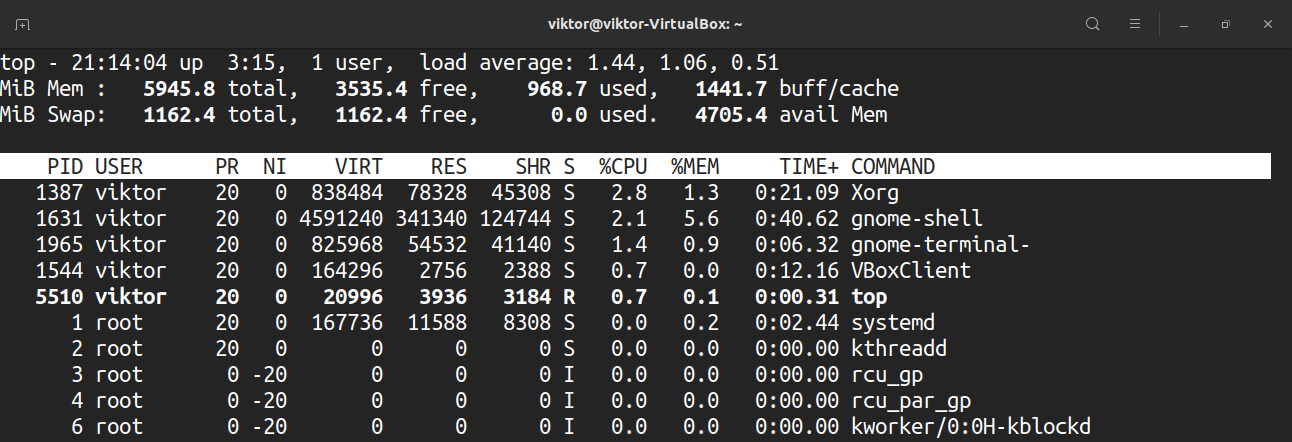
Press ‘i’ to get the list of idle/sleeping processes.
![]() List Linux Idle Processes
List Linux Idle Processes
15. Getting Top Command Help
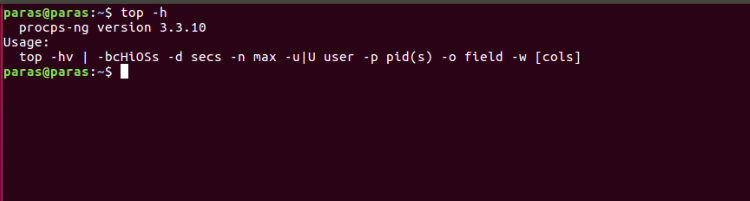
Press the ‘ h ‘ option to obtain the top command help.
![]() Linux Top Command Help
Linux Top Command Help
16. Exit Top Command After Specific Repetition
The output of the top command keeps refreshing until you press ‘ q ‘. With the below command, it will automatically exit after 10 repetitions.
There is a number of arguments to know more about the top command, you may refer man page of the top command. Please share it if you find this article useful or share your thoughts using our comment box below.
If You Appreciate What We Do Here On TecMint, You Should Consider:
TecMint is the fastest growing and most trusted community site for any kind of Linux Articles, Guides and Books on the web. Millions of people visit TecMint! to search or browse the thousands of published articles available FREELY to all.
If you like what you are reading, please consider buying us a coffee ( or 2 ) as a token of appreciation.

We are thankful for your never ending support.
Related Posts
![]()
![]()
![]()
![]()
![]()
![]()
80 thoughts on “16 Top Command Examples in Linux [Monitor Linux Processes]”
Can you explain use of options in this command.
The -n option specifies the maximum number of iterations and -b enables batch mode operation, which could be useful for sending output from top to a file.
![]()
Nice article, but how to search and see specific process memory and CPU utilization?
![]()
very nice Article….
![]()
basically I want this output to a file.. for 10 mins..
top – 13:29:09 up 1 day, 20:30, 1 user, load average: 0.65, 0.70, 0.69
Tasks: 1022 total, 1 running, 1020 sleeping, 0 stopped, 1 zombie
%Cpu0 : 13.0 us, 2.7 sy, 0.0 ni, 84.3 id, 0.0 wa, 0.0 hi, 0.0 si, 0.0 st
%Cpu1 : 49.3 us, 3.6 sy, 0.0 ni, 45.7 id, 0.3 wa, 0.3 hi, 0.0 si, 0.7 st
%Cpu2 : 2.0 us, 2.0 sy, 0.0 ni, 95.4 id, 0.0 wa, 0.3 hi, 0.3 si, 0.0 st
%Cpu3 : 7.6 us, 2.0 sy, 0.0 ni, 90.4 id, 0.0 wa, 0.0 hi, 0.0 si, 0.0 st
%Cpu4 : 1.3 us, 2.3 sy, 0.0 ni, 96.0 id, 0.0 wa, 0.0 hi, 0.3 si, 0.0 st
%Cpu5 : 26.1 us, 2.6 sy, 0.0 ni, 70.3 id, 0.3 wa, 0.3 hi, 0.0 si, 0.3 st
KiB Mem : 41042384 total, 1621820 free, 6024132 used, 33396432 buff/cache
KiB Swap: 21946356 total, 21946308 free, 48 used. 9811332 avail Mem
PID USER PR NI VIRT RES SHR S %CPU %MEM TIME+ COMMAND
34389 root 20 0 967380 57812 8156 S 91.7 0.1 243:41.66 java
4295 oracle 20 0 4517788 497680 9364 S 0.0 1.2 4:15.28 java
![]()
Hi All, is there a way to get top output for a given command only listing all CPU info also and write to a file..
Please go through this following article, that will explain how to save top command output to a file in Linux.
Got something to say? Join the discussion. Cancel reply
This site uses Akismet to reduce spam. Learn how your comment data is processed.
Источник
top command in Linux with Examples
top command is used to show the Linux processes. It provides a dynamic real-time view of the running system. Usually, this command shows the summary information of the system and the list of processes or threads which are currently managed by the Linux Kernel.
As soon as you will run this command it will open an interactive command mode where the top half portion will contain the statistics of processes and resource usage. And Lower half contains a list of the currently running processes. Pressing q will simply exit the command mode.
Here,
- PID: Shows task’s unique process id.
- PR: Stands for priority of the task.
- SHR: Represents the amount of shared memory used by a task.
- VIRT: Total virtual memory used by the task.
- USER: User name of owner of task.
- %CPU: Represents the CPU usage.
- TIME+: CPU Time, the same as ‘TIME’, but reflecting more granularity through hundredths of a second.
- SHR: Represents the Shared Memory size (kb) used by a task.
- NI: Represents a Nice Value of task. A Negative nice value implies higher priority, and positive Nice value means lower priority.
- %MEM: Shows the Memory usage of task.
Examples:
1) Exit Top Command After Specific repetition: Top output keep refreshing until you press ‘q‘. With below command top command will automatically exit after 20 number of repetition.
2) Display Specific User Process
3) Highlight Running Process in Top: Press ‘z‘ option in running top command will display running process in color which may help you to identified running process easily

4) Shows Absolute Path of Processes: Press ‘c‘ option in running top command, it will display absolute path of running pro

5) Kill running process: You can kill a process after finding PID of process by pressing ‘k‘ option in running top command without exiting from top window as shown below.
6) Sort by CPU Utilisation: Press (Shift+P) to sort processes as per CPU utilization.
7) Shows top command syntax:
8) Batch Mode : Send output from top to file or any other programs.
9) Secure Mode : Use top in Secure mode.
10) Command Line : The below command starts top with last closed state.
11) Delay time : It tells delay time between screen updates.
Источник
Top Command in Linux
In this guide, check out how to use the top command in Linux.
Top command usage
The top command will come pre-installed on any UNIX/Linux system. There’s no need to install any additional package to use it.
Check top version
Assuming your distro is up-to-date, your system should have the latest version of the top. Check the version of the top.

Default window
Run the top command without any parameter. This will load the default screen of the top.
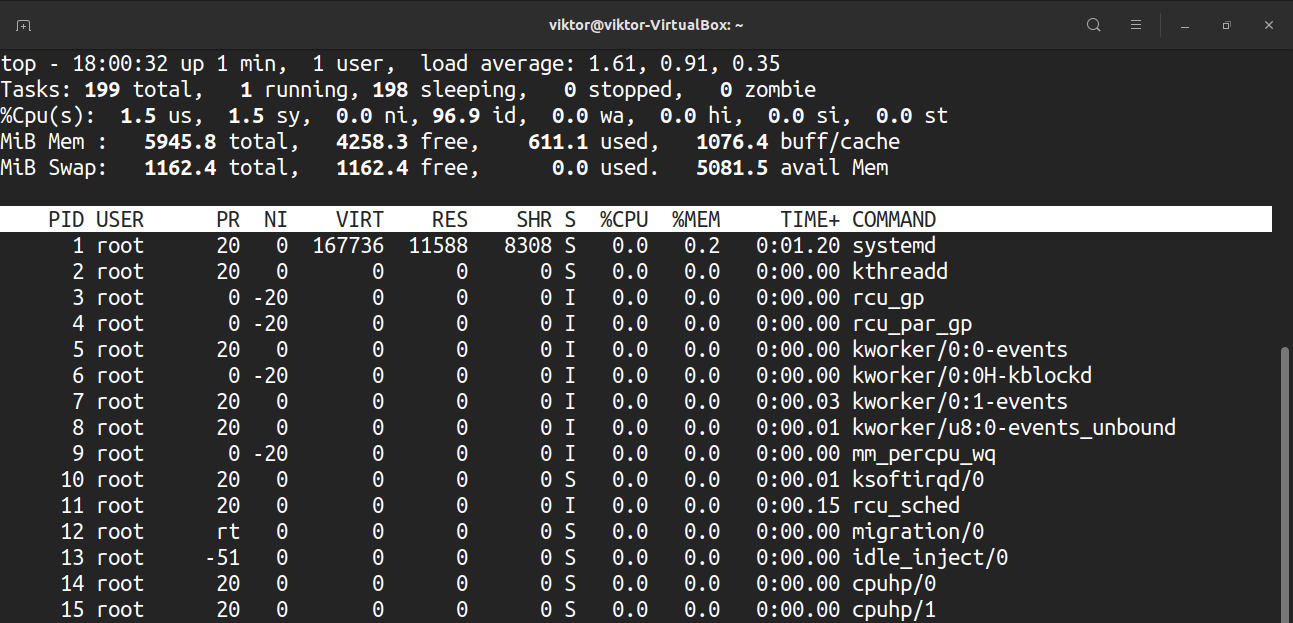
It’ll output a real-time report of various information. Let’s have a quick breakdown of it.
The first heading portion reports hardware resource usage. The first line consists of the time, the amount of time the system is running, the number of logged-in users, and the load average. The second line reports the number of tasks along with their states.
Here’s a quick list of all the states. The value of each state describes how much time the CPU spends executing processes of that state.
- us: Executing processes running under the userspace.
- sy: Executing system kernel processes.
- ni: Executing processes with a manually configured nice value.
- id: The amount of time CPU remains idle.
- wa: Waiting time for I/O to complete.
- hi: Servicing hardware interrupts.
- si: Servicing software interrupts.
- st: Time lost for running virtual machines, also known as “steal time”.
The fourth line describes the system memory usage, for example, total physical memory amount and how much of it is used, free, buffered, or cached.
The second part of the output is a table listing all the running processes. Here’s a quick explanation of all the columns constituting the table. All these explain various attributes of the related process.
- PID: The process ID of the process.
- USER: The user the process is running under.
- PR: Processor priority.
- NI: Process nice value.
- VIRT: Virtual memory used.
- RES: Resident memory used.
- SHR: Shared memory used.
- S: Process status. It can of five types described below:
- D: Uninterruptible sleep
- R: Running
- S: Sleeping
- T: Traced
- Z: Zombie
- %CPU: CPU time consumed by the process.
- %MEM: Percentage of physical memory used.
- TIME+: Total CPU time used (in millisecond).
- COMMAND: The command that’s the process is running with.
I guess that’s a lot of information to digest. It’s alright to take time and learn them slowly.
Scrolling
Top reports the entire list of running processes. As it’s a command-line tool, the navigation is a bit different than you’d expect in a GUI tool.
To navigate, use the Up and Down arrow keys. Additional navigation keys include Home, Page Up, Page Down, and End. To move the process list sideways, use the Left/Right arrow keys.
Change numeric unit
By default, the memory values are displayed in kibibytes. However, for practical purposes, it’s not a pleasant format. To switch the unit to other units, press “E”. The available unit formats are kibibytes, mebibytes, gibibytes, tebibytes, pebibytes, and exbibytes. Pressing “e” will do the same thing.
Change summary content
This impacts the first section of the top output. Press “l” to toggle the first line on/off.
If your system is running a multi-core CPU, then the top can report information for individual cores. Press “1” to toggle information on a per-core basis.

Want to change the CPU displays? Press “t”. On the first press, it’ll change the graphs to ASCII.

On the second press, it’ll change the graphs to solid block characters.
Press “t” once more and the CPU display and task summary will completely disappear.
To do the same with the memory and swap memory, press “m”.
Highlighting
The default screen of the top is just black and white. How about spicing things up? Press “z” to colorize the display.
To highlight the running tasks, press “y”. If you press “x”, the top will highlight the columns that it uses to sort the process list. The bold and reversed text highlight can be toggled by pressing “b”.
Full command line
In the case of running processes, we can toggle between just the process name and process name along with the full command. Press “c” to toggle.
To see a tree-style view where processes were launched/spawned by other processes, press “V”.

Filter output by the user
By default, the top will show the processes from all the users. To see the processes running under a specific process, press “u”. The top will ask for the user name or UID.
Active tasks
To see only the active tasks, press “I”.
To revert the changes, press “I” again.

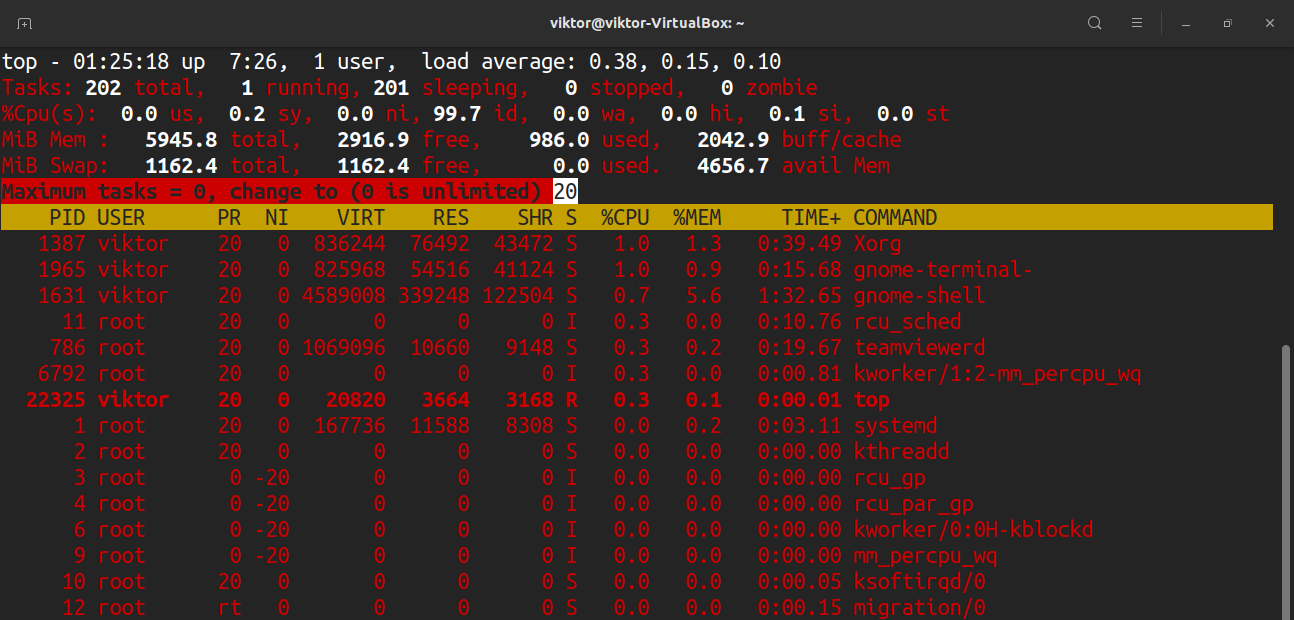
Number of processes to display
By default, the top will report all the processes in a long table. However, we can manually set the number of processes top will display irrespective of the number of processes running. I think it’s a useful trick in very specific scenarios.
To limit the displays, press “n”. The top will ask for the number of processes to display. By default, the value is 0 (unlimited).
Change process priority
Every single running process will have a nice value to them. This nice value determines the priority of the process among all the running processes. The top allows manually defining the nice value.
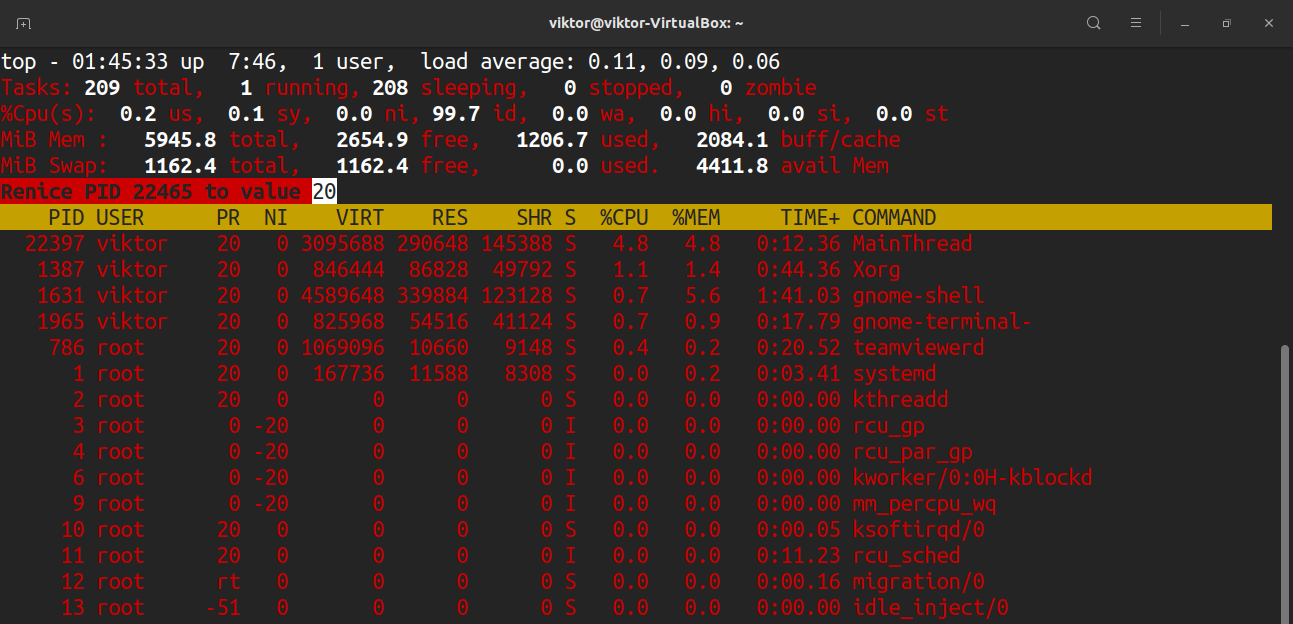
To manually determine the nice value of a process, press “r”. The top will ask for the PID.
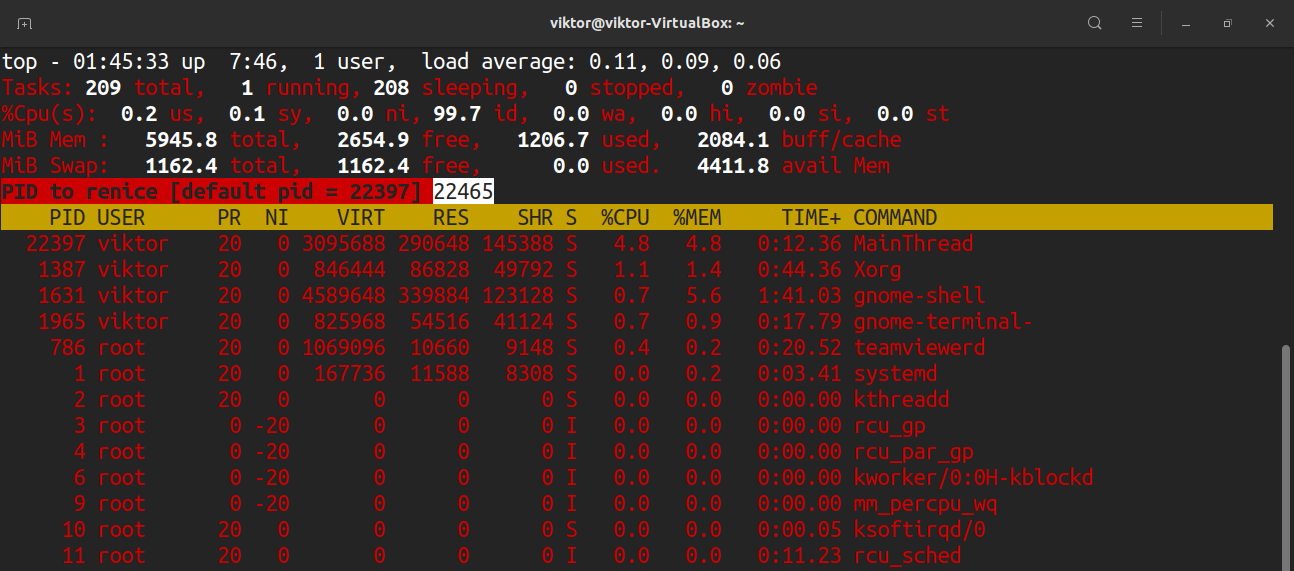
After entering the PID, the top will ask for the new nice value.
Kill process
In case you want to manually terminate a process, the top allows you to send a termination signal. To send a termination signal, we’ll be needing the PID and the signal name.
Press “k”. The top will ask for the PID.
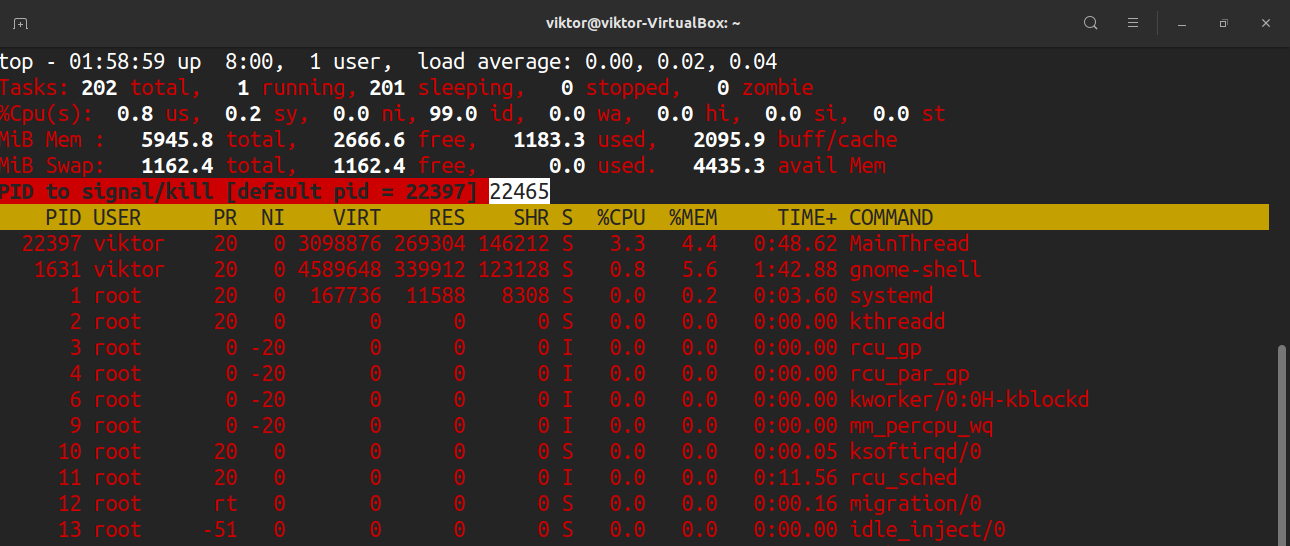
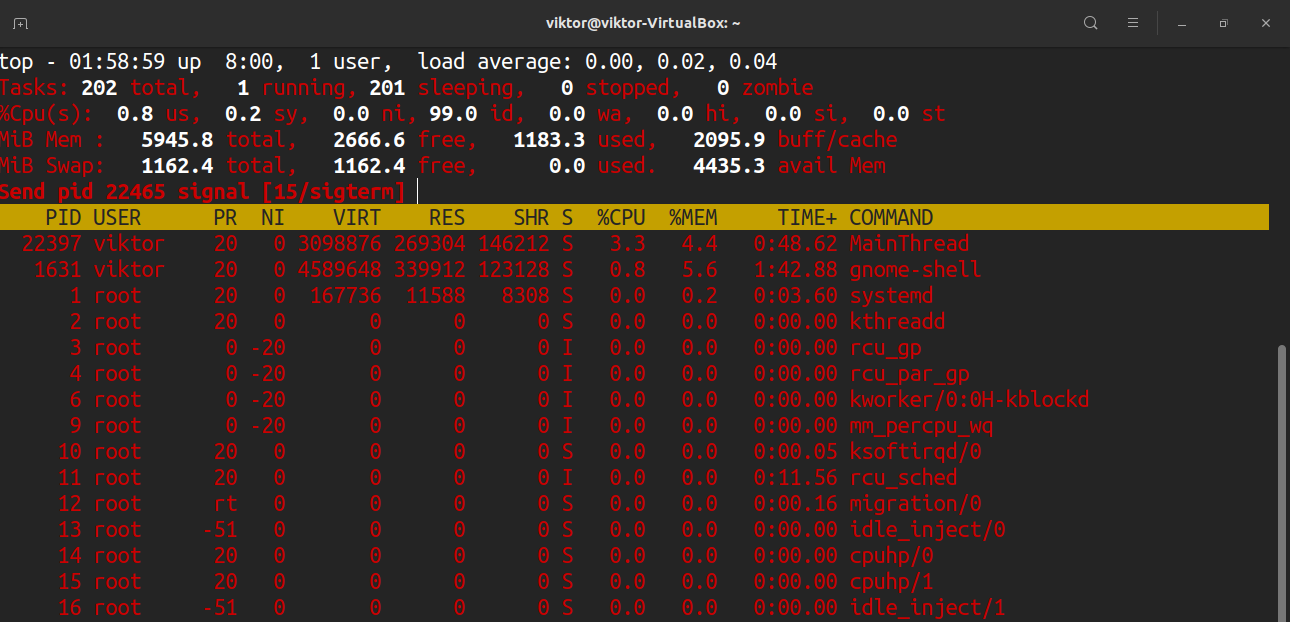
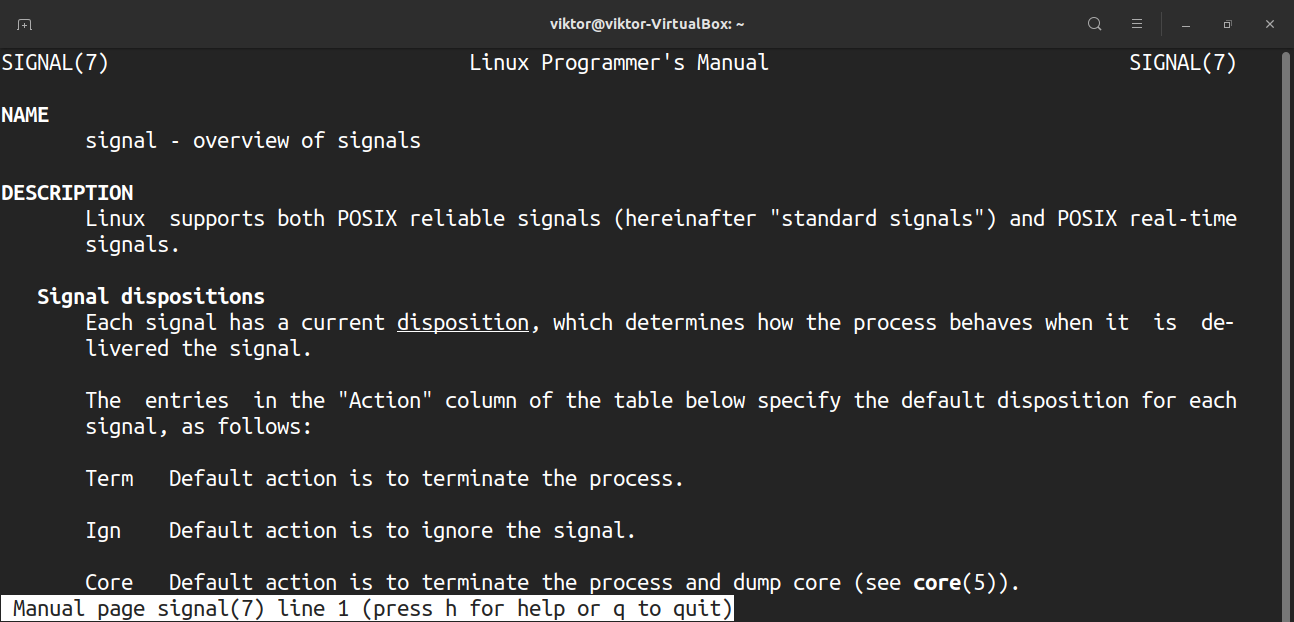
Once the PID is entered, the top will then ask for the signal to send. By default, it’ll be the SIGTERM (kill) signal. Most of the time, it’s the signal you want to send. For a complete list of all the available signals, check out the signal man page.
Miscellaneous shortcuts
Whatever changes you’ve made to how top behaves, it won’t be loaded unless you save it. To save the current preset, press “W”.
By default, the top will refresh the information at the default value. To define your custom value, press “d”.
To perform an instant quick refresh, press Spacebar.
Final thoughts
This is just the tip of the iceberg. The top is a complicated yet powerful tool for monitoring your system. There are plenty of tutorials available online. Check them out if you want to master the top command.
Interested in monitoring the system I/O? Then iotop is what you’re looking for. Check out how to monitor disk I/O using iotop.
About the author

Sidratul Muntaha
Student of CSE. I love Linux and playing with tech and gadgets. I use both Ubuntu and Linux Mint.
Источник


