- Switching from Mac to Windows? What You Need to Know
- Get a Microsoft Account
- Figure Out The Microsoft Equivalent Of Your Crucial Apple Apps
- Forget The Apple Key. CTRL Is King
- Spotlight Is Gone. Learn To Love The Search Bar
- Learn The Useful Windows Keyboard Shortcuts
- Find An Antivirus Software You Like & Download It
- Keep Your System Updated
- Become Comfortable With Customization
- How to Move Your Windows Drive to a New PC
- Step 1: Back Up the Entire Drive
- Step 2: Move Your Drive to the New PC
- Step 3: Install New Drivers (and Uninstall Old Ones)
- Step 4: Re-Activate Windows
Switching from Mac to Windows? What You Need to Know
Tips to make the transition easier
For a long time, Apple users and Windows users kept to their respective sides of the aisle. There was little overlap between the two user bases, but that has started to change.
Many people recognize the ease of use and simple productivity that Apple provides (and many people love the status and image that comes with the Apple ecosystem), but they also enjoy a round of “CS: GO” or a couple of matches of “Rainbow Six: Siege” here and there. For that, they need Windows.
As a result, many former Apple users have started to make the switch from Mac to Windows, only to discover an operating system that takes quite a bit of getting used to. While Windows and macOS operate on similar principles, the way users perform operations and tasks is very different. Even simple things like keyboard shortcuts can feel like two separate languages.
Whether you’re a longtime Apple user with no previous experience with Windows or someone making their return to Windows after years of working within the Apple ecosystem, a quick study of the basics can make the transition easier. This guide will walk you through everything you need to know when switching from Mac to Windows.
Get a Microsoft Account
A Microsoft account is to Windows what an Apple ID is to macOS. It grants access to many different services that you will end up using at some point, so it’s better to create one from the get-go than wait until later.
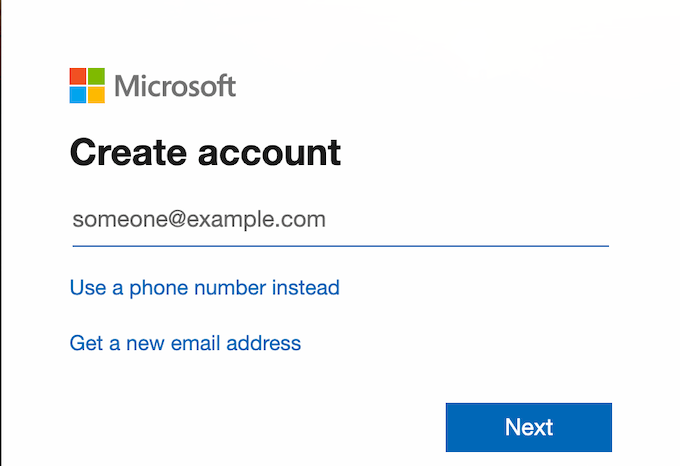
In fact, if you set up your PC, then you’ll likely have already created a Microsoft account. You’ll need it to use the Windows Store, Skype, OneDrive, and even the PC version of Xbox Games Pass.
Figure Out The Microsoft Equivalent Of Your Crucial Apple Apps
Apps like Pages, iMovie, and GarageBand are vital parts of many people’s day-to-day workflow. If you’re one of those people and are making the switch to Windows, you need to know what Microsoft programs take the place of those familiar Apple apps.
Here’s a quick list to give you an idea.
- Pages – Microsoft Word
- Numbers – Microsoft Excel
- FaceTime – Skype
- iCloud – OneDrive
- iMovie – Windows 10 Movie Maker
Sadly, there is no real built-in Microsoft equivalent to GarageBand. You can download Audacity for free, but the learning curve is steep and the control scheme can be tough to grasp.
The same applies to Messages. While the service is undoubtedly useful, Messages does not play well with other platforms and devices. There are third-party programs that attempt to replicate what Messages does, but these tend to be glitch-riddled and untrustworthy.
Forget The Apple Key. CTRL Is King
While the Apple key might have been the default part of every keyboard combination and shortcut you can imagine, Windows operates slightly differently.

The CTRL key serves essentially the same purpose as the Apple key, but it’s in a different place on the keyboard – the far bottom left as opposed to right beside the space bar. You will hit the Alt key looking for the Apple key, and you will likely do it many times before you get the hang of it. Don’t worry, that’s just part of the transition.
For the most part, Apple computers use the Alt key the same way that Windows computers do. Their uses are similar enough that there should be little to no learning curve for other keyboard shortcuts.
Spotlight Is Gone. Learn To Love The Search Bar
You might be used to hitting Apple + Space to bring up Spotlight, but Windows has no such utility. Instead, the search bar is always present.
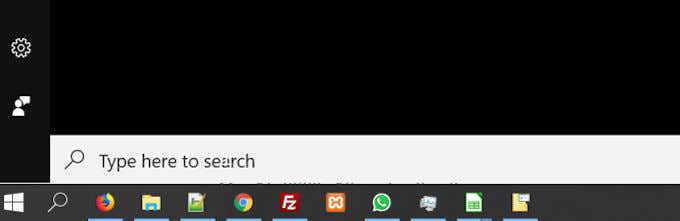
By default, it’s in the lower-left corner of the screen beside the Windows key. It operates a lot like a Spotlight search would – just type in what you’re looking for.
The search bar will look for files, apps, media, and will even display web results. It isn’t quite as fast or as streamlined as Spotlight, but it’s a solid replacement that has a lot of uses.
Learn The Useful Windows Keyboard Shortcuts
If you’re a long-time Mac user, you’re probably familiar with the touchpad. Macbooks have some of the best touchpads in the world, but Windows users typically rely on a mouse.

That said, keyboard shortcuts will always be the faster way to navigate a PC no matter how skilled you might be with a mouse cursor. Memorize this list of useful shortcuts.
- CTRL + C: Copy
- CTRL + X: Cut
- CTRL + V: Paste
- CTRL + A: Select all
- CTRL + Z: Undo (one you will likely make great use of at first)
- Alt + Tab: Swap between open windows
- Alt + F4: Close the current window or quit the current app
- Shift + Delete: Permanently delete selected item
- Windows key + M: Minimize all open windows
There are dozens of other shortcuts you can use, but these are some of the most important. Online Tech Tips has an article dedicated to Windows keyboard shortcuts if you’d like to learn more.
Find An Antivirus Software You Like & Download It
For various reasons both technical and not, Apple computers are not prone to picking up computer viruses. Contrary to popular belief, Macs are not immune to them – but the likelihood is far lower. On Windows PCs, however, computer viruses and all types of malware are a serious problem.

There are multiple antivirus and anti-malware options available for download for free. Malwarebytes, Norton, and Avira are some of the more notable names. Other antivirus programs have premium tiers that supposedly offer more protection, but these claims are often dubious.
Note that Kaspersky Antivirus has seen a lot of controversy lately surrounding cybersecurity implications (with the government going so far as to ban it), so you might want to steer clear of it for the time being.
Keep Your System Updated
Keeping your operating system up to date is essential for keeping it secure. macOS will politely notify you when an update is available, but you can put off updating your system mostly indefinitely.
Windows is not so patient. You will receive an alert that an update is ready for download. You might be tempted to push it back, and while you can, you might pay the price later.

The better option is to save what you are currently working on and make time for the update. Windows updates are notorious for happening in the middle of a busy workload, and once they start they cannot be stopped. Most of the time, updates won’t even save the work you’re doing. Any open documents will lose unsaved data.
Don’t put yourself through that. Update your computer regularly before it updates itself.
Become Comfortable With Customization
One of the major differences between Windows and macOS is the level of customization and control available at your fingertips. Apple designed macOS to be easy to use and user-friendly, and in doing so restricted many customization options behind layers of arcane menus. Windows is more open to modification.

While you should still certainly know what you’re doing, you can change your PC to reflect your tastes much more readily than you can with macOS. Tools like Rainmeter and a lot of different built-in customization options give you the ability to make your desktop your own.
Making the switch from Mac to Windows can be scary, but the systems are not that different. Windows is ultimately more powerful and gives you more control over your computing experience than macOS. Embrace that. Start with the basics and build your knowledge until you’re just as comfortable navigating a Windows PC as you are a Mac.
Patrick is an Atlanta-based technology writer with a background in programming and smart home technology. When he isn’t writing, nose to the grindstone, he can be found keeping up with the latest developments in the tech world and upping his coffee game. Read Patrick’s Full Bio
How to Move Your Windows Drive to a New PC
Need to migrate your Windows installation to a new PC? It’s technically possible, and Windows 10 streamlines the process, but there are caveats.


Buying a new computer can be fun, until you have to slog through migrating all your old apps, preferences, and files. Wouldn’t it be easier if you could just pop your old hard drive into the new PC and pick up where you left off? It’s technically possible, though it comes with some caveats.
With Windows 7, this was less tenable; it introduced driver conflicts, especially with lower-level hardware like your hard drive’s SATA controller. As a result, you’d often see a blue screen as soon as the computer booted, preventing you from even getting to the desktop.
Microsoft’s sysprep tool could sometimes help with this, but it wasn’t really meant for this purpose, and it came with many of its own caveats. You were almost always better off doing a clean install.
Windows 8 and 10, on the other hand, are much better about handling these conflicts. When you throw an existing Windows installation at a new PC, it’ll perform its first-time setup as if it were a new computer, grab drivers for your new hardware, and hopefully drop you onto the desktop without too much trouble.
You’ll have to do a few things yourself, but overall, it should work—I moved my drive from an AMD-based machine to an Intel/Nvidia machine with barely a hiccup. Windows Update was even able to download new patches.
That’s not to say you won’t run into any problems. This could all vary from PC to PC, and you never know what driver conflicts or performance issues may lay underneath the surface of a seemingly fine setup.
All told, I would still recommend doing a clean install if you’re migrating permanently to a new machine, but if you need something quick and dirty—like if your old PC dies and you need to access some data from your old installation—this should work well enough.
Step 1: Back Up the Entire Drive
Before making any substantial changes, it’s always a good idea to back up your data—and that goes double when you’re messing with hard drives. If you have a backup tool you really like, go ahead and use that.
However, for this particular case, I recommend cloning the entire drive. That way, if something goes wrong and you can’t boot, you can restore an exact image of the original drive and try a different approach.
Alternatively, if your new PC takes a different kind of drive than your old PC—say, you’re migrating from a PC with a 2.5-inch drive to one with an M.2 slot—you can clone the old drive to a new drive with the correct form factor, then plug that drive into your new PC.
Note that this may mean buying a new SSD and plugging it in with a USB-to-M.2 SATA or USB-to-M.2 NVMe enclosure in order to clone it. Do some research on which type of drives your new PC supports before buying.
Step 2: Move Your Drive to the New PC
Once your drive has been safely backed up, it’s time to swap it into your new PC, removing it from the external enclosure first (if you used one). You may have to look up instructions for opening up your specific machine and installing new storage.
Then, turn your PC on. Chances are, it’ll try to boot from the new drive automatically, but if not, you may need to press a key at startup to enter the BIOS settings, like F2 or Delete, and change the boot order.
Once the PC finds the right drive, you should be greeted with the Windows logo with the spinning wheel. It’ll likely say something like «Getting Devices Ready,» and you’ll have to let it do its thing—in my experience, this is pretty quick, though others have noted that it could require multiple restarts.
Step 3: Install New Drivers (and Uninstall Old Ones)
Windows will likely install a lot of the necessary drivers for you, especially once you connect your new PC to the internet. You may notice some flickering as it downloads the display drivers, so give it some time to go through its process (and restart when it asks you to do so).
You may find that you need to download some drivers manually, if Windows doesn’t do so on its own (or if it only downloads generic drivers instead of manufacturer-supplied ones).
To be safe, I recommend heading to your PC manufacturer’s website and downloading the chipset, audio, and other drivers yourself. If you built the computer yourself, go to the motherboard manufacturer’s website instead.
You can also head to Nvidia, AMD, or Intel’s website for graphics drivers, though again, Windows installed the non-generic versions for me without my intervention.
Finally, if you want to keep things clean, you can uninstall the old drivers left on your system by searching for «Add or Remove Programs» from the Start menu. For graphics drivers, you may want to use a tool like DDU to really clean them out.
For everything else, search the Start menu for Device Manager in the Control Panel, click View > Show Hidden Devices, and right-click devices you no longer use to uninstall their drivers.
Step 4: Re-Activate Windows
There’s one last hitch to this process: when you toss your drive into a new computer, Windows will recognize that the hardware has changed, and potentially—depending on the type of license you have—de-activate itself.
If this setup is temporary, and you’re only using it to grab a few things off your old PC, you don’t need to worry about activation—Windows should keep working as normal, with an activation watermark in the corner and a few features disabled.
If you plan on using this setup permanently, though, you should re-activate Windows. You can try entering the same product key you used before, but this may fail if you have an OEM license that isn’t meant to migrate to new hardware. I recommend trying the activate-by-phone option, though, as sometimes that will succeed when online activation fails.
Again, this whole thing is not a foolproof process—there are many tiny things that could trip things up, so you may have to do a bit of troubleshooting if something doesn’t work properly. And even then, there’s no guarantee you’ll be getting optimal performance if the system isn’t configured properly for your new hardware.
If you can take the time, a clean install is best—but when you need to get up and running right now, it’s nice to know Windows 10 has streamlined the process enough to make it usable.


