- How to Automatically Login to Windows 10 without a Password?
- How to Disable Windows 10 Login Password via the User Account Settings?
- Fix: Microsoft Removes User AutoLogin in Windows 10 20H1/20H2
- How to Turn On Automatic Logon in Windows via the Registry?
- Disable Password Prompt after Sleep/Hibernation in Windows 10
- Enable Secure Automatic Logon without a Password Using AutoLogon Tool
- Log out in Windows 10 user account
- Replies (1)
- Просмотр «Журнала ошибок» в Windows 10
- «Журнал ошибок» в Виндовс 10
- Включение логирования
- Запуск «Просмотра событий»
- Анализ журнала ошибок
How to Automatically Login to Windows 10 without a Password?
In order to login to Windows 10, a user has to enter password for local or Microsoft (online) account each time. This provides a certain level of device protection against access by third parties, but it is inconvenient for home users as it increases the time to access the device’s desktop. In this guide we’ll look at how disable the password sign in on Windows 10 (Windows Server 2016/2012 R2) Login Screen and how to configure autologin under a specific account.
Most often, automatic login without a password is allowed for devices running in kiosk mode. At any reboot (for example, due to a power outage), Windows will automatically logon to the desktop and start the necessary programs via Autorun.
Disabling the password dialog on the Windows 10 Login Screen doesn’t mean that your account should have a blank password. You can configure Windows 10 to automatically use saved credentials to logon to your computer. In all other cases, for example, when accessing your computer via the network (SMB) or connecting to a remote desktop (RDP), you will be prompted for a password.
How to Disable Windows 10 Login Password via the User Account Settings?
The easiest way to disable password login on Windows 10 is to set the appropriate option in the User Account settings dialog box.
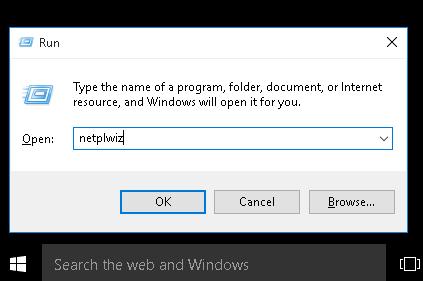
- Press Win+R;
- In the Run dialog box, enter netplwiz or control userpasswords2 command;

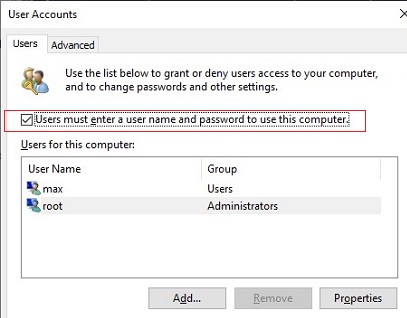
- In the next window with the list of local user accounts, uncheck the option “User must enter a username and password to use this computer” and save changes (OK);
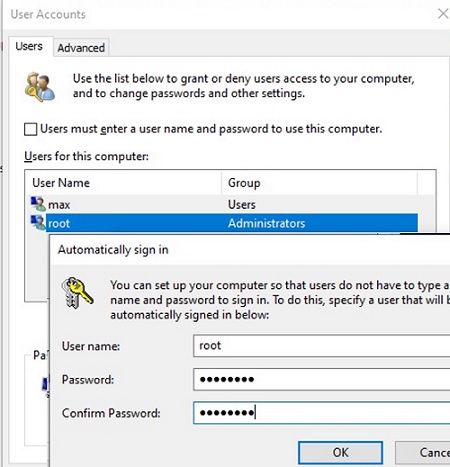
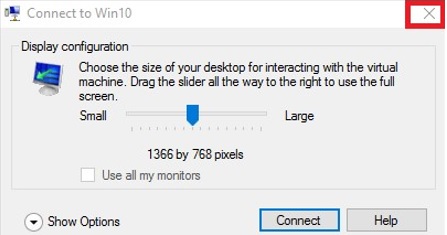
- A window appears where you have to enter the user account and password (twice) that you need to use for automatic login and click “OK”;
- Restart your computer and make sure that the Windows boots directly to the desktop without entering a password.
Fix: Microsoft Removes User AutoLogin in Windows 10 20H1/20H2
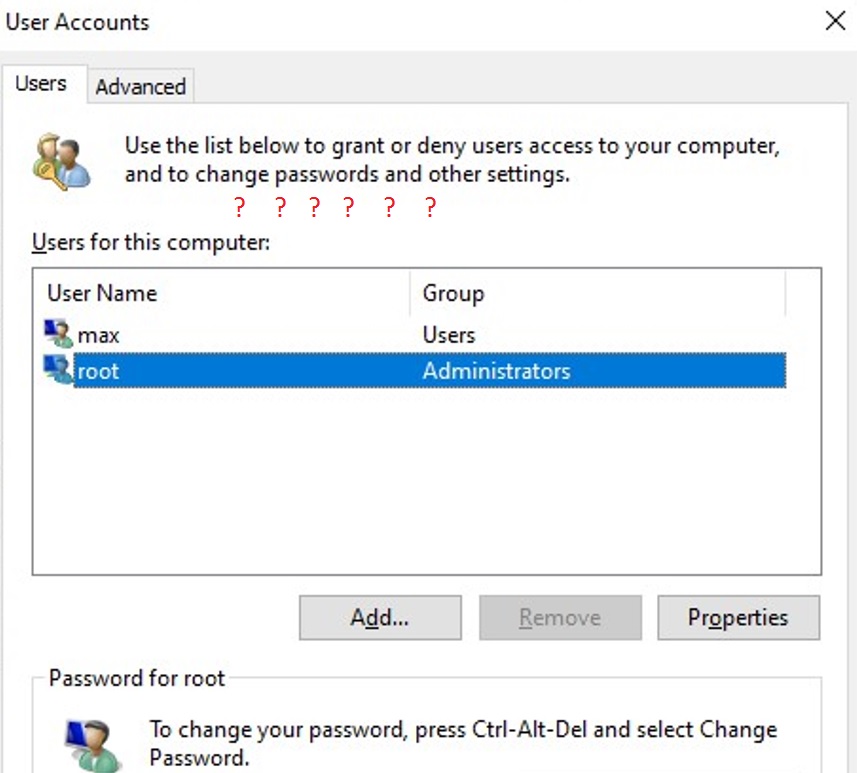
Starting with build Windows 10 2004 (20H1), Microsoft decided to remove the option to configure automatic login for local accounts in the User Control Panel (check the screen below). If you are using a local Windows logon account and not a Microsoft account (MSA), then the “User must enter a username and password to use this computer” option is not displayed.
To show the option used to disable password login on Windows 10 20H2, open the powershell.exe console and edit the registry:
New-ItemProperty -Path «HKLM:\SOFTWARE\Microsoft\Windows NT\CurrentVersion\PasswordLess\Device» -Name DevicePasswordLessBuildVersion -Value 0 -Type Dword –Force
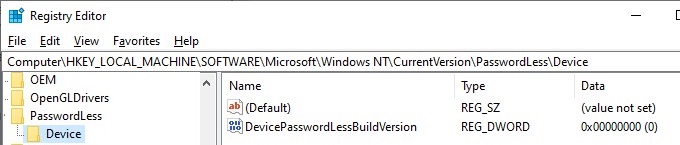
This registry key value disables the Windows 10 option “Require Windows Hello sign-in for Microsoft accounts” setting. Close and restart the netplwiz console and make sure the checkbox appears.
Thus, you can configure auto login without a password on the latest Windows 10 builds (20H2 and 20H2).
How to Turn On Automatic Logon in Windows via the Registry?
Let’s consider a more common way to automatically log into Windows 10 without prompting for a password and skipping the Login Screen. This method allows you to enable password-less sign-in for your Microsoft account, domain account, or Windows 10 local account via the Registry Editor.
- Press Win+R and type regedit ;
- Go to the registry key HKEY_LOCAL_MACHINE\Software\Microsoft\Windows NT\CurrentVersion\Winlogon;
- Change the value of the registry parameter AutoAdminLogon from 0 to 1;
- Create a new string parameter DefaultDomainName, specify the domain name or a local computer name as its value.
To enable autologon through the registry, you can use the following commands (replace root and P@ssword with your username and password, WORKGROUP should be replaced with the name of your AD domain if the domain account used):
reg add «HKLM\SOFTWARE\Microsoft\Windows NT\CurrentVersion\Winlogon» /v AutoAdminLogon /t REG_SZ /d 1 /f
reg add «HKLM\SOFTWARE\Microsoft\Windows NT\CurrentVersion\Winlogon» /v DefaultUserName /t REG_SZ /d root /f
reg add «HKLM\SOFTWARE\Microsoft\Windows NT\CurrentVersion\Winlogon» /v DefaultPassword /t REG_SZ /d P@ssword /f
reg add «HKLM\SOFTWARE\Microsoft\Windows NT\CurrentVersion\Winlogon» /v ForceAutoLogon /t REG_SZ /d 1 /f
reg add «HKLM\SOFTWARE\Microsoft\Windows NT\CurrentVersion\Winlogon» /v DefaultDomainName /t REG_SZ /d WORKGROUP /f
reg add «HKLM\SOFTWARE\Microsoft\Windows NT\CurrentVersion\Winlogon» /v IgnoreShiftOvveride /t REG_SZ /d 1 /f
reg add «HKLM\SOFTWARE\Microsoft\Windows NT\CurrentVersion\Winlogon» /v AutoLogonCount /t REG_DWORD /d 1 /f
Alternatively, you can use a PowerShell script to save the user’s login information to the registry:
$Username =’max’
$Pass = ‘Max$uperP@ss’
$RegistryPath = ‘HKLM:\SOFTWARE\Microsoft\Windows NT\CurrentVersion\Winlogon’
Set-ItemProperty $RegistryPath ‘AutoAdminLogon’ -Value «1» -Type String
Set-ItemProperty $RegistryPath ‘DefaultUsername’ -Value $Username -type String
Set-ItemProperty $RegistryPath ‘DefaultPassword’ -Value $Pass -type String
Restart-Computer
Disable Password Prompt after Sleep/Hibernation in Windows 10
Using GPO, you can turn off the password request when the computer wakes up from sleep or hibernation.
- To do this, run the gpedit.msc console (in the home versions of Windows 10, you can run the local policy editor console like this);
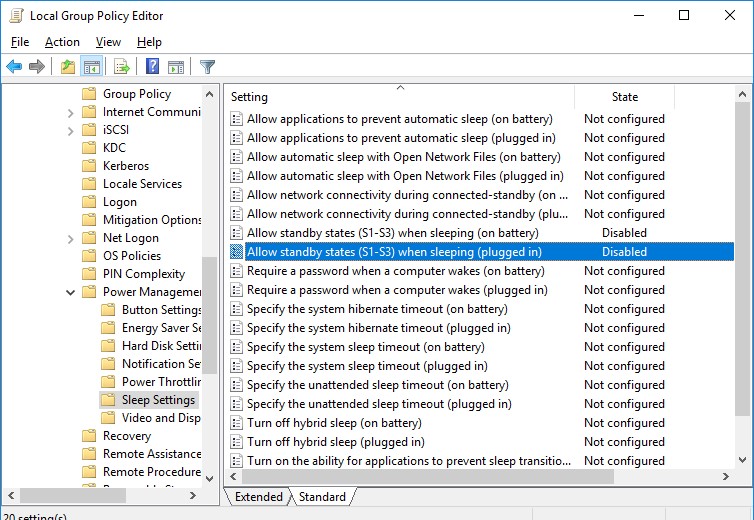
- Go to the policy section Computer Configuration -> Administrative Templates -> System -> Power Management -> Sleep Settings;
- Disable the GPO parameters “Require a password when a computer wakes (on battery)” and “Require a password when a computer wakes on battery (plugged in)”;
- Now Windows won’t require a password after resuming from sleep or hibernation.
Enable Secure Automatic Logon without a Password Using AutoLogon Tool
For more secure automatic logon to Windows 10, you can use the free AutoLogon for Windows tool. The utility was part of the Sysinternals system utilities pack and is now available for download on the Microsoft website (https://docs.microsoft.com/en-us/sysinternals/downloads/autologon). The Autologon is also useful because the previous ways of enabling autologon in Windows 10 may not work on computers that are joined the Active Directory domain.
- Download and run Autologon.exe (or autologon64.exe ) as an administrator;
- Accept the terms of the license agreement;
- Specify the user account, domain and user password under which you want to perform autologin and press the Enable button:
- A window will appear in which it is indicated that the autologon is enabled. Encrypted password is stored in LSA format under the registry key HKLM\SECURITY\Policy\Secrets. In this case, the password is not stored in clear text, but the encryption algorithm is not strong and any local computer administrator (but not a user) can decrypt it.
You can set user credentials to automatically log on to Windows using the Autologon command line options. To configure Windows autologin for a user, you can use the following command:
autologon64.exe USER_NAME DOMAIN PASSWORD /accepteula
In this guide we looked at how to disable password login on Windows 10 and boot the computer directly to the user’s desktop. In order to temporarily disable automatic logon in Windows and manually specify the user credentials under which you need to sign in, you must hold down the Shift key while Windows is booting.
Log out in Windows 10 user account
Replies (1)
![]()
Thank you for posting on Microsoft Community. We appreciate your interest in Windows 10.
We will help you in resolving your issue.
Before assisting further, I would like to ask you few questions related to the query.
- How are you logged in to your PC?
- When you say “How to log out my Hotmail in Windows 10 in my laptop” do you mean from Mail account or from PC?
If you want to sign out of your PC from the Hotmail account, follow the steps below and check if the issue is resolved.
- Close all the applications opened on the desktop and press Start key on the keyboard.
- Click on your account name and select Sign out option.
If you want to sign out of the Microsoft account connected to Hotmail account from the PC, I suggest you to login as a local account.
To convert to local account, follow the steps below:
- Sign in to your Microsoft account on Windows 10.
- Click Start and then PC settings.
- Click Users and accounts and under Your Profile click Disconnect on the right of the screen.
- Enter your Microsoft account’s password, and click on Next.
- Type in a Username, Password, and Password Hint that you want set for your Local account and click Next. Click on Sign out and Finish button.
Hope this helps!
Get back to us with the answers to the above questions to assist you further on this query. Your reply is most important for us to ensure that we assist you accordingly.
We are happy to assist you with any issues pertaining to Windows.
Просмотр «Журнала ошибок» в Windows 10
Во время работы операционной системы, как и любого другого программного обеспечения, периодически возникают ошибки. Очень важно уметь анализировать и исправлять подобные проблемы, дабы в будущем они не появлялись снова. В ОС Windows 10 для этого был внедрен специальный «Журнал ошибок». Именно о нем мы и поговорим в рамках данной статьи.
«Журнал ошибок» в Виндовс 10
Упомянутый ранее журнал является лишь небольшой частью системной утилиты «Просмотр событий», которая по умолчанию присутствует в каждой версии Windows 10. Далее мы разберем три важных аспекта, которые касаются «Журнала ошибок» — включение логирования, запуск средства «Просмотр событий» и анализ системных сообщений.
Включение логирования
Для того чтобы система могла записывать все события в журнал, необходимо включить его. Для этого выполните следующие действия:
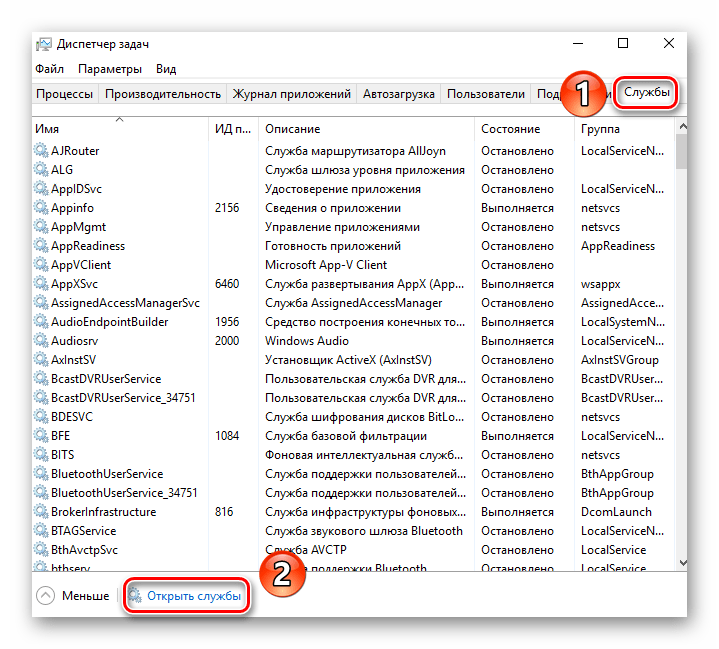
- Нажмите в любом пустом месте «Панели задач» правой кнопкой мышки. Из контекстного меню выберите пункт «Диспетчер задач».

В открывшемся окне перейдите во вкладку «Службы», а затем на самой странице в самом низу нажмите кнопку «Открыть службы».
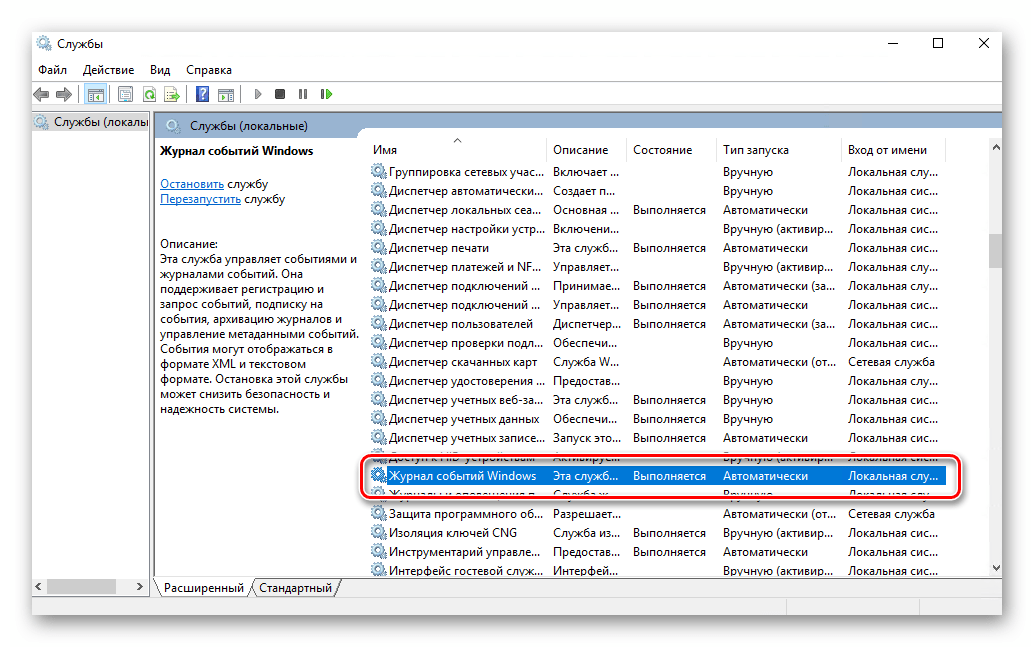
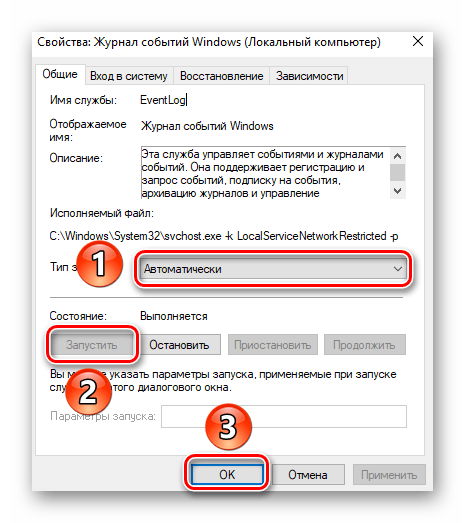
Далее в перечне служб нужно найти «Журнал событий Windows». Убедитесь, что она запущена и работает в автоматическом режиме. Об этом должны свидетельствовать надписи в графах «Состояние» и «Тип запуска».
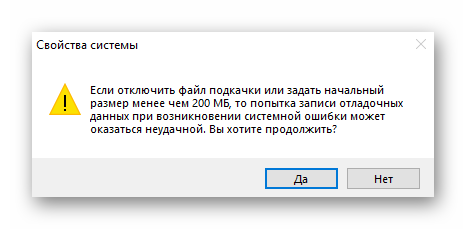
После этого остается проверить, активирован ли на компьютере файл подкачки. Дело в том, что при его выключении система попросту не сможет вести учет всех событий. Поэтому очень важно установить значение виртуальной памяти хотя бы 200 Мб. Об этом напоминает сама Windows 10 в сообщении, которое возникает при полной деактивации файла подкачки.
О том, как задействовать виртуальную память и изменить ее размер, мы уже писали ранее в отдельной статье. Ознакомьтесь с ней при необходимости.
С включением логирования разобрались. Теперь двигаемся дальше.
Запуск «Просмотра событий»
Как мы уже упоминали ранее, «Журнал ошибок» входит в состав стандартной оснастки «Просмотр событий». Запустить ее очень просто. Делается это следующим образом:
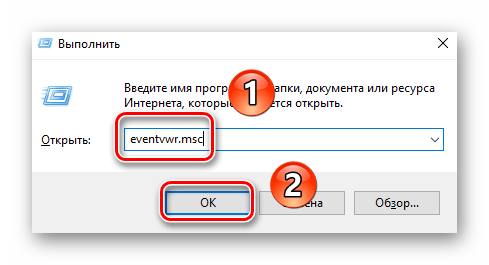
- Нажмите на клавиатуре одновременно клавишу «Windows» и «R».
- В строку открывшегося окна введите eventvwr.msc и нажмите «Enter» либо же кнопку «OK» ниже.
В результате на экране появится главное окно упомянутой утилиты. Обратите внимание, что существуют и другие методы, которые позволяют запустить «Просмотр событий». О них мы в деталях рассказывали ранее в отдельной статье.
Анализ журнала ошибок
После того как «Просмотр событий» будет запущен, вы увидите на экране следующее окно.
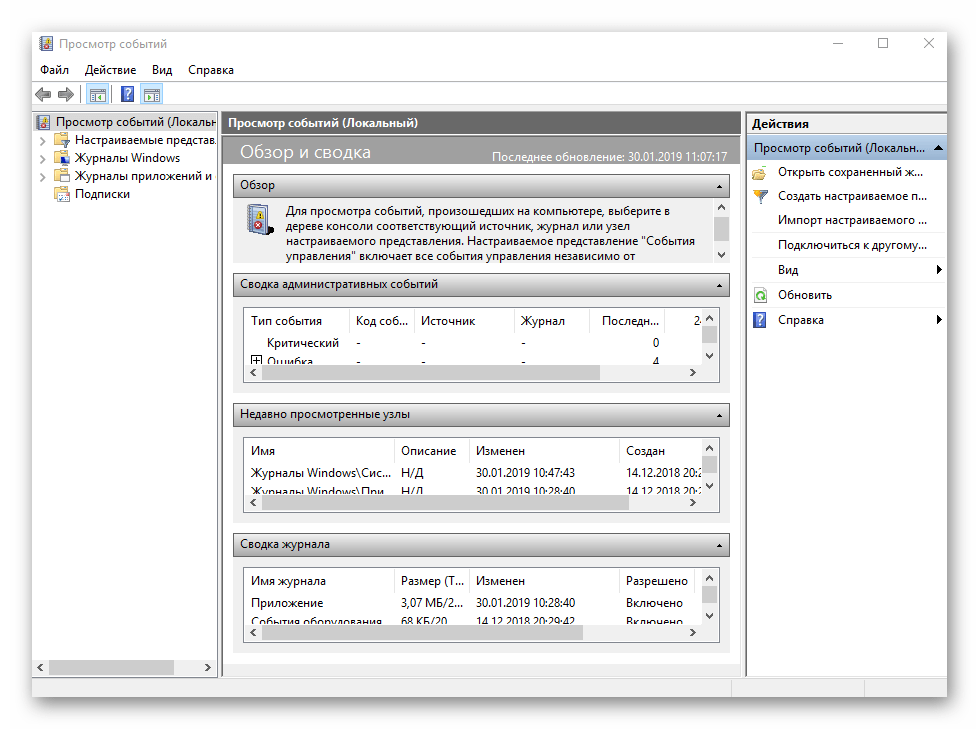
В левой его части находится древовидная система с разделами. Нас интересует вкладка «Журналы Windows». Нажмите на ее названии один раз ЛКМ. В результате вы увидите список вложенных подразделов и общую статистику в центральной части окна.
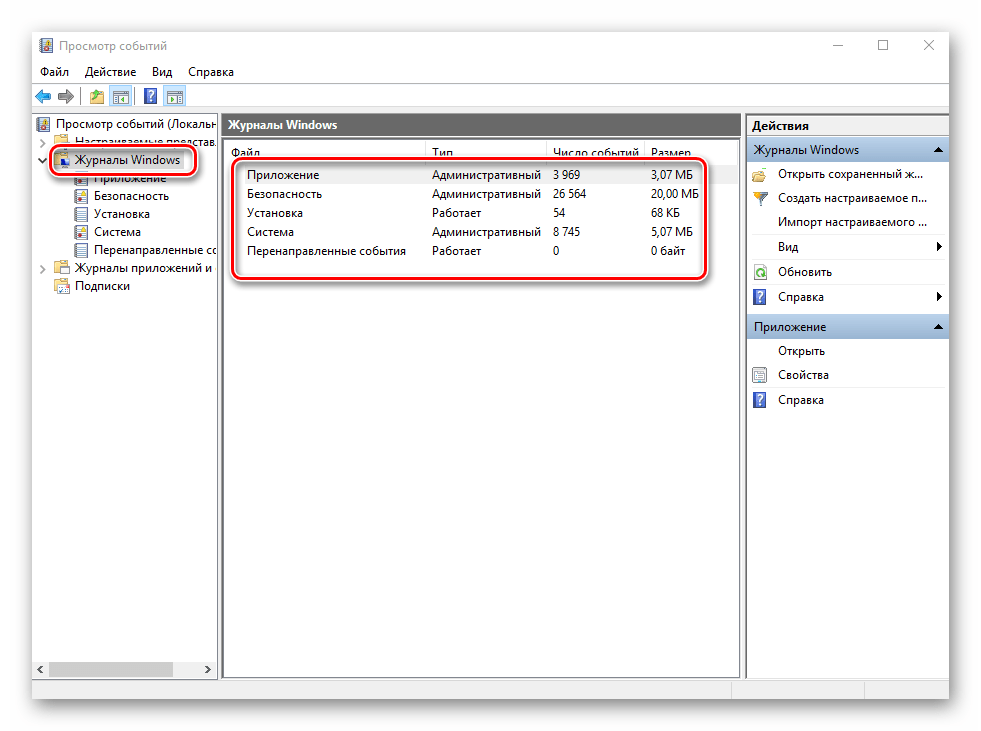
Для дальнейшего анализа необходимо зайти в подраздел «Система». В нем находится большой список событий, которые ранее происходили на компьютере. Всего можно выделить четыре типа событий: критическое, ошибка, предупреждение и сведения. Мы вкратце расскажем вам о каждом из них. Обратите внимание, что описать все возможные ошибки мы не можем просто физически. Их много и все они зависят от различных факторов. Поэтому если у вас не получится что-то решить самостоятельно, можете описать проблему в комментариях.
Критическое событие
Данное событие помечено в журнале красным кругом с крестиком внутри и соответствующей припиской. Кликнув по названию такой ошибки из списка, немного ниже вы сможете увидеть общие сведения происшествия.
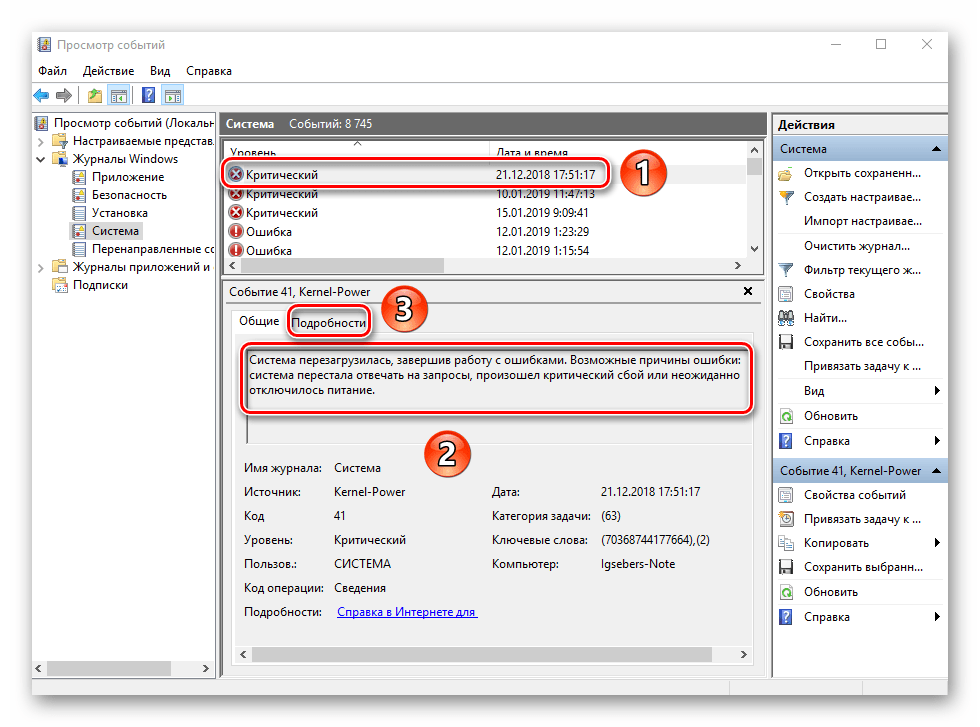
Зачастую представленной информации достаточно для того, чтобы найти решение проблемы. В данном примере система сообщает о том, что компьютер был резко выключен. Для того чтобы ошибка не появлялась вновь, достаточно просто корректно выключать ПК.
Для более продвинутого пользователя есть специальная вкладка «Подробности», где все событие представлены с кодами ошибок и последовательно расписаны.
Ошибка
Этот тип событий второй по важности. Каждая ошибка помечена в журнале красным кругом с восклицательным знаком. Как и в случае с критическим событием, достаточно нажать ЛКМ по названию ошибки для просмотра подробностей.
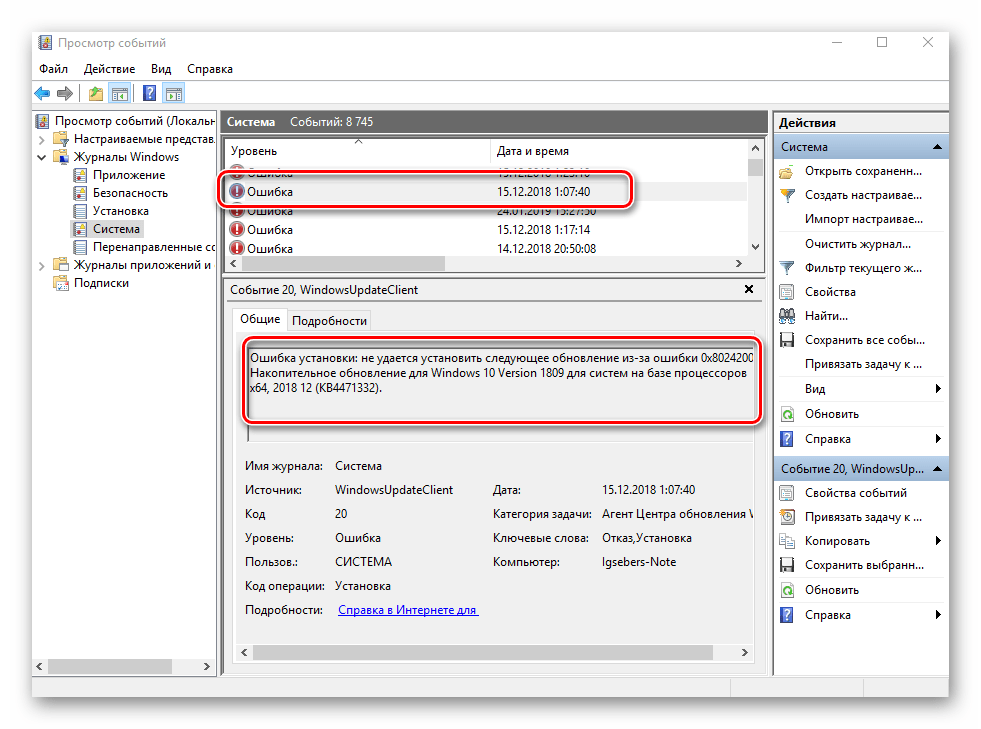
Если из сообщения в поле «Общие» вы ничего не поняли, можно попробовать найти информацию об ошибке в сети. Для этого используйте название источника и код события. Они указаны в соответствующих графах напротив названия самой ошибки. Для решения проблемы в нашем случае необходимо попросту повторно инсталлировать обновление с нужным номером.
Предупреждение
Сообщения данного типа возникают в тех ситуациях, когда проблема не носит серьезный характер. В большинстве случаев их можно игнорировать, но если событие повторяется раз за разом, стоит уделить ему внимание.
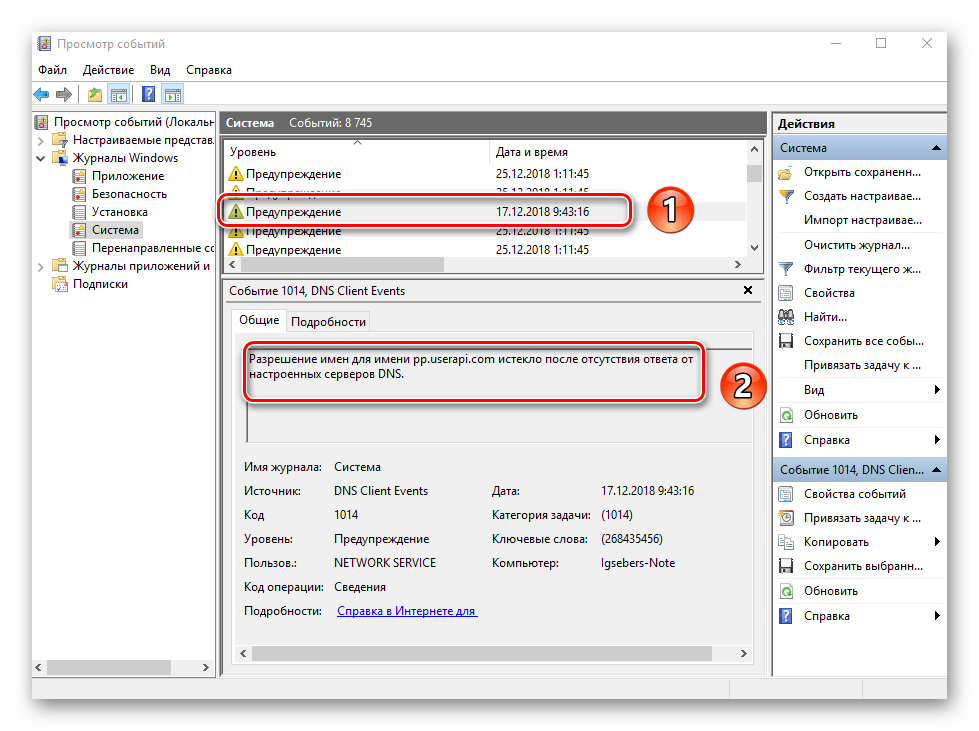
Чаще всего причиной появления предупреждения служит DNS-сервер, вернее, неудачная попытка какой-либо программы подключиться к нему. В таких ситуациях софт или утилита попросту обращается к запасному адресу.
Сведения
Этот тип событий самый безобидный и создан лишь для того, чтобы вы могли быть в курсе всего происходящего. Как понятно из его названия, в сообщение содержатся сводные данные о всех инсталлированных обновлениях и программах, созданных точках восстановления и т.д.
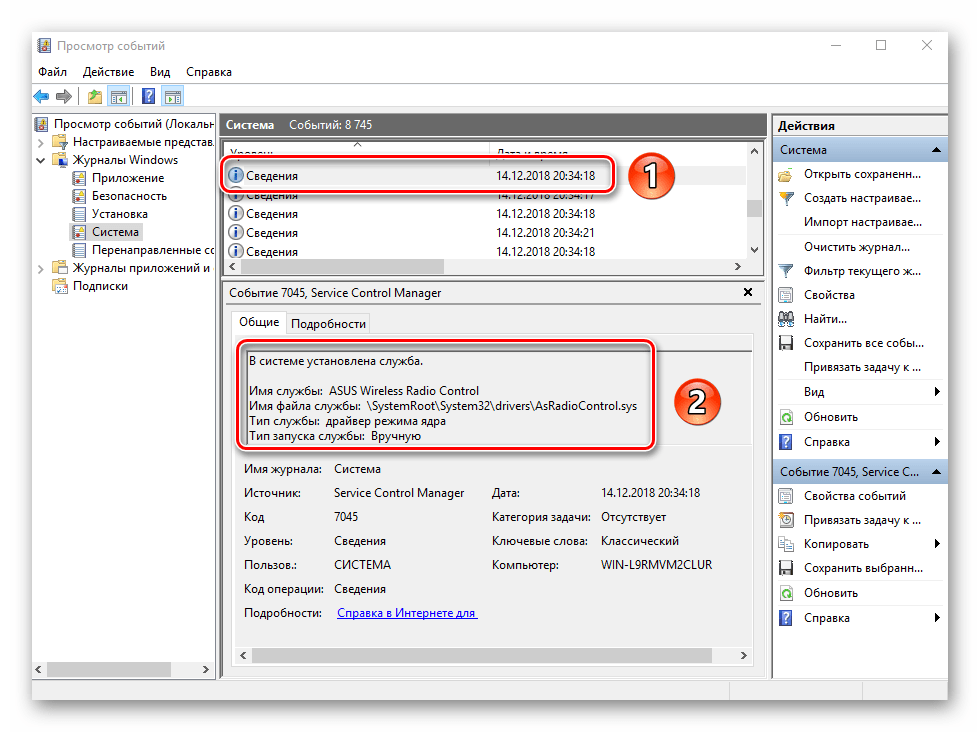
Подобная информация будет очень кстати для тех пользователей, которые не хотят устанавливать сторонний софт для просмотра последних действий Windows 10.
Как видите, процесс активации, запуска и анализа журнала ошибок очень прост и не требует от вас глубоких познаний ПК. Помните, что таким образом можно узнать информацию не только о системе, но и о других ее компонентах. Для этого достаточно в утилите «Просмотр событий» выбрать другой раздел.


