- Wifi hotspot для linux
- Software access point
- Contents
- Requirements
- Wi-Fi device must support AP mode
- Wireless client and software AP with a single Wi-Fi device
- Configuration
- Wi-Fi link layer
- Network configuration
- Bridge setup
- NAT setup
- Tools
- linux-wifi-hotspot
- RADIUS
- Troubleshooting
- WLAN is very slow
- NetworkManager is interfering
- Cannot start AP mode in 5Ghz band
- Программная точка доступа в Ubuntu (обновлено)
- Установка AP-Hotspot в Ubuntu
- Использование программной точки доступа в Ubuntu
- Автоматический запуск точки доступа при запуске Ubuntu
- Create A WiFi Hotspot On Linux
- An in-depth tutorial on creating a hotspot in Linux
- Overview
- Requirements
- Setup
- Configurations and running
Wifi hotspot для linux
Linux Wifi Hotspot
![]()


- UI improvements
- Fallback to same channel when same wifi interface does not support for multiple channels
- Show the connected devices
- Add MAC filter
- Share your wifi like in Windows — Use wifi and enable hotspot at the same time.
- Share access point from any network interface
- MAC filter
- Includes Both command line and gui.
- Support both 2.4GHz and 5GHz (Need to be compatible with your wifi adapter). Ex: You have connected to the 5GHz network and share a connection with 2.4GHz.
- Select Channel.
- Hide SSID
- Show the connected devices

Command line help and documentation
If you only need the command-line without GUI run make install-cli-only as root user.
Sometimes there are troubles with 5Ghz bands due to some vendor restrictions. If you cannot start hotspot while you are connected to 5Ghz band, Unselect Auto and select 2.4Ghz in frequency selection.
If any problems with RealTeK Wifi Adapters see this
Download the debian package from latest release
Источник
Software access point
A software access point, also called virtual router or virtual Wi-Fi, enables a computer to turn its wireless interface into a Wi-Fi access point. It saves the trouble of getting a separate wireless router.
Contents
Requirements
Wi-Fi device must support AP mode
You need a nl80211 compatible wireless device, which supports the AP operating mode. This can be verified by running the iw list command, under the Supported interface modes block there should be AP listed:
Wireless client and software AP with a single Wi-Fi device
Creating a software AP is independent from your own network connection (Ethernet, wireless, . ). Many wireless devices even support simultaneous operation both as AP and as wireless «client» at the same time. Using that capability you can create a software AP acting as a «wireless repeater» for an existing network, using a single wireless device. The capability is listed in the following section in the output of iw list :
The constraint #channels means that your software AP must operate on the same channel as your Wi-Fi client connection; see the channel setting in hostapd.conf below.
If you want to use the capability/feature, perhaps because an Ethernet connection is not available, you need to create two separate virtual interfaces for using it. Virtual interfaces for a physical device wlan0 can be created as follows: The virtual interfaces with unique MAC address are created for the network connection ( wlan0_sta ) itself and for the software AP/hostapd «wireless repeater»:
Random MAC address can be generated using macchanger.
Configuration
Setting up an access point consists of two main parts:
- Setting up the Wi-Fi link layer, so that wireless clients can associate to your computer’s software access point and exchange IP packets with it.
- Setting up the network configuration on your computer, so that it properly relays IP packets between its own internet connection and the wireless clients.
Wi-Fi link layer
The actual Wi-Fi link is established via the hostapd package, which has WPA2 support.
Adjust the options in hostapd configuration file if necessary. Especially, change the ssid and the wpa_passphrase . See hostapd Linux documentation page for more information.
For automatically starting hostapd on boot, enable the hostapd.service .
If you are starting hostapd on boot, make sure the wireless network interface is brought up first, otherwise it will fail. To ensure your wireless interface is ready, edit the unit configuration file and state that it is bound to and should start after your network interface:
Also make sure that the interface is not managed by other network managers. If you are using NetworkManager, see NetworkManager#Ignore specific devices.
Network configuration
There are two basic ways for implementing this:
- bridge: creates a network bridge on your computer, wireless clients will appear to access the same network interface and the same subnet that is used by your computer.
- NAT: with IP forwarding/masquerading and DHCP service, wireless clients will use a dedicated subnet, data from/to that subnet is NAT-ted. This is similar to a normal Wi-Fi router which is connected to the internet.
The bridge approach is simpler, but it requires that any service that is needed by the wireless clients, in particular DHCP, is available on the computer’s external interface. This means it will not work if the external modem which assigns IP addresses, supplies the same one to different clients.
The NAT approach is more versatile, as it clearly separates Wi-Fi clients from your computer and it is completely transparent to the outside world. It will work with any kind of network connection, and (if needed) traffic policies can be introduced using the usual iptables approach.
It is possible to combine these two approaches: for example having a bridge that contains both an ethernet device and the wireless device with a static ip, offering DHCP and setting NAT configured to relay the traffic to an additional network device connected to the WAN.
Bridge setup
You need to create a network bridge and add your network interface (e.g. eth0 ) to it. You should not add the wireless device (e.g. wlan0 ) to the bridge; hostapd will add it on its own.
NAT setup
In that article, the device connected to the LAN is net0 . That device would be in this case your wireless device (e.g. wlan0 ).
Tools
linux-wifi-hotspot
The linux-wifi-hotspot AUR package provides a script that can create either a bridged or a NATed access point for internet sharing. It combines hostapd, dnsmasq and iptables for the good functioning of the access point. Includes both command line and gui. The basic syntax to create a NATed virtual network is the following:
Alternatively, the template configuration provided in /etc/create_ap.conf can be adapted to ones need and the script run with:
To use the GUI, run in terminal:
Enable/start the create_ap.service to run the script at boot time with the configuration specified in /etc/create_ap.conf .
RADIUS
See [1] for instructions to run a FreeRADIUS server for WPA2 Enterprise.
 This article or section needs expansion.
Troubleshooting
WLAN is very slow
Frequent causes for a lower than expected throughput include
- An improper choice of operation mode with a hw_mode lower than the one supported can limit the router artificially. Check that a modern operating mode is selected.
- A crowded or otherwise noise afflicted channel can severely degrade performance especially in densely populated areas. Try changing to a different channel or even switch frequencies.
- The availability of too little entropy can lead to poor performance. Consider installing haveged.
NetworkManager is interfering
hostapd may not work, if the device is managed by NetworkManager. You can mask the device using MAC:
Or interface name:
Cannot start AP mode in 5Ghz band
Apparently with the special country code 00 (global), all usable frequencies in the 5Ghz band will have the no-ir (no-initiating-radiation) flag set, which will prevent hostapd from using them. You will need to have crda installed and have your country code set to make frequencies allowed in your country available for hostapd.
Источник
Программная точка доступа в Ubuntu (обновлено)

Программная точка доступа позволяет работать вашему компьютеру в качестве Wifi-роутера. Это наиболее легкий способ соединить несколько компьютеров в одну сеть, а также раздавать доступ в интернет через свой компьютер на другие устройства сети, включая ноутбуки, смартфоны и планшетные компьютеры. Эта функция доступна в Ubuntu «из коробки»: достаточно зайти в параметры системы, далее пункт «Сеть», в левом списке выбрать «Беспроводное» и нажать на кнопку «Сделать точкой доступа». Однако у этого способа есть один огромный минус — создается сеть типа AdHoc, подключение к которой не поддерживается на большинстве мобильных телефонов и планшетников. В этой статье я расскажу о замечатеном скрипте AP-Hotspot, который позволяет создать Wi-fi сеть в Ubuntu, которая будет поддерживать Android и практически всеми устройствами.
Заказать печать фотографий по приемлемым ценам
Данный скрипт протестирован в Ubuntu 13.04 на ноутбуке Dell Inspiron 1545 (с модулем Wi-Fi Broadcom BCM4312) и Dell XPS L702X (Intel Centrino Wireless-N 1030), а также Android-устройствами. Он должен быть совместим со всеми современными Wi-Fi адаптерами, т.к. умение работать в режиме программной точки доступа — это одно из требований, предъявляемых Microsoft к устройствам для сертификации их совместимости с Windows 7.
Одной из приятных особенностей скрипта является то, что он показывает всплывающие уведомления о состоянии сети и подключении устройств к вашей программной точке доступа, а его настройка занимает всего несколько секунд.
Установка AP-Hotspot в Ubuntu
Установка скрипта выполняется из репозитория PPA WebUpd8, выполнением следующих команд в терминале (CTRL+ALT+T):
sudo add-apt-repository ppa:nilarimogard/webupd8
sudo apt-get update
sudo apt-get install ap-hotspot
Для Ubuntu 14.04 также необходимо выполнить понижение версии пакета hostapd, иначе AP-Hotspot не будет работать. Для этого в терминале необходимо выполнить следующие команды:
для 64-разрядной Ubuntu:
cd /tmp
wget http://archive.ubuntu.com/ubuntu/pool/universe/w/wpa/hostapd_1.0-3ubuntu2.1_amd64.deb
sudo dpkg -i hostapd*.deb
sudo apt-mark hold hostapd
cd /tmp
wget http://archive.ubuntu.com/ubuntu/pool/universe/w/wpa/hostapd_1.0-3ubuntu2.1_i386.deb
sudo dpkg -i hostapd*.deb
sudo apt-mark hold hostapd
Использование программной точки доступа в Ubuntu
Чтобы запустить программную точку доступа, выполните следующую команду:
sudo ap-hotspot start
При первом запуске, скрипт автоматически определит, какой сетевой интерфейс подключен к интернету, однако, если автоматическое определение не сработает, скрипт предложит выбрать это вручную. Затем, вам предложат ввести имя для точки доступа и пароль для подключения к ней. При повторных запусках программной точки доступа, эти параметры уже не будут запрашиваться у вас, поэтому если вы хотите что-то поменять в них, выполните следующую команду:
sudo ap-hotspot configure
Для остановки точки доступа, используйте следующую команду:
sudo ap-hotspot stop
sudo ap-hotspot restart
Для просмотра других поддерживаемых команд, выполните:
Автоматический запуск точки доступа при запуске Ubuntu
Для того, чтобы настроенная программная точка доступа запускалась сама при старте компьютера, необходимо внести команду ее запуска в один из файлов конфигурации. Нажмите Alt+F2 введите следующую команду:
gksu gedit /etc/rc.local
нажмите Enter, у вас будет запрошен пароль администратора и после этого вы увидите окно текстового редактора, где перед строкой:
Источник
Create A WiFi Hotspot On Linux
An in-depth tutorial on creating a hotspot in Linux

Dec 25, 2018 · 6 min read
AIM: To create a WiFi hotspot on a Linux machine to share a wireless connection on a single wireless card
Moving from a Windows environment on to a Linux the first real challenge I faced was that I need to share the internet on my laptop. But unlike with windows where it was one button to rule them all I found that setting a WiFi hotspot on a Linux system was a bit more tedious affair.
For Starters, I looked a t online solutions and found out the hard way that most of the implementations were either to share an Ethernet network using a wireless card or a set up using two wireless cards.
You got to know a bit about the terminal and basic network to get through this guide follow it to the dot and you should be fine. you can just skip over all the explanation and run the commands it should work. probably…
Overview
To get started to set up a hotspot on a single wireless card requires some basic knowledge about networks and the terminal. The plan is rather simple.
- Check to see if your wireless card supports access point creation.
- Setup a virtual interface on the card as an access point using iw command
- Setup hotspot using Hostapd
- Create a DHCP service to provide IP address and configurations for the clients
- Test everything works properly and that’s it
Requirements
- iw: it is a new nl80211 based CLI configuration utility for wireless devices. It supports all new drivers that have been added to the kernel recently. The old tool iwconfig, which uses Wireless Extensions interface, is deprecated and it’s strongly recommended to switch to iw and nl80211.
- hostapd:hostapd is a user-space daemon-process software to manage, host and implement wireless access points on the fly under the influence of nl80211 driver which still is under development phase and not yet fully supported by many adapters. installation sudo apt install hostapd
- udhcpd: a very small DHCP program installation sudo apt install udhcpd
Setup
I am using a KDE Neon Linux based system running on a hp notebook laptop. along with all the tools mentioned above installed.
Configurations and running
step 1: check to see if the system supports access point supports for this run the command iw list

You should see an output as below


Scroll up to where it says supported interface modes and check to see if AP is listed. If so we are good to go…
step 2: Now we move on the most important step setting up a virtual wireless interface on top of our existing interface. this is also done using the iw command sudo iw phy phy0 interface add new1 type __ap

run the above command and then run ifconfig -a to list all devices. In the above, you may need to replace phy0 to your device’s physical name to see all physical devices use iw phy command.

now we need to set up the IP for our new interface. I am going to use 192.168.28.0 as my network address and for my interface, I am going to use the IP 192.168.28.1. To set the IP use the following command.


So far we have created and configured a virtual interface, now to move on one of the most important steps is, to use hostapd to create the actual hotspot.
Step 3: Setting up the hostapd. We first need to configure the hostapd. I am going to create a hostapd.conf file in my home directory and then open it. I am going to use vi. a sample configuration is shown below.

the final step is to run it using the command : sudo hostapd hostapd.conf

now if you were to scan for the WiFi you will see your hotspot. If you try to connect now with your password you can authorize on to the network but your device will fill fail to obtain any configurations either you can set it manually which is quite troublesome. But in most common networks we have a DHCP server and clients get their configurations from this server so let’s set up one for our local access point network.
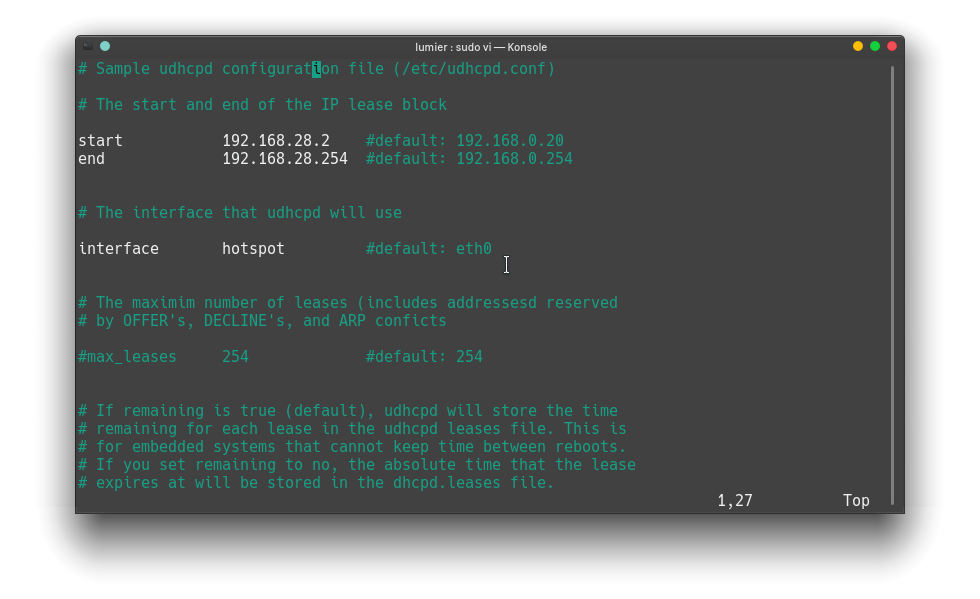
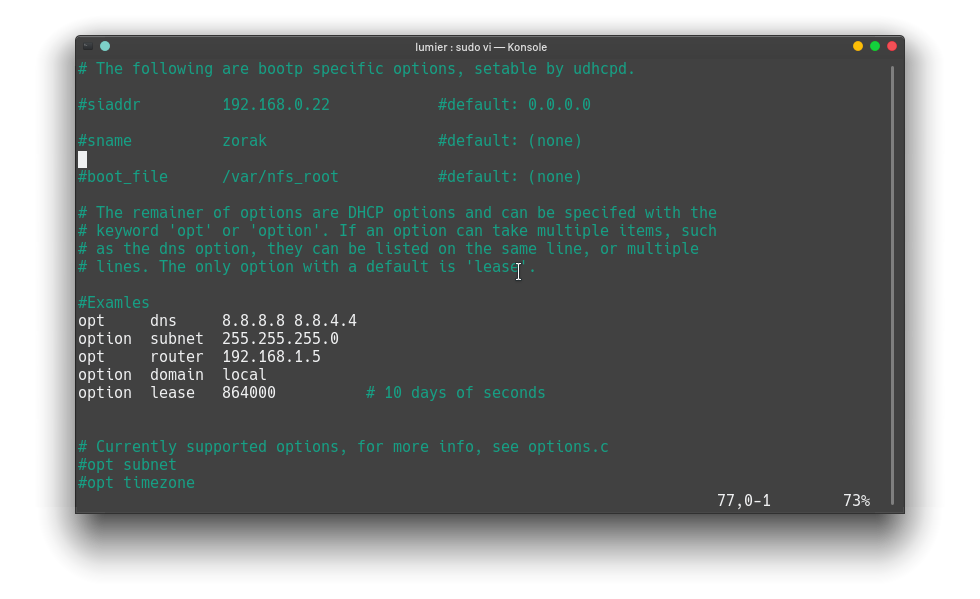
Step 4: Configuring the DHCP server. I am going to the DHCP server configuration to the file /etc/udhcpd.conf file. a sample configuration is shown below. you should already have some sample configuration in the file just edit the file as described below
One thing you have to note is the router address should be the address of your other interface.
to get the address of the other interface use ifconfig -a to list all connections and select the IP address of your specific connection. in my case, it is 192.168.1.5 for interface wlo1

Now that’s it the DHCP is configured you can run as sudo service udhcpd restart but for me, it seems to not work for some strange reason so I just ran it directly from the terminal using the following command sudo udhcpd -f
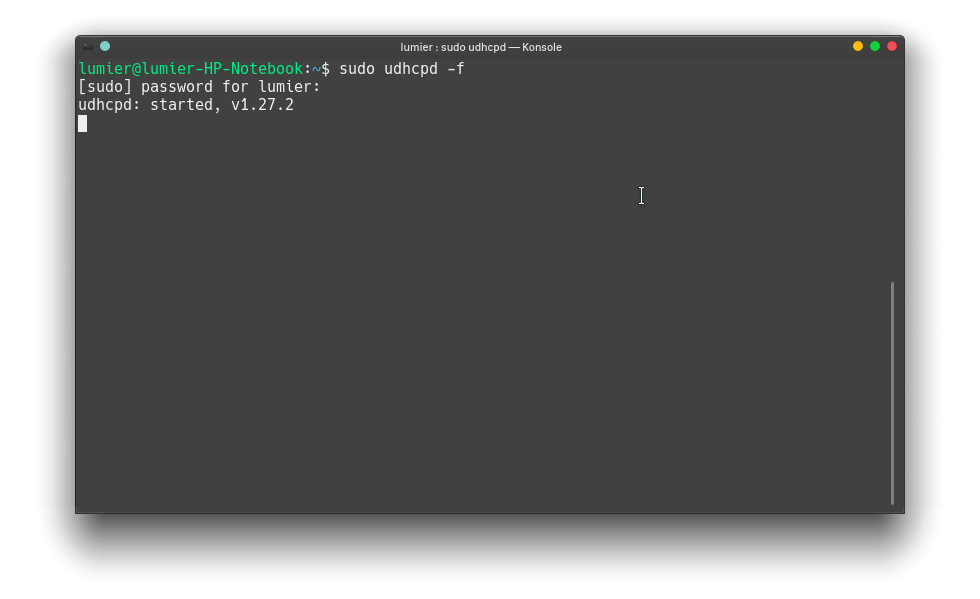
Now try connecting to your hotspot and you should be able to connect and receive the configurations too. and you should see something as shown below

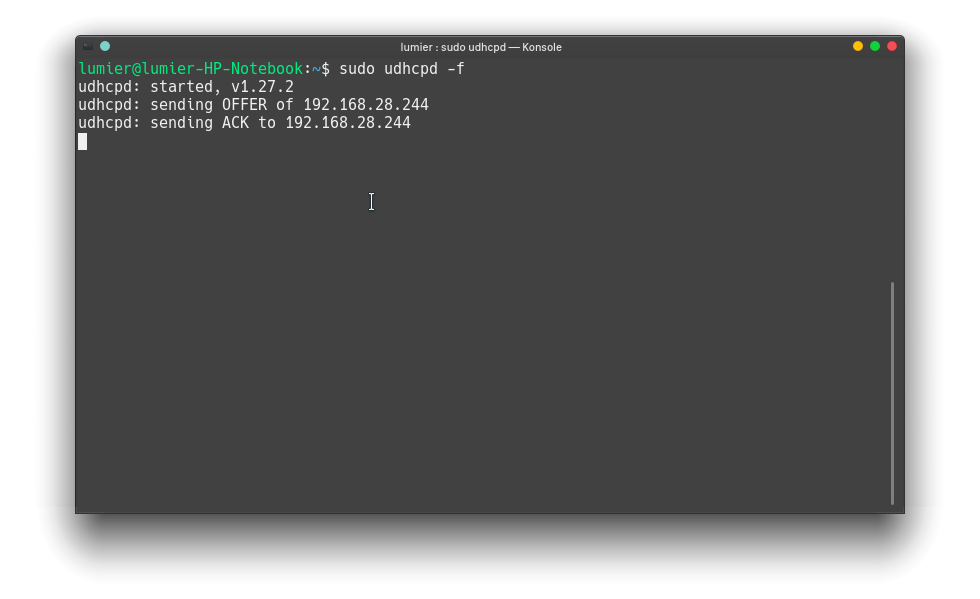
So pretty cool right you just created a hotspot configured the DHCP and it pretty much is over. but if you try to access the internet from your client device now it does not have any actual internet. To solve this we need to do just one more step that is to configure an IP forward. Basically route all our requests on our local network over to our card connected to the internet.
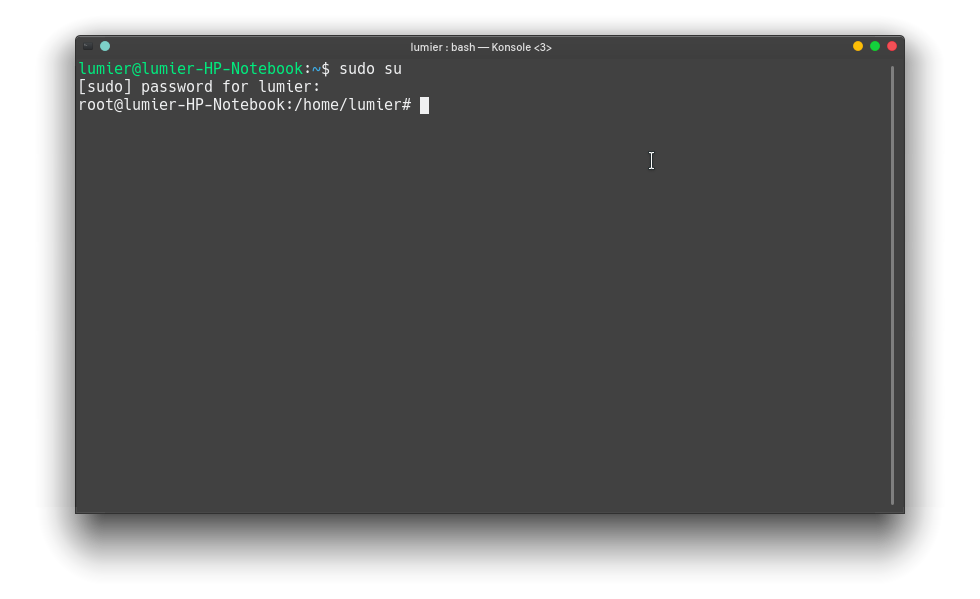
run sudo su to move on to a superuser terminal
now run the following commands. NOTE: replace wlo1 with your interface name, that is the interface that is connected to the internet
all done we now have the internet on the client device.
That’s it all done. if any of you find the time to automate this please let me know or if there is a better way to do the same.
Источник


