- Установка Minecraft на Linux
- Установка Minecraft в Linux (официальная версия)
- 1. Регистрация аккаунта Mojang
- 2. Установка Java и проприетарных драйверов
- 3. Установка официального Minecraft-лаунчера
- Сторонние лаунчеры Minecraft в Linux
- Запуск лаунчера Minecraft в Linux
- 1. MRLauncher
- 2. MLauncher
- 3. TLauncher
- Скриншоты из игры
- Выводы
- How to Install Minecraft on Linux?
- What Is Minecraft?
- Install Minecraft on Ubuntu and its Derivatives
- Step 1: Download the Installation Package
- Step 2: Install Minecraft
- Step 3: Launch Minecraft
- Install Minecraft on Other Distributions
- Step 1: Install Java Runtime
- Step 2: Install Graphics Drivers
- Step 3: Install & Launch Minecraft
- How to Uninstall Minecraft on Linux
- Conclusion
- About the author
- David Morelo
- How To Play Minecraft On Linux
- Download Minecraft
- Install Java on Linux
- Ubuntu
- Debian
- Fedora and OpenSUSE
- Install Minecraft On Linux
Установка Minecraft на Linux
В этой статье речь пойдёт о Minecraft. Да, многие ненавидят эту игру, но всё же она не так плоха и обладает большим количеством плюсов. У данной игры развитое сообщество (и это не только школьники). Так как Minecraft написан на Java, у нас есть возможность нативно запускать её под различными дистрибутивами Linux, чем мы и займёмся в данной статье.
Одним из важных критериев для запуска игры является наличие проприетарной Java от Oracle. Поэтому установку Minecraft на Linux рассмотрим на примере дистрибутивов Ubuntu, Arch Linux, Cent OS (Gentoo включать не буду, потому что на Wiki всё хорошо расписано). Так же сравним популярные лаунчеры.
Установка Minecraft в Linux (официальная версия)
1. Регистрация аккаунта Mojang
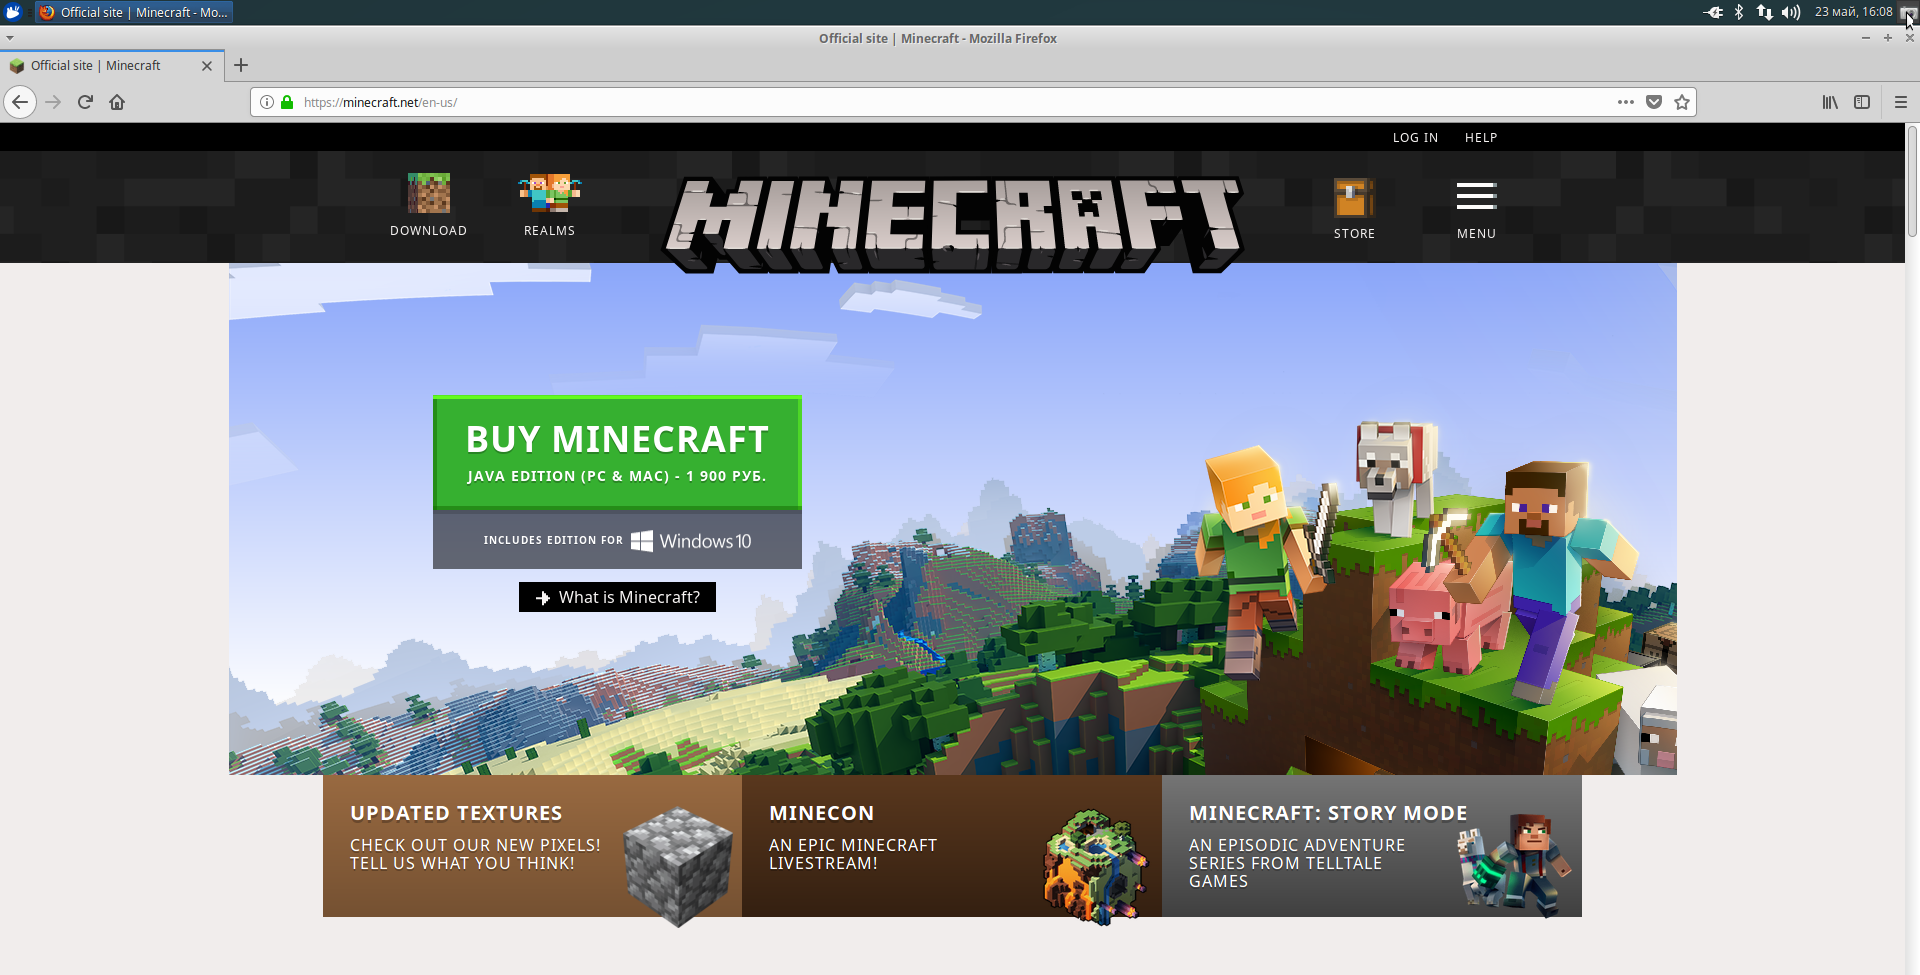
Если вы хотели бы приобрести лицензию Minecraft, перейдите на официальный сайт и нажмите BUY MINECRAFT:
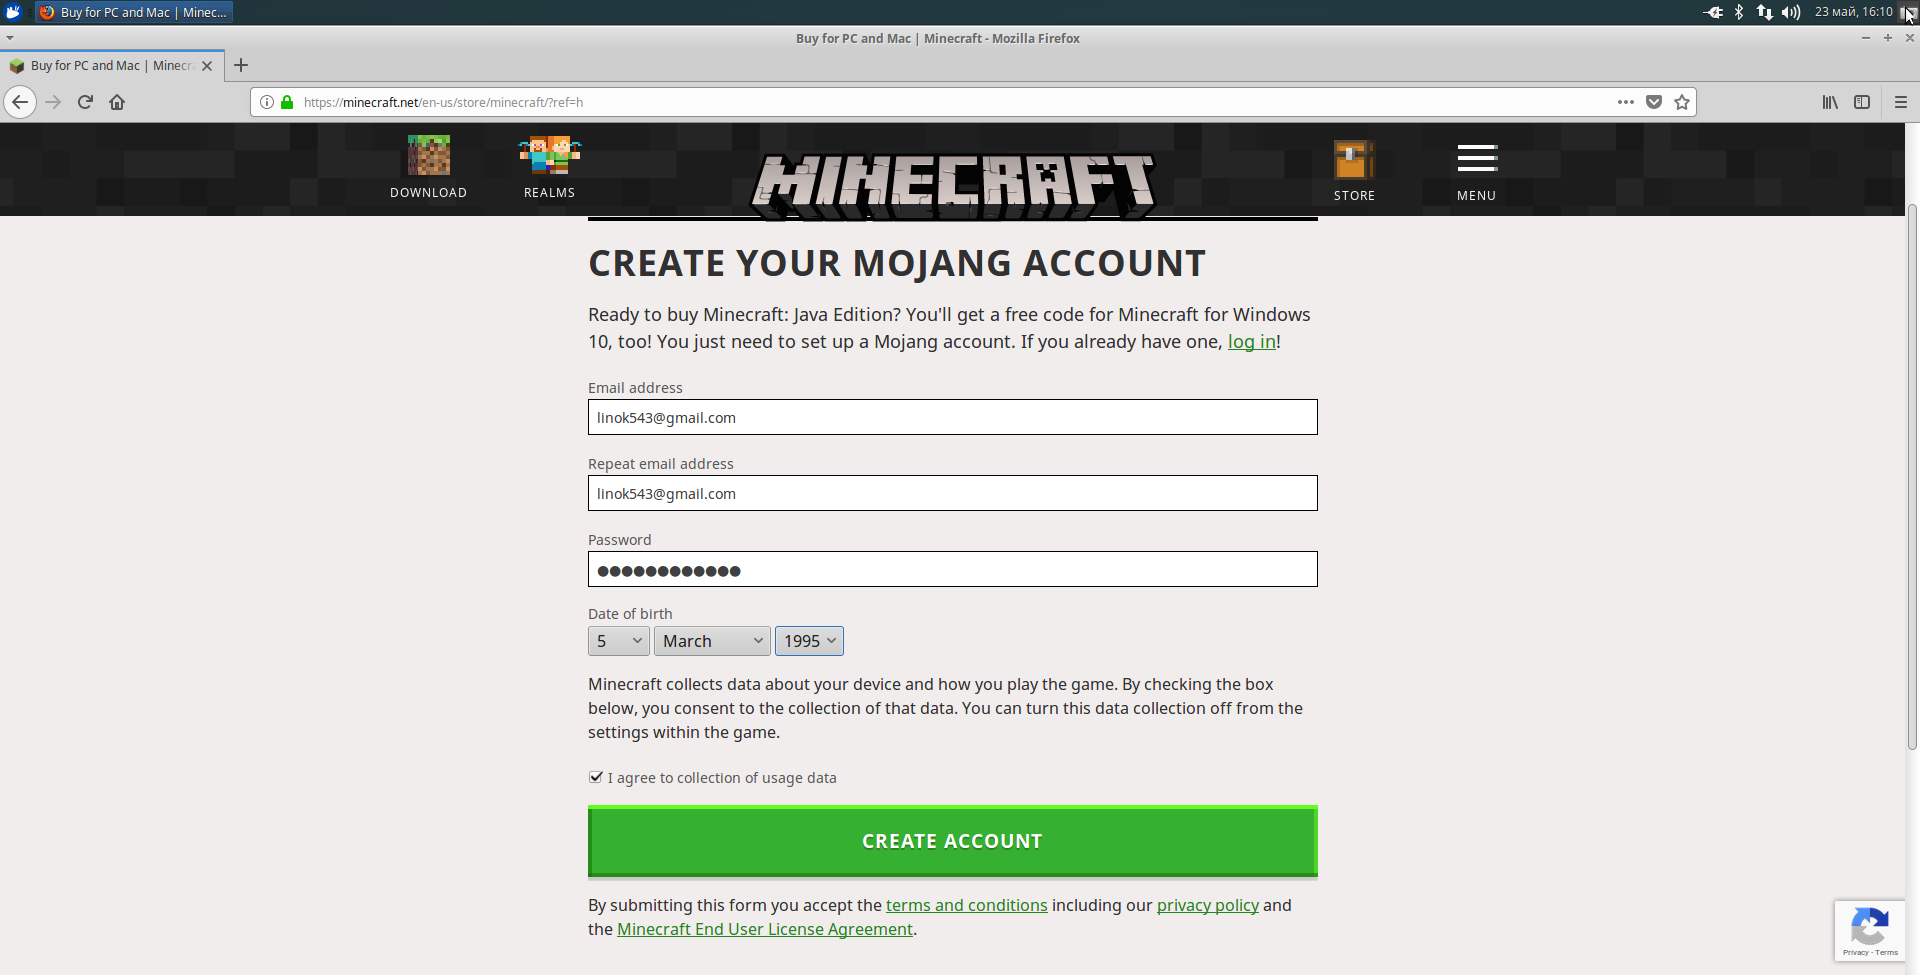
Далее вам необходимо ввести вашу почту (Gmail, MailRu или любую другую — не важно), пароль и дату рождения. Обратите внимание, вы должны согласиться со сбором данных, нажав I agree to collection of usage data. Чтобы создать аккаунт, нажмите CREATE ACCOUNT:
Чтобы подтвердить аккаунт, вам на почту, указанную при регестрации, будет выслан код подтверждения. Введите его в поле Verification code и нажмите VERIFY:

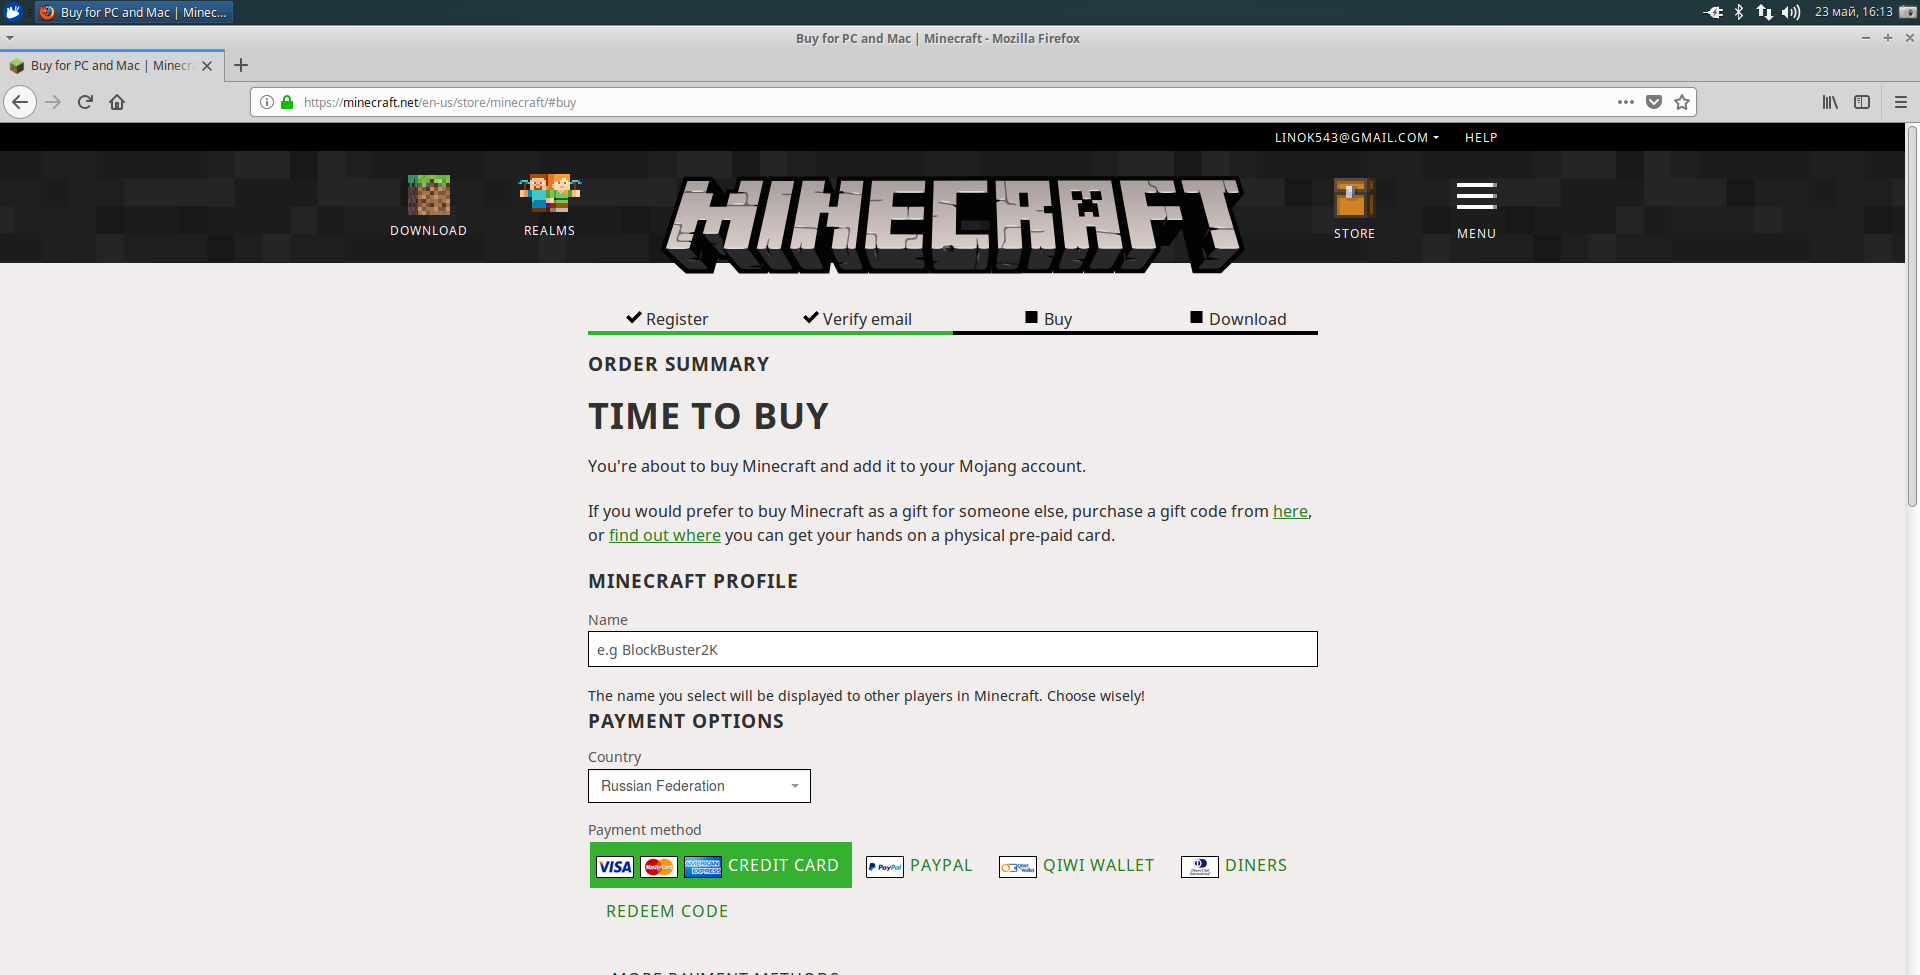
Далее вам нужно будет ввести данные, необходимые для покупки, и после оплаты скачать игру:
2. Установка Java и проприетарных драйверов
Для запуска игры вам понадобится установить в свою систему Java-машину. Рекомендуется использовать восьмую версию. Подробнее об установке Java читайте в статье установка Java в Linux. Также для лучшей производительности рекомендуется использовать проприетарные драйвры для видеокарты.
3. Установка официального Minecraft-лаунчера
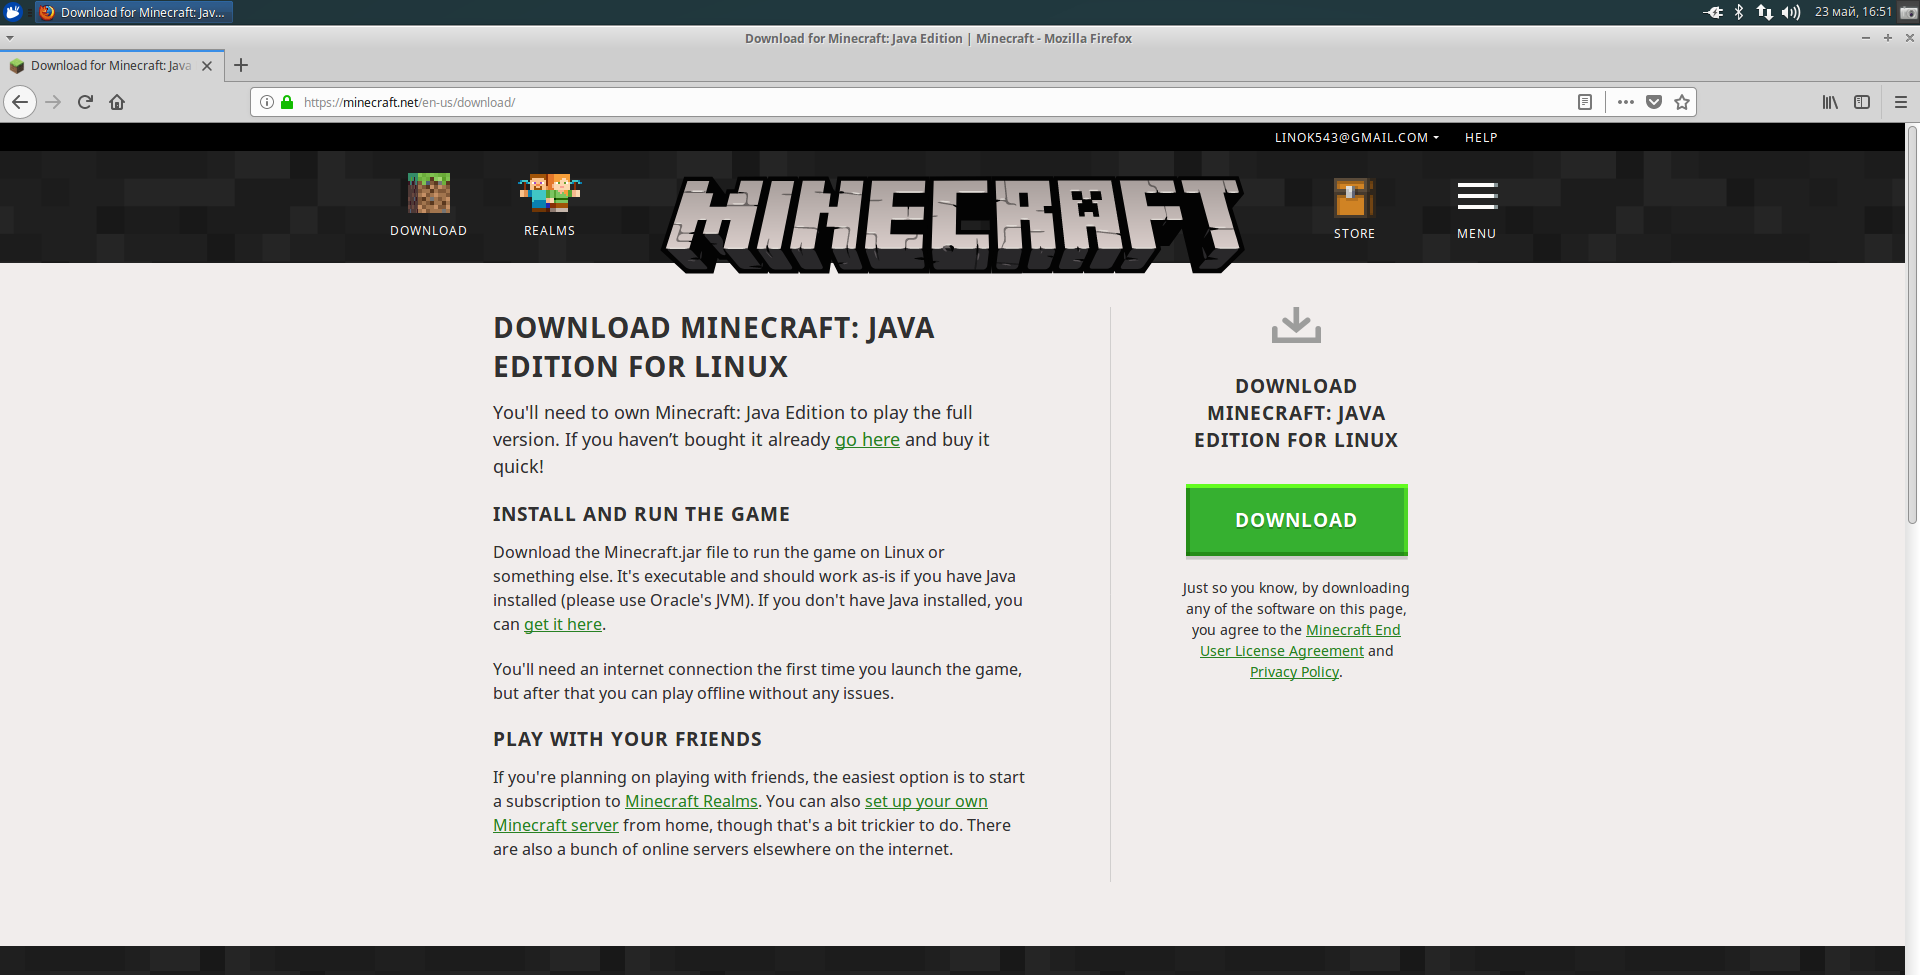
Скачать лаунчер можно и без оплаты. Но для игры вам всё равно надо будет пройти регистрацию. Если вы незаплатите, вам будет доступна только демо-версия игры (5 игровых дней, что
= 100 реальным минутам). Чтобы скачать лаунчер, просто нажмите Download и сохраните в удобную для вас папку:
После запуска скачанного файла, подождите несколько секунд, пока игра загрузится и распакуется:

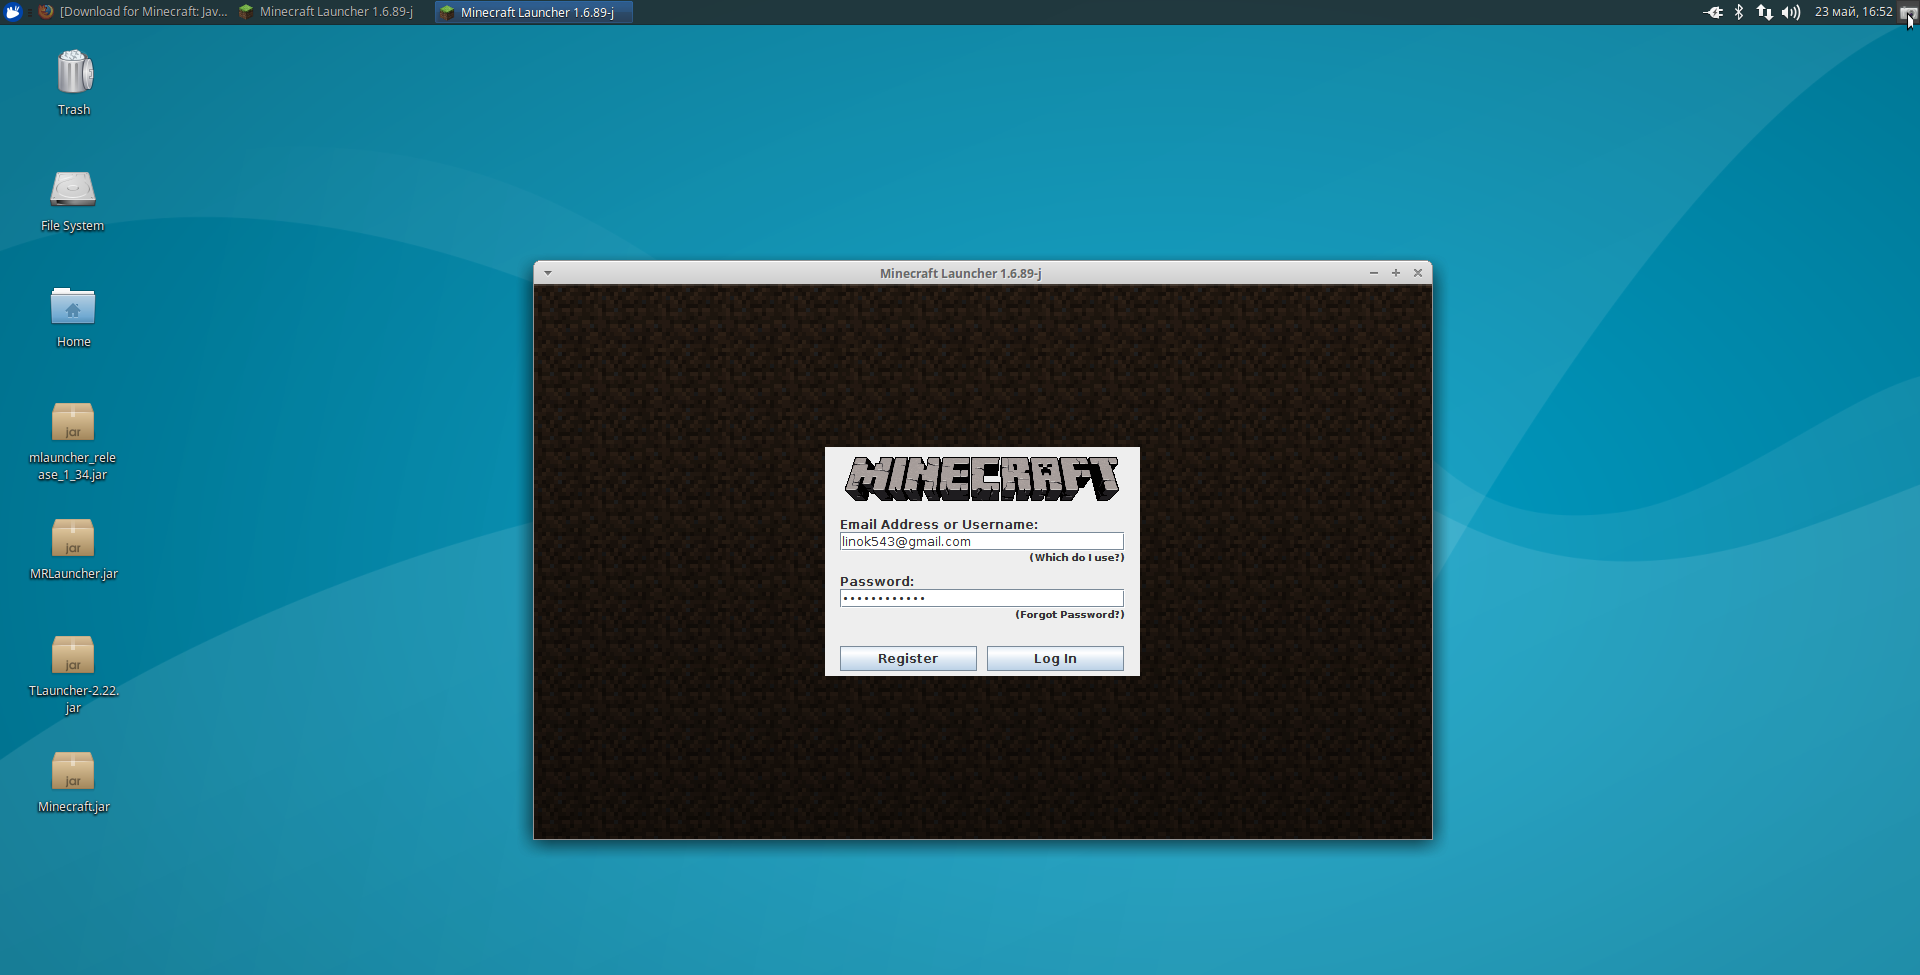
Теперь вам необходимо ввести логин и пароль, указанные при регистрации, и нажать Log In:
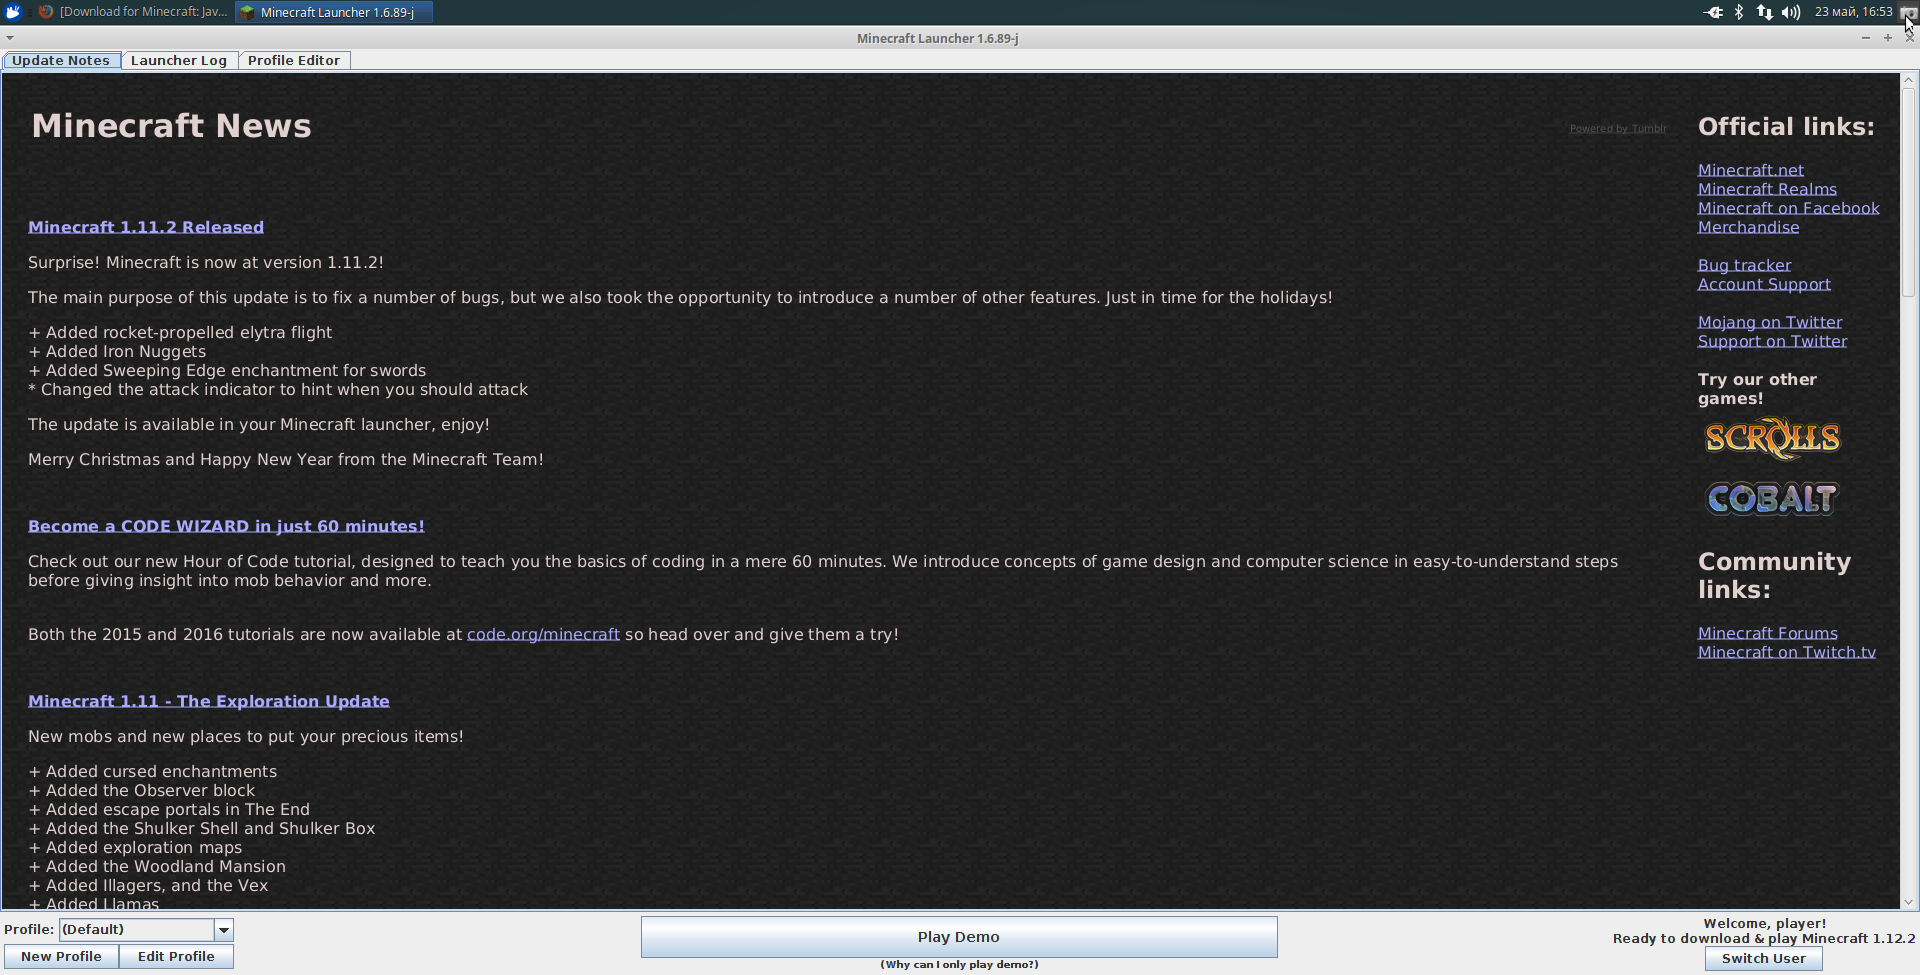
Если вы оплатили лицензию, то у вас будет кнопка Play, если же вы этого не сделали, то будет Play Demo. Нажмите на эту кнопку:
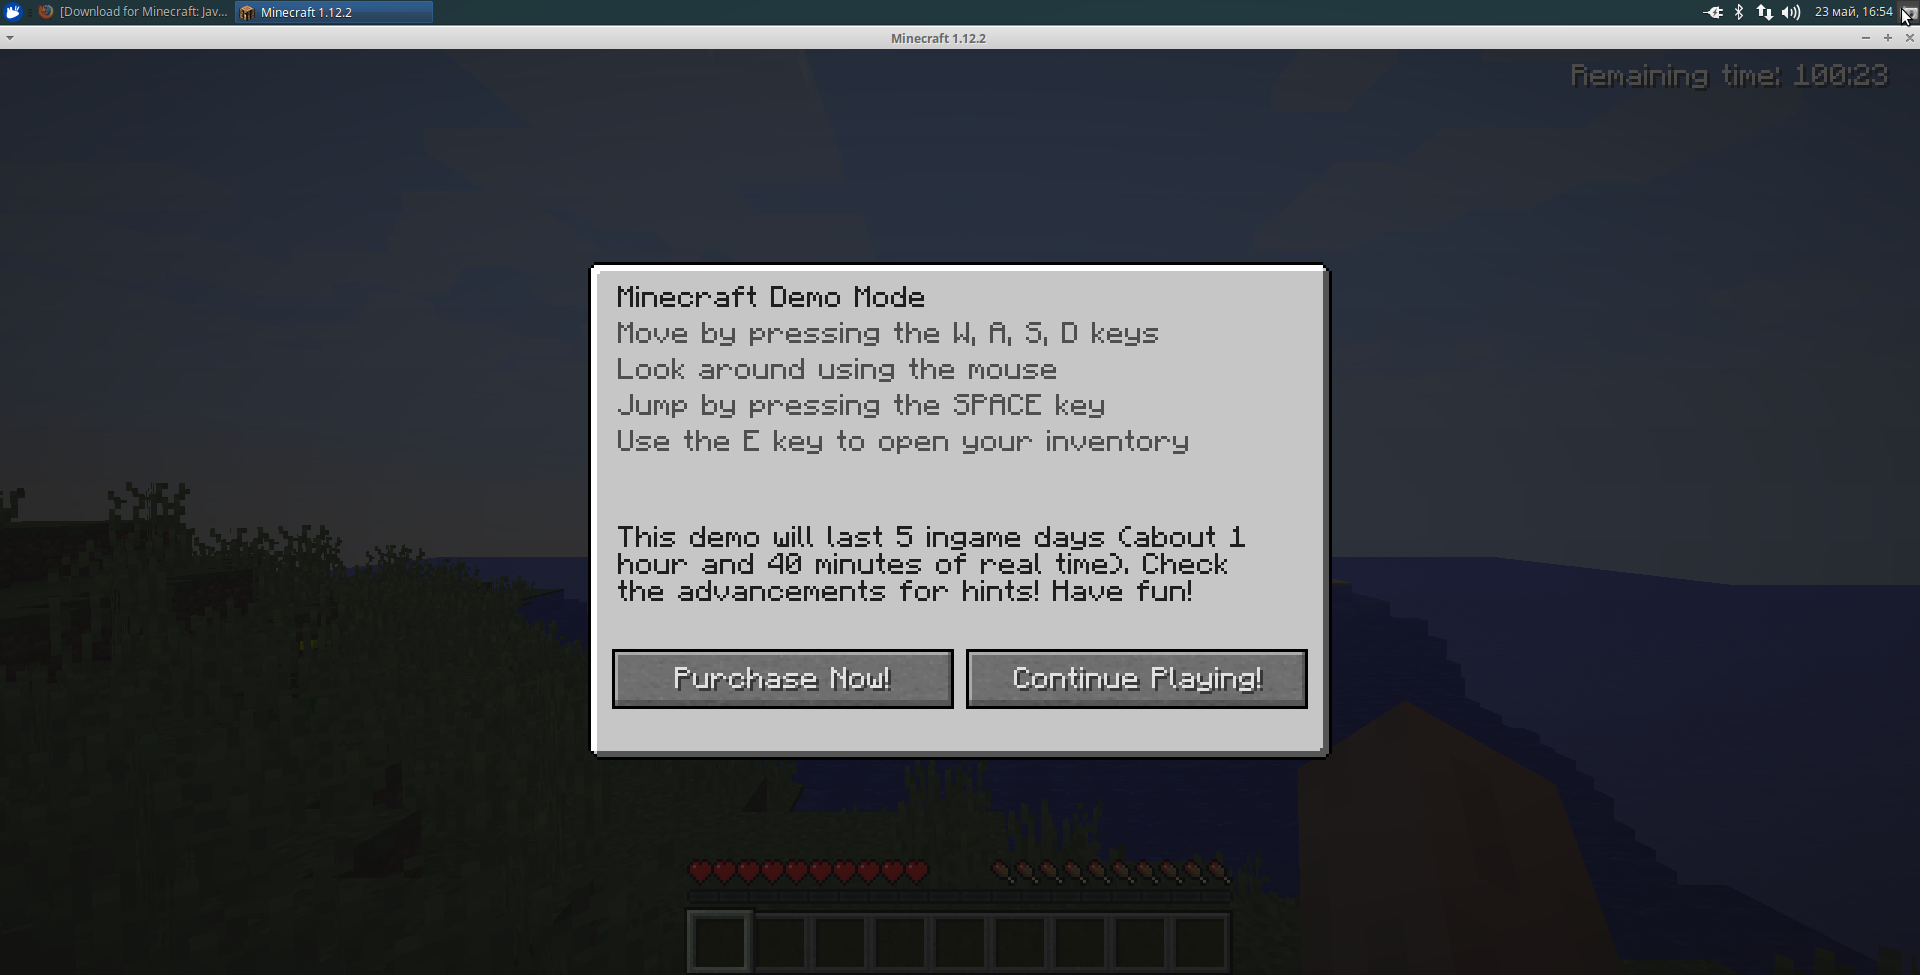
Повторюсь, если вы купили лицензию, то вас забросит в главное меню со всеми пунктами, если же вы в демо-режиме, то у вас будет только возможность создать и пересоздать новый мир. При том только один. И если вы создадите мир в демо, то увидите надпись, рассказывающую об основах управления, и пометку об ограничении времени. Так же таймер появится в правом верхнем углу. Если вы не хотите оплачивать, нажмите Continue Playing:
Так же есть возможность установить Minecraft на Linux через snap-пакет. Для этого выполните следующую команду в эмуляторе терминала:
sudo snap install minecraft
Сторонние лаунчеры Minecraft в Linux
Основным отличием является то, что в официальном лаунчере вы можете играть только через аккаунт Mojang, а в сторонних игра доступна либо вообще без аккаунта (только с ником), либо с аккаунтом одной из систем (например Ely.by) или же самой Mojang. Используя сторонний аккаунт (не путать с лаунчером — сторонним считается любой акк, зарегестрированный не в Mojang), вы не сможете играть на лицензионных серверах.
Запуск лаунчера Minecraft в Linux
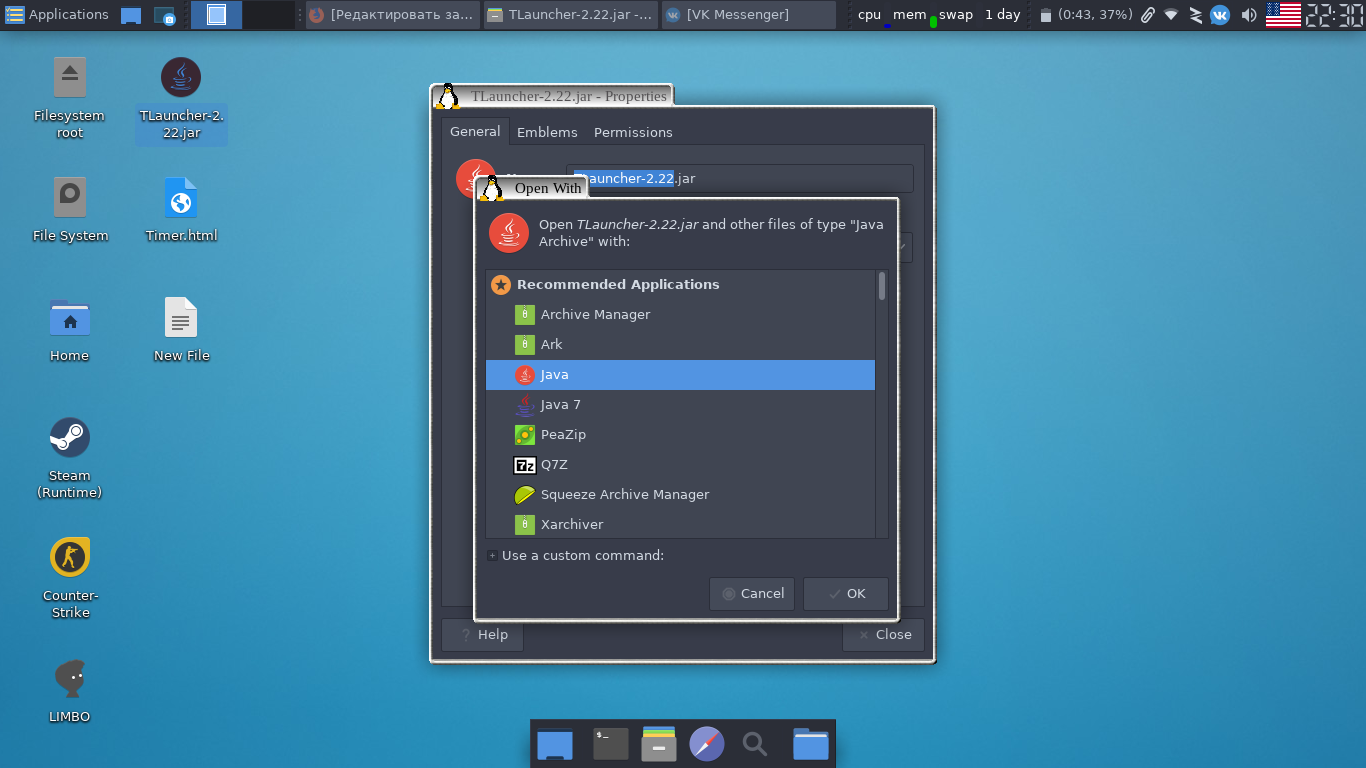
Установка Minecraft Linux состоит лишь в том, чтобы скачать лаунчер и запустить его. Любой скачанный вами лаунчер представляет собой обычный «*.jar» файл. Просто кликните по нему 2 раза. Если появится ошибка при запуске, или же он откроется как обычный архив, скорее всего, у вас нет проприетарной Java от Oracle. Ссылка на статью про установку Java есть выше. Если вы всё сделали правильно, то нажмите по файлу правой кнопкой мыши и в параметрах укажите запуск через Java той версии, которая вам нужна (рекомендую Java 8).
Или же вы можете использовать такую команду для запуска лаунчера через терминал:
java -jar /путь/к/файлу/лаунчера.jar
Давайте далее рассмотрим основные лаунчеры.
1. MRLauncher
Это бесплатный лаунчер от команды MinecraftRating.ru, в который интегрирован их собственный мониторинг серверов.
- Возможность входа с лицензионного аккаунта Mojang, поддержка игры через Ely.by, так же можно использовать обычный аккаунт без пароля;
- Возможность заходить на сервер в один клик, нажав кнопку «Играть.
Из минусов хотелось бы отметить, что у MRLauncher довольно громоздкий и не очень удобный интерфейс, но это на мой взгляд.

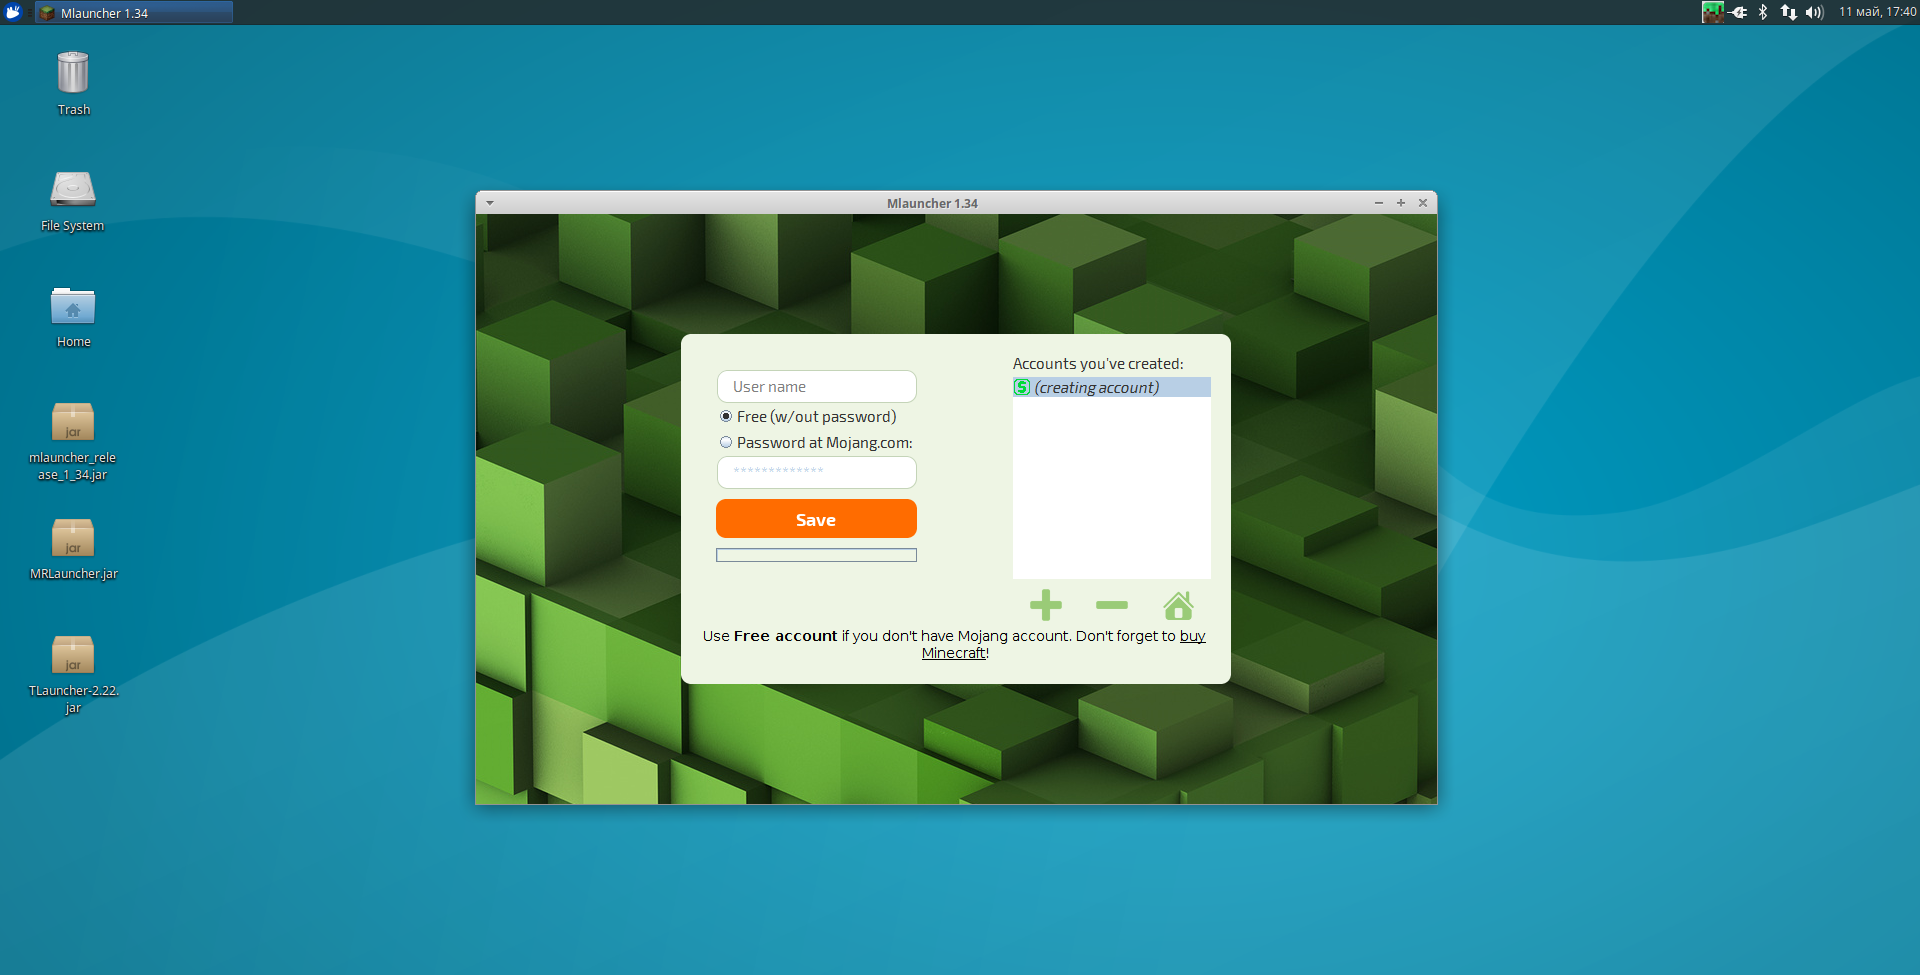
2. MLauncher
Свободный лаунчер Minecraft, имеющий довольно высокую популярность среди игроков.
- Поддержка аккаунтов Mojang, возможность игры через пиратский аккаунт без пароля;
- Своя система скинов;
- Удобная система сортировки серверов;
- Установка модов «В один клик»;
- Довольно красивый и приятный интерфейс (субъективно).
Из минусов — нет поддержки Ely.by.

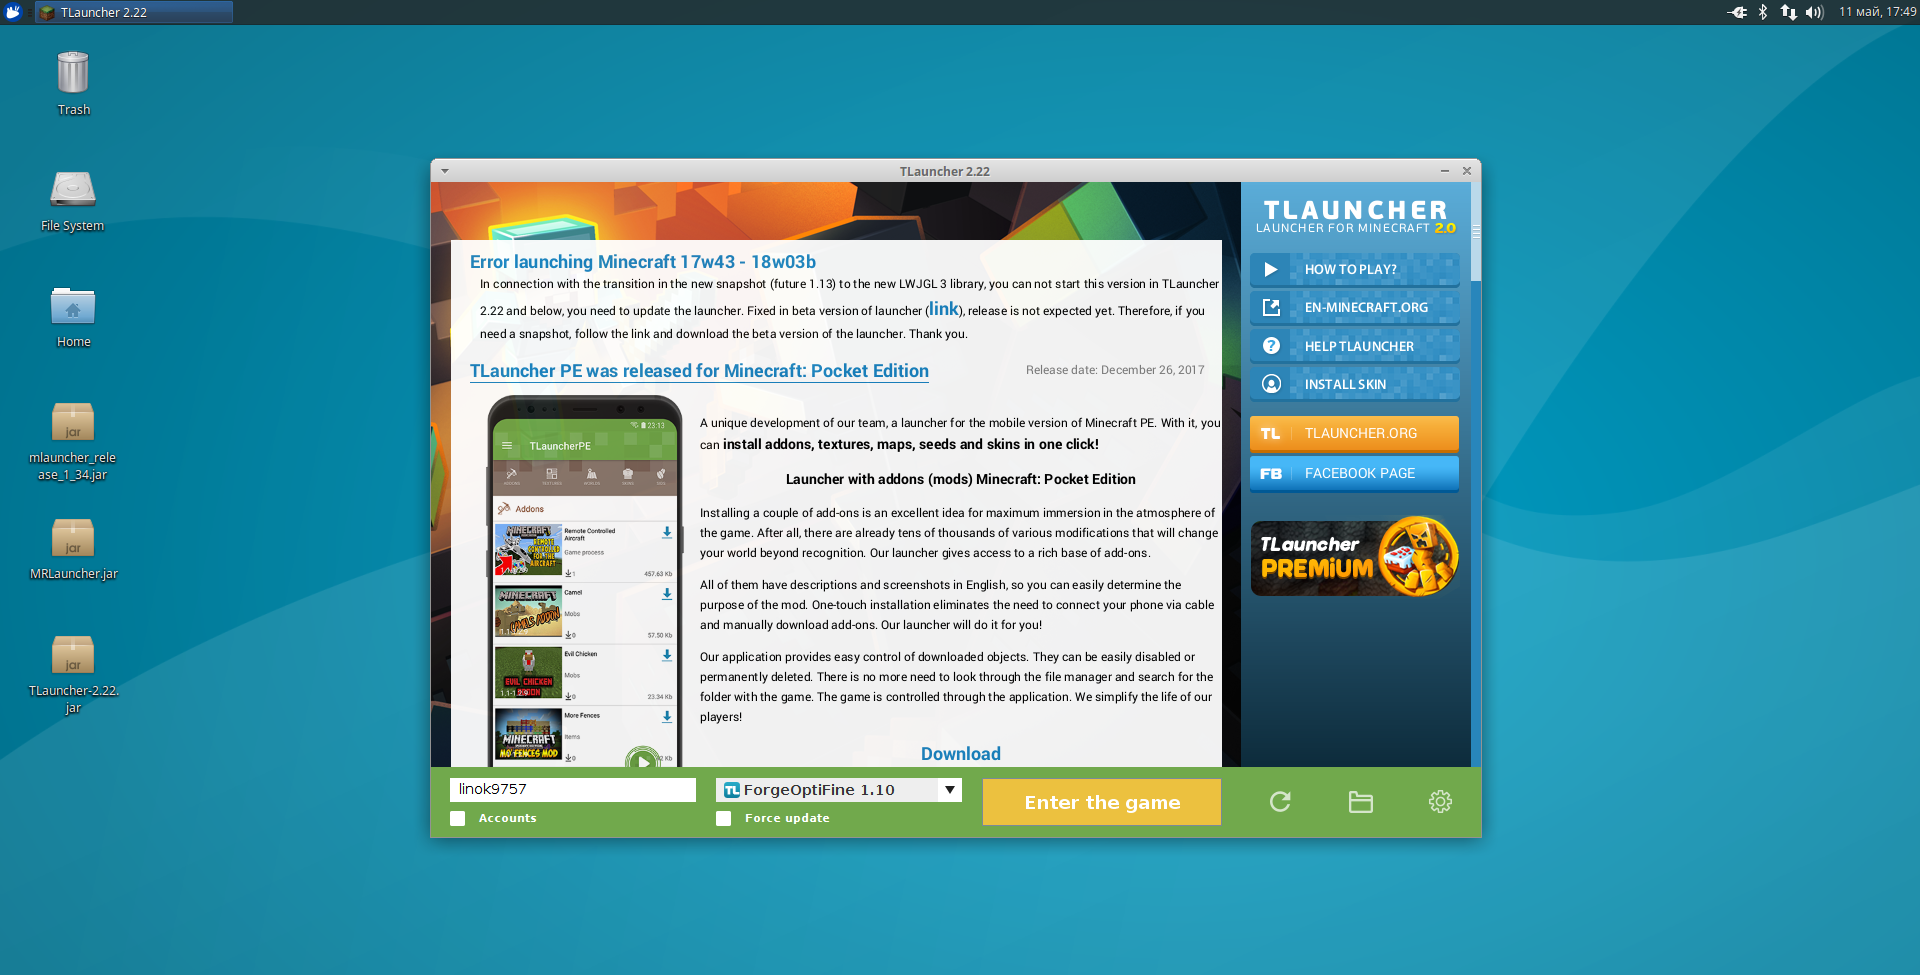
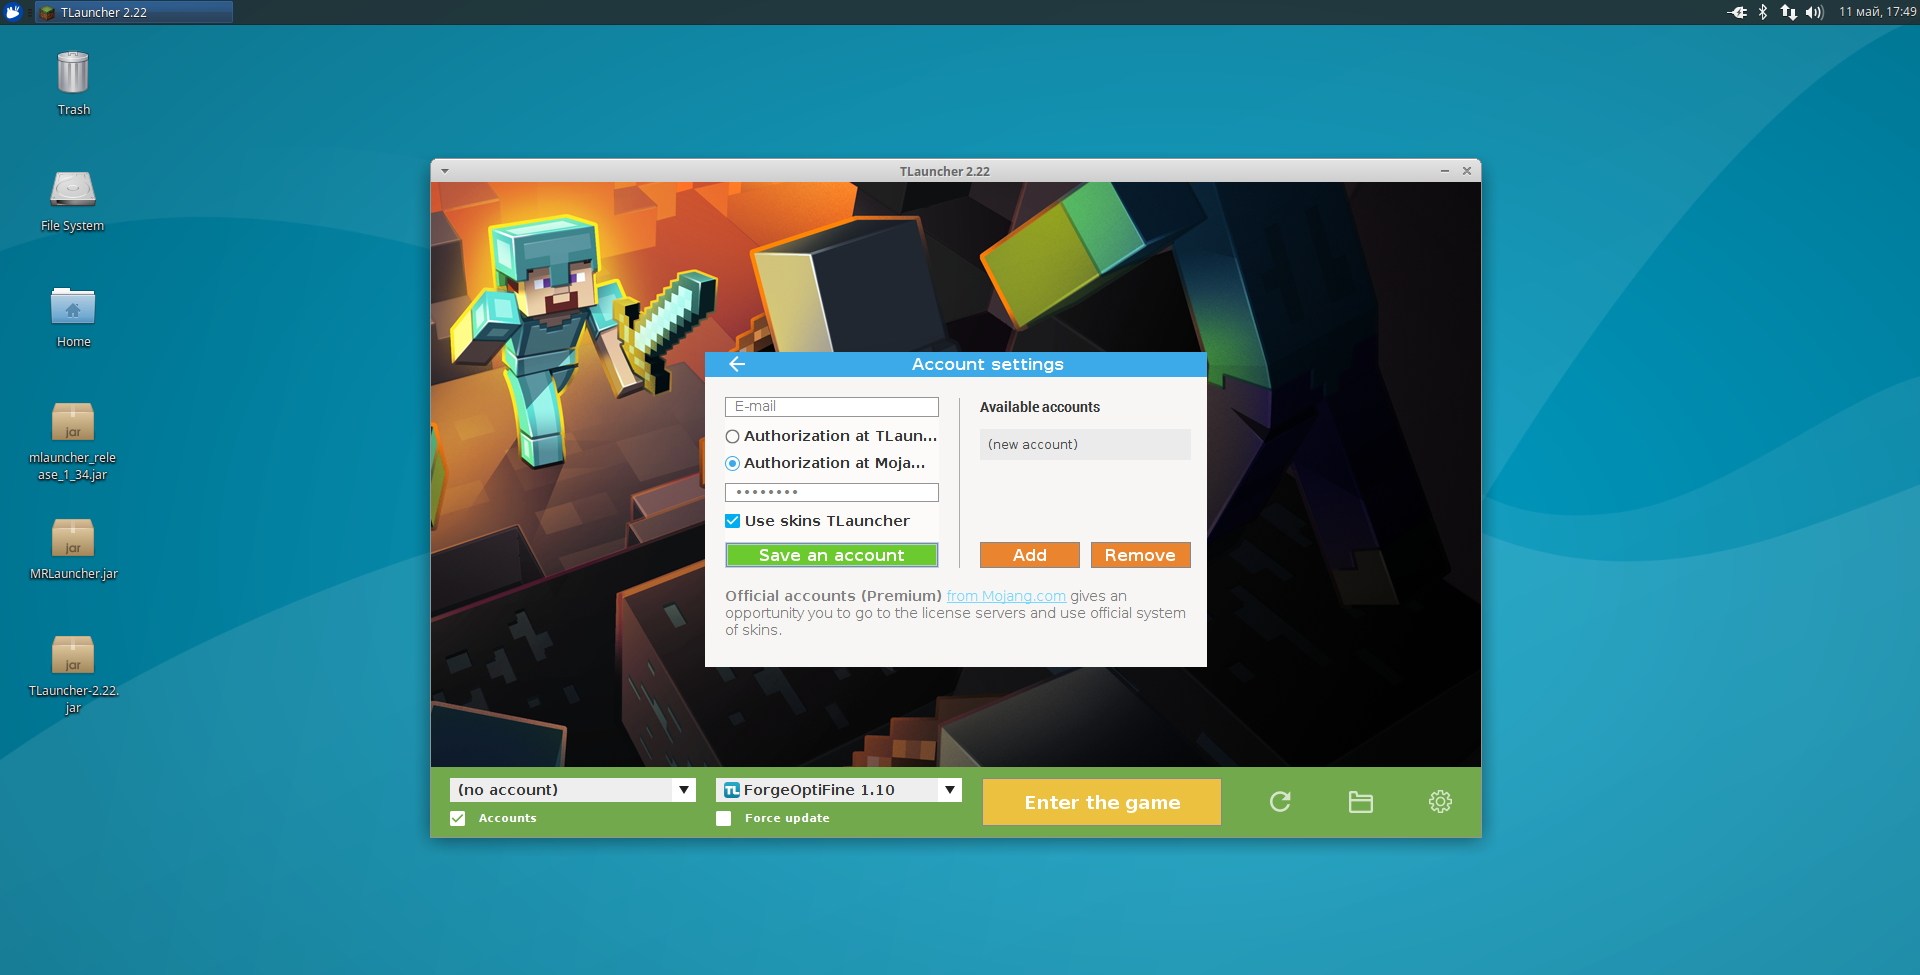
3. TLauncher
Сам пользуюсь данным лаунчером, но скорее по првычке.
- Поддержка аккаунтов Mojang, собственные аккаунты Tlauncher, поддержка пиратских аккаунтов без пароля;
- Своя система скинов (Ely.by);
- Есть версия для мобильных устройств TLauncherPE.
- Много рекламы в самом лаунчере;
- Сам добавляет серверы в ваш список в игре;
- Хоть вы и можете играть на пиратском аккаунте, но вас словно вынуждают завести учётную запись TLauncher;
- Слииишком часто вам намекают о том, что стоило бы купить премиум подписку, к слову, не очень дешёвую.
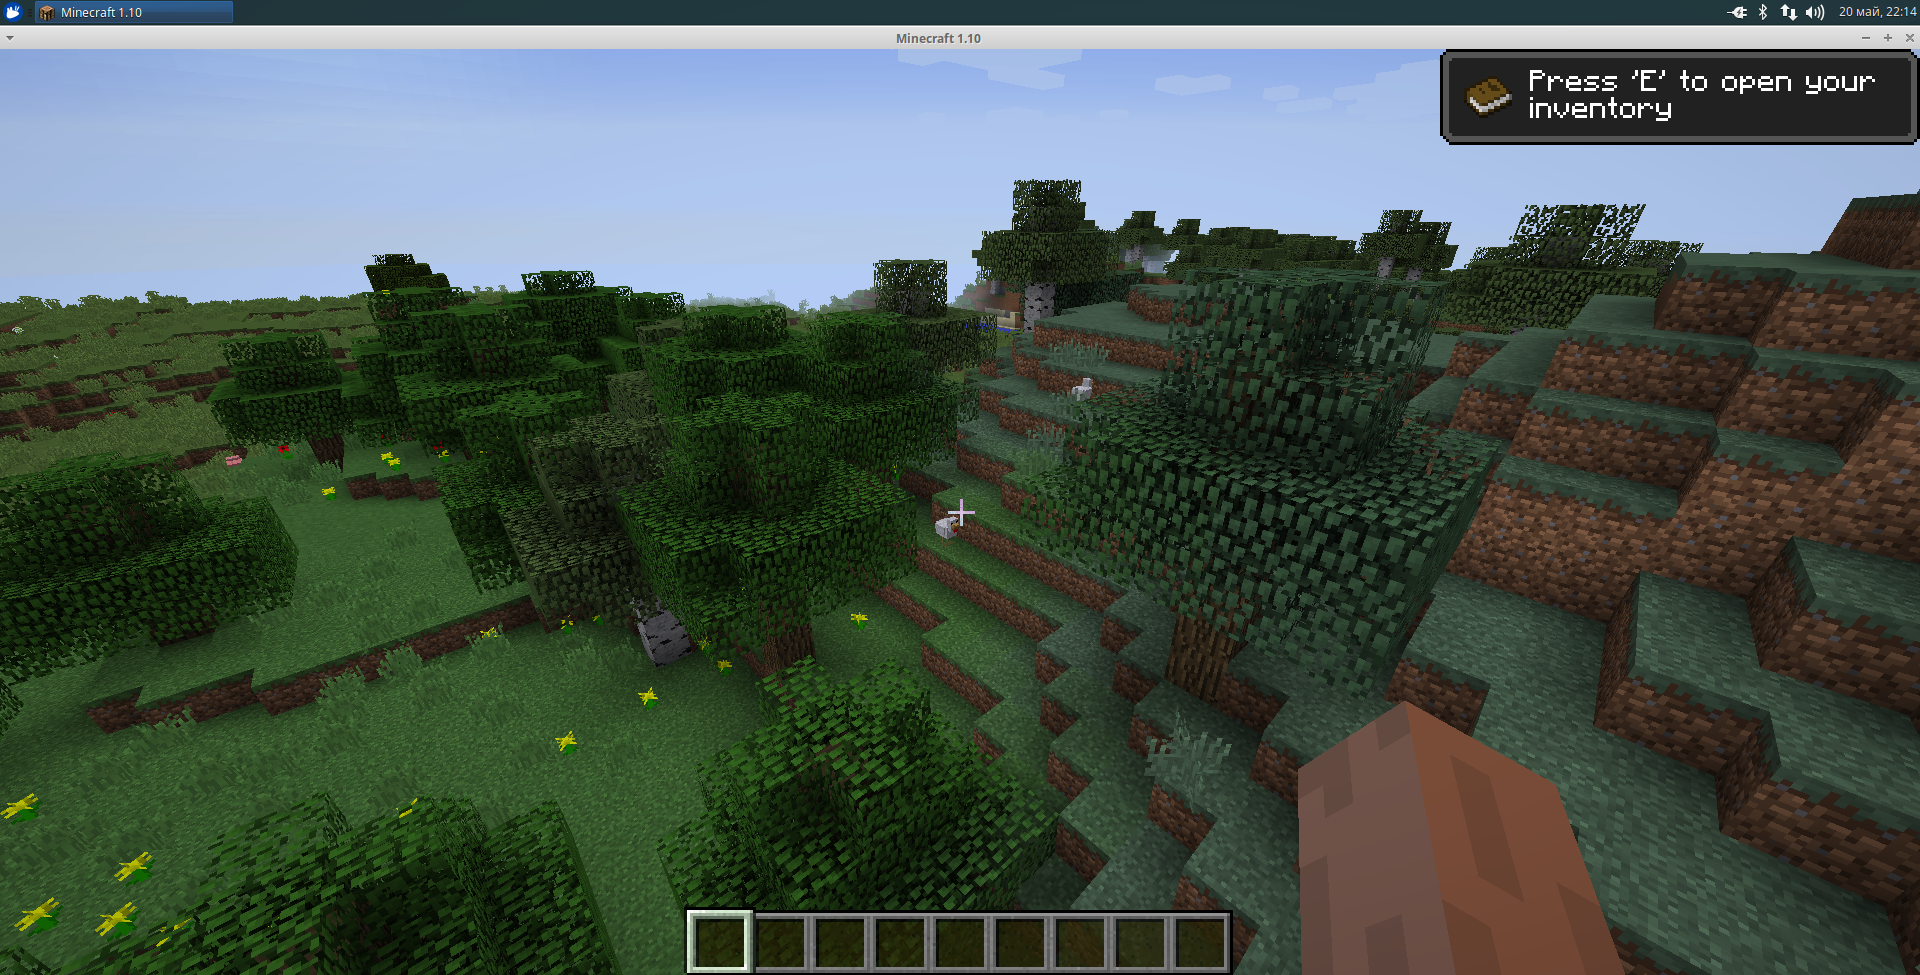
Скриншоты из игры
Ниже будет приведена пара скриншотов из самой игры. Запускалась она на Xubuntu:

Выводы
В данной статье мы рассмотрели, как выполняется установка Minecraft на Linux, а так же сравнили различные лаунчеры для игры Minecraft. Если остались какие-либо вопросы, спрашивайте в комментариях!
Источник
How to Install Minecraft on Linux?
What Is Minecraft?
Most Minecraft players would agree that the secrete to the game’s success lies in its creativity-inspiring design. Players are free to explore a large, procedurally generated world made of blocks, each of which can be interacted with, moved, or transformed into resources for crafting.
This blocky world is occupied by AI-controlled monsters, friendly villagers, and, in multiplayer mode, other players. Minecraft can be played either as a survival game or sandbox, and players are free to modify its gameplay mechanics and create new assets for it.
Because Minecraft is written in the Java programming language, it runs on Linux, Windows, and macOS. Keep in mind that there are several versions of Minecraft, and this article is about Minecraft: Java Edition.
Install Minecraft on Ubuntu and its Derivatives
Thanks to the official .DEB package, installing Minecraft on Ubuntu and its derivatives is a breeze, and the whole process won’t take you more than a few minutes.
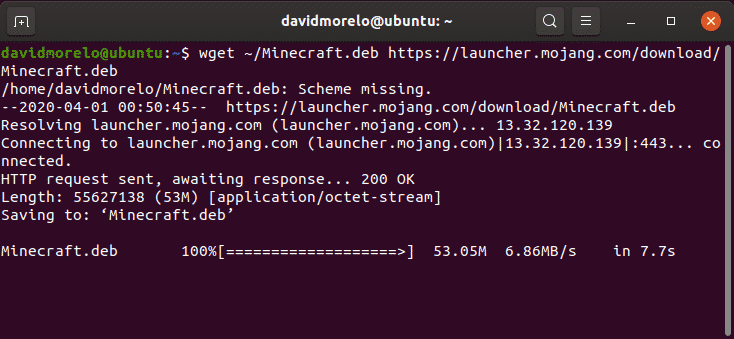
Step 1: Download the Installation Package
The first thing you need to do is download the Minecraft .DEB package from Minecraft’s official website. You can either open the alternative download page in your favorite web browser and download it from there, or you can use the following command and download the package to your home folder using wget:
Step 2: Install Minecraft
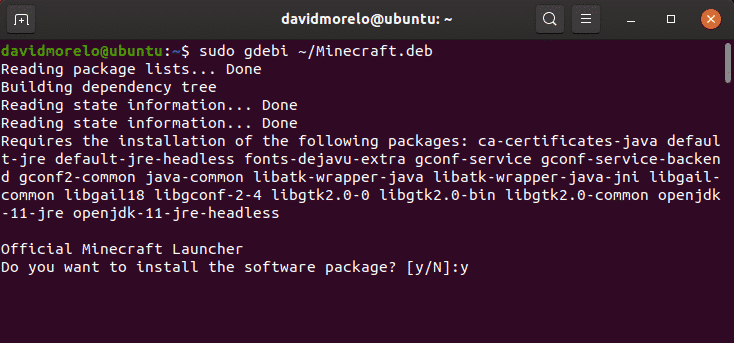
We recommend you use a small tool called gdebi to install the Minecraft .DEB package because it automatically resolves all dependencies.
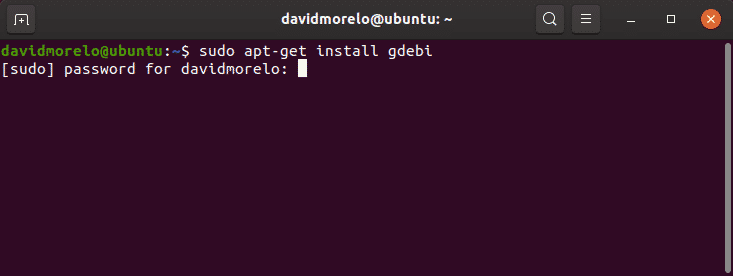
Use gdebi to install the Minecraft.deb package:
Step 3: Launch Minecraft
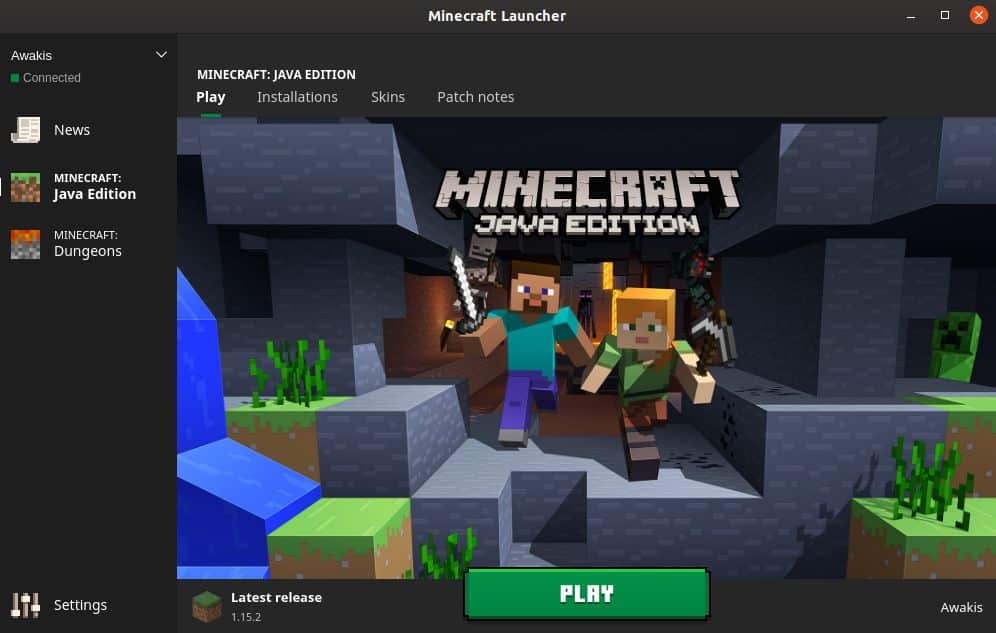
To launch Minecraft on Ubuntu and its derivatives, simply search for the Minecraft Launcher and run it. If everything goes right, the Minecraft Launcher should start right away, prompting you to enter your email address and password.
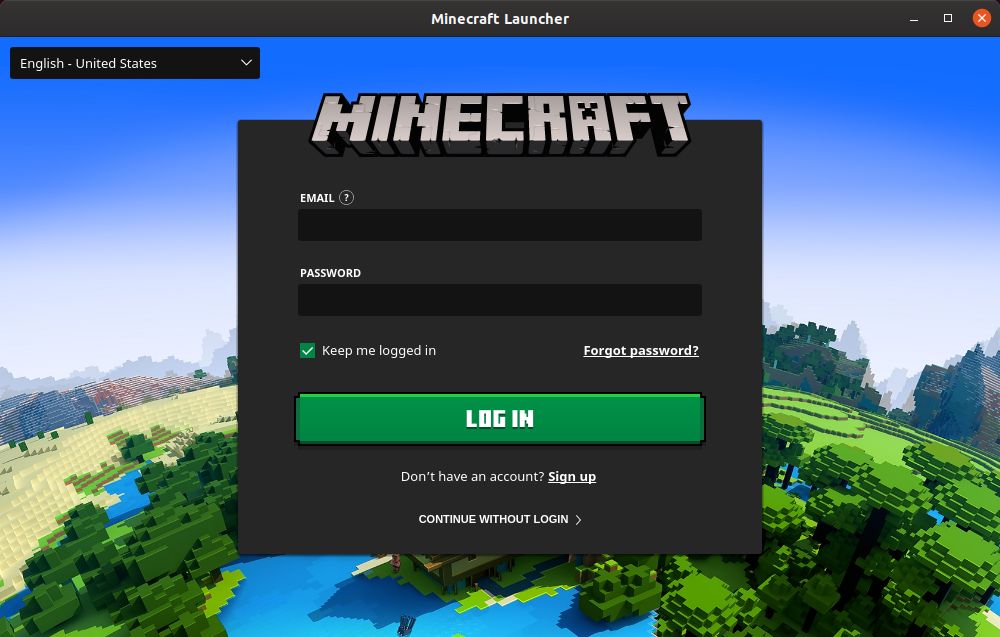
Once you’ve logged in, click the Play button and enjoy Minecraft—there’s really nothing more to it!
Install Minecraft on Other Distributions
Because Minecraft was programmed in Java, you can get it to run on just about any Linux distribution with the Java Runtime Environment installed and working 3D graphics drivers.
Step 1: Install Java Runtime
The Java Runtime Environment (JRE) provides all the necessary components to run Java applications. Most Linux distributions offer multiple options when it comes to executing Java programs:
- Headless JRE: This minimal version of the Java Runtime Environment is intended for running Java applications that don’t have a graphical user interface. As such, it can’t be used to run Minecraft on Linux.
- Full JRE: This version of the Java Runtime Environment depends on the headless version, and it includes everything you need to execute Java applications with a graphical user interface, including Minecraft.
- Java Development Kit (JDK): Intended for Java developers, the JDK includes a Java Virtual Machine (JVM) and other resources necessary to develop Java software applications.
The most popular open-source implementation of Java is called OpenJDK. There’s also Java SE, which is Oracle’s implementation of JRE and JDK. Starting from Minecraft 1.12, Java 8 is required to run Minecraft, but it doesn’t really matter if you choose OpenJDK or Java SE.
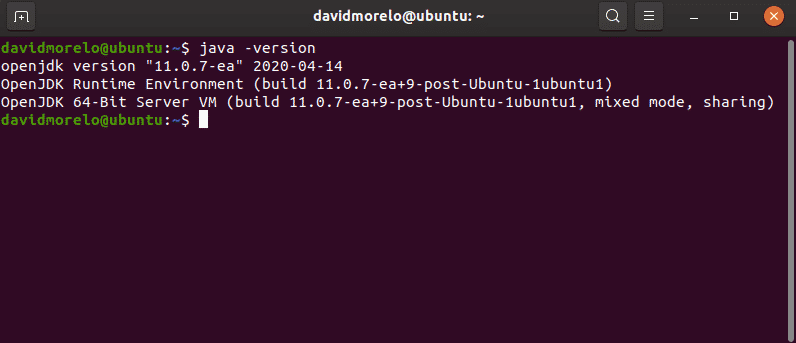
To check which version of Java is installed on your Linux distribution, enter the command “java -version” in the terminal.
Step 2: Install Graphics Drivers
To enjoy Minecraft on Linux, you need working 3D acceleration. You can test 3D acceleration using a popular OpenGL test called glxgears, which is part of the mesa-utils package.
First, install the mesa-utils package (it should be in your distribution’s repositories) and then enter “glxgears” in the terminal. A new window with three spinning gears will appear, and you’ll be able to see the number of rendered frames in the terminal. Because glxgears requires very little processing power, any decently powerful Linux computer with working 3D acceleration should be able to render hundreds of frames every second.

If the gears appear to be choppy, your 3D acceleration isn’t working, and you need to install the correct graphics driver for your graphics card.
Step 3: Install & Launch Minecraft
To launch Minecraft on a distribution that’s not based on Ubuntu, you need to download the Minecraft.tar.gz archive from the alternative download page.
Then, extract the archive and launch the executable file called minecraft-launcher using the following command:
If this seems like too much work, you can also install the Minecraft snap package on any Linux distribution that ships with Snap preinstalled (any recent Ubuntu release, most recognized Ubuntu flavors, Solus 3, and Zorin OS):
How to Uninstall Minecraft on Linux
Minecraft creates a hidden folder (.minecraft) in the home directory. The folder is used to store information about your Minecraft profile and progress in the game. To delete it:
- Open the terminal.
- Enter the following command: rm -vr
Conclusion
Even though the length of this article may make the installation of Minecraft feel somewhat intimidating, we can assure you that there’s nothing difficult about it at all, especially if you’re using Ubuntu or some distribution based on it.
If you have Minecraft installed and what to go to the next steps check out these tutorials:
About the author

David Morelo
David Morelo is a professional content writer in the technology niche, covering everything from consumer products to emerging technologies and their cross-industry application
Источник
How To Play Minecraft On Linux
Jun 14, 2018
Comment
Minecraft is one of the biggest games in the world right now, and it’s incredibly popular with kids and adults. The reason for this isn’t too hard to understand; the game is open-ended, and lets the player do whatever they want. Unlike a lot of other popular video games out right now, Minecraft has excellent support for Linux. If you’re a fan of this game and have recently switched away from Windows or Mac, you’re probably trying to figure out how to play Minecraft on Linux.
Luckily, getting Minecraft working on the Linux platform is very easy. Follow along with this tutorial, and soon you’ll be building and adventuring to your heart’s content!
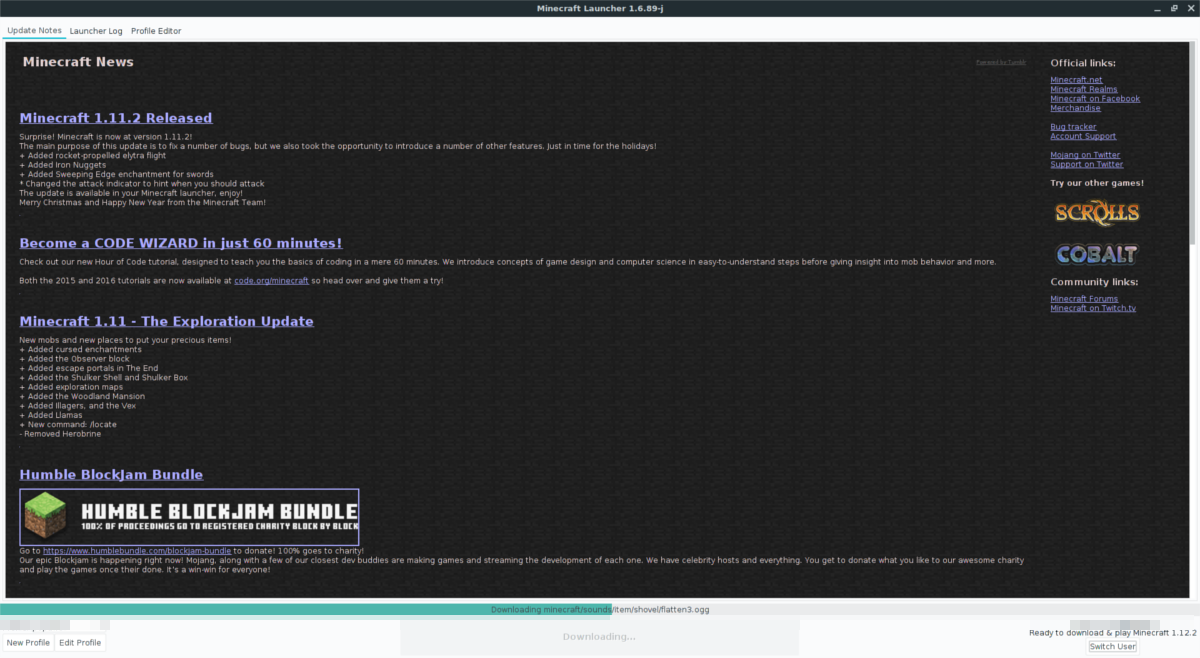
Note: This method no longer works. Minecraft has updated the launcher for Linux. For instructions on how to get the new Minecraft launcher for Linux to work, follow our guide here.
Download Minecraft
Before being able to play Minecraft on Linux, you’ll need to create a new account. You’ll also need to buy the game, as it’s not free. Purchase your copy of Minecraft from the Mojang store, here. Once you’ve paid for your copy of Minecraft, follow this download link here to download the Java edition of the game.
It is crucial that you do not download any other version of Minecraft. Just stick with the Java edition, as this is the only release of the game that we can confirm works on Linux. Additionally, Mojang does say that the Java edition is maintained explicitly so that Linux users can play the game!
With the Java version of Minecraft downloaded, open up your file manager and create a “Minecraft” folder inside /home/username/. Inside that folder, drag the Minecraft Jar file inside. We’ll come back to the Jar file later, after installing Java.
Install Java on Linux
Linux doesn’t come ready to use Java, as the Java runtime environment is not open source software. To remedy this, many Linux distribution maintainers choose to distribute an open source alternative to the official Java Runtime, known as “Open JRE.” For the most part, having the open source version of Java runs things very well. However, Mojang outline on their website that they would prefer players to stick with the official closed source version of Java (aka Oracle’s version of the Java runtime).
The reason for this is most likely that Minecraft doesn’t run as good in the open source Java runtime. To get the latest version of the Oracle Java runtime working, you’ll first need to open up a terminal window.
Ubuntu
Users can easily install Oracle’s version of Java, thanks to a PPA. To add this PPA, enter this command into the terminal.
Note: this PPA will also work with Linux Mint as well as other Linux distributions that use Ubuntu as a base.
Next, update Ubuntu’s software sources so that the new PPA can be put to use.
After running the update command, install any available upgrades that are ready.
Finally, install and enable the Java Runtime.
Debian
Thanks to the Ubuntu PPA, Debian users can easily install the Oracle Java Runtime. To start off, open up a terminal and use the Nano text editor to add a new software source in /etc/apt/sources.list.
Move all the way to the bottom of the sources list and paste the following:
deb https://ppa.launchpad.net/webupd8team/java/ubuntu trusty main
deb-src https://ppa.launchpad.net/webupd8team/java/ubuntu trusty main
Save the edits to the sources.list file in Nano with Ctrl + O. Exit the editor with Ctrl + X.
After adding the new software source to Debian, install the software repos GPG key and update your software sources.
Lastly, install Oracle Java to Debian with:
Fedora and OpenSUSE
Need to get Oracle Java for OpenSUSE or Fedora? Good news! It just so happens that Oracle distributes an RPM that can be used to easily install Java 8. To install, first download the RPM file. From there, follow the commands below:
Fedora
OpenSUSE
Install Minecraft On Linux
Now that Java is up and running, it’s time to install Minecraft on Linux. To install it, you’ll need to create a custom desktop icon. In the terminal, run the following command to create a launch script:
Next, use the wget tool to download a Minecraft icon to use for the shortcut.
Use touch to create a new file, then open Nano.
Paste the following code in Nano to create the game shortcut.
[Desktop Entry]
Name=Minecraft
Exec=sh
/Minecraft/mc-icon.png
Terminal=false
Type=Application
Update the permissions with chmod.
Once permissions are correct, Minecraft is ready to play! Go to the desktop, double-click on the icon and start up the game!
If you’re interested in hosting a Minecraft server on Linux, check out our detailed post on how to do just that.
Источник


