How to Perform a Clean Install in Windows 10

A clean install is when you reboot your computer to original Windows files. This means all your documents, folders, apps, etc. will be erased. Things like Microsoft Office, printers, and even media players will no longer exist on your computer. Sometimes this is needed to fix a frustrating error such as this one. It is truly a way to start fresh.
When Should You Perform a Clean Install?
The first and foremost reason you would perform a clean install is if you are upgrading your computer. Yes, Microsoft offers “upgrade” options that promise to painlessly transfer all your files, documents, settings, and programs, but in actuality, these hang during the upgrade and sometimes create big problems.
Upgrades don’t just transfer the files and apps you need; they transfer everything including some registry changes from old, uninstalled programs that you might not want on the new version of your operating system (OS). Chances are good, even if the upgrade completes, you will still end up spending time reinstalling programs that will not run because they are set to run on the old OS. Also, upgrades will transfer all the bloatware that came originally installed on your computer. Because of all this, it is much better to simply clean install the new version of the OS.
Another good reason to perform a clean install is if you purchase a new computer. Before you add files from your old computer, install new programs, or make any setting changes, you can perform a clean install of the OS to get rid of the bloatware that was installed in the factory. This saves you from going through and manually uninstalling all of it. Keep in mind, though, if there are programs that you want to keep, you will need to reinstall those after the clean install.
A clean install is also sometimes needed for certain computer issues. If you have Windows 10 on your computer, it is usually best to try the “Reset” feature before attempting a clean install for computer trouble. In this case, you have worked through troubleshooters and cannot resolve a serious problem any other way.
At that point, you would reset the computer as a last resort before a clean install. Here are the steps to perform a system reset if you are having computer problems and want to reset the computer to factory standards:
Step #1
Press the [X] and [Windows] keys together. Choose “Settings” from the menu.

Step #2
Click on “Update & Security.” Then click “Recovery” on the left side. You should see “Reset this PC” on the right. Click the “Get started” button found underneath that.

Step #3
Now choose whether you want to “Keep files” or “Remove everything” and continue. The computer will reset to Windows 10 factory conditions and save any documents you have if you choose to keep your files. Otherwise, your files and documents will all be removed.

If you have tried all other repair methods, including the factory reset that removes everything from your computer, a clean install may be the only option you have left.
Stop and Do This Before You Continue!
- You will need an Internet connection, sufficient storage (16 GB is recommended), and a computer that meets Windows 10 system requirements.
- Make a backup of all your documents and files. These will all be lost during the process. You should also perform a separate system backup in case something goes wrong with the clean install.
- Make a copy of your recovery drive. Also backup any partitioned drives. All partitions and the data on them will be removed with a clean install.
- Create a Microsoft account (if you don’t already have one) and make sure your version of Windows and other installed Microsoft software is activated on that account. This makes it easier to maintain your product registration after you perform the clean install, especially if something goes wrong.
- A clean install deletes all apps that do not come with Windows. You might be surprised to find out that Office and manufacturer’s apps are no longer on your computer after the install including manufacturer support apps. You will have to reinstall these apps manually after the clean install if you wish to keep them. Make sure you have copies of the software, licenses, and product registration keys.
- In addition to losing apps, you will probably lose your digital app content, digital licenses, and in some cases, you may no longer be able to use apps even if you paid for them. You need to visit manufacturer websites, even Microsoft’s Office website and learn if it is possible to keep your license and how to do it through this process if you wish to maintain any of these.
- Make a note of the drivers you need for your hardware and download these on a flash drive in case you need to reinstall them later. You can do this by accessing the device manager, right-clicking each device and looking at the properties for the driver name, manufacturer, and version. The drivers are available on the manufacturer’s website.
- If you are upgrading from a previous version of Windows, you should make sure your BIOS is set to compatibility mode or UEFI.
After finishing all your backups and downloads, disconnect any external drives, hard drives, flash drives, etc. from your computer. During the installation process, only the flash drive with the Windows 10 installation software on it should be connected to the computer to prevent the installation from overwriting your backup information.
Two Methods for Performing a Clean Install
1. Use the Built-in Fresh Start Option to Perform a Clean Install

Windows 10 comes with a “Refresh Option” that contains fewer steps than booting from a flash drive. In some cases, a flash drive may be the only option. But if you can access “Refresh” you might want to use this method. You still need to follow the “Do This Before You Continue” list, but the process of doing this method has fewer steps than restoring from media.
Step #1
Type “Settings” into the Start menu, and select the Settings option.
Step #2
In the Settings window, choose “Updates & Security.”

Step #3
Now, click “Recovery” on the left and then choose “Learn how to start fresh with a clean installation of Window,” which is found under “More recovery options” on the right.

Step #4
The link will take you to a Microsoft web page with a link to download the refresh tool. Click “Download tool now.”

Step #3
After the tool has finished downloading, click on it in the folder where it was downloaded to open and run it. When it asks you to choose what you want to keep, choose “Nothing.”

Step #4
Now, Windows will return your computer to a clean state. This process takes time. When Fresh Start is finished, you will be on the login screen and you can log in as you normally would. Once you are logged in, setup will begin. Follow the prompts. After everything is complete, check immediately for updates, re-install any apps and drivers that you want, and re-download your saved files.
2. Create Installation Media
If you want to perform the clean install from a flash drive, this is the method you need to follow. Please note, if you have Windows Enterprise version or Windows Education version, this process will not work.
Step #1
Find out what version of Windows you are using and whether it is x32 bit or x64 bit. You can find this by typing “System Information” into the Start menu and choosing that option. You will also need to find out which language your version of Windows is using if you don’t already know. You can do this by typing “Region and language” into the Start menu and selecting that option. You must reinstall the same version of Windows that you already have.

Step #2
After doing the “Do This Before You Continue” list, go to the Microsoft website and click the “Download tool now” button and select “Run.” You must be logged on as an administrator to run this tool.

Step #3
In the Windows 10 Setup window that opens, the first thing you will see is a Terms of Service agreement. Read and accept this to continue.

Step #4
At this point, it will ask what you want to do. You need to plug your clean 16GB flash drive into the computer and choose “Create installation media for another PC.” Then select “Next.”

Step #5
At this point, you will need to select the language, edition, and architecture that you currently have on your computer. This is just selecting what you learned in the first step.

Step #6
Now, choose USB flash drive as the media you are using.

Step #7
Now you will have the option to select a flash drive. Since you should only have one plugged into your computer, you should see only one option.

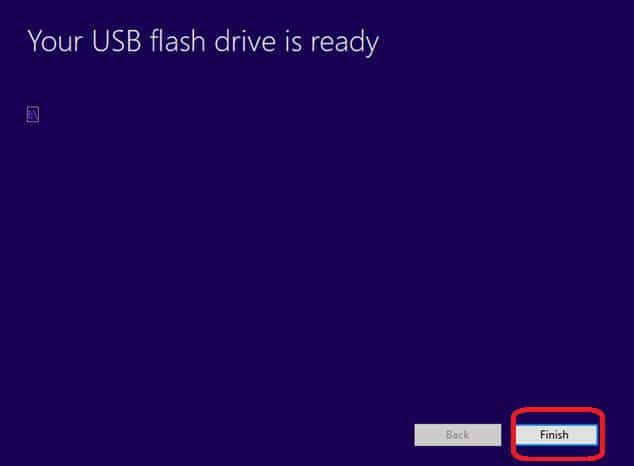
Step #8
Once you click next in the previous step, Windows 10 will begin downloading onto your flash drive. This could take a very long time depending on your connection speed. When the download is finished, Microsoft will then verify that the download is okay. This will take even more time. Be patient. You will be told when your flash drive is ready. Click “Finish.”
Step #9
Now, type “Settings” into the Start menu, and select the Settings option.
Step #10
Choose “Updates & Security.”
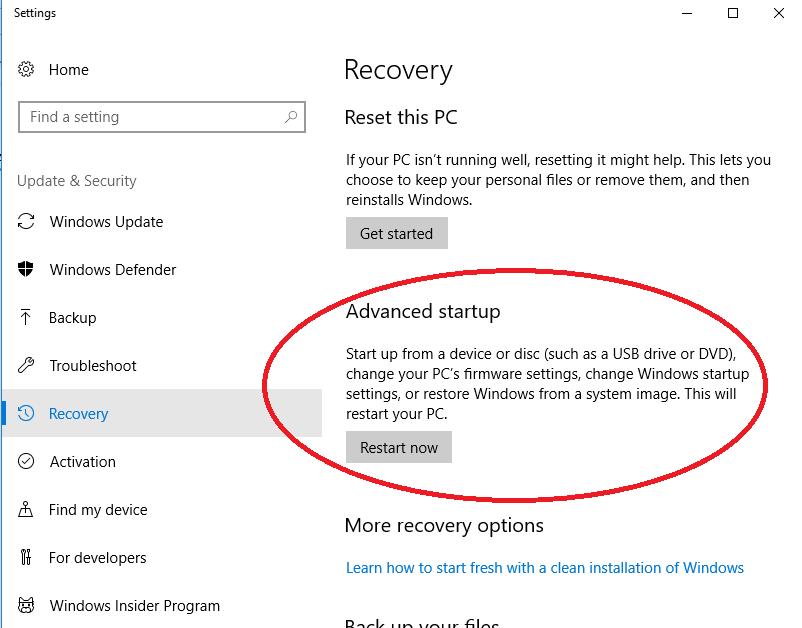

Step #11
Click “Recovery” on the left and then choose “Restart now,” which is found under “Advanced startup” on the right.
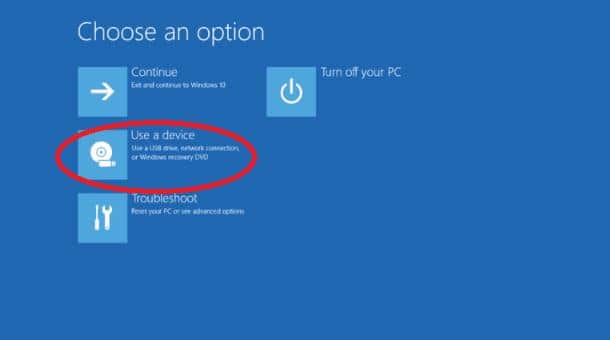
Step #12
You should see the “Choose an Option” menu. Click on “Use a device.” Then, choose your device from the menu.
Step #13
At this point, you need to follow any onscreen prompts, answering questions about your language and keyboard preferences, until you get to the “Install now” button, which you click.
Step #14
You can skip the product key step(s) if you do not have one. Make sure you choose the right edition for what you previously had (Home or Pro). You cannot change editions when you are doing a clean install using this method. If you attempt to, you will have to start over from the beginning.

Step #15
You will need to wait a bit and then be asked to agree to Terms of Service- review these, make sure the box is checked, and click “Next.”


Step #16
At this point, click “Custom: Install Windows only (advanced).” Note: If you get a driver missing error after clicking this, restart the setup. When you come to this screen, make sure your flash drive is not active and remove your flash drive before clicking “Custom: Install Windows only (advanced).” Once you have removed the drive, you should be able to continue the process. You will be prompted when you should reinsert the drive at a later time. Removing the flash drive while it is active can erase it or corrupt the files on it, so be careful if you need to do this.
Step #16
Next, you will be asked where you want to install Windows. You should only have one option available. (If you have multiple options, it means your drive is still partitioned. You need to remove the partitions by clicking on the bottom option and deleting it. Do not accidentally select your USB drive and delete that. Continue deleting partitions until there is only one drive option left that should read something like “Drive 0 Unallocated Space.”) Select the drive and click “New.” Then you need to click “Apply” and finally “OK.” Now you have created a properly partitioned drive. Part of the drive will be reserved for system restore. Click the main (largest) partition and then click “Next.”
Step #17
Again, have patience because this process takes time. When the clean install is finished, Windows will restart a few times and take you through some setup screens. After everything is complete, begin readjusting your settings (such as screensavers and wallpaper) to reflect your preferences, check immediately for updates, re-install any apps and drivers that you want, and re-download your saved files.


