- Sync files with OneDrive in Windows
- Productivity apps, 1 TB of OneDrive, and advanced security.
- Install and set up
- If you have no accounts signed in to OneDrive
- Key points in OneDrive Setup
- See and manage your OneDrive files
- Microsoft выводит «копипаст» на новый уровень. Обмениваться контентом между Windows 10 и Android станет намного проще
- Функция облачной синхронизации буфера обмена тестируется в SwiftKey
- 6 Ways | File Sharing Between Windows 7 and Windows 10
- Can I Share Files Between Windows 7 and Windows 10
- Part 1. File Sharing between Windows 7 and Windows 10 via NetworkВ
- Method 1. Use PC Transfer Software
- Method 2. Use Email
- Method 3. Use Cloud Drives
- Method 4. Use Windows Built-in Tools (Share/HomeGroup/Network Shared Drive)
- Tool 1 — Create Network Shared Link via Share/Share With
- Tool 2 — Use Windows HomeGroup
- Tool 3 — Map and Use Network Shared Drive
- Part 2. Share Files Between Windows 7 and 10 without NetworkВ
- Method 1. Manually Copy Files via External Storage Device
- Method 2. Transfer Files via Image with PC Transfer Tool
- Easy, Quick, and Safe FixesВ for File Sharing
Sync files with OneDrive in Windows
Productivity apps, 1 TB of OneDrive, and advanced security.
Important:
Support for the old OneDrive for Business sync app with SharePoint Online has ended. If you see this  icon in your taskbar, read this article to learn more.
With OneDrive, you can sync files between your computer and the cloud, so you can get to your files from anywhere — your computer, your mobile device, and even through the OneDrive website at OneDrive.com. If you add, change, or delete a file or folder in your OneDrive folder, the file or folder is added, changed, or deleted on the OneDrive website and vice versa. You can work with your synced files directly in File Explorer and access your files even when you’re offline. Whenever you’re online, any changes that you or others make will sync automatically.
This article describes how to download the OneDrive sync app and sign in with your personal account, or work or school account, to get started syncing. If you use Microsoft 365 Apps for business, you can also sync files from your SharePoint sites. If you’re not using Microsoft 365 Apps for business, see Sync SharePoint files with the OneDrive for Business sync app (Groove.exe).
Note: For information about syncing files on macOS, see Sync files with OneDrive on Mac OS X.
Note: For more information about how to use OneDrive, see OneDrive video training.

Install and set up
If you’re using Windows 10, your computer already has the OneDrive app installed — skip to step 2.
If you don’t have Windows 10 or Office 2016, install the Windows version of the new OneDrive sync app.
Start OneDrive Setup.
If you have no accounts signed in to OneDrive
If you don’t currently have an account signed in to OneDrive, use these instructions to start OneDrive.
Select the Start button, search for “OneDrive”, and then open it:
In Windows 10, select OneDrive.
In Windows 7, under Programs, select Microsoft OneDrive.

In Windows 8.1, search for OneDrive for Business, then select the OneDrive for Business app.
When OneDrive Setup starts, enter your personal account, or your work or school account, and select Sign in.

Key points in OneDrive Setup
There are two screens in OneDrive Setup that are helpful to watch for:
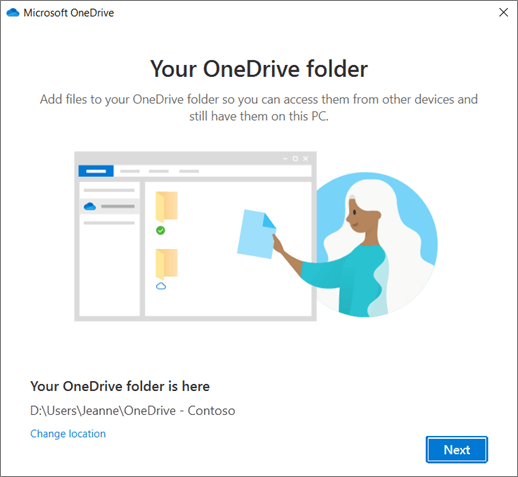
On the This is your OneDrive folder screen, select Next to accept the default folder location for your OneDrive files. If you want to change the folder location, select Change location — this is the best time to make this change.
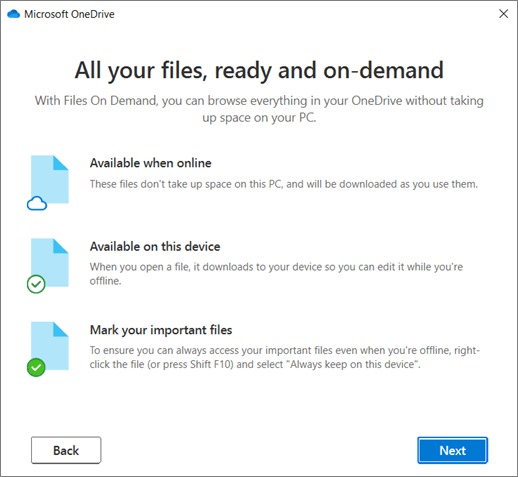
On the All your files, ready and on-demand screen, you’ll see how files are marked to show them as online-only, locally available, or always available. Files On-Demand helps you access all your files in OneDrive without having to download all of them and use storage space on your Windows device. Select Next.
Note: If you were already syncing OneDrive for work or school to your computer (using the previous sync app) and you’ve just installed the sync app, you won’t see the This is your OneDrive folder or the Sync files from your OneDrive screen during OneDrive Setup. The sync app automatically takes over syncing in the same folder location you were using before. To choose which folders you’re syncing, right-click the blue cloud icon in the taskbar notification area, and select Settings > Account > Choose folders.
See and manage your OneDrive files
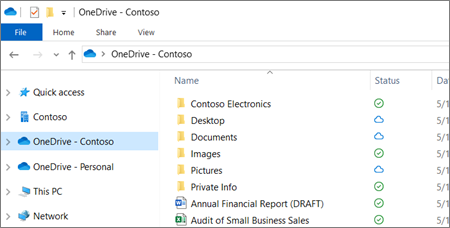
You’re all set. Your OneDrive files will appear in File Explorer in the OneDrive folder. If you use more than one account, your personal files appear under OneDrive – Personal and your work or school files appear under OneDrive — CompanyName.
You now have a new white or blue cloud icon (or both) in your notification area and your files are synced to your computer. Your blue cloud icon will appear as OneDrive – [YourTenantName] when you hover over the icon.

Note: Contoso is an example name — yours will show the name of your organization.
Any time you want to change the folders you sync on your computer, right-click that cloud icon in the taskbar notification area, and select Settings > Account > Choose folders. Find other information about your account and change other OneDrive settings from here.
Microsoft выводит «копипаст» на новый уровень. Обмениваться контентом между Windows 10 и Android станет намного проще
Функция облачной синхронизации буфера обмена тестируется в SwiftKey
Компания Microsoft работает над новой функцией в своей флагманском приложении клавиатуры SwiftKey, которая может изменить способ копирования и вставки контента в Windows 10.
С релизом осеннего обновления 2018 года (October 2018 Update), Microsoft добавила функцию Cloud Clipboard (облачный буфер обмена) в Windows 10. Она предлагает историю ранее скопированных текста и изображений, а также позволяет закреплять наиболее часто используемый контент, с синхронизацией между устройствами. Скопированный текст, изображения и под HTML в буферной истории доступны для всех устройств Windows, подключённых к аккаунту Microsoft.
После двух лет ожидания аналогичная функциональность также придёт на смартфоны с установленной клавиатурой SwiftKey. В бета-версии SwiftKey для Android производитель тестирует новую опцию под названием Sync clipboard history to the cloud (синхронизация буферной истории с облаком).
С запуском этой функции в SwiftKey, пользователь сможет, например, скопировать предложение на смартфоне Android и получить к нему доступ в истории буфера на Windows 10. Аналогично можно будет получить доступ к истории буфера с ПК на устройстве Android.
Отметим, что в приложении Your Phone (Ваш телефон) для операционной системы Windows 10 уже реализован буфер обмена контентом между устройствами, но пока эта функция доступна только для избранных смартфонов Samsung. Количество установок SwiftKey для Android на данный момент превышает 500 миллионов.
6 Ways | File Sharing Between Windows 7 and Windows 10
Can I Share Files Between Windows 7 and Windows 10
File sharing is not a difficult issue but also sticks unclear in someone’s mind. Do you have a clue to share files between Windows 7 and Windows 10 computers? You will get all the useful methods to transfer files from Windows 7 to Windows 10 over network or without network on this page.В
Here, we’ll list the applicable methods from easy to difficult so as to save your time and energy.В See the key part below:
| File Sharing | Step-by-step Troubleshooting |
|---|---|
| File Sharing via Network | Fix 1. (Easiest) Use PC Transfer SoftwareВ . Full steps Fix 2. Use Email . Full steps Fix 3. Use Cloud Drives . Full steps Fix 4. Use Windows Built-in Tools. Full steps |
| File Sharing without Network | Fix 1. Copy Files via External Storage Device . Full steps Fix 2. Transfer backup Files via PC Transfer Tool . Full steps |
Mentioned file sharing via Network, in part one, we hold 4 ways. If you want to use the most straightforward one, you can pick the first one — EaseUS Todo PCTrans, which features fast data transfer without data loss. Or you can try part two under data transfer without network.
Note: Provided methods for file sharing on this page can be allied to all Windows OS.
Part 1. File Sharing between Windows 7 and Windows 10 via NetworkВ
The earlier the solutions appear, the easier they would be for you to apply and transfer files between Windows 7 and Windows 10.
The best available solutionВ is the third-party PC transfer tool, including sharingВ and transferring files, applications, programs, and games. The other four ways are good helper but still not as good as EaseUS Todo PCTrans.
Support Windows 10/8.1/8/7/Vista/XP
| Comparison | Advantages | Limits |
|---|---|---|
| EaseUS Todo PCTrans | Easiest, one-click transfer | Transfer 500MB for free. |
| free | Sending large files acquires compression. | |
| Cloud Service | Cross-platform | Ensure your storage space is ample. |
| Windows Built-in tool | free | Network sharing not working problem. |
Method 1. Use PC Transfer Software
Applies to: Share and transfer files, applications, programs and games on all Windows OS.В
The first and easiest way for sharing files between Windows 7 and Windows 10 is to use powerful PC transfer software for help.
EaseUS Todo PCTrans is one of these tools that enables you to transfer unlimited files from PC to PC in only 4 steps. See how to transfer your files from Windows 7 to Windows 10 or vice versa:В
Step 1. Select the transfer mode.
- Download and install EaseUS Todo PCTrans on both PCs.
- Launch EaseUS Todo PCTrans on the PCs and click «PC to PC» on one of them.
- Make sure your PCs meet the requirements of a smooth transfer and click «Continue».

Step 2. Connect the PCs.
- Connect to the target PC, then input the account password or verification code of the target PC.
- Check the verification code on the right top of the «PC to PC» main screen on the target PC.
- Check the transfer direction and click «Connect»В to continue.

Step 3. Select the content you want to transfer.
- Hover on the category (Applications, Files, or Accounts) and click «Edit».
- Choose the specific items you want to transfer and click «Finish».

Step 4. Transfer selected items from Windows 7 to Windows 10.
- Click «Transfer» to start transferring applications, files, or accounts from Windows 7 to Windows 10.
- Wait for the transfer process to finish and then click «OK».

Besides, you can even use this software to migrate applications and user account from one computer to another in Windows 10/8.1/8/7/Vista/XP, such as «Move Dropbox to Another Computer». Read also:

This page shows you how to transfer Microsoft Office 2010/2013/2016 application with its product key from one laptop to another with the help of EaseUS PC Transfer software and Microsoft manual method.

Method 2. Use Email
Applies to: Everyone who has an email account in all Windows OS.
The other applicable and practical way for file sharing is email. The reason is that almost everyone has an email account in their daily file and jobs. It’s a common way to share files via emails is in ordinary people’s life.
Required: Two email accounts offered by Outlook, Windows Email/Mail, Gmail, Mozilla Thunderbird or Hotmail, etc.
You can follow the steps below to share files between your two PCs:
Step 1. Sign in with your email accounts on two PCs.
Step 2. On the source computer, go to Index, input the email addresses — From: your email address on the source PC, To: email address on the target PC.
Step 3. Click the Attachment icon, select the files that you want to share on your current PC.
Step 4. Click «Send» to start sending files to the target PC.
Step 5. On the target PC, go to Inbox, check and download the received attachment files.
Method 3. Use Cloud Drives
Applies to: File backup, File sharing on all Windows PCs
Cloud drive services also provide people with great convenience for file backup and file sharing in all Windows and Mac computers.
There are many cloud services available online that you can choose to backup and share files, such as OneDrive, Dropbox, Google Drive, iCloud, etc.
Here we’ll take OneDrive as an example to show you how to share files between Windows 7 and Windows 10:
Share Files Stored inside OneDrive
Step 1. Go to Open the OneDrive on the source PC with Windows 7 or Windows 10.
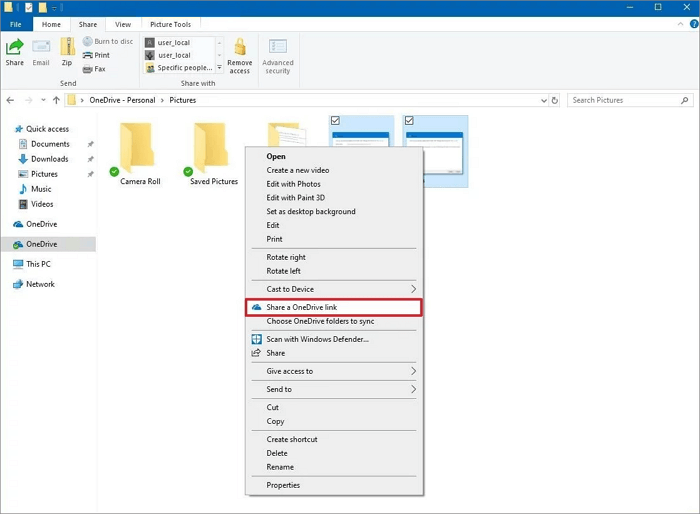
Step 2. Right-click the file or folder that you want to share and select «Share a OneDrive link».
Step 3. Paste the link to share it on any email, social media post, or any other type of messaging system.В
Step 4. Once you received the sent link on the target PC, you can access the shared files.
Method 4. Use Windows Built-in Tools (Share/HomeGroup/Network Shared Drive)
Applies to: Share files between Windows PCs
Microsoft Windows also has offered some built-in tools that allow users to share files between Windows computers. Here are three major tools that you can apply to transfer files between Windows 7 and Windows 10:
Tool 1 — Create Network Shared Link via Share/Share With
Step 1. Open Network & Sharing Center and Change advanced sharing settings on the source PC
1. Right-click the Windows icon, click Search and type: network and sharing center, click to open it.
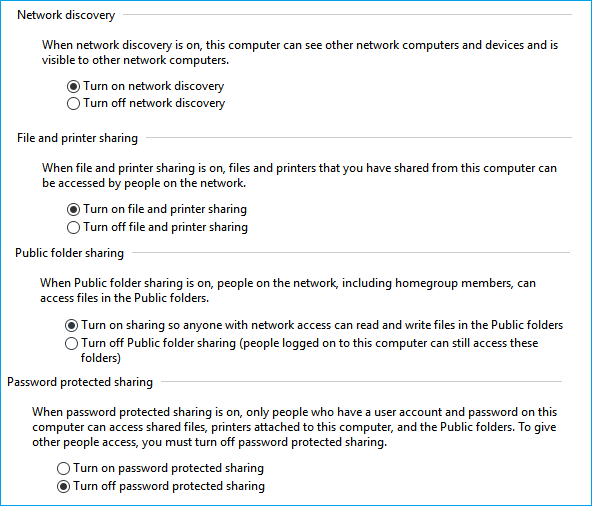
2. Click «Change advanced sharing settings», check the boxes below and save changes:
- Turn on network discovery
- Turn on file and printer sharing
- Turn on sharing so anyone with network access can read and write files in the public folders
- Turn off password protected sharing
Step 2. Create a shared link for the files that you want to share
From Windows 10 to Windows 7:
1. Open drives in Windows 10 File Explorer and select files that you want to share with Windows 7.В
2. On the Windows File Explorer window, go to the Share tab at the top pane, click «Share» and select «Specific people. «.
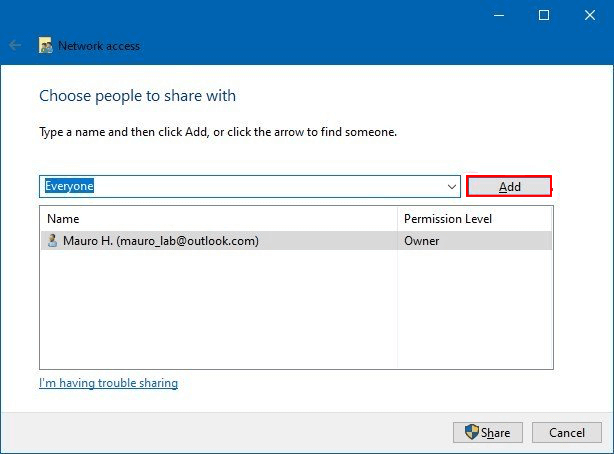
3. Click the expand button and choose «Everyone» as the share mode, click «Add» to confirm.
4. Click «Everyone», and specify the access privilege as «Read/Write» under the Permission Level. And click «Share» to confirm.

5. Right-click the shared folder path and select «Copy Link» as shown below:
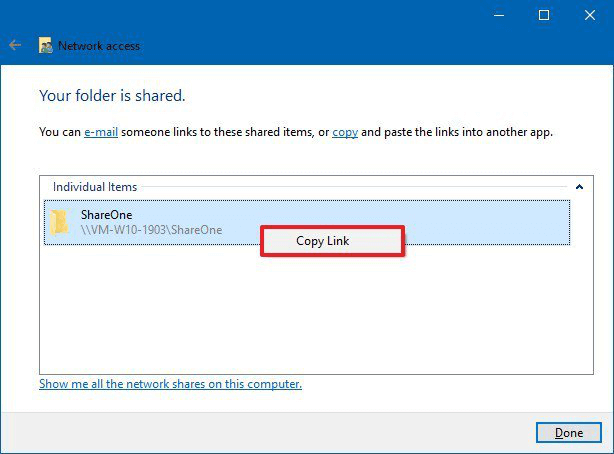
6. Send the shared link to the target PC via Email or other ways.
From Windows 7 to Windows 10:
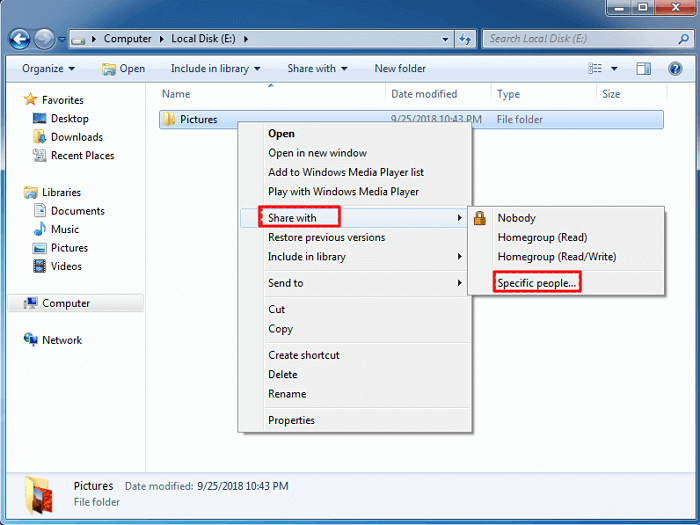
1. Open drive or partition in Windows 7 Explorer, right-click on the folder or files that you want to share and select «Share with» > Choose «Specific people. «.
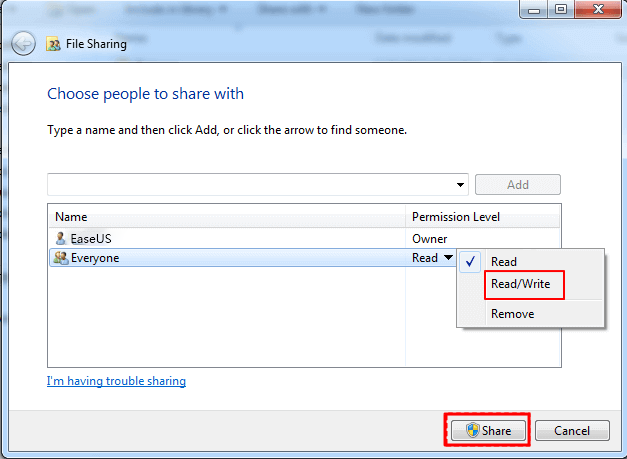
2. Choose «Everyone» in the drop-down menu on File Sharing, click «Add» to confirm.

3. Click «Everone» and set permissions to «Read/Write» and click «Share» to confirm.
Step 3. Access shared files on target PC
From Windows 10 to Windows 7:
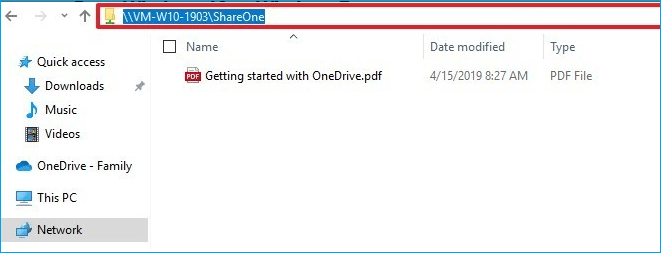
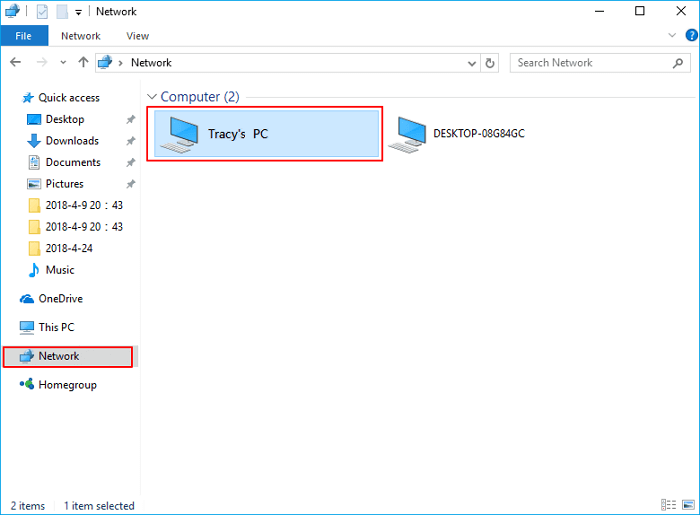
1. Open Windows 7 File Explorer, click «Network».
2. Paste the shared link and hit enter to access the shared content.
From Windows 7 to Windows 10:
1. Open Windows 10 File Explorer and click «Network».
2. Find the Windows 7 computer’s name and double-click to open it, access the shared files.
P.S.В Suppose you face Windows 7 to Windows 10 network sharing not working issue, you canВ see a how-to article ofВ Windows 10 file sharing not working.
Tool 2 — Use Windows HomeGroup
HomeGroup is used to share files or folders between two Windows computers connected to the same network.В
If your Windows OS stays in versions before 1803, you can use HomeGroup to share files between Windows 7 and Windows 10 with the below steps:
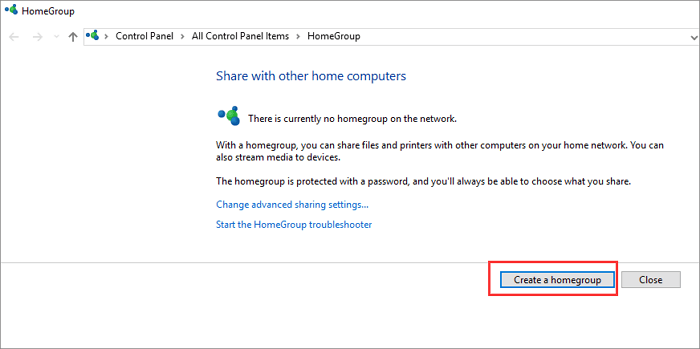
Step 1. On the Windows computer, type and search for a homegroup in the Search box. Click to open it.В
Step 2. Choose «Create a homegroup» > «Next», and follow the instructions.
Step 3. Select files and folders that you want to share and switch the Permissions buttons to «Shared», and click «Next».
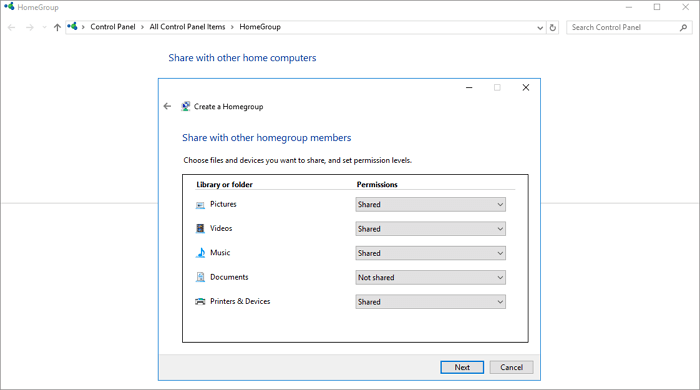
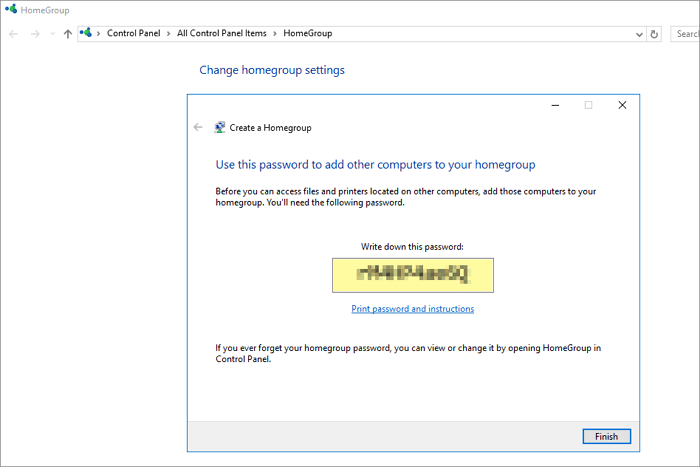
Note: Remember the password shown on-screen.В
Step 4. Go to Windows 10 computer and open HomeGroup: Control Panel > All Control Panel Items > HomeGroup.
Step 5. Join the existing Homegroup and enter the password you got earlier and click «Finish».
Step 6. Access the shared files on the new PC.
If you Windows 10 has been updated to the new versions after April 2018 Update (version 1803), use the Share option to accomplish file sharing between Windows 7 and Windows 10:
Step 1. Open File Explorer on Windows 7, select the folder or files that you want to share.
Step 2. Click the «Share» tab at the top panel, and click the «Share» button.

Step 3. Select a contact, nearby sharing device, or one of the Microsoft Store apps (such as Mail).В
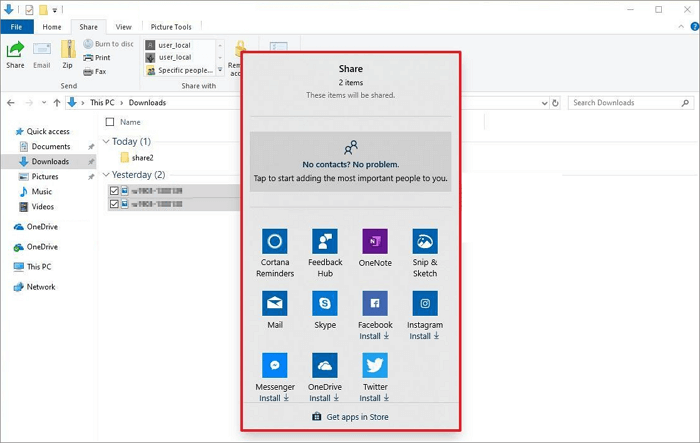
Step 4. Finish the process by following the on-screen directions to transfer files from Windows 7 to Windows 10.
Tool 3 — Map and Use Network Shared Drive
Tip: Both Windows 7 and Windows 10 must connect to the same network or LAN for sharing files via the network shared drive.
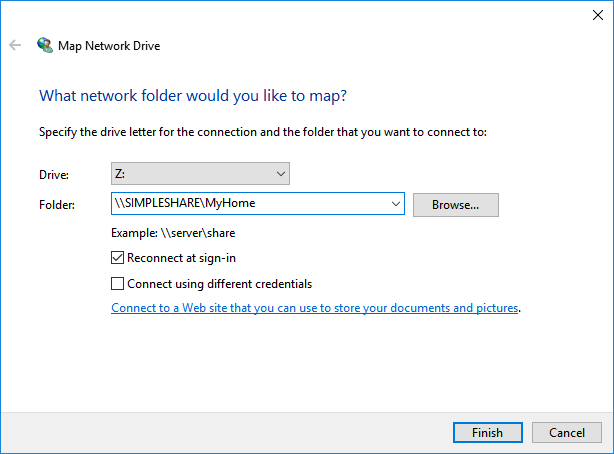
Step 1. Map a network drive on the source computer.
1. Right-click on This PC/Computer and select «Map network drive».
2. In the Drive box, click the drive letter you want to use.
Note: The drive should be big enough for saving the files and folders that you want to share.В
3. In the Folder box, type \\server\share, where you can type the IP address of the drive to be mapped.
For example, if the IP address is 192.168.6.xxx, you can type \\192.168.6.xxx.
Step 2. Save files and folders to the mapped drive.
Step 3. One the target PC, open File Explorer and type the IP address of the mapped network drive, e.g: 192.168.6.xxx
Step 4. Hit Enter and access the shared files. You can copy and save the files to your local PC.
Part 2. Share Files Between Windows 7 and 10 without NetworkВ
Applies to: Share confidential files offline between Windows 7 and 10.
If you prefer an offline file sharing option between Windows 7 and Windows 10, you can use three provided methods here without using the network:
Method 1. Manually Copy Files via External Storage Device
Note: Be careful while copying and pasting files. Improper operation may result in unexpected file loss.
Step 1. Prepare a big enough empty external hard drive or USB drive.
Step 2. Connect the external storage drive to the source PC, copy, and save files and folders to the drive.
Step 3. Unplug the external device and connect it to the target PC, copy and save shared files to a local drive.
Method 2. Transfer Files via Image with PC Transfer Tool
The «Backup and Restore»В Transfer feature in EaseUS Todo PCTrans allows you to create compressed backup files and folders and transfer them to the target PC at one time:
For a detailed guide, refer to the link on how to transfer files from PC to PC without networkВ for help.
Easy, Quick, and Safe FixesВ for File Sharing
On this page, we show you six methods in all to transfer files between Windows 7 and Windows 10.В
For the easiest solution,В EaseUS Todo PCTrans in Method 1В is the best one for all users. For manual guidelines, email, cloud drive, and network sharing are also practicalВ ways. Your advice is important to us. Looking forward to your consultation!


