- The 5 Best Ways to Run Windows on Your Mac
- Find out which option best fits you
- Boot Camp
- Virtualization
- How to Run Mac On Windows -XP,7,8,8.1,10
- Methods to Dual Boot Mac alongside Windows on PC or Laptop
- Requirements to Run Mac On Windows
- Tools Needed to Install Mac On Windows PC or laptop
- How To Run Mac On Windows [Guide]
- How to Run Windows 10 on Mac Free with VirtualBox for Mac OS X
- How to Run Windows 10 on Mac with VirtualBox for Mac OS X
- How to Run macOS on Windows 10 in a Virtual Machine! (Step-by-Step Guide)
- Files Required to Create A macOS Virtual Machine On Windows 10!
- Download macOS Catalina Virtual Image!
- Using VirtualBox To Create macOS Catalina Virtual Machine
- Edit Settings Of macOS Catalina Virtual Machine
- Add Custom Code to VirtualBox Using Command Prompt.
- Time To Boot Your macOS Mojave Virtual Machine
- Use VMware Workstation Player to Create a macOS Catalina Virtual Machine
- Patch VMware Workstation Player
- Edit the Settings Of macOS Mojave Virtual Machine
- How To Edit the macOS Catalina VMX File for AMD Hardware?
- Installing VMware Tools for The macOS Catalina Virtual Machine
- Troubleshooting Errors or Mistakes:
- AMD Hardware’s macOS Virtual Machines
- Wrapping It Up!
- 19 thoughts on “How to Run macOS on Windows 10 in a Virtual Machine! (Step-by-Step Guide)”
- Leave a Comment Cancel reply
The 5 Best Ways to Run Windows on Your Mac
Find out which option best fits you
While macOS is made to run using Mac hardware, it is not the only operating system that can run on a Mac computer.
Plenty of other operating systems, including Window and Linux, will work on a Mac device. That makes the Mac among the most versatile computers you can buy. Here’s what we’d use to install Windows on a Mac.
Boot Camp
:max_bytes(150000):strip_icc()/BootCampPartition-5849de633df78c491eaf721b.jpg)
Supports Windows 7, 8.1, and 10
Windows runs natively on Mac hardware for best performance
Requires a full Windows license for the initial install.
Cannot run Windows and Mac OS concurrently.
Perhaps the best-known option for running Windows on a Mac is Boot Camp. Included free with your Mac, Boot Camp allows you to install Windows and then choose between Mac and Windows on startup.
Because Boot Camp runs Windows directly on your Mac’s hardware (there is no virtualization or emulation to be performed) Windows can run at the best possible speed your Mac is able to deliver.
Installing Windows on your Mac is no more difficult than installing Windows on a PC. Apple even provides the Boot Camp Assistant to partition the startup drive to make room for Windows as well as to install all the drivers Windows needs for special Apple hardware.
Virtualization
:max_bytes(150000):strip_icc()/ParallelsWizard-576f016d5f9b585875b92396.jpg)
Run both macOS and a guest OS side-by-side.
Not limited to Windows; a large number of guest operating systems are supported.
Performance tuning and customization needed to achieve the best performance.
May impact the performance of your Mac.
Virtualization allows several operating systems to run on computer hardware at the same time. Virtualization abstracts the hardware layer, making it look like each operating system has its own processor, RAM, graphics, and storage.
Virtualization on the Mac makes use of a software layer called a hypervisor to emulate all of the underlying hardware. As a result, the guest operating system running on the virtual machine does not run as fast as in Boot Camp. But unlike Boot Camp, both the Mac operating system and the guest operating system run at the same time.
There are three primary virtualization apps for Mac:
- Parallels: The first to bring virtualization to the Mac. Parallels supports a wide range of guest OS, including Windows, Linux, and Mac.
- VMWare Fusion: Fusion is the Mac virtualization app offered by VMWare — a leader in virtualization tech. Fusion supports the installation of many different operating systems, including Windows, Linux, and macOS.
- VirtualBox: Oracle supports an open source virtualization app known as VirtualBox. This free virtualization app runs on multiple computer systems, including Mac. Like the other virtualization apps, VirtualBox can be used to run many different operating systems, including Windows, Linux, and macOS.
Installing the virtualization apps is similar to any other Mac app. Guest OS may be more involved with some customization required to obtain the best performance. All three apps have lively forums and support services to help with tuning the performance.
Источник
How to Run Mac On Windows -XP,7,8,8.1,10
Mac OS X is an advanced operating system, easy to use and extremely stable when used daily, and sometimes one would prefer to have OSX on PC rather than using Windows 7 or latest Windows 10. Well we have brought something interesting for you – The Guide to Run OSX on Windows which means users can Run Mac OS alongside Windows 7,8,8.1. The aim of installing Mac On Windows will be achieved by Virtual Technology. Many users aspire to buy Apple powered Macbook or any other premium Mac OS X running Apple device, but as we know that all can’t afford it, but atleast one can make ends meet by getting Mac OSx experience on Windows with very few steps.
Here is the glimpse of the result that you will see after you install mac on windows 7 on laptop :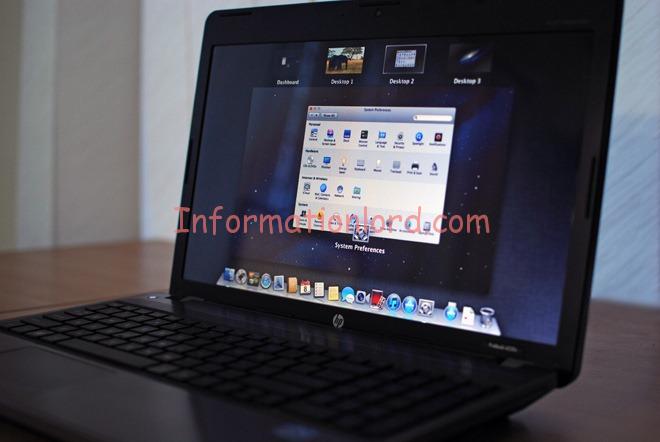
Methods to Dual Boot Mac alongside Windows on PC or Laptop
We actually have two methods by which you will be able to use Mac On Windows PC –
- Buy Apple’s Macbook which will cost you three times you buy a new Window powered Laptop.
- Use this tutorial and little tech work which will cost you nothing but will give you a feeling of self-satisfaction that you have installed Mac OS on PC without spending even a penny.
So I would like to go by procedure 2 as that is very easy and hope you will not mind it 😛 So now the basic question that arises is – How to Run Mac On Windows -XP,7,8,8.1,10 – Follow up this easy tutorial to Install or Run OSX on Windows PC without losing important data or compromising with the Speed of your PC.
Requirements to Run Mac On Windows
The Basic Requirements to Run MAC on PC or Laptop or to Install Mac OS X (10.5 and above) on Virtual Machine VMWare. As VMWare is a virtual machine so it runs alongside windows and unlike other Operating System which we run using VMware, we need little more hardware requirements to run Mac on Vmware.
- 8 GB RAM will give you more than enough speed to cope up with the load of Mac OS on Virtual Machine
- Intel Core i3, i5, i7 will work like a charm.
- 128 GB of storage available on the hard disk to make Mac run without errors on PC.
It is not compulsory to have the above requirements. But lower than this will result into slow performance by the VMWare Workstation while loading MAC. But one can always give it a try to Run OSX on Windows with whatever config you have.
Tools Needed to Install Mac On Windows PC or laptop
To run mac on windows VMware one need to have few essentials that will equip you up to Run MAC OS-X alongside windows smoothly.first and the foremost software we require is the VMWare Virtual Machine itself. Download
First and the foremost software we require is the VMWare Virtual Machine itself. Download VMware Workstation from here.
VMWare is not the only one software required to Install MAC on Windows 7,8 or 10; You require an essential Unlocker as well. Download Latest MaC Unlocker required to Install Mac OSX on Windows from link in the Social Locker Below. [Like/+1/Tweet in order to Download latest Mac Unlocker]
Now Download the Essential VMDK Disk image of OSX that you will be using for running mac on windows from here and extract the same with xnohat as password 🙂
How To Run Mac On Windows [Guide]
- Step 1: Install the latest virtual technology powered VMWare Workstation which can be done easily by following on-screen instructions.
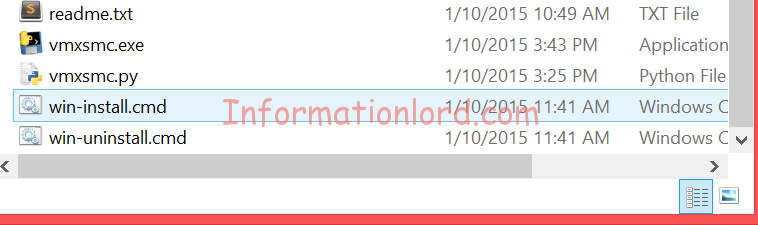
- Step 2: Now the real task starts here- Unzip the Unlocker 2.0.8 which you downloaded from second link and then Run the file named “win-install.cmd“. We would recommend that you run the file as Administrator.

You can hereafter link your CD Drive, Internet connection etc via editing settings of the Virtual Machine! If you are facing any problem to run OS-X on windows or if you want to share your views, do comment here, We will be at your service!
Running Mac OS X on Windows via Dual Boot is not a very hard task as well, but then the procedure mentioned here to Install Mac alongside Windows using VMware is of much use compared to totally formatting the system for Hackintosh. Do let us know if you are looking for Hackintosh tutorials in the comments section. This setup is all for free to get Mac Os X running on your Windows pc with all official udpates.
Источник
How to Run Windows 10 on Mac Free with VirtualBox for Mac OS X

Need to run Windows 10 on a Mac? You can install and run Windows 10 in Mac OS X for free using VirtualBox and the Windows 10 Preview from Microsoft. Because this installs Windows into a virtual machine atop existing Mac system software, running Windows is basically like running any other application, which makes it much easier than configuring Boot Camp for a native Windows experience.
Setting up Windows 10 to run on the Mac is quite simple and requirements are basic enough, though the more resources the computer has the better the overall experience will be.
To get started, you’ll first need to download Windows 10 ISO from Microsoft and get VirtualBox. The rest is just a matter of following the simple instructions, and soon you’ll have Windows running in MacOS X in no time.
- Download VirtualBox from Oracle (free) – install this as like any other app
- Download Windows 10 ISO from Microsoft (free) – put this somewhere easy to locate, like the Mac Desktop (here and here are additional Windows 10 ISO links from MSFT if needed)
- At least 8GB of disk space to install Windows into the virtual machine
- A reasonably speedy computer with sufficient RAM and CPU (the newer the better, as usual)
A quick side note: VirtualBox is cross platform compatible, and while we’re demonstrating installing Windows 10 in Mac OS Catalina, macOS Mojave, MacOS Sierra, Mac OS X High Sierra, El Capitan, Yosemite here, you can actually run through this exact tutorial on any other major operating system as well outside of the Mac. Essentially this means you can run Windows 10 in Mac OS X (High Sierra, Yosemite, Mavericks, you name it), Windows 7, or even Linux, using the exact same software and instructions, nifty huh?
How to Run Windows 10 on Mac with VirtualBox for Mac OS X
Now that you’ve got the software components necessary to run Windows 10 in a virtual machine, let’s run through the installation process:
- Open VirtualBox and click on the “New” button to build a new virtual machine
Name the new virtual machine “Windows 10 VM” (or something equally obvious), select “Microsoft Windows” as the type and choose “Windows 10” as the version, then choose Continue
In a moment or two you’ll be in the Windows 10 installer, select your language and click “Next”
Go through the standard Windows 10 installation experience, this can take a little while but eventually you’ll create a user account, select a user name, and do some basic Windows configuration
When you’re finished, quit VirtualBox like any other application and Windows 10 will shut down. When you want to run Windows again in Mac OS X, just launch VirtualBox again, select your Windows 10 virtual machine, and click the “Start” button to boot Windows in the app. Easy, right?
Yes, this is a complete version of Windows 10. These preview builds expire eventually when the final version comes out from Microsoft, but there is some speculation that they may make Windows 10 free. Regardless, when the final version comes out you’ll be able to install it and run within VirtualBox the same way as outlined above.
Keep in mind this is a virtual machine, which basically means the VirtualBox app is functioning as a virtual computer on top of your existing Mac. This undoubtedly impacts performance, which is part of why the more resources the computer has the better the experience, so you’re not going to want to be using this for trying to play some wild Windows games in Mac OS X. Nonetheless, this is more than sufficient for basic Windows tasks, using Windows apps like Internet Explorer, or just to get a feel for Windows 10. For a true native Windows experience on a Mac, you’d want to install Windows with Boot Camp as a side-by-side bootable operating system, we’ll cover that separately here if that interests you.
If you’re enjoying this VirtualBox experience, you may be pleased to discover that you can run many other operating systems in the virtual machine environment as well. If you want to try Linux, you can run Ubuntu on your Mac with VirtualBox, or many versions of Internet Explorer in different Windows VMs, Windows 8, even Android 4, older versions of Mac OS X like Snow Leopard, and much more, you can explore our VirtualBox section for more.
If you get tired of Windows 10, you can either delete the virtual machine from within VirtualBox, or remove the Windows .vdi file (the virtual disk image) from your hard disk manually. Keep in mind that if you delete the VM, any files that you created in Windows will be removed as well.
Источник
How to Run macOS on Windows 10 in a Virtual Machine! (Step-by-Step Guide)
Microsoft released Windows 10 in 2015 and this is the last version of Windows till now.
However, Windows is one of the most efficient and widely used operating systems that is incorporated with a broad range of amazing features.
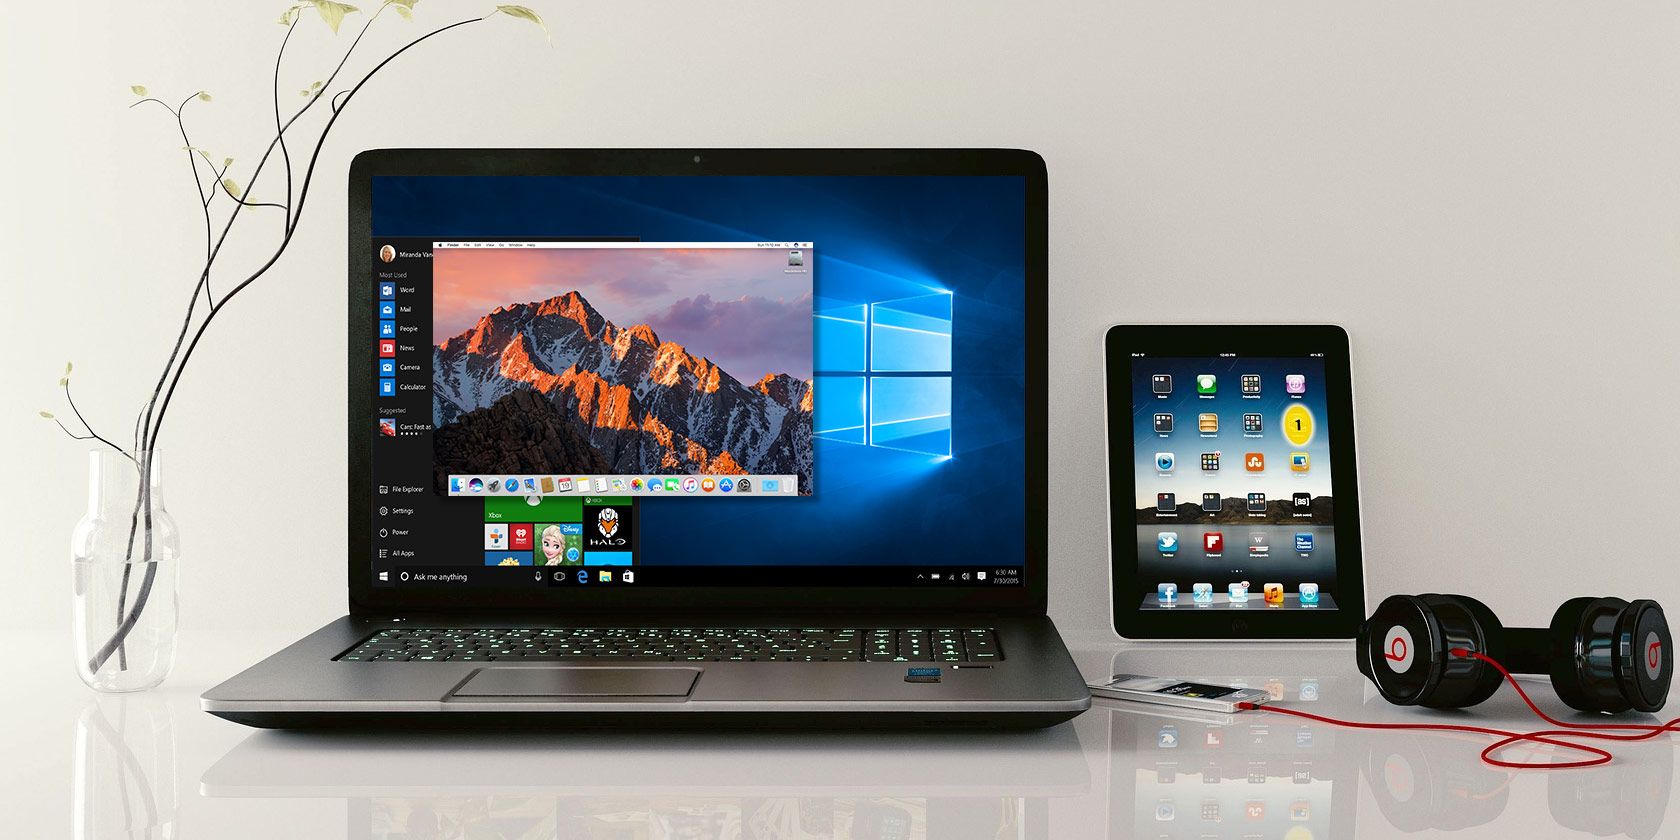
However, now with advancing technology, you can even run two operating systems on one computer.
There are several ways to do that, but in this article, we will talk about how you can run macOS on Windows in a Virtual Machine (VM.)
This is a good option if you want to multitask with the creative features of macOS and efficiency of Windows.
Before we start the guide, you must be focused and read the article carefully so that you don’t miss any important point.
Because any kind of negligence will hinder your whole process.
Files Required to Create A macOS Virtual Machine On Windows 10!
Before you begin with the main process, you must install and download the important files. You would also need a macOS copy, and for this purpose, Catalina is the latest version for macOS.
This guide aims to provide you with steps and solutions to install macOS Catalina in Virtual Machine (VM) that is running on intel hardware.
This process may include the use of either VMware Player or VirtualBox.
Download macOS Catalina Virtual Image!

We have provided you with a link at the end of this section, from where you can download macOS Catalina for both VMware and VirtualBox.
When you are downloading macOS Catalina Virtual Machine image file and Google Drive touches its download limit, then right-click on the file and choose COPY to make a copy in the Google Drive of your own.
From here download the macOS Catalina virtual image file.
Moreover, we have provided an alternative link of media fire too. You can download it from there if the problem with Google Drive continues.
Right-click on a virtual image file when the downloading is finished and extract it using the suitable tool.
For example, Right-click on Winrar and then click on Extract to macOS Catalina.
Below are the links from where you can download the respected files.
Note: the above-given link can stop working sometimes, you don’t need to worry if you have another link you can download it from there too.
Using VirtualBox To Create macOS Catalina Virtual Machine
You have to download the VirtualBox Extension before you begin with creating macOS Virtual Machine.
This includes fixes of all the essential applications i.e mouse and keyboard support, USB 3.0 support, and other useful VirtualBox patches.
You can download the VirtualBox extension from the link we have given below.
When you open VirtualBox, click on New and type macOS. The VirtualBox will identify the OS and default for Mac OS X when you enter the name.
Concerning Virtual Machine name, you can give it a creative name.
But, you would have to type the name in a series of commands and as you head further it gets annoying to type the difficult name a number of times.
Then, you will set the capacity of RAM storage that can be used by macOS Virtual Machine (VM).
For this purpose, a minimum of 4GB is advised. But, this more you gave the better performance and efficiency you will get.
Note : Don’t be foolish by assigning more RAM then your system has. Since you need to keep the balance, so you must leave some RAM for the host computer too.
Once the RAM is assigned, it’s time to assign the HardDisk. That is a virtual image you must have downloaded already.
From the options provided, you will select “ Use an existing virtual hard disk file”, then you need to put the location to the VMDK file and click on Create.
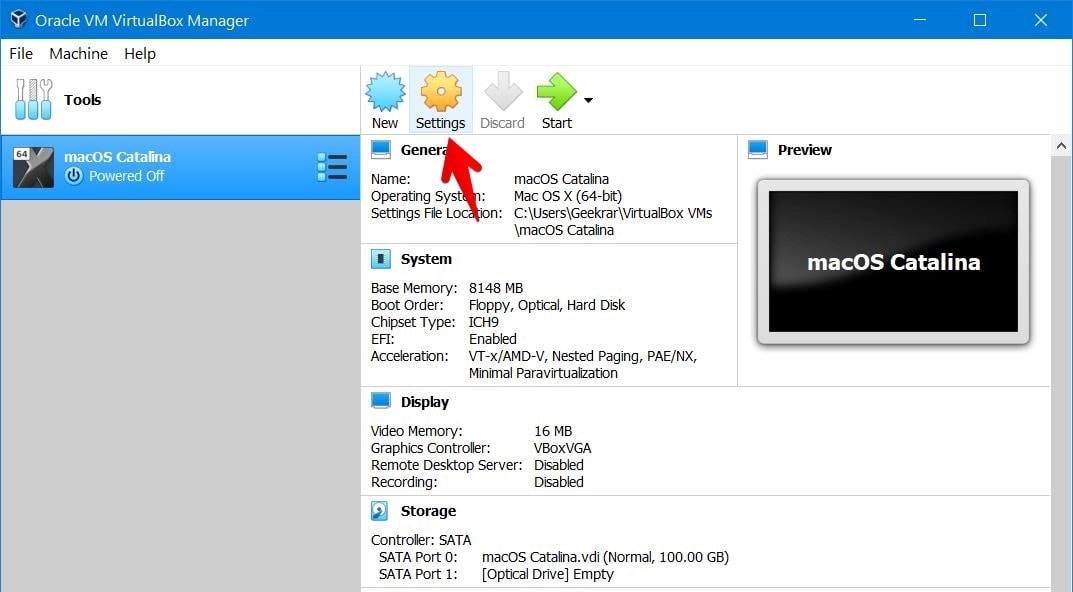
Edit Settings Of macOS Catalina Virtual Machine
Until you are done with the process, don’t think of starting your macOS Catalina VM.
Before you start the Virtual Machine, there are some changes needed to make in the settings. Go to Settings by right-clicking on macOS VM.
In System , un-check the floppy in the boot order section. Verify that the Chipset section is set to ICH9.
Now click on Processor Tab, set 2 processors. You can assign more if you have a PC with powerful specs, but it is not necessary. Moreover, Check the Enable PAE/NX box with Extended Feature.
Then you will go Display , here you will set the video memory to 128mb. Then in the Storage window, make sure that the box alongside Use Host I/O Cache is checked.
Lastly, you will go to the USB section and choose USB 3.0, then click on OK.
Add Custom Code to VirtualBox Using Command Prompt.

Be patient, because the time to start up your macOS Catalina VM still has not arrived. The current settings of VirtualBox are not compatible to work properly with your macOS VMDK.
You effectively have to patch VirtualBox until the virtual machine in macOS works.
For this purpose, a code must be entered with the Prompt command. We have given all the details at the end of this section.
Start with the VirtualBox closing. If VirtualBox or any of its associated processes is running, the commands do not function properly. Hold Windows Key + X when done, then pick Command Prompt from the display menu.
If only the PowerShell option appears on your screen, type the command in the Start menu search bar.
After that, right-click on Best Match, and choose to Run as Administrator.
To locate Oracle Virtual Box directory, you can use the following command:
cd “C:\Program Files\Oracle\VirtualBox\”
Then, you will input the below-mentioned commands one by one. The command that you set must be similar to the name of VM. For example, if my commands name is “ether”, then the commands will be followed as:
- VBoxManage.exe modifyvm “ether” –cpuidset 00000001 000106e5 00100800 0098e3fd bfebfbff VBoxManage setextradata “ether” “VBoxInternal/Devices/efi/0/Config/DmiSystemProduct” “iMac11,3” VBoxManage setextradata “ether ” “VBoxInternal/Devices/efi/0/Config/DmiSystemVersion” “1.0” VBoxManage setextradata “ether ” “VBoxInternal/Devices/efi/0/Config/DmiBoardProduct” “Iloveapple” VBoxManage setextradata “ether ” “VBoxInternal/Devices/smc/0/Config/DeviceKey” “ourhardworkbythesewordsguardedpleasedontsteal(c)AppleComputerInc” VBoxManage setextradata “ether ” “VBoxInternal/Devices/smc/0/Config/GetKeyFromRealSMC” 1
When you are done with this process with no errors encountered, you can close the Command Prompt.
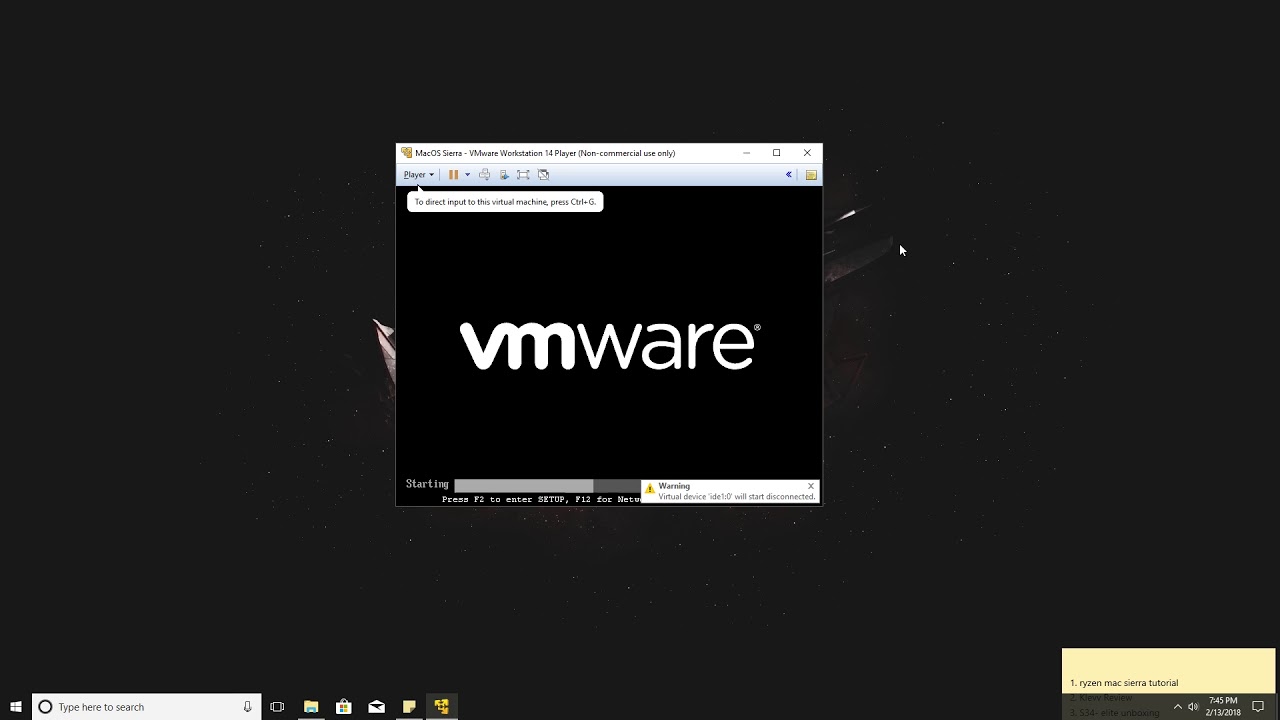
Time To Boot Your macOS Mojave Virtual Machine

VirtualBox needs to start again. To start the virtual machine, double-click on your macOS. A wide stream of text, then a grey screen, is shown.
It could take a minute or two to clear the grey screen, but do not panic. Once the screen is clear, the installation of macOS Catalina starts.
When completed, the message “Welcome” should show on the macOS. You can configure the virtual machine macOS Mojave to suit from here.
Tip : take a virtual machine screenshot when the grey screen is passed. Try going back to the Welcome Screen Setup and start the cycle again if something goes wrong along the road.
You can take one more so that you can immediately hop into the macOS program when the macOS setup is completed.
Run to Machine > Take Screenshot, type a name for your screenshot, wait for it to continue.
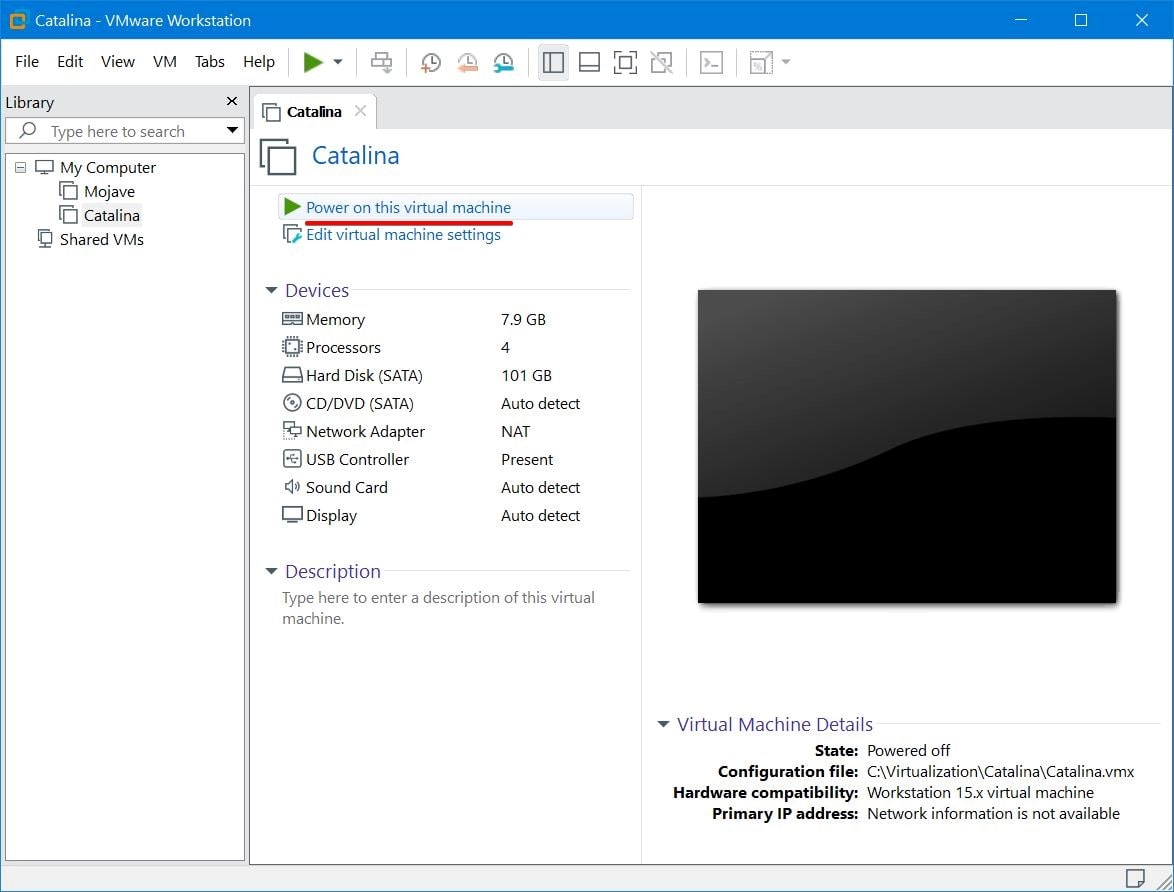
Use VMware Workstation Player to Create a macOS Catalina Virtual Machine

Will you choose VMware over VirtualBox? You can use VMware to build a virtual macOS Catalina machine which functions the way VirtualBox functions.
And, as with VirtualBox, patching is required before the virtual machine is running for the macOS Catalina.
Intel and AMD modules operate this portion of the guide. When editing the VMX Virtual Machine script, AMD users will use the second code snippet.
Study the guide and see just what it entails.
Patch VMware Workstation Player

The VMware Player Patch Tool is included in the “MacOS Catalina Virtual Image” list. Download the patch tool before you head further
Then search the location where the patch tool was downloaded. Extract the archive material.
This method functions better if the files on the same drive are stored (e.g. the C:\ drives hold the Root folder of VMware and the directory extracted).
Confirm that the VMware is totally shut down. Now click on the win-install command script in the patcher folder and select Run as admin. The file is accessed and the patch script will be executed.
Important Note: The script is running around and you have to check for a message that will be shown as “File not Found.”
The common explanation for a “not found” file or “the system cannot locate the requested file” error is to install VMware Workstation Player and to execute the patch from a separate directory in a specific position in the default folder.
You can access VMware once the patch is completed.
Follow the Following Instruction to Create macOS Catalina Virtual Machine via VMware Workstation:
Firstly, the option Create a New Virtual Machine will be selected. after that you will click on I will install the operating system later to continue.
Now you can pick and adjust Apple Mac OS X to macOS 10.14. It is because the patch hasn’t loaded correctly that you don’t see the macOS option.
Next, for your Catalina virtual machine macOS, you will select a name. Pick something that is likely to remember, and then transfer the file-path to anywhere convenient, you may have to change it at once.
On the next page, choose Store virtual disk as one file, keep to the recommended maximum hard disk capacity. Fill out a wizard for virtual disk creation, but don’t just start the virtual machine now.
Edit the Settings Of macOS Mojave Virtual Machine

You need to update the hardware specs until you can start the virtual machine. Moreover, to locate the macOS VMDK, you need to tell VMware.
Pick the virtual machine from the main VMware tab, then right-click and choose Settings from your Catalina macOS. Bump virtual machine memory up to a minimum of 4 GB, like VirtualBox. If you have RAM to spare, you might assign more.
In the processor tab, change the number of available processors to 2.
Then in the Hard Disk (SATA) tab, you will eliminate the already created hard disk. The VMware will eliminate the hard disk once you click the Remove.
After that click on Add, go to Hard disk (SATA) and select the option “use an existing disk” Then, you will find and select the location of macOS VMDK.
How To Edit the macOS Catalina VMX File for AMD Hardware?
You can leave this section if you are not an AMD user. AMD users must update the VMX file before continuing, as in the above section. Since the AMD edit consists of many lines more than Intel, the details can be copied and pasted in the file.
Close VMware. Go to the macOS virtual machine location where you installed. By default the location is:
C:\Users\YOURNAME\Documents\Virtual Machines\YOUR MAC OS X FOLDER
Select Notepad (or your preferred text editor) to browse the macOS.vmx, right-click and select Open with. Scroll down to the bottom of the configurations file and include the following data:
- smc.version = “0” cpuid.0.ebx = “0111:0101:0110:1110:0110:0101:0100:0111” cpuid.0.ecx = “0110:1100:0110:0101:0111:0100:0110:1110” cpuid.1.eax = “0000:0000:0000:0001:0000:0110:0111:0001” cpuid.1.edx = “0000:1111:1010:1011:1111:1011:1111:1111” cpuid.1.ebx = “0000:0010:0000:0001:0000:1000:0000:0000” cpuid.0.edx = “0100:1001:0110:0101:0110:1110:0110:1001” cpuid.1.ecx = “1000:0010:1001:1000:0010:0010:0000:0011” cpuid.0.eax = “0000:0000:0000:0000:0000:0000:0000:1011”
Before you Exit, make sure to save the edit.
Open VMware now, click on your macOS Mojave virtual machine to start it up.
Installing VMware Tools for The macOS Catalina Virtual Machine

Now you have to install a set of utility and extension VMware Tools that will improve video performance, mouse handling and more.
Navigate to Player, click on Manage and then Install VMware Tools with the virtual machine macOS running.
On the macOS desktop, digavsc is installed. Select Install VMware Tools when the option shows, then allow the removable volume to enter. Ignore the directed installer that needs to be restarted upon completion.
Troubleshooting Errors or Mistakes:
While you are working on the macOS Virtual Machine installation in Vmware Player Workstation, there are a few things that can trouble you or go wrong:
- You need to restart the patch phase if you can’t see “Apple Mac OS X” in the virtual machine development wizard. Ensure that all VMware Player operations are stopped. You have a strong chance of triggering virtualization in your BiOs / UEFI setup if you get a notification “Mac OS X is not enabled with the binary translation” while beginning your virtual machine. You will be told to go back to the configuration file macOS.vmx and ensure that you’ve added the additional line and saved the change if you get the notification “VMware Player unrecoverable error:(vcpu-0)” after running the virtual machine.
Power off the virtual machine first when the AMD hardware is working and the Apple logo is stopped. Go to Settings, click on Options and then select General now. Switch Guest to Microsoft Windows and Windows 10 x64 models for Guest operating system. Click OK and then try to re-start the virtual machine. When the Apple logo has been gone, power the virtual machine down then set Apple Mac OS X to the Guest OS option and pick the right distribution.
AMD Hardware’s macOS Virtual Machines
Intel hardware is used by Apple for powering laptops and desktops. The macOS virtual machine is easier to configure with Intel hardware, as the hardware requirements are pretty nearly the same.
The contrary is accurate of AMD. Since Apple does not develop macOS on AMD hardware, it is more difficult to create a macOS virtual machine on an AMD system.
Besides, We don’t have an AMD system in which virtual macOS can be checked, so a comprehensive overview can’t be given.
Still, we can refer to some macOS-AMD virtual machine teaching guides as long as you are patient.
The AMD OS X platform is an outstanding tool for virtual macOS machines. Many AMD macOS virtual machines platform articles can be found over the internet if you want to know more about them.
Wrapping It Up!
For your macOS Catalina virtual machine, you can choose from two options.
Before switching from Windows, you can try macOS and enjoy the best Apple apps on offer. Both are viable options to consider.
Having said that, we come to the end of our guide. We are hopeful that this guide helps you learn and understand how this process functions.
You can leave your feedback and ask a question if you are confused.
19 thoughts on “How to Run macOS on Windows 10 in a Virtual Machine! (Step-by-Step Guide)”
unknown option -cpuidset in frist command here VBoxManage.exe modifyvm “ether” –cpuidset 00000001 000106e5 00100800 0098e3fd bfebfbff
There is error in text, use –cpuidset (two minuses)

/VirtualBox VMs/MacOS$ ls
Logs MacOS.nvram MacOS.vbox MacOS.vbox-prev
yeti@paw:
/VirtualBox VMs/MacOS$ vboxmanage modifyvm “MacOS” –cpuidset 00000001 000106e5 00100800 0098e3fd bfebfbff
yeti@paw:
/VirtualBox VMs/MacOS$ vboxmanage setextradata “MacOS” “VBoxInternal/Devices/efi/0/Config/DmiSystemProduct” “iMac11,3”
VBoxManage: error: Could not find a registered machine named ‘“MacOS”’
VBoxManage: error: Details: code VBOX_E_OBJECT_NOT_FOUND (0x80bb0001), component VirtualBoxWrap, interface IVirtualBox, callee nsISupports
VBoxManage: error: Context: “FindMachine(Bstr(a->argv[0]).raw(), machine.asOutParam())” at line 934 of file VBoxManageMisc.cpp
The first command worked ok on linux but the 2nd command did not. It seems vboxmanage was not able to find my “MacOS”
For Windows, specifically Intel systems (not sure about AMD), if you leave the Operating System Version on MAC OS X it will not work. It will error out every time. Simply go back to the settings and change the version to High Sierra 64 bit or 32 bit, depending upon your processor’s abilities. Then everything works as it should.
Can you elaborate on this? I don’t understand..
VBoxManage.exe modifyvm “ether” –cpuidset 00000001 000106e5 00100800 0098e3fd bfebfbff
I entered VBoxManage.exe modifyvm “MacOS” –cpuidset 00000001 000106e5 00100800 0098e3fd bfebfbffand got “VBoxManage.exe: error: Unknown option: -cpuidset”
then I got, “VBoxManage.exe: error: Unknown option: -cpuidset”
Did you try –cpuidset (two dashes)?
Why can’t someone find a simple way to make this work? Why does everything in computer and especially in the IT world, have to be so difficult? Do they sit around and try to come up with ways to make it difficult? Do you really have to have an engineering mind to do these things. Its’ so ridiculous!
no one gas come up with a simple way to do this because no one is working on a simple way to do this. because they don’t want to. it’s considered a waste of their time. someone like you asks, “hey, can you smart people come up with a way to run a macOS VM on windows?” and they think, “macOS on windows? are you out of the mind? no, absolutely not. why would anyone want to do that. what a dumb idea and a waste of time” so the rest of us here get bs tutorials like this one instead.
.\VBoxManage.exe modifyvm “ether” –cpuidset 0000000×1 000106e5 00100800 0098e3fd bfebfbff
.\VBoxManage setextradata “ether” “VBoxInternal/Devices/efi/0/Config/DmiSystemProduct” “iMac11,3”
.\VBoxManage setextradata “ether ” “VBoxInternal/Devices/efi/0/Config/DmiSystemVersion” “1.0”
.\VBoxManage setextradata “ether ” “VBoxInternal/Devices/efi/0/Config/DmiBoardProduct” “Iloveapple”
.\VBoxManage setextradata “ether ” “VBoxInternal/Devices/smc/0/Config/DeviceKey” “ourhardworkbythesewordsguardedpleasedontsteal(c)AppleComputerInc”
.\VBoxManage setextradata “ether ” “VBoxInternal/Devices/smc/0/Config/GetKeyFromRealSMC” 1
“ether” use your name of VM
Can’t find the vmware patch link. Can only see the virtual box one
Not booting on virtualbox. stuck at BdsDxe: starting Boot0002 “UEFI VBOX HARDDISK VB9cfda0db-b1108da0 ” from PciRoot (0x0)/Pci(9x1F,0x2)/Sata(0x0,0xFFFF,0x0)
Same here – all I get is the following:
BdsDxe: failed to load Boot0001 “UEFI VBOX CD-ROM VB1-1a2b3c4d ” from PciRoot (0x0) /Pci (0x1F,0x2) /Sata (0x1,0xFFFF,0x0): Not Found
BdsDxe: loading Boot0002 “UEFI VBOX HARDDISK VB9cfda0db-b1108da0 ” from PciRoot (0x0) /Pci (0x1F,0x2) /Sata (0x0,0xFFFF,0x0)
BdsDxe: starting Boot0002 “UEFI VBOX HARDDISK VB9cfda0db-b1108da0 ” from PciRoot (0x0) /Pci (0x1F,0x2) /Sata (0x0,0xFFFF,0x0)
Tried your AMD fix for VMware as my VM had been made on Intel and moved to AMD machine. You use different quotes to standard so adjusted them and also ordered them logically (not that VMware cares)
cpuid.0.eax = “0000:0000:0000:0000:0000:0000:0000:1011”
cpuid.0.ebx = “0111:0101:0110:1110:0110:0101:0100:0111”
cpuid.0.ecx = “0110:1100:0110:0101:0111:0100:0110:1110”
cpuid.0.edx = “0100:1001:0110:0101:0110:1110:0110:1001”
cpuid.1.eax = “0000:0000:0000:0001:0000:0110:0111:0001”
cpuid.1.ebx = “0000:0010:0000:0001:0000:1000:0000:0000”
cpuid.1.ecx = “1000:0010:1001:1000:0010:0010:0000:0011”
cpuid.1.edx = “0000:1111:1010:1011:1111:1011:1111:1111″
But it generated an error: ” ‘cpuid.ds’ was absent but must be present” (shown twice) and “Module ‘FeatureCompatLate’ power on failed”
It was a Leopard (10.5) VM made in VMware 10 so I tried a Catalina (10.15) made in VMware 16 but that did exactly the same.
Are you SURE those are right as it looks like a different Mask is being applied to cpuid0 as to cpuid1.
If someone could crack the masking for Ryzen to pretend to be, say Penryn, we’d be 100% sorted….
Just in case anyone else had an issue where the virtual environment kept rebooting or gets stuck on the grey screen, make sure you don’t have the intel hyperv feature turned on. From what I can tell, the hyperv feature interferes with the Oracle VM Virtualbox software. I turned the feature off, went back through the walkthrough and magically everything worked like a charm.
I too had a problem with the missing second dash, but found it. I had tried the process on another page, but could not get it to work. The one here on this page worked successfully for me. However, at times the mouse does not work, also I cannot click and drag windows down for some reason. Anyone have any suggestions? Thanks for the guide.
Hi
Can you help, I cannot find Virtual Box Patch which I need as the only option for USB is 1
Thank you
I cannot assign 4 cpu’s, due to the fact that I cannot switch off hardware virtualisation on the systempage, because the hostsystem does not support it. It stops for me here.
Once you are able to run MacOS as VM on Windows machine. Does the internet work on the VM?
Leave a Comment Cancel reply
This site uses Akismet to reduce spam. Learn how your comment data is processed.
Источник


