- 3 Ways to Keep a Window Always on Top on Windows 10
- 1. Use a Keyboard Shortcut with an Always on Top AutoHotkey Script
- 2. Use Your Mouse with DeskPins
- 3. Use a System Tray Menu with TurboTop
- Bring the Always-on-Top Feature to All Windows
- QML on Windows: make the window to stay on top
- How to make a window always stay on top in .Net?
- 13 Answers 13
- Windows 10: Keep a Window Always On Top
- You Might Also Like
3 Ways to Keep a Window Always on Top on Windows 10


When you are working in Windows with limited screen space, it’s useful to have certain windows stay on top of others. Some programs in Windows automatically incorporate this “always on top” feature, but most programs don’t, and Windows doesn’t include this feature either.
Today we’ll cover three ways to easily add the “always on top” feature to every single program in Windows.
1. Use a Keyboard Shortcut with an Always on Top AutoHotkey Script
AutoHotkey is a free program that allows you to create scripts to perform multiple actions with a single keyboard shortcut. It runs in the background and sits in the system tray.
We’re going to use AutoHotkey to create a script that will keep a selected window on top of all others when you press Ctrl + Spacebar when that window is active. We’ll show you the script and explain how it works. But we’ll also provide a downloadable AutoHotkey script file you can use.
Download and install AutoHotkey and then run it.
Download the AlwaysOnTop.ahk script file, extract the .zip file, and put the script in a folder on your hard drive that won’t be moved or deleted.
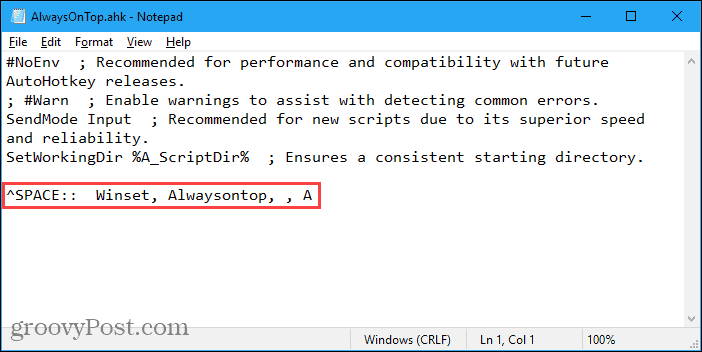
The script contains some comments and then the following command:
This command sets the currently active window to always be on top when you press Ctrl + Spacebar. If you’d rather use a different key combination, you can change the first part of the command, “^SPACE“. The “^” character represents the Ctrl key. You’ll find the symbols to use for other hotkeys in the Hotkey Modifier Symbols section on this AutoHotkey help page.
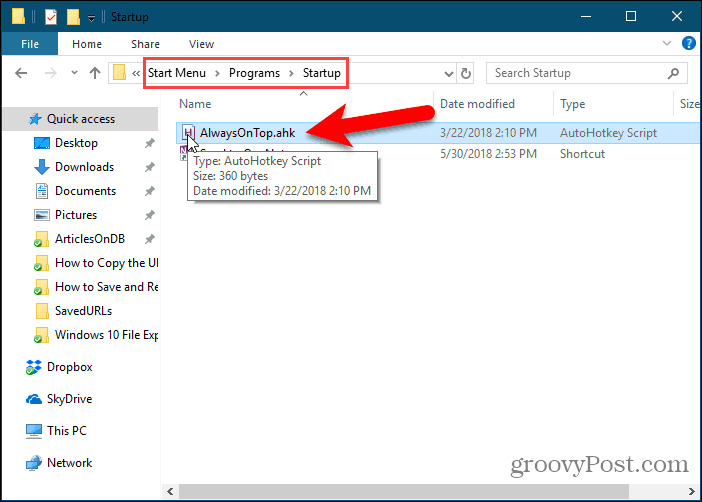
You can put the script in the Windows startup folder (%AppData%\Microsoft\Windows\Start Menu\Programs\Startup), so it starts automatically when Windows starts.
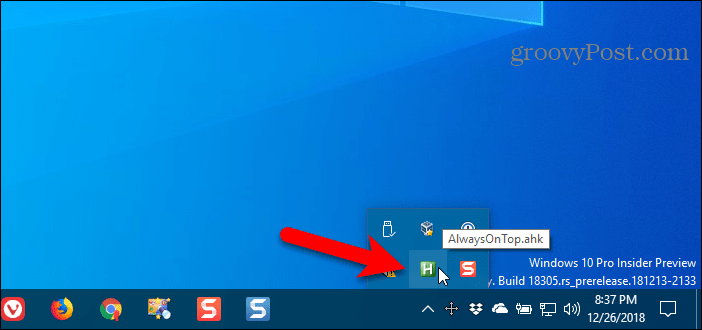
The AutoHotkey script stays in the system tray.
To make the active window always on top, press Ctrl + Spacebar (or the keyboard shortcut you assigned). Press the keyboard shortcut again to disable “always on top” for the active window.
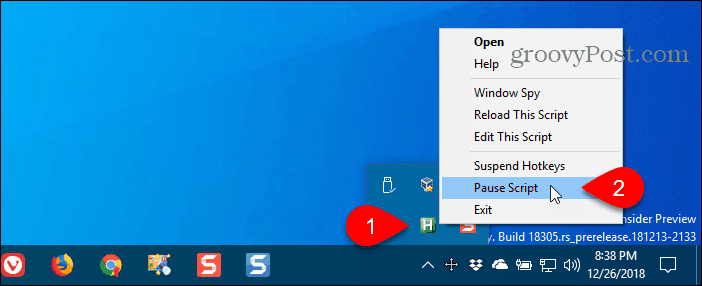
For script options, right-click on the AutoHotkey icon in the system tray.
2. Use Your Mouse with DeskPins
DeskPins provides pins you can grab and use to keep any window on top of all other windows. The program sits in the system tray and uses minimal resources.
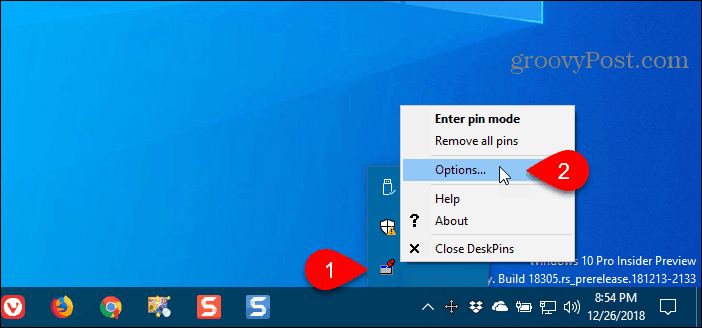
Download and install DeskPins. Run the program, right-click the icon in the system tray, and select Options to change the Pins, Autopin, and Hotkeys settings.
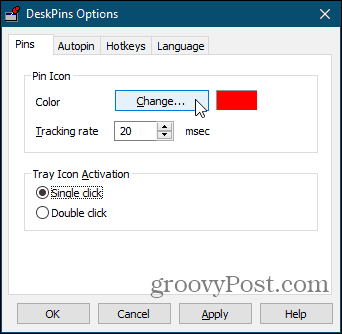
On the Pins tab, you can change the color of the pins. The Tracking rate controls how often each pin checks the pinned window’s position and state. Lower values make the pins more responsive. You can enter any number from 10 to 1000 msec (milliseonds).
If you have an older computer, you may want to increase the Tracking rate number to avoid slowing down your computer.
You can also choose Single click or Double click under Tray Icon Activation to indicate how you get pins from the DeskPins system tray icon. The default is Single click.
You can have DeskPins automatically pin certain types of windows using rules on the Autopin tab.
Check the Enable box and then click Add to add a new rule. Use the check boxes next to the rules to enable and disable individual rules.
Click Help to access the DeskPins help file for more information about automatically pinning windows.

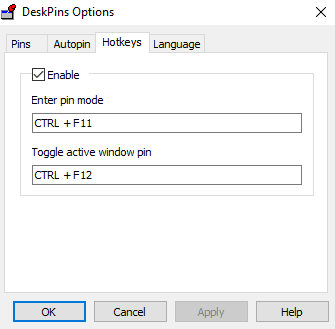
DeskPins provides default shortcuts for entering pin mode and toggling the active window pin. You can change these shortcuts on the Hotkeys tab.

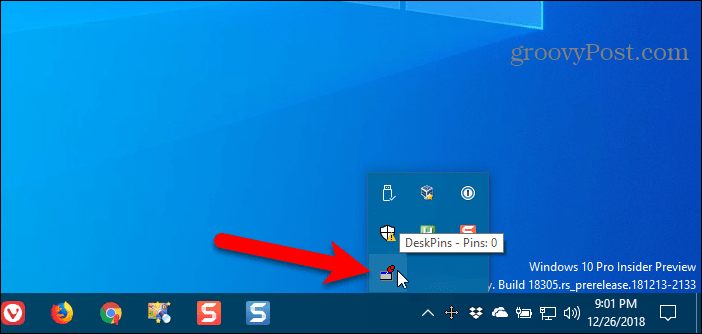
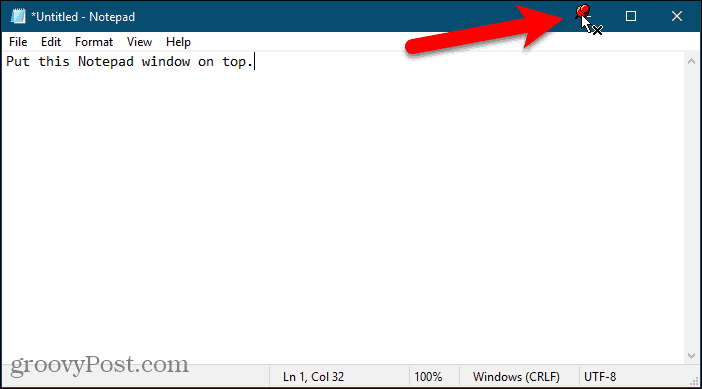
To pin a window on top, click (or double-click, depending on the setting) the DeskPins icon in the system tray.
Then, click the title bar on the window you want to keep always on top.
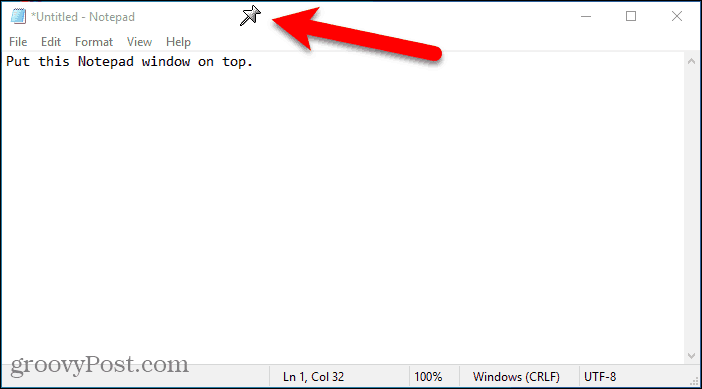
A pin displays on the title bar of the chosen window in the color you specified, or in the default color red.
Click the pin again to disable always on top for the window.
3. Use a System Tray Menu with TurboTop
TurboTop also sits in your system tray like DeskPins. But it operates differently.
Download and install TurboTop. Then, run the program.
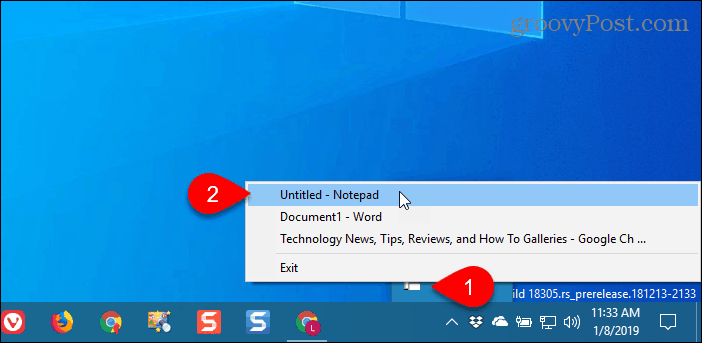
To keep a window always on top, click the TurboTop icon in the system tray. A list of all open windows displays. Select the title of the window you want.
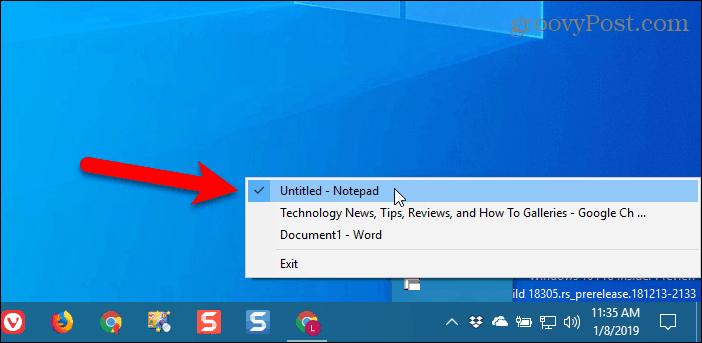
Any windows you choose to be always on top are indicated with a check mark on the TurboTop menu.
To stop keeping a window always on top, click the TurboTop icon in the system tray and select that window again, so there’s no check mark next to the window name on the menu.
Bring the Always-on-Top Feature to All Windows
Whether you like using keyboard shortcuts or prefer using the mouse, there’s an easy solution for keeping windows always on top. If you’ve found other options for keeping windows always on top, let us know in the comments.
QML on Windows: make the window to stay on top
I do really need to make my window to stay on top on Windows, but Windows itself does not seem willing to allow me to do this.
I cannot use the workaround with setting registry values because I am not able to ask the user to log-out/log-in.
Besides, I use QML and the solution with QWidget::raise() and QApplication::setActiveWindow() does not seem to work also because I have not managed to get the QML root object as a QWidget pointer with the following code:
I have also tried to make the window active right from the QML:
but with no luck also.
Is there, either way to bring the window on top on Windows without changing the registry and, preferably, from the QML purely?
Edit: currently used window flags are:
I am deploying Qt 5.7 app on the Windows 10 x64 machine. I have found this two bugfixes:
from which I can conclude that QWidget::activateWindow() and QWindow::requestActive() should work on Windows XP and Windows 7.
Here is my mcve, as @derM asked:
It was compiled under Windows 10 x64 with MinGW x32.
Easier way to reproduce: run in the command prompt
where debug\Test.exe is a path to the mcve binary, then open File Explorer and navigate somewhere. When the window opens, it won`t be in the foreground.
Harder way: If you just run it, the window will stay on top as it should. But if you press Run button in the Qt Creator and switch the focus (I suppose, mouse focus should be changed, just pressing Alt+Tab won`t help) to another process (in my case — File Explorer), the window is displayed under the current active File Explorer window, and even if I will bring it up by clicking, it will go background as soon as I choose any other application.
The real application is started from a service, so there often will be an app holding mouse focus when my app is started. I suppose that Qt ability to bring the window to foreground is implemented using SetForegroundWindow API call, which notes the following restrictions in it`s remarks:
- The process is the foreground process.
- The process was started by the foreground process.
- The process received the last input event.
- There is no foreground process.
- The process is being debugged.
- The foreground process is not a Modern Application or the Start Screen.
- The foreground is not locked (see LockSetForegroundWindow).
- The foreground lock time-out has expired (see — SPI_GETFOREGROUNDLOCKTIMEOUT in SystemParametersInfo).
- No menus are active.
So I wonder is it possible at all to bring the window to foreground if the process has been started by a service, not a user (i. e. the process has not been an active process during startup).
How to make a window always stay on top in .Net?
I have a C# winforms app that runs a macro in another program. The other program will continually pop up windows and generally make things look, for lack of a better word, crazy. I want to implement a cancel button that will stop the process from running, but I cannot seem to get the window to stay on top. How do I do this in C#?
Edit: I have tried TopMost=true; , but the other program keeps popping up its own windows over top. Is there a way to send my window to the top every n milliseconds?
Edit: The way I solved this was by adding a system tray icon that will cancel the process by double-clicking on it. The system tray icon does no get covered up. Thank you to all who responded. I read the article on why there is not a ‘super-on-top’ window. it logically does not work.

13 Answers 13
Form.TopMost will work unless the other program is creating topmost windows.
There is no way to create a window that is not covered by new topmost windows of another process. Raymond Chen explained why.
I was searching to make my WinForms application «Always on Top» but setting «TopMost» did not do anything for me. I knew it was possible because WinAmp does this (along with a host of other applications).
What I did was make a call to «user32.dll.» I had no qualms about doing so and it works great. It’s an option, anyway.
First, import the following namespace:
Add a few variables to your class declaration:
Add prototype for user32.dll function:
Then in your code (I added the call in Form_Load()), add the call:
Hope that helps. Reference
If by «going crazy» you mean that each window keeps stealing focus from the other, TopMost will not solve the problem.
This will show the ‘child’ form without it stealing focus. The child form will also stay on top of its parent even if the parent is activated or focused. This code only works easily if you’ve created an instance of the child form from within the owner form. Otherwise, you might have to set the owner using the API.

I had a momentary 5 minute lapse and I forgot to specify the form in full like this:
But what I really wanted was THIS!

Set the form’s .TopMost property to true.
You probably don’t want to leave it this way all the time: set it when your external process starts and put it back when it finishes.
The way i solved this was by making a system tray icon that had a cancel option.
The following code makes the window always stay on top as well as make it frameless.

What is the other application you are trying to suppress the visibility of? Have you investigated other ways of achieving your desired effect? Please do so before subjecting your users to such rogue behaviour as you are describing: what you are trying to do sound rather like what certain naughty sites do with browser windows.
At least try to adhere to the rule of Least Surprise. Users expect to be able to determine the z-order of most applications themselves. You don’t know what is most important to them, so if you change anything, you should focus on pushing the other application behind everything rather than promoting your own.
This is of course trickier, since Windows doesn’t have a particularly sophisticated window manager. Two approaches suggest themselves:
- enumerating top-level windows and checking which process they belong to, dropping their z-order if so. (I’m not sure if there are framework methods for these WinAPI functions.)
- Fiddling with child process permissions to prevent it from accessing the desktop. but I wouldn’t try this until the othe approach failed, as the child process might end up in a zombie state while requiring user interaction.
Windows 10: Keep a Window Always On Top
Posted on November 7, 2019 by Mel Hawthorne 2 Comments
There are several different ways you can make sure that a window stays on top of other ones. You’ll need to download an external program to accomplish this. There are several out there, but one of the best ones is DeskPins.
Follow the steps below to quickly and easily pin something to the top of your screen.
It’s free open-source software that lets you pin any application to the top, no matter what it is. Go to the DeskPins website and download the relevant version for your machine. Run the executable and install the program in your location of choice.
Once you’ve finished installing it, locate the deskpins.exe file in the folder where you installed it and run it. A new icon will appear in your taskbar. Right-clicking on it will bring up a menu and let you select ‘Options’.
 DeskPin Icon
- Set Hotkeys and other Options
Under the Hotkey tab, you can set up specific key combinations and hotkeys. Set them to whatever you would like and adjust any additional settings you want to change as well. When you are happy with your settings, close the options window.
 DeskPin Options
Adjusting the tracking rate can help if DeskPins slows down your computer – a higher rate means less impact on the performance. A lower value makes the pin more responsive. You have an Autopin function available as well – it lets you automatically pin certain types of windows when they are opened – for example, you could set a rule that automatically pins all instances of Notepad being open.
- Pin your preferred Window
In order to pin a window, right-click on the icon in your tray again and enter Pin Mode. Your cursor will change to a pin – click on the title bar of the window you want to always keep on top, and a pin will appear on that bar. It’ll be the color you set in the options menu earlier. By default, it will be red.
 DeskPin Pin
In order to unpin the window, you can either click on the colored pin again or right-click on the tab icon and select Remove all Pins. You can pin multiple windows – they will follow the same pattern of use as normal, that is to say, the most recent one will be on top, while all non-pinned windows will be below them.
You Might Also Like
Filed Under: Windows Tagged With: Windows 10


