- Windows 10 High CPU and Disk usage problem Fix
- How to fix windows 10 High RAM and CPU usage problem
- 1) Change a particular registry value-
- 2 ) Disable SysMain to solve windows 10 high cpu usage-
- 3) Disable apps running in Background to solve high ram usage
- 4) Disable Runtime Broker for solving high cpu usage
- 5) Adjust system settings for best performance
- 6) Optimize your Hard Drives for faster performance
- 7) Update Drivers to fix windows 10 high CPU usage
- 8) Turn off Automatically pick an accent color from my background
- How To Fix High RAM and CPU Usage of Windows 10 System (ntoskrnl.exe) Process
- How To Fix High RAM and CPU Usage of Windows 10 System (ntoskrnl.exe) Process?
- How to Fix High RAM and CPU Usage of Windows 10:
- 1. Registry Hack:
- 2. Fix the driver issue:
- 3. Adjust your Windows 10 for the best performance
- 4. Disable startup programs
- 5. Defragment Hard DrivesHit Win Key + R
- How To Fix System ntoskrnl.exe Process High CPU/RAM uses in Windows 10?
- Is ntoskrnl.exe process a virus?
- How to Check RAM on Windows 10
- A brief intro to RAM
- How to check how much RAM you have on Windows 10
- Step 1: Click “Start”
- Step 2: Find “About Your PC”
- Step 3: Navigate to “Device Specifications”
- Step 4: Find out how much RAM you have
- How to check RAM usage in Windows Task Manager
- Method 1– ctrl, shift, esc
- Method 2 – ctrl, alt, del
- Method 3 – start, task manager, performance
- Upgrading your RAM
Windows 10 High CPU and Disk usage problem Fix
April 23, 2020 By Admin
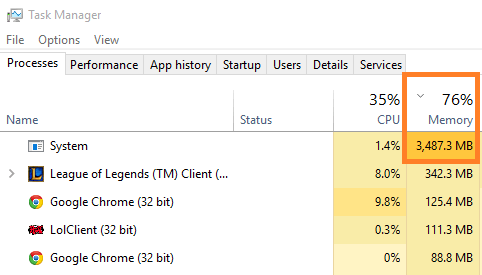
A lot of Windows 10 users are experiencing high disk usage and cpu usage problem. When i digged into the problem, i found that that high ram usage or high cpu consumption by windows 10 os may be due to some extra processes and features turned on mainly and sometime due to outdated drivers in your system. I am listing here the most responsible things which you can fix to solve the problem. Find out what works for you and please feel free to comment about your experience.
How to fix windows 10 High RAM and CPU usage problem
Go for these solutions to reduce RAM and CPU usage on your computer.
1) Change a particular registry value-
NOTE–
Before going ahead to the main fix, we strongly suggest you to create a a backup of the registry on your computer. After opening Registry Editor, click on “File” > “Export” to create the backup.
If anything goes wrong you can retrieve your registry by simply importing the backup.
1. Press Windows key+R together to launch Run window on your computer.
2. Type “regedit” in Run window and then click on “OK“.
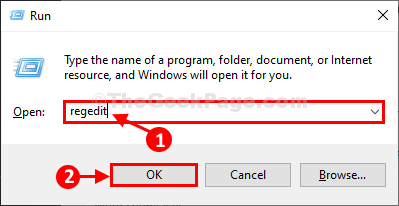
Registry Editor window will be opened.
3. In Registry Editor window, on the left hand side, navigate to this location-
HKEY_LOCAL_MACHINE\SYSTEM\CurrentControlSet\Control\Session Manager\Memory Management
4. Now, on the right hand side, double click on “ClearPageFileAtShutDown” to modify it.
![]()
5. In Edit DWORD (32-bit) Value window, set the ‘Value data:‘ to “1” and then click on “OK” to save the value change.
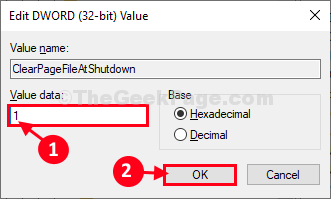
Once it is done, close Registry Editor window.
Reboot your computer to let the changes take effect.
After rebooting check the ram and CPU usage on your computer. It should drop significantly.
2 ) Disable SysMain to solve windows 10 high cpu usage-
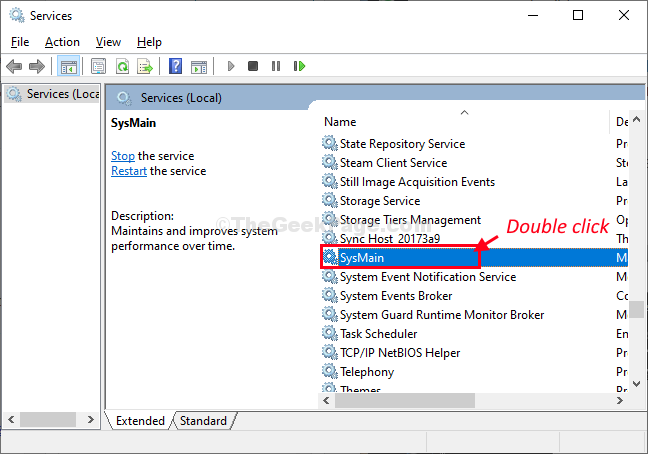
Step 1 – Search services in windows 10 taskbar search box. Click on services.

Step 2 – Scroll down and find “SysMain” in the right side of Services window.
Step 3- Double click on “SysMain” to access it’s properties.
Step 4- In SysMain Properties widow, click on the ‘Startup type:‘ and choose “Disabled” from the drop-down list.
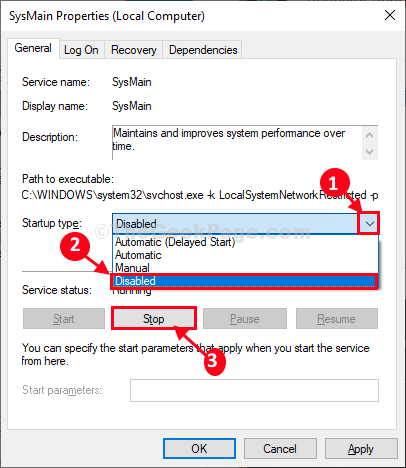
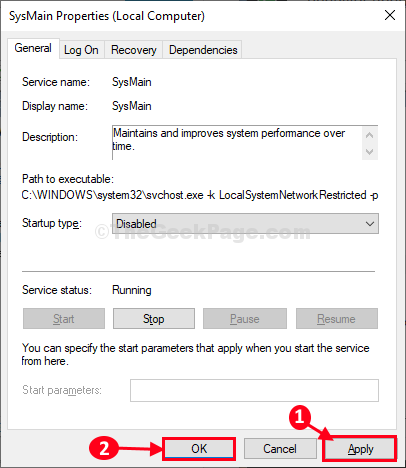
Step 5- Finally, click on “Apply” and then on “OK” to save the changes on your computer.
Now, reboot your windows 10 for changes to come into effect.
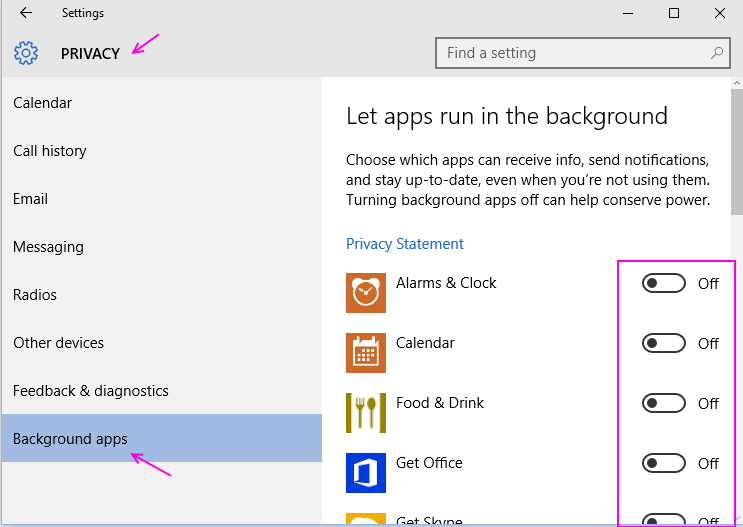
3) Disable apps running in Background to solve high ram usage
If you want to ask me which one. I would say every one. Why would any app run in background, when we are not using them. Even if they want to update themselves, it can be done once we open it. So, better shut all of them off.
Go to Settings -> Privacy -> Background apps and turn all of them off.
4) Disable Runtime Broker for solving high cpu usage
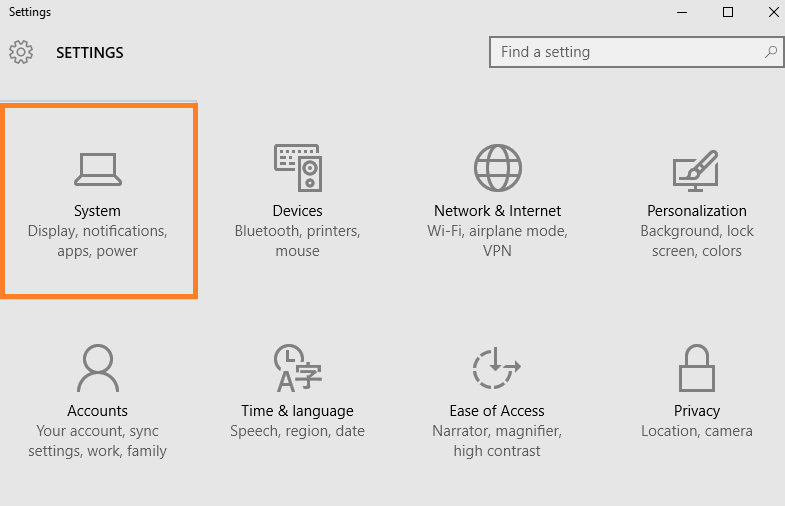
Step 1 – Press windows key + i to open system control panel.
Click on system.
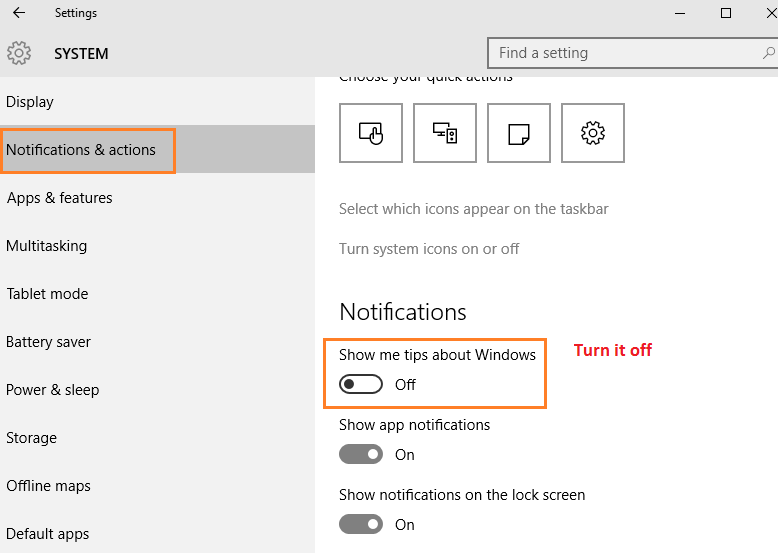
Step 2 – Now, click on Notifications & actions in the left menu.
There is an option in the right side, saying show me tips about windows. Turn it off.
5) Adjust system settings for best performance
Step 1: – Search view advanced system settings in start menu search box.
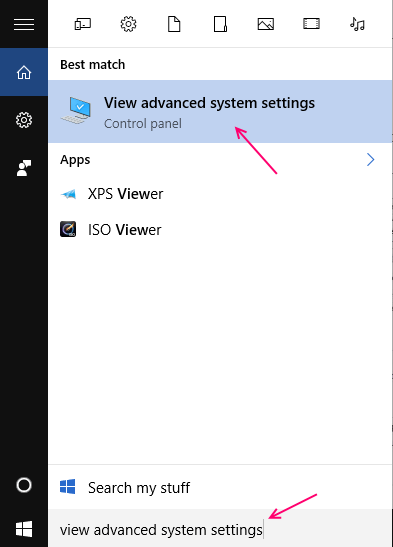
Step 2: – Now, click on settings as shown in the pic.

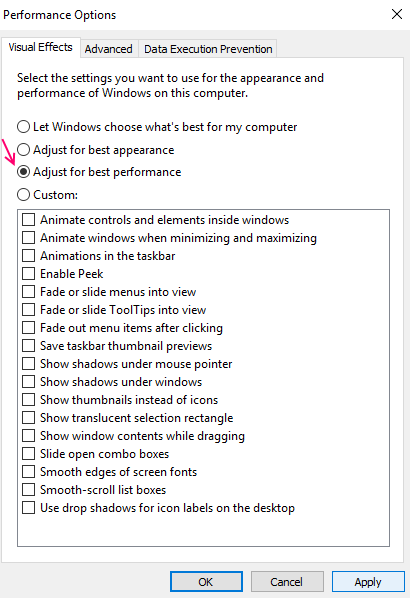
Step 3: – Now, choose adjust for best performance. Finally choose apply and then click ok. Finally restart your PC.
6) Optimize your Hard Drives for faster performance
7) Update Drivers to fix windows 10 high CPU usage
Updating all your drivers can also solve your memory problem, if outdated driver are the reason behind it.
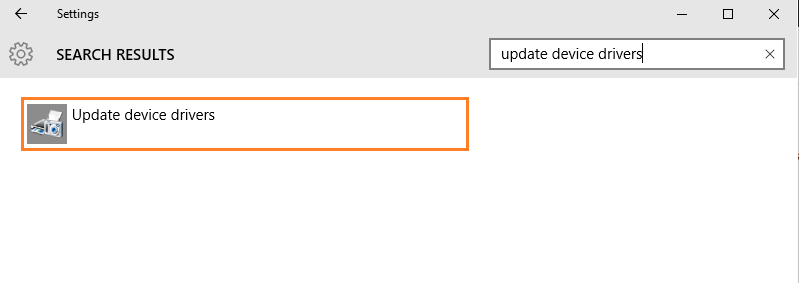
Press windows key + i to open system control panel. Search update device drivers in the search box. Click on update device drivers and proceed.
Note – windows 10 have certain memory requirement. You must be sure that your device is having this much amount of system configuration with it.
Processor
Installed memory (RAM)
1 GB for 32-bit Operating System
2 GB for 64-bit Operating System
Free hard disk space
16 GB for 32-bit version
20 GB for 64-bit version
If your system configuration is above that, please follow the methods illustrated above. If everything else fails, clean install windows 10. I will update this posts with more ways to tackle high cpu and high ram usage problem of windows 10.
8) Turn off Automatically pick an accent color from my background
Step 1 – Press windows key + i to reach system control panel.
Step 2 – Click on personalization as show below.
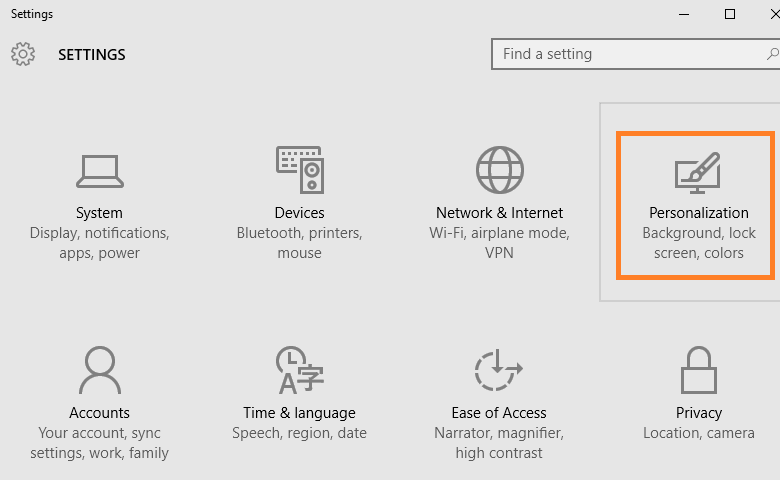
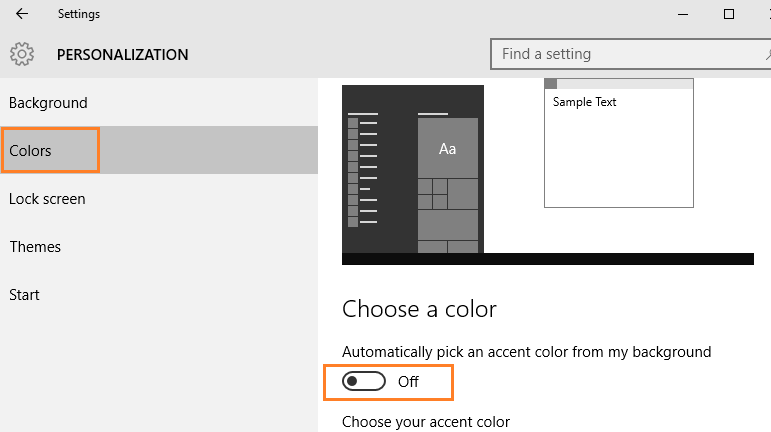
Step 3 – Now, choose colors from the left menu.
In the right side, Turn off Automatically pick an accent color from my background.

Saurav is associated with IT industry and computers for more than a decade and is writing on The Geek Page on topics revolving on windows 10 and softwares.
How To Fix High RAM and CPU Usage of Windows 10 System (ntoskrnl.exe) Process
 L ots of Windows 10 users report on Reddit and Microsoft forums that some processes (e.g.: ntoskrnl.exe) in Windows 10 are slowing down the OS by consuming tons of RAM and CPU power. Here are some ways to fix high RAM and CPU usage in Windows 10.
In 2015, Microsoft released its long-awaited Windows 10 operating system and people upgraded their Windows 7 and 8.1 PCs for free. To help the Windows users, I’ve been writing regular Windows 10 guides on fossBytes . I’ve told you about Windows 10 Phone Companion app to sync your Android phone or iPhone or iPhone with Windows 10 .
Today, I’m here to tell about a bug in Windows 10 that is worrying the Windows 10 users. According to them, processes like ntoskrnl.exe Windows 10 are slowing down the OS by consuming tons of RAM and CPU power.
The main process that is being observed as troublesome is the System (ntoskrnl.exe) process. Reportedly, this process uses an increasing amount of RAM after PC starts. It remains calm for few hours, but then it eats up all the free RAM and a large portion of CPU juice.
Here, we are sharing some simple fixes to fix memory leak in Windows 10 due to high RAM and CPU usage issue:
How To Fix High RAM and CPU Usage of Windows 10 System (ntoskrnl.exe) Process?
Instead of changing any advanced system settings on your PC, make sure that your PC isn’t affected by some malware. Most of the users have upgraded their PCs from older Windows 7 and 8.1. Thus, any malware in the previous OS gets migrated to Windows 10.
You can install the anti-malware tools like MalwareBytes to deep scan your Windows 10 PC and take the first step in fixing Windows 10 high memory leakage. After the scan, reboot your PC. Now, move to the next solution to fix high RAM and CPU usage if this problem persists.
How to Fix High RAM and CPU Usage of Windows 10:
1. Registry Hack:
- Hit Win Key + R
- Type in “Regedit” and then hit Enter.
- Go to ‘HKEY_LOCAL_MACHINE\SYSTEM\CurrentControlSet\Control\Session Manager\Memory Management’
- Find ‘ClearPageFileAtShutDown’ and change its value to 1
- Restart the computer.
2. Fix the driver issue:
- Open ‘Device manager’ and ‘Scan for hardware changes.’
3. Adjust your Windows 10 for the best performance
- Right click on “Computer” icon and select “Properties.”
- Select “Advanced System settings.”
- Go to the “System properties.”
- Select “Settings”
- Choose “Adjust for best performance” and “Apply.”
- Click “OK” and Restart your computer.
4. Disable startup programs
- Hit Win Key + R
- Type ‘msconfig’ and press enter
- The Task manager window will open. Click on the “Startup” tab, and you will see a list of programs that run at startup.
- Right-click on the applications that you don’t want to run at startup and select “Disable”.
5. Defragment Hard DrivesHit Win Key + R
- Hit Win Key + R
- Type “dfrgui” and press enter
- In the new window click on the hard drives you want to defragment (Prefer the drive in which Windows is installed)
- Click “Optimize” and follow the instructions on the screen to finish the defragment process.
- Restart your computer.
6. Close and uninstall as many unwanted preinstalled applications as many you can. Here are the steps on How To Remove Pre-installed And Suggested Apps In Windows 10
The above steps should be sufficient to solve the high CPU uses problem in Windows 10 along with High RAM uses in Windows 10. Below are the steps on containing memory leak and High CPU/ RAM problem due to ntoskrnl.exe process.
How To Fix System ntoskrnl.exe Process High CPU/RAM uses in Windows 10?
- Clean your PC using a trusted antivirus
- Update the faulty and outdated drivers
- Disable Runtime Broker to fix high CPU and memory usage
- Go to Start menu > Settings app and then open System > Notifications & Actions. Deselect the option “Show me tips about Windows” and reboot the computer.
On Reddit and Microsoft forums, people have claimed that the root cause of this Windows 10 memory leak is some faulty driver. If you have RAID disk drive setup, update those drivers. Also, try updating the remaining hardware drivers as it’s a problem caused due to unmatching OS and drivers. It is a known fact that Microsoft has taken control of the update process . Still, we recommend you to update the network, graphics and sound drivers manually. This step has worked for the most of the people and fixed their high RAM and CPU usage.
Some discussion threads suggest that Runtime Broker is one such system process that eats a large chunk of CPU power due to the poor memory optimization. This ntoskrnl.exe Windows 10 doesn’t deliver any functionality as such, so you can disable it to solve the Windows 10 high memory leakage problem.
To disable the Runtime Broker, open the Settings app and go to System. Inside System window, locate Notifications & Actions and unselect “Show me tips about Windows.” Now restart the PC to bring it back to the normal and fix high RAM and CPU usage.

If you are having any alternate solution to fix this high RAM and CPU usage due to ntoskrnl.exe Windows 10, do let us know in the comments below.
Is ntoskrnl.exe process a virus?
Just because you saw numbers crunching in the Task Manager, it doesn’t mean the System process in some of sort of malware. It’s an internal process present in Windows 10. Still, if you’re skeptical, you see make sure its located in the System32 folder on the Windows installation drive.
How to Check RAM on Windows 10
If your PC is running slowly or giving you “low memory” error messages, you may need more PC memory. Or perhaps you are just curious about the specs of your PC? Read on to learn how to check RAM on Windows 10.
(Please note, checking RAM in a Mac is different and is not covered within the scope of this tutorial.)
A brief intro to RAM
Random access memory (RAM) is an important and fast type of short-term storage your computer uses to hold data that is in-use. This short-term storage is used for whatever applications your computer is running, such as browsing or word processing. RAM clears when you shut down your computer. RAM is different from a hard disk drive or a solid state drive, which holds files and applications on a permanent basis.
How to check how much RAM you have on Windows 10
Checking RAM on Windows 10 operating systems is simple. Following the steps below should tell you how much memory you currently have installed.
Step 1: Click “Start”
Begin by clicking on the “Start” menu, located in the bottom left of your screen.
Step 2: Find “About Your PC”
Next, type “About Your PC” and press enter when the correct result appears.
Step 3: Navigate to “Device Specifications”
A window should appear called, “About.” Scroll down using the navigation bar on the right side of the window until you see a section titled, “Device Specifications.”
Step 4: Find out how much RAM you have
Look for a line titled, “Installed RAM.” This will tell you how much RAM your PC currently has installed.
If your computer has bogged down and you want to know how your RAM is being used, you can always check the “Windows Task Manager.”
How to check RAM usage in Windows Task Manager
Many modern computers are sold with 8GB of RAM pre-installed. Some higher-end computers, including gaming computers, may come with 16GB of RAM or more pre-installed. In general, the more RAM your computer has, the better ability it has to handle multi-tasking (running multiple programs at the same time and potentially switching between them).
However, not everyone needs more RAM or has a computer capable of handling more RAM. One way to check RAM on Windows 10 and find out your usage is via the “Windows Task Manager.” To consult the Windows Task Manager about your memory usage, use the following steps:
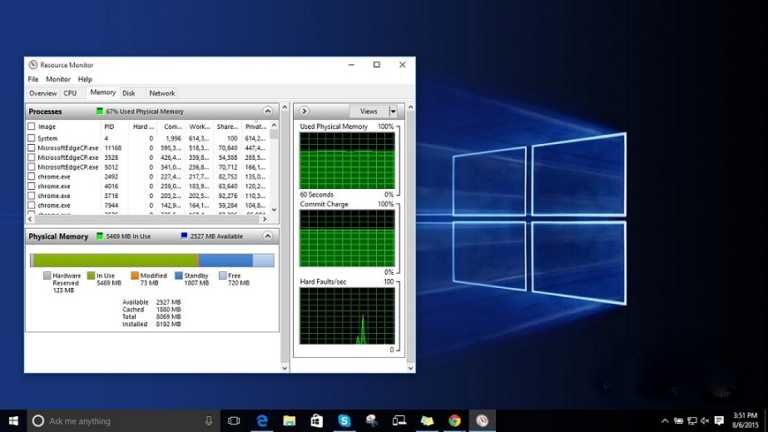
Method 1– ctrl, shift, esc
- Press the following keys: Ctrl + Shift + Esc
- The Task Manager should appear
- Click on the “Performance” tab and check the section titled “Memory”
Method 2 – ctrl, alt, del
- Press the following keys: Ctrl + Alt + Del
- Click on “Task Manager”
- Click on the “Performance” tab and check the section titled “Memory”
Method 3 – start, task manager, performance
- Select the “Start” menu, located in the bottom left of your screen
- Next, type “Task Manager” and press enter when the correct result appears
- Click on the “Performance” tab and check the section titled “Memory”
After you have followed any of these three methods on Windows 10, you should see a graph that presents the current performance and usage of your RAM. If the graph indicates your RAM usage is above 70% and you are only performing simple tasks or are not doing anything at all, you may need additional RAM to prevent sluggish performance. However, sometimes high RAM usage shown on the Task Manager can be due to having too many programs running in the background.
Once you have checked your memory usage, you can start to work out how much RAM your computer needs.
Upgrading your RAM
If you have checked both your installed RAM amount and the Task Manager and have determined you need more RAM, finding compatible memory for your system is a relatively simple process. Whether you’re upgrading RAM on a laptop or desktop, there will be an option available for you.
The Crucial System Scanner is an easy-to-use tool that will look in your BIOS for information about your complete PC system and then search Crucial.com for compatible memory upgrades. The video below explains more about the tool and how it works.


