- Как использовать Fast Audio Switcher в Windows 10 —
- Способ 1: использование встроенного аудио-переключателя
- Способ 2. Создание ярлыка «Настройки звука»
- Способ 3: использование стороннего решения
- Audio Switcher — быстрый способ переключаться между аудиостройствами
- Top 5 and Best Audio Switcher for Windows 10 Free
- Audio Switcher for Windows 10
- 1] Ear Trumpet
- 2] AudioSwitcher_v1
- 3] SoundSwitch
- 4] AudioSwitch v2.2.2
- 5] Manual method
- How to Switch Sound Output Between Headphones and Speakers on Windows 10
- How to Switch Between Headphones and Speakers from Windows 10 Settings App
- Option 1 – The Quickest (Recommended)
- Option 2 – Just a Few Clicks
- Option 3 – More Complicated
- How to Add the Sound Icon to the Taskbar If It Is Missing
- Has the Volume Been Hidden?
- Audio Driver Issue
- How to Open the Deprecated Audio Settings
- How to Enable and Disable Sound Input and Output Devices
- Don’t Forget – You Can Select Audio Output in the Particular Program
- What if the Volume Control Stopped Working
- Third-Party Apps for Switching and Routing Audio Streams
- Sound Switch
- Audio Switcher
- Wrapping Up
Как использовать Fast Audio Switcher в Windows 10 —
Многие пользователи ПК были разочарованы тем фактом, что Microsoft решила не включать и быстрый переключатель звука с Windows 10. Это еще более удивительно, учитывая тот факт, что Windows 7 раньше имела быстрый переключатель звука на значке в трее.
Если вы используете урезанную версию Windows 10 (без применения каких-либо серьезных обновлений), быстрого способа переключения между несколькими аудиовыходами нет. Единственный способ сделать это — щелкнуть правой кнопкой мыши значок громкости, а затем изменить устройство вывода по умолчанию из системных настроек.
Если вы ищете быстрый способ переключения между устройствами, через которые вы воспроизводите звук, воспользуйтесь одним из способов ниже.
Способ 1: использование встроенного аудио-переключателя
Поскольку решение Microsoft об исключении быстрого переключателя звука из Windows 10 вызвало большую негативную реакцию, разработчики, наконец, установили рекорд с помощью Юбилейное обновление.
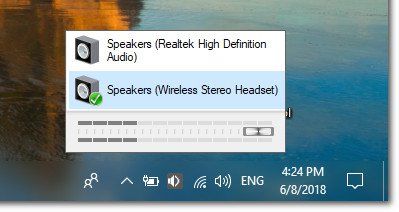
Если вы уже применили Anniversary Update, у вас уже есть встроенный аудио переключатель Windows 10. Чтобы использовать его, просто нажмите на значок громкости на панели задач. В верхней части меню громкости вы должны заметить стрелку, направленную вверх. Нажмите на него, и Windows покажет вам прокручиваемый список со всеми аудиоустройствами, которые вы в настоящее время подключили. Просто нажмите на аудиоустройство, чтобы переключить аудио на него. Как видите, это гораздо проще, чем копаться в настройках звука. 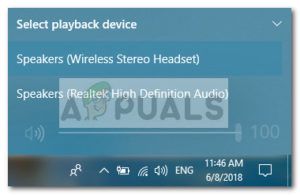 Если у вас нет этой функции в Windows 10, откройте окно запуска (Windows ключ + R), тип «мс-настройка: WindowsUpdateИ ударил Войти открыть Центр обновления Windows. Затем нажмите Проверьте наличие обновлений нажмите кнопку и следуйте инструкциям на экране, чтобы ваша операционная система применяла каждое обновление, пока ваша система не обновится.
Если вы не заинтересованы в применении обновления Anniversary или просто ищете другую альтернативу, перейдите к Способ 2.
Способ 2. Создание ярлыка «Настройки звука»
Если первый метод неприменим и вы предпочитаете оставаться на собственных каналах, вы также можете создать ярлык меню «Звук» и разместить его на рабочем столе для быстрого доступа. Вот краткое руководство о том, как это сделать:
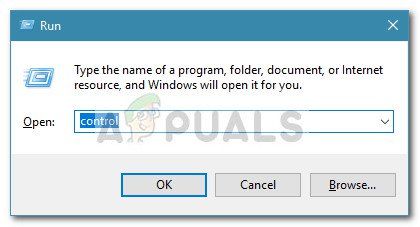
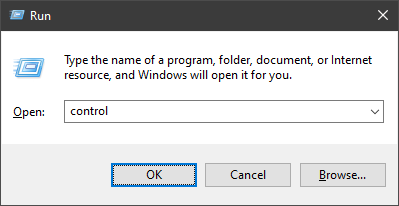
- Нажмите Windows ключ + R открыть окно Run. Затем введите «контрольИ ударил Войти открыть Панель управления.

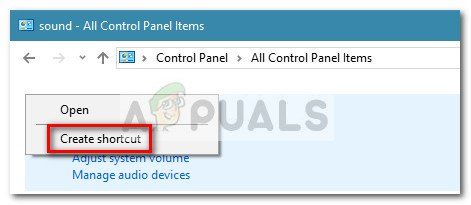
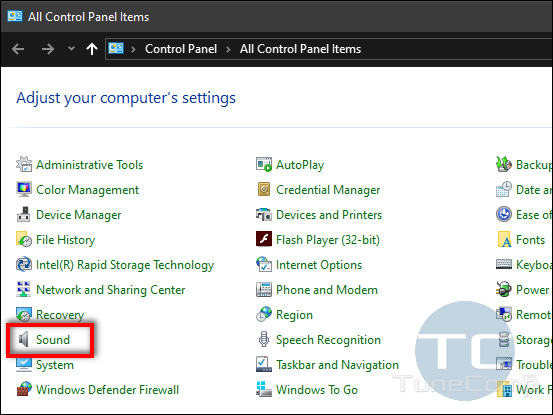
- В Панель управления, щелкните правой кнопкой мыши на звук и нажмите на Создать ярлык а затем ударил да разместить ярлык на рабочем столе. Теперь, когда ярлык создан, вы можете открыть меню настроек простым двойным щелчком мыши.
 Теперь, когда ярлык создан, вы можете открыть меню настроек простым двойным щелчком мыши.
Если вы ищете другой аудио переключатель, перейдите к Способ 3 для стороннего решения.
Способ 3: использование стороннего решения
Если описанные выше методы оказались неудовлетворительными, вы всегда можете выбрать стороннее решение. Auto Switch — чрезвычайно легкая программа, которая добавляет функцию автоматического переключения в Windows 10 для тех пользователей, которые не применяли Юбилейное обновление.
Чтобы использовать Auto Switch, просто перейдите по этой ссылке GitHub (Вот) и загрузите последнюю доступную версию. Не забывайте загружать исполняемый файл программы установки, а не исходный код. 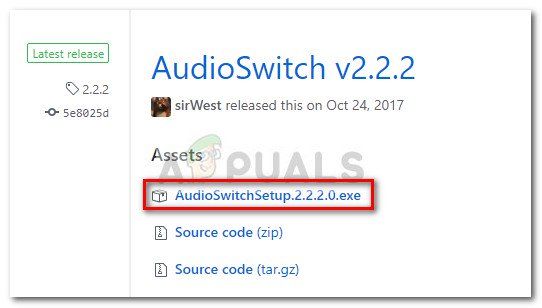 Затем дважды щелкните по установке и следуйте инструкциям на экране для установки программного обеспечения в вашей системе.
 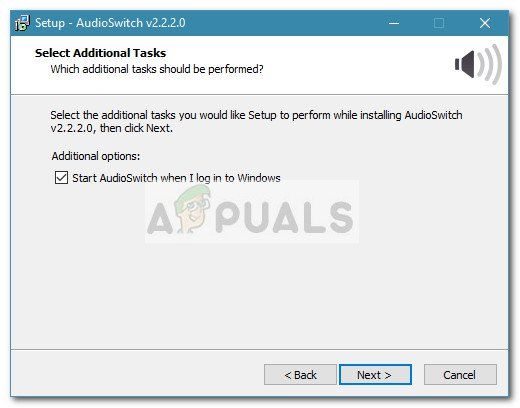 После установки программного обеспечения вы увидите новый значок звука в меню на панели задач. Простой щелчок откроет ваши параметры вывода звука. Нажатие на любой из них переключит аудио на него.
Если вы недовольны интерфейсом, есть другие сторонние альтернативы, которые помогут вам сделать то же самое. Audio Switcher Это также бесплатно и имеет более сложный интерфейс. Вы также можете использовать Audio Switcher (то же имя, другой разработчик), но нет доступной установки, поэтому вам придется пересобрать проект самостоятельно в Visual Studio.
Audio Switcher — быстрый способ переключаться между аудиостройствами

Если вам часто приходится изменять аудиоустройство, используемое по-умолчанию, к примеру, отправляя звук на наушники, то вы в курсе, как неудобно это делать средствами системы. Программа Audio Switcher упрощает эту процедуру, позволяя переключать устройства буквально одним кликом мышью.
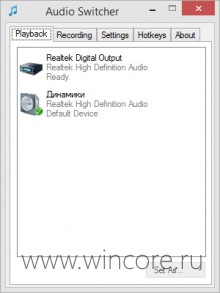
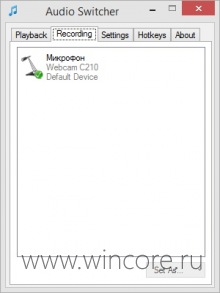
Утилита поддерживает работу как с устройствами воспроизведения, так и записи звука. Переключиться на нужное можно из главного окна Audio Switcher, из контекстного меню иконки в системном трее, простым кликом по этой иконке (опция Quick Switch в настройках), а также при помощи настраиваемых горячих клавиш.
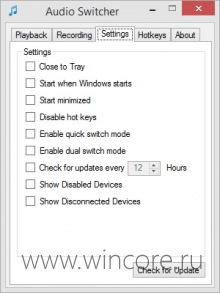
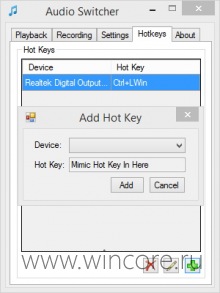
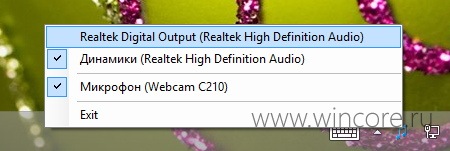
В контекстном меню иконки программы в трее отображаются только выбранные пользователям устройства, что удобно если в системе их несколько. В будущем разработчик Audio Switcher обещает реализовать функцию автоматического переключения источника звука при запуске определённой программы или игры.
Установки Audio Switcher не требует, распространяется на бесплатной основе, язык простейшего интерфейса — английский.
Top 5 and Best Audio Switcher for Windows 10 Free
List, short description, and download links for Top 5 and Best Audio Switcher for Windows 10.
You might need to switch sounds between your headphone and speaker or other peripherals on Windows 10. There are handful of tools to change the audio devices but some of them work the best. However, Windows 10 will always let you set up or Change Default Sound Device. You will see a list of 5 top and best software with a short description to change audio output resource.
These will be the Best Audio Switcher for Windows 10 free allowing to perform the task in a single or double click. Most of the software is lightweight and you can use them hassle-free. Furthermore, you will see manual ways to for the same.
Audio Switcher for Windows 10
Here are Top 5 Best Audio Switcher for Windows 10 –
1] Ear Trumpet
Ear Trumpet is a Powerful Volume Control application brought to you by Microsoft MVP Rafael Rivera and previous Microsoft Engineer Dave Armenta, developer David Golden. The application was developed to minimize some limitations in Audio Management experience in Windows 10. It includes specific features, for example, classic control ability, quick switching between audio devices, moreover, move applications between playback devices.
The brand new Ear Trumpet 2.0 offers to manage with hotkeys, change all audio settings, and multi-channel peak monitoring. The new version can be supported in both Windows 10 light and dark mode, which was an issue previously. Other inclusive features are –
- Provides standalone volume mixer.
- Allows configuring hotkeys for various tasks.
- Have good sets of modern context menus
- Offers multi-lingual support for native users.
- It’s a Default playback device management
- The application will get updates automatically via Microsoft Store.
2] AudioSwitcher_v1
AudioSwitcher_v1 is a useful Audio Switcher for Windows 10 that all the power users were looking for long before for managing their devices. The application adds a headphone icon in the system tray holding Speaker at the top and Mic at the bottom. You can make a right click on them and set it as default. Despite having no option, this is an ideal and portable tool for switching the audio device from your PC speakers to an external one quickly.
3] SoundSwitch
SoundSwitch is a handy utility for Audio devices for Windows 10 providing you the smoothest switching back and forth between the externally connected devices. The tasks are controlled by good sets of hot-key combinations and you can pick a preferred audio device for a specific time period.
SoundSwitch, usually, runs in background, for the first time use, you will have to choose preferred hotkey combination required for the application. You can avail shortcut keys in the Settings section of the application and set up in a very easy way. The app also offers the following inclusive features –
- Shortcut key combinations need to be chosen only once, and from the following time you are good to go.
- Widespread support for various sound devices like sound cards, digital audio, headphones, or playback devices.
- SoundSwitch will send you five types of notification once a device is changed.
- Notifications are balloon type and will appear with sound i.e. if a new device is selected, there will be a chime sound to confirm.
- Inbuilt ability to customize the notification sound i.e. you can also customize the sound to silent Toast notification.
4] AudioSwitch v2.2.2
AudioSwitch v2.2.2 is one of the top and best Audio Switcher for Windows 10 and it is absolutely free. The program offers a quicker way to install without even rendering a compatibility issue and advanced settings. No additional tool or driver is required for having AudioSwitch v2.2.2 in Windows 10.
After starting the program, AudioSwitch v2.2.2 will put an icon in the SysTray clicking which will show a compact menu. The application will detect all the connected audio devices automatically and will display on the appearing menu from where you have to just click one to select. Furthermore, you can change the volume settings of a selected device using the slider from this in app menu. Other inclusive features are –
- Provides an accessible configuration panel in the System Tray.
- Offers a wide range of options including on-screen volume slider.
- You can enable multiple hotkey combinations in order to switch between devices.
- Let the user control the volume change, mute sound, and accomplish other tasks using the shortcut key combinations.
5] Manual method
However, having the above Top and Best Audio Switcher for Windows 10, it allows users to switch between audio devices using default settings. There are a number of options using which you can easily change the sounds for various system events, configure the internal and external devices. Usually, the Windows Settings app holds these options by default but you can also set up Default Audio Device with a flyout and from classic applet. So, here are a few ways to Change Default Audio Device manually in Windows 10 –
From the Sound flyout
- Click the volume icon from the taskbar.
- Select Up arrow from the flyout.
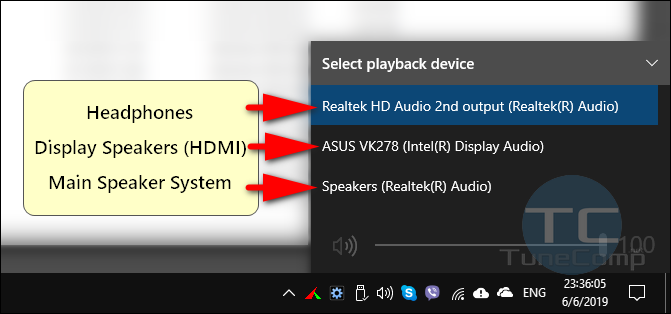
- Choose the desired one from the list.
From Settings app
- Press the Windowskey and I at once.
- Click System.
- From the additional settings page, choose Sound.
- Click the dropdown menu under Choose your output device.
- Select one.
From the Classic Sound Applet
You can also use the classic Sound Applet in order to Switch audio device which can be done both from the Control Panel and from the System Tray.
- Right-click the Volume icon.
- Select Sounds.
- When the Sound pop up will arrive, you will be in the Playback tab.
- Scroll down and choose the desired device in the list.
- Finally, click the Set Default button to switch.
How to Switch Sound Output Between Headphones and Speakers on Windows 10
It happens that you need to swap between your headphones and speaker system. When you communicate using Skype or WhatsApp you may want to route the sound to your headphones so that nobody will hear what you are talking about, but in other cases you may prefer all sound play through your speaker system.
Very long time ago we all used to connect and disconnect headphones to change the output device but this method is so yesterday. Nowadays almost everyone is using a sound card that supports high-definition setup.
This means that such sound cards can use multiple outputs for different apps at the same time that is a way more convenient. For instance, you may be listening to music or watch a movie and you won’t need to make a single click once you receive a call via Skype.
But nevertheless, from time to time you have to swap sound output from speakers to headphones or backwards manually. And in this guide we will explain several ways to switch sound output between speakers, headphones, HDMI, etc on Windows 10.
Until recently, Windows 10 used the Control Panel applet for switching audio input and output devices. It is still available but now in Windows 10 version 1903 we’ve got a new sound control section in the modern Settings app.
How to Switch Between Headphones and Speakers from Windows 10 Settings App
First make sure you have your speakers and headset connected to your computer.
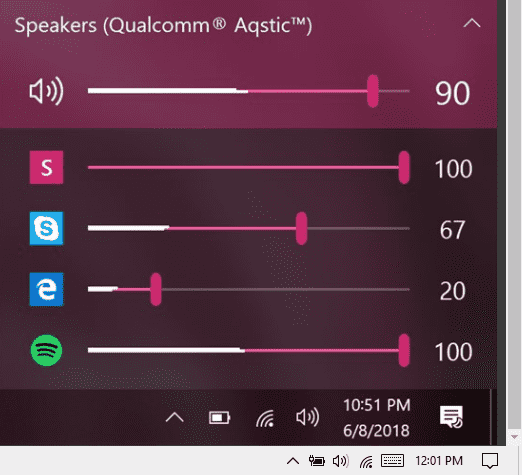
Option 1 – The Quickest (Recommended)
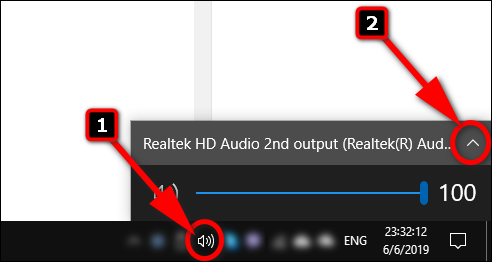
- Click the volume (speaker) icon.
- Now click on the small arrow:
- select the output device you want to route your sound to by default:
Option 2 – Just a Few Clicks
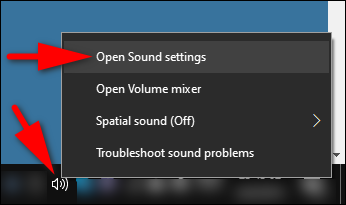
- Right-click the volume icon in the system tray.
- Select Open Sound Settings:
- Select your preferred playback and record devices in the Settings app: Choose your audio output and input devices in Windows 10 sound settings
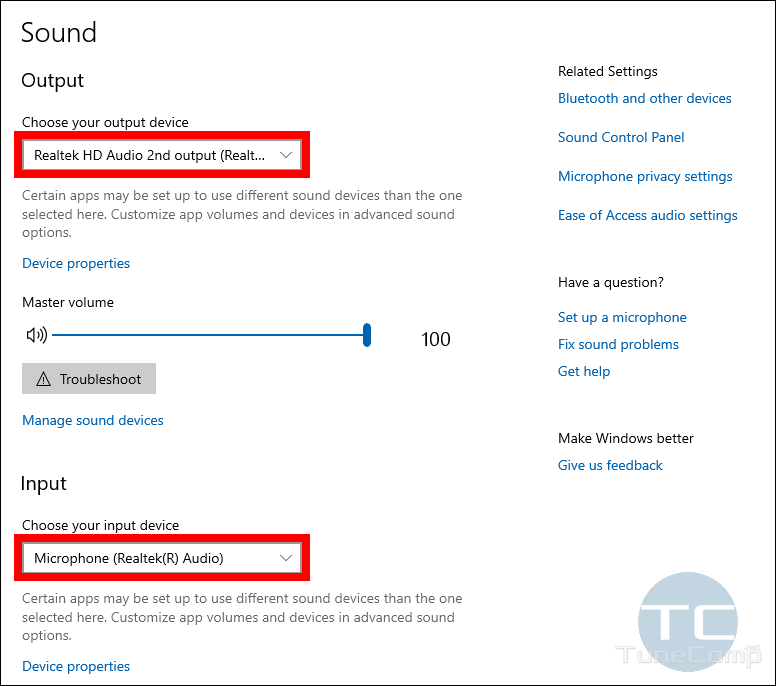 Choose your audio output and input devices in Windows 10 sound settings
Option 3 – More Complicated
Get to the same sound section in Settings manually step by step:
- Press Win+I to launch the Settings app.
- Go to the System section
- Select Sound in the left pane
- Now you can select the audio output device as described in the previous method.
How to Add the Sound Icon to the Taskbar If It Is Missing
Has the Volume Been Hidden?
In case if you don’t see the audio (volume, speaker) icon you should check if the sound icon is not hidden.
First, make sure the speaker icon is not hidden in the additional section – click on the arrow and look for it. Note that you can drag icons from this section directly to the main area of your System Tray:
Yet another thing – now you should make sure that the Volume icon is not disabled in the Settings. Follow the steps:
- Right-click the Taskbar and select Taskbar Settings.
- Scroll down a bit and click on the Select which icons appear on the taskbar link:
- Ensure the Volume is toggled on:
Audio Driver Issue
If no success, please, check if the proper audio driver is installed. Go to the official website of your PC, motherboard or external sound card manufacturer, navigate to the Support section, search for your exact product model, download the driver for your current Windows version and install it.
How to Open the Deprecated Audio Settings
- Open Control Panel.
The fastest way is to press the Win button, type “control” and hit Enter as soon as you see “Control Panel” in the search results.
Alternatively, you can press Win+r, type “control” in the field and hit Enter: - Click Sound:
How to Enable and Disable Sound Input and Output Devices
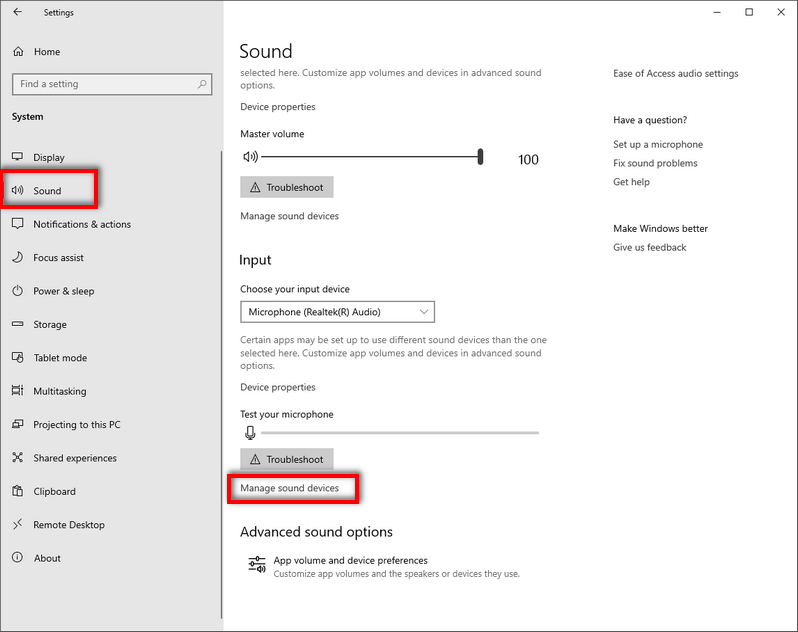
- Go to Settings > System > Sound.
- Scroll down and click the Manage Sound Devices link at the bottom:
Stereo Mix is a virtual input device that allows you to record all the sounds that are played on your PC. In such a way you can record sounds that you cannot find and download normally. You should keep it disabled unless you are 100% sure what to do with it.

You can also use a deprecated Control Panel applet for this purpose (we talked about in the previous paragraph).
Don’t Forget – You Can Select Audio Output in the Particular Program
If you switched the audio output device but the sound still plays through the same device, check the setting of the program that is currently used to play the sound (song, track, sample). Probably, it has an ability to select the audio device separately from the system settings.
If you want a certain app or program to use system audio settings, you should select Windows Default or Default in its settings. Note that some programs require restart to take effect. I mean that if you launched an audio player, then changed the audio output device you may need to restart the player.
It is advised to firmly select audio output device for messengers. I configured my Skype and WhatsApp desktop client to route sound to my headphones and additionally ring through built-in speakers of my monitor not to miss a call.
What if the Volume Control Stopped Working
It happens rarely but if you happened to face such a problem, here is what you need to do:
- Right-click on your Taskbar;
- Select Task Manager;
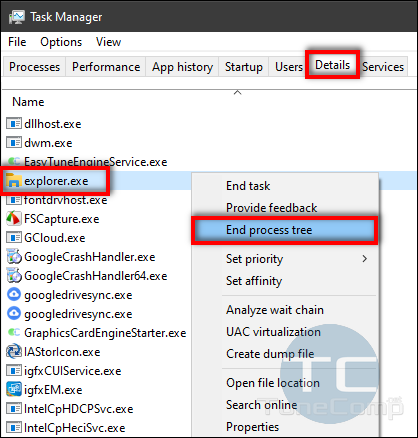
- Go to Details (Windows 10) or Processes (Windows 7);
- Restart Explorer – right-click on Explorer, select End process tree:
- Press CTRL+ALT+DEL;
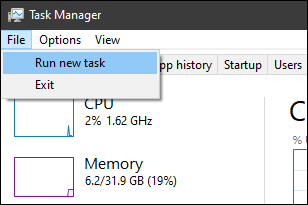
- Click Task Manager;
- In the Task Manager click File > Run new task:
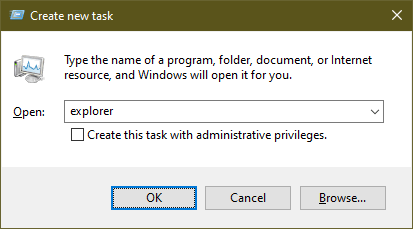
- Type explorer;
- Click OK:
Third-Party Apps for Switching and Routing Audio Streams
Sound Switch
With the help of this marvelous app you can assign and use your Scroll Lock or Pause / Break key as the output switcher.
All you need to do is:
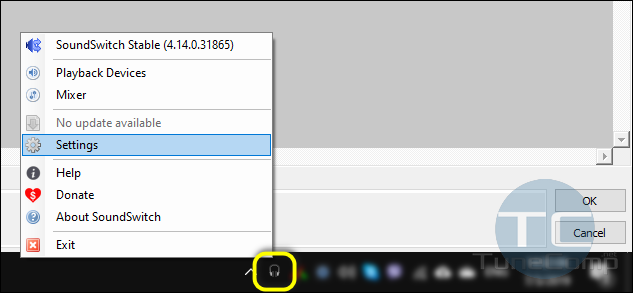
- Download the program at https://soundswitch.aaflalo.me/
- Install and run it.
- Go to Settings:
- Select sound output devices you wish to quickly switch between
- Specify the hot key (or key combination):
Audio Switcher
Audio Switcher is a freeware program designed to route audio streams on Windows. It allows to configure your inputs and outputs at your own taste. You can download the utility at https://audioswit.ch/er
Wrapping Up
We hope, now you got a comprehensive knowledge about audio input and output devices and how to quickly switch sound between them. Tell us what sound-related problems have you faced on Windows 10 and whether or not this guide was useful in your case. Thank you in advance and good luck!


