- Устранение ошибки «Windows 10 использует не всю оперативную память»
- Устраняем проблему с неиспользуемой RAM
- Способ 1: Настройка Windows
- Способ 2: «Командная строка»
- Способ 3: Настройка BIOS
- Способ 4: Уменьшение памяти, используемой встроенной видеокартой
- Способ 5: Проверка модулей ОЗУ
- Заключение
- SOLVED: Windows 10 Won’t Use Full RAM
- Solution 1: Modify RAM used on Boot
- Solution 2: BIOS Settings
- Solution 3: Physical Inspect RAMs
- Solution 4: Update BIOS
- Solution 5: Update Windows and Drivers of Your PC to the Latest Build
- Solution 6: Restore the BIOS of Your PC to Defaults
Устранение ошибки «Windows 10 использует не всю оперативную память»
Устраняем проблему с неиспользуемой RAM
Причин у описываемой проблемы существует немало. В первую очередь источником является программный сбой в определении ОЗУ. Также ошибка появляется и вследствие аппаратной неисправности как модуля или модулей, так и материнской платы. Начнём с программных неполадок.
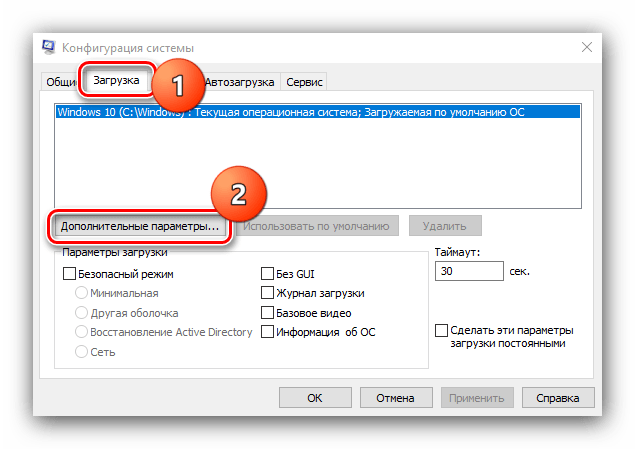
Способ 1: Настройка Windows
Первая причина проблем с использованием «оперативки» – некорректные настройки операционной системы, как правило, параметров работы с этими комплектующими.
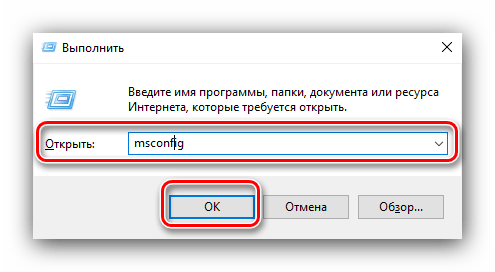
- На «Рабочем столе» нажмите сочетание клавиш Win+R. В окне «Выполнить» введите команду msconfig и кликните «ОК».
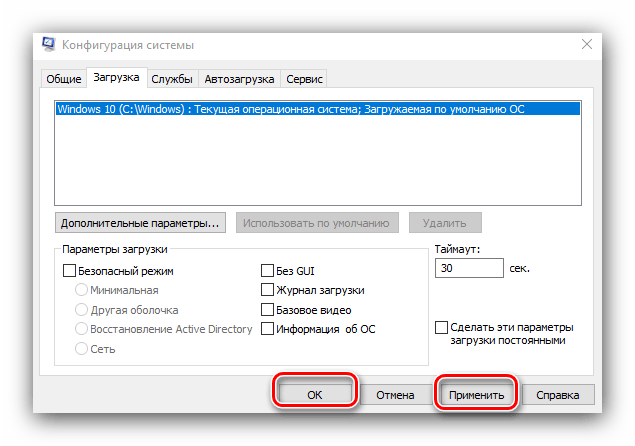
В следующем окне найдите опцию «Максимум памяти» и снимите с неё отметку, после чего нажмите «ОК».
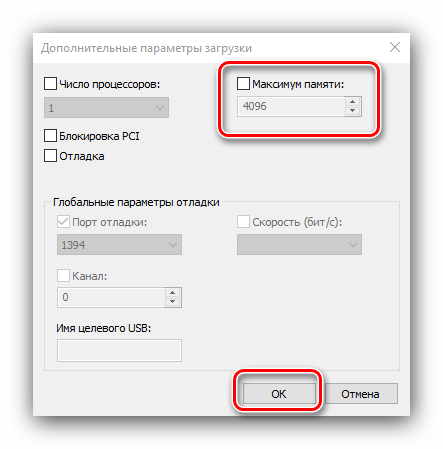
Нажмите «Применить» и «ОК», и затем перезагрузите компьютер.
Способ 2: «Командная строка»
Также стоит попробовать отключить несколько опций, доступных через «Командную строку».
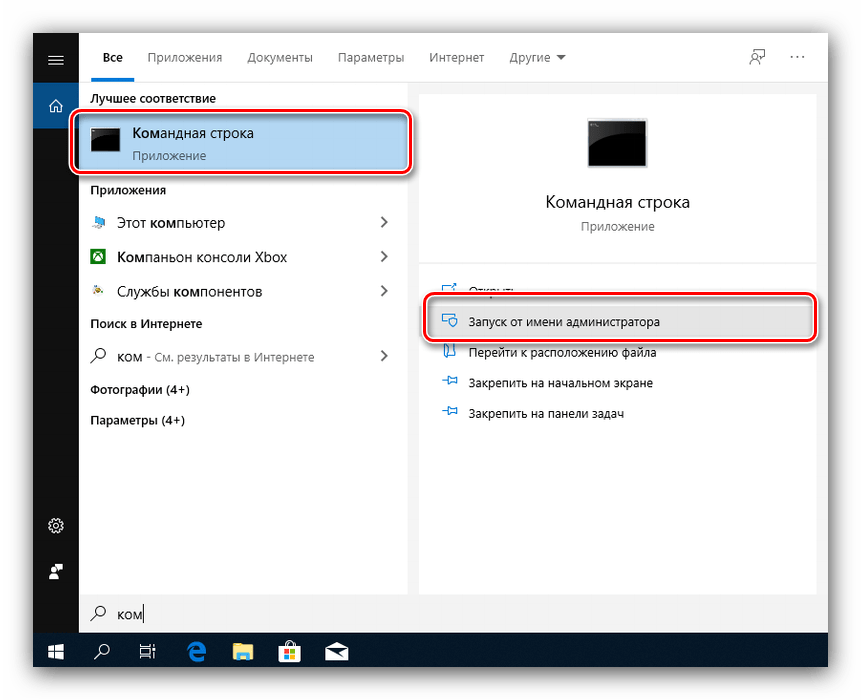
- Откройте «Поиск», в котором начните вводить слово командная . После обнаружения результата выделите его, затем обратитесь к меню справа и воспользуйтесь пунктом «Запуск от имени администратора».
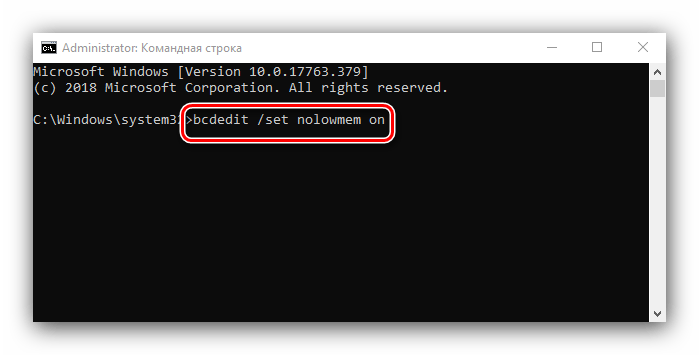
После появления интерфейса ввода команд пропишите следующее:
bcdedit /set nolowmem on
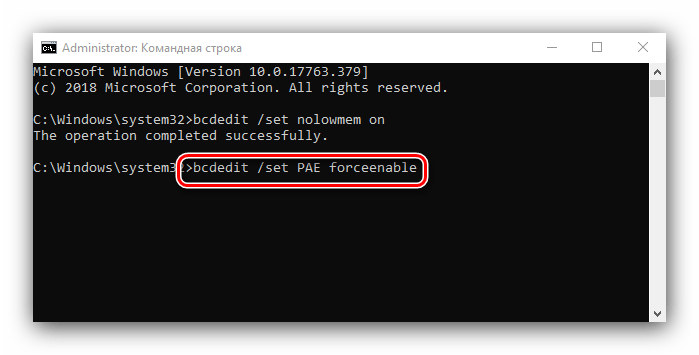
Нажмите Enter, затем пропишите следующую команду и снова воспользуйтесь клавишей ввода.
bcdedit /set PAE forceenable
После изменения параметров закрывайте «Командную строку» и перезагружайте компьютер.
Данный метод является более продвинутой версией первого.
Способ 3: Настройка BIOS
Не исключены также неправильные настройки микропрограммы «материнки». Параметры следует проверить и изменить.
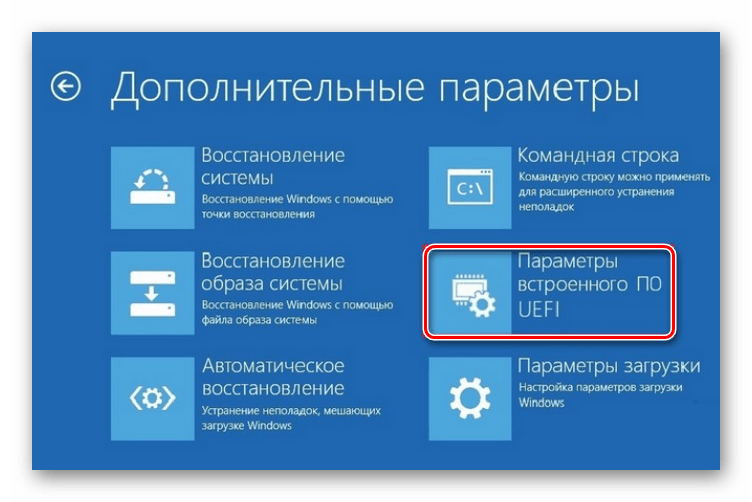
- Войдите в БИОС любым подходящим методом.
Урок: Как войти в BIOS
- «Memory Remapping»;
- «DRAM Over 4G Remapping»;
- «H/W DRAM Over 4GB Remapping»;
- «H/W Memory Hole Remapping»;
- «Hardware Memory Hole»;
- «Memory Hole Remapping»;
- «Memory Remap Feature».
Параметры нужно включить – как правило, достаточно переместить соответствующую опцию в положение «On» или «Enabled».

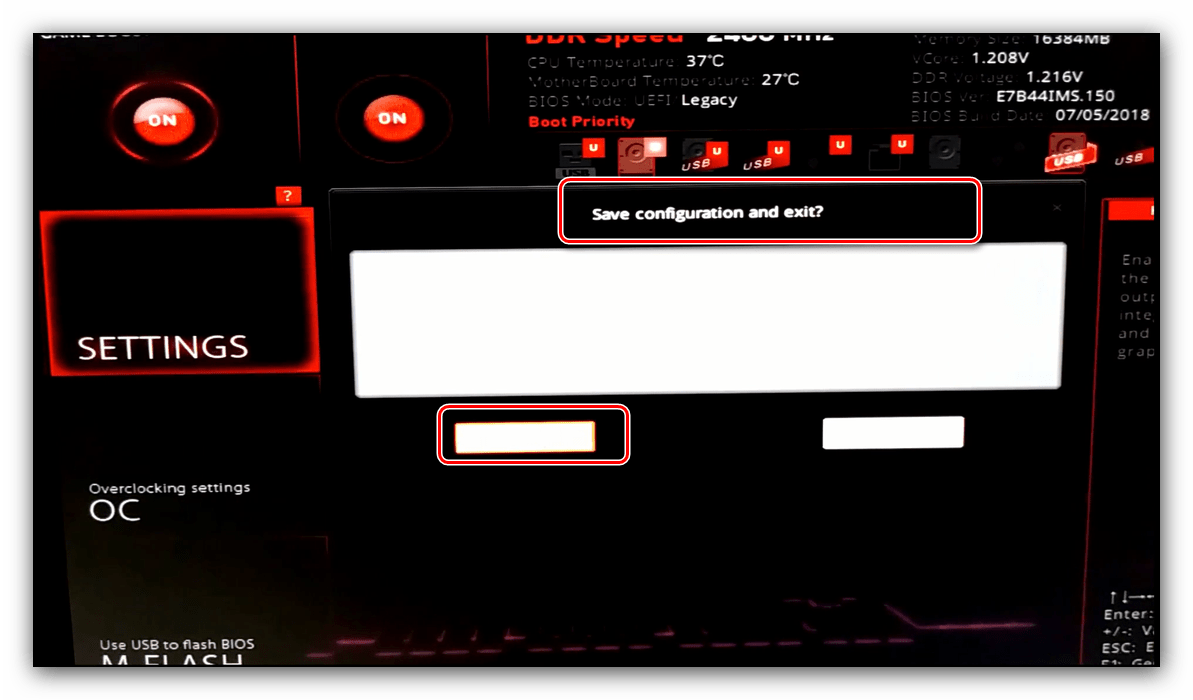
Нажмите F10 для сохранения изменений и загрузите компьютер.
Если вы не можете найти подходящие пункты, не исключено, что производитель заблокировал такую возможность на вашей модели «материнки». В этом случае поможет либо прошивка новой версии микропрограммы, либо замена системной платы.
Способ 4: Уменьшение памяти, используемой встроенной видеокартой
Пользователи ПК или ноутбуков без дискретной видеокарты часто сталкиваются с рассматриваемой проблемой, поскольку встроенные в процессор решения пользуются «оперативкой». Часть из неё закреплена за интегрированной графикой, причём объём задействованной ОЗУ можно изменить. Делается это следующим образом:
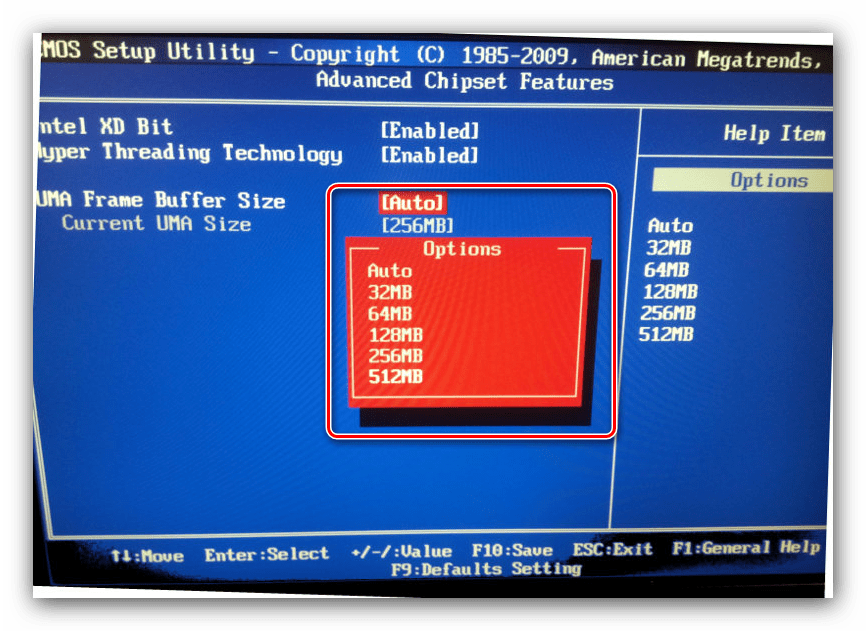
- Войдите в БИОС (шаг 1 предыдущего способа) и переключитесь на вкладку «Advanced» или же любую, где фигурирует этот термин. Далее найдите пункты, которые отвечают за работу графической подсистемы. Они могут называться «UMA Buffer Size», «Internal GPU Buffer», «iGPU Shared Memory» и в таком роде. Обычно шаги объёма фиксированы и опустить его ниже определённого порога не получится, поэтому выставьте минимально возможное значение.
В оболочке UEFI ищите разделы «Дополнительно», «System Configuration» а также просто «Memory».

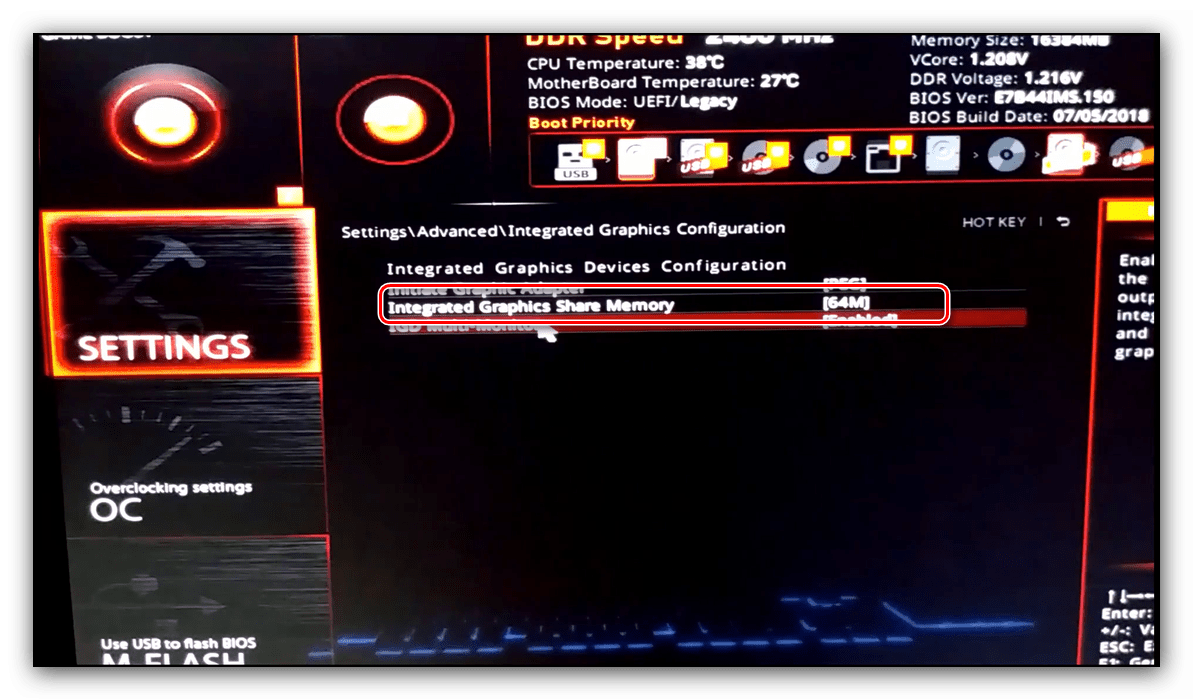
Далее откройте разделы «Конфигурация системного агента», «Расширенные настройки памяти», «Integrated Graphics Configuration» либо подобное, и задайте требуемый объём по аналогии с текстовым БИОС.
Способ 5: Проверка модулей ОЗУ
Нередко источником ошибки являются неполадки с планками оперативной памяти. Проверить их и устранить возможные проблемы можно по следующему алгоритму:
- Первым делом проверьте работоспособность «оперативки» одним из программных способов.
Если появятся ошибки, сбойный модуль нужно заменить.
Аппаратные неисправности – одна из самых редких причин описываемой проблемы, однако и самая неприятная из возможных.
Заключение
Таким образом, мы рассказали, почему в Виндовс 10 появляется сообщение о том, что используется не вся оперативная память, а также предложили варианты устранения этой ошибки.
SOLVED: Windows 10 Won’t Use Full RAM
RAM is a volatile storage device that your computer uses to store data and also use it simultaneously but it is used to store the type of data that is being frequently used by the operating system or an application running on it. Once your computer shuts down all the data in it is lost as it is a temporary but fast storage device. The more amount of RAM you have, more smoothly your computer will multitask by enabling the applications to store more files they need frequently. Having more RAM never hurts, but not able to use the whole of it can be unacceptable to a user.
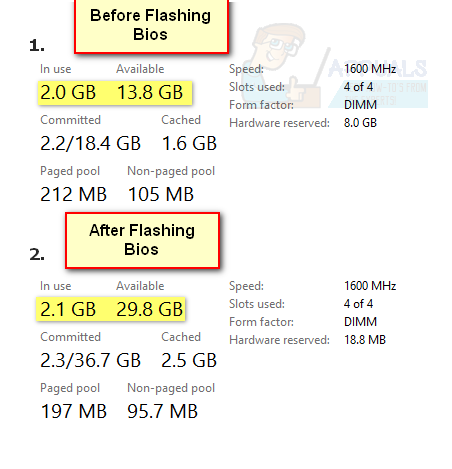
Many of the users, when started using Windows 10, reported that when they open the Windows property window or the Task Manager, they noticed that only a part of the total amount of RAM is currently usable by Windows. In some cases, they would see an unusually large amount of RAM been “Hardware Reserved” by the Windows in the Task manager. It could be in fact due to reason that amount of memory has been reserved for the internal graphics adapter installed on your computer but if you have dedicated graphics card installed on your computer then this shouldn’t be the problem. And for some, the amount was from 1024 MB to 4181 MB which is not normal.
There are some configurations in Windows 10 and your motherboard’s BIOS that can reserve some amount of RAM making them unusable. They can be easily changed and are listed in the solutions below. But In some cases, the hardware was also found to be the culprit causing this issue. Below listed are the best solutions that have worked for users. But before you start with the solutions, you should know that if you have a 32 bit Windows 10 operating system installed, you can only use 3.5GB RAM no matter how much RAM is physically installed on your computer. You will need to install a 64 bit Windows 10 operating system to use more than 3.5GB RAM.
- To know which type of operating system you have, simply Press and Hold the Windows key and Press R.
- In the Run dialog box type msinfo32 and Press Enter.
- In the SystemInformationwindow that opens, look for System type in the right pane.
- If next to System type the value is x86 then you have a 32 bit Windows 10 installed. If it is x64 then you have a 64 bit Windows 10 installed.
- Now let’s start with the solutions.
Solution 1: Modify RAM used on Boot
This option in Windows is used to reserve RAM that is used during the boot procedure when your system is turning on. By default, it may permanently and unnecessarily reserve a significantly large amount of RAM for it.
- To set that right, Press and Hold the Windows key and Press R. Type msconfig in the Run dialog box and Press Enter.
- The System Configuration window will open. Go to the Boot tab in it.
- Select your Operating system from the list below if you have more than one. Now Click on the Advanced Options button.
- On the upper right corner, Clear the checkbox next to Maximum memory. Click Ok.

- Now restart your computer. Check of the issue resolved. If not, move on to the next solution.
Solution 2: BIOS Settings
There are a few configurations on BIOS that can limit the Windows from using the full amount of RAM installed. Firstly, if you have a separate dedicated video card installed, then you have to make sure the internal graphic processing unit (iGPU) is off which is is used in case you don’t have any external one. If it is On, Windows can be reserving the memory for it.
To make sure it is off, Restart your computer and enter its BIOS/UEFI setup. You will have to tap a specific key to Enter BIOS and it differs by your system’s model. It can be F1, F2, F12 or the Esc key. You can easily google the model of your system to see which key to use to enter the BIOS setup.
In the BIOS setup, search for iGPU, Internal Graphics or Onboard Graphics. The name and location of this setting can once again vary according to your system’s manufacturer so you will have to search for it. Once you find it, make sure it is Disabled or turned Off.
Also in BIOS, there is a Memory Map Feature that can give Windows full access to the RAM installed. Search for it and make sure it is Enabled or turned On.
In addition to the feature mentioned above, if you can find the below features, make sure they are in their respective states as mentioned next to them.
Feature State
Render Standby Enabled
iGPU Memory Auto
Multimonitor Disabled
Save changes and Restart your computer. Check if can now use the whole RAM. If still an amount of RAM is unusable, move on to the next solution.
Solution 3: Physical Inspect RAMs
In some cases, the reason Windows 10 showed less amount of RAM usable was due to a physical defect. So we will check the RAMs physically, and will also rule out the possibility if the slots on which the RAMs are installed are faulty. Only proceed if you’re comfortable opening your CPU.
Unplug all wires and remove the cover of your computer. Here, you will be able to see Rectangular sticks (RAMs) installed on your motherboard. They will be next to a big heat sink with a fan on it. There will be either 2 or 4 slots on which RAMs can be installed.
There will be clips at the sides of the slots. Toggle them and Unplug All the RAMs installed and make sure there contacts are clean. Also, remove any dust that may be inside the slots.
If you have more than 1 stick of RAM installed it is possible one may be faulty so remove any one them and start up your computer. Do the same with the other stick of RAM. If the system fails to run with any one of the RAM installed, then that stick of RAM is faulty.
Similarly, check the slots in use by inserting a known working stick of RAM in it and running your computer. If it fails to run on any one slot, then the slot in question is faulty rendering the RAM inserted in it unusable by Windows.
If all the slots and stick of RAM are working, inserting them back but in different slots as they were originally in before. This is also known to work for some users. Make sure they are properly placed and locked in.
Solution 4: Update BIOS
In some cases, an outdated BIOS version has been known to cause this memory bug to appear in Windows 10.
The procedure to update BIOS varies by system manufacturers and models. Access your system manufacturer’s website to download and install the latest BIOS version on your system.
Before moving with the solutions to make your RAM fully usable in Windows 10, check if booting the system with the bare minimum (make sure to empty the PCI slots e.g., removing a PCI network card) resolves the issue. Moreover, make sure your system supports the RAM you are trying to use with it i.e., no hardware limit is in place, for example, Intel 945 chipset motherboard has a hardware limit of 4 GB of RAM, and more than that cannot be used with it.
Solution 5: Update Windows and Drivers of Your PC to the Latest Build
Windows, like any OS, is prone to bugs and the RAM issue at hand could also be a result of a bug. Microsoft is trying its best to eliminate bugs from Windows and for this purpose, it uses the Windows update channel to populate the latest patches of the reported bugs. Before diving into more technical solutions, it will be a good idea to update the Windows of your system to the latest build which may solve the problem.
- Manually update the Windows of your PC to the latest stable release. Also, make sure the system’s drivers are updated to the latest build. Check for Windows Updates
- After updating the Windows and drivers, check if the RAM issue is resolved.
- If not, then check if reinstalling the graphics drivers resolves the RAM issue.
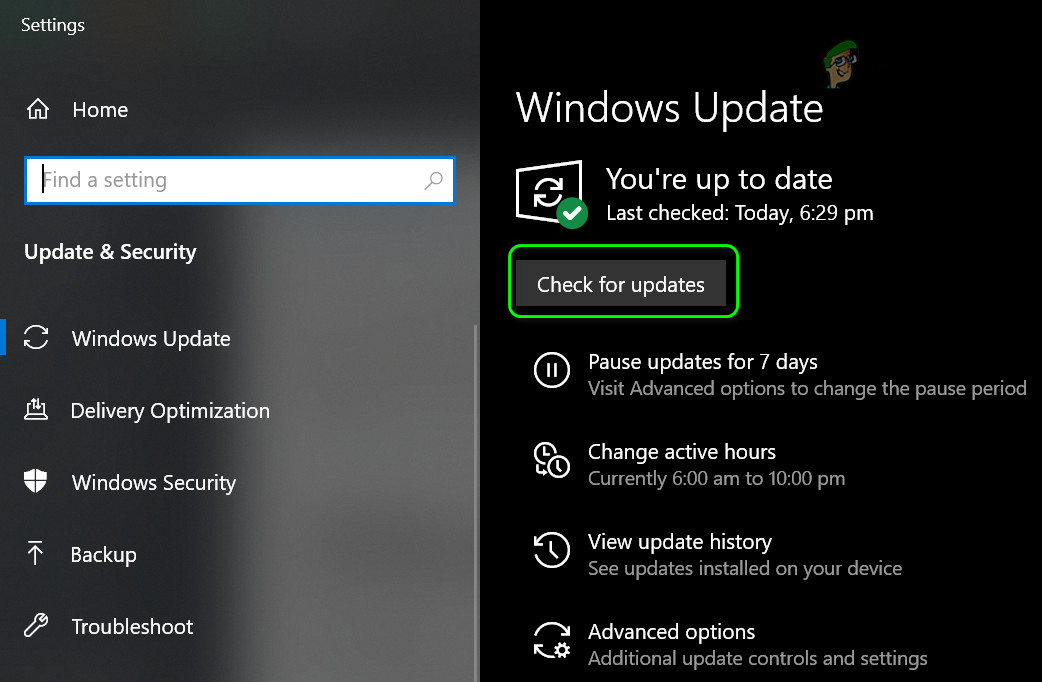 Check for Windows Updates
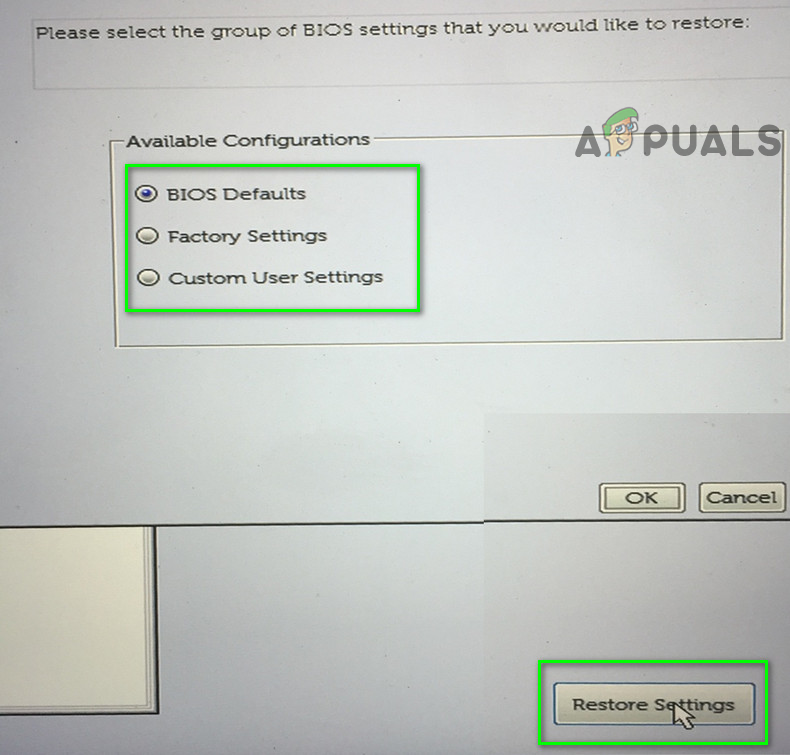
Solution 6: Restore the BIOS of Your PC to Defaults
You may encounter the issue at hand if the BIOS of your system is wrongly configured. In this case, restoring the BIOS to the factory defaults may solve the problem. For illustration, we will discuss the process for a Dell system, you may follow the instructions as per your make and model of the PC.
Warning: Advance at your own risk as editing the system’s BIOS is a proficient task and if done wrong (or if a sudden power failure occurs during the process), you may brick your system and cause everlasting damage to your data.
- Boot your system into BIOS (you may press the F2 key when powering on your system).
- Now, near the bottom of the right pane, click on Restore Settings (or Load Defaults) and then confirm to restore the BIOS (or load defaults). Reset BIOS to Defaults
- Then exit BIOS and boot the system into Windows to check if the RAM issue is resolved.
 Reset BIOS to Defaults
If the issue persists, then check if disabling/enabling the paging file resolves the issue. You can also use a utility TestLimit by Sysinternals to solve the RAM problem. If that did not do the trick, then either the RAM sticks are faulty/incompatible or the issue is caused by a failing hard drive (some users reported that a failing hard drive caused the same issue for them).


