- How to fix common Start Menu bugs on Windows 10
- How to fix Start Menu issues in Windows 10
- 1. General methods to fix Start Menu issues
- 1.1. Temporarily disable your antivirus
- Run a System Scan to discover potential errors
- 1.2. Run Microsoft’s troubleshooter
- 1.3. Create a new Admin account
- 1.4. Re-register with the PowerShell
- 1.5. Clean install Windows 10
- How to fix common Start Menu bugs on Windows 10
- 2. How to fix specific Start Menu issues
- 2.1. Can’t click on Start Menu in Windows 10
- 2.2. Windows 10 Start Menu is full screen
- 2.3. Windows 10 Start Menu is black
- 2.4. Windows 10 Start Menu is locked
- 2.5. Windows 10 Start Menu is small
- 2.6. Windows 10 Start Menu just flashes
- 2.7. Windows 10 Start Menu keeps scrolling
- 2.8. Windows 10 Start Menu keeps opening and closing
- Nasty Windows 10 bug causes Start Menu to act up: What to do
- Start menu Windows 10 bug
- What to do
How to fix common Start Menu bugs on Windows 10

- Windows 10 is a feature-rich operating system, with an intuitive UI designed with productivity in mind.
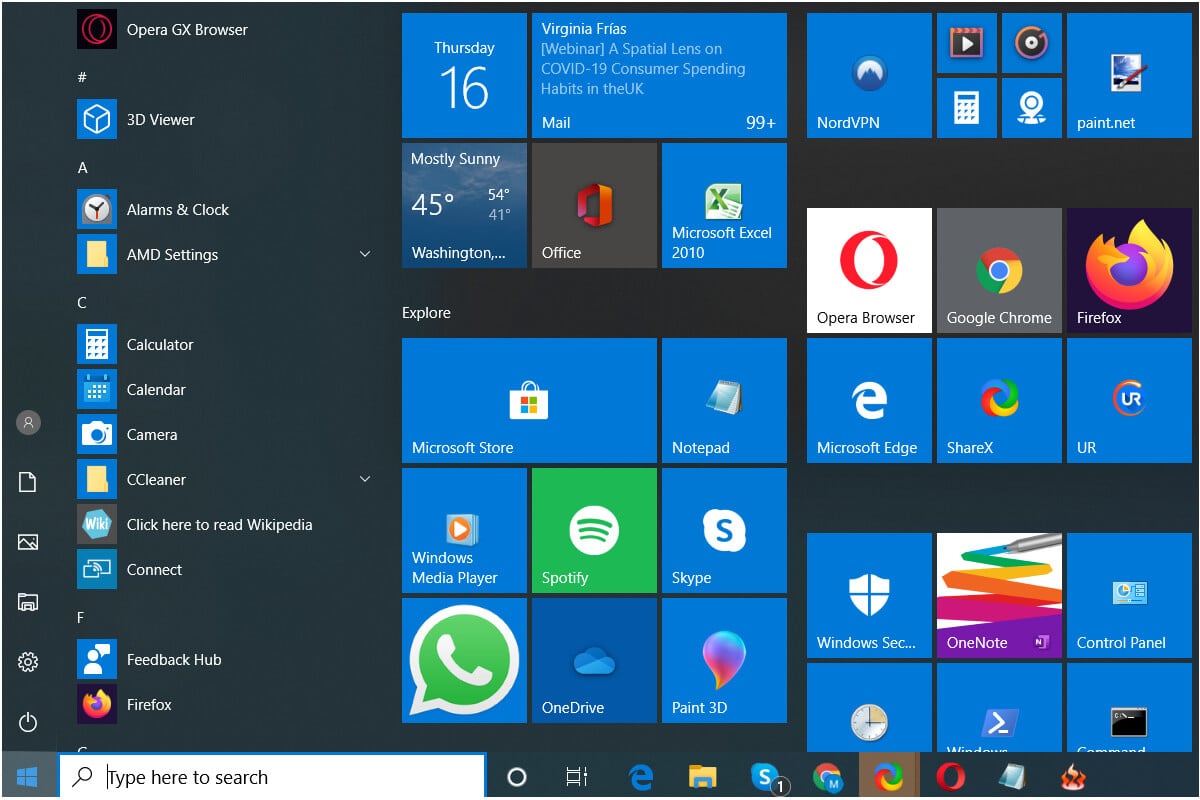
- As its name suggests, the Start Menu is a Windows 10 feature that acts as a door, offering users quick access to the programs installed on their devices.
- If your Start Menu keeps on flashing, scrolling by itself, won’t do anything when you click on it, and more, then this guide is what you need. We’ll show you how you can quickly fix common Start Menu bugs.
- Visit our page dedicated to the Start Menu to learn how you can optimize your settings on Windows 10.
- Download Restoro PC Repair Tool that comes with Patented Technologies (patent available here).
- Click Start Scan to find Windows issues that could be causing PC problems.
- Click Repair All to fix issues affecting your computer’s security and performance
- Restoro has been downloaded by 0 readers this month.
It seems that making a flawless major update isn’t Microsoft’s cup of tea. Oftentimes, right after users install the latest OS updates, they start reporting various issues. For some of those, the problems actually break the OS, for others, the problems are mild but not less annoying.
Nonetheless, it’s like history repeating itself. Namely, the problem we are addressing in this guide isn’t a novelty for Windows 10 users.
Start Menu bugs affected every Windows 10 feature update, starting from the Anniversary Update to the current OS version. Some users reported that the Start Menu is either missing or that they were unable to access it. On the other hand, others managed to enter the Start menu but they encountered missing apps and shortcuts.
This is the experience of one user from the Microsoft Community forum:
However, after the installation, all my programs went missing from the start menu with the exceptions of the “stock” apps and those apps I installed from the MS store (such as Facebook, Twitter, etc.)
The program shortcuts are still there. They are in the proper place in ProgramData… […]
It’s the Windows start menu that refuses to display them. What can I do?
For that reason, we prepared this list of possible solutions to help you resolve any Start-related issues. If you have any resembling problems, make sure to check the list below.
How to fix Start Menu issues in Windows 10
This guide is divided into two parts. In the first part, you’ll find a list of 5 general solutions to fix Start Menu glitches. In the second part of the guide, we’ll focus on specific bugs and specific methods you can use to fix them.
1. General methods to fix Start Menu issues
1.1. Temporarily disable your antivirus
Even though the antivirus solutions are the best way to protect your PC from malware attacks, it seems that they are not exactly in the best terms with Windows 10. Namely, a lot of issues with the system update and all-around performance are provoked by the third-party antivirus.
Two of the most notorious are Norton and McAfee, but no one can be certain what impact the others may have on your OS. Or on the Start menu. Meanwhile, if you want to completely uninstall Norton and McAfee, use the two guides below:
Run a System Scan to discover potential errors


So, basically, for the time being, we advise you to disable the antivirus at least temporarily and use Windows Defender. However, if the problem with the Start is still there, you should move to the additional steps.
1.2. Run Microsoft’s troubleshooter
The built-in troubleshooter is the next obvious step. Just run the troubleshooter and wait for the completion. After that, your problems should be resolved.
However, besides the native Start menu troubleshooter, you can also download the specific troubleshooter that is created for Start Menu-related issues in the first place.
You can download the troubleshooter by clicking on this link from Microsoft. Once you’ve acquired it, just run it and follow the instructions. If the problem is still there, it can at least give you an insight into the problem’s origins.
1.3. Create a new Admin account
Another workaround that proved as a valid solution for some users. Namely, after they’ve created the brand new administrative account, the Start issues were resolved. Have in mind that you’ll lose your previous setup, so the fresh customization is needed.
Follow these steps to create the new Administrative account and ideally resolve issues:
- Open Settings with the combination of the Windows key + I.
- Select Accounts.
- Click on Family & other people.
- Under Other people, click on Add someone else to this PC.

- Enter the username and password (optional) and click Next and then Finish.
- Now, under the Family & other people, select a newly created account.
- Open Change account type.
- Select Administrator and confirm with OK.
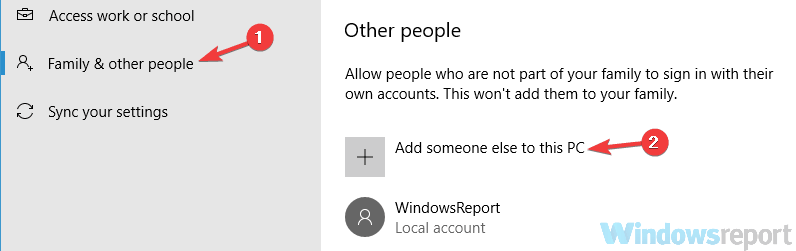
Now, after you restart your PC, make sure to log in with the new account. The Start Menu problems should be gone. Nevertheless, if they’re still there, try the other solutions.
1.4. Re-register with the PowerShell
Now we are moving to a more thorough approach. As you’re aware, the Start Menu is an essential Windows element and can’t be uninstalled or restarted, in the standard manner of speaking.
But, luckily, you can re-register certain built-in processes with a little help from the PowerShell.
Follow this procedure to re-register Start Menu and hopefully repair your Start Menu:
- Under the Windows Search, type PowerShell.
- Right-click the Power Shell and Run as administrator.
- Under the command line, type (copy-paste) the following command:
- Get-AppXPackage -AllUsers | Foreach
- Press Enter and wait for the procedure to complete.
1.5. Clean install Windows 10
On the other hand, if the previous workarounds fell short, you can always reinstall the system. The important thing to remember is to perform a clean reinstall rather than an upgrade. Additionally, make sure to save your credentials and backup your data from the system partition.
The reinstallation isn’t exactly a complicated process, but if you’re not certain, you can always turn to this article with detailed explanations.
Editor’s Note: This article continues on the next page with more solutions to fix specific Start Menu issues. If you want to read more about the Start Menu, check out our collection of guides.
How to fix common Start Menu bugs on Windows 10
- Windows 10 is a feature-rich operating system, with an intuitive UI designed with productivity in mind.
- As its name suggests, the Start Menu is a Windows 10 feature that acts as a door, offering users quick access to the programs installed on their devices.
- If your Start Menu keeps on flashing, scrolling by itself, won’t do anything when you click on it, and more, then this guide is what you need. We’ll show you how you can quickly fix common Start Menu bugs.
- Visit our page dedicated to the Start Menu to learn how you can optimize your settings on Windows 10.
- Download Restoro PC Repair Tool that comes with Patented Technologies (patent available here).
- Click Start Scan to find Windows issues that could be causing PC problems.
- Click Repair All to fix issues affecting your computer’s security and performance
- Restoro has been downloaded by 0 readers this month.
2. How to fix specific Start Menu issues
Please follow the instructions listed in this section of the guide first. Then, if the issue persists, you can use the general solutions listed on the first page. Let’s dive in.
2.1. Can’t click on Start Menu in Windows 10
If your left or right-click won’t work on the Start Menu, here are 4 solutions to fix this problem:
- Run an SFC (System File Checker) scan
- Run the Hardware and Sound Troubleshooter
- Create a new user account
- Run the Microsoft Start Menu troubleshooter
2.2. Windows 10 Start Menu is full screen
The quickest way to fix that annoying Start Menu full screen issue is to use the correct settings.
- Open the Settings app
- Go to Personalization
- In the left sidebar, click on Start
- Locate the option Use Start full screen. and turn off the toggle.
- Restart your computer.
2.3. Windows 10 Start Menu is black
1. Restart Windows Explorer
- Close your Windows Explorer window if it’s active
- Right-click on your taskbar, click on Task Manager
- Go to the Processes and locate the Windows Explorer process
- Right-click on Windows Explorer and click Restart.
Running outdated graphics driver versions could explain why your Start Menu is black. Check out our dedicated guide to learn how you can update outdated drivers.
2. Update your graphics driver
2.4. Windows 10 Start Menu is locked
IT admins can lock down sections of the Start Menu so that users cannot add or remove tiles. Your admin is the only person who can change the Group Policy settings so as to unlock the Start Menu.
If this issue affects your personal computer, use the general troubleshooting solutions listed in the first part of this guide.
2.5. Windows 10 Start Menu is small
If your Start Menu is too small, you can fix that by simply resizing it. To do this:
- Click on the Start Menu
Move your mouse cursor to the edge of the Start Menu. - Stop when the cursor turns into a double-sided arrow
- Press and hold the left mouse button and and drag your cursot up or down to resize the Start Menu.
2.6. Windows 10 Start Menu just flashes
If the Start Menu keeps on flickering, one of these 3 solutions will help you fix it:
- Uninstall incompatible apps and programs, especially if you noticed the problem occurred after you install a particular program
- Install the latest display drivers
- End the Windows Shell Experience Service from the Task Manager.
2.7. Windows 10 Start Menu keeps scrolling
If the Start Menu keeps on scrolling up or down, most likely this issue is triggered by your mouse settings. To fix it:
- Go to Settings >Devices > Mouse > turn off the toggle for the option Scroll inactive windows when I Hover over them and restart your computer.
- Update or roll back your mouse driver
- Uninstall your mouse driver, disconnect the device and then plug it back in.
2.8. Windows 10 Start Menu keeps opening and closing
To solve this problem, do the following:
- Re-register the Start Menu with PowerShell (see solution 4 from the first part of the article)
- Run SFC scan
- Remove recently installed updates and programs
- Scan your computer for malware
With that, we finished our list. Don’t forget that Microsoft fixes general OS bugs, including Start Menu issues with swift patches on Patch Tuesday. So, be sure to install the latest updates.
In addition, feel free to tell us what do you think about the Windows 10 Start Menu. The comments section is below!
Nasty Windows 10 bug causes Start Menu to act up: What to do
By Phillip Tracy 15 September 2020
September updates are causing a wide range of issues
The Start Menu is the main interface in Windows 10. Without it, there is not a whole lot you can do. That’s why the latest Windows 10 update bug has become a serious problem for a handful of users.
Reported by Windows Latest, September updates KB4571756 and KB4574727 cause Start Menu crashes for some users as well as a host of other problems. Those aren’t trivial, either, and include sign-in issues, a user profile bug and the dreaded Blue Screen of Death.
The most common problem — and this is becoming a trend — is the inability to download the update in the first place (which, if you ask me, could be a saving grace). Angered users are flooding Reddit and Microsoft’s community forums to report about the problems.
Before you start saving for a MacBook, it’s worth noting these issues only appear to affect a small portion of Windows 10 users — in all likelihood, you won’t encounter them. Regardless, Microsoft needs to clean up its mess because it’s preventing customers from using their laptops.
Start menu Windows 10 bug
Microsoft hasn’t revealed the cause of these problems but Windows Latest speculates the culprit could be a change in the tablet experience when 2-in-1 laptops are docked. Convertibles are fine but normal clamshell laptops are now having issues using a mouse and keyboard to access the Action Center and Start Menu.
«I’ve tried Chkdsk, Sfc, restarting Windows Explorer and disabling and reenabling Action Center. I can’t rename the Usrclass.dat file because it is in use,” one user wrote in Microsoft’s community forum.
Other reports say the Start Menu and Windows Search generates a blank box instead of search results. This sounds similar to a previous Windows 10 bug that several Laptop Mag staffers encountered back in February. It was fixed, then broke again before Microsoft finally put the issue to bed. Or so we thought.
Along with issues with the Start Menu, the latest September updates are preventing users from signing in to their devices. Once logged in, Windows 10 kicks these unlucky users right back out.
Furthermore, a profile bug forces people into using a temporary user profile. When that happens, Windows 10 loads without any personalized settings, themes or data.
What to do
I wish there were a simple solution to these problems, but an official fix probably won’t arrive until Microsoft releases another update with patches for this one. Your best bet is to revert to an earlier version of Windows that you know to be stable.
To do so, open the settings menu by pressing the Windows icon in the bottom-left corner then click the Settings gear (or type «Settings» in Windows Search).
Choose «Update and Security» from the main Settings page. On the left side, ensure «Windows Update» is selected. Toward the bottom, you’ll see «View Update History.» Select it. Press the first option: «Uninstall update» and choose the appropriate update version to uninstall.


