- Create a local user or administrator account in Windows 10
- How to Make a User Account an Administrator on Windows 10
- Method 1: Use Windows 10’s Settings utility
- Method 2: Change user account type from the Control Panel
- Method 3: Change account type from the User Accounts utility
- Method 4: Change user account type from an elevated Command Prompt
- Создание учетной записи локального пользователя или администратора в Windows 10
Create a local user or administrator account in Windows 10
You can create a local user account (an offline account) for anyone who will frequently use your PC. The best option in most cases, though, is for everyone who uses your PC to have a Microsoft account.
If needed, the local user account can have administrator permissions; however, it’s better to just create a local user account whenever possible.
Caution: A user with an administrator account can access anything on the system, and any malware they encounter can use the administrator permissions to potentially infect or damage any files on the system. Only grant that level of access when absolutely necessary and to people you trust.
As you create an account, remember that choosing a password and keeping it safe are essential steps. Because we don’t know your password, if you forget it or lose it, we can’t recover it for you.
If you’re using Windows 10, version 1803 and later, you can add security questions as you’ll see in step 4 under Create a local user account. With answers to your security questions, you can reset your Windows 10 local account password. Not sure which version you have? You can check your version.
Create a local user account
Select Start > Settings > Accounts and then select Family & other users. (In some versions of Windows you’ll see Other users.)
Select Add someone else to this PC.
Select I don’t have this person’s sign-in information, and on the next page, select Add a user without a Microsoft account.
Enter a user name, password, or password hint—or choose security questions—and then select Next.
Change a local user account to an administrator account
Select Start > Settings > Accounts .
Under Family & other users, select the account owner name (you should see «Local Account» below the name), then select Change account type.
Note: If you choose an account that shows an email address or doesn’t say «Local account», then you’re giving administrator permissions to a Microsoft account, not a local account.
Under Account type, select Administrator, and then select OK.
Sign in with the new administrator account.
How to Make a User Account an Administrator on Windows 10
There are two different kinds of user accounts on Windows 10 – Standard User accounts and Administrator accounts. The difference between these two user account types is not of functionality but of permissions and authority.
Administrator accounts have complete autonomy and control over every single aspect of a Windows 10 computer – from changing computer settings for all user accounts on the computer and installing applications to getting through User Access Control (UAC), Administrator accounts can do it all. Standard User accounts, on the other hand, are relatively more limited in what they have control over – Standard Users can launch applications but not install any new ones, they can change settings but only as long as the settings they fiddle with don’t affect any other user accounts on the computer, and you need to type in the username and password for an Administrator account to get through any UAC prompts on a Standard User account on Windows 10.
On older versions of Windows, another user account type known as “Guest” used to exist, but nothing of the sort exists on Windows 10. When you create a new user account on a Windows 10 computer, it is created as a Standard User account by default, although you can choose to turn it into an Administrator account while you create it. Standard User accounts are extremely useful for when you need to create a user account for a child or for someone who cannot be trusted to not make a mess of things if given too much power but won’t fit the bill for someone who needs to have a significant amount of access to and control over a computer.
If you want to give a Standard User account on a Windows 10 computer more autonomy and control over the computer, you need to turn it into an Administrator account, which is something that is definitely possible. The following are the four different ways you can go about turning a Standard User account on a Windows 10 computer into an Administrator account:
Note: It is recommended that you try to turn a Standard User account into an Administrator account while logged into an existing Administrator account since most of the methods listed and described require administrative privileges. If you’re not already logged into an Administrator account, you will have to get through UAC prompts using the username and password for an Administrator account on the computer.
Method 1: Use Windows 10’s Settings utility
First and foremost, you can use Windows 10’s Settings utility to turn an already existing Standard User account into an Administrator account. Doing so is quite simple as you use a graphics-based interface to get the job done. If you would like to do so, you need to:
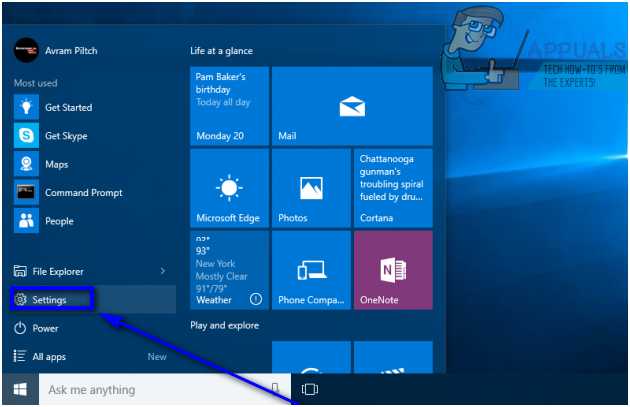
- Open the Start Menu.
- Click on Settings to open Windows 10’s Settings utility.

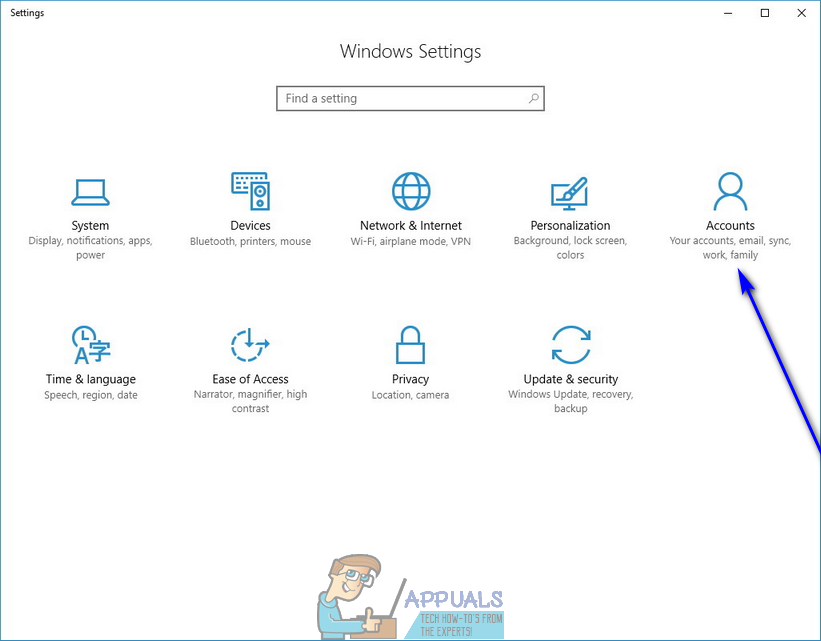
- Click on Accounts.
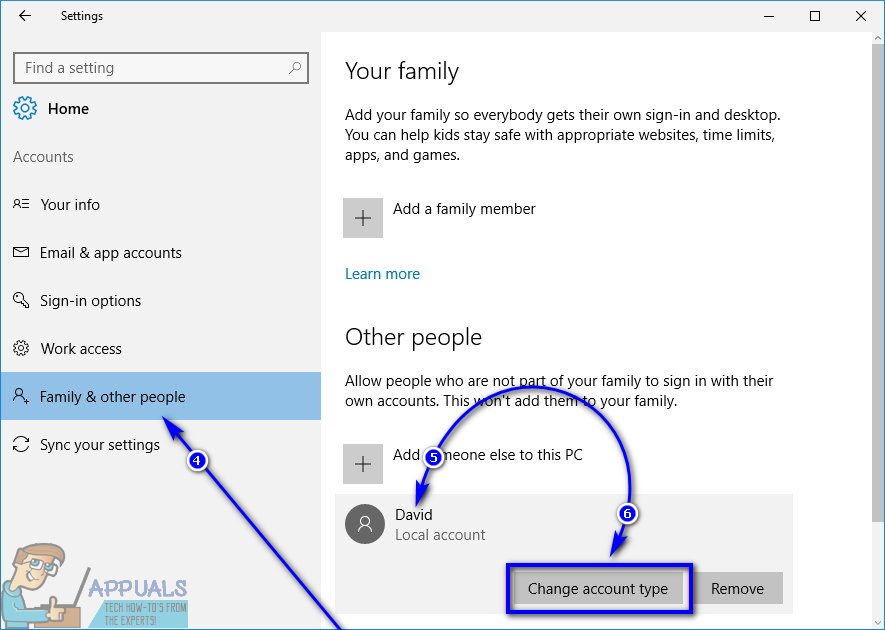
- In the left pane of the window, click on Family & other people.
- Under the Other people section in the right pane, locate and click on the Standard User account you want to make an Administrator.
- Click on Change account type.
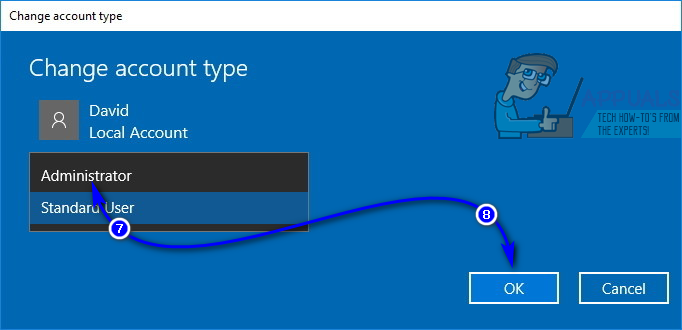
- Open the dropdown menu located directly under the Account type option and click on Administrator to select it.
- Click on OK.
- Close the Settings utility.
As soon as you do so, the selected Standard User account will be turned into an Administrator account and will be given all the same privileges as the average Administrator account. The same process described above can also be used to turn an Administrator account into a Standard User account – all a user needs to do is click on Standard User instead of Administrator in the dropdown menu in step 7.
Method 2: Change user account type from the Control Panel
One of the most prominent features of the Windows Operating System is the ability to go about doing the same thing a number of different ways. Windows 10 also has the Control Panel – a utility that has been a constant throughout the many different iterations of Windows that have existed, and it too can be used to change the account type of a user account. To turn a Standard User account into an Administrator account using this method, you need to:
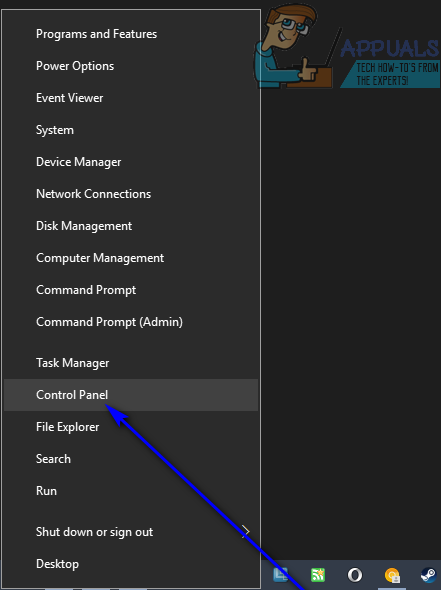
- Right-click on the Start Menu button or press the Windows Logo key + X to open the WinX Menu.
- Click on Control Panel in the WinX Menu to launch the Control Panel.
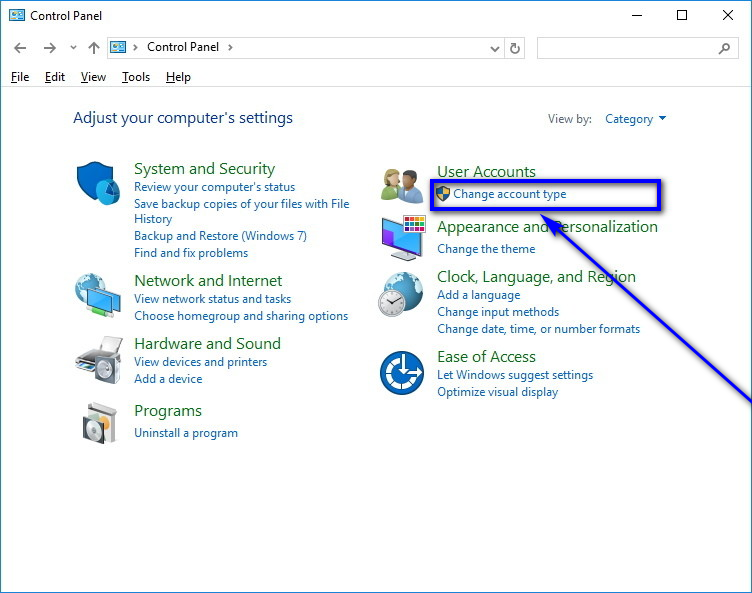
- With the Control Panel in Category view, click on Change account type under the User Accounts section.
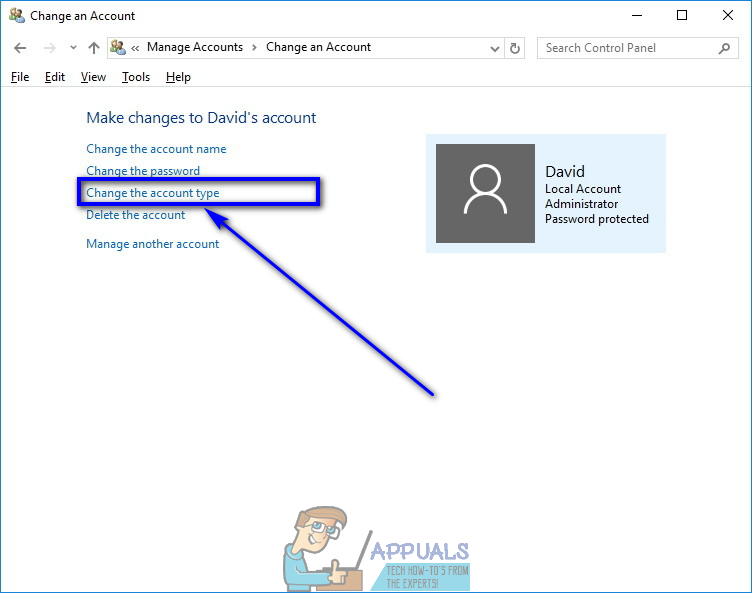
- Locate and click on the Standard User account you want to turn into an Administrator account.
- Click on Change the account type.
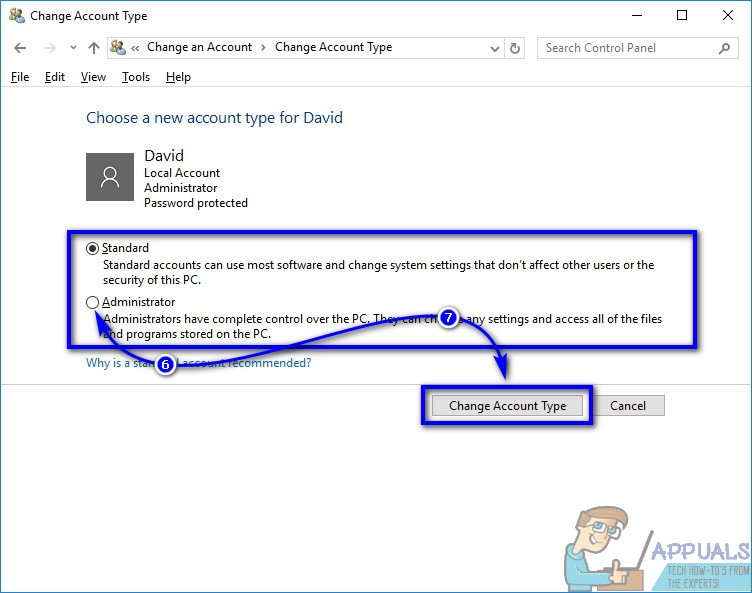
- Click on the radio button next to the Administrator option to select it.
- Click on Change Account Type and you’re all done!
You can now close the Control Panel as the selected Standard User account will have been successfully turned into an Administrator account.
Method 3: Change account type from the User Accounts utility
A slightly more sophisticated but a lot more direct way to change the account type of a user account on Windows 10 is to do so from the User Accounts utility that exists on all versions of the Windows Operating System. To use this method, you need to:
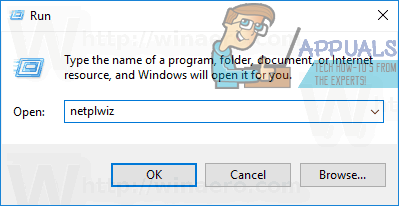
- Press the Windows Logo key + R to open a Run dialog.
- Type netplwiz into the Run dialog and press Enter to launch the User Accounts utility.
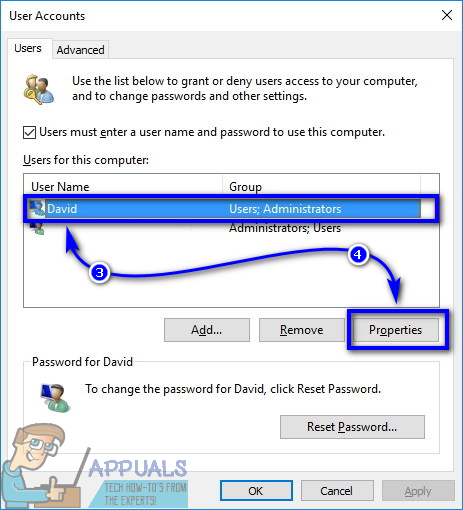
- Under the Users for this computer: section, locate and click on the Standard User account you want to turn into an Administrator account to select it.
- Click on Properties.
- Navigate to the Group Membership tab.
- Click on the radio button next to the Administrator option to select it. In this dialog, you will also see an option known as Other, selecting which will allow you to choose from an array of different access and control levels ranging from Backup Operators and Power Users to Remote Desktop Users, but none of these have the same access to and control over a Windows 10 computer as an Administrator account, so you’re better off not paying any attention to them.
- Click on Apply and then on OK.
- Click on Apply and then on OK in the User Accounts window.
Method 4: Change user account type from an elevated Command Prompt
Last, but certainly not the least, you can turn a Standard User account on a Windows 10 computer into an Administrator account, all from the comfort of an elevated Command Prompt. All it takes is a couple of simple commands! If you would like to use this method to turn a Standard User account into an Administrator account, you need to:
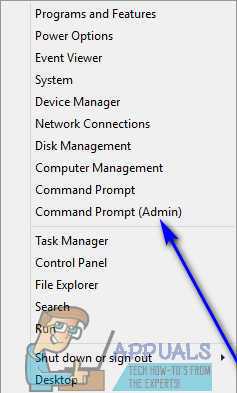
- Right-click on the Start Menu or press the Windows Logo key + X to open the WinX Menu.
- Click on Command Prompt (Admin) to launch an elevated Command Prompt that has administrative privileges.
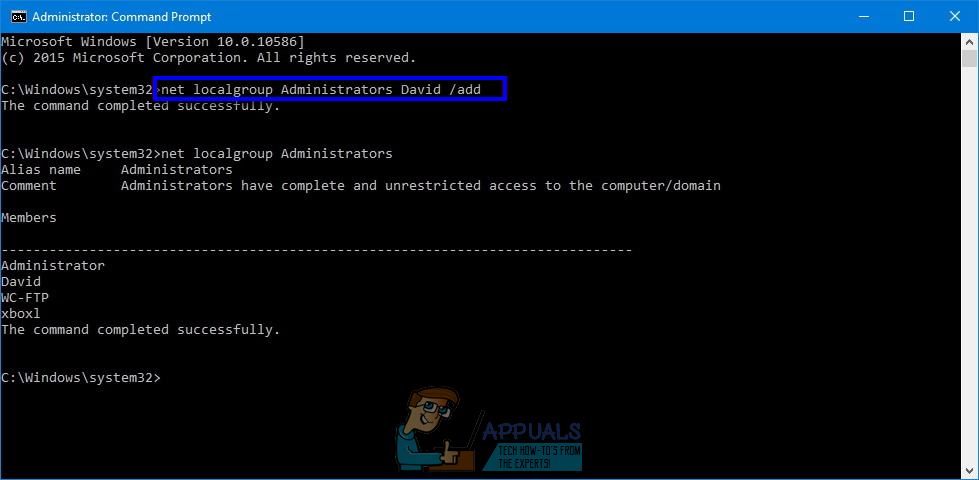
- Type the following command into the elevated Command Prompt, replacing AccountName with the exact name of the Standard User account you want to turn into an Administrator account, and then press Enter:
net localgroup Administrators AccountName /add - As soon as the command has been executed, close the elevated Command Prompt. The selected Standard User account will have been successfully turned into an Administrator account.
While this guide has been engineered to be used on Windows 10, all of the methods listed and described above (apart from Method 1, of course) can also be used to turn Standard User accounts on older versions of the Windows Operating System into Administrator accounts with just a tiny bit of tinkering to make some of the steps viable – opening the Control Panel a different way on versions of Windows that don’t have the WinX Menu, for example.
Создание учетной записи локального пользователя или администратора в Windows 10
Вы можете создать локализованную учетную запись пользователя (автономную учетную запись) для всех пользователей, которые часто используют ваш компьютер. Однако в большинстве случаев рекомендуется создать для всех пользователей компьютера учетные записи Майкрософт.
При необходимости учетная запись локального пользователя может иметь разрешения администратора; однако лучше по возможности просто создать учетную запись локального пользователя.
Внимание: Пользователь с учетной записью администратора может получить доступ ко всем данным в системе, а любые вредоносные программы, с которыми они сталкиваются, могут использовать разрешения администратора для потенциального заражения или повреждения любых файлов в системе. Предоставляйте этот уровень доступа только при абсолютной необходимости и только людям, которым вы доверяете.
При создании учетной записи помните, что выбор пароля и его сохранение являются очень важными шагами. Поскольку мы не знаем вашего пароля, если вы забудете или потеряете его, нам не удастся его восстановить для вас.
Если вы используете Windows 10 версии 1803 или более поздней, можно добавить секретные вопросы, как описано в шаге 4 раздела Создание учетной записи локального пользователя. С помощью ответов на секретные вопросы можно сбросить пароль к вашей локальной учетной записи Windows 10. Все еще не знаете, какая версия вам нужна? Проверьте, какая версия у вас сейчас.
Создание учетной записи локального пользователя
Выберите Пуск > Параметры > Учетные записи и щелкните Семья и другие пользователи.(В некоторых версиях Windows вы увидите пункт Другие пользователи.)
Выберите Добавить пользователя для этого компьютера.
Выберите пункт У меня нет учетных данных этого пользователя и на следующей странице нажмите Добавить пользователя без учетной записи Майкрософт.
Введите имя пользователя, пароль, подсказку о пароле или выберите секретные вопросы, а затем нажмите Далее.
Изменение учетной записи локального пользователя на учетную запись администратора
Выберите Пуск > Параметры > Учетные записи .
В разделе Семья и другие пользователи щелкните имя владельца учетной записи и нажмите Изменить тип учетной записи.
Примечание: Если вы выбрали учетную запись, в которой указан адрес электронной почты или не помечено «Локализованная учетная запись», вы даете разрешения администратора для учетной записи Майкрософт, а не локальной учетной записи.
В разделе Тип учетной записи выберите Администратор, и нажмите OK.
Войдите в систему с новой учетной записью администратора.


