- Создание загрузочной флешки Windows 10 в Linux
- Загрузочная флешка Windows 10 с помощью WoeUSB
- Создание загрузочной флешки Windows 10 в Linux без программ
- Create a Bootable Windows 10 USB in Linux With Ubuntu/Debian GUI
- Method 1 . Create a Bootable Windows 10 USB in Linux with woeusbgui GUI app
- Clone WoeUSB
- Make a Bootable Windows 10 USB from Linux
- Method 2 . Bash shell script to create a bootable Windows 10 USB device from one ISO file
- Method 3 . Create a Bootable Windows 10 USB in Linux with CLI apps only
- Download and install ms-sys
- Create a ntfs partition
- Linux create windows 10 Bootable USB by coping installer files
- Use ms-sys command to write mbr to create a bootable Windows 10 pro usb in Linux
- Conclusion
- How to Create a Windows 10 Installer USB from Linux
- Formatting your USB stick
- Create a Windows 10 USB Installer on Debian 10 using dd
- Create a Windows 10 USB Installer on Debian 10 using UNebootin
- Related articles:
- About the author
- David Adams
Создание загрузочной флешки Windows 10 в Linux
 Если вам по той или иной причине потребовалась загрузочная флешка Windows 10 (или другой версии ОС), при этом на имеющемся компьютере в наличии только Linux (Ubuntu, Mint, другие дистрибутивы), вы сравнительно легко можете записать её.
В этой инструкции пошагово о двух способах создать загрузочную флешку Windows 10 из Linux, которые подойдут как для установки на UEFI-системе, так и для того, чтобы установить ОС в Legacy режиме. Также могут пригодиться материалы: Лучшие программы для создания загрузочной флешки, Загрузочная флешка Windows 10.
Загрузочная флешка Windows 10 с помощью WoeUSB
Первый способ создания загрузочной флешки Windows 10 в Linux — использование бесплатной программы WoeUSB. Созданный с её помощью накопитель работает и в UEFI и в Legacy режиме.
Для установки программы используйте следующие команды в терминале
После установки порядок действий будет следующим:
- Запустите программу.
- Выберите ISO образ диска в разделе «From a disk image» (также, при желании, можно сделать загрузочную флешку с оптического диска или смонтированного образа).
- В разделе «Target device» укажите флешку, на которую будет записан образ (данные с неё будут удалены).

- Нажмите кнопку Install и дождитесь завершения записи загрузочной флешки.
- При появлении ошибки с кодом 256 «Source media is currently mounted», размонтируйте образ ISO с Windows 10.
- При ошибке «Target device is currently busy», размонтируйте и отключите флешку, затем снова подключите её, обычно помогает. Если не сработало, попробуйте предварительно отформатировать её.


На этом процесс записи завершен, можно использовать созданный USB накопитель для установки системы.
Создание загрузочной флешки Windows 10 в Linux без программ
Этот способ, пожалуй, ещё проще, но подойдет только в том случае, если вы планируете загружаться с созданного накопителя на UEFI-системе и устанавливать Windows 10 на GPT диск.
- Отформатируйте флешку в FAT32, например, в приложении «Диски» в Ubuntu.
- Смонтируйте образ ISO с Windows 10 и просто скопируйте всё его содержимое на отформатированную флешку.


Загрузочная флешка Windows 10 для UEFI готова и с неё можно без проблем загрузиться в EFI-режиме.
Источник
Create a Bootable Windows 10 USB in Linux With Ubuntu/Debian GUI
Warning: Writing or selecting the wrong kind of boot record to a device (USB/hard disk) might destroy partition information or file system or data forever. Be careful with partition and disk names.
Method 1 . Create a Bootable Windows 10 USB in Linux with woeusbgui GUI app
This method is recommended for all new Linux users as it requires less typing at the CLI and easy to use. WoeUSB is a simple Linux program to create a Windows 10 USB stick installer from a real Windows DVD or ISO image. From the Github page:
WoeUSB is a simple tool that enable you to create your own usb stick windows installer from an iso image or a real DVD. It is a fork of Congelli501’s WinUSB. This package contains two programs:
- woeusb: A command-line utility that enables you to create your own bootable Windows installation USB storage device from an existing Windows Installation disc or disk image
- woeusbgui: A GUI wrapper of woeusb based on WxWidgets
It supports Windows Vista, Windows 7, Window 8.x, Windows 10. All languages and any version (home, pro, ltsb, …) and Windows PE.
Clone WoeUSB
Type the following git command git clone https://github.com/WoeUSB/WoeUSB.git
Set the application version string:
cd WoeUSB/
./setup-development-environment.bash
Install WoeUSB’s build dependencies on a Debian or Ubuntu Linux using the apt-get command or apt command sudo apt-get install devscripts equivs gdebi-core
mk-build-deps
sudo gdebi woeusb-build-deps_*.deb
dpkg-buildpackage -uc -b
sudo gdebi ../woeusb*.deb
Install WoeUSB to create usb stick windows 10 installer from an iso image on Linux
Make a Bootable Windows 10 USB from Linux
Method 2 . Bash shell script to create a bootable Windows 10 USB device from one ISO file
Install it as follows from the Github:
sudo apt install extlinux
mkdir
/bin/
curl -L https://git.io/bootiso -O
chmod +x bootiso
To list your usb pen drive run:
/bin/bootiso -l
To write create a bootable Windows 10 USB from an ISO image named
Create a Windows 10 USB bootable device from an ISO image using a bash shell script
Method 3 . Create a Bootable Windows 10 USB in Linux with CLI apps only
First you need to install a tool called ms-sys. It is a Linux cli app for writing Microsoft compatible boot records. This program does the same as Microsoft “ fdisk /mbr ” to a hard disk except that it does not copy any system files, only the boot record written.
- No ads and tracking
- In-depth guides for developers and sysadmins at Opensourceflare✨
- Join my Patreon to support independent content creators and start reading latest guides:
- How to set up Redis sentinel cluster on Ubuntu or Debian Linux
- How To Set Up SSH Keys With YubiKey as two-factor authentication (U2F/FIDO2)
- How to set up Mariadb Galera cluster on Ubuntu or Debian Linux
- A podman tutorial for beginners – part I (run Linux containers without Docker and in daemonless mode)
- How to protect Linux against rogue USB devices using USBGuard
Join Patreon ➔
Download and install ms-sys
Grab the latest version from this page. Use the wget command or curl command to grab the file:
cd /tmp/
wget https://nchc.dl.sourceforge.net/project/ms-sys/ms-sys%20development/2.5.2/ms-sys-2.5.2.tar.gz
Untar the tar ball named ms-sys-2.5.2.tar.gz using the tar command:
tar -zxvf ms-sys-2.5.2.tar.gz
If you do not have gnu gcc c/c++ compiler installed on a Debian or Ubuntu Linux, install it using the apt command or apt-get command:
sudo apt install build-essential
See the following links for more info:
Build and install it:
cd ms-sys-2.5.2
make
sudo make install
Create a ntfs partition
Linux create windows 10 Bootable USB by coping installer files
You need copy files from Windows 10 ISO image to usb disk. Create a folder on Linux using the mkdir command sudo mkdir /mnt/win10/
Mount Windows 10 ISO image in Linux using the mount command:
sudo mount -t udf -o loop,ro,unhide /mnt/win10/
## I got a win10 ltsb iso file in
/Downloads/ ##
sudo mount -t udf -o loop,ro,unhide
/Downloads/14393.0.160715-1616.RS1_RELEASE_CLIENTENTERPRISE_S_EVAL_X64FRE_EN-US.ISO /mnt/win10/
Mount usb pen drive too:
sudo mkdir /mnt/usb/
sudo mount /dev/sdc1 /mnt/usb/
df -h | grep ‘/mnt’
Ready to burn the Windows 10 ISO to a USB on Linux
Use ms-sys command to write mbr to create a bootable Windows 10 pro usb in Linux
In order to burn the Windows 10 ISO to a USB and boot it, run:
sudo ms-sys -7 /dev/sdc
Sample outputs:
Unmount /dev/sdc:
sudo sync
sudo umount /mnt/usb/
Now boot from USB pen and you should see Windows 10 installer as follows:
Conclusion
And there you have it. You just created a Windows 10 bootable USB stick on Linux using two different methods. Creating a Microsoft bootable Windows 10 USB stick from Linux is very simple, and I hope it helps you manage your enterprise workload without leaving Linux desktop.
🐧 Get the latest tutorials on Linux, Open Source & DevOps via
Источник
How to Create a Windows 10 Installer USB from Linux
Formatting your USB stick
This step is only necessary for users using the dd technique without additional space on their USB devices, if you are using the graphical method to create a booteable USB stick with UNebootin or have enough space for the Windows installer on an used USB stick you can omit this step.
To begin, before plugging in the USB device check the current disks attached to your computer by running:
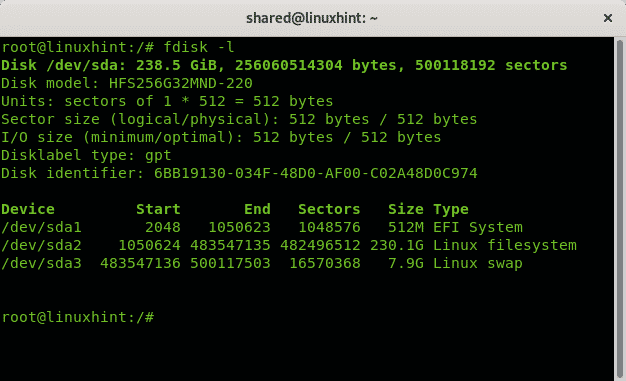
As you see in the output above the only device is /dev/sda with 3 partitions, /dev/sda1, /dev/sda2 and /dev/sda3. Now plug in your USB stick into your computer and run fdisk again:
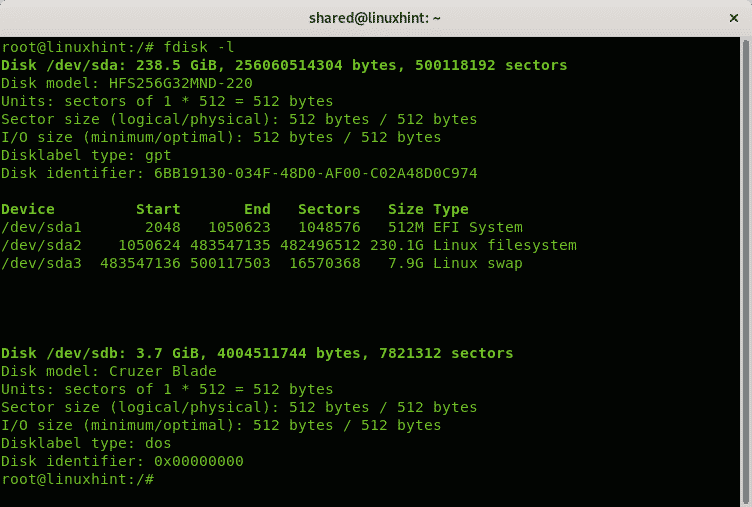
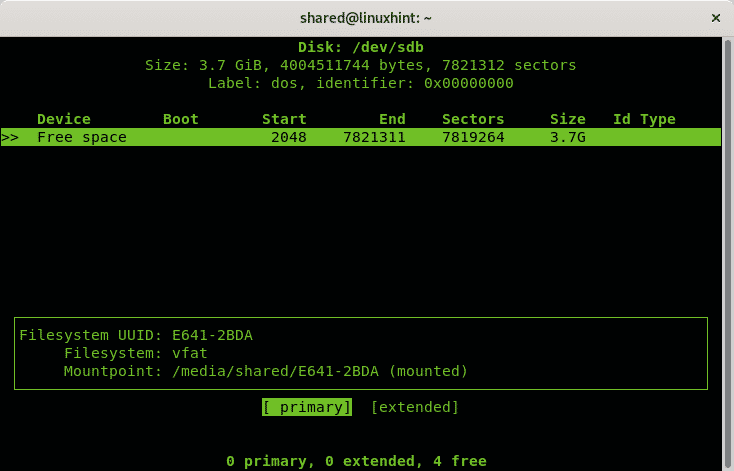
You can see the new device /dev/sdb model Cruzer Blade of 3.7GB, that’s the pendrive on which Windows installer will be installed.
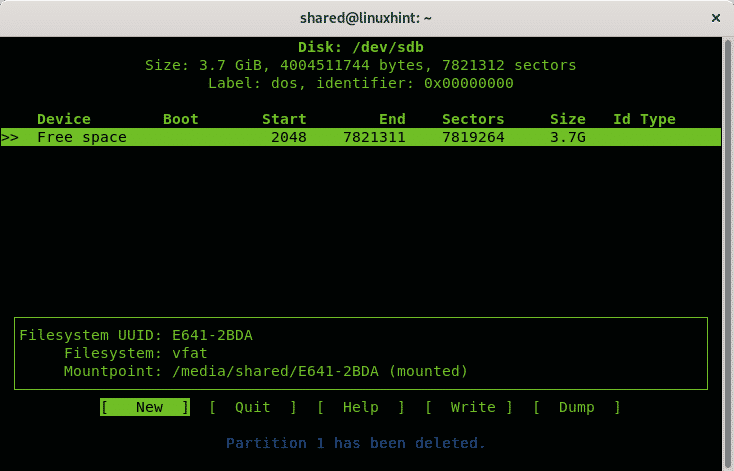
Since it is a small USB disk, I will format it to guarantee space for Windows, the dd command we’ll use to copy the ISO image to the pendrive won’t remove existing information on it, this step is not mandatory and if you have a big pendrive with existing information and available space you can omit it leaving all the data together inside the disk.
If you want to proceed with the format, before formatting the pendrive run:
Once started cfdisk will show the chosen disk (sdb in my case) and the existing partitions, in my case all the space is free. To create a FAT 32 partition select NEW and press ENTER.
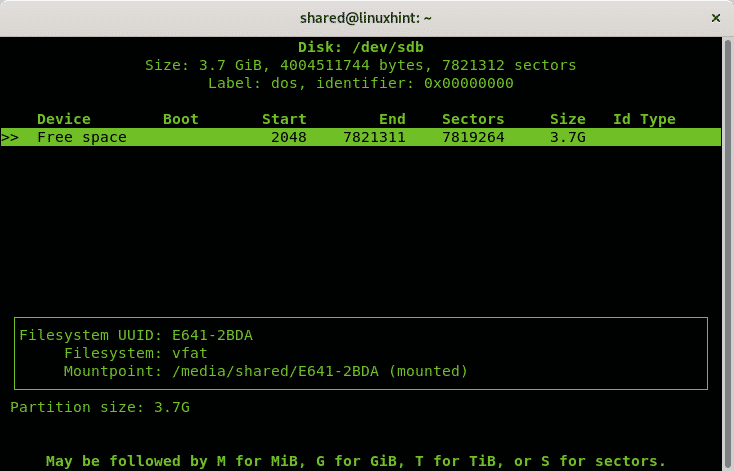
Select the space for the fat partition, you can leave the entire disk, press ENTER.
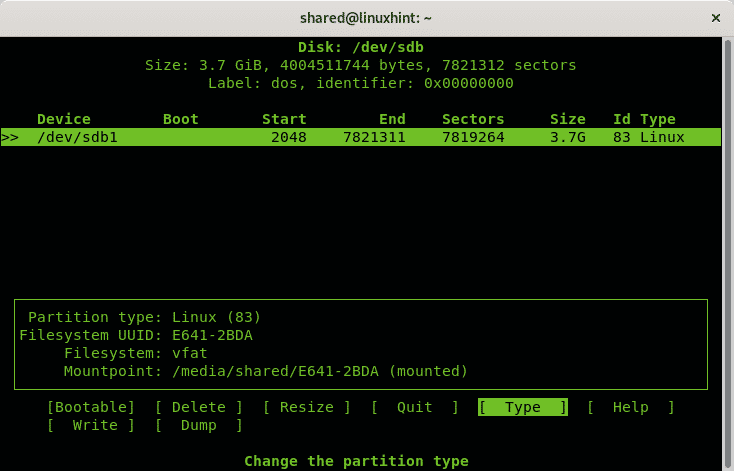
Then select primary and press ENTER again.
Once back in the main menu select the option TYPE and press ENTER.
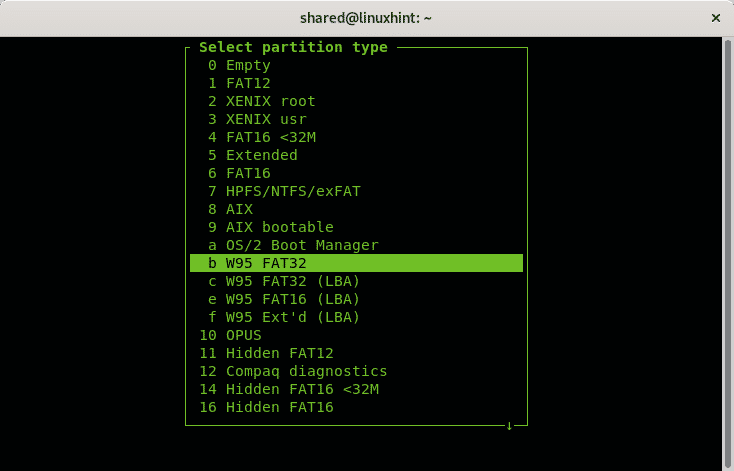
Select the option “b W95 FAT 32” and press ENTER.
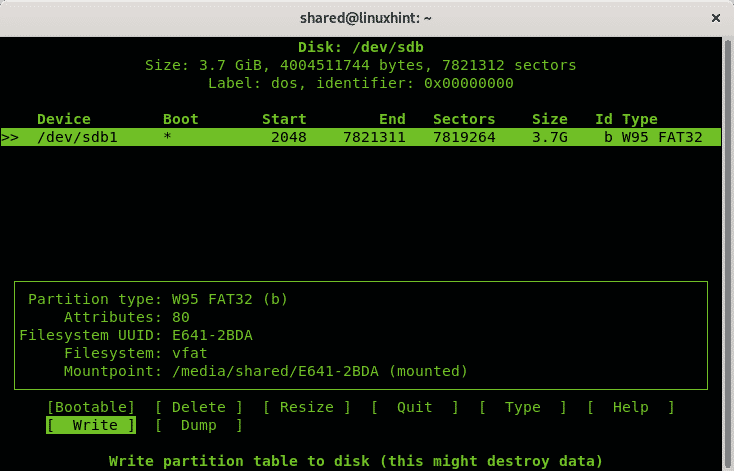
In the main menu select “Booteable” and press ENTER.

Finally press on “Write” to save all changes on the USB drive.
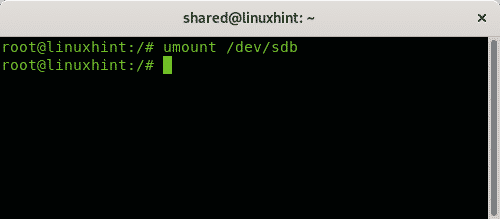
Now umount the disk by running:
Once unmounted to format the USB stick creating a FAT filesystem run:
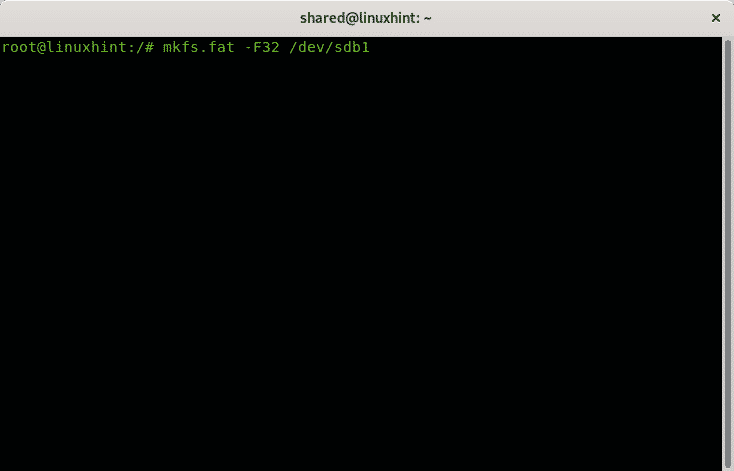
Depending on your device the process may take a while, once finished it will let you know the process ended successfully.
Create a Windows 10 USB Installer on Debian 10 using dd
should be replaced for your Windows ISO image path and for your device letter.
In my case I run:

Where:
bs: read and write bytes
if: reads the indicated file as origin
of: writes the indicated file as destination
conv=fdatasync: assures the data will be written in destination before the operation ends.
status=progress: will show progress in real time, otherwise dd doesn’t show progress.
At the end of the process the program will let you know the operation ended successfully.

NOTE: when you reboot your computer to boot make sure your BIOS is configured to boot from the USB stick or press the proper key to allow selecting the boot device on boot.
Create a Windows 10 USB Installer on Debian 10 using UNebootin
While the previous method is the recommended there is a graphical option for users who dislike the text mode, the software explained in this tutorial is UNebootin and it is available for Linux, Windows and Mac at https://unetbootin.github.io/linux_download.html.
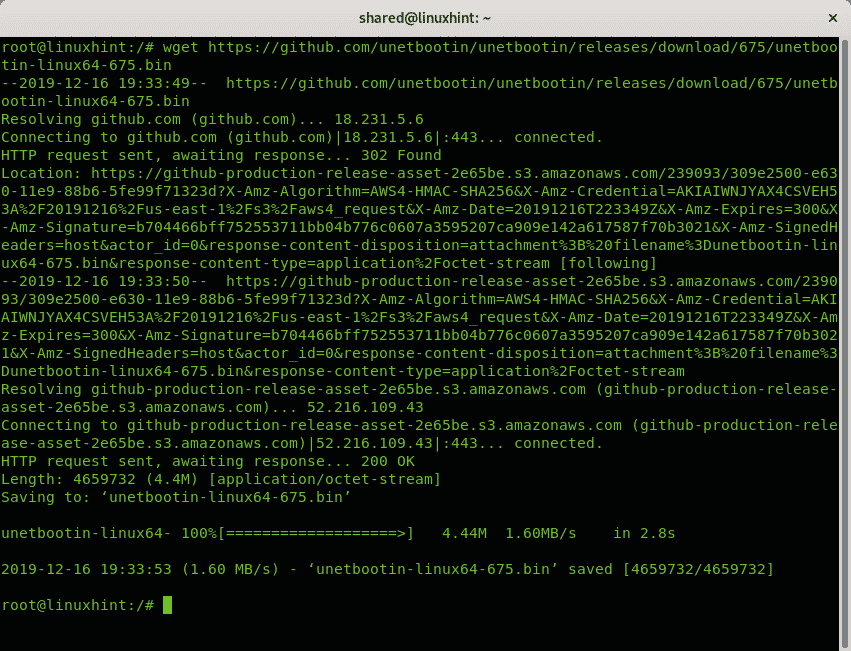
To download the 64x version you can use wget, run:
To download the 32x version using wget run:
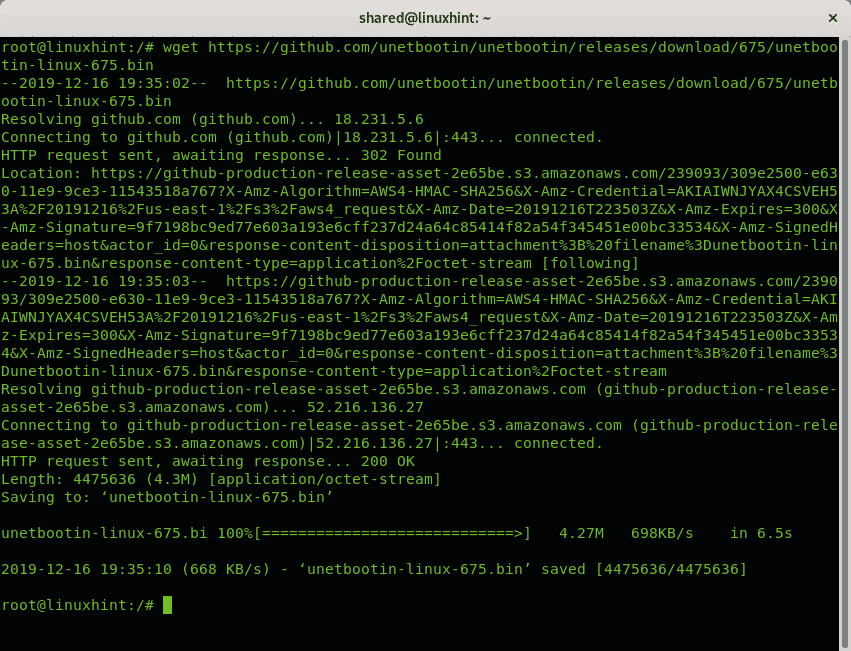
In my case I got the 64 bits version, once downloaded you need to give execution rights to the file by running:

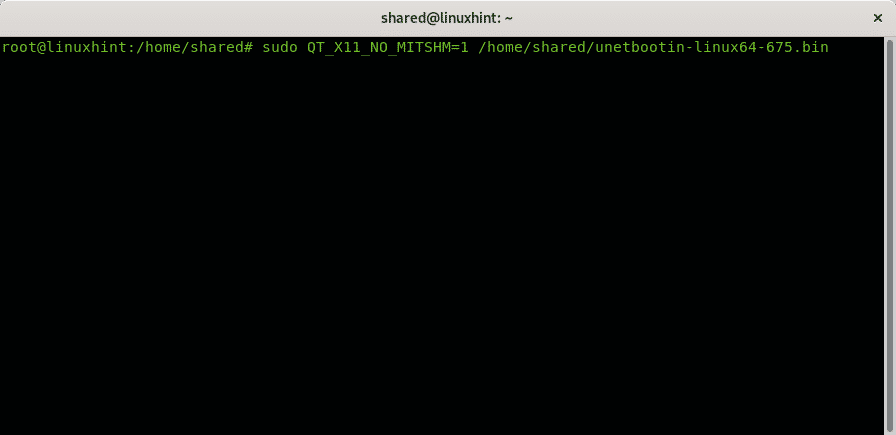
Then as normal user run
And as root run:
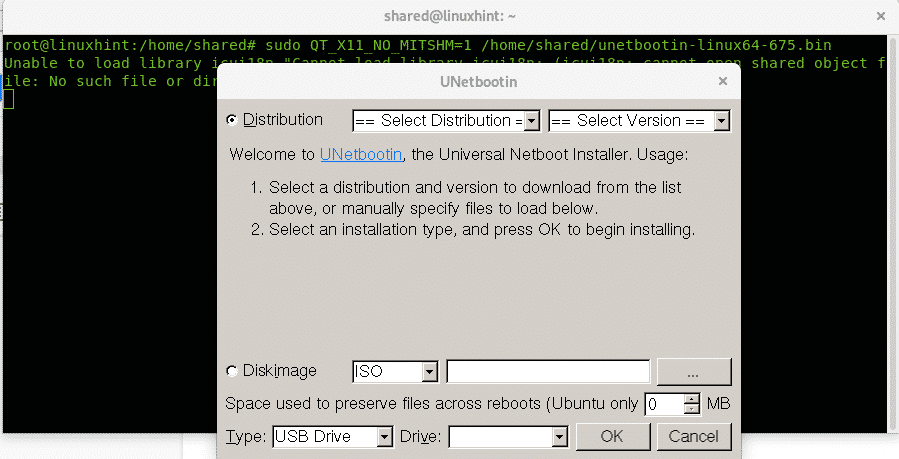
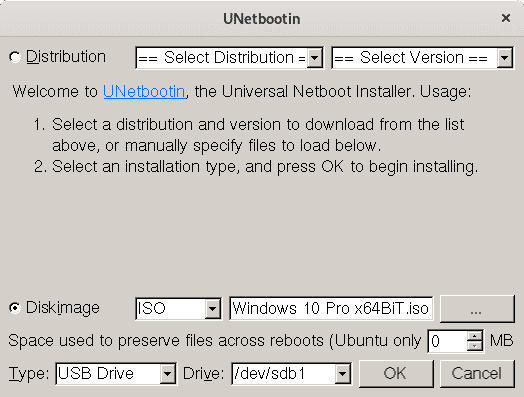
UNetbootin will prompt, unselect “Distribution” and instead select “Disk Image” and select your ISO’s path, the disk type and the drive:
The process may take several minutes showing the steps of the image below: 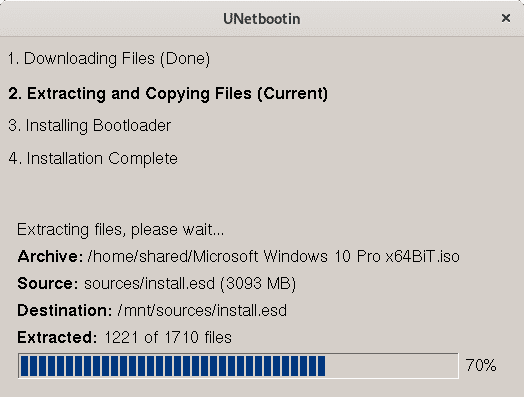
Once finished you can reboot as instructed in the final screen:
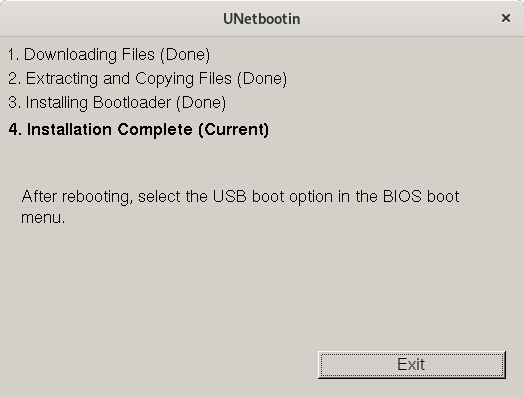
Now you can reboot your system, make sure your BIOS is configured to boot from USB devices.
I hope you found this brief tutorial on Windows booteable USB sticks useful, thank you for reading it and consider using LinuxHint support channel in case you need help with any of the steps described above or any Linux or networking related issue.
Keep following LinuxHint for additional updates and tips on Linux and Networking.
Related articles:
About the author
David Adams
David Adams is a System Admin and writer that is focused on open source technologies, security software, and computer systems.
Источник


