- Cursor Set — Default Windows 10
- Default Windows 10 Cursors
- Resources
- by eough
- See also
- Recent reviews and comments
- How to use Custom Cursor for Windows 10
- Q: How to install Custom Cursor for Windows 10 app?
- Go to Windows download page of Custom Cursor website
- Installation of Custom Cursor for Windows 10
- Installation
- Installed Custom Cursor for Windows 10
- Q: How to use Custom Cursor for Windows 10 app?
- Custom Cursor home menu
- Setting the cursor
- Changing the size
- Default Cursor
- Q: How to download cursors from site?
- Accessing Custom Cursor website
- Adding cursors to Custom Cursor for Windows 10
- Setting a cursor from out website
- Q: How to add your own cursors to Custom Cursor for Windows app?
- Opening add own cursors interface
- Add own cursors interface
- Uploading new cursors and other pointers
- Activating own cursor packs
- Q: How to manage your Custom Cursor for Windows app?
- Deleting downloaded cursor packs
- Editing own cursor packs
- You still do not have a Custom Cursor for Chrome extension?
- You still do not have a Custom Cursor for Edge addon?
- You still do not have a Custom Cursor for Opera addon?
- You still do not have a Custom Cursor for Yandex addon?
- You still do not have a Custom Cursor for Firefox addon?
- How to use custom mouse cursors and pointers in Windows 10
- What is a mouse cursor in Windows?
- How to change the mouse pointer scheme used by Windows 10
- How to create your own pointer scheme in Windows 10
- How to change the pointer size and color in Windows 10
- How to change the thickness of the cursor used when typing in Windows 10
- What does your mouse pointer look like?
Cursor Set — Default Windows 10
Default Windows 10 Cursors

- Published on August 11th 2020 by eough.
- Released under the Release to Public Domainlicense.
Windows 10 Default Cursors
Resources
- Learn how to download and customize your mouse pointer.
- Have a web page or a blog? Learn how to add custom cursors to your web pages.
- Make your own cursors with our freeware cursor maker.
- Your favorite cursor is missing? Make a suggestion.
by eough

See also
Recent reviews and comments
how do i get the white mouse!!
 😎 😎 😎
😎 😎 😎  😮 :-
😮 :-
4 out of 5 stars.
i want the whole set yeye
-)  | -)»/> | -) | -)»/> |
not all cursors >:(
How can you get these pointers and cursors?
How do you make the pointer and cursor BIG?!
Someone know where is full pack?
2 out of 5 stars.
There isn’t any point in this, they are on Windows 8/8.1/10 by default
0.5 out of 5 stars.
not full pack
How to use Custom Cursor for Windows 10
Q: How to install Custom Cursor for Windows 10 app?
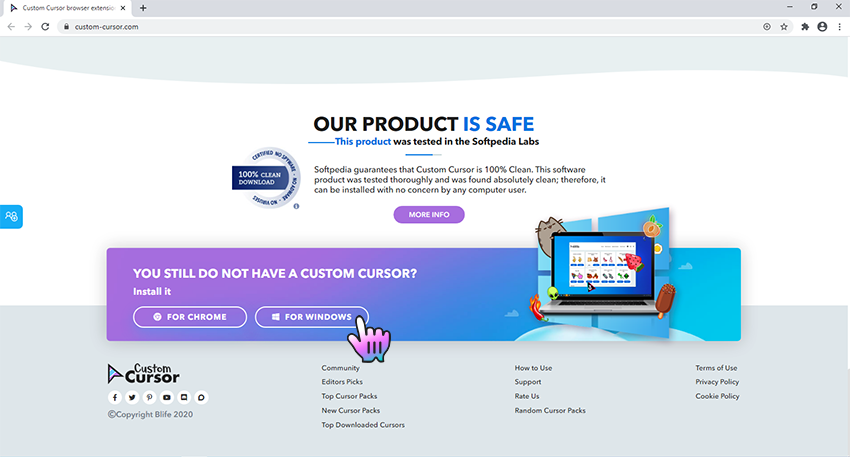
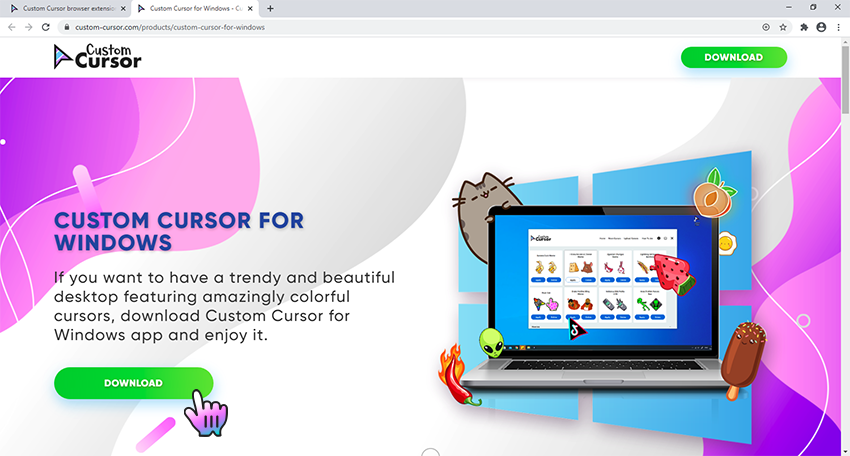
Go to Windows download page of Custom Cursor website
Follow the Windows download link on the banner in the lower part of the page or open this link and click the «DOWNLOAD» button.
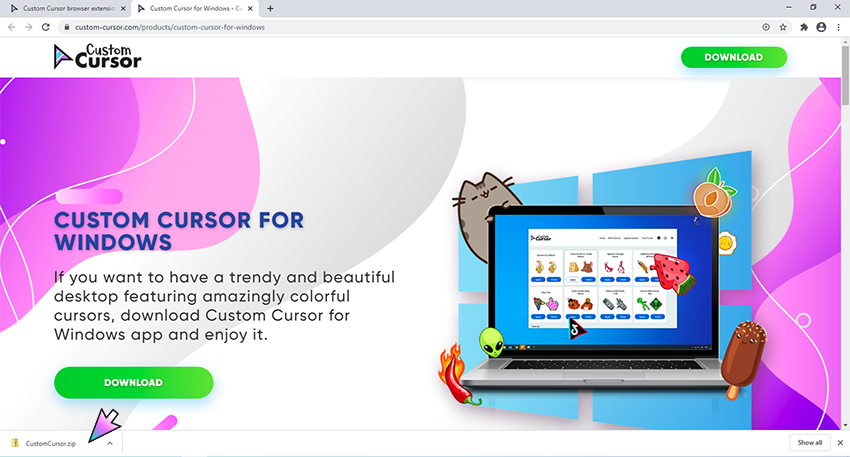
Installation of Custom Cursor for Windows 10
Once you have successfully downloaded the installer — unpack and run it. Click on it in browsers downloads and double click the Custom Cursor.msi in opened window, it will run the installer.
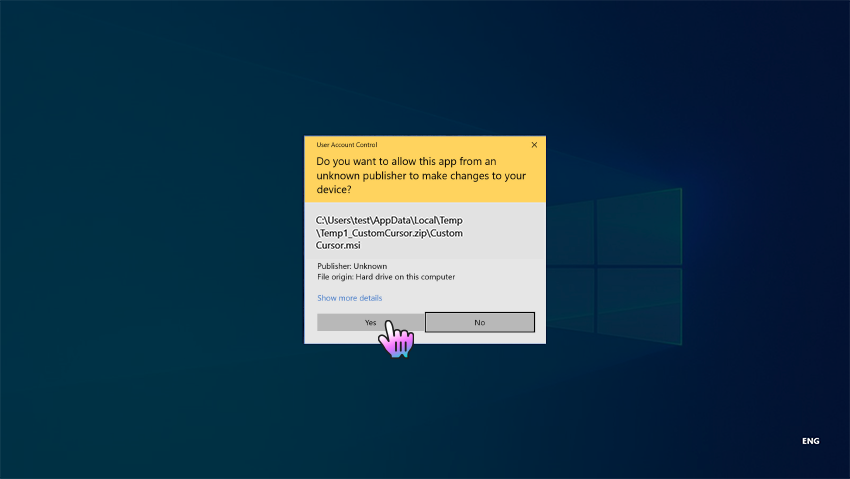
Installation
Follow the steps in the Custom Cursor setup wizard to install Custom Cursor for Windows 10 app. Make sure to agree when UAC window will appear.
Installed Custom Cursor for Windows 10
Once you have successfully completed the installation a Custom Cursor link will appear on your Windows desktop, same as a link in Windows Run menu. To launch the Custom Cursor app simply double click one of those links.
Q: How to use Custom Cursor for Windows 10 app?
Custom Cursor home menu
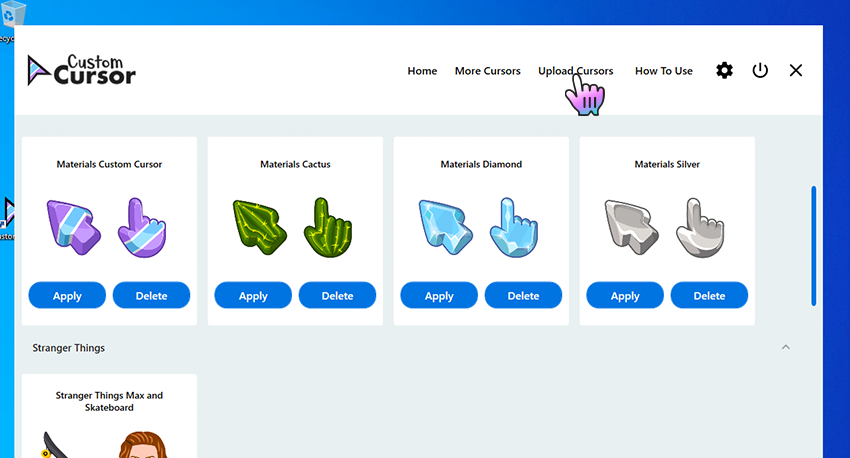
On the home screen of the app you can find many useful buttons that will help you using Custom Cursor for Windows 10 app, as you can see on a screenshot.
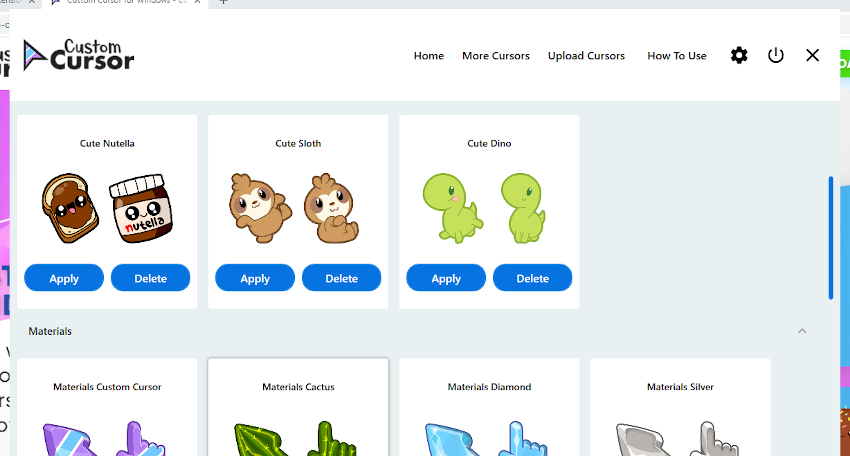
Here you can find:
- Custom Cursor logo — this button leads to our website in case you want to check for updates or browse our cursor.
- Home — this button lets you return to home/cursor selection page at any time.
- More Cursors — is a link to Custom Cursor website to download new cursors to play with.
- Upload Cursors — is a link to page where you can upload your cur files you use with the Custom Cursor for Windows app.
- How to Use — link to Custom Cursor website, this how to use. or Settings button — Opens Custom Cursor app Settings page where you can change language, cursor size and make other customisations to the app. or Default Cursor — this button lets you return to Windows Default cursor settings. or Exit — Just exits the Custom Cursor for Windows 10 application.
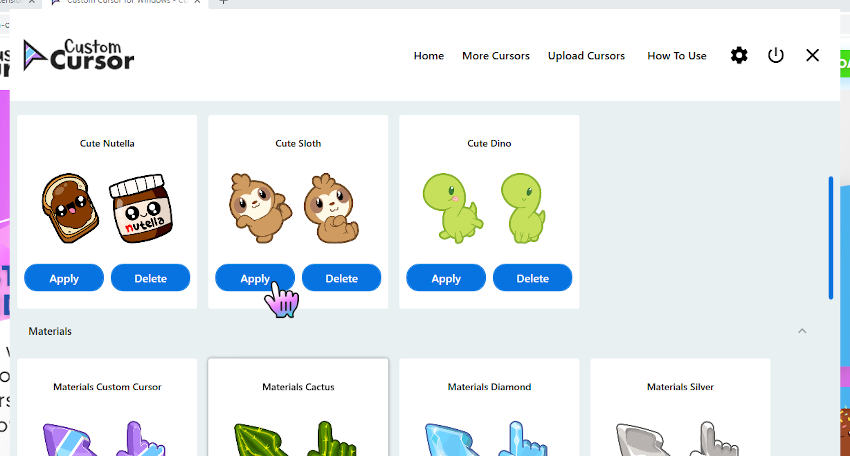
Setting the cursor
On the home screen of the Custom Cursor for Windows 10 app, scroll down and choose a cursor pack that you like and press the “Apply” button to make it the active cursor.
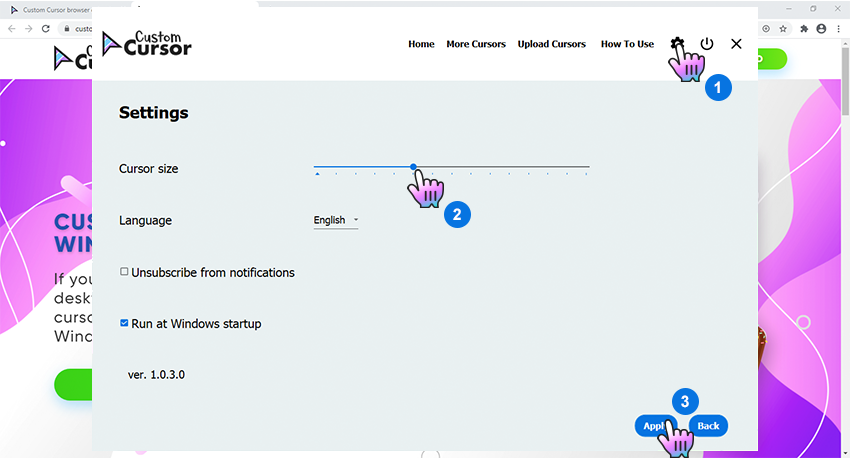
Changing the size
To change the size of your cursor you need to open Custom Cursor for Windows 10 app window. In the upper menu press the Settings button. On the settings page use size slider to choose the cursor size you like and press “Apply”.
Default Cursor
To return to default cursor at any moment open Custom Cursor for Windows 10 app window and press “Default cursor” button. Alternatively, you can open your Windows Mouse setting and select any other system cursor that you like. Custom Cursor will not be active until you hit the Apply on another cursor again.

Q: How to download cursors from site?
Accessing Custom Cursor website
Use the «More Cursors» button in main window of the Custom Cursor for Windows 10 app or follow this link to access the website cursor collections.

Adding cursors to Custom Cursor for Windows 10
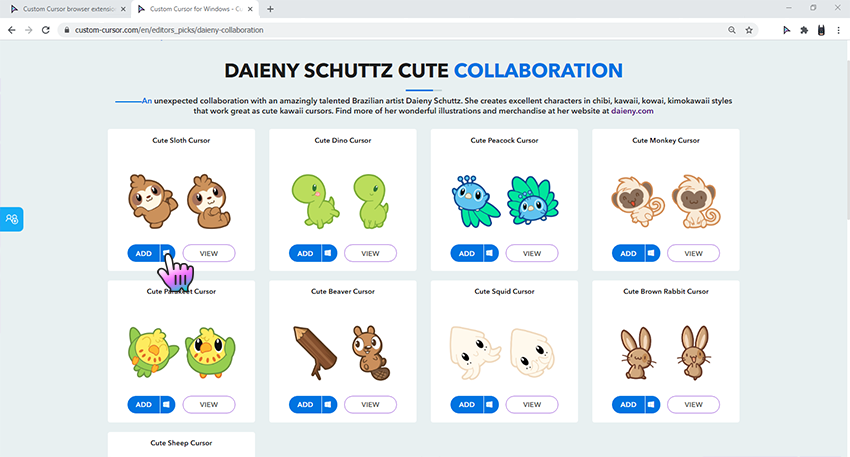
On the pack list page you can find all cursor packs of the chosen collection.
Once you found cursor pack you like, you can click “Add to Custom Cursor for Windows 10 app» button under it.
It will be added to Custom Cursor for Windows app.
Setting a cursor from out website
On the home screen of the Custom Cursor for Windows 10 app, scroll down and choose a cursor pack that you like and press the “Apply” button to make it the active cursor.
Q: How to add your own cursors to Custom Cursor for Windows app?
Custom Cursor for Windows 10 app has the ability to work with third-party .cur files. You can add, manage, and set your favorite cursor files as your Windows cursor, even if those were downloaded from the internet or gifted to you by a friend.
Opening add own cursors interface
To create your own cursor pack in the Custom Cursor for Windows app you need to open the Custom Cursor app main window and click the “Upload Cursors” button on the top menu. This will open the upload cursors page.
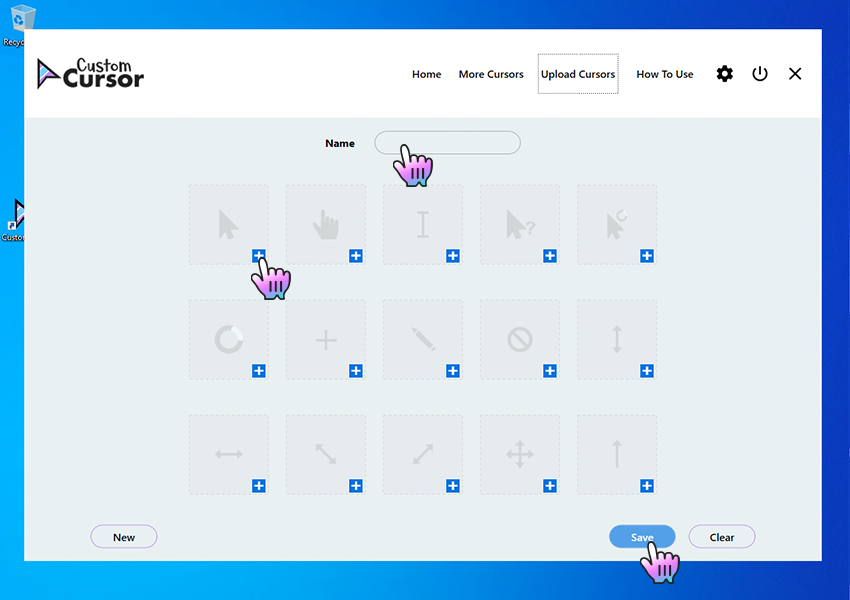
Add own cursors interface
Once on the Upload Cursors page you will see a cursor pack name input field called “Name”, a cursor elements upload cells with an image of the element you are setting and a “+” button to add that element. Buttons: “New” to clear the fields and start creating a new own cursor pack; “Save” to save your current progress, and “Clear” to clean the page forms.
Remember to save your progress before switching to home page and activating you new own cursor pack.
Uploading new cursors and other pointers
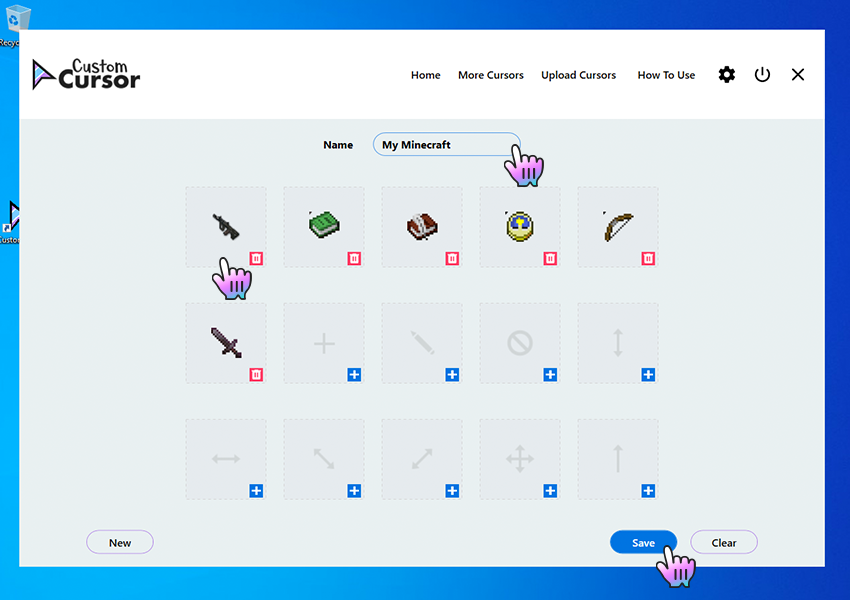
To create your own cursor pack, once you are on the Upload Cursors page, you must complete the following actions:
- Set a Name for a pack you are creating.
- Add cursor elements you have in the .cur file format, to be used in your cursor pack.
- Press Save when you are done adding elements.
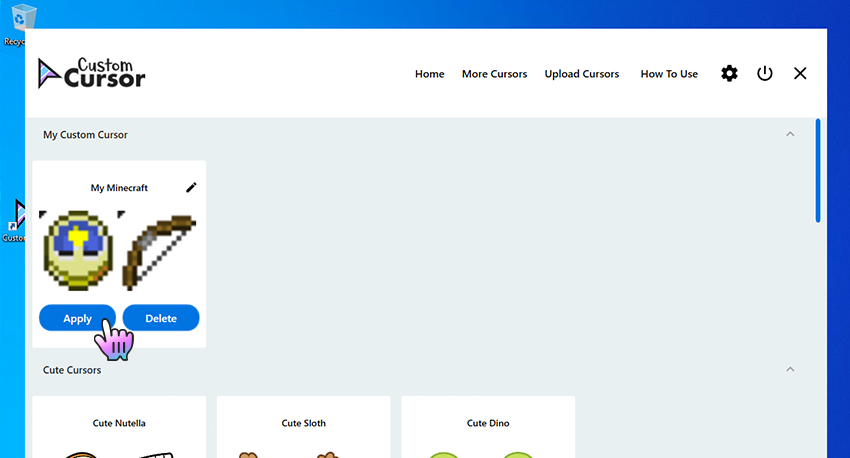
The cursor pack you created will appear on the Home page, in the My Custom Cursor section, with a Name you have set for the pack and can be activated there by hitting the “Apply” button.
Activating own cursor packs
To Apply the uploaded cursor pack navigate to the Home screen of the Custom Cursor for Windows 10 app, find “My Custom Cursor” section, choose a cursor pack that you created and press the “Apply” button to make it the active cursor.
Q: How to manage your Custom Cursor for Windows app?
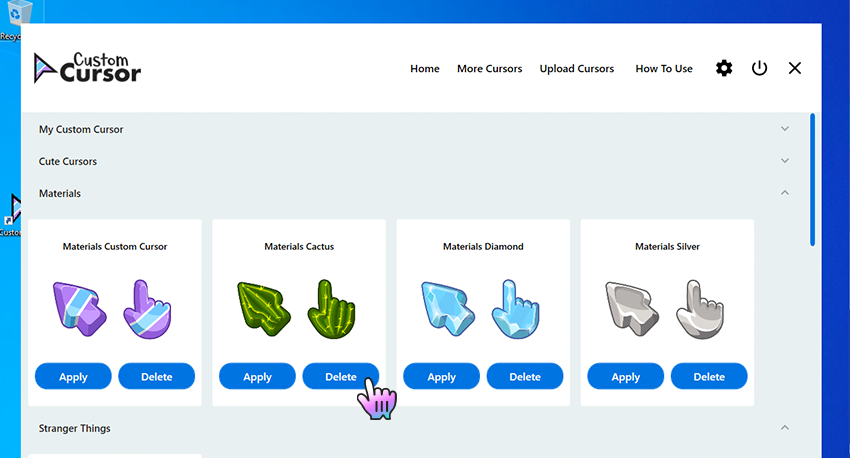
When you’ve downloaded all cursor packs in your Custom Cursor for Windows 10 app and want to clean up a little bit 🙂
Deleting downloaded cursor packs
To create your own cursor pack in the Custom Cursor for Windows app you need to open the Custom Cursor app main window and click the “Upload Cursors” button on the top menu. This will open the upload cursors page.
Editing own cursor packs
If you added your own cursor pack from .cur files to the Custom Cursor for Windows 10 app — you can edit them to fit your current needs. To do so, you need to navigate to Custom Cursor for Windows home page, find the cursor pack tile you like to edit. In the top right corner of the own cursor tile, you can find a pencil icon, click on it to open own cursor pack edit mode.
n the edit mode you can change own cursor pack name and add or remove its elements like cursors or pointers. Please note that if you delete some of the elements your Windows defaults will be used.
- To add an element you need to press “Blue plus icon” on the tile you wish to assign a custom cursor element.
- To remove an element you just need to press the “Red trash can icon” for it to be removed.
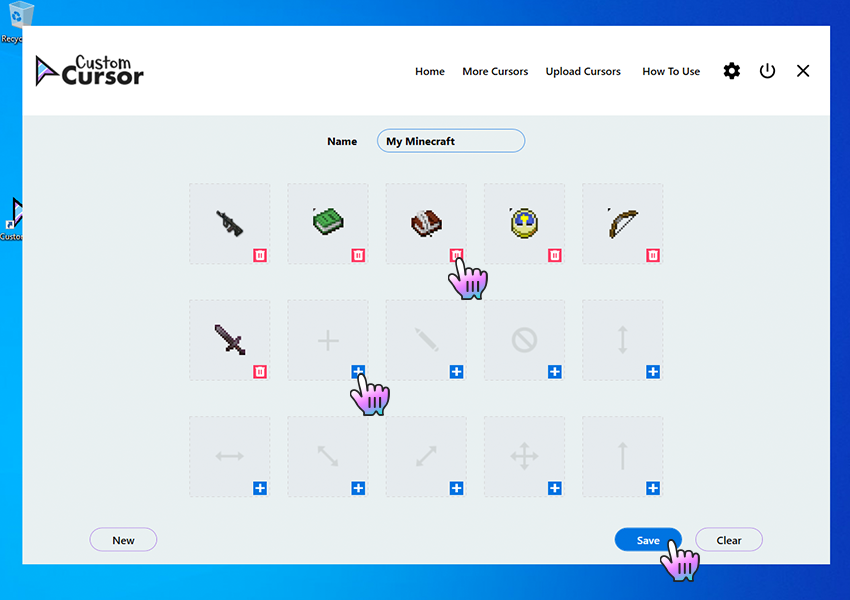
*Please note that you need to save your progress before exiting the “Edit own cursor” section by clicking the “Save” button.
You still do not have a Custom Cursor for Chrome extension?
Install it from official Chrome Web Store
You still do not have a Custom Cursor for Edge addon?
Install it from official Microsoft Edge Addons site
You still do not have a Custom Cursor for Opera addon?
Install it from official Opera addons site
You still do not have a Custom Cursor for Yandex addon?
Install it from official Opera addons for Yandex site
You still do not have a Custom Cursor for Firefox addon?
Install it from official Firefox Browser Add-ons site
How to use custom mouse cursors and pointers in Windows 10
Your mouse cursor plays a vital role when using your computer, and you should be completely comfortable with its appearance. Maybe you want a larger cursor, that’s easy to find in a text without straining your eyes, or perhaps you are bored with the same old pointer that you have been using since what feels like forever. Whatever the case, this tutorial shows you how to customize mouse cursors on your Windows 10 computer or device:
NOTE: The features presented are available in Windows 10 Version 1903 (May 2019 Update) or newer. If you’re using an older version of Windows 10, you might not have access to all the features. Check your Windows 10 build and, if necessary, get the latest Windows 10 update available for you.
What is a mouse cursor in Windows?
A mouse cursor is an indicator used to depict on your display either the current position for user interaction, or the movements of your pointing device. In Windows 10, you can change the cursor’s thickness, adjust the size and color for your pointer, or you can replace the currently used icons with completely different ones. Windows uses the “.ani” (animated cursor) and “.cur” (cursor) extensions when it comes to files used for mouse cursors. Built-in Windows 10 cursors are usually around 9-10KB in size each, while animated cursors can be as large as 500-600KB.
The default folder for these files is “C:WindowsCursors,“ and, if none of the available options are to your liking, and you decide to download a new mouse cursor scheme, the new scheme should be extracted it in its own subfolder under this default folder.
With custom mouse pointers and cursors, new mouse cursor schemes are way more entertaining than what Windows 10 has to offer, although you should keep in mind that animated cursors from downloaded cursor schemes can take up to four times more space (approximately 2MB).
How to change the mouse pointer scheme used by Windows 10
If you want to change the mouse pointer scheme and replace the current cursor icons displayed, enter “mouse” in your taskbar’s search field. Then, click or tap on Mouse settings.
In the Related settings section, click or tap on “Additional mouse options.“
The Mouse Properties window opens. Click or tap the Pointers tab, and you should see some familiar shapes in Windows Default scheme’s list of cursors.
In the Scheme section, press the arrow to reveal a drop-down menu with all the pre-installed pointer schemes.
There are twelve system schemes in total. To see a preview of a scheme, select it from the menu, and you can see all its icons by scrolling in the Customize section.
You can also choose to “Enable pointer shadow” by checking the corresponding box under the Customize section.
Once you have found a scheme that you want to use, press on either Apply or OK.
How to create your own pointer scheme in Windows 10
If you can’t find a scheme to your liking, you can mix and match the existing icons to create your own. First, go to the Pointers tab of the Mouse Properties window by following the instructions in the previous section of this tutorial. Then, in the Customize list, click or tap the entry you want to replace and press Browse.
This opens the “C:WindowsCursors” folder, which stores all the available icons. Scroll through the thumbnails until you find what you’re looking for. Some thumbnails look similar, but clicking or tapping on them allows you to get a better look with the help of the Preview section in the lower-left corner. When you are happy with your choice, click or tap Open.
You can start from a scheme that is close to what you want to use and just replace whatever icons you don’t like. If you change your mind, click or tap the Use Default button, followed by either OK or Apply, and the scheme resets to its original set of cursors, discarding all the changes you made.
Choosing even one custom mouse cursor to replace the default one from a scheme causes Windows to treat your changes as an entirely new scheme. To save this scheme for future use, click or tap the Save As button in the Scheme section, give your scheme a name, and then press OK.
TIP: Any custom scheme you create can be deleted by selecting it and pressing the Delete button from the Scheme section. System schemes can not be deleted.
How to change the pointer size and color in Windows 10
After choosing the perfect pointer icons, you might want to adjust their size and color. In the Cursor & pointer tab of the “Ease of Access” settings, Windows 10 offers both a vast array of colors and plenty of sizes to choose from.
To learn how to modify the size and color for your pointer, read: How to change the mouse pointer size and color in Windows 10.
How to change the thickness of the cursor used when typing in Windows 10
There is only one more cursor left to customize, and it gets a lot of attention, especially if you spend time writing on your Windows 10 computer or device: the blinking cursor used when typing. If you spend a substantial amount of time in the company of letters or numbers, as we do, you might appreciate the option to make this cursor more visible, by adjusting its thickness.
Open the Settings app by pressing the Windows + I keys on your keyboard. In Windows Settings, click or tap “Ease of Access.“
From the tabs on the left, choose Cursor & pointer. There is only one option in the aptly named “Make the cursor easier to see when typing” section: “Change cursor thickness.“ Move the slider and watch the preview box to its left to make your decision.
NOTE: Windows 10 also offers other customization options when it comes to your mouse. Here is how to configure basic mouse settings, or use it to open files with a single click.
What does your mouse pointer look like?
The mouse pointer is one of the things you always see when you’re using your Windows 10 computer or device, so you shouldn’t neglect it. Customizing it according to your preferences can make you more productive, while offering you an enjoyable user experience. Before closing this tutorial, tell us which mouse pointers are you using and why did you decide to change them?


