- Как в Windows 10 установить любую веб-страницу в качестве обоев рабочего стола
- Файл desktop.ini на рабочем столе Windows 10: назначение и способ удаления
- Что такое desktop.ini?
- Способы, как убрать Desktop.ini с рабочего стола Windows 10?
- Download Windows 10
- Windows 10 October 2020 Update
- Create Windows 10 installation media
Как в Windows 10 установить любую веб-страницу в качестве обоев рабочего стола

Ч то может быть проще смены фона рабочего стола в Windows 10? Кликнули по картинке правой кнопкой мыши и выбрали в меню опцию «Сделать фоновым изображением рабочего стола». Это самый быстрый и удобный способ, к тому же работает он даже на неактивированной системе. А теперь представьте, что вместо статического фона на рабочем столе вы бы хотели видеть веб-страницу вашего любимого сайта?
В Windows 10 имеется масса инструментов для настройки внешнего вида рабочего стола, но вот чтобы установить в качестве обоев веб-страницу сайта, такой функции в системе нет. Она присутствовала в старой доброй Windows XP и называлась Active Desktop, но уже в Vista разработчики Microsoft по какой-то причине решили удалить её. Отныне установить веб-страницу на рабочий стол можно только с помощью сторонних программ.
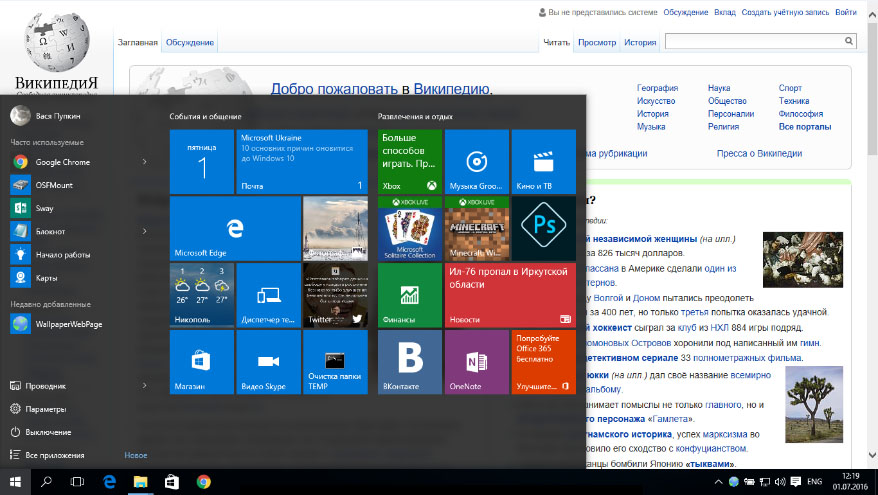
Одной из таких программ является WallpaperWebPage. Эта небольшая утилита позволяет в буквальном смысле заменить обычный рабочий стол веб-страницей любого сайта, причём вести себя страница будет точно так же, как если бы она была открыта в браузере. Вы сможете прокручивать её, переходить по ссылкам, копировать текст, скачивать изображения и другой контент, оставлять в формах комментарии и тому подобное. Вам будет даже доступно контекстное меню, позволяющее просматривать HTML-код страницы, выводить её на печать, выполнять переход назад и вперёд, просматривать свойства соединения и так далее.
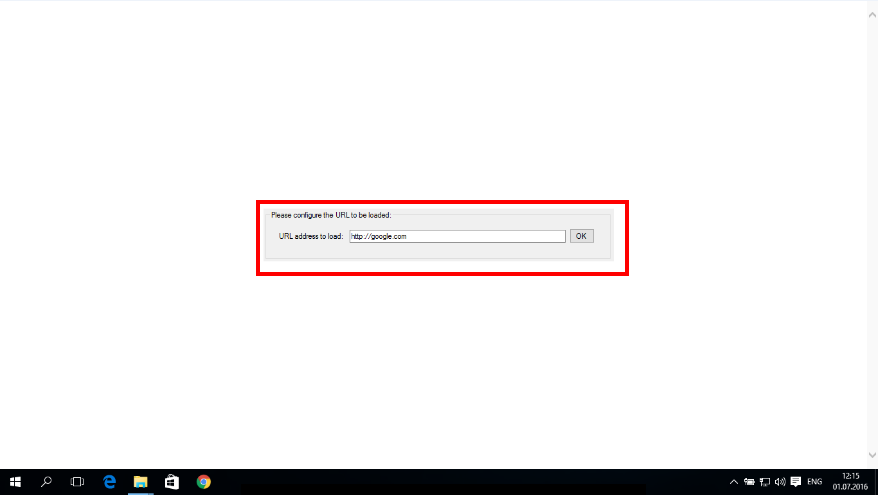
После установки WallpaperWebPage заменяет рабочий стол белым фоном, посредине которого располагается форма, в которую следует ввести адрес сайта и нажать «OK».
В дальнейшем управление утилитой производится из системного трея.
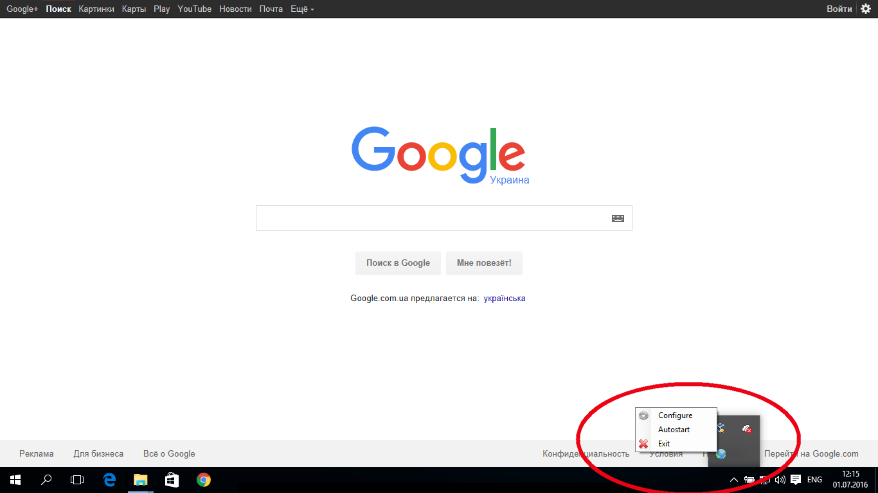
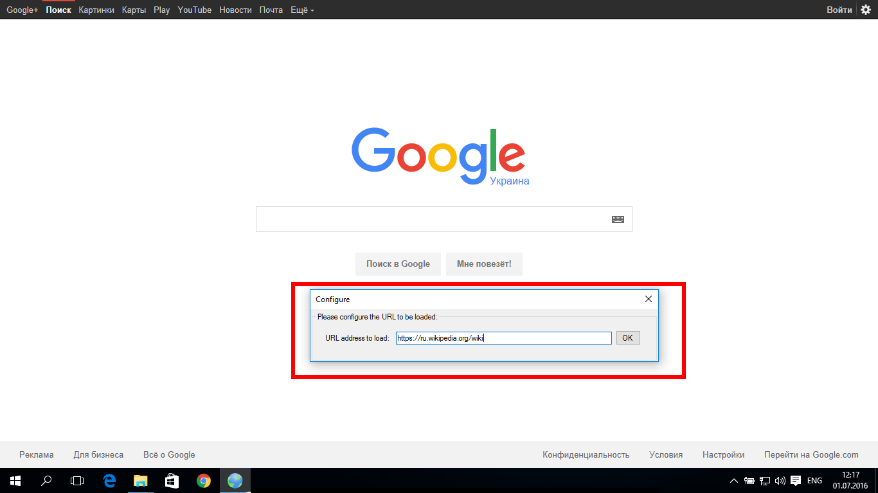
Поддерживается всего три функции: смена URL-адреса, добавление в автозагрузку Windows и выход.
Обратной стороной использования утилиты является отсутствие доступа к традиционному рабочему столу — меню десктопа будет заменено меню веб-страницы, а все ярлыки будут скрыты. Чтобы получить к ним доступ, нужно закрыть утилиту или попробовать нажать Win + M (не всегда срабатывает) . А вот панель задач, как и прежде, останется доступной со всеми её функциями.
Файл desktop.ini на рабочем столе Windows 10: назначение и способ удаления

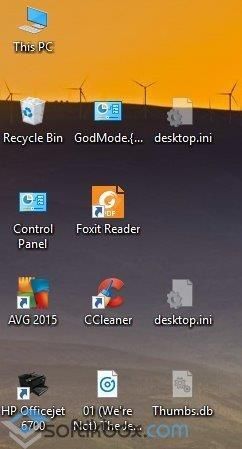
После загрузки операционной системы пользователь Windows 10 может наблюдать появление на рабочем столе файла desktop.ini. Удалив его стандартным способом и, перезагрузив компьютер, можно было бы забить обо всех проблемах. Однако файл появляется вновь. И сколько бы этот файл не удаляли с рабочего стола, он все равно будет возвращаться после перезагрузки системы. Что же это за файл? За что отвечает desktop.ini? Как скрыть desktop ini на рабочем столе в Windows 10?
Что такое desktop.ini?
Файл desktop.ini – это стандартный набор конфигураций, который имеется в каждой операционной системе Windows, в независимости от версии и разрядности системы. Он необходим для нормального функционирования всей системы. Обычно системные файлы с расширением .ini имеют скрытые атрибуты и пользователю их не видно.
Файл конфигурации типа .ini содержит настройки, которые отвечают за внешний вид системной папки. В нем заданы характеристики таких параметров как цвет текста, рисунок и прочее. Внутри файла имеются четко структурированные данные, разделённые на секции. Если пользователь внес какие-то изменения в настройки вида папок или самостоятельно включив отображение скрытых файлов, то файл desktop.ini (сколько раз бы его не удаляли) будет появляться на рабочем столе.
Способы, как убрать Desktop.ini с рабочего стола Windows 10?
Поскольку файл desktop.ini появляется по причине неправильных настроек отображения системных файлов в Windows 10, то удалять его изначально не нужно. Стоит внести коррективы в настройки ОС. Для этого выполняем следующее:
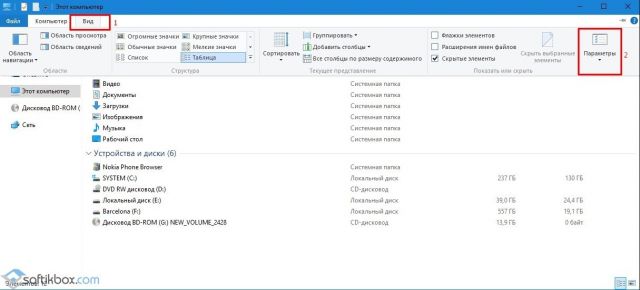
- Открываем «Проводник». Выбираем опцию «Вид», «Параметры».
- Откроется небольшое окно. Нужно изначально снять отметку с пункта «Скрывать защищенные системные файлы».
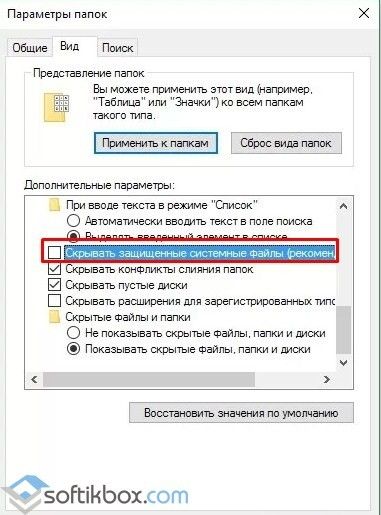
- После кликаем «Применить» и «Ок». Возвращаемся к рабочему столу Windows
- На рабочем столе появится еще несколько файлов desktop.ini.
- Выделяем и удаляем все.
- Теперь вновь возвращаемся к настройкам отображения папок и файлов.
- Ставим назад отметку «Скрывать защищенные системные файлы», а также «Не показывать скрытые файлы, папки и диски».
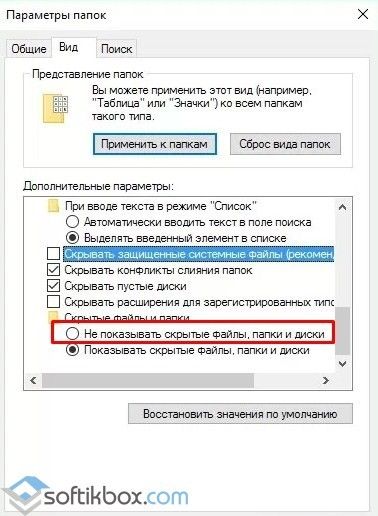
- После сохранения настроек и перезагрузки ПК файл desktop.ini больше не будет появляться на рабочем столе.
Поэтому, если вы столкнулись с подобной ситуацией и вам нужен эффективный способ, как убрать desktop ini с рабочего стола, то сначала просканируйте систему на наличие вирусов (если изменения в настройки вы не вносили, возможно, система заражена), а затем воспользуйтесь приведенным методом.
Download Windows 10
Before updating, please refer to the Windows release information status for known issues to confirm your device is not impacted.
Windows 10 October 2020 Update
The Update Assistant can help you update to the latest version of Windows 10. To get started, click Update now.
Create Windows 10 installation media
To get started, you will first need to have a license to install Windows 10. You can then download and run the media creation tool. For more information on how to use the tool, see the instructions below.

Here’s when to use these instructions:
- You have a license to install Windows 10 and are upgrading this PC from Windows 7 or Windows 8.1.
- You need to reinstall Windows 10 on a PC you’ve already successfully activated Windows 10.
If you are installing Windows 10 on a PC running Windows XP or Windows Vista, or if you need to create installation media to install Windows 10 on a different PC, see Using the tool to create installation media (USB flash drive, DVD, or ISO file) to install Windows 10 on a different PC section below.
Note: Before you install Windows 10, check to make sure your PC meets the system requirements for Windows 10. We also recommend going to the PC manufacturer’s website for any additional info about updated drivers and hardware compatibility.
- Select Download tool, and select Run. You need to be an administrator to run this tool.
- On the License terms page, if you accept the license terms, select Accept.
- On the What do you want to do? page, select Upgrade this PC now, and then select Next.
After downloading and installing, the tool will walk you through how to set up Windows 10 on your PC. All Windows 10 editions are available when you select Windows 10, except for Enterprise edition. For more information on Enterprise edition, go to the Volume Licensing Service Center.
- If you don’t have a license to install Windows 10 and have not yet previously upgraded to it, you can purchase a copy here: https://www.microsoft.com/en-us/windows/get-windows-10.
- If you previously upgraded to Windows 10 on this PC and you’re reinstalling it, you don’t need to enter a product key. Your copy of Windows 10 will automatically activate later using your digital license.
Follow these steps to create installation media (USB flash drive or DVD) you can use to install a new copy of Windows 10, perform a clean installation, or reinstall Windows 10.
Before you download the tool make sure you have:
- An internet connection (internet service provider fees may apply).
- Sufficient data storage available on a computer, USB or external drive for the download.
- A blank USB flash drive with at least 8GB of space or blank DVD (and DVD burner) if you want to create media. We recommend using a blank USB or blank DVD, because any content on it will be deleted.
- When burning a DVD from an ISO file, if you are told the disc image file is too large you will need to use Dual Layer (DL) DVD Media.
Check a few things on the PC where you want to install Windows 10:
- 64-bit or 32-bit processor (CPU). You’ll create either a 64-bit or 32-bit version of Windows 10. To check this on your PC, go to PC info in PC settings or System in Control Panel, and look for System type.
- System requirements. Make sure the PC meets the system requirements for Windows 10. We also recommend going to the PC manufacturer’s website for additional info about updated drivers and hardware compatibility.
- Language in Windows. You’ll need to choose the same language when you install Windows 10. To see what language you’re currently using, go to Time and language in PC settings or Region in Control Panel.
- Edition of Windows. You should also choose the same edition of Windows. To check what edition you’re currently running, go to PC info in PC settings or System in Control Panel, and look for Windows edition. Windows 10 Enterprise isn’t available in the media creation tool. For more info, go to the Volume Licensing Service Center.
- Microsoft Office products. If you just purchased a new device that includes Office 365, we recommend redeeming (installing) Office before upgrading to Windows 10. To redeem your copy of Office, please see Download and install Office 365 Home, Personal, or University on your PC. For more information, check How to upgrade to Windows 10 on new devices that include Office 365.
If you have Office 2010 or earlier and choose to perform a clean install of Windows 10, you will need to locate your Office product key. For tips on locating your product key, check Find your Office 2010 product key or Enter the product key for your Office 2007 program.
Using the tool to create installation media:
- Select Download tool now, and select Run. You need to be an administrator to run this tool.
- If you agree to the license terms, select Accept.
- On the What do you want to do? page, select Create installation media for another PC, and then select Next.
Select the language, edition, and architecture (64-bit or 32-bit) for Windows 10. This table will help you decide which edition of Windows 10 you’ll choose:
| Your current edition of Windows | Windows 10 edition |
|---|---|
| Windows 7 Starter Windows 7 Home Basic Windows 7 Home Premium Windows 7 Professional Windows 7 Ultimate Windows 8/8.1 Windows 8.1 with Bing Windows 8 Pro Windows 8.1 Pro Windows 8/8.1 Professional with Media Center Windows 8/8.1 Single Language Windows 8 Single Language with Bing Windows 10 Home Windows 10 Pro | Windows 10 |
| Windows 8/8.1 Chinese Language Edition Windows 8 Chinese Language Edition with Bing | Windows 10 Home China |
- USB flash drive. Attach a blank USB flash drive with at least 8GB of space. Any content on the flash drive will be deleted.
- ISO file. Save an ISO file to your PC, which you can use to create a DVD. After the file is downloaded, you can go to location where the file is saved, or select Open DVD burner, and follow the instructions to burn the file to a DVD. For more info about using an ISO file, see Additional methods for using the ISO file to install Windows 10 section below.
After completing the steps to install Windows 10, please check that you have all the necessary device drivers installed. To check for updates now, select the Start button, and then go to Settings > Update & Security > Windows Update, and select Check for updates. You may also wish to visit your device manufacturer’s support site for any additional drivers that may be needed.
Note: Drivers for Surface devices may be found on the Download drivers and firmware for Surface page.
Before you install Windows 10, it’s a good idea to save any work and back up your PC before you start. If you used the media creation tool to download an ISO file for Windows 10, you’ll need to burn it to a DVD before following these steps.
- Attach the USB flash drive or insert the DVD on the PC where you want to install Windows 10.
- Restart your PC.
If your PC does not automatically boot to the USB or DVD media, you might have to open a boot menu or change the boot order in your PC’s BIOS or UEFI settings. To open a boot menu or change the boot order, you’ll typically need to press a key (such as F2, F12, Delete, or Esc) immediately after you turn on your PC. For instructions on accessing the boot menu or changing the boot order for your PC, check the documentation that came with your PC or go to the manufacturer’s website. If you do not see the USB or DVD media device listed within the boot options, you may need to reach out to the PC manufacturer for instructions for temporarily disabling Secure Boot in your BIOS settings.
If changing the boot menu or order doesn’t work, and your PC immediately boots into the OS you want to replace, it is possible the PC had not fully shut down. To ensure the PC fully shuts down, select the power button on the sign-in screen or on the Start menu and select Shut down.
If you downloaded an ISO file for Windows 10, the file is saved locally at the location you selected. If you have a third-party DVD burning program installed on your computer that you prefer to use for creating the installation DVD, that program might open by going to the location where the file is saved and double-clicking the ISO file, or right-click the ISO file, select Open with and choose your preferred DVD burning software.
If you want to use the Windows Disk Image Burner to create an installation DVD, go to the location where the ISO file is saved. Right-click the ISO file and select Properties. On the General tab, click Change and select Windows Explorer for the program you would like to use to open ISO files and select Apply. Then right-click the ISO file and select Burn disc image.
If you want to install Windows 10 directly from the ISO file without using a DVD or flash drive, you can do so by mounting the ISO file. This will perform an upgrade of your current operating system to Windows 10.


