- Hyper-V: Встроенная виртуальная машина в Windows 10
- Как включить виртуализацию Hyper-V в windows 10
- Настройка и установка другой ОС на Hyper-V
- Горький опыт, который поможет вам
- Get a Windows 10 development environment
- Download a virtual machine
- File hashes
- Build a distributed environment for Windows 10 deployment
- Replicate deployment shares
- Linked deployment shares in MDT
- Why DFS-R is a better option
- Set up Distributed File System Replication (DFS-R) for replication
- Prepare MDT01 for replication
- Prepare MDT02 for replication
- Create the MDTProduction folder on MDT02
- Configure the deployment share
- Replicate the content
- Create the replication group
- Configure replicated folders
- Verify replication
- Configure Windows Deployment Services (WDS) in a remote site
- Deploy a WindowsВ 10 client to the remote site
Hyper-V: Встроенная виртуальная машина в Windows 10
Многие из вас наверняка и не знали, что в Windows 10 есть своя встроенная виртуальная машина для виртуализации. Вам больше не нужно скачивать сторонние программы, такие как VM VirtualBox и VMware Workstation, чтобы запустить виртуальную машину. С этой виртуальной машиной Hyper-V в Windows 10, вы сможете установить Linux, Ubuntu, Windows 10, Android OS и другие операционные системы, чтобы ознакомиться или протестировать их. К примеру, я использую Hyper-V с установленной Windows 10 insider для ознакомления функций, которые потом будут выпущены. Также я применяю инструкции на сайте с помощью виртуализации Hyper-V, чтобы не навредить основной системе.
Давайте разберем, как включить Hyper-V в Windows 10, создать виртуальную машину и настроить её.
Что нужно знать:
- Вам потребуется Windows 10 Pro или Enterprise, поскольку Hyper-V недоступен в домашних версиях ОС.
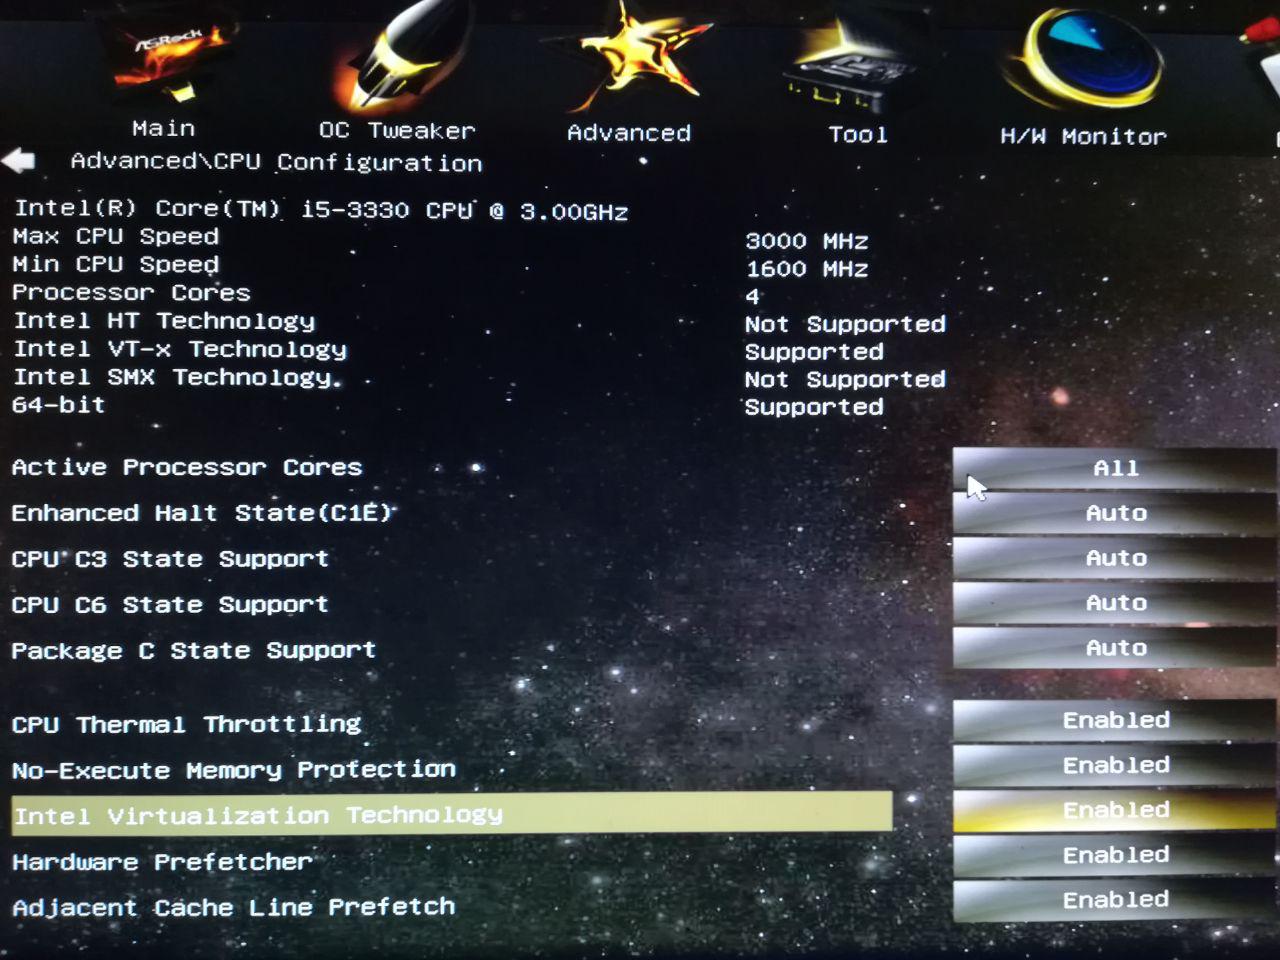
- Вы должны зайти в BIOS или UEFI и включить параметр виртуализации. В моем случае я вошел в БИОС и перешел по параметрам Advanced >CPU Configuration >Intel Virtualization Technology и Enabled (Включено).
- Рекомендую создать отдельный локальный диск, к примеру F, для хранения виртуальных машин. В конце статьи я описал ситуацию, что может произойти, в случае резкого прерывания процесса.
Вы можете пропустить шаг с включением виртуализации в BIOS, по умолчанию он включен. Вы всегда можете вернутся к этому шагу, если ниже не получится включить виртуализацию.
Как включить виртуализацию Hyper-V в windows 10
Нужно включить виртуализацию в самой системе. Нажмите сочетание кнопок Win+R и введите Appwiz.cpl. Далее слева выберите «Включение и отключение компонентов«, найдите в списке Hyper-V и поставьте галочку. Нажмите «OK», чтобы активировать виртуальную машину. Дождитесь окончания установки необходимых компонентов и перезагрузите ПК.

Настройка и установка другой ОС на Hyper-V
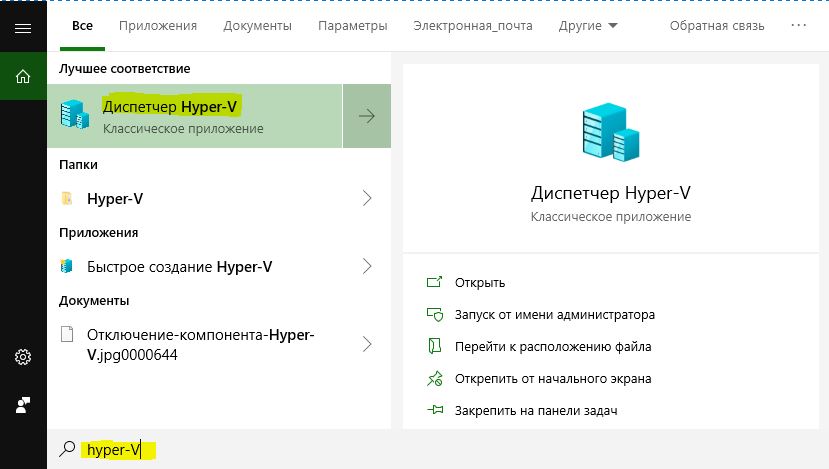
Шаг 1. Как только мы включили Hyper-V он появится в вашей системе. Чтобы открыть виртуальную машину, просто наберите в поиске «hyper-v» и запустите.
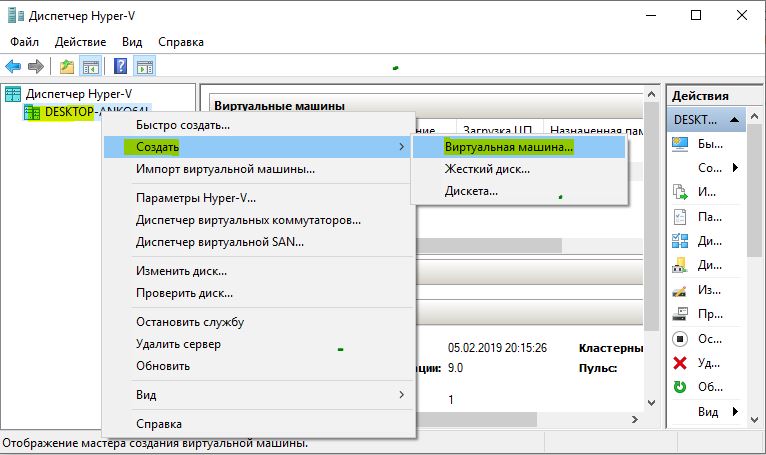
Шаг 2. Чтобы установить другую ОС, нажмите правой кнопкой мыши на своем имени устройства и «Создать» > «Виртуальная машина«.
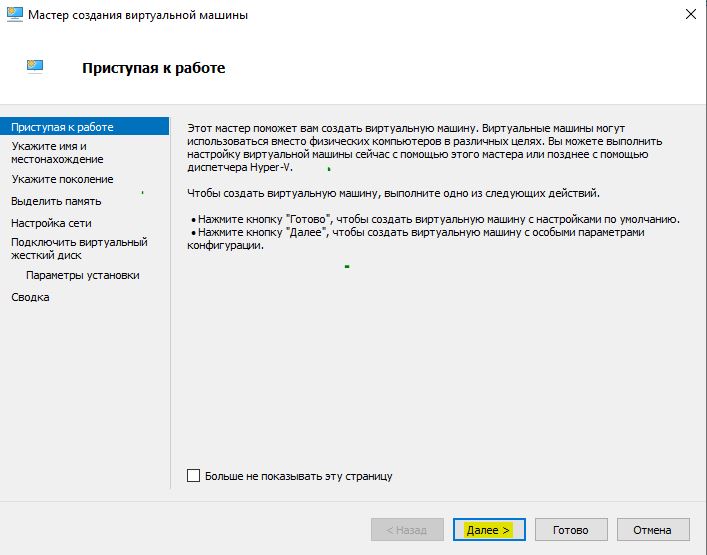
Шаг 3. Появится мастер первоначальных настроек «приступая к работе«. Нажимаем «Далее».
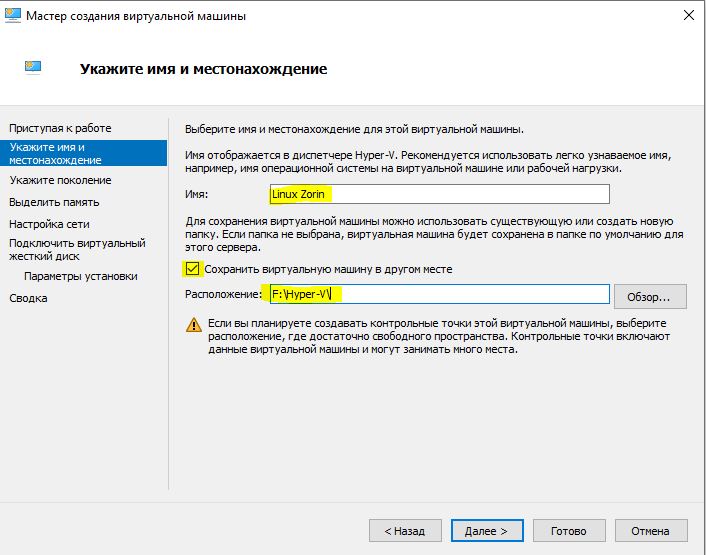
Шаг 4. Задайте имя виртуальной машине и укажите путь, если вам нужно сохранить виртуальную машину на другом локальном диске. Если вы не укажите другой путь, то виртуальная машина сохранится на диске «C» по умолчанию.
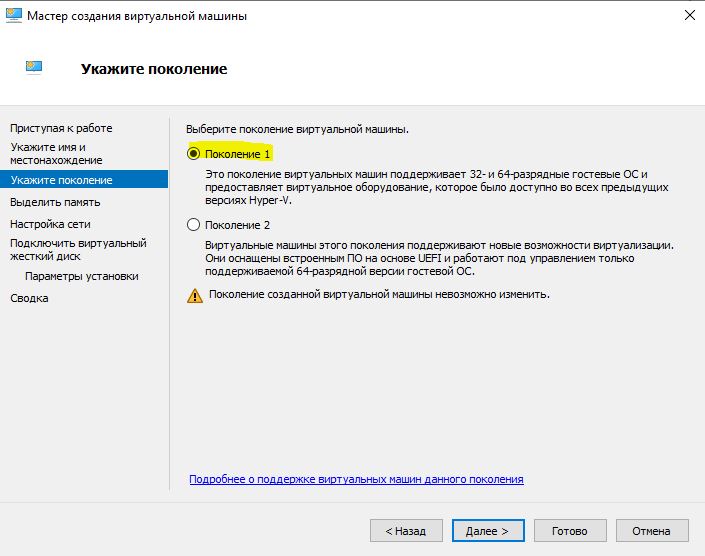
Шаг 5. Выберите поколение виртуальной машины. Если вы уверены, что устанавливаете 64-bit версию, то выбирайте 2 поколение. Первое поколение подойдет для запуска старых 32-bit ОС и программ. Если вы сомневаетесь, то выбирайте первое поколение.
Шаг 6. Укажите объем выделенной памяти для виртуальной машины. Если вы устанавливаете ОС, то рекомендую 2048 МБ.

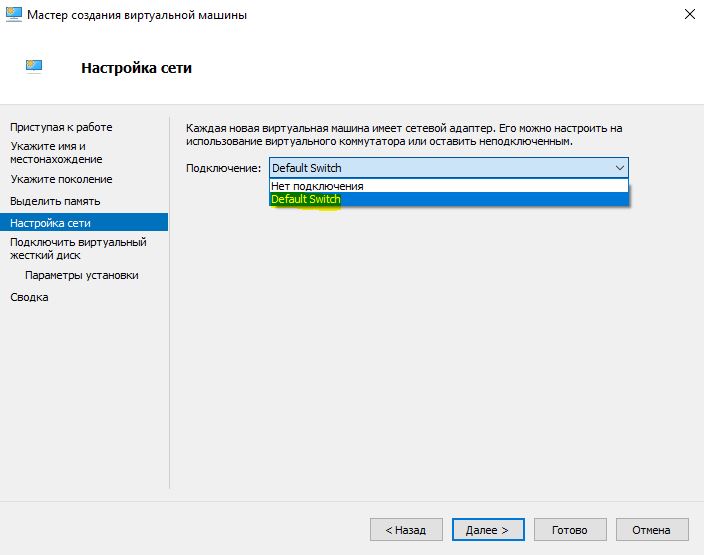
Шаг 7. Выберите свой сетевой адаптер из списка. Если у вас, как и у меня на картинке, то выбираем «Default Switch«.
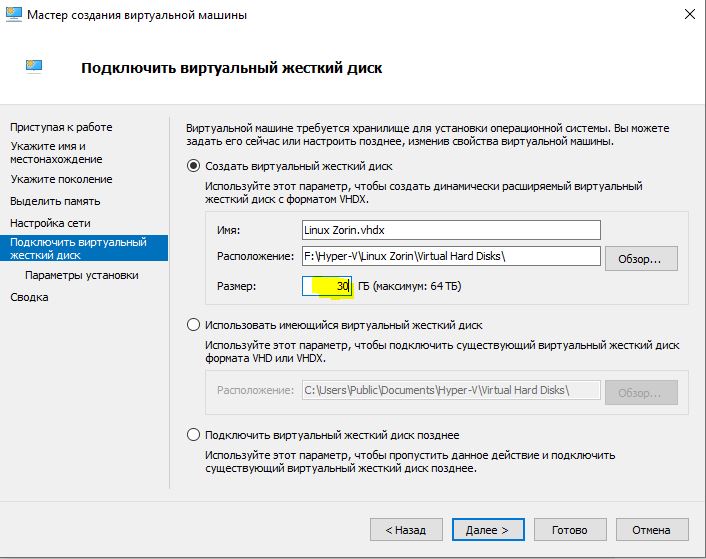
Шаг 8. Тут все просто. Если мы создаем новую установку ОС, то выбираем «Создать виртуальный жесткий диск«. Путь будет указан, который мы указали выше в шаге 4. Единственное, что нужно изменить это размер. Я указал 30 Гб, так как ставлю Linux и мне много не нужно. Если у вас уже была ранее создана виртуальная машина, то выберите «Использовать имеющийся виртуальный жесткий диск» и укажите к нему путь.
Созданный виртуальный жесткий диск, можно скопировать на флешку и установить позднее со всеми настройками на другом ПК указав путь к папке Virtual Hard Disks и расширения файла с именем .vhdx.
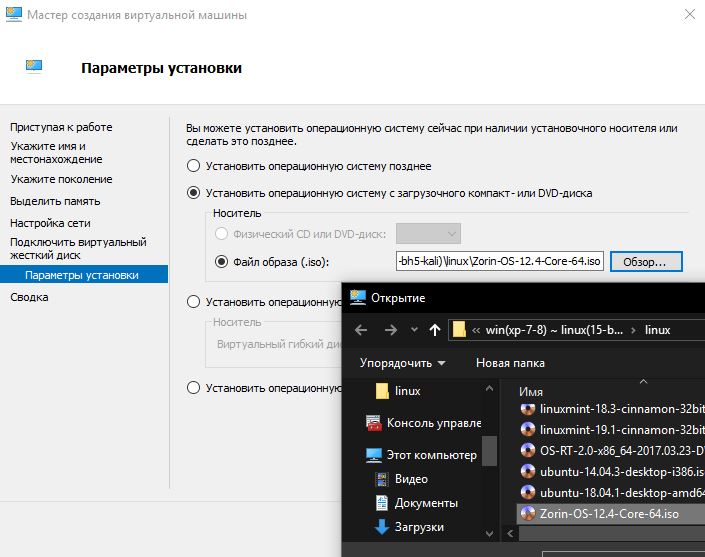
Шаг 9. Выберите «Установить ОС с загрузочного компакт диска«, установите «файл образ ISO» и укажите путь к вашей системе которую хотите установить на виртуальную машину Hyper-V.
Шаг 10. Завершение мастера настроек покажет вам все выбранные параметры. Убедитесь еще раз и нажмите «Готово» для установки.

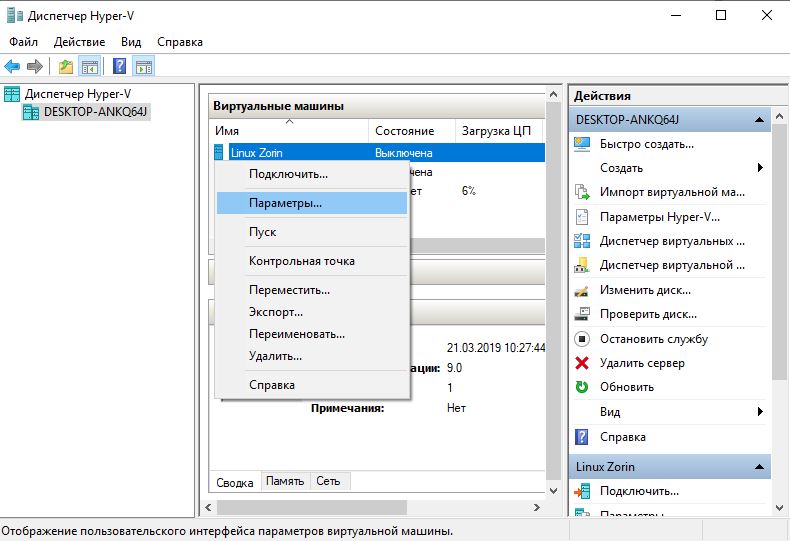
Шаг 11. Все готово. Еще пару штрихов перед установкой. Откройте диспетчер Hyper-V, описано в шаге 1, и вы увидите справа список вашей созданной виртуальной машины. Нажмите по ней правой кнопкой мыши и выберите «Параметры«.
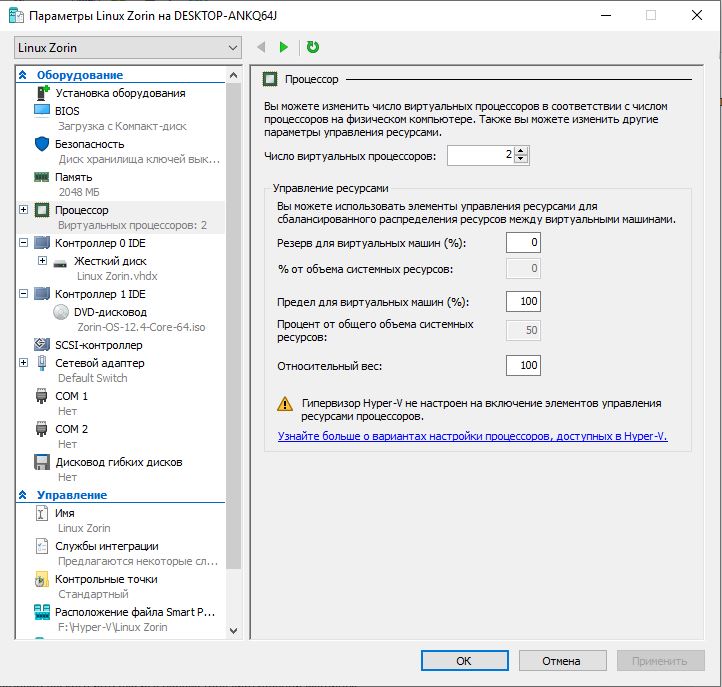
Шаг 12. Здесь вы можете изменить параметры. К примеру, изменить сетевой адаптер, добавить оперативной памяти. Рекомендую первым делом добавить 2 виртуальных ядра, так как в мастере настроек этой опции не было.
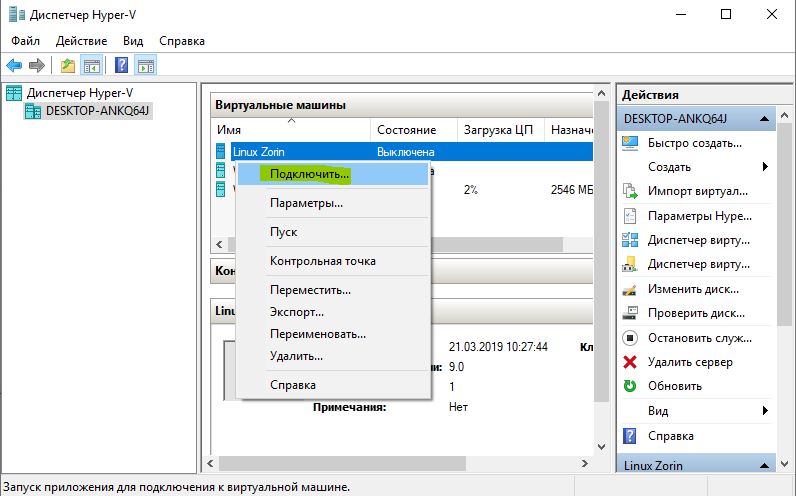
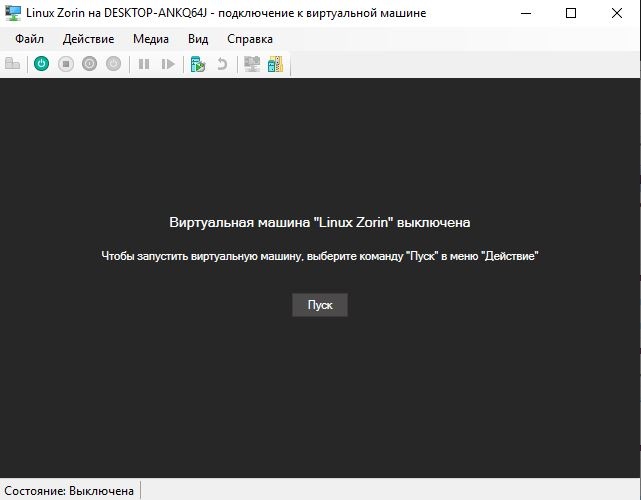
Шаг 13. Возвращаемся обратно в диспетчер Hyper-v, нажимаем по созданной машине правой кнопкой мыши и выбираем «Подключить«.
Шаг 14. Появится темное окно и нажимаем «пуск» для установки ОС на Hyper-v.
Шаг 15. Далее просто следуйте инструкциям на экране. Думаю дальше вы разберетесь, как установить ту или иную ОС, если вам понадобился Hyper-V. Если после установки ОС на виртуальную машину Hyper-V у вас нет сети, то смотрите ниже.
Горький опыт, который поможет вам
1 момент. Когда я писал эту инструкцию, я не дождался установки Linux Zorin и попытался выключать. Установка не выключалась, а на экране появились ошибки связанные с кривым дистрибутивом. После перезагрузил ПК локальный диск на котором были созданные виртуальные машины не открывался и просил отформатировать его. Я понимал, что на диске была вся моя работа и она просто исчезнет.
Совет: Если после сбоя диск не открывается и просит отформатировать его, то запустите командную строку от имени администратора и введите команду:
- chkdsk F: /f — где F имя локального диска, который не открывается и просит отформатировать.
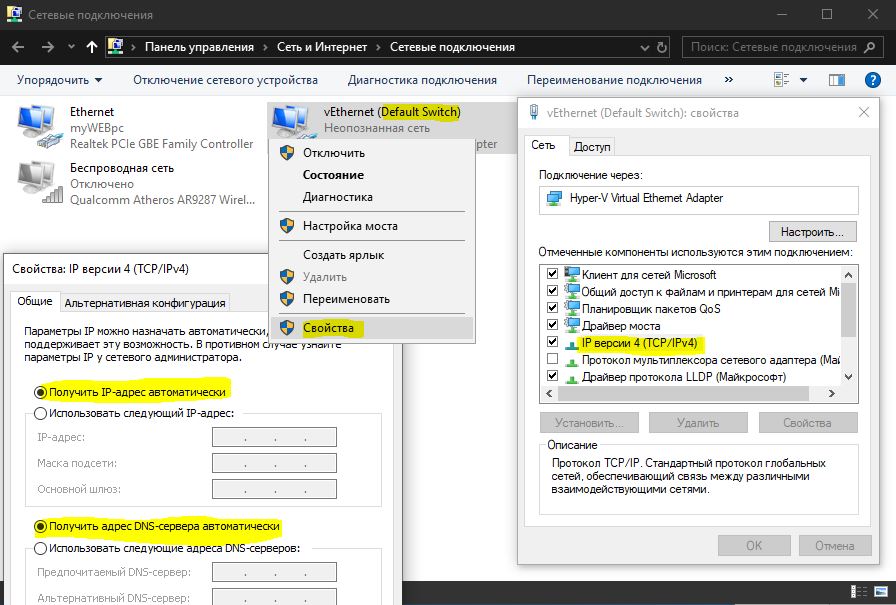
2 момент. Если после установки ОС на виртуальную машину Hyper-V у вас нет интернета и сети, то откройте «сетевые адаптеры«, нажмите правой кнопкой мыши на заданном нами адаптере «Default Switch» и выберите «Свойства«. Далее выделите графу «IP версии 4 (TCP/IPv4)» и нажмите ниже на кнопку «Свойства«. В новом окне установите получать автоматически IP и DNS адреса.
Get a Windows 10 development environment
Start building Windows applications quickly by using a virtual machine with the latest versions of Windows, the developer tools, SDKs, and samples ready to go
Download a virtual machine
We currently package our virtual machines for four different virtualization software options: VMWare, Hyper-V, VirtualBox, and Parallels.
Windows 10 Enterprise — 20 GB download
This VM will expire on 5/16/21.
This evaluation virtual machine includes:
Windows 10, version 2004 (10.0.19041.0)
Windows 10 SDK, version 2004 (10.0.19041.0)
Visual Studio 2019 (latest as of 2/15/21) with the UWP, .NET desktop, and Azure workflows enabled and also includes the Windows Template Studio extension
Visual Studio Code (latest as of 2/15/21)
Windows Subsystem for Linux enabled with Ubuntu installed
Developer mode enabled
File hashes
| Name | Length | FileHash |
|---|---|---|
| WinDev2102Eval.HyperVGen1.zip | 19365882391 | 2754ECB324EA251F36F50D5F90C92394288F08497B3FB71CD6353A2D00403496 |
| WinDev2102Eval.Parallels.zip | 19802994386 | 8295B20DF754EC2F5A3788CDCFF971A25A260F6CC476C4C1B8B567E7645E2B84 |
| WinDev2102Eval.VirtualBox.zip | 19964017894 | 2725E99F67819DB0ED960405C7B360F33D8F0D88A057C371BCCB514DB5144009 |
| WinDev2102Eval.VMware.zip | 21143650101 | F3D493C1F6909040876ABF9478C3ED0E8D73FDEFC16B4F74F8219C268F922026 |
The Microsoft Software License Terms for the Windows 10 VMs supersede any conflicting Windows license terms included in the VMs.
Build a distributed environment for Windows 10 deployment
Applies to
Perform the steps in this article to build a distributed environment for Windows 10 deployment. A distributed environment for deployment is useful when you have a segmented network, for example one that is segmented geographically into two branch locations. If you work in a distributed environment, replicating the deployment shares is an important part of a deployment solution because images of 5 GB or more in size can present bandwidth issues when deployed over the wire. Replicating this content enables clients to do local deployments.
Four computers are used in this topic: DC01, MDT01, MDT02, and PC0006. DC01 is a domain controller, MDT01 and MDT02 are domain member computers running Windows ServerВ 2019, and PC0006 is a blank device where we will deploy WindowsВ 10. The second deployment server (MDT02) will be configured for a remote site (Stockholm) by replicating the deployment share on MDT01 at the original site (New York). All devices are members of the domain contoso.com for the fictitious Contoso Corporation.
For the purposes of this article, we assume that MDT02 is prepared with the same network and storage capabilities that were specified for MDT01, except that MDT02 is located on a different subnet than MDT01. For more details on the infrastructure setup for this topic, please see Prepare for deployment with MDT.

Computers used in this topic.
HV01 is also used in this topic to host the PC0006 virtual machine.
Replicate deployment shares
Replicating the content between MDT01 (New York) and MDT02 (Stockholm) can be done in a number of different ways. The most common content replication solutions with Microsoft Deployment Toolkit (MDT) use either the Linked Deployment Shares (LDS) feature or Distributed File System Replication (DFS-R). Some organizations have used a simple robocopy script for replication of the content.
Robocopy has options that allow for synchronization between folders. It has a simple reporting function; it supports transmission retry; and, by default, it will only copy/remove files from the source that are newer than files on the target.
Linked deployment shares in MDT
LDS is a built-in feature in MDT for replicating content. However, LDS works best with strong connections such as LAN connections with low latency. For most WAN links, DFS-R is the better option.
Why DFS-R is a better option
DFS-R is not only very fast and reliable, but it also offers central monitoring, bandwidth control, and a great delta replication engine. DFS-R will work equally well whether you have 2 sites or 90. When using DFS-R for MDT, we recommend running your deployment servers on Windows Server 2008 R2 or higher. From that version on, you can configure the replication targets as read-only, which is exactly what you want for MDT. This way, you can have your master deployment share centralized and replicate out changes as they happen. DFS-R will quickly pick up changes at the central deployment share in MDT01 and replicate the delta changes to MDT02.
Set up Distributed File System Replication (DFS-R) for replication
Setting up DFS-R for replication is a quick and straightforward process: Prepare the deployment servers, create a replication group, then configure some replication settings.
Prepare MDT01 for replication
On MDT01:
- Install the DFS Replication role on MDT01 by entering the following at an elevated Windows PowerShell prompt:
- Wait for installation to comlete, and then verify that the installation was successful. See the following output:
Prepare MDT02 for replication
On MDT02:
- Perform the same procedure on MDT02 by entering the following at an elevated Windows PowerShell prompt:
- Wait for installation to comlete, and then verify that the installation was successful. See the following output:
Create the MDTProduction folder on MDT02
On MDT02:
- Create and share the D:\MDTProduction folder using default permissions by entering the following at an elevated command prompt:
- You should see the following output:
Configure the deployment share
When you have multiple deployment servers sharing the same content, you need to configure the Bootstrap.ini file with information about which server to connect to based on where the client is located. In MDT, that can be done by using the DefaultGateway property.
On MDT01:
Using Notepad, navigate to the D:\MDTProduction\Control folder and modify the Boostrap.ini file as follows. Under [DefaultGateway] enter the IP addresses for the client’s default gateway in New York and Stockholm, respectively (replace 10.10.10.1 and 10.10.20.1 with your default gateways). The default gateway setting is what tells the client which deployment share (i.e. server) to use.
The DeployRoot value needs to go into the Bootstrap.ini file, but you can use the same logic in the CustomSettings.ini file. For example, you can redirect the logs to the local deployment server (SLSHARE), or have the User State Migration Tool (USMT) migration store (UDDIR) local. To learn more about USMT, see Refresh a Windows 7 computer with Windows 10 and Replace a Windows 7 computer with a Windows 10 computer.
Save the Bootstrap.ini file.
Using the Deployment Workbench, right-click the MDT Production deployment share and select Update Deployment Share. Use the default settings for the Update Deployment Share Wizard. This process will take a few minutes.
After the update is complete, use the Windows Deployment Services console on MDT01. In the Boot Images node, right-click the MDT Production x64 boot image and select Replace Image.
Browse and select the D:\MDTProduction\Boot\LiteTouchPE_x64.wim boot image, and then complete Replace Boot Image Wizard using the default settings.

Replacing the updated boot image in WDS.
If you modify bootstrap.ini again later, be sure to repeat the process of updating the deployment share in the Deployment Workbench and replacing the boot image in the WDS console.
Replicate the content
Once the MDT01 and MDT02 servers are prepared, you are ready to configure the actual replication.
Create the replication group
On MDT01, using DFS Management (dfsmgmt.msc), right-click Replication, and click New Replication Group.
On the Replication Group Type page, select Multipurpose replication group, and click Next.
On the Name and Domain page, assign the MDTProduction name, and click Next.
On the Replication Group Members page, click Add, add MDT01 and MDT02, and then click Next.
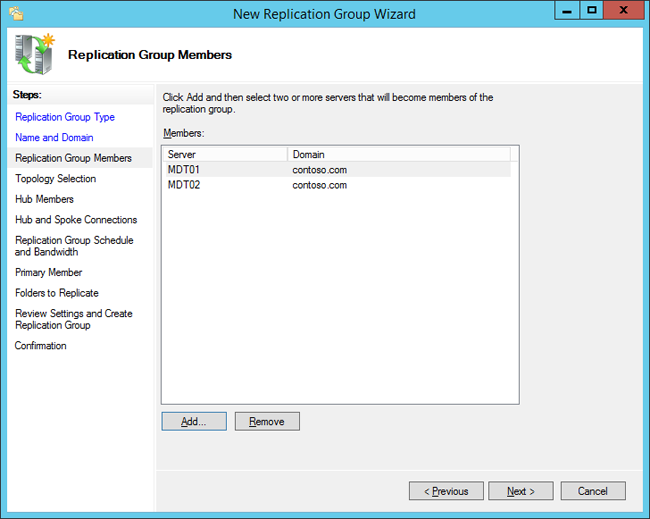
Adding the Replication Group Members.
On the Topology Selection page, select the Full mesh option and click Next.
On the Replication Group Schedule and Bandwidth page, accept the default settings and click Next.
On the Primary Member page, select MDT01 and click Next.
On the Folders to Replicate page, click Add, enter D:\MDTProduction as the folder to replicate, click OK, and then click Next.
On the Local Path of MDTProduction on the Other Members page, select MDT02, and click Edit.
On the Edit page, select the Enabled option, type in D:\MDTProduction as the local path of folder, select the Make the selected replicated folder on this member read-only check box, click OK, and then click Next.
On the Review Settings and Create Replication Group page, click Create.
On the Confirmation page, click Close.
Configure replicated folders
On MDT01, using DFS Management, expand Replication and then select MDTProduction.
In the middle pane, right-click the MDT01 member and click Properties.
On the MDT01 (MDTProduction) Properties page, configure the following and then click OK:
In the Staging tab, set the quota to 20480 MB.
In the Advanced tab, set the quota to 8192 MB. In this scenario the size of the deployment share is known, but you might need to change the values for your environment. A good rule of thumb is to get the size of the 16 largest files and make sure they fit in the staging area. Below is a Windows PowerShell example that calculates the size of the 16 largest files in the D:\MDTProduction deployment share:
In the middle pane, right-click the MDT02 member and select Properties.
On the MDT02 (MDTProduction) Properties page, configure the following and then click OK:
- In the Staging tab, set the quota to 20480 MB.
- In the Advanced tab, set the quota to 8192 MB.
It will take some time for the replication configuration to be picked up by the replication members (MDT01 and MDT02). The time for the initial sync will depend on the WAN link speed between the sites. After that, delta changes are replicated quickly.
Verify that MDT01 and MDT02 are members of the MDTProduction replication group, with MDT01 being primary as follows using an elevated command prompt:
Verify replication
On MDT02:
- Wait until you start to see content appear in the D:\MDTProduction folder.
- Using DFS Management, expand Replication, right-click MDTProduction, and select Create Diagnostics Report.
- In the Diagnostics Report Wizard, on the Type of Diagnostics Report or Test page, choose Health report and click Next.
- On the Path and Name page, accept the default settings and click Next.
- On the Members to Include page, accept the default settings and click Next.
- On the Options page, accept the default settings and click Next.
- On the Review Settings and Create Report page, click Create.
- Open the report in Internet Explorer, and if necessary, select the Allow blocked content option.
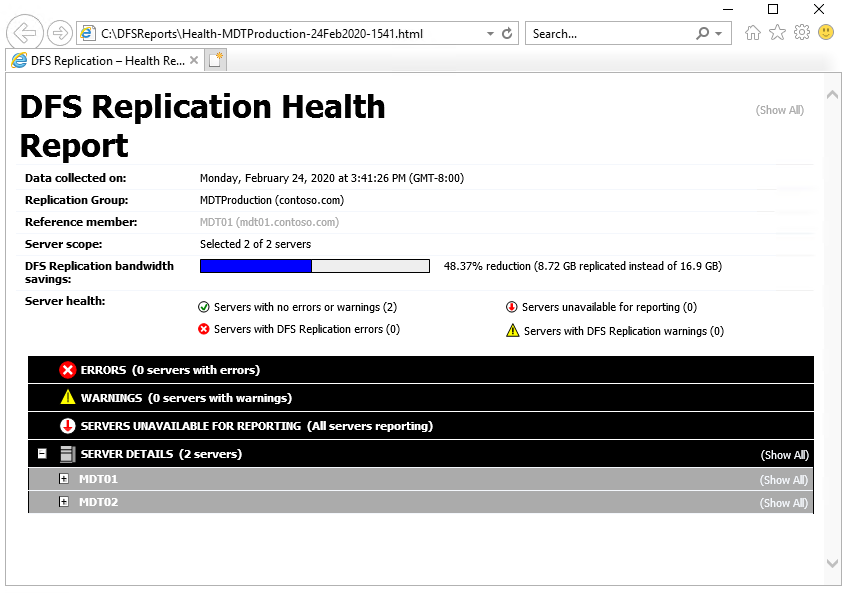
The DFS Replication Health Report.
If there are replication errors you can review the DFS event log in Event Viewer under Applications and Services Logs.
Configure Windows Deployment Services (WDS) in a remote site
Like you did in the previous topic for MDT01, you need to add the MDT Production Lite Touch x64 Boot image to Windows Deployment Services on MDT02. For the following steps, we assume that WDS has already been installed on MDT02.
- On MDT02, using the WDS console, right-click Boot Images and select Add Boot Image.
- Browse to the D:\MDTProduction\Boot\LiteTouchPE_x64.wim file and add the image with the default settings.
Deploy a WindowsВ 10 client to the remote site
Now you should have a solution ready for deploying the WindowsВ 10 client to the remote site: Stockholm, using the MDTProduction deployment share replica on MDT02. You can test this deployment with the following optional procedure.


