- Reducing Lag In Windows 10 Laptops While Gaming
- Step 1: Adjust Power Settings
- Step 2: Adjust Performance Options
- Step 3: Adjust System Configurations
- Final Thoughts
- 7 steps to minimize game lags in Windows 10
- 1. Rule out Internet issues
- 2. Optimize your game’s video settings
- 3. Optimize your power settings
- 4. Halt unnecessary applications
- 5. Set up antivirus properly
- 6. Set up Windows Update properly
- 7. Keep your computer tidy
- How to fix mouse lags in Windows 10 (and make it fast again)
- How can I solve mouse lags in Windows 10?
- 1. Install the official mouse driver
- Driverfix
- 2. Enable / Disable Scroll Inactive Windows
- 3. Change Palm Check Threshold
- 4. Set the touchpad to No Delay
- 5. Turn off Cortana
- 6. Disable NVIDIA High Definition Audio
- 7. Change your mouse frequency
- 8. Disable Fast Startup
Reducing Lag In Windows 10 Laptops While Gaming
Sometimes lag during gaming becomes an intolerable problem, especially for a heavy game such as Overwatch. This can cause a lot of frustration, as despite the fact that there are tons of tips or improvement ideas out there, very little end up helping towards reducing laptop lag in games.
Although in many cases the problem occurs due to the game itself, sometimes certain issues in your Windows 10 also affect the performance of games. That being said, there could be a number of reasons due to which this problem occurs.
In this article, we will look at how to improve your gaming performance in Windows 10 laptops with just 4 tips that aren’t very commonly pointed out as fixes.
Step 1: Adjust Power Settings
The way to go about doing that is moving your cursor over to the right-hand corner of your screen. Move the mouse over the Windows 10 taskbar and right over the battery icon and then left-click. And once you do, move the cursor up to power and sleep settings. From here on, you are going to go ahead and click on “Power and Sleep Settings” and it will open up the settings window for power and sleep screen.
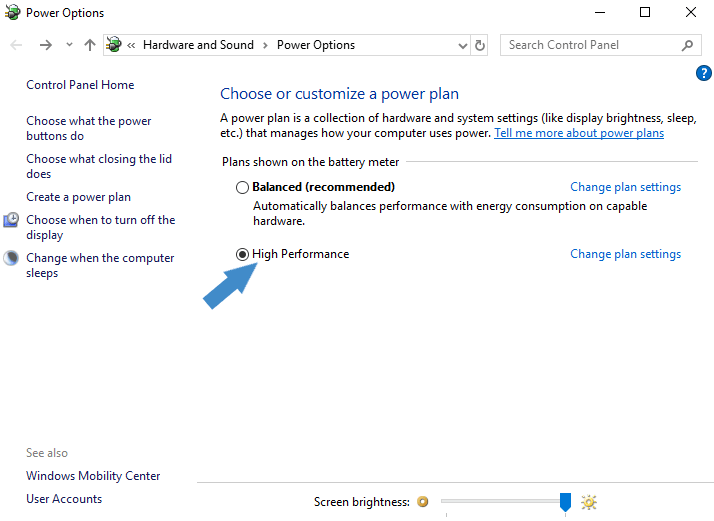
Once you are there, click on additional power settings and then that will provide you with the power options.
Now by default, it will show the balanced plan, which is recommended by Windows. You will have to click on the option to “show additional plans” and it will show you the “high performance setting”. Once you click on that option, you are now set for high performance on your power settings.
You should now see a significant improvement in your performance within all applications including gaming.
Step 2: Adjust Performance Options
In order to access the Performance Options, press Windows Key + I to open up the Windows Settings. Here, in the “Find a setting” search bar, type “performance”, then select the Adjust the appearance and performance of Windows.
Once you’re in the Performance Options panel, under the “Visual Effects” tab, you’ll be presented with four options, from which you need to choose the “Adjust for best performance” plan, which turns all these visual effects off.
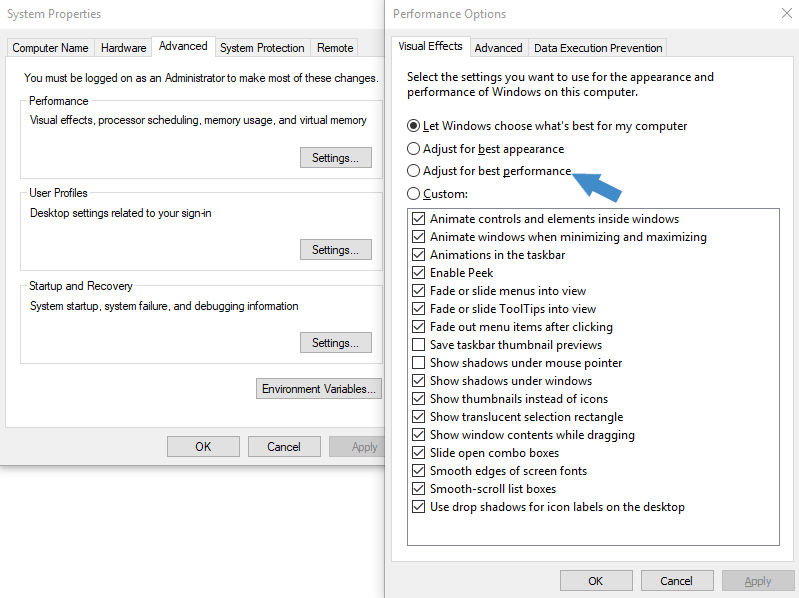
However, if you want any individual visual effect to run, select that particular effect, and this will turn your plan into a custom one.
Once you’ve done that and decided that you are happy with the settings, click on “Apply” and then click on “OK” and then close the window.
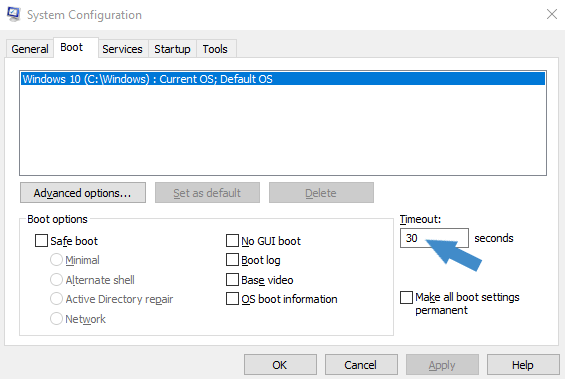
Step 3: Adjust System Configurations
Start by right-clicking on the Start menu icon on the bottom-left of your screen which will open up the hidden menu. The click on the option “Run” (or press Windows Key + R), and that will open up the run command prompt.
In the console, type in “msconfig” and then click on “OK”. It will then open up the system configuration window.
Select the “Boot” tab and the windows you are using (in case of multiple OS) and go down below and change the boot time from 30 to 5 seconds. Some people make it 3, but usually 5 is the most recommended one to help your Windows 10 boot quicker.
Once you have done that, make sure that you don’t have any programs automatically running on Windows boot which aren’t required to be starting up and using up your resources.
For that, in the very same “System Configuration” window, click on the “Startup” tab then on “Open Task Manager”.
On the “Startup” tab of the task manager, you will see some programs. You can disable the programs that you feel are taking up excess space, however, make sure not to disable any antivirus programs that you have running.
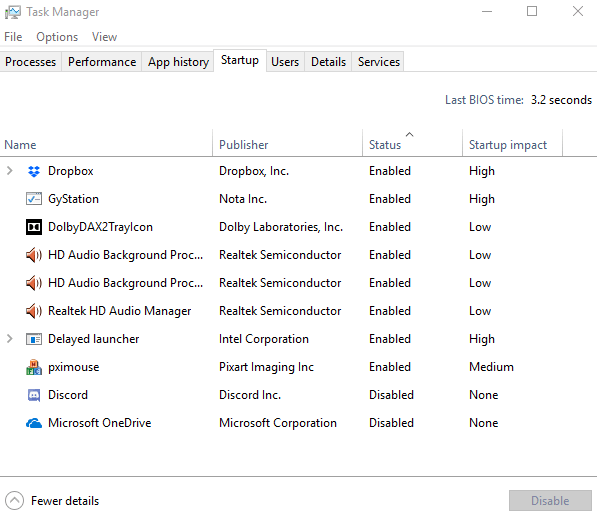
An example of something that can be disabled, that would be “Microsoft OneDrive” if you’re not using it, so you can go ahead and select it and click on “Disable”, which will disable it and it will not start up when the computer starts.
Once you’re done, click on “OK” and then you’re prompted to make another choice which is either “Restart” or “Exit without restart”. If you want the changes which you have just made to take effect immediately, then you would click on “Restart”. This will overall make a significant increase in performance in your system after bootup.
Step 4: Update Graphics Drivers
Games freezing in Windows 10 issues can also appear if you haven’t updated the graphics drivers. In order to fix the problem, you have to update them with the correct and yet new version, such as from the manufacturer’s website.
If you are also using an older version of DirectX and running latest games, it may cause games to freeze or lag in Windows 10. Install the latest and the most updated version of DirectX from Microsoft’s website.
Final Thoughts
It is equally likely that due to the low-intensity graphics card and the insufficient RAM, the games being ran on your laptop can lag. It is recommended in this situation to sort out the exact specifications required to play a certain game and then enhance your system’s capability to ensure that it is powerful enough to play that game.
However, if you are really tired of games lagging and want to get rid of this issue quickly, you can go ahead and even look at a new gaming laptop.
Apart from that, you can utilize the features such as registry cleaning, registry defrag and services optimizer to boost the system performance as well. Some recommended programs are IOBit Advanced SystemCare and CCleaner.
7 steps to minimize game lags in Windows 10
These seven tips will help you get maximum gaming performance from your PC while retaining a high level of protection.


Losing a multiplayer match because your computer suddenly froze for 50 milliseconds can be bitter. The good news is that you can prevent this mishap in the vast majority of cases. In this post we focus on the software-related problems and solutions that are most common for modern gamers. These seven tips will help you minimize performance-related defeats.
1. Rule out Internet issues
Make sure your Internet has stable speed and latency (signal delay). Open your Web browser and navigate to a comprehensive speed testing service such as speedtest.net or dslreports.com. Make sure that Internet speed is adequate (most games will do fine with 10 Mbit/s, but video streaming the whole thing requires 50–100 Mbit/s) and a really small delay (aka ping). Modern fiber optic channels typically get you a 5–50 ms ping, which is fine for most games. A delay in hundreds of millisecond might be a real obstacle to winning a battle royale.
Fixing this issue might involve experimenting with your router’s Wi-Fi settings, moving it closer to your gaming computer, switching to a wired connection between computer and router (keep in mind that pro players use wired connections only) or even changing your Internet provider. We will cover all that in a separate article one day, but for now let’s switch to software issues and tweaks.
2. Optimize your game’s video settings
If your game is too resource-hungry and your graphics card cannot provide enough processing power, the gaming experience could be frustrating. Setting a lower detail level or reducing resolution in the game settings can help a lot. Focus on reducing eye candy while maintaining things such as viewing distance that help you win. Switch on an FPS indicator if it’s supported by the game settings, and fine-tune settings until you can consistently squeeze 30–60 frames per second out of your system. More is better (and gives you some room for graphics enhancements); less is usually considered unplayable for dynamic games such as shooters. For online gaming more than 60 FPS is highly recommended.
3. Optimize your power settings
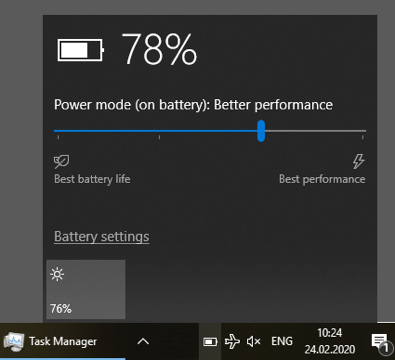
This one is critical for laptops but relevant for other computers too. Make sure you’re playing on AC power and have the best performance mode enabled. The easiest way to adjust that is to click the battery icon in the task bar and move the slider to the far right, where the “Best performance” setting is located.
4. Halt unnecessary applications
Any apps that compete for resources with the game can introduce that dreaded lag. It may help to close all browser windows, unneeded chat apps, and everything else that is not system-level and not related to the game you’re playing. This small trick alone can solve the issue with lags.
To get an idea of what apps consume the most memory and processing power, use Windows’ Task Manager app. If you click the “More details” button in the lower part of its window, it will flood you with details on all processes running. Sort this table by the “Memory” and “CPU” columns and consider closing the hungriest processes. You may also find some additional offenders, like a messenger client you didn’t even realize was running in the background, or some other unobtrusive app.
5. Set up antivirus properly
Many gamers think an antivirus or Internet security solution is the app worth stopping. Some go as far as uninstalling it permanently. In reality, this approach is outdated and unhelpful. In fact, it can even make your games run slower!
Consider two things: First, in Windows 10 you can’t have no antivirus at all — if you turn off a third-party solution, Windows Defender automatically jumps into action. Second, not all antiviruses are created equal. Some security solutions have a dedicated gaming mode that minimizes their impact on PC performance, but Windows Defender doesn’t provide such a luxury.
Keep in mind that you probably have one more “bonus” antivirus that you’re not aware of. It’s hidden inside … Google Chrome! That AV also has very limited settings, and nothing particularly useful for gamers. That’s another reason to close browser windows when you’re trying to optimize your computer speed.
That said, the right approach to the AV question is to install one of a few security solutions that have both a proven minimal impact on speed and a dedicated gaming mode to reduce lag and disable any pop-ups, additional scans, and so forth. We will demonstrate with Kaspersky Internet Security and Kaspersky Security Cloud, which have consistently received top marks for performance and efficiency for quite a few years already.
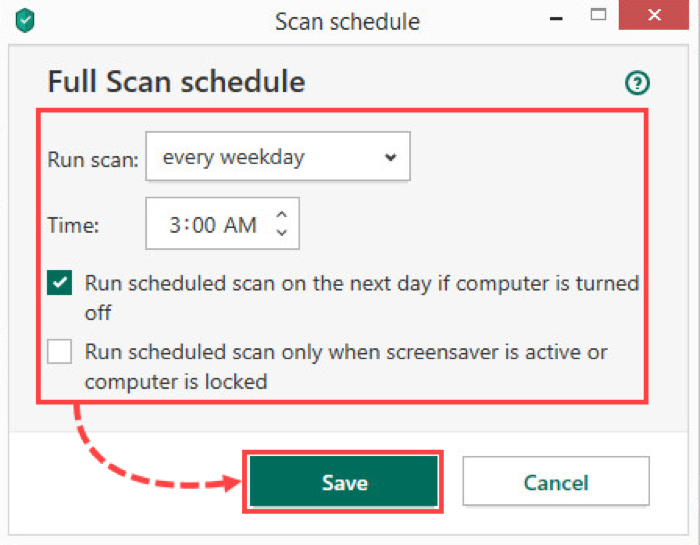
- Make sure that any scheduled scans or updates are set for times when you’re not gaming:
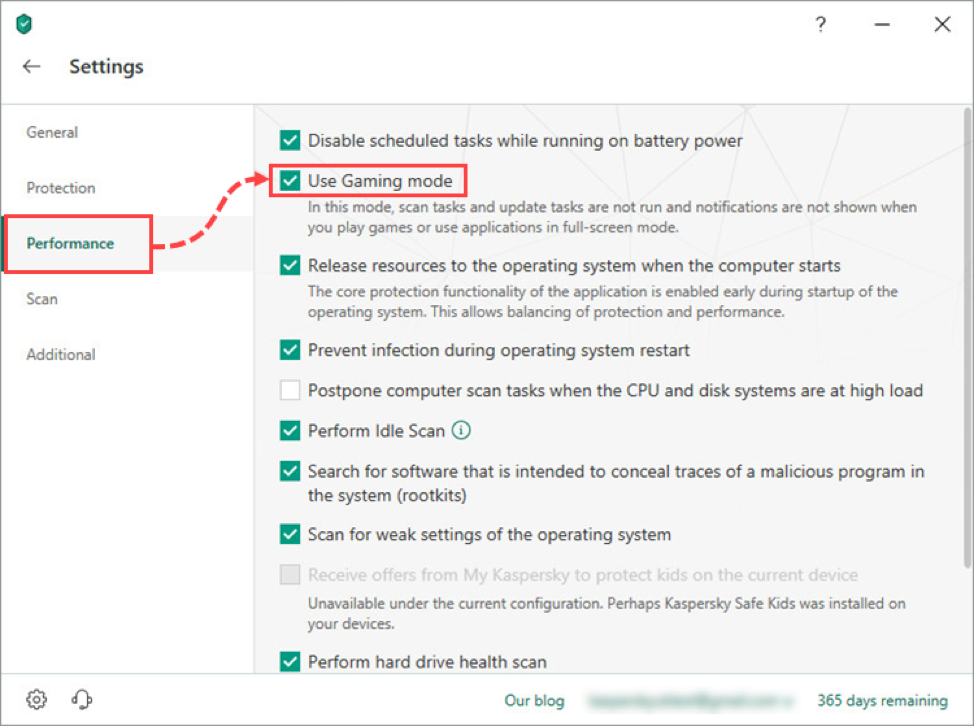
- Use gaming mode. This mode turns on automatically whenever a full-screen app is running, and in this mode the security solution will not run full scans or update databases so as not to disturb you.
6. Set up Windows Update properly
Certain Windows 10 subsystems’ background operations can be the cause of sudden delays. Most notably, when Windows Update is downloading and installing something, it hits performance substantially. That’s why it helps to set the update schedule for times when you’re not gaming: Open Windows 10 settings, navigate to Windows Update, and click “Change active hours.” The description states that active hours affect restart times only, but this setting actually informs other update tasks as well.

7. Keep your computer tidy
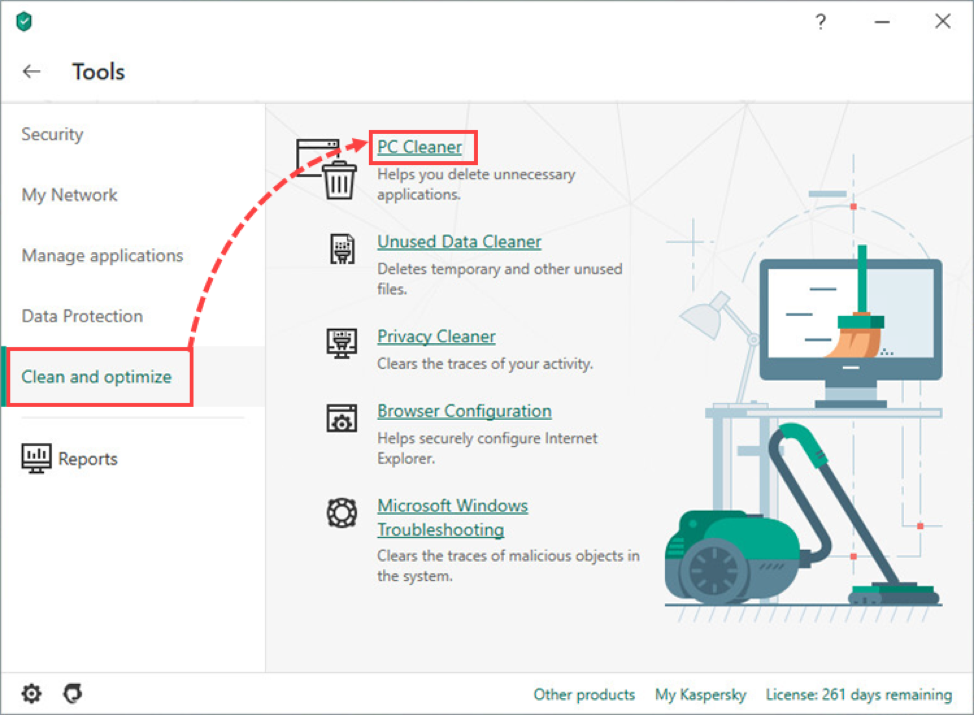
As time goes by, almost every computer shows some speed degradation. The major reason for this slowdown is the accumulation of junk files and apps. To help your computer run faster, you should clean out temporary files, archive or delete unneeded documents, and uninstall the games you don’t play anymore. Many dedicated apps do this maintenance for you, and Kaspersky Total Security and Kaspersky Security Cloud also perform cleanup functions.
With all of the steps above taken, your computer should be a failure-proof gaming rig — and winning the game becomes a matter of tactics, training, and teamwork.
How to fix mouse lags in Windows 10 (and make it fast again)

- A laggy mouse can be quite troublesome during certain activities, such as gaming.
- The following guide will show you how to fix any potential mouse lag that you may meet.
- If you want to read more about such system issues, visit our System Errors Hub.
- Even more, guides can be found on our Windows 10 Troubleshooting Guides.

- Download Restoro PC Repair Tool that comes with Patented Technologies (patent available here).
- Click Start Scan to find Windows issues that could be causing PC problems.
- Click Repair All to fix issues affecting your computer’s security and performance
- Restoro has been downloaded by 0 readers this month.
Mouse lag is a major hindrance that will affect your user experience and it appears that some Windows 10 users are having this issue, so let’s see if there’s a way to fix it.
There are many mouse related issues that can occur on Windows 10, and we covered the following problems in this article:
- Windows 10 mouse lag in games
- According to users, this issue can often appear in games.
- This can be a big problem since your game performance might be reduced.
- Windows 10 mouse stutter
- This is another problem that users reported.
- According to them, their mouse frequently stutters which makes it harder to perform everyday tasks.
- Mouse freeze Windows 10
- Another common problem that can appear with your mouse.
- Many users reported that their mouse keeps freezing on their PC.
- This can be a big problem, but you should be able to fix it with one of our solutions.
- Wireless mouse lag Windows 10
- This issue can affect both wired and wireless mice, but according to users, this issue appears more frequently while using a wireless mouse.
- Mouse input, pointer lag Windows 10
- Another issue that can appear is mouse input or pointer lag.
- This is a common problem, but you should be able to solve it easily with one of our solutions.
- Mouse not moving
- Several users reported that their mouse isn’t moving at all.
- This issue is usually caused by a corrupted driver or your mouse configuration.
According to users this issue is present after switching to Windows 10, and the issue persists when using Windows 10 and also while using any other software.
Mouse lag is also a major issue when it comes to gaming and it seriously affects your user experience and performance, but don’t worry, there are few solutions that you can try out.
How can I solve mouse lags in Windows 10?
1. Install the official mouse driver
Several users reported that they fixed mouse lag issues simply by installing the official driver for their mouse. In most cases, Windows 10 will automatically install the default mouse driver, and while that driver usually works, sometimes certain issues can occur.
If you’re using a branded mouse, check the manufacturer’s website and download the latest drivers for your mouse.
Update drivers automatically
Downloading drivers manually is a process that carries the risk of getting the wrong driver installed, which may lead to serious malfunctions.
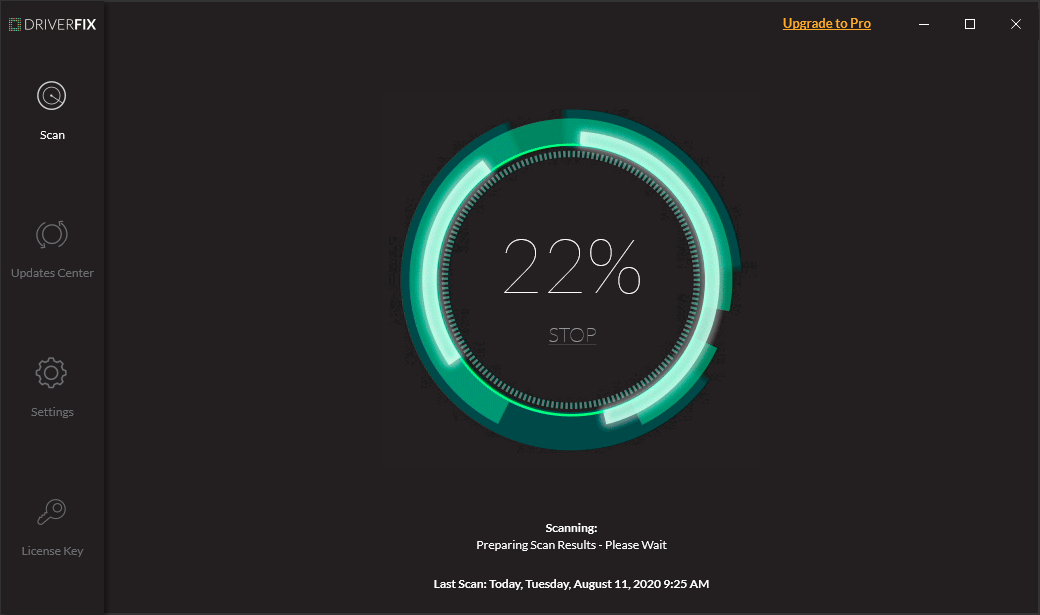
The safer and easier way to update drivers on a Windows computer is by using an automatic tool such as DriverFix.
- Download DriverFix
- Launch the program
- There is no setup process beforehand since DriverFix is completely portable
- DriverFix will proceed to scan your PC for missing broken or outdated drivers

- Choose which drivers to update or repair
- Wait while DriverFix deals with your drivers
- Restart your PC
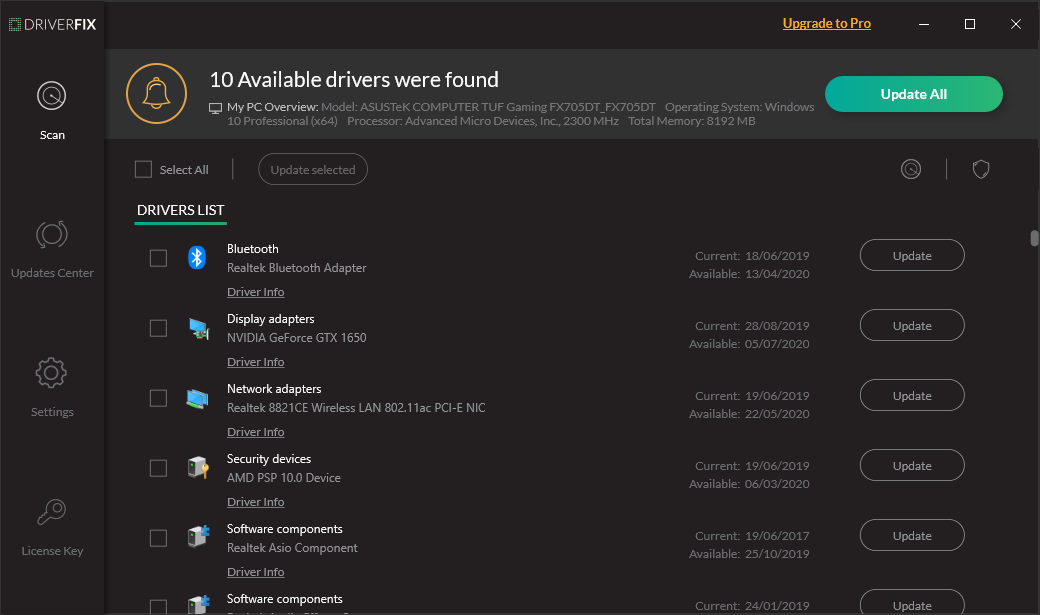

Driverfix
2. Enable / Disable Scroll Inactive Windows
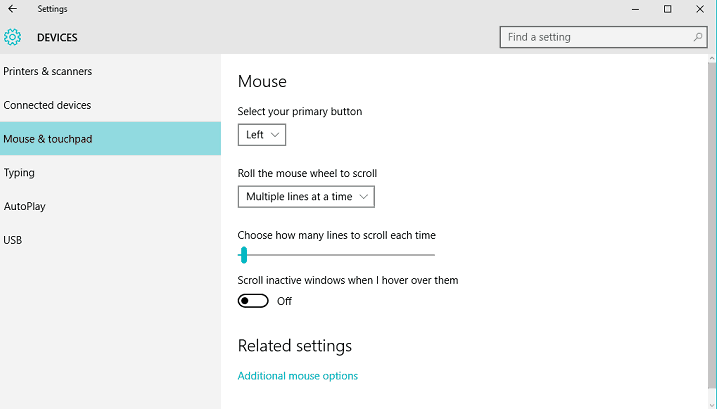
- Navigate to Settings > Devices > Mouse & Touchpad.
- Now locate the Scroll Inactive Windows option and disable / enable it.
- Try disabling and enabling this option a few times and check if the issue is resolved.
If you can’t access the Setting app, check out this guide that will help you solve the problem.
3. Change Palm Check Threshold
- Go to Mouse & Touchpad settings like we showed you in the Solution 1.
- Click Additional Mouse Options.
- Next choose TouchPad Tab.
- Click on Settings and go to Advanced Tab.
- Locate the Palm Check Threshold and move it all the way to the left.
4. Set the touchpad to No Delay
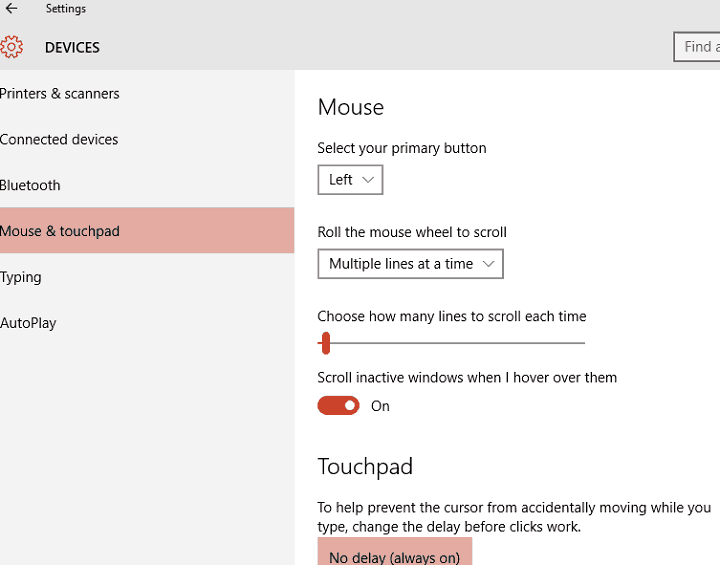
To do this navigate to Mouse & Touchpad settings as we explained in the previous steps. Now find the Touchpad section and set the delay before clicks to No delay (always on).
If you’re using a wired or wireless mouse and you don’t need the touchpad, you can easily disable it by following these steps.
5. Turn off Cortana
This seems like an unusual solution, but many users report that after turning off Cortana the issues with mouse lag disappear as well. To turn off Cortana do the following:
- Open Cortana and go to Settings in the top left corner.
- In Settings find the Cortana can give you suggestions, ideas, reminders, alerts and more option and set it to off.
6. Disable NVIDIA High Definition Audio
Some users claim that NVIDIA High Definition Audio and other audio drivers can sometimes cause these issue. If you’re using NVIDIA card you can try the following steps:
- Uninstall the GeForce Experience app.
- After that go to Device Manager and locate NVIDIA High Definition Audio.
- Right click it and choose Disable.

Same thing might work for other audio drivers such as Realtek, so try disabling them as well. If disabling audio drivers doesn’t help, you might want to uninstall them.
If you’re using Realtek audio, you should know that this issue can be caused by Realtek Audio Manager.
According to users, this application starts automatically with Windows and causes this problem to appear.
To fix the issue, you need to open Task Manager and disable Realtek Audio Manager in Startup tab. After doing that, the issue should be resolved.
You can also fix the problem simply by going to the C:Program FilesRealtekAudioHDA directory and renaming FMAPP.exe. After you rename the file, Realtek Audio Manager won’t start automatically with your PC, and the problem will be resolved.
Can’t access task manager? Here are a few solutions that you should try.
7. Change your mouse frequency
Sometimes mouse lag problems can be related to its frequency. This issue usually affects wireless mice, and if your mouse is lagging, you might be able to solve the problem by adjusting its frequency.
To do that, open your mouse configuration software and change its frequency from 500 to 250Hz. After doing that, your mouse will start working normally.
If your mouse is connected through Bluetooth and it’s not working, this article may help you fix it.
8. Disable Fast Startup
To fix this problem, many users are recommending to disable Fast Startup feature. This is a useful feature, but users reported that it can cause certain issues with your PC such as mouse lag. To fix the problem, you need to do the following:
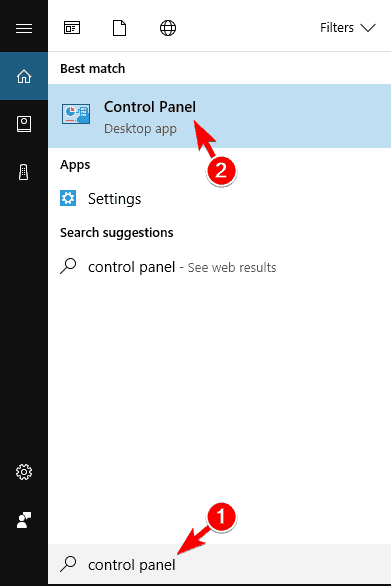
- Press Windows Key + S and enter control panel.
- Choose Control Panel from the list.
- Choose Control Panel from the list.
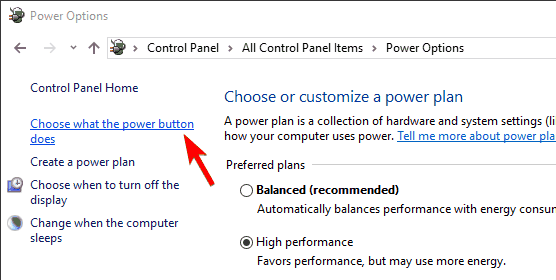
- When Control Panel opens, select Power Options.
- Now click on Choose what the power button does.
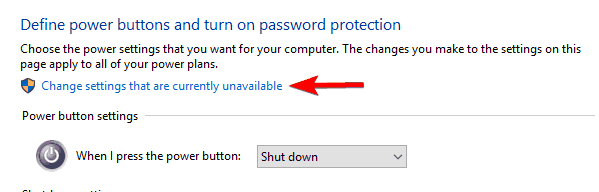
- Click on Change settings that are currently unavailable.
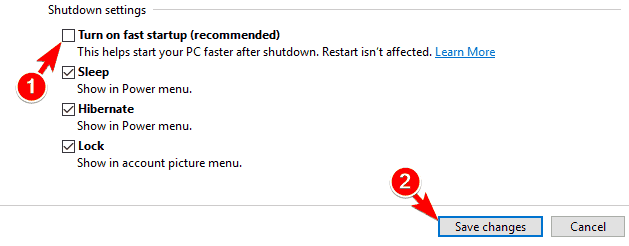
- Uncheck Turn on fast startup (recommended) and click on Save changes.