- SOLVED: Windows 10 Sleeps After 1-4 Minutes of Inactivity
- Solution 1: Resetting and then re-configuring your power settings
- Solution 2: Fix the problem by editing your registry
- Solution 3: Checking Screensaver Settings
- Solution 4: Disabling all Themes
- Solution 5: Changing What the Power Buttons Do
- Solution 6: Downloading Third-Party Software
- Solution 7: Using the Projection menu
- Windows 10 goes to sleep too fast? Here’s how to keep it awake
- What to do if Windows 10 goes to sleep too quickly?
- 1. Run the Power troubleshooter
- 2. Create your own custom power plans
- 3. Update your graphics card drivers
- 4. Control sleep/lockout mode
- 5. Use the power button to go to instant sleep
- 6. Check Screensaver Settings
- Run a System Scan to discover potential errors
- 7. Change System unattended sleep timeout
- 8. Perform a clean boot
- 9. Change Power options settings
- 10. Change the time when the display turns off when your PC is locked
- 11. Change the Lock screen timeout using Command Prompt
SOLVED: Windows 10 Sleeps After 1-4 Minutes of Inactivity
After upgrading from an older version of the Windows Operating System to Windows 10, or even after upgrading from an older build of Windows 10 to a newer one, quite a few users start experiencing a variety of problems, chief among them being their computer going to sleep after 1-4 minutes of inactivity. For some affected users, their computers go to sleep after 2 minutes, whereas some affected users have reported 3-4 minutes of inactivity triggering the problem in their case. This seems to happen even if an affected user has set their computer to go to sleep after a longer period of time, which is why this problem can be quite troubling.
Thankfully, though, this problem is pretty fixable, and the following are the two solutions that have proven to be most effective in resolving this problem:
Solution 1: Resetting and then re-configuring your power settings
In most cases, the root of this problem are customized power plan settings – if you have custom power settings and you upgrade to a newer version of Windows, the new Operating System may not be able to cope with and support your custom power settings and, as a consequence, cause your computer to go to sleep after every 1-4 minutes of inactivity. If this is what is causing this issue in your case, you can fix it by resetting and then re-configuring your power settings. To do so, you need to:
Open the Start Menu.
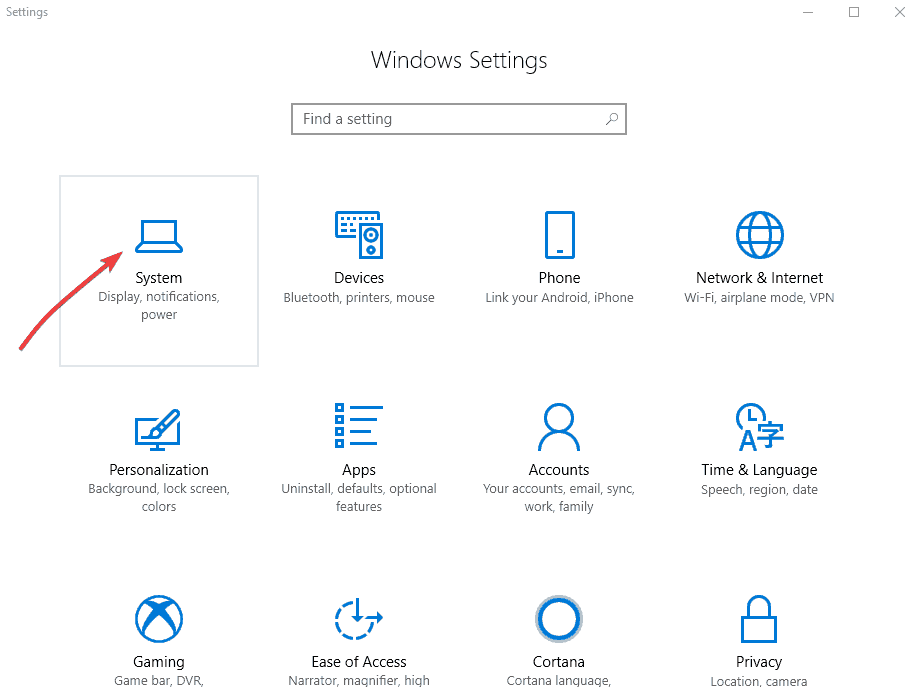
Click on Settings.
Click on System.
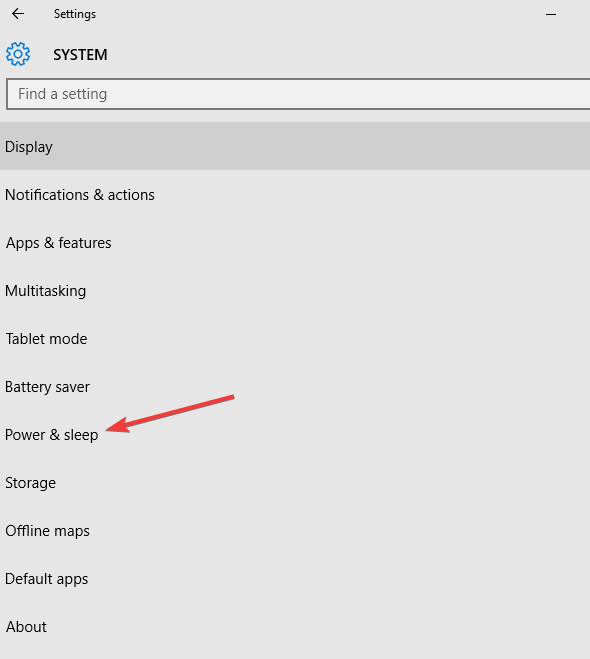
Navigate to Power & sleep in the left pane.
In the right pane, click on Additional power settings.
Select Choose when to turn off the display.
Click on Change advanced power settings.
Click on Restore plan defaults.
Once you do so, you need to re-configure all of your power settings – including the one that dictates the amount of time of inactivity after which your computer goes to sleep – and these settings will then work as they are supposed to.
Solution 2: Fix the problem by editing your registry
Many affected users have also had luck with applying a certain fix to their registry and then configuring custom power settings to make sure that your computer only goes to sleep after a longer period of inactivity. To do so, you need to:
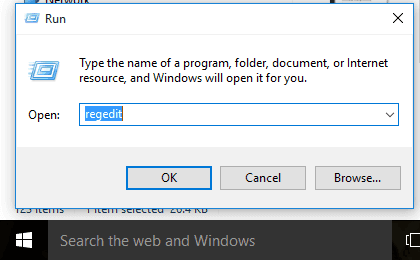
Press Windows Logo key + R to launch a Run
Type regedit into the Run dialog and press Enter.
In the left pane of the Registry Editor, navigate to the following directory:
In the right pane of the Registry Editor, double-click on a value named Attributes to modify it.
Replace whatever is in this value’s Value data field with 2.
Click on OK.
Exit the Registry Editor.
Once you have applied the registry fix, you need to change your system unattended sleep timeout to a longer period of time. To do so, you need to:
Open the Start Menu.
Search for “power options”.
Click on the search result titled Power Options.
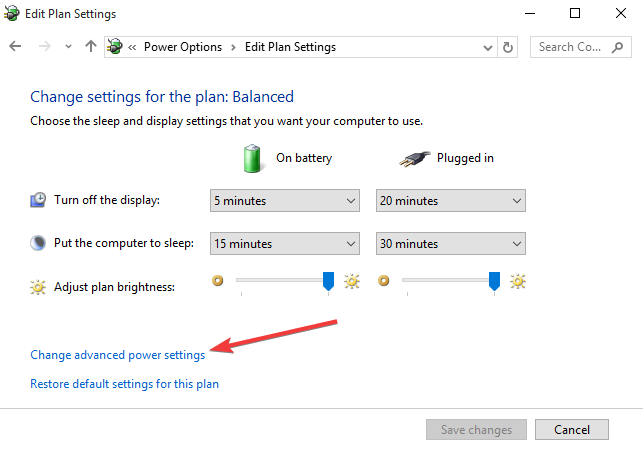
Click on Change plan settings under your selected power plan.
Click on Change advanced power settings.
Click on Change settings that are currently unavailable.
Click on Sleep.
Select System unattended sleep timeout. The value for this setting will probably be set to 2 minutes – change it to something longer, for example, 30 minutes.
Also, click on “Hibernate After” and then select a longer period of time such as 30 minutes.
Apply and save the changes you have made, exit, and the problem should have been fixed.
Solution 3: Checking Screensaver Settings
Screensaver utility is known to cause potential problems related to your sleeping. The screensaver is a utility present in Windows which allows your computer to go into a sleep mode to preserve energy. The computer is running in the background but with minimum usage and the screen is turned off. Improper configuration of this setting might cause discrepancies and hence, cause the problem. We can try disabling it and check if the problem still persists.
- Press Windows + R to launch the Run application. Type “control panel” in the dialogue box and hit Enter.
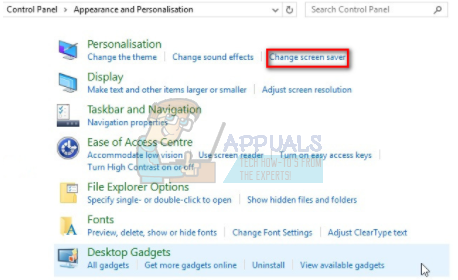
- Once in the control panel, click on the heading of “Appearance and Personalization”. It will be present at the second entry in the right column.

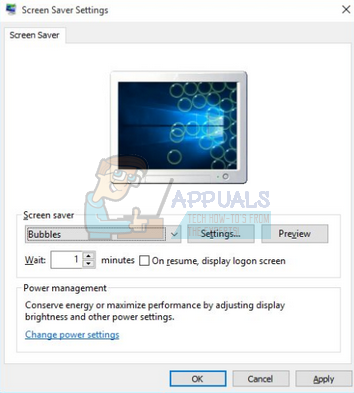
- Now click on “Change screen saver” button present in the personalization heading.
- Now the screensaver settings window will pop up. You can check if it is enabled. If it isn’t, you can disable it easily by selecting “None”.
If your Windows is updated to the latest version, you might not find the settings of the screensaver in the default location as in the past. Follow the steps below.
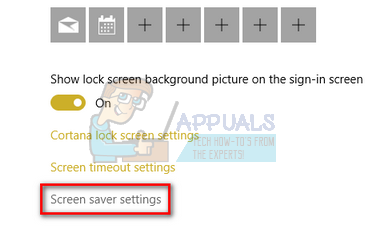
- Press Windows + S to launch the search bar of your start menu. Type “lock screen settings” in the dialogue box and hit enter.
- Select the first result which comes and click it. You will be navigated to your computer’s lock screen settings.
- Navigate to the bottom the screen and click on “Screensaver settings”.
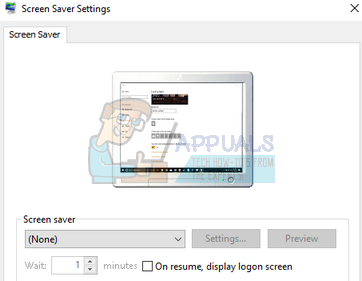
- It is possible that there is a default screensaver active on your computer. Many users gave feedback that the screensaver was activated with a black background which didn’t let it distinguish whether it was a screensaver or not. Make sure that it is disabled and try checking the problem again.
Note: You can also set the screensaver time to a very large number if you don’t want to remove it completely.
There was another glitch present in the system where the fix reported by the users was to set all the power settings as you want, select another screensaver, save changes, then select the blank screensaver again and save changes for the final time. Here we are temporarily selecting another screensaver so the settings are updated properly when we set our blank screensaver. Also, make sure that the screen timeout is set as 30 minutes + for both (powered and battery).
Solution 4: Disabling all Themes
Themes can be characterized as a bundle of settings consisting of a font, wallpaper, sounds, cursor and sometimes, even screensaver. It is possible that you have a theme installed and activated on your Windows which is causing your computer to sleep every once in a while. You can disable all the themes and reset the settings to default so the computer sticks to the default configuration done (it is assumed that you have already set the sleep time higher than 2-3 minutes when the problem is occurring).
- Press Windows + S to launch the search bar. Type “themes” in the dialogue box and open the most relevant result.

- Once the theme settings are opened, select the default (or windows) theme and exit. Restart your computer and see if this solves the problem for you. If you are using a third-party theme, it is recommended that you do a little digging and confirm it isn’t the theme which is causing you the problem.

Solution 5: Changing What the Power Buttons Do
There are advanced power options available on Windows to make sure you have complete accessibility on what you can change. Sometimes these very features tend to be the root of the problem. In this solution, we will change the advanced power options and make all the power buttons do “nothing” in the “what the power buttons do” option.
- Press Windows + R to launch the Run application. Type “control panel” in the dialogue box and press Enter.
- Once the control panel is opened, click the subheading “Hardware and Sound”.
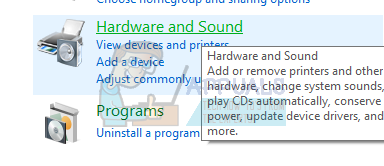
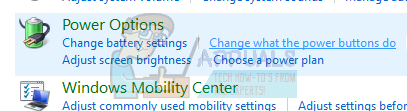
- Now beneath the Power Options heading, you will see a sub-option “Change what the power buttons do”. Click it.
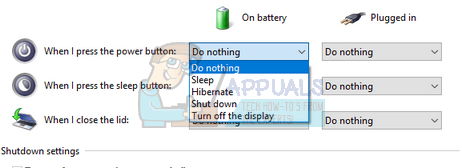
- Now change all the options to “Do nothing”. Press Save Changes, exit and reboot your computer.
Solution 6: Downloading Third-Party Software
If all the above methods don’t work, you can try downloading third-party software like MouseJiggler etc. to keep your computer from sleeping. This program fakes mouse movements every minute or so which triggers the action from the user; this activity makes the system believe that a user is moving the mouse; hence your computer doesn’t go into sleep mode.
Note: Appuals have no affiliations with any third-party software. All the software listed are for the pure information of the reader. Install and use them at your own risk.
- Download Mousejiggler from the CodePlex website and open the executable.
- Once it is opened, you will see a small window like this.
The Enable jiggle option enables jiggling your mouse whenever it is not in use. You can check this option and leave your mouse still and see the effect for yourself.
The Zen jiggle option makes the mouse move “virtually”; the mouse doesn’t move in the screen in front of you but the system still thinks it is moving.

- You can click the arrow button after activating the jiggle for it to disappear from the screen and be shown at your taskbar (besides the clock).
- You can disable the function anytime you wish.
Solution 7: Using the Projection menu
Some users have pointed out that they were able to prevent their system from going to sleep by using the Project menu. This is especially helpful for those users that are only encountering this behavior when they connect their computer to an external TV source.
The Project menu can be accessed by pressing the Windows + P command. Most users report that they managed to resolve the issue by using the Project menu to the option Projector Only, Extend or Second Screen Only.
Windows 10 goes to sleep too fast? Here’s how to keep it awake


- Download Restoro PC Repair Tool that comes with Patented Technologies (patent available here).
- Click Start Scan to find Windows issues that could be causing PC problems.
- Click Repair All to fix issues affecting your computer’s security and performance
- Restoro has been downloaded by 0 readers this month.
If your Windows 10 computer goes to sleep too fast, it could be happening for several reasons, among them the lockout feature that ensures your computer is locked or sleeps when unattended, or your screensaver settings, and other issues like outdated drivers.
Your computer goes into sleep mode based on the power management, which caters both for your security and saving power, but sometimes sleep mode also causes issues as you work.
This post will guide you through a series of solutions and troubleshooting fixes that will help you when Windows 10 goes to sleep too fast.
What to do if Windows 10 goes to sleep too quickly?
1. Run the Power troubleshooter
- Click Start and select Control Panel

- Click View by and change to Large Icons
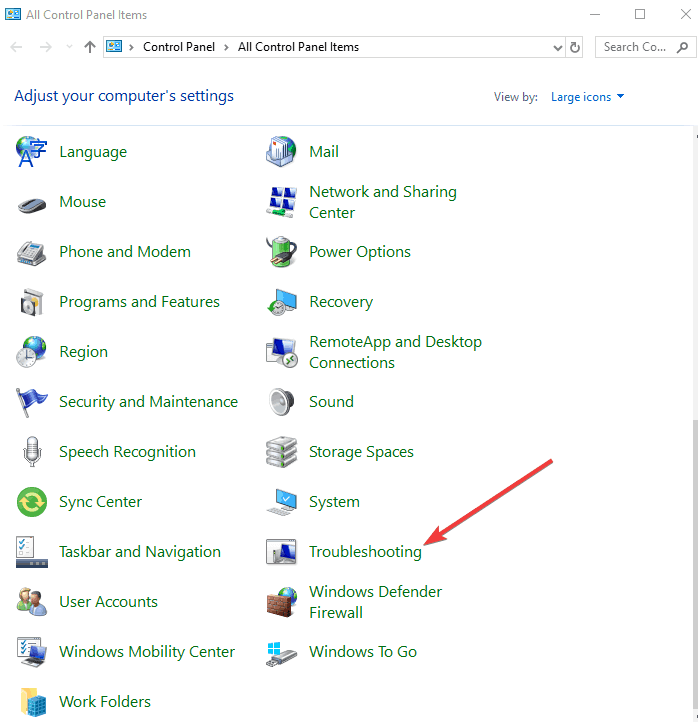
- Double click Troubleshooting
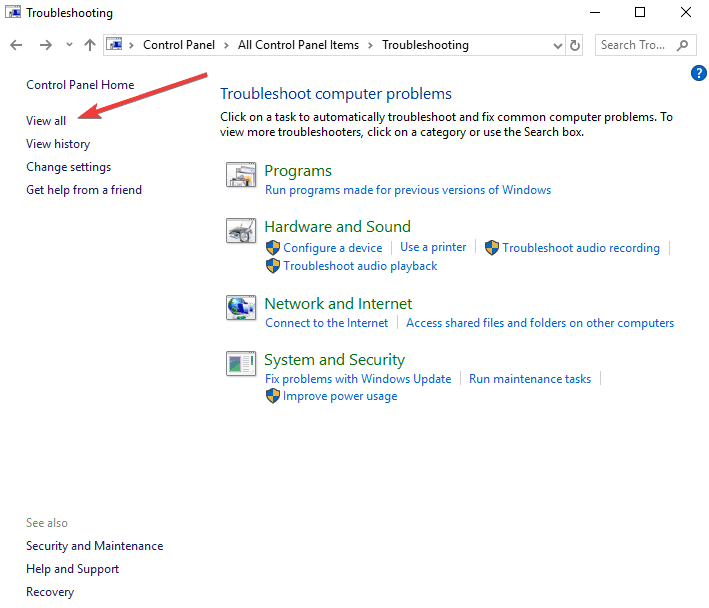
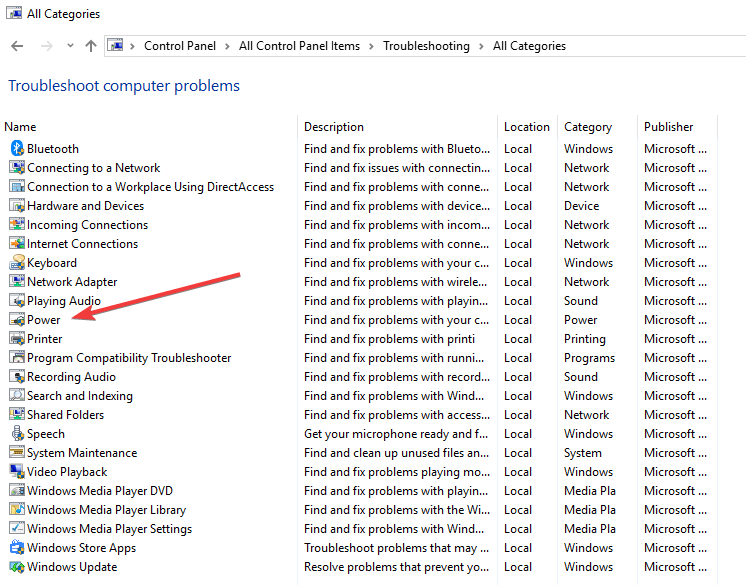
- Click View all on the left pane
- Click Power and select Next to run the troubleshooter
- Follow on-screen instructions to complete the process, then restart your computer

2. Create your own custom power plans
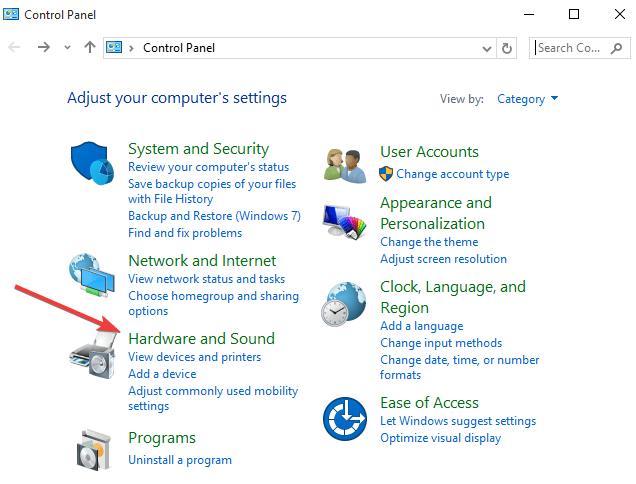
- Click Start and select Control Panel
- Click Hardware and Sound
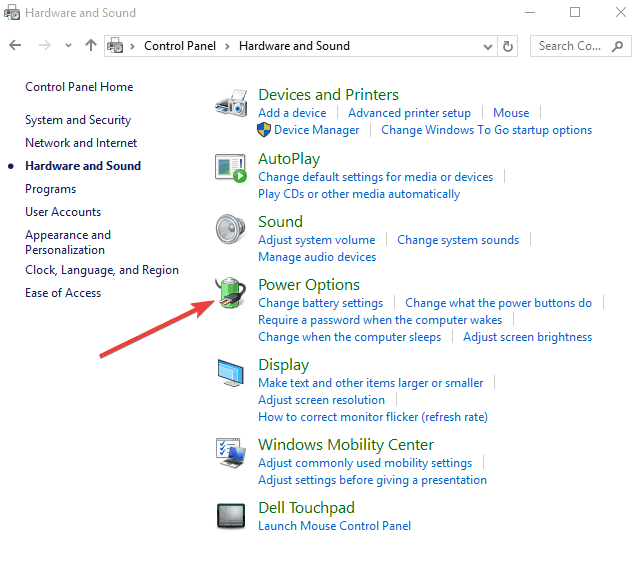
- Click Power options
- Click Create a power plan
- Go to Plan Name and give a name to your custom power plan then click Next to configure the time settings.
3. Update your graphics card drivers
Driver updates for Windows 10 are automatically downloaded and installed through Windows Update. To do this:
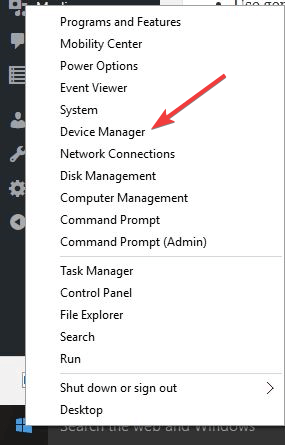
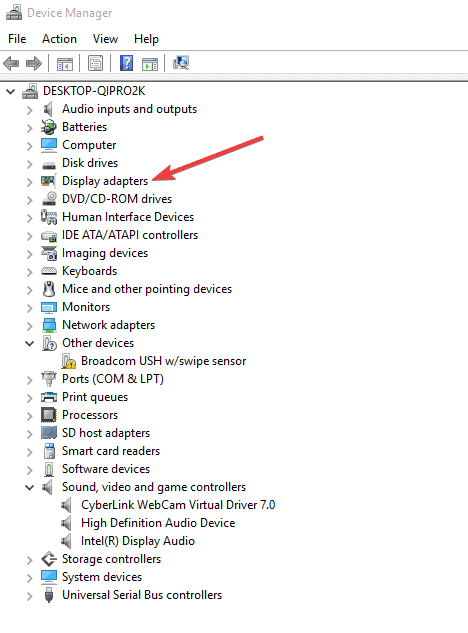
- Right click Start and select Device Manager
- Expand Display adapters category
- Right-click and select Update Driver
- Select Search automatically for updated driver software. If Windows doesn’t find a new driver, you can try looking for one on the device manufacturer’s website and follow their instructions.
Note: You can also try reinstalling the driver by right clicking Start> Device Manager> right-click graphics card>select Uninstall. Restart your computer and Windows will attempt to reinstall the driver.
4. Control sleep/lockout mode
- Click Start and select Settings
- Click System
- Click Power & Sleep
- Configure the time out for your screen as well as sleep timing. Usually, the default is set to 10 minutes for screen timeout and 30 minutes for sleep mode.
5. Use the power button to go to instant sleep
If you don’t want your computer to go to sleep on its own but want to do it manually, you can change the settings to ensure the power button is used for sleep mode. To do this:
- Click Start and select Settings
- Click System
- Select Power and Sleep
- Click Related Settings
- Click Additional Power Settings
- Click Choose What the Power button does
- Select Sleep instead of Shutdown
This helps you save more power otherwise your computer waits for 10 minutes to turn off the screen, and another 30 minutes to go to sleep. Sleep mode uses very little power, and your computer will start up faster, so you can instantly resume your work from you left off. If you have low battery, Windows will save all your work, and turn off the machine.
6. Check Screensaver Settings
- Click Start and select Settings
- Search for Screensaver
- Find the search result that reads: Turn screen saver on or off
Note: Whether or not you use screensaver, the time value locks the screen, so you can set it to None and ensure the checkbox is unselected such that it won’t need a password.
Run a System Scan to discover potential errors


7. Change System unattended sleep timeout
If the screensaver settings solution doesn’t work when Windows 10 goes to sleep too fast, check the System unattended sleep timeout settings. To do this:
- Ensure you have admin permissions for this as you’ll also be editing registry settings
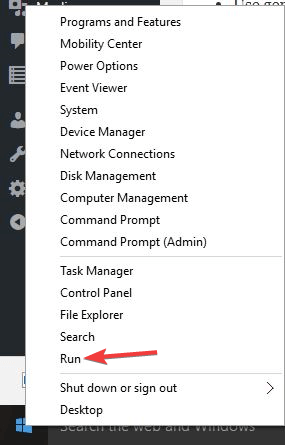
- Right click Start and select Run
- Type regedit and press Enter
- Go to this registry key: HKEY_LOCAL_MACHINE\SYSTEM\CurrentControlSet\Control\Power\PowerSettings\238C9FA8-0AAD-41ED-83F4-97BE242C8F20\7bc4a2f9-d8fc-4469-b07b-33eb785aaca0
- Double click Attributes
- Enter the value as 2
- Exit the Registry Editor
- Click Start and select Settings
- Search for Power Plan
- Select Edit Power plan from the search results
- Open the Change advanced power settings link
- Go to Sleep
- Select System Unattended sleep timeout and change to 10 minutes

8. Perform a clean boot
If Windows 10 goes to sleep too fast even after trying the above solutions, perform a clean boot to eliminate software conflicts that happen when you install a program or update or run a program in Windows. To do this:
- Click start and type msconfig then select System Configuration from the search results.
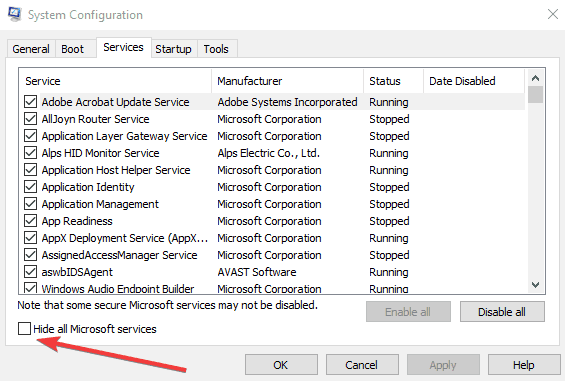
- On the Services tab of the System Configuration dialog box, tap or click to select the Hide all Microsoft services check box and click Disable all.
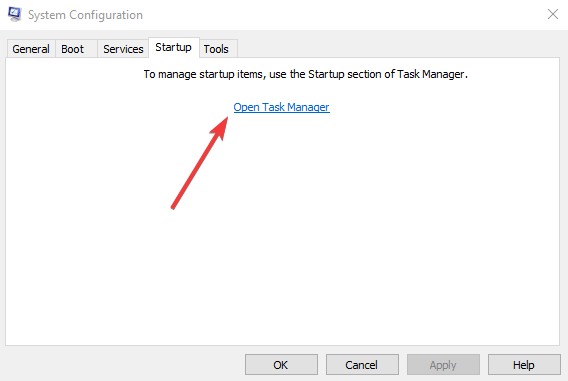
- On the Startup tab of the System Configuration dialog box, tap or click Open Task Manager
- On the Startup tab in Task Manager, for each startup item, select the item and then click Disable.
- Close Task Manager.
- On the Startup tab of the System Configuration dialog box, click OK, and then restart the computer.
9. Change Power options settings
- Click Start and select control panel
- Click Hardware and sound
- Select Power options
- Go to Screen and Sleep section
- Click Never for When plugged in, turn off after (instead of a fixed time)
- In the battery power section under Screen and Sleep, 5 to 10 minutes is ideal for most people
10. Change the time when the display turns off when your PC is locked
- Right click Start and select Run
- Type regedit and press enter
- Go to this path: HKEY_LOCAL_MACHINE\SYSTEM\CurrentControlSet\Control\Power\PowerSettings\7516b95f-f776-4464-8c53-06167f40cc99\8EC4B3A5-6868-48c2-BE75-4F3044BE88A7
- On the right side, double-click the Attributes DWORD.
- Change the value from 1 to 2.
- Click OK.
Note: These steps enable the Console lock display off timeout. To customize this option at any time, do this:
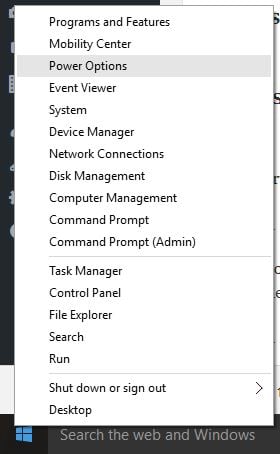
- Right click Start and select Power Options.
- Click the Change plan settings link for the selected plan.
- Click the Change advanced power settings link.
- On Advanced settings, scroll down and expand the Display settings.
- You should now see the Console lock display off timeout option, double-click to expand.
- Change the default time of 1 minute to the time you want, in minutes.
- Click Apply.
- Click OK to complete the task.
11. Change the Lock screen timeout using Command Prompt
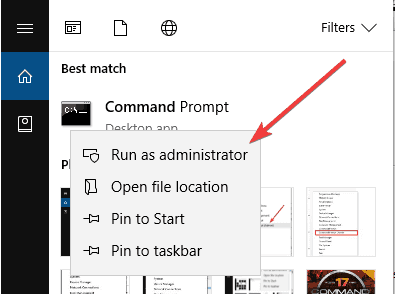
- Type CMD in the search box, then right click Command Prompt and select Run as administrator
- Type the following command and press enter: powercfg.exe /SETACVALUEINDEX SCHEME_CURRENT SUB_VIDEO VIDEOCONLOCK 60
Note: You must change “60” in the command-line with the timeout time you want to use, in seconds. For example, if you want the screen to turned on for 5 minutes, use 300 at the end of the command.
- Type the following command and press enter: powercfg.exe /SETACTIVE SCHEME_CURRENT
- Use the Windows key + L keyboard shortcut to lock your PC and see if the new settings work.
The command in the second step will work when your computer is using AC power. Replace /SETACVALUEINDEX for /SETDCVALUEINDEX if you want to change the timeout setting on your laptop or tablet running on battery.
Let us know if any of these solutions worked by leaving a comment in the section below.
RELATED STORIES TO CHECK OUT:


