- Customize Windows 10 Start and taskbar with Group Policy
- Operating system requirements
- How Start layout control works
- Use Group Policy to apply a customized Start layout in a domain
- Use Group Policy to apply a customized Start layout on the local computer
- Update a customized Start layout
- Changes to Group Policy settings for Windows 10 Start
- Start policy settings supported for WindowsВ 10 Pro, WindowsВ 10 Enterprise, and WindowsВ 10 Education
- Deprecated Group Policy settings for Start
- Установка программ с помощью групповых политик
- Настраиваем дистрибутив для установки с помощью Group Policy
- Настраиваем групповую политику для установки ПО
Customize Windows 10 Start and taskbar with Group Policy
Applies to
In WindowsВ 10 Pro, Enterprise, and Education, you can use a Group Policy Object (GPO) to deploy a customized Start and taskbar layout to users in a domain. No reimaging is required, and the layout can be updated simply by overwriting the .xml file that contains the layout. This enables you to customize Start and taskbar layouts for different departments or organizations, with minimal management overhead.
This topic describes how to update Group Policy settings to display a customized Start and taskbar layout when the users sign in. By creating a domain-based GPO with these settings, you can deploy a customized Start and taskbar layout to users in a domain.
When a full Start layout is applied with this method, the users cannot pin, unpin, or uninstall apps from Start. Users can view and open all apps in the All Apps view, but they cannot pin any apps to Start. When a partial Start layout is applied, the contents of the specified tile groups cannot be changed, but users can move those groups, and can also create and customize their own groups. When you apply a taskbar layout, users will still be able to pin and unpin apps, and change the order of pinned apps.
Operating system requirements
In Windows 10, version 1607, Start and taskbar layout control using Group Policy is supported in WindowsВ 10 Enterprise and WindowsВ 10 Education. In Windows 10, version 1703, Start and taskbar layout control using Group Policy is also supported in WindowsВ 10 Pro.
The GPO can be configured from any computer on which the necessary ADMX and ADML files (StartMenu.admx and StartMenu.adml) for WindowsВ 10 are installed. In Group Policy, ADMX files are used to define Registry-based policy settings in the Administrative Templates category. To find out how to create a central store for Administrative Templates files, see article 929841, written for Windows Vista and still applicable in the Microsoft Knowledge Base.
How Start layout control works
Three features enable Start and taskbar layout control:
The Export-StartLayout cmdlet in Windows PowerShell exports a description of the current Start layout in .xml file format.
To import the layout of Start to a mounted Windows image, use the Import-StartLayout cmdlet.
You can modify the Start .xml file to include or create an .xml file just for the taskbar configuration.
In Group Policy, you use the Start Layout settings for the Start Menu and Taskbar administrative template to set a Start and taskbar layout from an .xml file when the policy is applied. The Group Policy object doesn’t support an empty tile layout, so the default tile layout for Windows is loaded in that case.
To learn how customize Start to include your line-of-business apps when you deploy WindowsВ 10, see Customize the Windows 10 Start layout.
Use Group Policy to apply a customized Start layout in a domain
To apply the Start and taskbar layout to users in a domain, use the Group Policy Management Console (GPMC) to configure a domain-based Group Policy Object (GPO) that sets Start Layout policy settings in the Start Menu and Taskbar administrative template for users in a domain.
The GPO applies the Start and taskbar layout at the next user sign-in. Each time the user signs in, the timestamp of the .xml file with the Start and taskbar layout is checked and if a newer version of the file is available, the settings in the latest version of the file are applied.
The GPO can be configured from any computer on which the necessary ADMX and ADML files (StartMenu.admx and StartMenu.adml) for WindowsВ 10 are installed.
The .xml file with the Start and taskbar layout must be located on shared network storage that is available to the users’ computers when they sign in and the users must have Read-only access to the file. If the file is not available when the first user signs in, Start and the taskbar are not customized during the session, but the user will be prevented from making changes to Start. On subsequent sign-ins, if the file is available at sign-in, the layout it contains will be applied to the user’s Start and taskbar.
For information about deploying GPOs in a domain, see Working with Group Policy Objects.
Use Group Policy to apply a customized Start layout on the local computer
You can use the Local Group Policy Editor to provide a customized Start and taskbar layout for any user who signs in on the local computer. To display the customized Start and taskbar layout for any user who signs in, configure Start Layout policy settings for the Start Menu and Taskbar administrative template. You can use the Start Menu and Taskbar administrative template in User Configuration or Computer Configuration.
This procedure applies the policy settings on the local computer only. For information about deploying the Start and taskbar layout to users in a domain, see Use Group Policy to deploy a customized Start layout in a domain.
This procedure creates a Local Group Policy that applies to all users on the computer. To configure Local Group Policy that applies to a specific user or group on the computer, see Step-by-Step Guide to Managing Multiple Local Group Policy Objects. The guide was written for WindowsВ Vista and the procedures still apply to WindowsВ 10.
This procedure adds the customized Start and taskbar layout to the user configuration, which overrides any Start layout settings in the local computer configuration when a user signs in on the computer.
To configure Start Layout policy settings in Local Group Policy Editor
On the test computer, press the Windows key, type gpedit, and then select Edit group policy (Control panel).
Go to User Configuration or Computer Configuration > Administrative Templates >Start Menu and Taskbar.
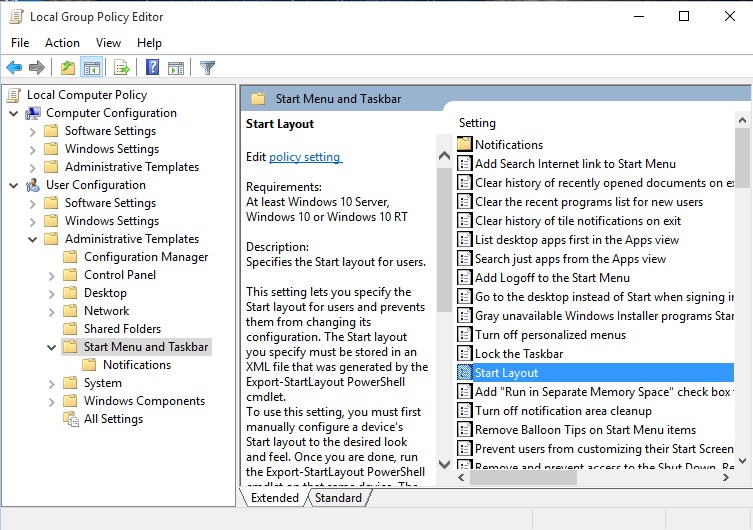
Right-click Start Layout in the right pane, and click Edit.
This opens the Start Layout policy settings.
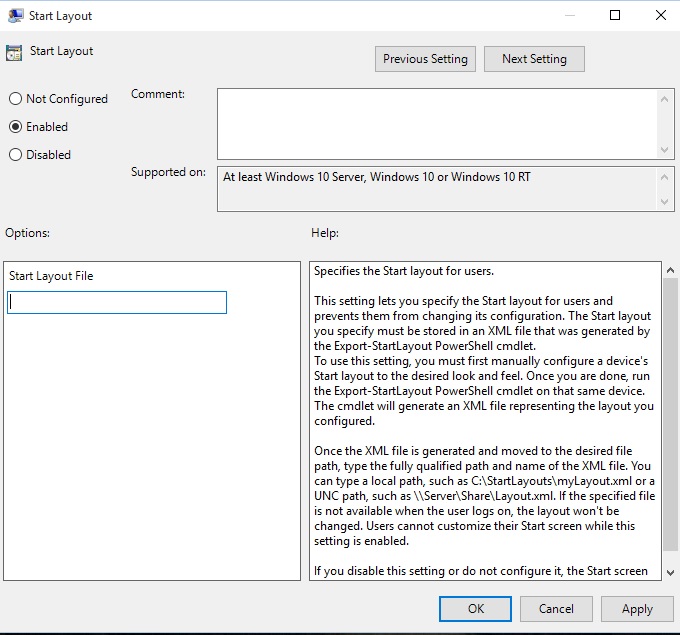
Enter the following settings, and then click OK:
Select Enabled.
Under Options, specify the path to the .xml file that contains the Start and taskbar layout. For example, type C:\Users\Test01\StartScreenMarketing.xml.
Optionally, enter a comment to identify the Start and taskbar layout.
If you disable Start Layout policy settings that have been in effect and then re-enable the policy, users will not be able to make changes to Start, however the layout in the .xml file will not be reapplied unless the file has been updated. In Windows PowerShell, you can update the timestamp on a file by running the following command:
Update a customized Start layout
After you use Group Policy to apply a customized Start and taskbar layout on a computer or in a domain, you can update the layout simply by replacing the .xml file that is specified in the Start Layout policy settings with a file with a newer timestamp.
Changes to Group Policy settings for Windows 10 Start
Applies to
WindowsВ 10 has a brand new Start experience. As a result, there are changes to the Group Policy settings that you can use to manage Start. Some policy settings are new or changed, and some old Start policy settings still apply. Other Start policy settings no longer apply and are deprecated.
Start policy settings supported for WindowsВ 10 Pro, WindowsВ 10 Enterprise, and WindowsВ 10 Education
These policy settings are available in Administrative Templates\Start Menu and Taskbar under User Configuration.
| Policy | Notes |
|---|---|
| Clear history of recently opened documents on exit | Documents that the user opens are tracked during the session. When the user signs off, the history of opened documents is deleted. |
| Do not allow pinning items in Jump Lists | Jump Lists are lists of recently opened items, such as files, folders, or websites, organized by the program that you use to open them. This policy prevents users from pinning items to any Jump List. |
| Do not display or track items in Jump Lists from remote locations | When this policy is applied, only items local on the computer are shown in Jump Lists. |
| Do not keep history of recently opened documents | Documents that the user opens are not tracked during the session. |
| Prevent changes to Taskbar and Start Menu Settings | In WindowsВ 10, this disables all of the settings in Settings > Personalization > Start as well as the options in dialog available via right-click Taskbar > Properties |
| Prevent users from customizing their Start Screen | |
| Prevent users from uninstalling applications from Start | In WindowsВ 10, this removes the uninstall button in the context menu. It does not prevent users from uninstalling the app through other entry points (e.g. PowerShell) |
| Remove All Programs list from the Start menu | In WindowsВ 10, this removes the All apps button. |
| Remove and prevent access to the Shut Down, Restart, Sleep, and Hibernate commands | This removes the Shut Down, Restart, Sleep, and Hibernate commands from the Start Menu, Start Menu power button, CTRL+ALT+DEL screen, and Alt+F4 Shut Down Windows menu. |
| Remove common program groups from Start Menu | As in earlier versions of Windows, this removes apps specified in the All Users profile from Start |
| Remove frequent programs list from the Start Menu | In WindowsВ 10, this removes the top left Most used group of apps. |
| Remove Logoff on the Start Menu | Logoff has been changed to Sign Out in the user interface, however the functionality is the same. |
| Remove pinned programs list from the Start Menu | In WindowsВ 10, this removes the bottom left group of apps (by default, only File Explorer and Settings are pinned). |
| Show «Run as different user» command on Start | This enables the Run as different user option in the right-click menu for apps. |
| Start Layout | |
| Force Start to be either full screen size or menu size | This applies a specific size for Start. |
Deprecated Group Policy settings for Start
The Start policy settings listed below do not work on Windows 10. Most of them were deprecated in Windows 8 however a few more were deprecated in Windows 10. Deprecation in this case means that the policy setting will not work on Windows 10. The “Supported on” text for a policy setting will not list Windows 10. The policy settings are still in the Group Policy Management Console and can be used on the operating systems that they apply to.
Установка программ с помощью групповых политик
Прежде чем приступить к описанию процесса установки ПО с помощью групповых политик, оговорим, что распространение ПО на с помощью политик не всегда является оптимальным решением и имеет ряд ограничений. Вот несколько основных недостатков этого метода установки софта:
1. Невозможность планирования установки ПО. При установке софта при помощи групповой политики, установить или деинсталлировать ПО можно только при следующей загрузке системы. Поэтому практически невозможно, организовать массовое обновление какого-либо ПО, например, в ночное время, когда нагрузка на сеть минимальная. В этом случае лучше использовать, например, SCCM. Используя окна обслуживания (maintenance) или настройки WOL(Wake On LAN).
2. Поддерживаются только MSI и ZAP установщики. Формат дистрибуции приложений в групповых политиках– это лишь популярный MSI installer и менее известные пакеты ZAP. В этом случае опять предпочтительнее использование SCCM, т.к. он поддерживает использование всех возможных установщиков.
3. Фиксированный порядок установки приложений. При добавления нового приложения в объект групповой политики, оно устанавливается на ПК последним, и поменять этот порядок нельзя.
4. Отсутствие контроля. При установке ПО через групповую политику, пакет установщика выполняется на целевом компьютере, однако какая-либо обратная связь отсутствует. Поэтому вы с уверенностью не сможете сказать установилось ли ваше ПО на конкретном компьютере или нет.
Итак, после того, как вы познакомились с основными недостатками установки софта средствами групповых политик, перейдем к конкретному примеру. Отметим, что с помощью групповых политик правильно было бы устанавливать общесистемное ПО, которое используется на всех ПК организации, это может быть, например, антивирусный агент, клиент SCCM или InTune. В данной статье мы будем описывать установку агента InTune.
Windows InTune – это новый сервис Microsoft, предназначенный для служб ИТ, позволяющий управлять и осуществлять мониторинг компьютеров с помощью веб консоли. Этот сервис зачастую называют «облачным» SCCM, причем эта облачная служба позволяет управлять множеством рабочих станций без необходимости создания серверной инфраструктуры.
Т.к. ни одна из компонент InTune не устанавливается на сервера, поэтому все что нужно – это расставить клиентов InTune на рабочих станциях. Естественно, его можно расставить вручную, но если в вашей организации больше чем 10 ПК, то это может превратиться в головную боль. Поэтому мы попытаемся организовать процесс установки Windows InTune с помощью групповых политик.
Настраиваем дистрибутив для установки с помощью Group Policy
1. Качаем дистрибутив клиента InTune Client.
2. Жмем правой кнопкой по файлу “Windows_Intune_Setup.zip” и выбираем “Extract All”
3. Распаковываем содержимое файла Windows_Intune_Setup.exe в текущую папку, набрав команду “Windows_Intune_Setup.exe /extract .”.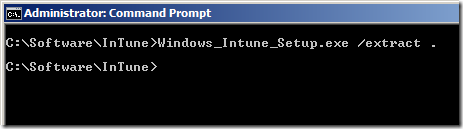
4. Копируем файлы (список их ниже) на сетевую папку, с которой будет производиться установка.
Совет: Для корректной работы необходимо, чтобы группа “Domain Computers” имела права на чтение из указанной сетевой папки, иначе ПК организации не смогут скачать и установить эти файлы.
Настраиваем групповую политику для установки ПО
5. Перейдите в режим редактирования групповой политики, применяемой к целевым компьютерам, на которые вы хотите установить клиент InTune.
6. Перейдите в раздел “Computer Configuration > Policies > Software Settings > Software installation”. Щелкните правой кнопкой по элементу “Software installation”, выберите “New>Packages”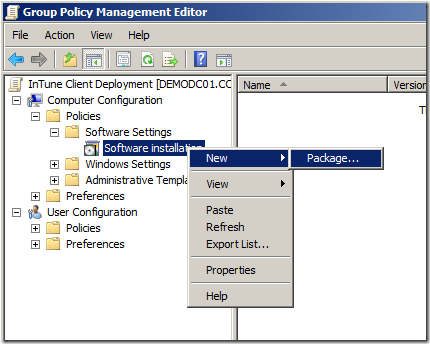
7. Выберите сетевую папку, в которую вы поместили файлы установщика, найдите и укажите файл “Windows_Intune_X64.msi” и затем нажмите “Open”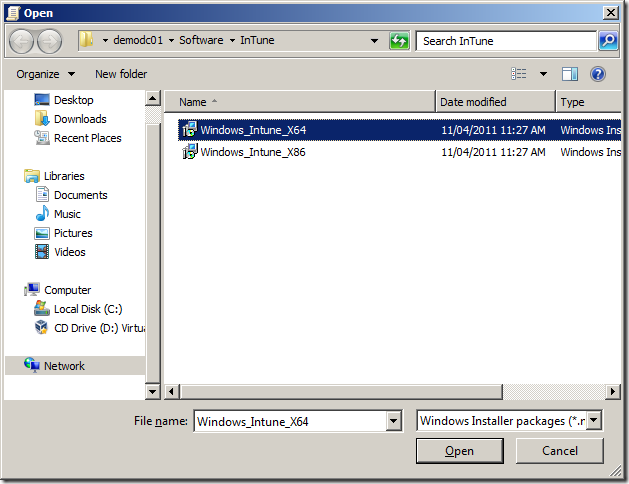
8. Выберите опцию “Advanced” и нажмите “OK”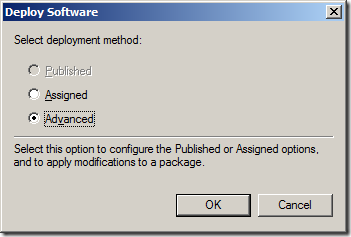
9. Т.к. в данном случае мы устанавливаем 64 битную версию клиента,рекомендуется добавить к имени приложения постфикс “x64”.
10. Согласимся с настройками по-умолчанию и нажмем “OK”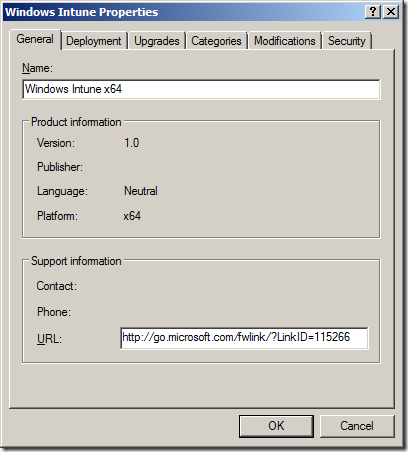
В результате у вас получится примерно такая картинка.
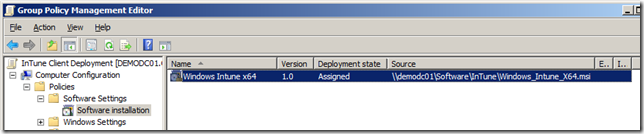
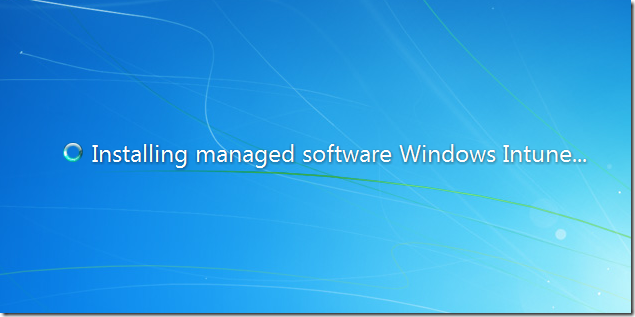
И данное ПО будет установлено на компьютеры, к котором применяется данная политика, при следующей перезагрузке ПК.


