- How Long Does Windows 10 Update Take? Windows 10 Update Taking Forever Fixes
- Windows 10 Update Taking Too Long
- How Long Does Windows 10 Update Take
- Why DoesВ Windows 10 Update Take So LongВ
- 5 Effective Fixes for Windows 10 Update Taking Forever Problem
- Method 1. Optimize Your NetworkВ
- Method 2. Free Up Hard DriveВ Space by Cleaning Large and Junk Files
- Method 3. Fix Windows Update Errors with Windows Update Troubleshooter
- Method 4. Disable Startup Programs That Conflict with the Update
- Method 5.В Schedule Updates for Low-Traffic Periods
- To Sum Up
- Windows 10 Update Taking ForeverВ FAQs
- 1.В How long does Windows 10 update take 2019?
- 2. Why do Windows 10 updates take so long?
- 3. Can I stop a Windows 10 update in progress?
- 3. How long does it take to update Windows 10 1903?
- Download Windows 10
- Windows 10 October 2020 Update
- Create Windows 10 installation media
How Long Does Windows 10 Update Take? Windows 10 Update Taking Forever Fixes
| Workable Solutions | Step-by-step Troubleshooting |
|---|---|
| How Long Does Windows 10 Update Take 2018 /2019/ 2020/2021 | It may take between 10 and 20 minutes to update Windows 10 on a modern PC with solid-state storage. Full steps |
| Why Does Windows 10 Update Take So Long | |
| 6 Useful Fixes for Windows 10 Update Taking Forever Issue | Optimize network, free up space, run Windows Update troubleshooter, disable startup programs. Full steps |
Windows 10 Update Taking Too Long
Windows 10 pushes a lot of regular updates, with some improvement in stability and performance, and critical updates as well, mainly about bug fixes and shiny new features. Windows 10 update is quite normal and frequent, like twice each month. That’s the point! You seem to reach the frustrating moment again, where Windows 10 updates are taking hours and hours downloading and installing itself correctly on your PC. How long does windows update take? How are you going to skip such long waiting?
How Long Does Windows 10 Update Take
Between 10 and 20 minutes
It may takeВ between 10В and 20 minutes to update Windows 10В on a modern PC with solid-state storage. The installation process may take longer on a conventional hard drive.В Besides, the size of the update also affects the time it takes. Some updates are small, and you might not even notice them installing, others are massive and take a good chunk of time to install.В
Why DoesВ Windows 10 Update Take So LongВ
The amount of time Windows updates can be affected by multiple factors.
- A low-speedВ internet connectionВ or simultaneous downloads
- An old hard disk drive on your computer bursting with data
- Too many fragments cause Windows 10 update slow
- Microsoft’s servers are getting slammed with many people all trying to download at the same time
- Windows update components might be broken
- The software might be conflicting with Windows update
5 Effective Fixes for Windows 10 Update Taking Forever Problem
Do you see Windows 10 taking forever in every 2018 update? Like one of the most seen blue screen loop, saying «getting Windows ready, don’t turn off your computer». Be prepared. Your computer is now slowing down, plodding, frozen and stuck! Let’s try the following methods to fix Windows 10 update slow issue.
Method 1. Optimize Your NetworkВ
A faster internet connection may solve your problem and decrease the update speed. You can change to another faster connection by upgradingВ to a fiber-optic connection or purchasing more bandwidth from your internet service provider. You can also try a brandwidth management tool to ensure sufficient network resources are reserved for Windows 10 updates.
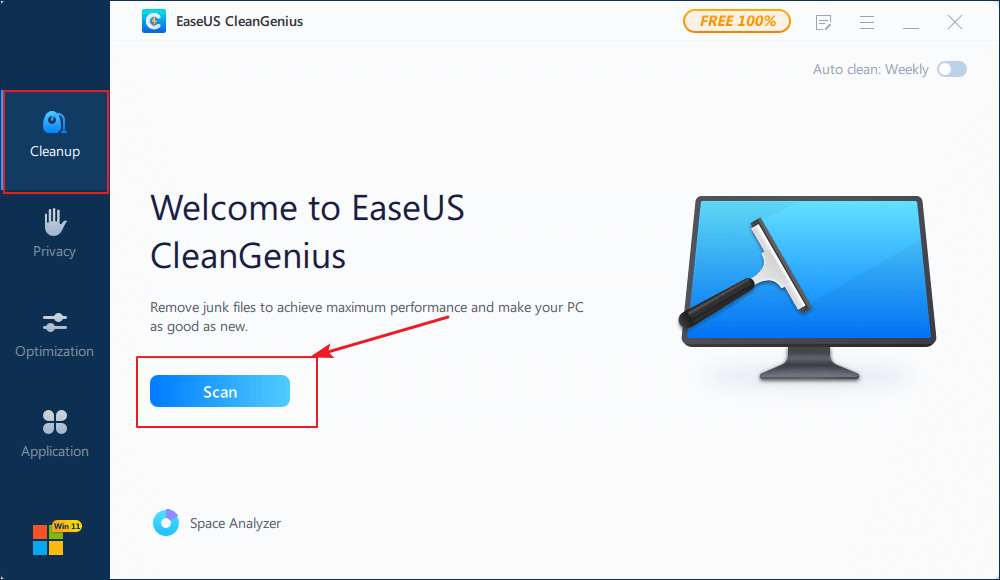
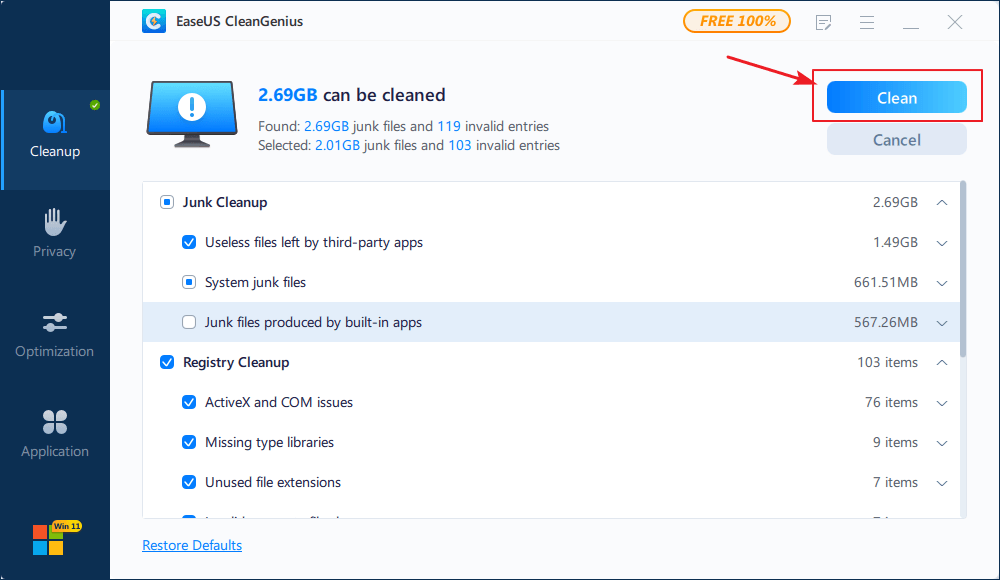
Method 2. Free Up Hard DriveВ Space by Cleaning Large and Junk Files
Windows 10 updates often take up a lot of hard drive space, so you need to make sure there is enough room for them to speed up the installation. This means deletingВ junkВ files and unnecessary large files. If there are a lot of files waiting for removing, manual deletion can be cumbersome and time-consuming. In this case, you can use EaseUS Tools M to help delete large amounts of files at once automatically.
Now, download this powerful disk management tool to fix the slow Windows 10 update issue.
Step 1. оњљ DOWNLOAD EaseUS Tools M for free and install it on your computer.
Step 2. Launch EaseUS Tools M in Windows PC. Select «Large File Cleanup» on the main screen.
Step 3. Select the drive and click «Scan» to let the program locate, find all large files on your disk.
Step 4. Identify and select useless large files and click «Delete» to remove those files from your PC or laptop. A message pops up and tells you this process will permanently delete the files. Click «Yes» to start the process.

Method 3. Fix Windows Update Errors with Windows Update Troubleshooter
Excluding the internal hardware factors, it’s probably just the system bugs that throw your computer onto a blue screen where Windows 10 works on an infinite update.
The Windows own little program called Windows Update Troubleshooter can fix the broken components that might break the update progress.
Method 4. Disable Startup Programs That Conflict with the Update
You never know that third-party applications always conflict with the update because they happen to start at the same time. Along with applications, services and drivers are making the same effect. So, if you feel certain that the problem does not come from a poor internet connection or hard drive bad performance, consider this factor, and you may try performing a clean boot of Windows 10 before attempting to get the new update.
Step 1. Press Windows + R keys to open Run.
StepВ 2. Type msconfig in the Run box and click OK.
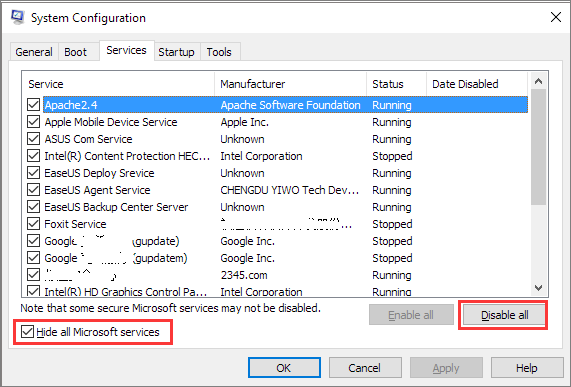
StepВ 3. In the System Configuration, click the «Services» tab.
StepВ 4. Check the box Hide all Microsoft services.
StepВ 5. Click «Disable all».
StepВ 6. Next, return and go on with the Startup tab.
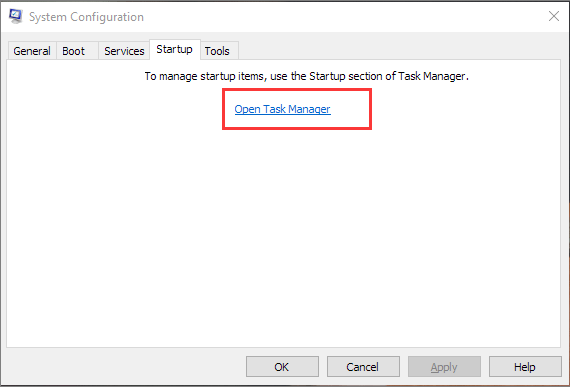
StepВ 7.В Click Open Task Manager.
StepВ 8. Click any startup program that is suspicious in conflicting with the update and click «Disable».
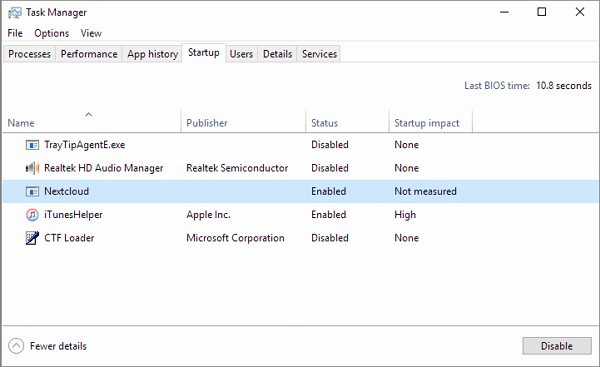
Repeat the previous step until all the startup programs in question were disabled.
StepВ 9. Close the Task Manager and click «OK» in the System Configuration window.
StepВ 10.В Restart your PC and get the new update for the second time.
Method 5.В Schedule Updates for Low-Traffic Periods
Massive Windows 10 updates with long installation can happen at any time. But your Internet connection may not be fast all day long. You can disable auto-updates and schedule it for after-hours when your computers and office network aren’t in use. Open the Windows Update window and specify when you prefer updates to be installed. В В
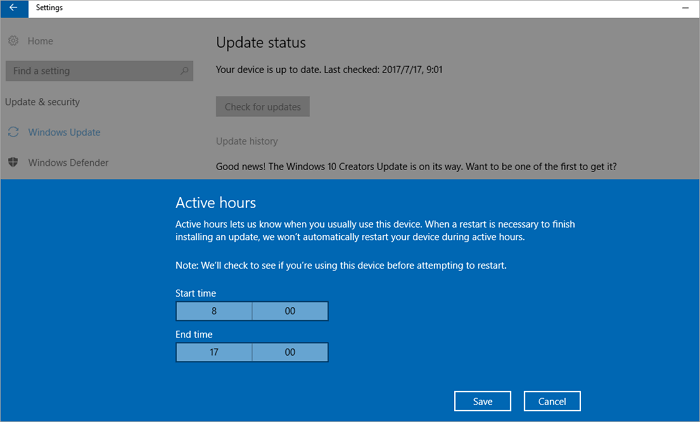
Most of the time, people receive a Windows 10 unwillingly because Microsoft turns on an automatic update on our computers by default. To avoid receiving any problematic update in the future, you can always try to disable Windows 10 update for permanent.
By the way, whenever you suffer from a slow boot or startup issue after Windows 10 update, find solutions on this page.В
To Sum Up
This tutorial demonstrates how long does Windows 10 update take and why is Windows 10 update taking so long. The most six useful solutions here can help you fix Windows 10 update taking forever problems. Among them, freeing up storage space and defragmenting your hard drive is very useful. You can complete the job with the assistance of EaseUS Partition Master Free.
This free disk management program makes complex hard drive organization easier than ever, such as convert MBR to GPT, convert FAT to NTFS, convert a logical partition to primary or primary partition to logical, etc..
Windows 10 Update Taking ForeverВ FAQs
1.В How long does Windows 10 update take 2019?
Major updatesВ to the Windows OS come about every six months, with the most recent being the November 2019 update. Major updates may take a little longer.В The regular version only takes 7 to 17 minutes to install.
2. Why do Windows 10 updates take so long?
Why does Windows 10 update take so long? Windows 10 updates take so long to complete because Microsoft is constantly adding larger files and features to them. The biggest updates, released in the spring and fall of every year, usually take upwards of four hours to install.В Besides, it’s also relevant to the small available space, hard drive fragments, software conflicts, and other factors.
3. Can I stop a Windows 10 update in progress?
You can stop Windows 10 updatesВ in progress in the services.
Step 1. Open the Search windows box and type Services in Windows 10.В Right-click Services and select «Run as Administrator».В
Step 2. In the Services window, you will find out the list of all the services running in the background. You need to find the Windows Update service.
Step 3. Right-click «Windows Update», and from the context menu, select «Stop». Alternatively, you can click on the «Stop» link available under the Windows update option on the top left side of the window.
3. How long does it take to update Windows 10 1903?
It depends. On different devices, in different network situations, the time spent is different. The installingВ of Windows 10 1903В takes about 30 minutes.В Configuring, and restartingВ may takeВ a few times. In short, you’ll probably upgrade to Windows 10 1903В in an hour.В
Download Windows 10
Before updating, please refer to the Windows release information status for known issues to confirm your device is not impacted.
Windows 10 October 2020 Update
The Update Assistant can help you update to the latest version of Windows 10. To get started, click Update now.
Create Windows 10 installation media
To get started, you will first need to have a licence to install Windows 10. You can then download and run the media creation tool. For more information on how to use the tool, see the instructions below.

Here’s when to use these instructions:
- You have a license to install Windows 10 and are upgrading this PC from Windows 7 or Windows 8.1.
- You need to reinstall Windows 10 on a PC you’ve already successfully activated Windows 10.
If you are installing Windows 10 on a PC running Windows XP or Windows Vista, or if you need to create installation media to install Windows 10 on a different PC, see Using the tool to create installation media (USB flash drive, DVD, or ISO file) to install Windows 10 on a different PC section below.
Note: Before you install Windows 10, check to make sure your PC meets the system requirements for Windows 10. We also recommend going to the PC manufacturer’s website for any additional info about updated drivers and hardware compatibility.
- Select Download tool, and select Run. You need to be an administrator to run this tool.
- On the License terms page, if you accept the license terms, select Accept.
- On the What do you want to do? page, select Upgrade this PC now, and then select Next.
- After downloading and installing, the tool will walk you through how to set up Windows 10 on your PC. All Windows 10 editions are available when you select Windows 10, except for Enterprise edition. For more information on Enterprise edition, go to the Volume Licensing Service Center.
- If you don’t have a license to install Windows 10 and have not yet previously upgraded to it, you can purchase a copy here: https://www.microsoft.com/en-us/windows/get-windows-10.
- If you previously upgraded to Windows 10 on this PC and you’re reinstalling it, you don’t need to enter a product key. Your copy of Windows 10 will automatically activate later using your digital license.
- When Windows 10 is ready to install, you’ll see a recap of what you’ve chosen, and what will be kept through the upgrade. Select Change what to keep to set whether you would like to Keep personal files and apps, or Keep personal files only, or choose to keep Nothing during the upgrade.
- Save and close any open apps and files you may be running, and when you’re ready, select Install.
- It might take some time to install Windows 10, and your PC will restart a few times. Make sure you don’t turn off your PC.
Follow these steps to create installation media (USB flash drive or DVD) you can use to install a new copy of Windows 10, perform a clean installation, or reinstall Windows 10.
Before you download the tool make sure you have:
- An internet connection (internet service provider fees may apply).
- Sufficient data storage available on a computer, USB or external drive for the download.
- A blank USB flash drive with at least 8GB of space or blank DVD (and DVD burner) if you want to create media. We recommend using a blank USB or blank DVD, because any content on it will be deleted.
- When burning a DVD from an ISO file, if you are told the disc image file is too large you will need to use Dual Layer (DL) DVD Media.
Check a few things on the PC where you want to install Windows 10:
- 64-bit or 32-bit processor (CPU). You’ll create either a 64-bit or 32-bit version of Windows 10. To check this on your PC, go to PC info in PC settings or System in Control Panel, and look for System type.
- System requirements. Make sure the PC meets the system requirements for Windows 10. We also recommend going to the PC manufacturer’s website for additional info about updated drivers and hardware compatibility.
- Language in Windows. You’ll need to choose the same language when you install Windows 10. To see what language you’re currently using, go to Time and language in PC settings or Region in Control Panel.
- Edition of Windows. You should also choose the same edition of Windows. To check what edition you’re currently running, go to PC info in PC settings or System in Control Panel, and look for Windows edition. Windows 10 Enterprise isn’t available in the media creation tool. For more info, go to the Volume Licensing Service Center.
- Microsoft Office products. If you just purchased a new device that includes Office 365, we recommend redeeming (installing) Office before upgrading to Windows 10. To redeem your copy of Office, please see Download and install Office 365 Home, Personal, or University on your PC. For more information, check How to upgrade to Windows 10 on new devices that include Office 365.
If you have Office 2010 or earlier and choose to perform a clean install of Windows 10, you will need to locate your Office product key. For tips on locating your product key, check Find your Office 2010 product key or Enter the product key for your Office 2007 program.
Using the tool to create installation media:
- Select Download tool now, and select Run. You need to be an administrator to run this tool.
- If you agree to the license terms, select Accept.
- On the What do you want to do? page, select Create installation media for another PC, and then select Next.
Select the language, edition, and architecture (64-bit or 32-bit) for Windows 10. This table will help you decide which edition of Windows 10 you’ll choose:
| Your current edition of Windows | Windows 10 edition |
|---|---|
| Windows 7 Starter Windows 7 Home Basic Windows 7 Home Premium Windows 7 Professional Windows 7 Ultimate Windows 8/8.1 Windows 8.1 with Bing Windows 8 Pro Windows 8.1 Pro Windows 8/8.1 Professional with Media Center Windows 8/8.1 Single Language Windows 8 Single Language with Bing Windows 10 Home Windows 10 Pro | Windows 10 |
| Windows 8/8.1 Chinese Language Edition Windows 8 Chinese Language Edition with Bing | Windows 10 Home China |
- USB flash drive. Attach a blank USB flash drive with at least 8GB of space. Any content on the flash drive will be deleted.
- ISO file. Save an ISO file to your PC, which you can use to create a DVD. After the file is downloaded, you can go to location where the file is saved, or select Open DVD burner, and follow the instructions to burn the file to a DVD. For more info about using an ISO file, see Additional methods for using the ISO file to install Windows 10 section below.
After completing the steps to install Windows 10, please check that you have all the necessary device drivers installed. To check for updates now, select the Start button, and then go to Settings > Update & Security > Windows Update, and select Check for updates. You may also wish to visit your device manufacturer’s support site for any additional drivers that may be needed.
Note: Drivers for Surface devices may be found on the Download drivers and firmware for Surface page.
Before you install Windows 10, it’s a good idea to save any work and back up your PC before you start. If you used the media creation tool to download an ISO file for Windows 10, you’ll need to burn it to a DVD before following these steps.
- Attach the USB flash drive or insert the DVD on the PC where you want to install Windows 10.
- Restart your PC.
If your PC does not automatically boot to the USB or DVD media, you might have to open a boot menu or change the boot order in your PC’s BIOS or UEFI settings. To open a boot menu or change the boot order, you’ll typically need to press a key (such as F2, F12, Delete, or Esc) immediately after you turn on your PC. For instructions on accessing the boot menu or changing the boot order for your PC, check the documentation that came with your PC or go to the manufacturer’s website. If you do not see the USB or DVD media device listed within the boot options, you may need to reach out to the PC manufacturer for instructions for temporarily disabling Secure Boot in your BIOS settings.
If changing the boot menu or order doesn’t work, and your PC immediately boots into the OS you want to replace, it is possible the PC had not fully shut down. To ensure the PC fully shuts down, select the power button on the sign-in screen or on the Start menu and select Shut down.
If you downloaded an ISO file for Windows 10, the file is saved locally at the location you selected. If you have a third-party DVD burning program installed on your computer that you prefer to use for creating the installation DVD, that program might open by going to the location where the file is saved and double-clicking the ISO file, or right-click the ISO file, select Open with and choose your preferred DVD burning software.
If you want to use the Windows Disk Image Burner to create an installation DVD, go to the location where the ISO file is saved. Right-click the ISO file and select Properties. On the General tab, click Change and select Windows Explorer for the program you would like to use to open ISO files and select Apply. Then right-click the ISO file and select Burn disc image.
If you want to install Windows 10 directly from the ISO file without using a DVD or flash drive, you can do so by mounting the ISO file. This will perform an upgrade of your current operating system to Windows 10.


