Windows 10 Boot Skin
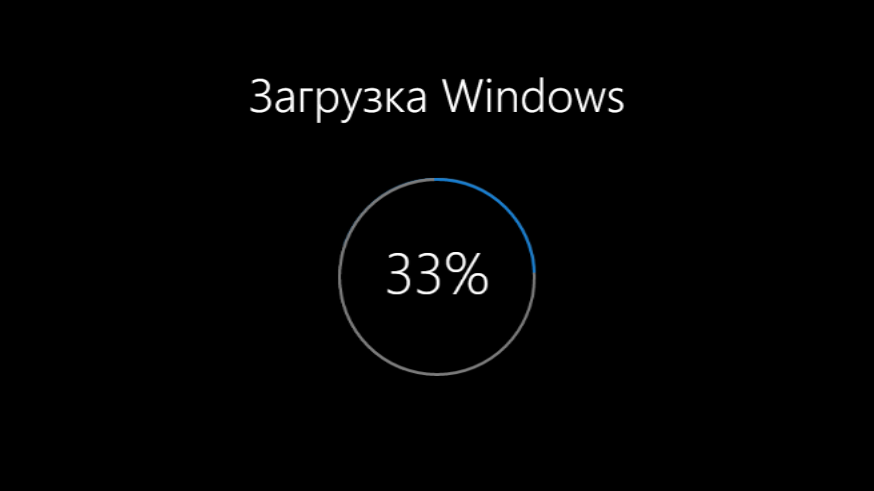
Экран загрузки для Windows 7 стилизованный под экран Windows 10 Update.
По ссылке на Яндекс.Диск доступна папка с тремя архивами для разных разрешений экранов:
- 1024 х 768 пикселей;
- 1280 х 768 пикселей;
- 1366 х 768 пикселей.
Автор (разработчик): DenisK 


В программе Windows 7 Boot Updater откройте меню «файл» и выберите пункт «Загрузить boot skin. » и, соответственно, загрузите данный файл. После этого нажмите на кнопку в нижнем правом углу программы «Полноэкра. » и сделайте снимки результата в полноэкранном режиме.
Снимки мне нужны как экрана загрузки, так и восстановления. Снимки сделайте в двух позициях: с «бубликом» и с точками.
Видимо, Дмитрий обиделся и не хочет отвечать. Видимо, просто молча скачал файлы, не заходя в профиль и теперь делает вид, что его тут больше нет.
Ну что же, Дмитрий, благодарю что хоть повысили репутацию.
Опишите подробнее что Вы хотите. Непонятен Ваш вопрос. Конвертировать надо в gif-формат то, что на экране загрузки высвечивается или как-то иначе?
Если правильно понял, то Вы это можете сделать и сами. Можно просто снять видеозапись с программы Windows 7 Boot Updater (включить в ней просмотр в полноэкранном режиме и после снять с этого запись с помощью другой программы) и конвертировать её потом в нужный формат предварительно обрезав для того чтобы убрать надписи программы Windows 7 Boot Updater и убрать лишние поля. Правда минус такого способа в том, что качество картинки пострадает (пикселизация).
gif-изображение можно ещё собрать из кадров анимации (они находятся в архиве), тогда просто будут точки, а потом «бублик», без надписи сверху. Впрочем, можно заморочиться и собрать анимацию из 105 кадров вместе с надписью сверху, но это всё «геморрой».
Есть только этот: Windows 10 Boot Skin 1280х768.rar (закрыто).
На аналогичный вопрос уже был дан ответ, но он, как вижу, был недостаточен. Смотрите мой комментарий №18 тут же ниже.
К нему могу только добавить, что надпись на фоне делал просто в Microsoft PowerPoint, а кадры анимации взяты из gif-ки из интернета, в частности сам «бублик» одолжил отсюда, просто содрал снимки с экрана в браузере.
Итак, минимальный размер bootscreen: 267 х 200 пикселей (в Windows 7).
Загрузочный экран Windows XP должен иметь размер 4 бит 640 x 480 пикселей и состоять только из 16 цветов.
ПРОПОРЦИИ СОЗДАНИЯ (Windows 7):
— для разрешения экрана 1366 х 768 px:
1) bootscreen: 278 х 208 px;
2) background: 1366 х 768 px → 1024 х 768 px (сжатие изображения, команда «изменить размер изображения» в Paint.NET);
____________________
— для разрешения экрана 1280 х 768 px:
1) bootscreen: 236 х 208 px;
2) background: 1366 х 768 px → 1152 х 768 px (урезать полотно, команда «размер полотна» в Paint.NET) → 1024 х 768 px (сжатие изображения, команда «изменить размер изображения» в Paint.NET);
____________________
— для разрешения экрана 1024 х 768 px:
1) bootscreen: 208 х 228 px;
2) background: 1366 х 768 px → 928 х 768 px (урезать полотно, команда «размер полотна» в Paint.NET) → 1024 х 768px (растянуть изображение, команда «изменить размер изображения» в Paint.NET);
____________________
Повтор анимации один раз — делаем 60 кадров;
Повтор циклически — добавляем снимки с 61 кадра по 105 кадр, отсюда следует период = 44 кадра, поэтому не каждая анимация подойдёт.
Всего в bootscreen содержится 105 кадров.
Win10 FAQ
Windows 10 Guides and Help
How to set a GIF as a wallpaper in Windows 10
We are a participant in the Amazon Services LLC Associates Program, an affiliate advertising program designed to provide a means for us to earn fees by linking to Amazon.com and affiliated sites.
Hey everyone! As part of our ongoing series on Windows 10 hacks, today we are going to show how to get rid of your typical static wallpapers. From now on, you will be able to have animated GIFs as your wallpapers.
If you’re here, you may have already realized that Windows 10 itself doesn’t support GIFs as desktop wallpapers. Therefore, we will download a third party program to do this for us. We will be introducing two different programs: BioniX and Plastuer. They do almost the same thing but BioniX is free while Plastuer costs a small amount of money. (you pay any amount you want with minimum 2 USD). If you pay that sum you get a friendlier interface and software that’s a little easier to use. Let’s start with our Free choice, Bionix.
What is BioniX?
BioniX is a pretty cool free program which manages your wallpapers. In it you can:
- Create a playlist of wallpapers (which can include GIFs) to change between.
- Decide how often the change will be made.
- Decide whether the order of wallpapers will be decided randomly or whether they switched according to the order you decided.
- Plus many other features, but we’ll focus on the features above for this article. We encourage you to play with the program, it’s fun and pretty easy to use.
How to download BioniX?
Go to http://www.bionixwallpaper.com/downloads/Animated_GIF_Wallpaper/gif_wallpaper.html and click on Download it now.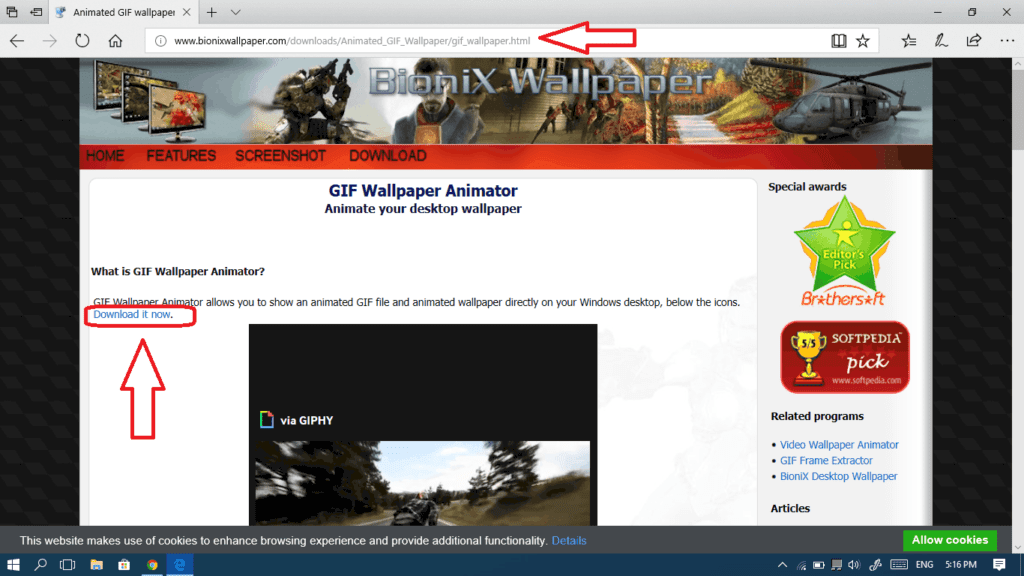
How to install and use BioniX?
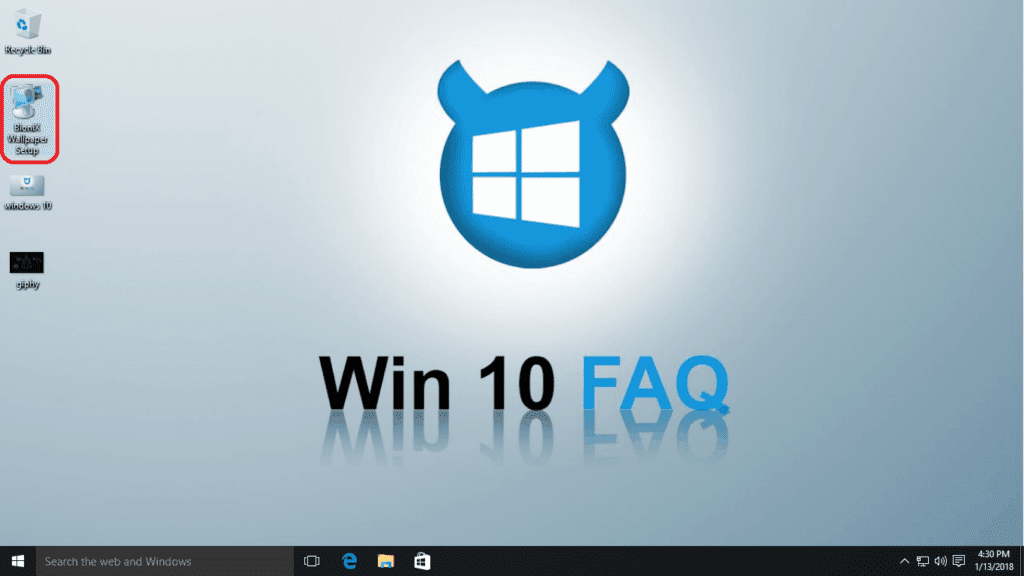
- When you finish downloading the program, double-click on the setup file to start installing it.

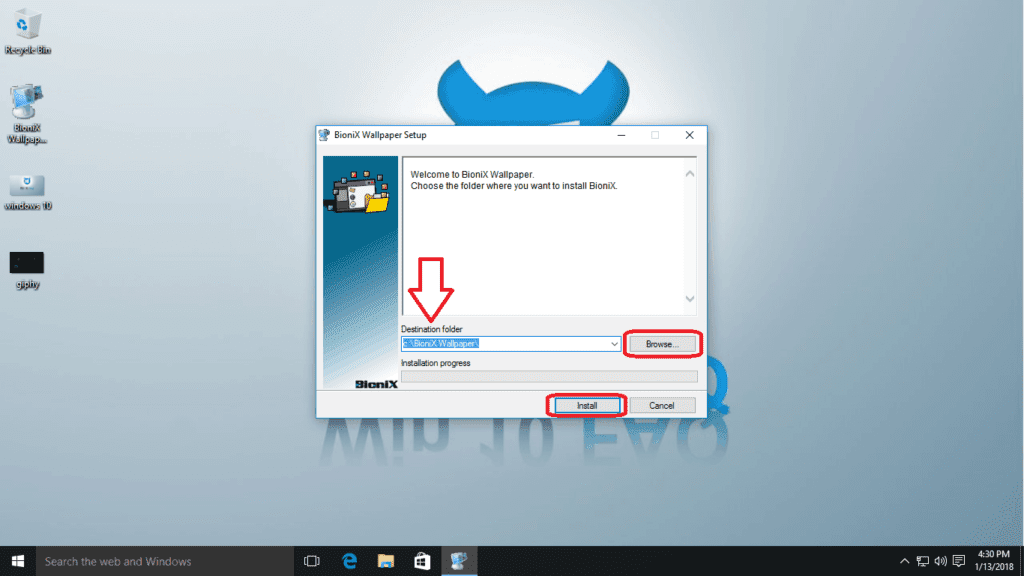
- Set your installation directory from Browse (The default location is C:\BioniX Wallpaper\), you can leave the default if you’re not sure what to do here and then click Install.
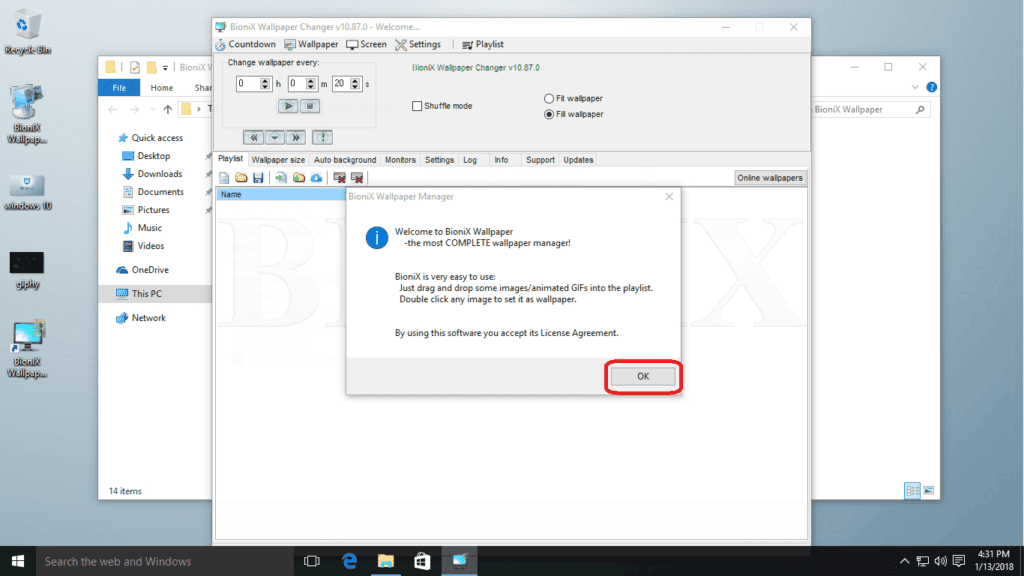
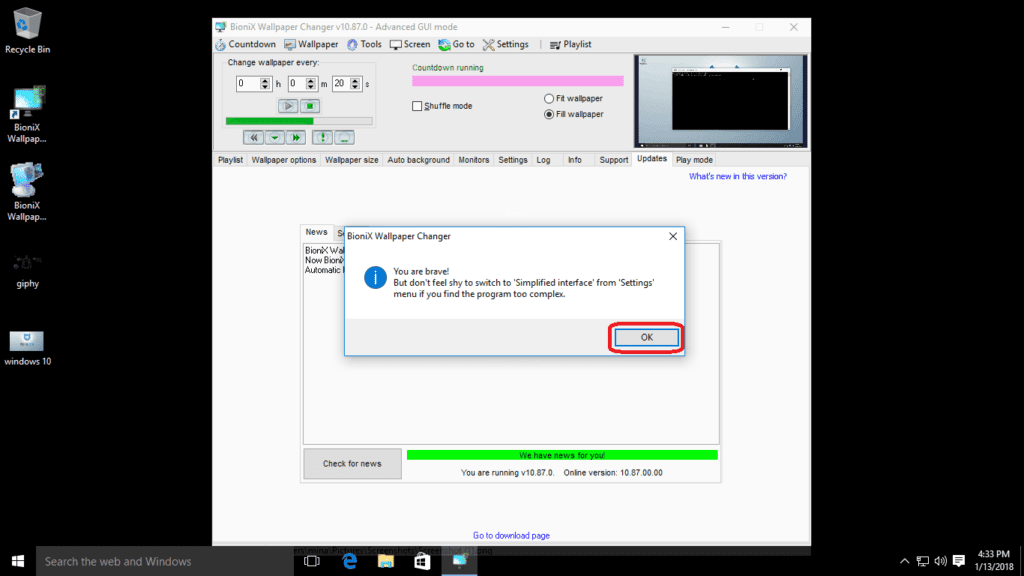
- After the installation is done, click Ok to accept the License Agreement.
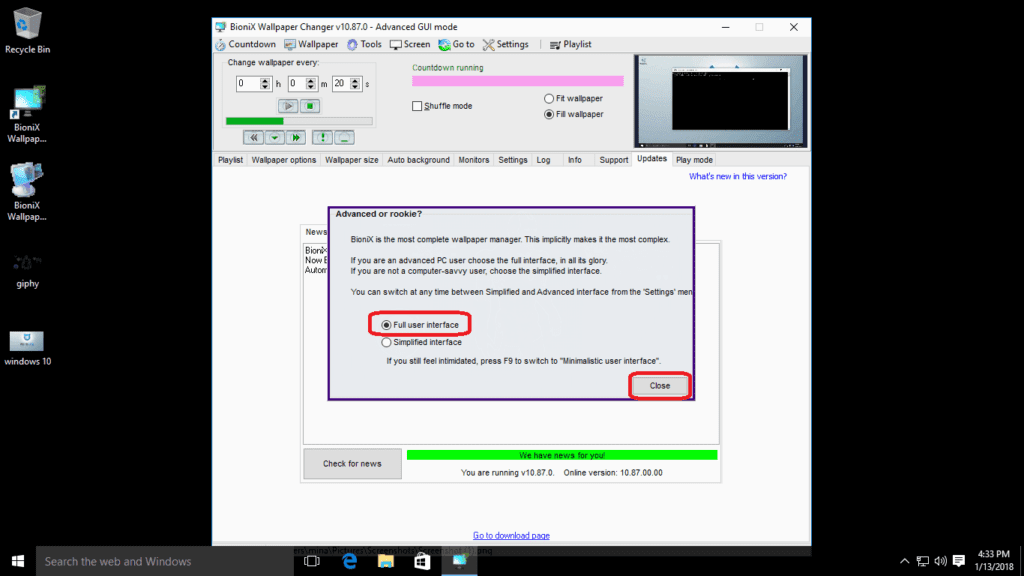
- Choose the Full user interface and then click Close (You will be able to change that later so no worries).
- Click Ok.
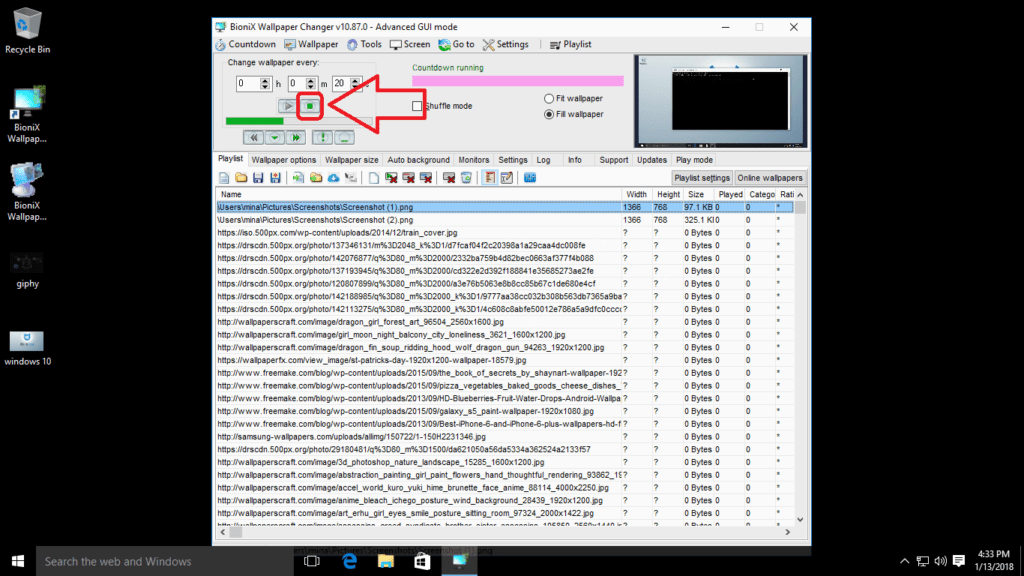
- Now to focus on adjusting your settings, you should click the Stop button to stop any automatic wallpaper changes for the moment.
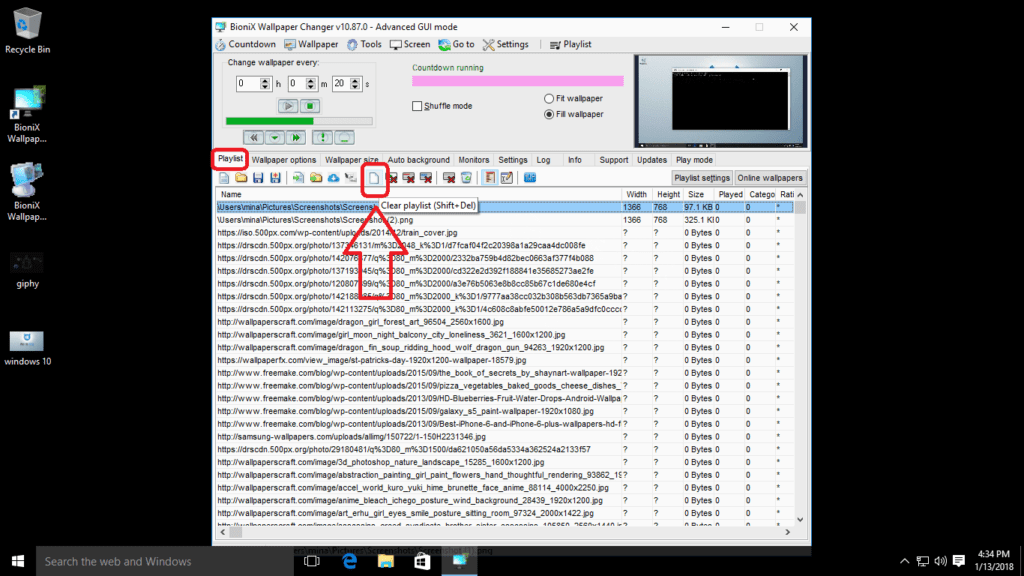
- In the Playlist tab, click the Clear playlist button in order to remove all the imported media files from you computer.
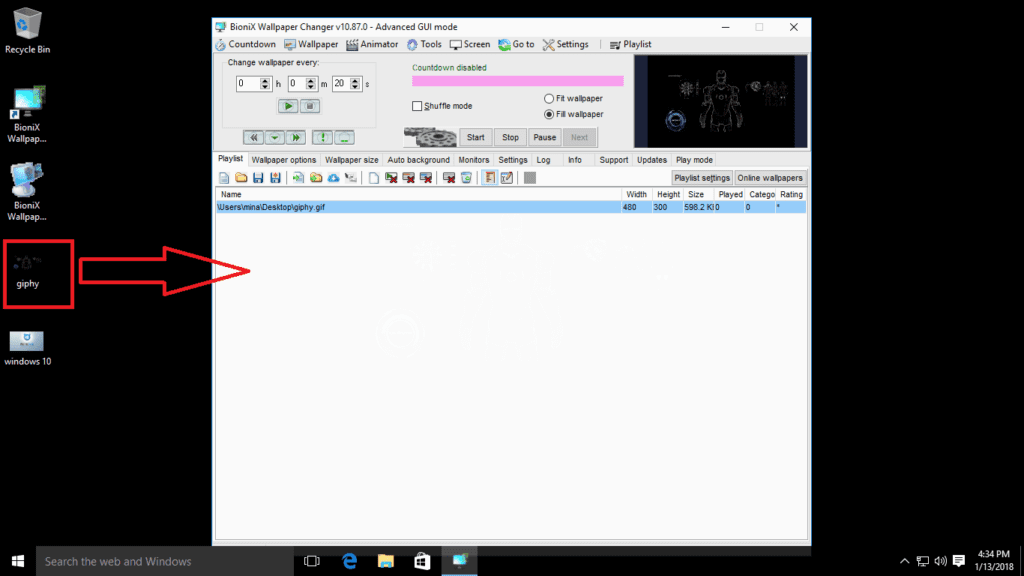
- Now you have a clean playlist, drag and drop the GIF wallpaper into the blank playlist (you can actually add more than one and the program will switch between them automatically – see next step).
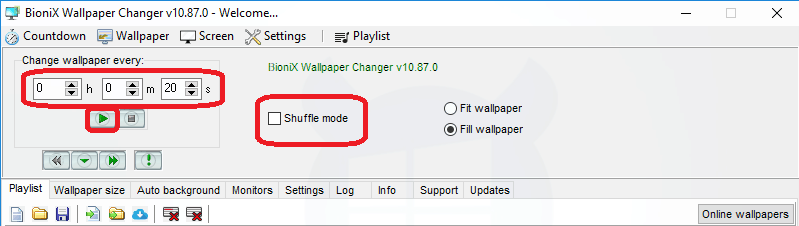
- Adjust the timing in case you have more than one wallpaper in your playlist and then click on the Play button to start the wallpaper timer. If you don’t press the play button then it won’t automatically change the backgrounds. Click on the ‘Shuffle mode‘ checkbox if you want to be surprised by the order of the background changes.
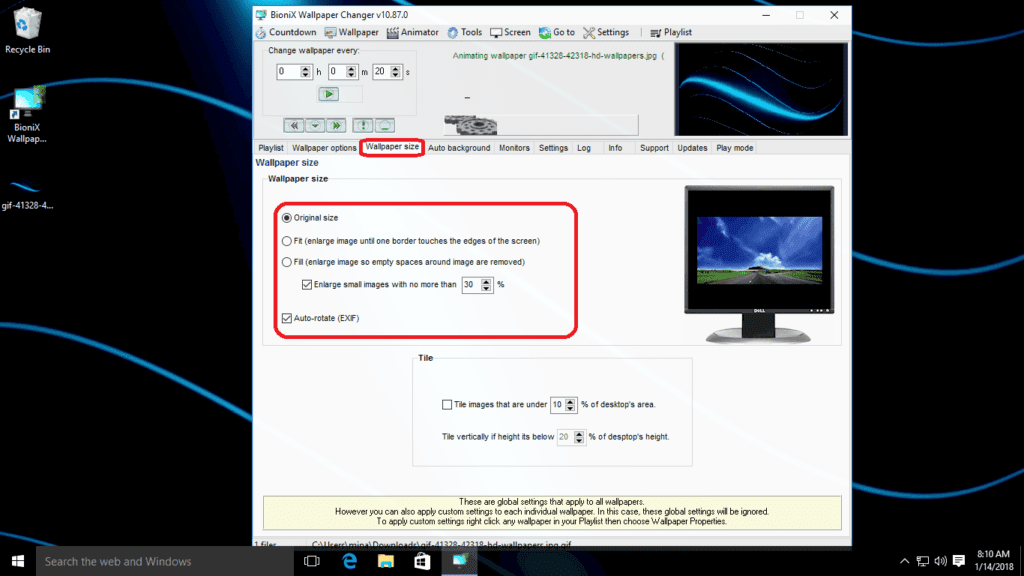
- Also let’s adjust the wallpaper size from its tab. Many choices are available there: you can use the originalsize of the wallpaper, you can also choose to fit and fill it. If you plan to use the fill option then you can adjust the maximum enlargement you want. Beware that small GIFs can get pixelated when enlarged.
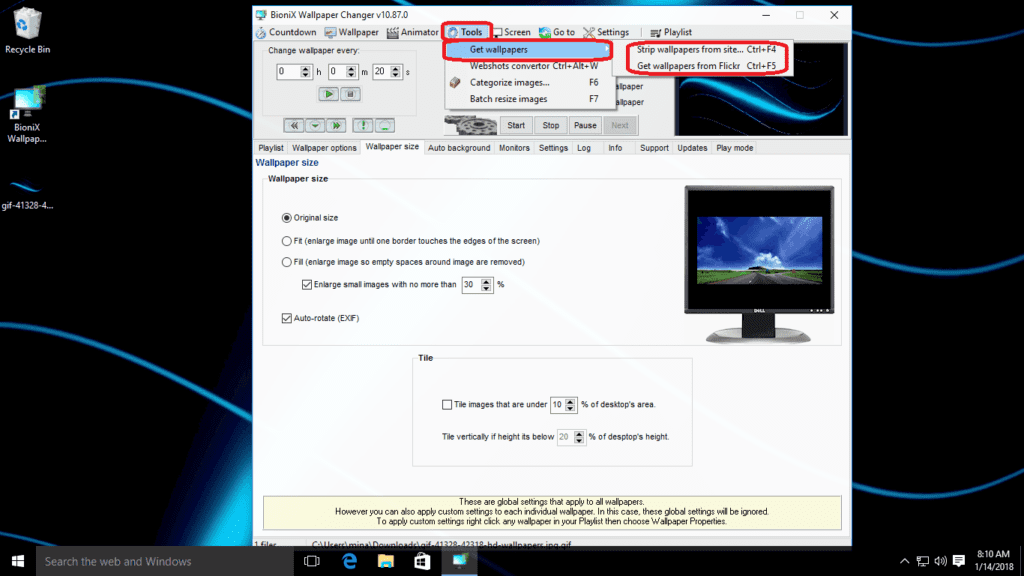
- If you would like to add some online wallpaper/s from a specific website, there’s a way to do so. Also there is a special tool to get wallpapers from Flickr. You can do both of these things from the Tools menu as shown below.
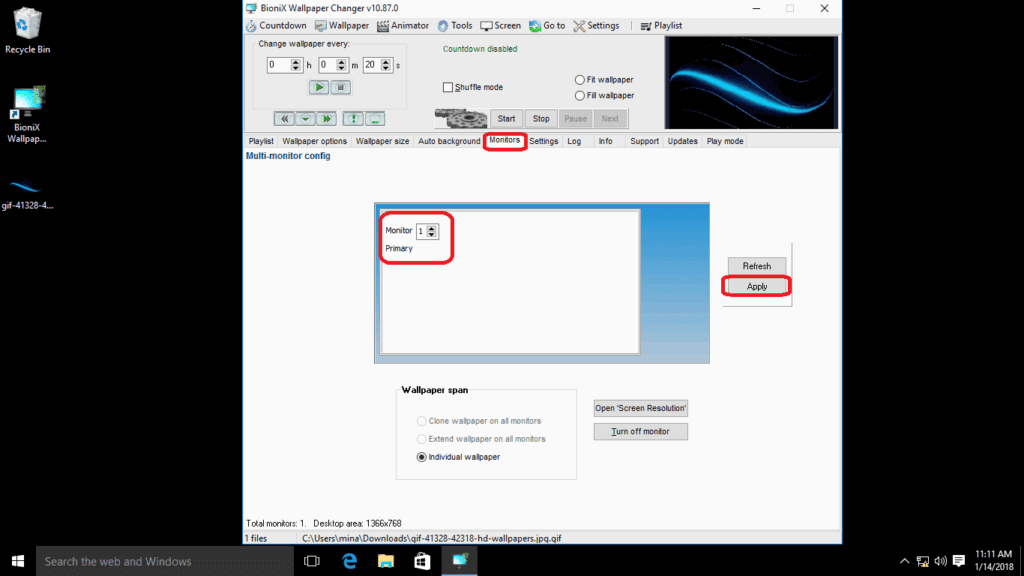
- Also if you want to control which monitor(s) you want to manage using the program, open the Monitor tab, set each monitor by number and then click Apply.
- Click on the Start button to start the whole thing.
- Here you are. Your GIF wallpapers will now work perfectly as long as the application is running. Note that minimizing the application will not exit it while Close will.
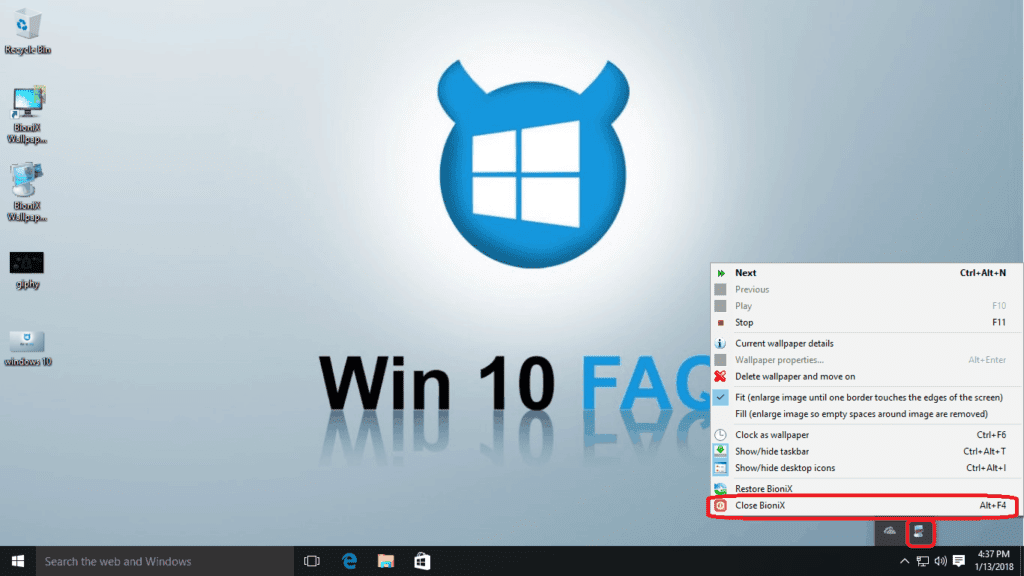
- If you want to stop your GIF wallpaper’s animation or maybe return control of the wallpapers to Windows, right-click on the BioniX icon and choose Close BioniX.


What’s Plastuer?
Plastuer is another solution to make your GIF wallpaper work, it’s available as PWYW (Pay What You Want) with a minimum of 2 USD. We have tried it ourselves and it’s almost the same as BioniX but we found its interface more friendly and elegant.
How to download Plastuer?
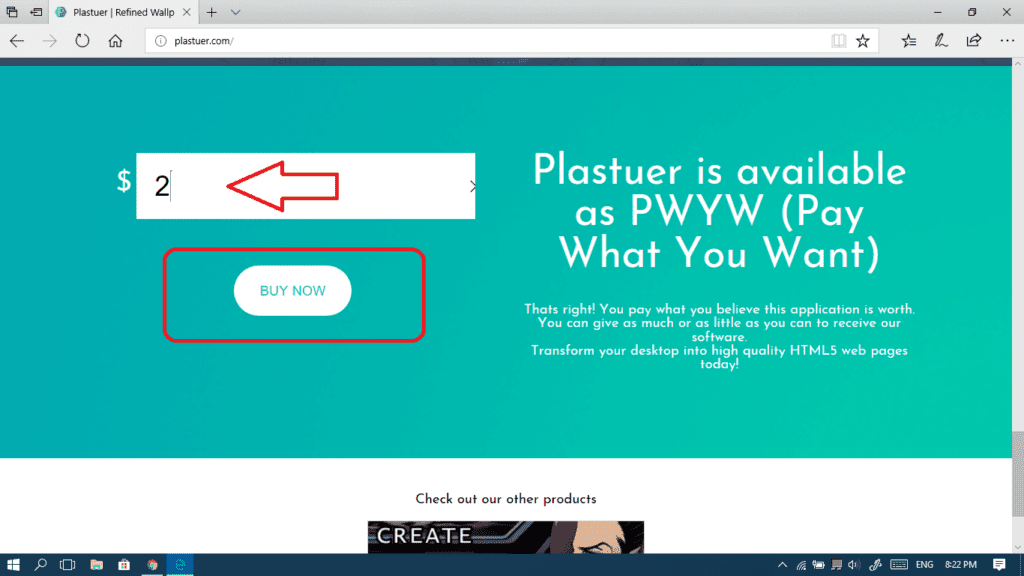
- Go to http://plastuer.com/ and scroll down until you reach the bottom of the webpage and input the amount of money you would like to pay with a minimum of 2 USD and then click on the Buy now button.
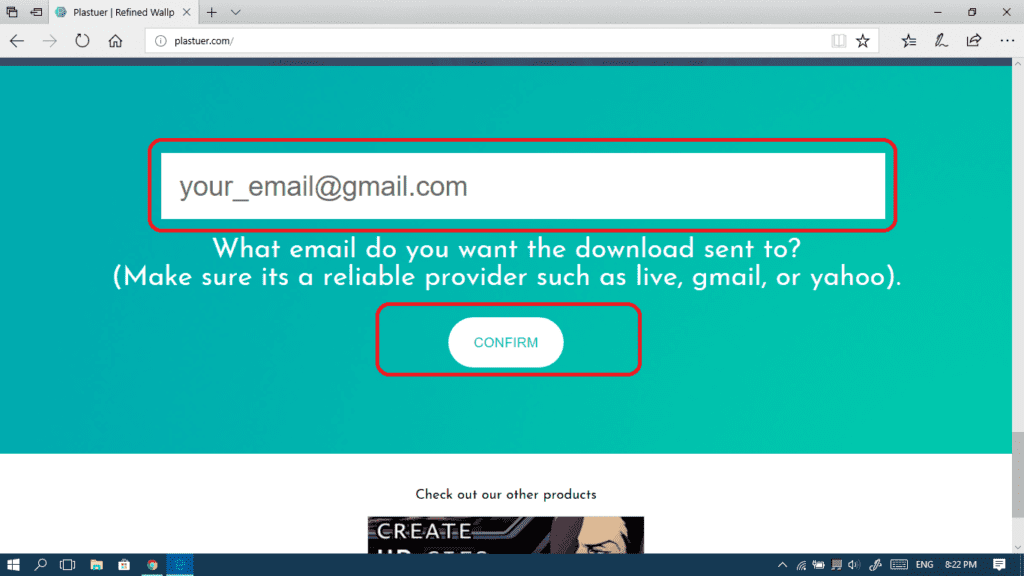
- Now enter your personal email because after you finish the PayPal transaction, they will send you the download link. Click Confirm.
How to run and use Plastuer?
If you noticed, we said “run and use” without mentioning installing, and that’s because Plastuer doesn’t need any installation, it’s a portable program which requires no installations to work.
In general, the user interface is pretty easy and it takes you step-by-step. We really liked how smoothly it went. Let’s take a look:
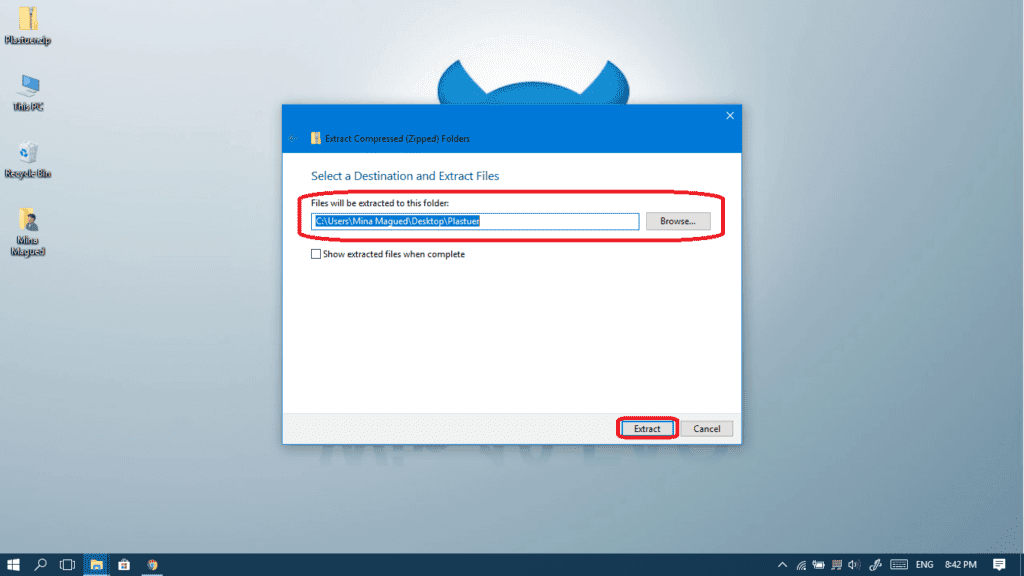
- Right-click on the downloaded zip file and choose Extract all.
- Choose the location where you want to extract this file and then click Extract.
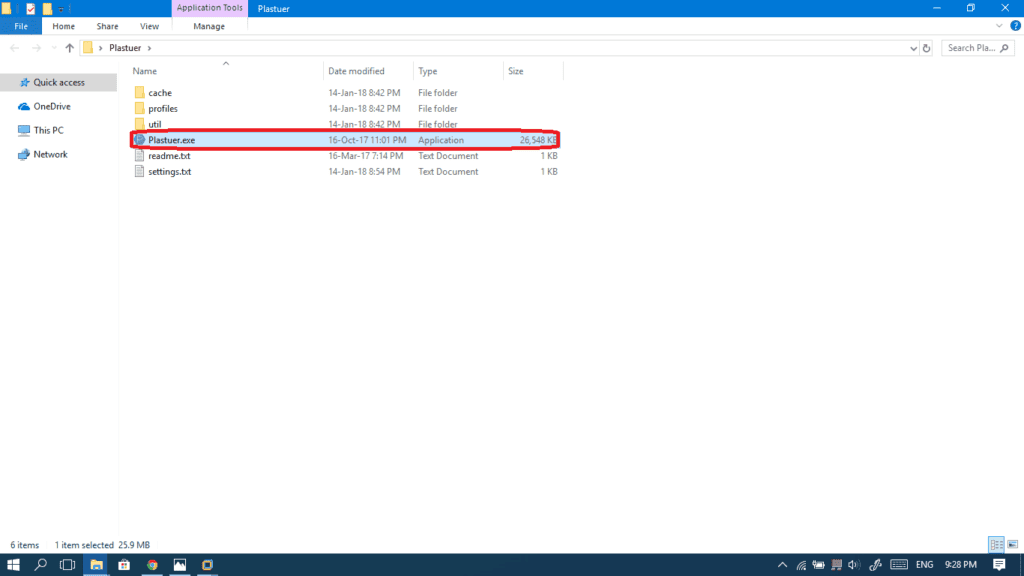
- In the extracted folder, double-click on Plastuer.exe to launch the program.
- We will begin by selecting the monitors we would like to control via Plastuer.
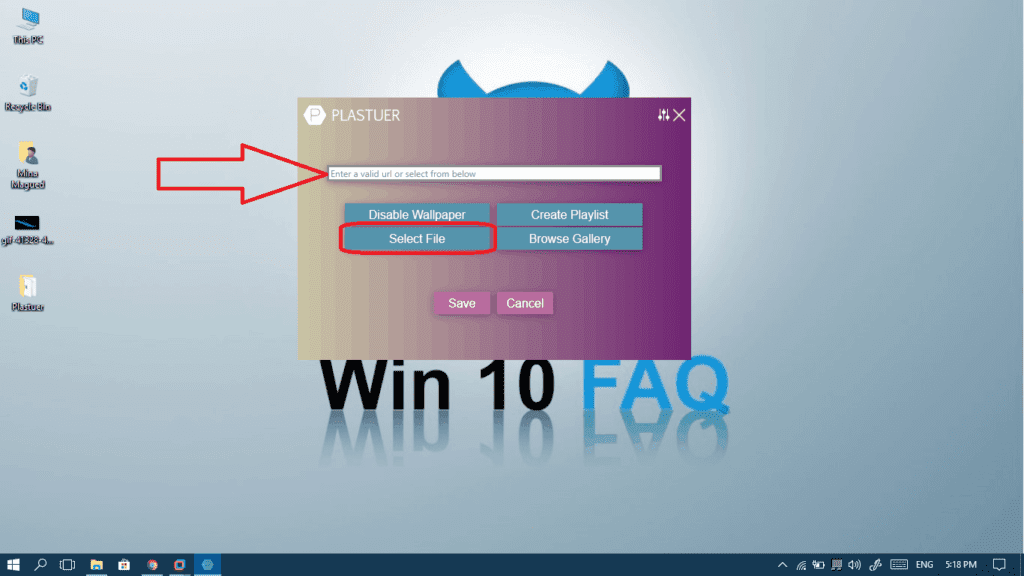
- Click Select File to choose the GIF you want to set as your desktop wallpaper. If you want to add the GIF URL directly because you don’t have it on your local computer, just paste it in the top bar and go so step 7.
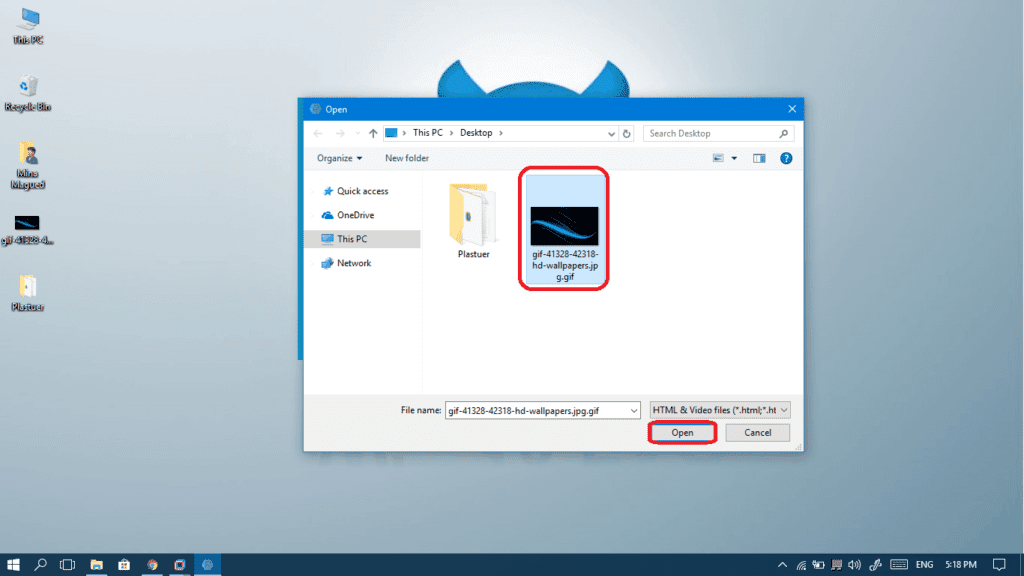
- Browse to the GIF’s location, select the wanted GIF and then click Open.
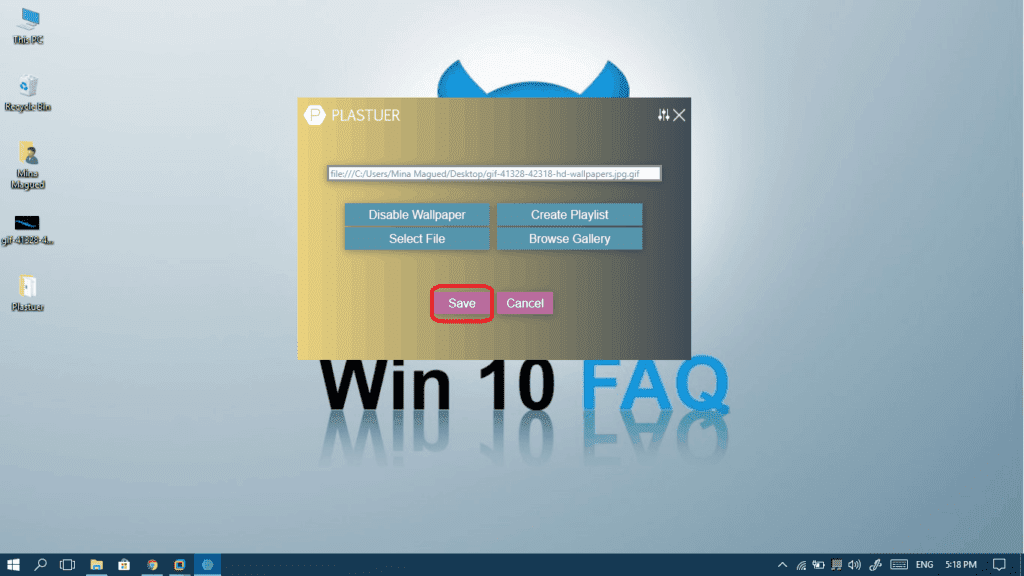
- Now, click Save.
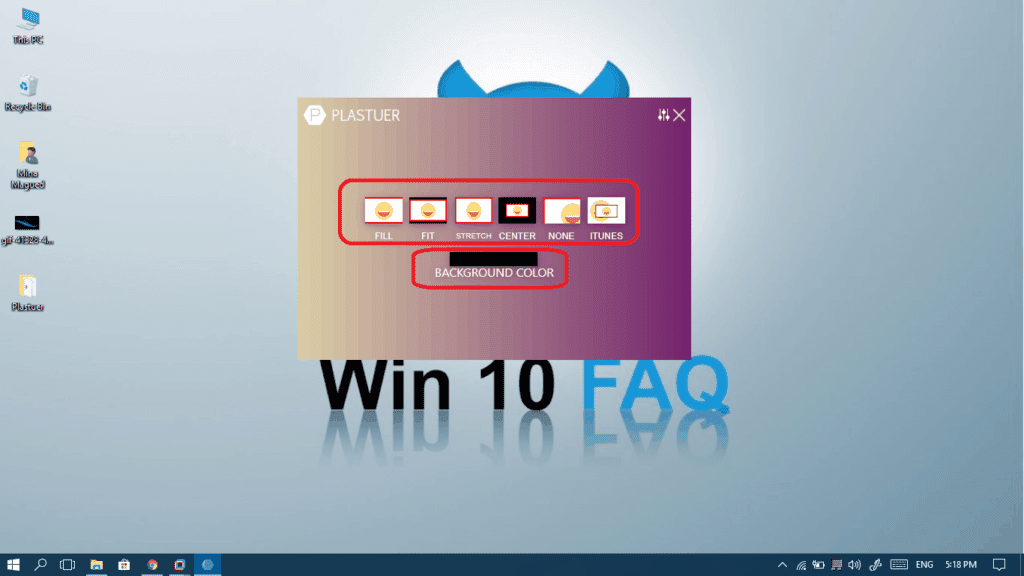
- Choose the wallpaper layout and the background color that might appear behind the GIF.
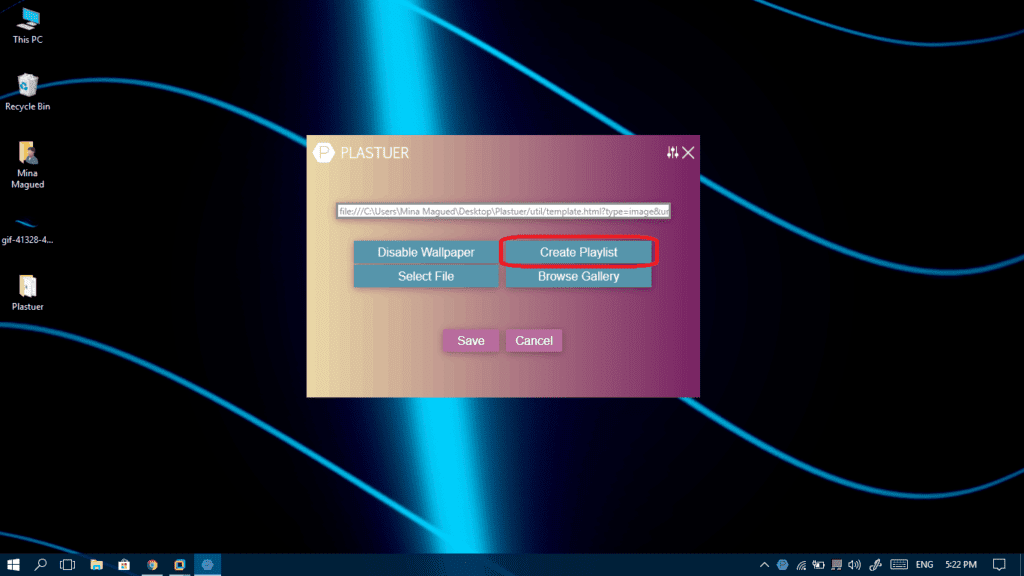
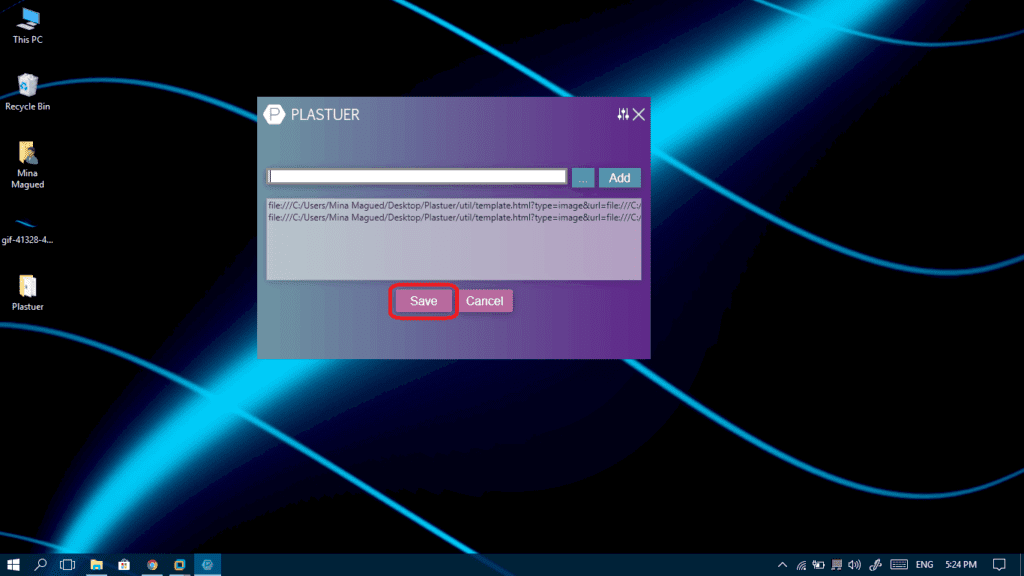
- Now you have set your wallpaper, but back to step 5 and let’s Create a Playlist.
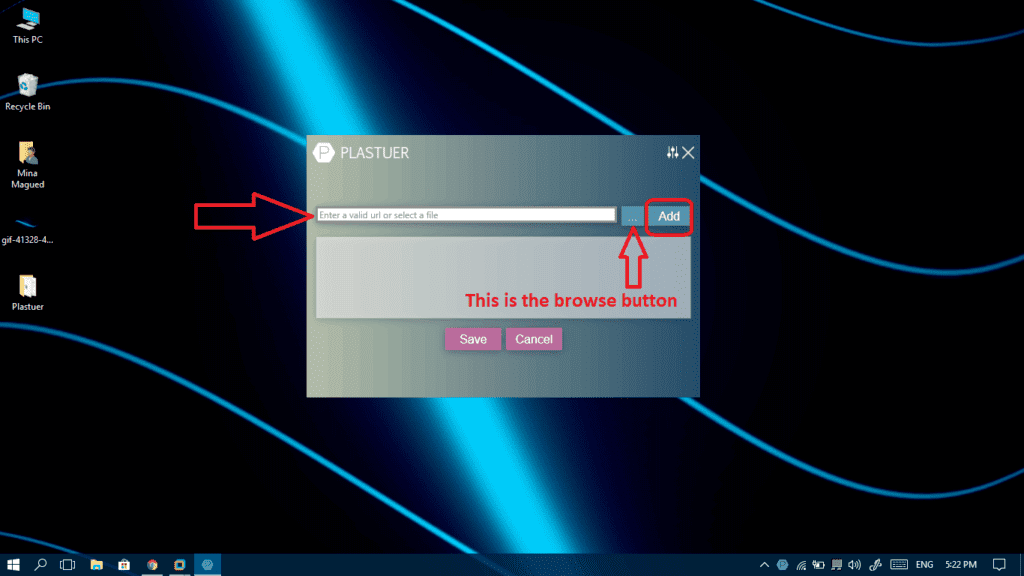
- You can now browse and select the wallpapers you want to add to your playlist and you can past a URL and the program will add the online wallpaper to the playlist immediately.
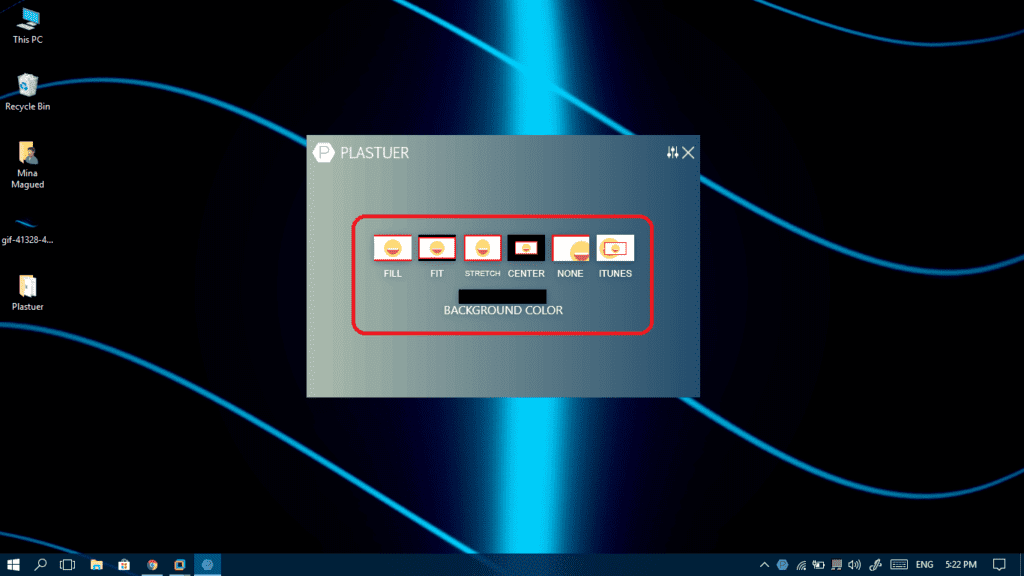
- Don’t forget that you will have to choose the layout and the background color for every wallpaper you add.
- After your playlist is ready, click Save.
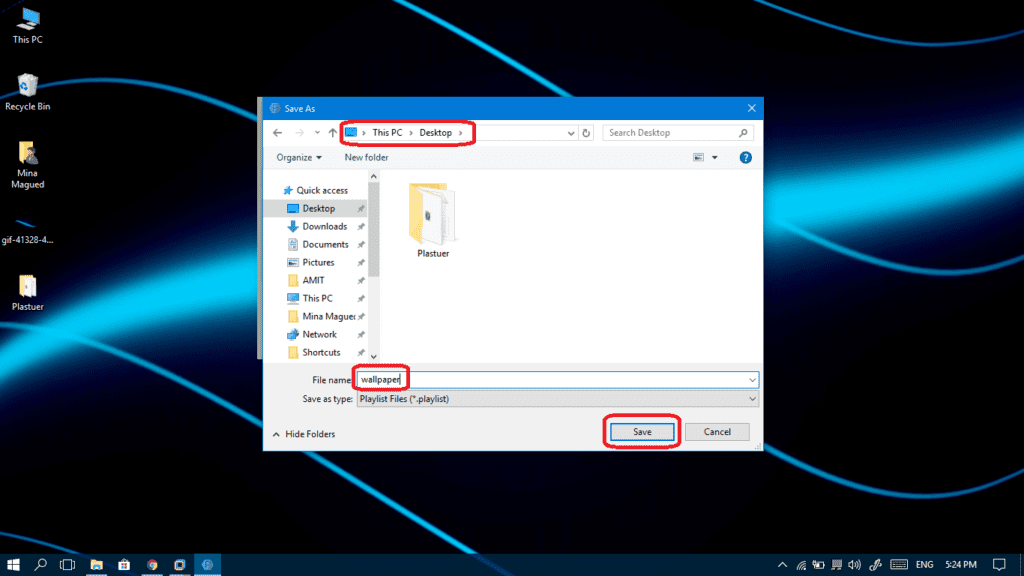
- Choose the location where the playlist will be saved, give it a name and then click Save.
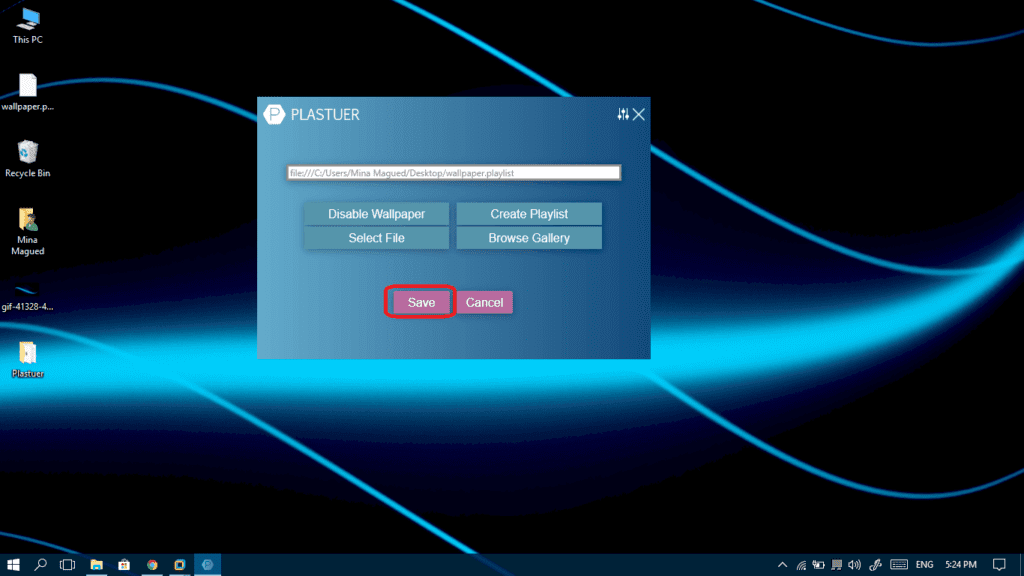
- Click Save to start working using your playlist.
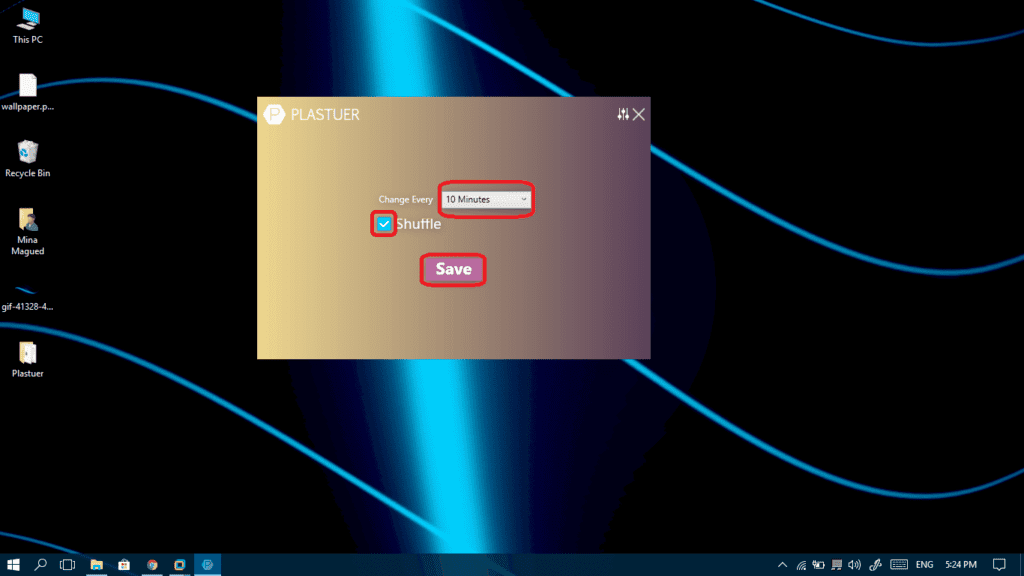
- Determine the duration of each wallpaper in the playlist and whether to shuffle or to stick to the order. This can be done through the checkbox. Now click Save.
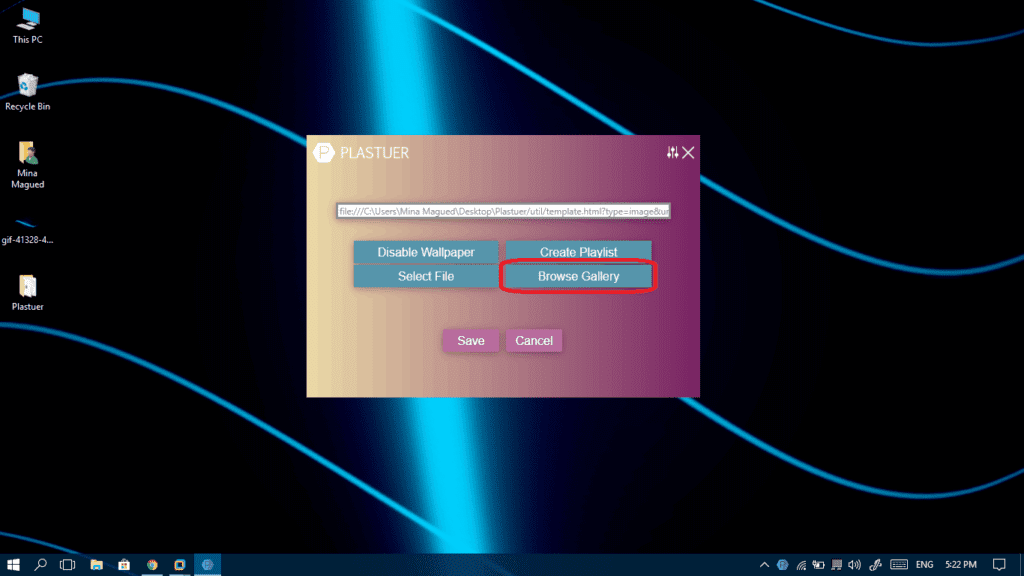
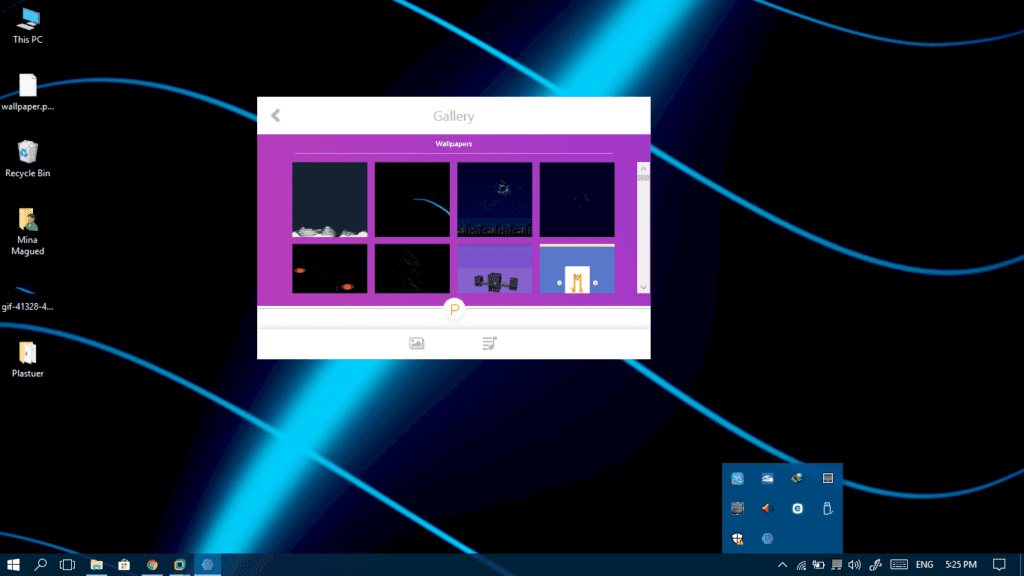
- Finally the program offers some free wallpapers in its gallery, if you want to choose among them, go to the main menu and click Browse Gallery.
- You can now choose from a variety of wallpapers.
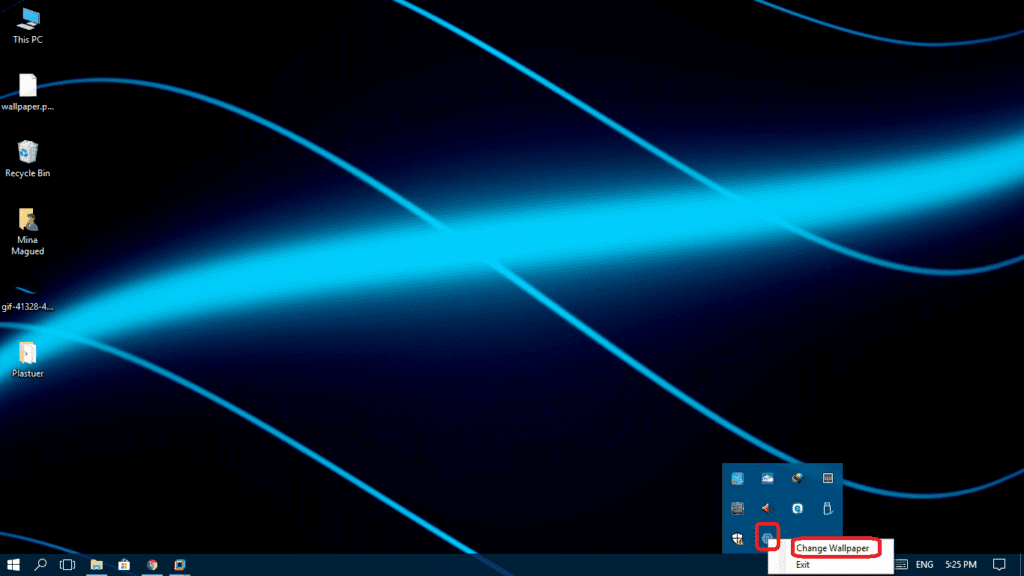
- That’s it. Your GIF wallpapers will now work perfectly as long as the application is running. You can make sure it’s running in the bottom-right corner of your screen. You can also skip the current wallpaper to the following one by right-clicking on the icon and choosing Change wallpaper.


6 Comments
These examples you are using cost money, I found a bit of software through youtube/reddit that is actually free.


