- How to fix cursor disappeared in Windows 10?
- How to fix a black screen with cursor in Windows 10
- How do I fix the Windows 10 black screen with cursor error?
- 1. Update your drivers
- DriverFix
- 2. Use Windows Key + P shortcut to switch displays
- 3. Uninstall your graphic card driver
- 4. Disable onboard graphics from Device Manager
- 5. Disable Dual monitor from BIOS/disable CPU Graphics Multi-Monitor
- 6. Connect your monitor with both cables to your computer/connect additional monitor
- Run a System Scan to discover potential errors
- 7. Update your BIOS
- 8. Uninstall problematic applications
- 9. Change display brightness
- 10. Disconnect your second monitor
How to fix cursor disappeared in Windows 10?
cursor has disappeared in windows 10
*Modified title for accuracy*
*Original title: cursor disappeared in windows 10*
My name is Angel. I am an Independent Advisor. Thank you for posting in Microsoft Community.
Solution 1. Use Windows Function Keys to Get the Disappearing Cursor Back in Windows 10
The installation of Windows 10 may disable the function of your mouse cursor, causing the mouse pointer missing on Windows 10. If that’s the case, it could be possibly resolved by pressing the Windows function keys on your keyboard.
Depending on your keyboard and mouse model, the Windows keys you should hit are varying from one to another. Thus you may try the following combinations to make your disappearing cursor back to visible in Windows 10: Fn + F3/ Fn + F5/ Fn + F9/ Fn + F11.
If using the Fn keys to retrieve the missing cursor doesn’t work for bringing the mouse cursor back, there could be some errors with your mouse driver in Windows 10. Since upgrading Windows OS sometimes leads to driver or software compatibility issue.To fit Windows 10 with the compatible mouse drivers, you might as well roll back your mouse driver or update it.
Solution 2. Update the Mouse Driver to Fix the Missing Cursor in Windows 10
Since there’s no mouse pointer and the mouse is not working, you can only process updating mouse driver with the keyboard:
1. Press Windows + R keys altogether to bring out the Run box.
2. Type devmgmt.msc and then hit Enter to open Device Manager.
3. Press Tab to switch to devices list.
4. Use arrow keys to scroll down to Mice and other pointing devices and use the right arrow key to expand it.
5. Use the down arrow key to select your mouse device.
6. Press Shift + F10 open the context menu.
7. Choose Update driver with arrow keys and hit Enter.
8. Follow the on-screen installation instructions to finish the updates and then check whether the lost cursor or mouse not working issue persists on your Windows 10 laptop or desktop PC.
Solution 3. Roll Back the Mouse Driver to Fix Mouse Cursor Disappears in Windows 10 Issue
If you update the mouse driver and the mouse pointer just keeps disappearing on Windows 10, the latest mouse driver version may be incompatible with Windows 10. You should try to roll back your mouse driver to find the lost window 10 mouse cursor or fix cursor disappearing after Creators Update glitch. Below is how:
1. Repeat steps 1-4 as the solution 2.
3. Press Tab a couple of times, until the square is on General.
4. Press right arrow key to go to Driver.
5. Press Tab a couple of times until Roll back driver is selected, and then hit Enter.
6. Follow further on-screen instructions to finish the installation.
7. Reboot your computer and your mouse cursor should be back to normal.
Hope the information provided is useful. If the issue persists, reply here and we will be glad to help you.
Note: This is a non-Microsoft website. The page appears to be providing accurate, safe information. Watch out for ads on the site that may advertise products frequently classified as a PUP (Potentially Unwanted Products). Thoroughly research any product advertised on the site before you decide to download and install it.
How to fix a black screen with cursor in Windows 10

- Most of the time the black screen with cursor error occurs before login on Windows 10.
- In this case, you might want to try using a specific repair tool to get rid of the W indows 10 black screen with cursor after update.
- Another solution would be to update your drivers, and we have the perfect tool to help you, check it out below!
- Also, it may be necessary to take some action in the BIOS. To make sure you don’t do anything wrong, read the whole article!

- Download Restoro PC Repair Tool that comes with Patented Technologies (patent available here).
- Click Start Scan to find Windows issues that could be causing PC problems.
- Click Repair All to fix issues affecting your computer’s security and performance
- Restoro has been downloaded by 0 readers this month.
Users have reported that they are getting black screen with cursor on Windows 10. Let’s see how to fix this problem, so keep reading!
You can also watch our video troubleshooting guide below to learn what methods to use in order to fix black screen issues on Windows 10.
How do I fix the Windows 10 black screen with cursor error?
- Update your drivers
- Use Windows Key + P shortcut to switch displays
- Uninstall your graphic card driver
- Disable onboard graphics from Device Manager
- Disable Dual monitor from BIOS / disable CPU Graphics Multi-Monitor
- Connect your monitor with both cables to your computer / connect additional monitor
- Update your BIOS
- Uninstall problematic applications
- Change display brightness
- Disconnect your second monitor
- Disable Secondary Output from Device Manager
- Set display output to IGFX
- Connect your monitor using HDMI
- Disable / enable dedicated card from BIOS
- Check your graphic card settings in BIOS
- Remove computer battery and reset your BIOS
- Disable Fast Startup
- Check additional displays
- Connect your monitor to integrated graphic card
- Uninstall problematic software before upgrade
1. Update your drivers
- Type device in the search bar and click on Device Manager.
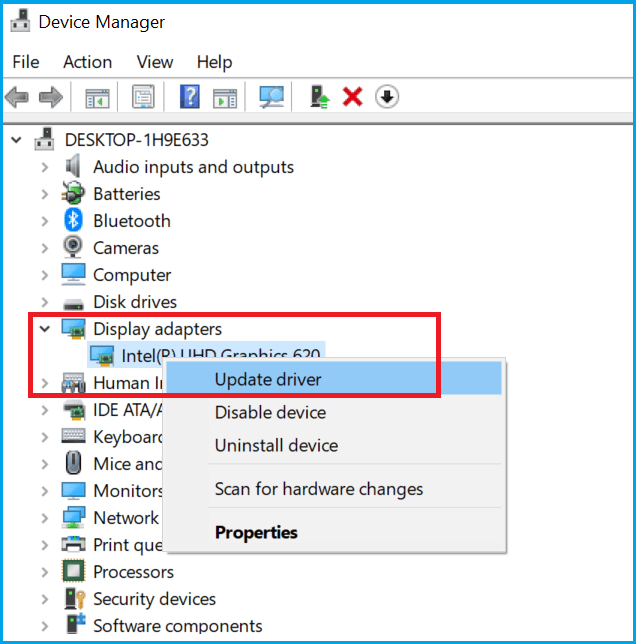
- In the Device Manager expand the Display Adapter section.
- Right-click on your graphics device and select Update Driver.

- Select Search automatically for updated driver and software option.
- Windows will now search for any pending update and download it.
- Once the update is installed, check if Windows 10 fit the screen.

Updating drivers manually is a serious procedure that can be a bit time-consuming, and it does not give you the assurance that the system will find the latest drivers.
You can update your drivers by using a special third-party software tool. We strongly recommend that you use the software below to automatically update all your drivers in just a few seconds.
DriverFix
2. Use Windows Key + P shortcut to switch displays
- Press Windows Key + P shortcut to open the Project menu.
- Project menu will now open, but you won’t be able to see it. Don’t worry, that’s perfectly normal.
- Now press the up or down arrow key a few times and press Enter.
- If you are successful, your screen should appear. If your screen doesn’t appear, you might have to repeat this step a few times.

If you’re getting black screen before login on Windows 10, you might want to try using Windows Key + P shortcut to switch displays.
For some reason, after update to Windows 10, your project mode might change to Second screen only, and you need to change that by following our instructions.
We’ve had this issue, and it was fixed after 6 or 7 tries, so it crucial that you be persistent.
We have to mention that if your account is protected by password, you’ll have to log in first. To do this, press Space or Ctrl, enter your password and press Enter.
This can be tricky, because you’ll be doing this on black screen, so it might take you a few tries.
If you need more information on how to switch displays on Windows 10, take a look on this detailed guide.
3. Uninstall your graphic card driver
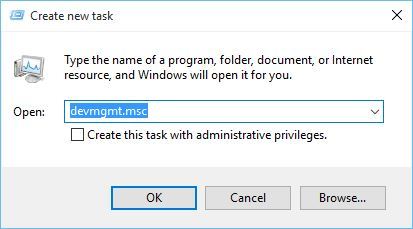
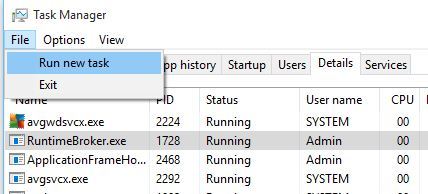
- Press File, and select Run new task.
- Enter devmgmt.msc, and press Enter to run it.
If you have black screen with cursor issues, you can try pressing Ctrl + Alt + Del in order to start Task Manager. From Task Manager you’ll be able to start Device Manager.
If you can’t open it, you might have to access Safe Mode and uninstall install display drivers from there. To access the Safe Mode, do the following:
- While your computer boots keep pressing F4 or F8 (it might be a different key on your PC) to access Boot Options.
- Choose Troubleshoot, select Advanced Options, and choose Startup Settings.
- Your PC will now restart, and you’ll be presented with a list of options. Choose Safe Mode with Networking (or any other Safe Mode option).
In order to uninstall the drivers, follow these steps:
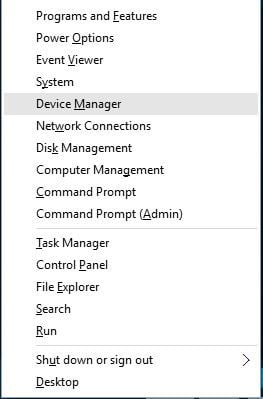
- Press Windows Key + X, and choose Device Manager from the list.
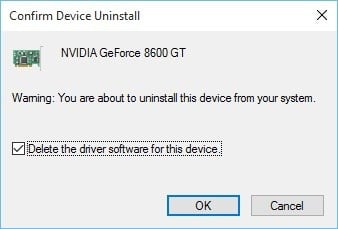
- When Device Manager opens, locate your graphic card, right click it and choose Uninstall. If asked, make sure that you check Delete driver software for this device.
- After you’ve uninstalled the driver, restart your PC. Windows 10 should start normally and black screen issue should be fixed.
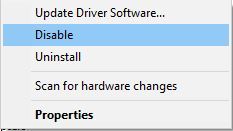
4. Disable onboard graphics from Device Manager
- Locate your onboard graphics.
- Right click it and from the menu choose Disable.
- Restart your PC, and check if the issue still persists.
If your computer has both onboard and dedicated graphics, make sure that you disable your onboard graphic from Device Manager.
To do that, you might have to access Safe Mode, if your Windows 10 won’t load. If Safe Mode won’t accept your password, easily fix it by following our guide.
5. Disable Dual monitor from BIOS/disable CPU Graphics Multi-Monitor
- While your computer boots press F2 or Del (it might be a different key on your computer) to access BIOS.
- When BIOS stats you need to find and disable CPU graphics function or Dual monitor function.
- Save changes and restart your PC.
Also, if you have the CPU Graphics Multi-Monitor option, it’s also suggested that you disable it in order to fix this issue. After you’ve disabled this option, save changes and restart.
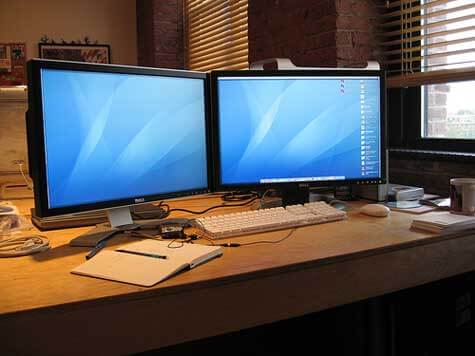
6. Connect your monitor with both cables to your computer/connect additional monitor
This is a bit of unusual solution, but users have reported that it fixes the black screen before login problem.
According to users, if you have a monitor with two connectors, such as DVI and HDMI, you need to connect your monitor using both DVI and HDMI cable.
After you’ve done that, you can turn on your computer and check if the problem is resolved.
Run a System Scan to discover potential errors


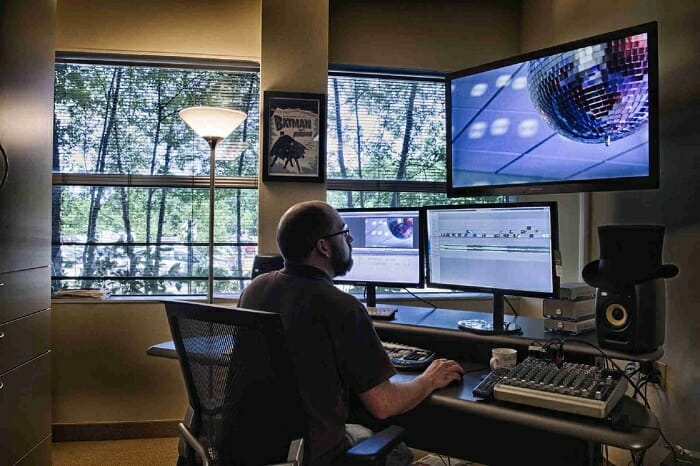
Some users also suggest that you might be able to fix this issue by attaching an additional monitor, so if you have an extra monitor, try connecting it to your PC.
Even if this doesn’t fix the problem, your second monitor should work without any problems.
7. Update your BIOS

Some users claim that you can fix black screen with cursor after update by updating your BIOS.
Updating BIOS is a procedure for advanced users, and if you don’t do it properly, you can cause permanent damage to your hardware, so please keep that in mind.
In order to perform BIOS update, you need to go to your motherboard manufacturer’s website and download the latest version of BIOS for your motherboard.
In most cases, there should be an instruction manual on how to update your BIOS, so make sure that you read it carefully.
If you don’t know how to update your BIOS, please ask an expert to do it for you in order to avoid any potential damage.
If you want to update BIOS on Windows 10 yourself, just follow the exact steps from our guide to make sure that everything will go as planned.
8. Uninstall problematic applications
- Press Ctrl + Shift + Esc to start Task Manager.
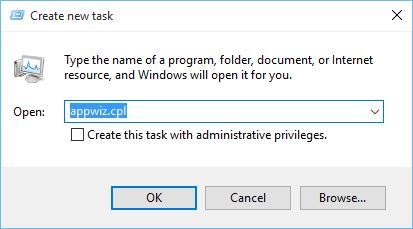
- Click File, and select Run new task.
- Enter appwiz.cpl and press Enter to run it.
- Programs and Features window will now open, and you’ll be able to uninstall problematic applications.
If you have issues with black screen with cursor after Windows 10 update, then find out that certain applications such as antivirus, third-party firewall, iCloud, Cisco VPN client, or IDT Audio, can cause this problem.
In order to fix this problem, it’s advised that you uninstall those applications from your PC.
If you can’t access Task Manager, you should enter Safe Mode and try this solution again.
Sometimes, these applications can leave their files in system32 directory (for example, IDT Audio creates IDTNC64.cpl file and moves it to system32 folder).
In order to completely fix this problem, you might have to find the problematic file and delete it manually or by using Command Prompt.
Be very careful while doing this, because you don’t want to delete any core Windows 10 files.
9. Change display brightness
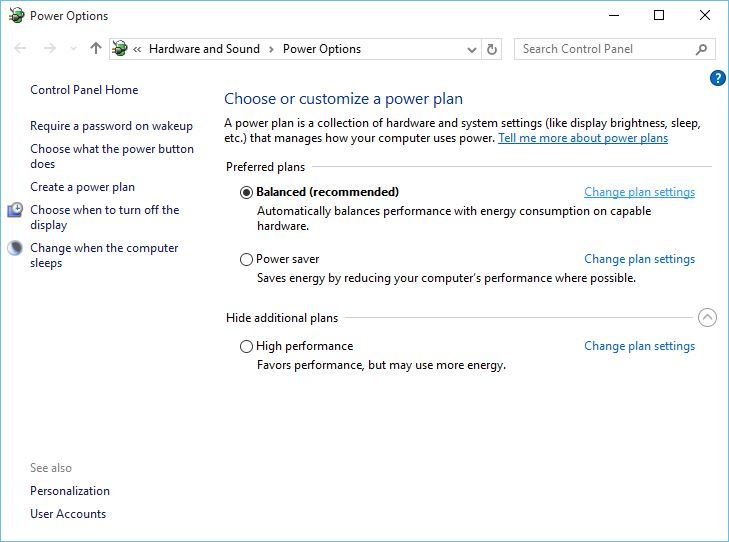
- Press the Windows Key + X, and type Power Options.
- Choose Power Options from the menu.
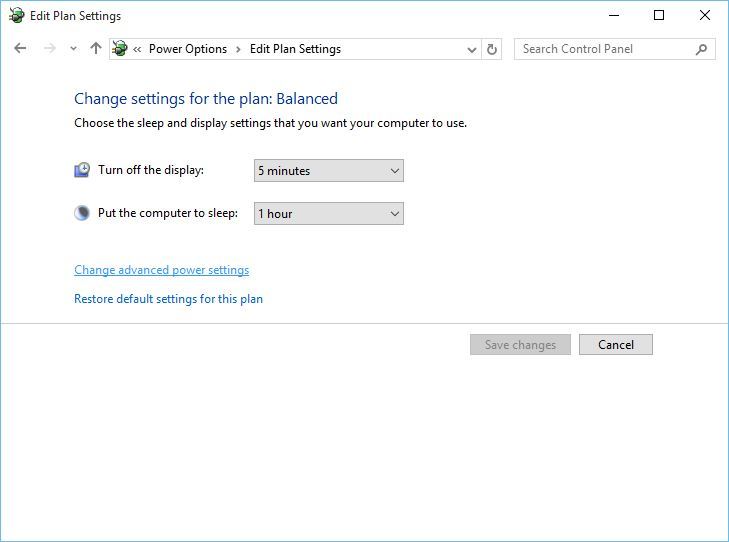
- Find your current plan, and click Change plan settings.
- Now click on Change advanced power settings.
- Locate Display brightness setting and make sure that you set display brightness to 99% or 98% when your device is plugged in.
- Save changes and restart your PC.

Users have reported that they are having issues with black screen on Windows 10 after they connect the AC adapter to their laptop.
In most other cases, the laptop works fine, but after the user connects the AC adapter, the screen goes dark. This is caused by the display brightness problem, and you can fix it by following thee above steps.
If you are having trouble changing the display brightness, then you should check out our helpful guide and get the things done with ease.
10. Disconnect your second monitor

In certain cases, black screen with cursor on Windows 10 can be fixed by unplugging your second monitor.
Nvidia users have reported that unplugging the second monitor has fixed this issue for them, so make sure that you try it out.
Editor’s Note: This article continues on the next page. If you want to read more about Black Screen of Death errors, check out our wide collection of guides.


