- Операционная система не найдена — An operating system wasn’t found
- Отключение внешних USB устройств от компьютера
- Изменение приоритета загрузки BIOS
- Включить или отключить Безопасную загрузку
- Сбросьте BIOS на заводские настройки
- Восстановить MBR жесткого диска
- Активируйте раздел Windows
- Fix- An operating system wasn’t found problem Windows 10
- Fix-1 Activate the boot drive-
- Fix-2 Repair MBR and rebuild BCD-
Операционная система не найдена — An operating system wasn’t found
Одной из наиболее страшных ошибок пользователей является та, которая появляется при включении компьютера и сообщает нам, на черном экране BIOS, что «операционная система не найдена«. Когда появится это сообщение, загрузка нашей системы будет невозможна, и единственный выход — перезагрузить компьютер, нажав «ctrl+ alt+del», и при этом скорее всего увидите это сообщение снова An operating system wasn’t found. Ttry disconnecting any drives that don’t contain an operating system. Press Ctrl+ Alt+Del to restart.
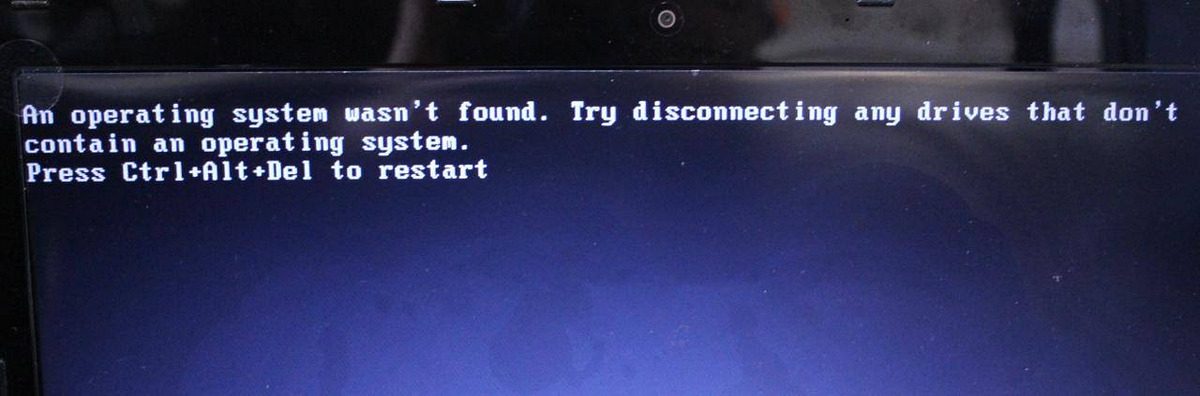
Проблема ошибки в том, что операционная система не отображается, и поэтому BIOS не может загрузить систему Windows. Причины появления этой ошибки очень разнообразны: от простой ошибки конфигурации в BIOS до более серьезной проблемы, которая в худшем случае заставляет нас полностью форматировать компьютер. По этому разберем основные причины и их решения для устранения ошибки «Операционная система не найдена» (An operating system wasn’t found).
Отключение внешних USB устройств от компьютера
Если на компьютере подключены несколько внутренних жестких дисков, внешние и USB-флешки, вполне вероятно, что BIOS пытается найти операционную систему в неположенном месте. Следовательно, не обнаружив систему Windows, выдает ошибку «Не найдено операционной системы».
- Чтобы решить эту проблему, нужно отключить все внешние устройства хранения, подключенные к USB-портам, и повторить попытку. Мы также можем проверить наш оптический дисковод, чтобы убедиться, что он не пытается загрузить неправильный DVD.
Если после этого проблема все еще не решена, следующим шагом будет переход в BIOS настройки.
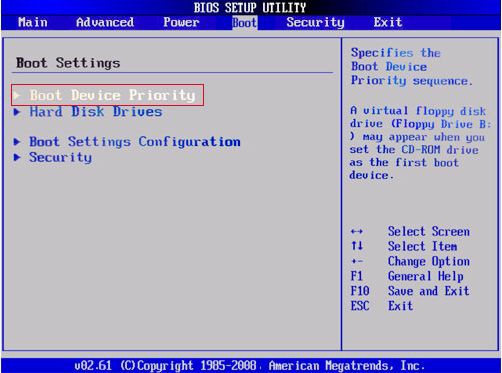
Изменение приоритета загрузки BIOS
Зайдите в конфигурации BIOS нажатием кнопок F2, F12 или Delete. После этого перейдите в раздел конфигурации Boot и выставить на первое место в графе Priority жесткий диск на котором рабочая и основная операционная система Windows. В разных версиях БИОС он называется по-разному, но вы ищите слово с сочетанием Priority, что означает «приоритетная загрузка». Вот несколько названий с разных BIOS: Hard Disk Priority, Boot Device Priority, Hard Disk Boot Priority.
После того как вы задали приоритет загрузки с жесткого диска на котором находится ваша система, не забудьте сохранить выставленные настройки кнопкой F10 и перезагрузите компьютер, чтобы убедиться «найдена ли система при включении компьютера».
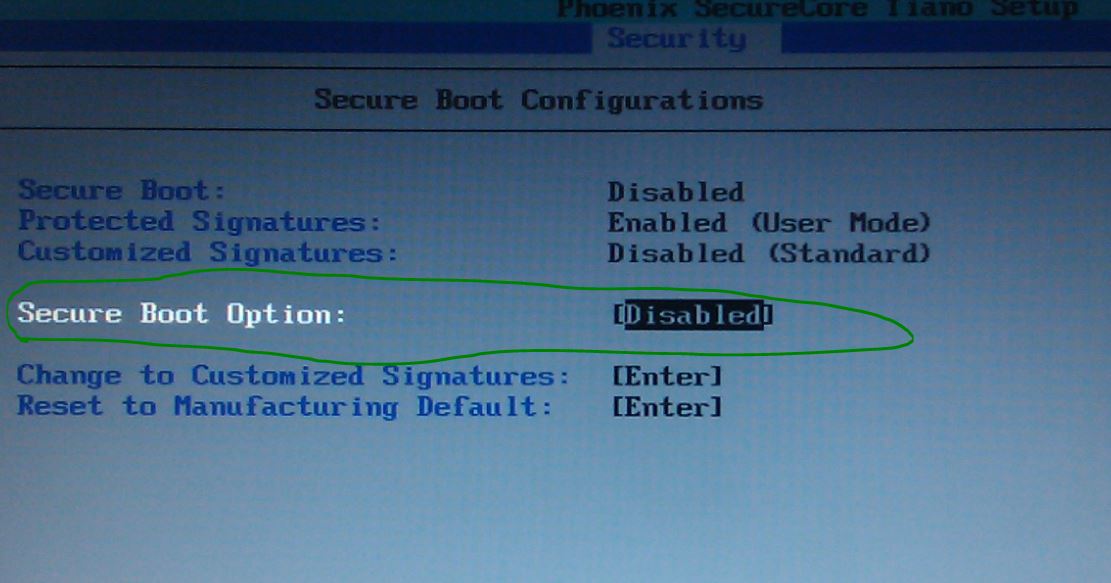
Включить или отключить Безопасную загрузку
Если вы используете современный компьютер с операционной системой, такой как Windows 8 или Windows 10, тогда возможно причина, по которой наша Windows не запускается, заключается в неправильной настройке безопасной загрузки UEFI.
Зайдите обратно в BIOS, найдите раздел конфигурации Secure Boot (Безопасная загрузка) и деактивируйте его или активируйте, если он отключен, чтобы проверить пропала ли ошибка «Операционная система не найдена при загрузке компьютера».
В разных версиях BIOS или UEFI расположение настроек выглядит по разному, но вы в любой версии БИОСа ищите графу Secure Boot, пробуйте отключить или включить.
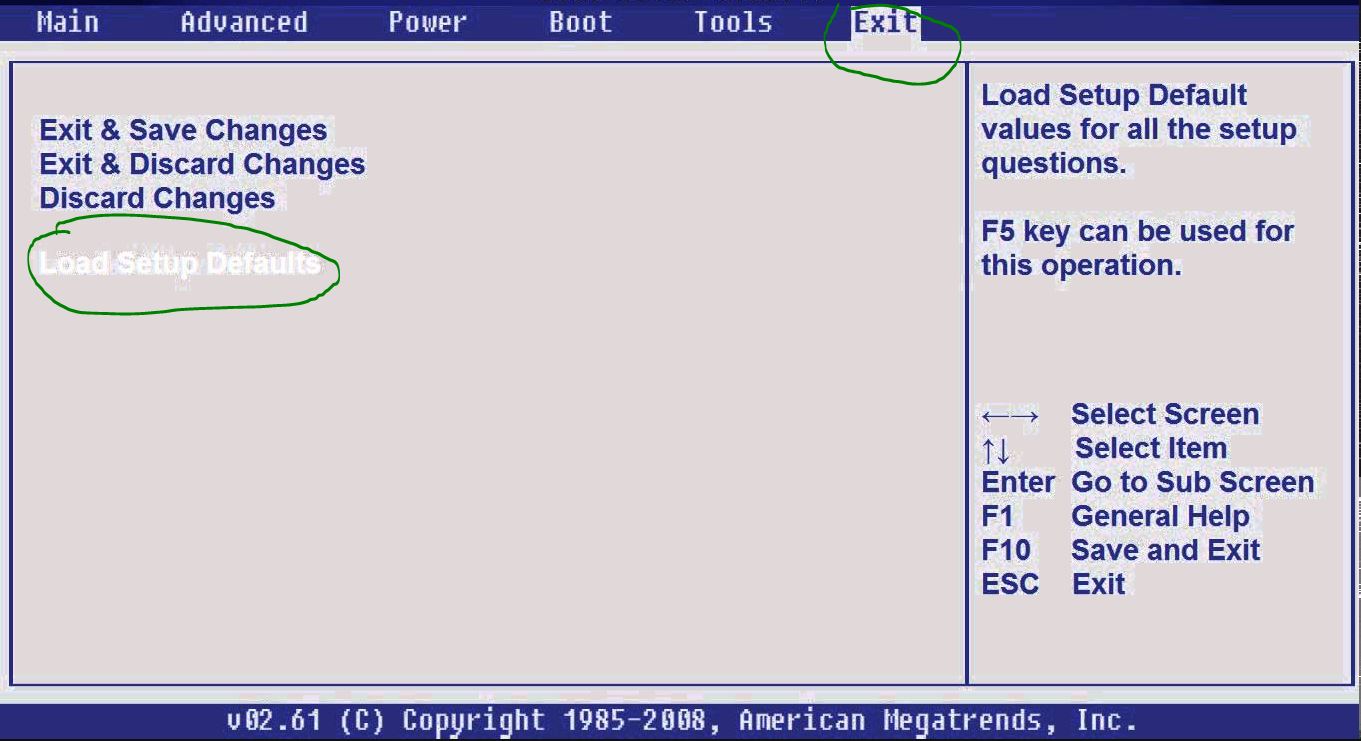
Сбросьте BIOS на заводские настройки
В нижней части меню BIOS вы увидите ключ для настроек по умолчанию или сброс BIOS. На моей машине это F9. Подтвердите свое решение при появлении запроса и перезапустите компьютер.
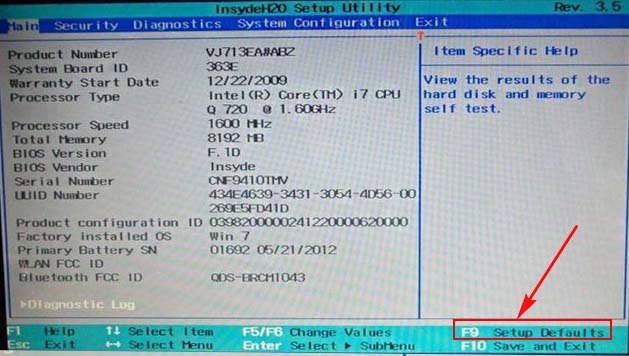
Если вы не нашли примерную кнопку, как F9 для сброса настроек на заводские, то ищите строку Load Setup Default и сбросьте БИОС.
Восстановить MBR жесткого диска
Если ваш жесткий диск с операционной системой помещен первым, но компьютер по-прежнему не загружается, возможно, что некоторые из начальных секторов диска были повреждены, такие-как основная загрузочная запись (MBR), загрузочная запись DOS (DBR) , или База данных конфигурации загрузки (BCD).
Ремонт этих секторов довольно прост. Все, что нам нужно — это создать установочную флешку Windows и через неё войти в дополнительные параметры загрузки.
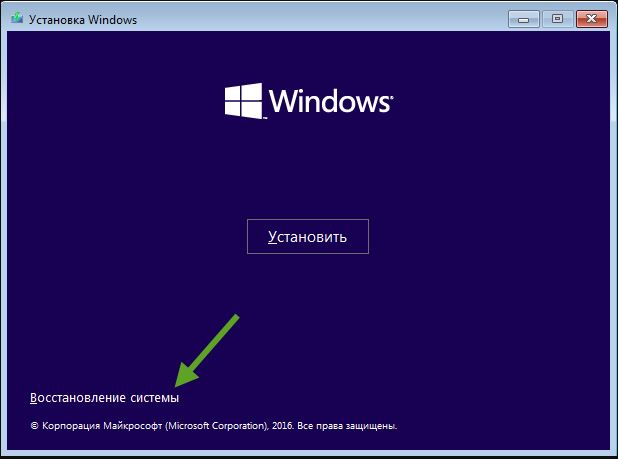
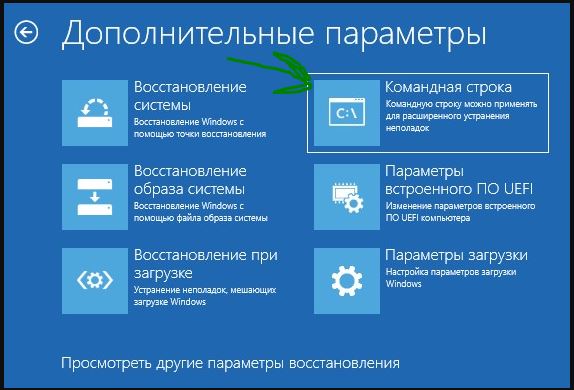
Далее найдите «Командную строку», чтобы запустить ее, пройдите по пути Устранение неполадок > Дополнительные параметры > Командная строка.
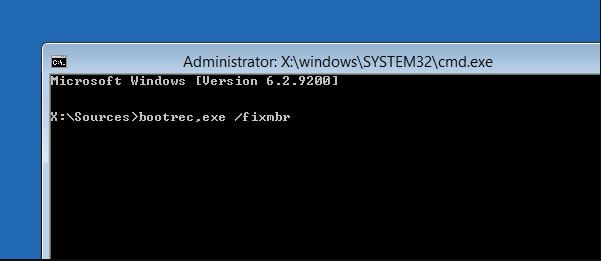
Введите следующие команды в CMD по порядку, нажимая enter. Для выполнение каждой команды может потребоваться время.
- bootrec.exe / fixmbr
- bootrec.exe / fixboot
- bootrec.exe / rebuildbcd
Активируйте раздел Windows
Возможно, что раздел, на котором установлена Windows, отключен. Вы можете исправить это, используя собственный инструмент diskpart Windows. Чтобы выполнить следующие шаги, вам снова понадобится USB-носитель для установки Windows. Запустите командную строку, как описано выше, через диск восстановление или установочную флешку Windows и в командной строке вбейте следующие команды:
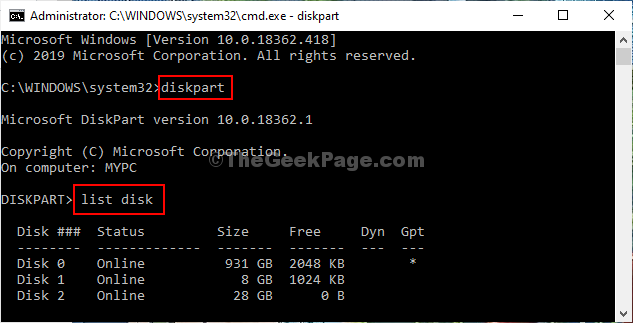
- diskpart — Запуск инструмента.
- list disk — Список подключенных дисков к компьютеру.
- select disk 0 — Выбор жесткого диска на котором нужно активировать раздел. В моем случае, основной жесткий диск 0.
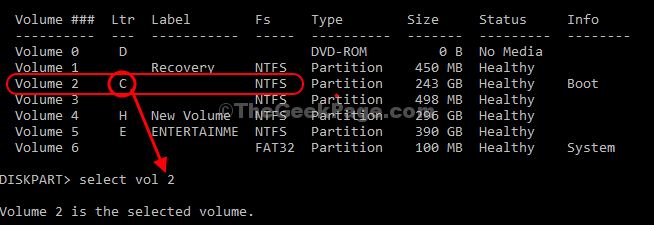
- list volume — Показывает разделы на выбранном жестком диски.
- select volume 2 — Выбрать локальный диск для активации. Выбирайте тот, где установлена сама система widows.
- active — Активировать раздел.
Перезагрузите компьютер и удостоверьтесь, пропала ли ошибка при включении компьютера An operating system wasn’t found. Ttry disconnecting any drives that don’t contain an operating system. Press Ctrl+ Alt+Del to restart, что означает, операционная система не найдена, нажмите для перезагрузки ctrl+alt+del.
Fix- An operating system wasn’t found problem Windows 10
January 18, 2021 By Sambit Koley
Is Windows not booting up on your computer? Are you seeing the error message “An operating system wasn’t found” on a blue screen? If this is happening then there is a problem that involves the wrong partition of your HDD to be identified as the boot drive of your system. Don’t worry. Follow these easy fixes and the problem will be solved in no time at all.
Pre-requisite–
You will need a Windows installation media. If you don’t have one, you have to create a bootable installation media.
Once you have done so you can go ahead to the main solutions.
Fix-1 Activate the boot drive-
As we have said before, this problem may occur due to the wrong boot drive configuration.
1. At first, insert the installation media you have created (or the Windows 10 installation DVD) on your computer.
2. Press any key from your keyboard to boot from the DVD.
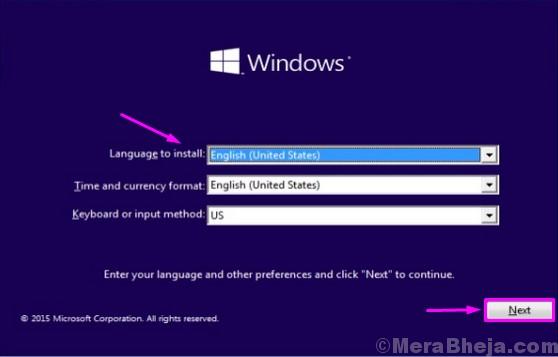
3. Now, set your language preferences and click on “Next“.
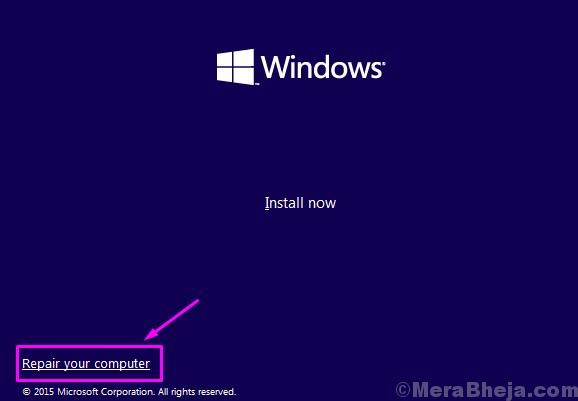
4. Now, click on “Repair your computer“.
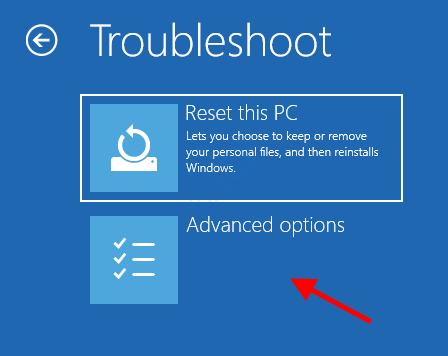
5. When the Troubleshooting window pops up, click on “Advanced options” to see advanced options on your screen.
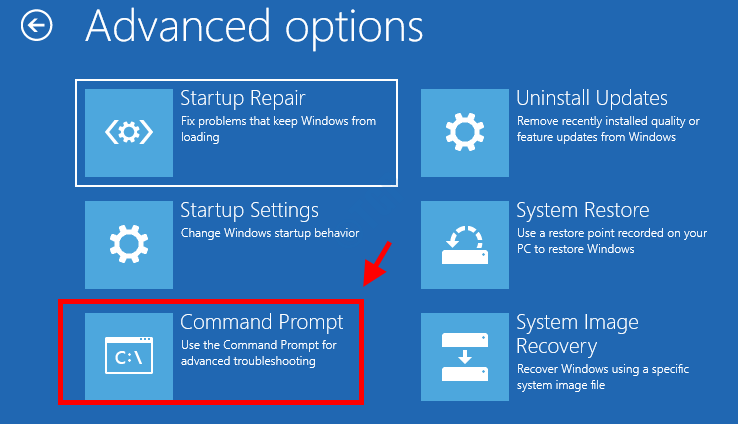
6. When the Advanced options window, click on the “Command Prompt” to access it.
7. In Command Prompt window, copy-paste these two commands one-by-one and hit Enter to execute both of the commands sequentially on your computer.
9. To select the particular disk where Windows is installed on your computer, execute these codes.
[NOTE– Replace the “ ” with the particular digit which signifies the HDD drive where the Windows is installed.
For this computer, it is “Disk 0 “. So the command will be like this-
select disk 0 ]

10. To select the System reserved volume you need to execute this particular line.
[NOTE– Replace the “ ” which is declared as “System reserved” in the list of volumes. If you don’t see ‘System Reserved‘ in the list of volumes, it is the drive where Windows is installed.
Example- For us, it is “C:” drive where Windows is installed, so it is ‘Volume 2′. So the command will be –
select vol 2
11. Now, you have to assign a new drive letter to the partition(You can enter any letter from “M” to “Z“.). Copy-paste this command in Command Prompt window and hit Enter to do so.

When you see that there is – ‘diskpart successfully assigned the drive letter’ has arrived.
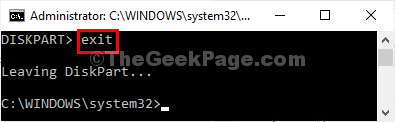
12. To exit the diskpart, type this command and press Enter.
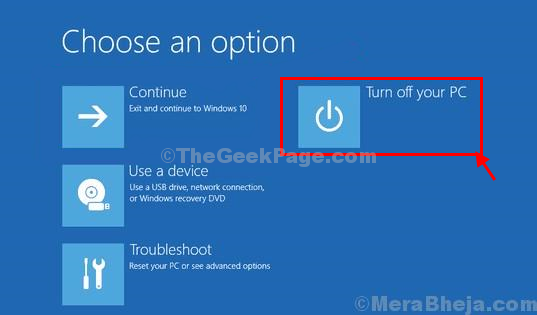
13. Coming back to Choose an option screen, click on “Turn off your PC” to shut down the computer.
14. Wait for a while. Eject the Windows 10 installation drive from your computer.
15. Start your computer and it will boot up Windows 10 normally.
Check if the problem is still there or not.
Fix-2 Repair MBR and rebuild BCD-
1. Insert the installation media you have created (or the Windows 10 installation DVD) on your computer.
2. Press any key from your keyboard to boot from the DVD.
3. and set your language preferences and click on “Next“.
4. Now, click on “Repair your computer” on the bottom left corner of the Recovery Environment.
5. When the Troubleshooting window pops up, click on “Advanced options” to see advanced options on your screen.
6. When the Advanced options window, click on the “Command Prompt” to access it.
7. To repair Maste Boot Record (MBR), copy-paste this command in Command Prompt window and then hit Enter.
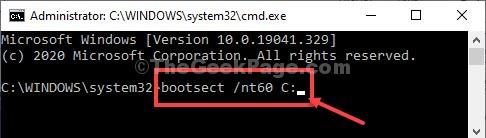
You will see “Bootcode was successfully updated on all targeted volumes” message upon successful completion.
8. In Command Prompt window, copy-paste these two commands one-by-one and hit Enter to execute both of the commands sequentially on your computer.
9. Now, execute these sets of commands on your device.
[NOTE– Replace the “ ” with the number of HDD drives on which the Windows is installed.
For this computer, it is “Disk 0 “. So the command will be like this-
select disk 0 ]
10. Again copy-paste this command in Command Prompt and then hit Enter to select the System reserved volume.
[NOTE– What you need to do is to replace the “ ” which is declared as “System reserved” in the list of volumes. In case, if you don’t see ‘System Reserved‘ in the list of volumes, it actually drives where Windows is installed on your device. Generally, it is the C: drive.
Example- For us, it is “C:” drive where Windows is installed, so it is ‘Volume 2′. So the command will be –
select vol 2
11. Next what you need to do is to have to assign a new drive letter to the partition(You can enter any letter from “M” to “Z“.). Copy-paste this command in Command Prompt window and hit Enter to do so.
Upon completion, you will see this message – ‘diskpart successfully assigned the drive letter’.
12. To exit the diskpart, type this command and press Enter.
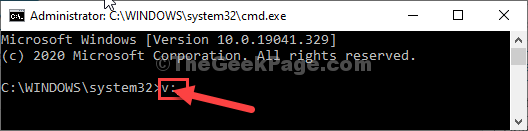
13. Now, you have to go to the newly assigned drive. Just enter the drive letter in CMD and hit Enter to do so.
(Example– As we have assigned “v:” letter, so the command will be like this for us-
v:
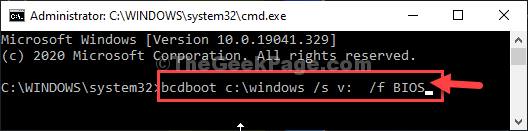
14. Finally, you need to boot rebuilding command on your computer.
[NOTE– Replace the “ assigned drive letter > “ with the drive letter you have assigned before.
Example– As we have assigned “v:” letter, so the command will be-
bcdboot c:\windows /s v: /f BIOS
15. Close Command Prompt window.
16. Then, click on “Turn off your PC” to shut down the computer.
17. Eject the Windows 10 installation drive from your computer.
18. Start your computer.
It will boot up Windows 10 normally. Your problem is now fixed.

Sambit is a Mechanical Engineer By qualification who loves to write about Windows 10 and solutions to weirdest possible problems.


