- How to Turn Off Automatic Restart on Windows 10
- Solution 1: Tweaking the Group Policy Settings or Registry
- Solution 2: Another Registry and Group Policy Fix
- Solution 3: Disabling a Task in Task Scheduler
- How to Disable or Block automatic Windows Update in Windows 10
- Turn off Windows Updates in Windows 10
- 1] Disable Windows Update & Windows Update Medic Services
- 2] Change WU settings using the Group Policy Editor
- 3] Set your network connection to ‘Metered’
- 4] Tools that help you block automatic Windows 10 Updates
How to Turn Off Automatic Restart on Windows 10
You may have already noticed that Windows 10 sometimes decides to simply restart itself in the worst possible time. Users sometimes leave their computers turned on to download something or to buffer a video but Windows forcefully restarts itself if a new update has been downloaded.
The option to turn off automatic restarts is present by setting the active hours on your PC but users have reported that Windows sometimes overrides these settings and restarts no matter what. There are several solutions to this problem and they will completely prevent this functionality from occurring on your PC ever again.
Losing data to this feature has angered plenty of users and that is the reason why they are constantly urging Microsoft to stop enforcing updates and restarts on its users. Follow the solutions presented below in order to prevent Windows 10 from restarting automatically.
Solution 1: Tweaking the Group Policy Settings or Registry
The first solution on display is quite a powerful one and it lets you access certain settings which are not available through the regular method in Settings or in Control Panel. This way you can choose several extra settings on how the updates are delivered to your computer and hopefully prevent Windows 10 from restarting without notifying you.
- Hold the Windows key and press the R button from your keyboard.
- Enter “gpedit.msc” in the Run dialog box, and press the OK button in order to open the Group Policy Editor.

- On the left section of Local Group Policy Editor, under Computer Configuration, double click on Administrative Templates, and navigate to the Windows Components >> Windows Update.
- Select the Windows Update folder, and navigate to its right side section. Double-click on the Configure Automatic Updates option and enable this policy by switching the radio button at the top of the windows to Enabled.

- Check under the Configure automatic updating and choose the option which works the best for you. The optimal option is the Auto download and notify to install which will download the updates automatically but wait for your approval to install.
- In order to check if the setting has been applied, open up the Settings app by clicking on the Start menu button and tapping the gear icon. Navigate to Update & Security >> Windows Update >> Advanced Options. You should see the option you set in grey, unable to be changed.
Alternative: If you are somehow unable to access the Local Group Policy Settings on your computer, the second method is to simply use the Registry Editor for the same process. Note that you should be quite careful when editing the registry as a simple unwanted change can cause system instability.
Follow the instructions on this backup registry article in order to safely backup your registry!
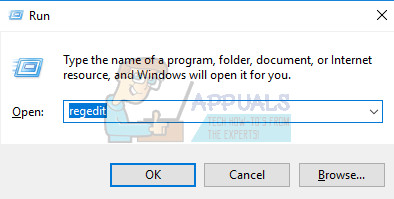
- Open the Registry Editor by typing this into the Start menu or in the search bar located at the left part of the taskbar. You can also open the Run dialog box and type in “regedit”.
- Navigate to the following key in the registry editor:
Note: If some of these keys do not exist, you will need to create them manually by clicking on the destination key, right-clicking on the empty space in the right section of the screen and choosing the New >> Key option. Make sure you name it correctly.
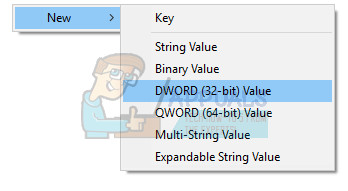
- Right-click on the right section of the Registry Editor window and click on New >> DWORD (32-bit) Value.
- Set its name to AUOptions and set its value to either 2 or 3 according to the option you want.
2 = Notify before download
3 = Automatically download and notify of installation
- Restart your PC in order to save the changes. In order to check if the setting has been applied, open up the Settings app by clicking on the Start menu button and tapping the gear icon. Navigate to Update & Security >> Windows Update >> Advanced Options. You should see the option you set in grey, unable to be changed.

Solution 2: Another Registry and Group Policy Fix
If the solution above did not work for you, you can always try this one out as plenty of users have suggested that this did the trick on their PC instantly. There are also two ways to approach this problem: via registry or via Group Policy settings.
- Hold the Windows key and press the R button from your keyboard.
- Enter “gpedit.msc” in the Run dialog box, and press the OK button in order to open the Group Policy Editor.
- On the left section of Local Group Policy Editor, under Computer Configuration, double click on Administrative Templates, and navigate to the Windows Components >> Windows Update.
- Double-click on the No auto-restart with logged on users for scheduled automatic updates installations and enable this policy by switching the radio button at the top of the windows to Enabled.
Via Registry:
- Open the Registry Editor by typing this into the Start menu or in the search bar located at the left part of the taskbar. You can also open the Run dialog box and type in “regedit”.
- Navigate to the following key in the registry editor:
Note: If some of these keys do not exist, you will need to create them manually.
- Right-click on the right section of the Registry Editor window and click on New >> DWORD (32-bit) Value.
- Set its name to NoAutoRebootWithLoggedOnUsers and set its value to 1.
- Restart your PC in order to save the changes.
Solution 3: Disabling a Task in Task Scheduler
Windows 10’s UpdateOrchestrator scheduled task folder contains a task called “reboot”. This task will wake your computer up to install updates regardless of whether or not any are available. Simply removing its permission to wake the computer is not sufficient; Windows will just edit it to give itself permission again after you leave the Task Scheduler.
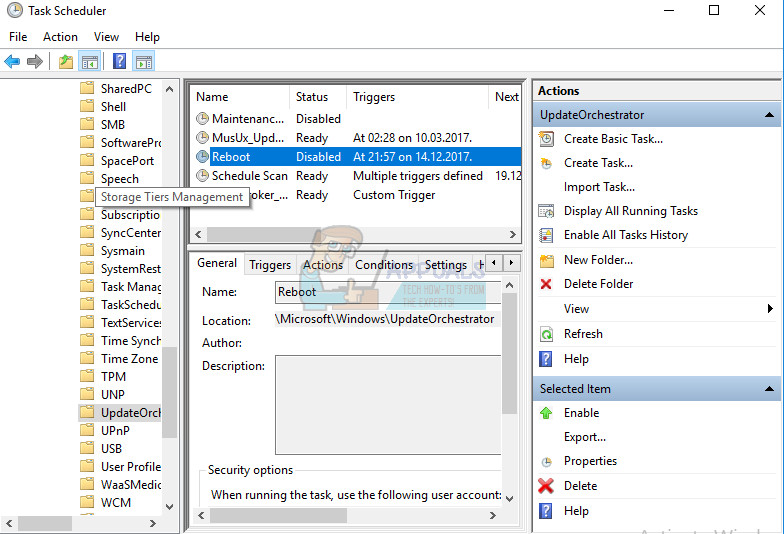
- From the Control Panel, enter Administrative Tools and open your Task Scheduler.
- The task is located under Task Scheduler Library >> Microsoft >> Windows >> UpdateOrchestrator. You need to understand that changing the options in Task Scheduler won’t do any good as Windows will immediately revert them after you exit.
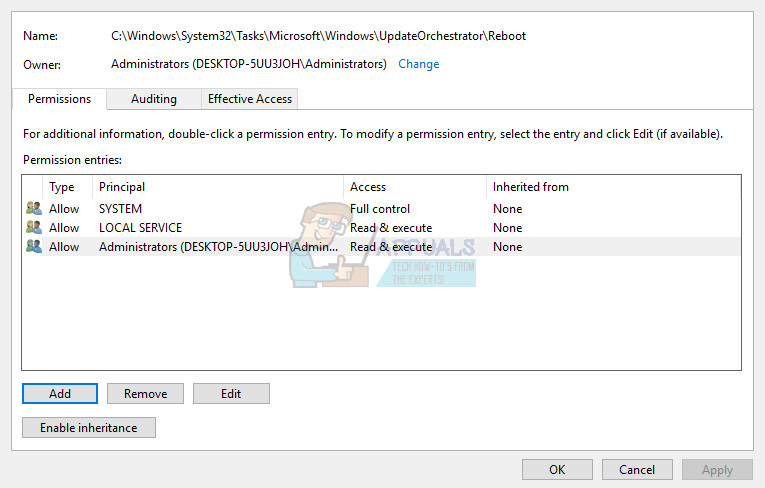
- From here, you will need to change the permissions for the task so that Windows can’t use it at all. The task is located in the following location:
- It’s called “Reboot and it does not have an extension.
You will need to make yourself the owner of the file by following the instructions below. This is somewhat difficult to follow but it’s necessary in order to disable the task from occurring.
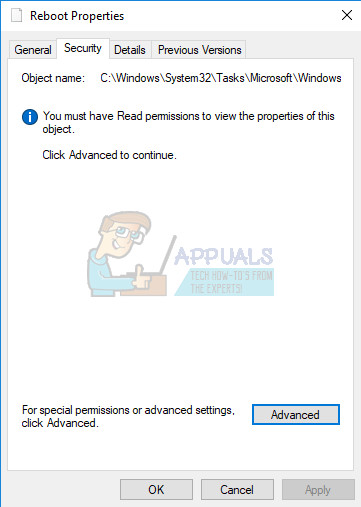
- Right click on the Reboot file and select Properties from context menu.
- Now select the Security tab to access the NTFS permissions and click on the Advanced button.
- Once in the Advanced security window, click on “Change” located at the front of Owner filed.
- Now click on the Advanced button on the next window that comes forth.
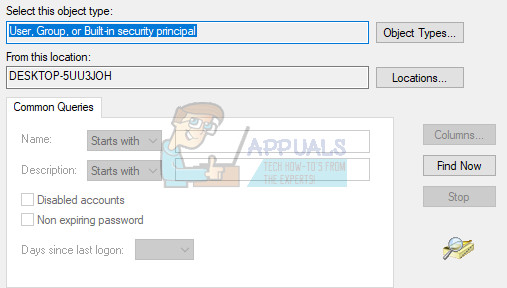
- Now you will be on the “select user or group” page. Click on Advanced so we can select which accounts are available.
- Click on “Find Now” to search for an account to which you can grant the ownership to.
- Once you have selected the user to whom you wish to transfer the ownership to, press Ok and save changes.
- Now we need to grant your account full access. Right click on the file/folder and click on Properties from the list of options.
- Navigate to the Security tab so we can access the NTFS permissions.
- Click on the Advanced
- Now you will see all the permissions listed regarding each account in front of you. Under the Permission tab, click on Add.
- Now you should click on Select a Principal so we can add your account.
- Again you will be seeing the “Select User or Group” window in front of you. Click on Advanced so we can browse through all the accounts.
- Click on the Find Now button to list all the account to whom permission can be granted.
- Locate your account from the list and click on Ok and save changes. Make sure you click on Disable inheritance in the Advanced Security Settings window.
Make it so that no account has write access, not even your own. Please also ensure you disable any inherited permissions for the file from the “Advanced” button on this screen, to override any existing permissions on the root folder.
- You can do this by accessing the Reboot’s properties and checking the permissions for each user. Click on the SYSTEM option at the top and deny all permissions except Read & execute and Read.
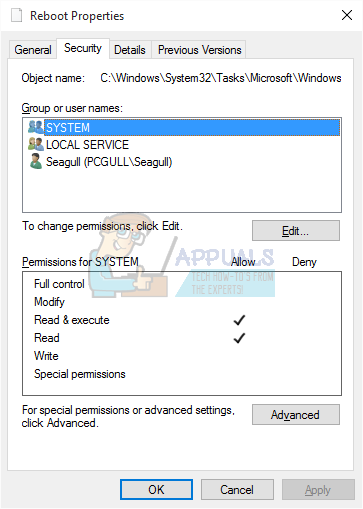
- Repeat the same process for all users.
- Once this has been set, you won’t need to worry about that scheduled task any more.
How to Disable or Block automatic Windows Update in Windows 10
There is no option to stop or turn off Windows Updates using the Control Panel or Settings app in Windows 10, as it used to be with earlier versions of Windows. But there is a workaround to disable or turn off Windows Update in Windows 10, that we’ll talk about in this post.
First, let us take a look at why people may want to turn off Windows updates.
With Windows 8.1 and earlier versions, we had Windows Update giving us options to:
- Install updates automatically (Recommended)
- Download Updates but choose when to install them
- Check for updates but let me choose whether to download and install them
- Never check for updates (Not Recommended)
These options provided a way to defer updates until we had enough time to download and install them or to have them downloaded automatically and then install them at a time we wish. These options are not present in Windows 10 Update & Security Settings.
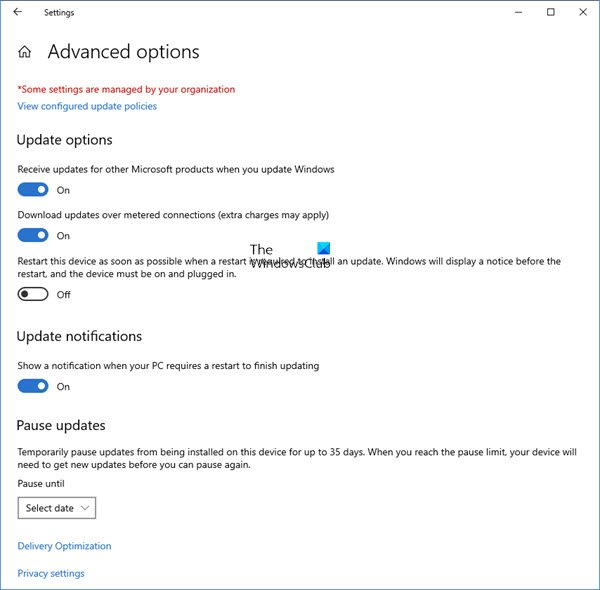
Now in Settings app > Update and Security > Windows Update > Advanced Options, you will see the following settings:
Microsoft has explained that it will provide updates in two distinct methods for its two distinct types of clients.
The Home users now have the option to pause Windows Updates. Earlier they did not have this option. Windows 10 will also let you defer restart, but that is not enough because a download in the background might slow down your browsing in some cases.
The other ring of users are Enterprise users who will have the option to delay updates so that they can hold it to the time when they are free. Microsoft said it would push updates to such users less frequently so that they are faced with minimum downtime. These are the corporates and real-time users such as hospitals and ATMs etc.
Coming back to Home users and Professional users, there is not even the option to delay the updates. They will be downloaded as soon as they are available. The availability of Windows Updates for normal users means that the updates have already been tested by Windows Insiders. If you are a Windows Insider, running Windows 10 Home or Pro, you will be in priority to receive updates. After a few days of you testing the updates and if it doesn’t pose any problems, it will be released to the normal ring of users.
Thus, you are stuck. Windows 10 will keep on downloading updates as soon as they are available and will occupy your computer resources, when you may not want it too. Some of us will want to keep the automatic downloads to be stopped so that we can install the updates manually when free – when we are not working on something urgent. That is to say; some users would want the liberty and option to download and install updates when they want and not when Microsoft provides it.
Since there is no option to turn off Windows updates from Control Panel or PC Settings, here is a workaround.
Turn off Windows Updates in Windows 10
To stop automatic Windows Updates in Windows 10, you will have to:
- Disable Windows Update & Windows Update Medic Services
- Change WU settings using the Group Policy Editor
- Set your network connection to ‘Metered’
- Use a free tool that lets you disable automatic updates.
Now let us see each of these suggestions in detail.
1] Disable Windows Update & Windows Update Medic Services
You can disable the Windows Update Service via Windows Services Manager. In the Services window, scroll down to Windows Update and turn off the Service. To turn it off, right-click on the process, click on Properties and select Disabled. That will take care of Windows Updates not being installed on your machine.
But since Windows is a Service now onwards, you have to keep your computer updated. To be able to install the next set of features or a newer build, you will require the earlier updates to be installed. That’s why if you use the above workaround, you will have to go to the Windows Services Manager and turn it on once in a while to download and update your copy of Windows.
You need to also disable the Windows Update Medic Service or WaaSMedicSVC. The Windows Update Medic Service is a new Windows Service introduced in recent versions of Windows 10. This Service has been introduced to repair Windows Update components from damage so that the computer can continue to receive updates. We recommend you try this method first.
After you turn on the Windows Update Service, when you open Windows Update in PC Settings, you will see a message that updates were not installed because the computer was stopped. You will have to click on Retry so that all the available updates are downloaded and installed. This may take two or three “Check for Updates” tries. You will have to keep on clicking “Check for updates” until it says your computer is up to date. Then you can go back and turn off the Windows Update service until next time you feel you are free enough to spend time updating your copy of Windows 10.
2] Change WU settings using the Group Policy Editor
If your version of Windows 10 has Group Policy, you can also change some settings using the Group Policy Editor. Run gpedit and navigate to the following policy setting:
Computer Configuration > Administrative Templates > Windows Components > Windows Update.
On the right side, double-click on Configure Automatic Updates and change its settings to suit your requirements.
Once you configure the settings, you will see the result in the Settings app as follows:
We do not recommend that you disable automatic Windows Update in Windows 10. If your computer is fine with downloads in the background and doesn’t affect your work, it is not advisable to do it. But if you face slowdown of computer due to updates downloading and installing in the background, the above tip to turn off Windows updates in Windows 10 will be of some help.
3] Set your network connection to ‘Metered’
Setting your network connection to ‘Metered’, can also stop Windows 10 from automatically downloading the Updates. You can do it as follows – Settings app > Network & Internet > WiFi > Advanced options. Move the slider to On position for Set as metered connection. See how to set Metered Connection in Windows 10.
4] Tools that help you block automatic Windows 10 Updates
Here is a list of some free Windows Update Blocker tools to Stop Automatic Windows 10 Updates. You might want to take a look at them as they allow you to control Widows 10 Updates with a click.
- Windows Update Blocker
- StopUpdates10
- Wu10Man
- Kill-Update
- WuMgr
- Win Update Stop
- Win Updates Disabler
- WAU Manager.
Incidentally, Microsoft has released a tool called Show or Hide Updates that allows users to hide or block specific unwanted Windows Updates in Windows 10. Using it, you can stop Windows 10 from downloading specific updates.
Date: November 4, 2019 Tags: Windows Updates


