- Исправление ошибки Memory Management в Windows 10
- Что собой представляет ошибка?
- Почему появляется проблема?
- Алгоритмы решения конфликта
- Было установлено новое программное обеспечение
- Повреждения системных файлов или диска
- Обнаружение конфликтного драйвера
- Другие проблемы
- SOLVED: Windows 10 Won’t Use Full RAM
- Solution 1: Modify RAM used on Boot
- Solution 2: BIOS Settings
- Solution 3: Physical Inspect RAMs
- Solution 4: Update BIOS
- Solution 5: Update Windows and Drivers of Your PC to the Latest Build
- Solution 6: Restore the BIOS of Your PC to Defaults
Исправление ошибки Memory Management в Windows 10
Пользователи, установившие последнюю операционную систему от Microsoft, регулярно сталкиваются с недоработками ее создателей. Сегодня узнаем, каким образом устраняется ошибка memory management в Windows 10.
Что собой представляет ошибка?
Неполадка относится к так называемым BsoD, появление которых сопровождается созданием дампа памяти и перезагрузкой компьютера. Источников данной проблемы масса, столько же и решений, для каждого случая оно будет собственным.

Отметим, что надпись «video memory management internal» в окне ошибки касается неполадок в видеосистеме: следует переустановить драйвер видеокарты, заменив его на новый или более старый, но стабильный. Реже источником ошибки становится драйвер монитора или мониторов.
Почему появляется проблема?
Синий экран смерти вызывается целым рядом факторов, которые производят к конфликту ядра Windows 10 с каким-либо приложением/драйвером.
- Драйвер может быть повреждённым или в его новой версии есть критические ошибки.
- Оперативная память физически повреждена или имеет проблемы с контактами.
- Повреждены системные файлы или диск.
- В BIOS или Windows 10 необходимо правильно настроить схему электропитания.
Алгоритмы решения конфликта
Как исправить ошибку, если ее вызывает множество факторов? Начинать, пожалуй, следует из выявления ее источника и самых простых вариантов его устранения, которые не отнимут у пользователя много времени, а лишь потом браться за более сложные методы исправления неполадки.
Было установлено новое программное обеспечение
Если BSoD начал появляться после инсталляции или обновления какой-либо программы, драйвера или апгрейда Windows 10, необходимо все вернуть на свои места, то есть удалить последние обновления, откатить драйвер или программу до последней версии. Но прежде всего, следует выяснить виновника ситуации. Сделать это поможет чистый запуск Windows 10.
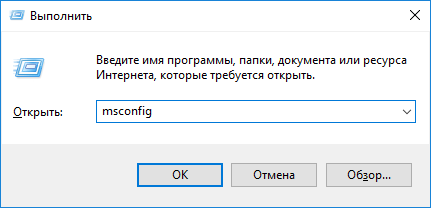
2. В текстовой строке пишем «msconfig» и нажимаем «OK» или «Ввод».
3. На первой вкладке переносим чекбокс к позиции «Выборочный запуск».

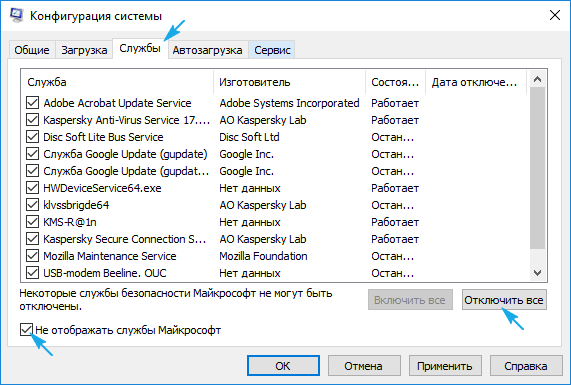
5. Посещаем вкладку «Службы», отключаем отображение сервисов от Microsoft и все остальные службы.
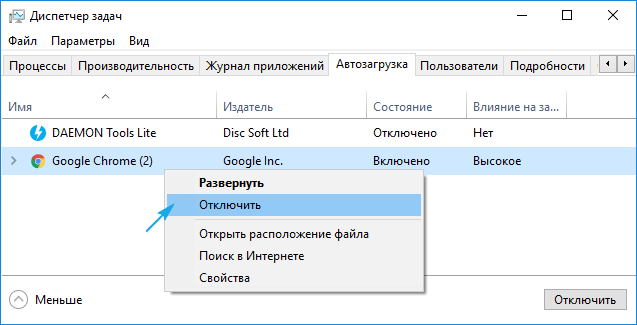
6. Идем во вкладку «Автозагрузка», запускаем «Диспетчер задач» и в нем в одноименной вкладке деактивируем все приложения.
7. Теперь перезагружаем компьютер и делаем все то, что вызывало появление ошибки.
Если она не возникла, вероятнее всего, ее появление связано с отключенной службой, драйвером или приложением. Здесь необходимо по порядку включать каждый отключенный элемент, если не уверены в виновнике проблемы, и выявить его. После удалить, обновить или откатить до предыдущей версии, в зависимости от ситуации.
Здесь же будет очень полезной функция отката, возврата состояния системы к одной из ранее созданных точек восстановления, если она включена. Выбирать следует последнюю точку перед появлением неполадки.
Повреждения системных файлов или диска
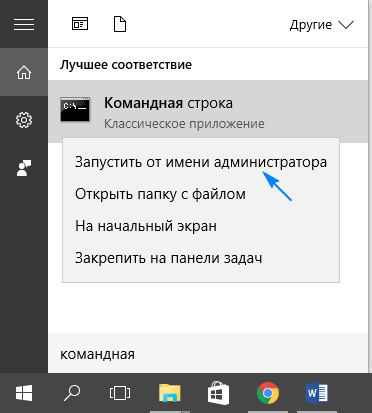
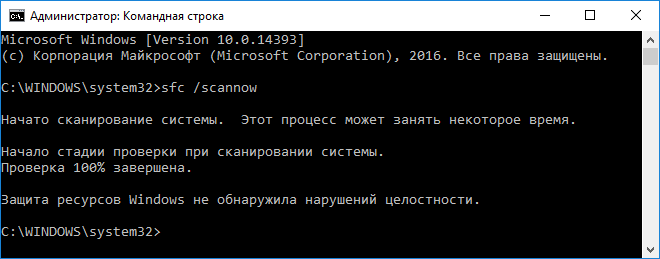
Для проверки контрольных сумм системных файлов и их восстановления следует воспользоваться запущенной от имени администратора командной строкой.
Вводим и выполняем команду «sfc /scannow».
Также следует проверить поверхность системного диска на присутствие в нем битых секторов. Выполняем «chkdsk C: /F /R» в этом же окне.
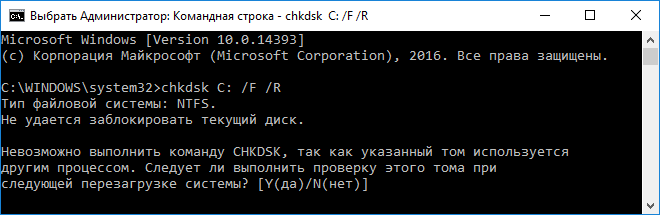
Если Windows 10 не позволяет запустить командную строку, к примеру, ошибка появляется на этапе или сразу после запуска ОС, загрузитесь с установочного дистрибутива Виндовс той же редакции, и в окне с кнопкой «Установить» запускайте нужный инструмент.
Обнаружение конфликтного драйвера
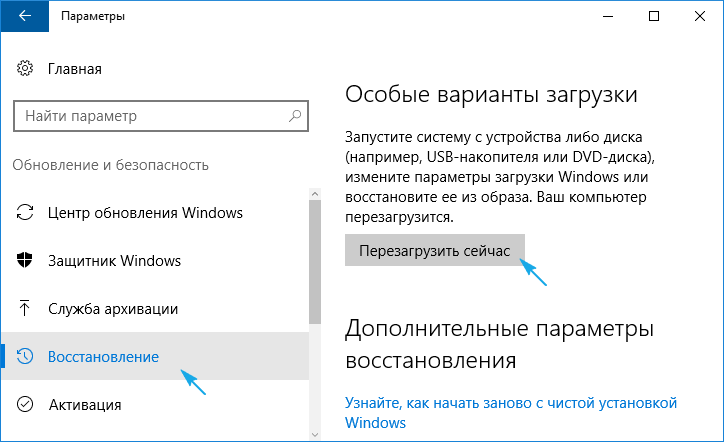
1. Запускаемся в безопасном режиме, например, через «Параметры».
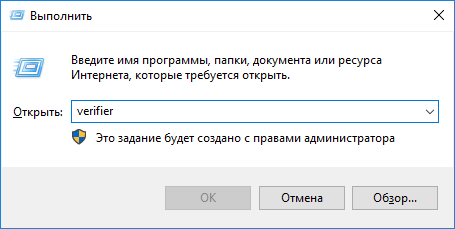
2. Выполняем команду «verifier» в окне, запускаемом через Win+R.
3. В «Диспетчере проверки» создаем нестандартный параметр.
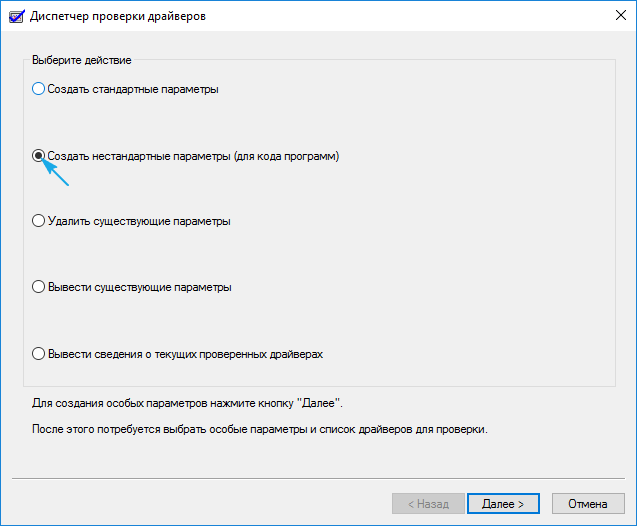
4. Указываем отображённые на скриншоте параметры из приведенного в окне списка, и ставим флажок возле опции «Прочие проверки».

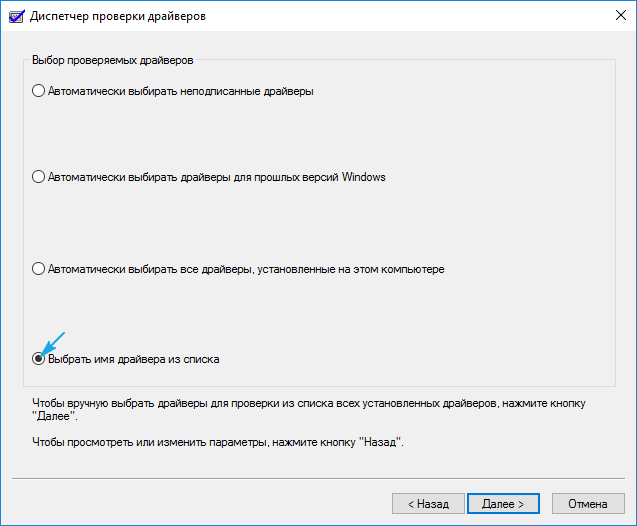
5. Ставим триггерный переключатель в последнее положение: «Выбирать имя драйвера из списка».
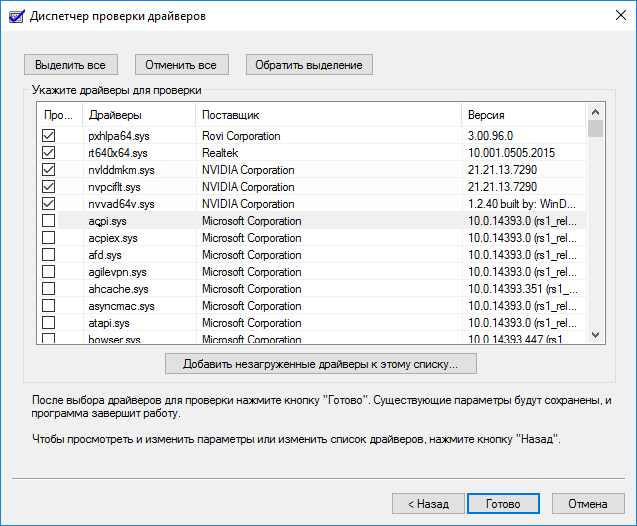
6. Сортируем все продукты по поставщику и снимаем флажки с драйверов от Microsoft.
7. Перезагружаемся для запуска анализа и сбора информации.
Здесь при обнаружении проблемы Windows 10 может выдать синий экран, перезагрузиться и зациклиться на этом. Но паниковать не следует, разработчики предусмотрели подобные случаи: после двух перезагрузок появится меню диагностики с предложениями выбрать путь решения проблемы.
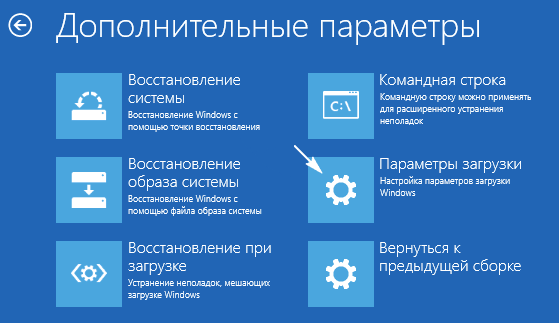
8. В дополнительных параметрах выбираем вариант реанимации системы во время запуска.
9. Перезагружаемся в безопасном режиме с возможностью вызова командной строки.

9. В ней выполняем перечень команд:
- verifier /reset – для деактивации проверки драйверов;
- shutdown -r -t 0 – стандартная перезагрузка ПК.
10. Через проводник или файловый менеджер переходим в каталог «windows\minidump» на системном диске.
11. При помощи свободно распространяемой утилиты BlueScreenView открываем дамп памяти с целью выполнить анализ результатов тестирования и проверки драйверов.
12. Изучаем информацию, содержащуюся в подсвеченных розовым цветом строках в нижнем фрейме.

13. По названию проблемных файлов или библиотек определяем, к каким программам они относятся и делаем откат драйверов этих устройств, удаляем и устанавливаем заново или обновляем. В разных ситуациях помогают различные решения.
Здесь на помощь придет не только логическое мышление и знания (понятно, что при наличии букв dx драйвер относится к платформе DirectX, nv – касается видеокарты Nvidia и т. д.), но и поисковые системы. По названию файла найти драйвер, в состав коего он входит, несложно.
Загружать драйверы следует вручную и только с официальных ресурсов поддержки устройств. Обновлять их через Центр обновления ни в коем случаи не следует.
Другие проблемы
Приведем еще несколько рекомендаций, которые периодически помогают вернуть Windows 10 к штатному режиму функционирования.
1. Проверка ОЗУ при помощи синтетического теста, например, Memtest86.
2. Обновление BIOS до последней версии (это следует выполнять осторожно или обратиться в сервисный центр).
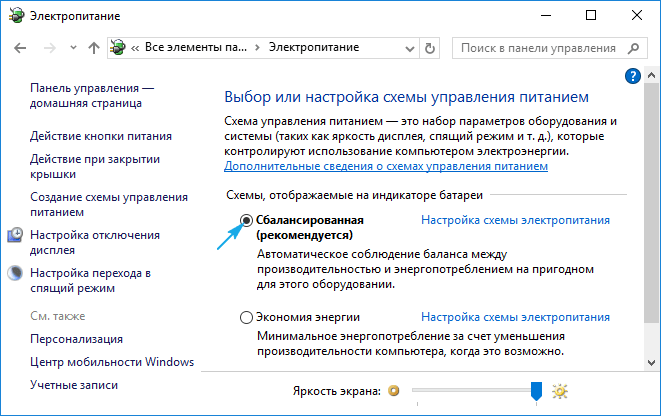
3. Установите сбалансированную схему питания на портативных устройствах при работе от сети.
Не лишней будет очистка реестра, системного тома от мусора и сканирование ПК на вирусы.
SOLVED: Windows 10 Won’t Use Full RAM
RAM is a volatile storage device that your computer uses to store data and also use it simultaneously but it is used to store the type of data that is being frequently used by the operating system or an application running on it. Once your computer shuts down all the data in it is lost as it is a temporary but fast storage device. The more amount of RAM you have, more smoothly your computer will multitask by enabling the applications to store more files they need frequently. Having more RAM never hurts, but not able to use the whole of it can be unacceptable to a user.
Many of the users, when started using Windows 10, reported that when they open the Windows property window or the Task Manager, they noticed that only a part of the total amount of RAM is currently usable by Windows. In some cases, they would see an unusually large amount of RAM been “Hardware Reserved” by the Windows in the Task manager. It could be in fact due to reason that amount of memory has been reserved for the internal graphics adapter installed on your computer but if you have dedicated graphics card installed on your computer then this shouldn’t be the problem. And for some, the amount was from 1024 MB to 4181 MB which is not normal.
There are some configurations in Windows 10 and your motherboard’s BIOS that can reserve some amount of RAM making them unusable. They can be easily changed and are listed in the solutions below. But In some cases, the hardware was also found to be the culprit causing this issue. Below listed are the best solutions that have worked for users. But before you start with the solutions, you should know that if you have a 32 bit Windows 10 operating system installed, you can only use 3.5GB RAM no matter how much RAM is physically installed on your computer. You will need to install a 64 bit Windows 10 operating system to use more than 3.5GB RAM.
- To know which type of operating system you have, simply Press and Hold the Windows key and Press R.
- In the Run dialog box type msinfo32 and Press Enter.
- In the SystemInformationwindow that opens, look for System type in the right pane.
- If next to System type the value is x86 then you have a 32 bit Windows 10 installed. If it is x64 then you have a 64 bit Windows 10 installed.
- Now let’s start with the solutions.
Solution 1: Modify RAM used on Boot
This option in Windows is used to reserve RAM that is used during the boot procedure when your system is turning on. By default, it may permanently and unnecessarily reserve a significantly large amount of RAM for it.
- To set that right, Press and Hold the Windows key and Press R. Type msconfig in the Run dialog box and Press Enter.
- The System Configuration window will open. Go to the Boot tab in it.
- Select your Operating system from the list below if you have more than one. Now Click on the Advanced Options button.
- On the upper right corner, Clear the checkbox next to Maximum memory. Click Ok.

- Now restart your computer. Check of the issue resolved. If not, move on to the next solution.
Solution 2: BIOS Settings
There are a few configurations on BIOS that can limit the Windows from using the full amount of RAM installed. Firstly, if you have a separate dedicated video card installed, then you have to make sure the internal graphic processing unit (iGPU) is off which is is used in case you don’t have any external one. If it is On, Windows can be reserving the memory for it.
To make sure it is off, Restart your computer and enter its BIOS/UEFI setup. You will have to tap a specific key to Enter BIOS and it differs by your system’s model. It can be F1, F2, F12 or the Esc key. You can easily google the model of your system to see which key to use to enter the BIOS setup.
In the BIOS setup, search for iGPU, Internal Graphics or Onboard Graphics. The name and location of this setting can once again vary according to your system’s manufacturer so you will have to search for it. Once you find it, make sure it is Disabled or turned Off.
Also in BIOS, there is a Memory Map Feature that can give Windows full access to the RAM installed. Search for it and make sure it is Enabled or turned On.
In addition to the feature mentioned above, if you can find the below features, make sure they are in their respective states as mentioned next to them.
Feature State
Render Standby Enabled
iGPU Memory Auto
Multimonitor Disabled
Save changes and Restart your computer. Check if can now use the whole RAM. If still an amount of RAM is unusable, move on to the next solution.
Solution 3: Physical Inspect RAMs
In some cases, the reason Windows 10 showed less amount of RAM usable was due to a physical defect. So we will check the RAMs physically, and will also rule out the possibility if the slots on which the RAMs are installed are faulty. Only proceed if you’re comfortable opening your CPU.
Unplug all wires and remove the cover of your computer. Here, you will be able to see Rectangular sticks (RAMs) installed on your motherboard. They will be next to a big heat sink with a fan on it. There will be either 2 or 4 slots on which RAMs can be installed.
There will be clips at the sides of the slots. Toggle them and Unplug All the RAMs installed and make sure there contacts are clean. Also, remove any dust that may be inside the slots.
If you have more than 1 stick of RAM installed it is possible one may be faulty so remove any one them and start up your computer. Do the same with the other stick of RAM. If the system fails to run with any one of the RAM installed, then that stick of RAM is faulty.
Similarly, check the slots in use by inserting a known working stick of RAM in it and running your computer. If it fails to run on any one slot, then the slot in question is faulty rendering the RAM inserted in it unusable by Windows.
If all the slots and stick of RAM are working, inserting them back but in different slots as they were originally in before. This is also known to work for some users. Make sure they are properly placed and locked in.
Solution 4: Update BIOS
In some cases, an outdated BIOS version has been known to cause this memory bug to appear in Windows 10.
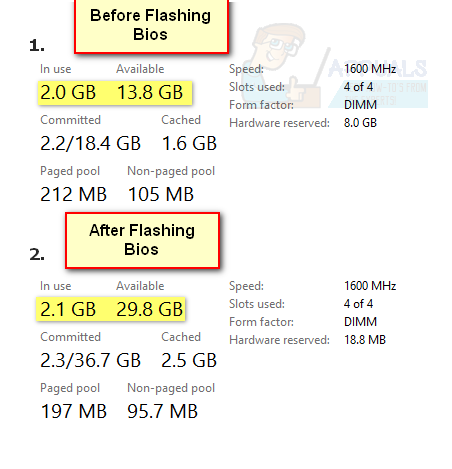
The procedure to update BIOS varies by system manufacturers and models. Access your system manufacturer’s website to download and install the latest BIOS version on your system.
Before moving with the solutions to make your RAM fully usable in Windows 10, check if booting the system with the bare minimum (make sure to empty the PCI slots e.g., removing a PCI network card) resolves the issue. Moreover, make sure your system supports the RAM you are trying to use with it i.e., no hardware limit is in place, for example, Intel 945 chipset motherboard has a hardware limit of 4 GB of RAM, and more than that cannot be used with it.
Solution 5: Update Windows and Drivers of Your PC to the Latest Build
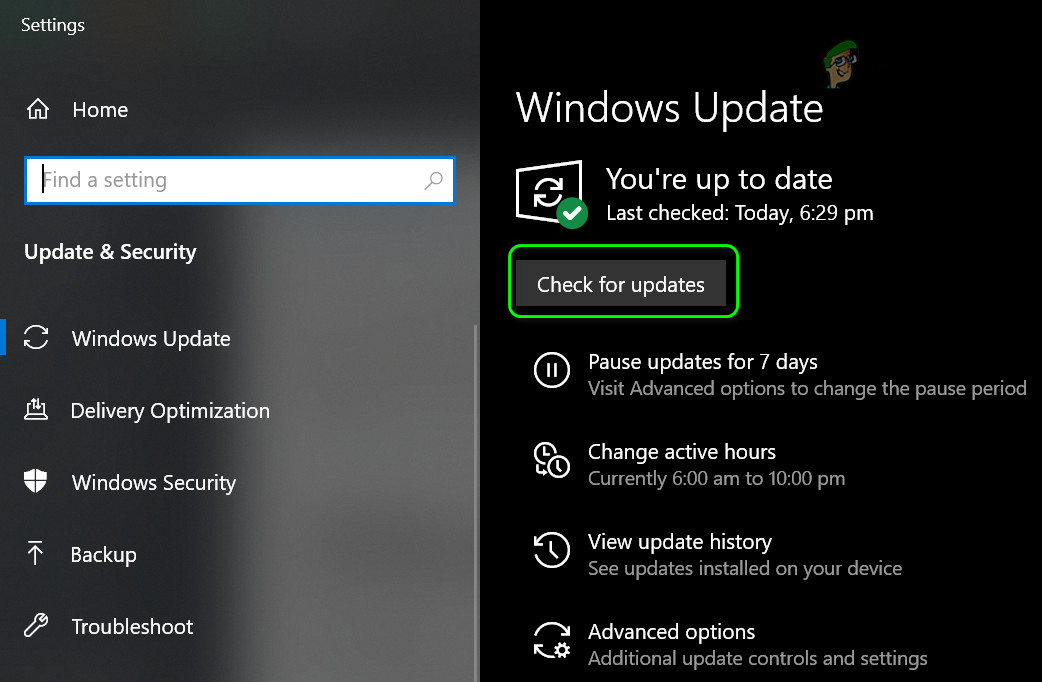
Windows, like any OS, is prone to bugs and the RAM issue at hand could also be a result of a bug. Microsoft is trying its best to eliminate bugs from Windows and for this purpose, it uses the Windows update channel to populate the latest patches of the reported bugs. Before diving into more technical solutions, it will be a good idea to update the Windows of your system to the latest build which may solve the problem.
- Manually update the Windows of your PC to the latest stable release. Also, make sure the system’s drivers are updated to the latest build. Check for Windows Updates
- After updating the Windows and drivers, check if the RAM issue is resolved.
- If not, then check if reinstalling the graphics drivers resolves the RAM issue.
 Check for Windows Updates
Solution 6: Restore the BIOS of Your PC to Defaults
You may encounter the issue at hand if the BIOS of your system is wrongly configured. In this case, restoring the BIOS to the factory defaults may solve the problem. For illustration, we will discuss the process for a Dell system, you may follow the instructions as per your make and model of the PC.
Warning: Advance at your own risk as editing the system’s BIOS is a proficient task and if done wrong (or if a sudden power failure occurs during the process), you may brick your system and cause everlasting damage to your data.
- Boot your system into BIOS (you may press the F2 key when powering on your system).
- Now, near the bottom of the right pane, click on Restore Settings (or Load Defaults) and then confirm to restore the BIOS (or load defaults). Reset BIOS to Defaults
- Then exit BIOS and boot the system into Windows to check if the RAM issue is resolved.
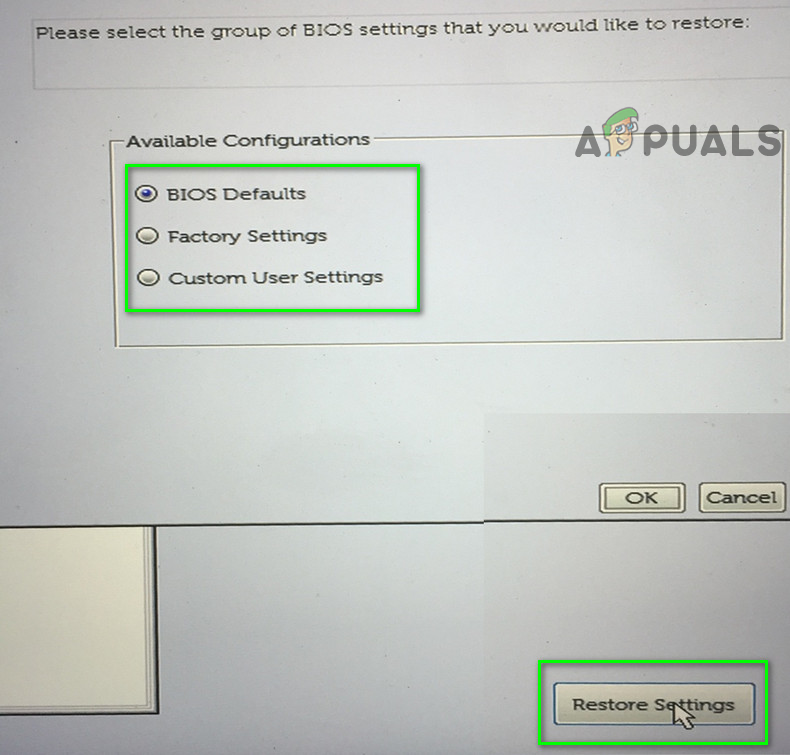 Reset BIOS to Defaults
If the issue persists, then check if disabling/enabling the paging file resolves the issue. You can also use a utility TestLimit by Sysinternals to solve the RAM problem. If that did not do the trick, then either the RAM sticks are faulty/incompatible or the issue is caused by a failing hard drive (some users reported that a failing hard drive caused the same issue for them).


