- Скрытая папка Recent в Windows о которой вы точно не знали, но в ней есть всё про вас
- Что означает папка Recent на диске С:?
- Отключаем слежение за действиями пользователя через групповые политики Windows
- Комментариев: 2
- Restore Recent Places to Windows 10?
- Windows 10 – How to disable Recent Items and Frequent Folders history
- Method 1: Manually clear the Recent Items and Frequent Folders history
- Method 2: Disable the Recent Items list
- Method 3: Disable the Recent Items and Frquent Folders list using the Registry Editor
- [How To] Restore Or Add Recent Folders To Windows 10 File Explorer
- How To Restore/Add Recent Folders To Windows 10 File Explorer
- Method 1 – Using Recent Folders CLSID
- Method 2 – Using Registry Editor
- About Kapil Arya
- 8 Comments
Скрытая папка Recent в Windows о которой вы точно не знали, но в ней есть всё про вас
Ко мне часто обращаются с просьбами «почистить комп, потому что тормозит». Порой попадаются весьма интересные экземпляры, когда компьютер оказывается забит троянами и скрытыми криптомайнерами просто под завязку, несмотря на кучу установленных антивирусов и прочих «оптимизаторов».
Вычислить происхождение всего этого безобразия бывает довольно просто — достаточно открыть историю браузера. и тут может произойти неловкий момент, если вдруг попросят озвучить причину. В общем, перед тем как сдавать ноутбук или компьютер в сервис, для начала бывает не лишним немного прибраться и начнём со скрытой папки Recent.
Что означает папка Recent на диске С:?
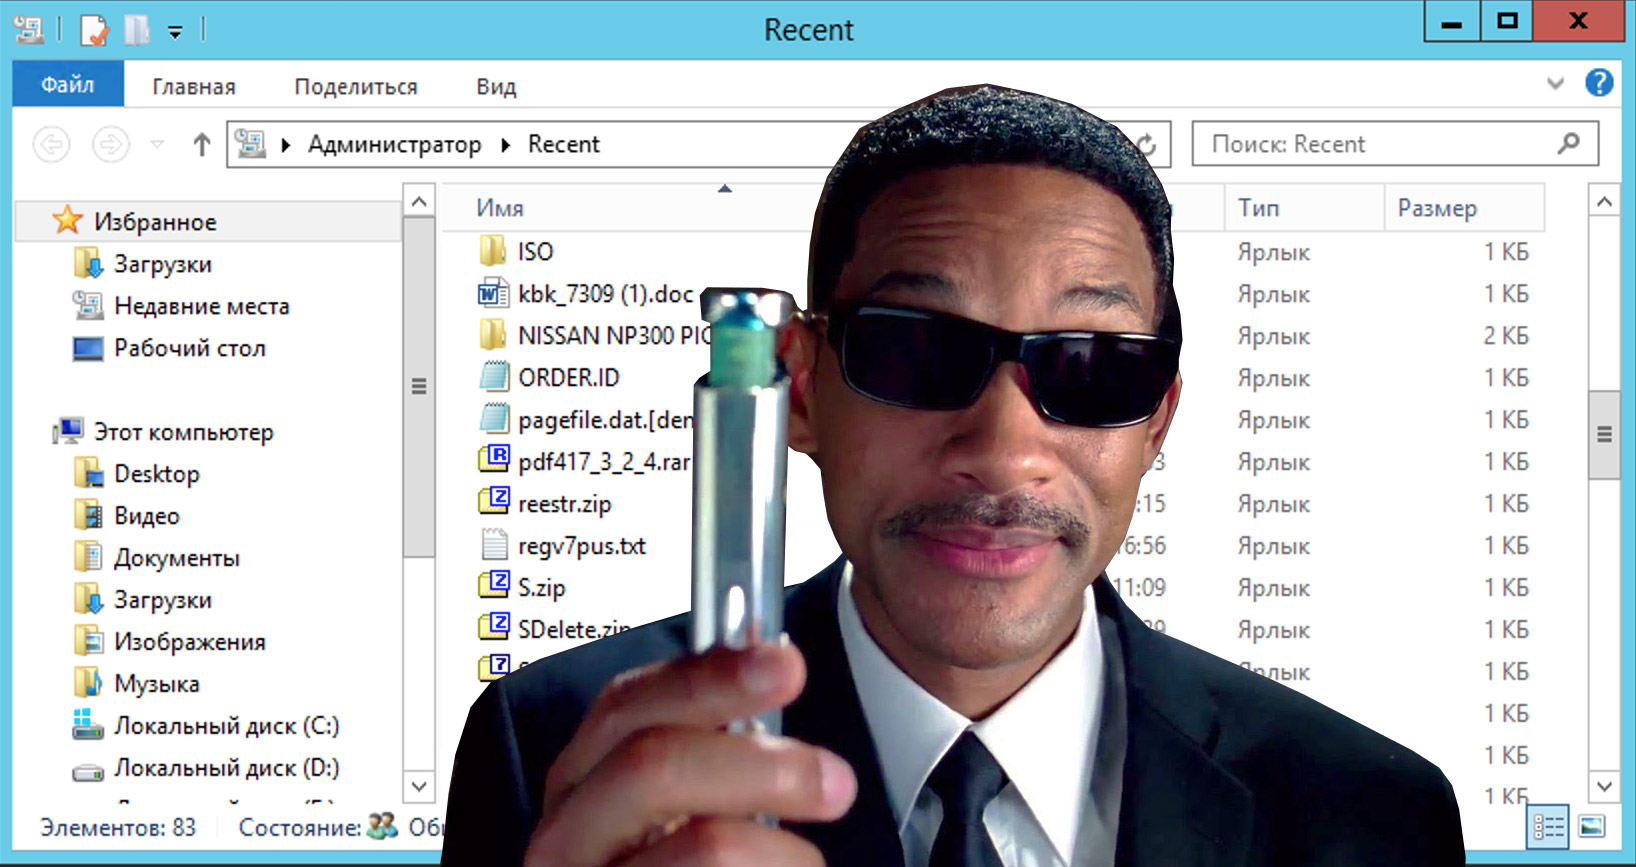
Лично мне никогда не нравилось, как навязчиво «винда» сохраняет историю открытия документов и запущенных программ. Всё это дело копится в скрытой папке Recent, которою не так то просто найти на просторах жёсткого диска. Подавляющее число пользователей и вовсе не подозревает о её существовании.
Конечно, активировав показ скрытых файлов и папок, можно найти её вручную, но есть способ проще. Жмём Windows + R и в открывшемся окошке набираем recent, после чего не забываем нажать Enter.
Откроется список всех файлов и папок, к которым текущий пользователь обращался в последнее время. Содержимое этой папки можно смело почистить (выделяем всё содержимое Ctrl + A и жмём Del).
Аналогичным образом можно почистить и папки:
где хранятся пути к файловым объектам и используемым приложениями Windows.
Отключаем слежение за действиями пользователя через групповые политики Windows
Чтобы «винда» впредь самостоятельно прибивала лишние файлы, следует внести изменения в локальные групповые политики. Снова жмём Windows + R и набираем строку gpedit.msc.
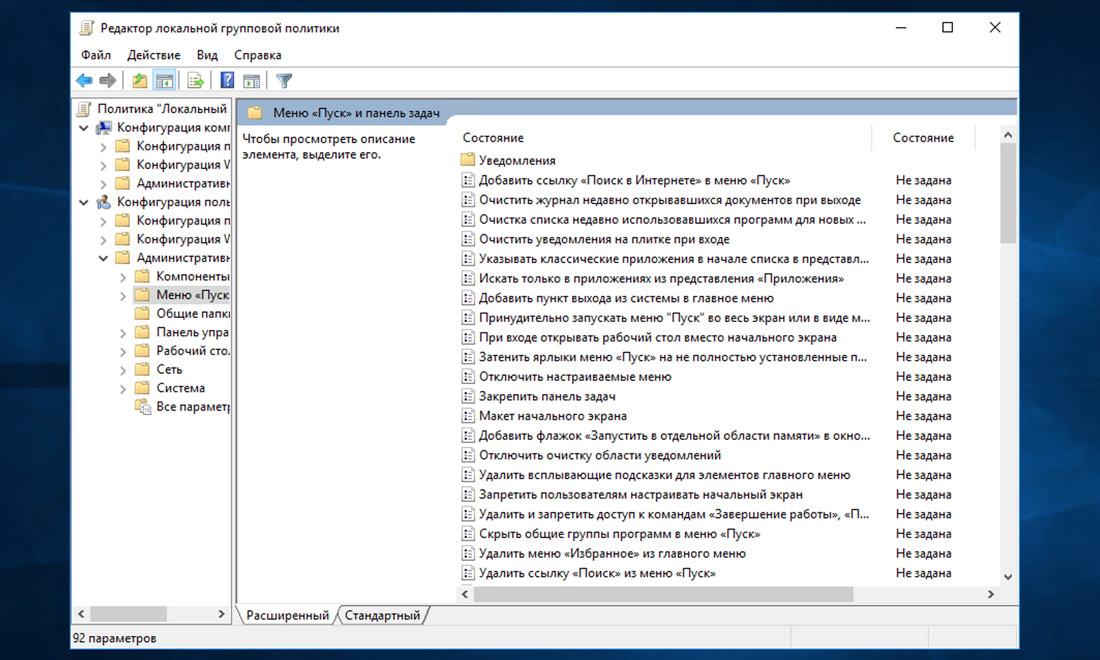
Открываем раздел «Конфигурация пользователя → Административные шаблоны → Меню «Пуск и панель задач» и активируем перечисленные ниже политики:
- Очистить журнал недавно открывавшихся документов при выходе;
- Очистка списка недавно использовавшихся программ для новых пользователей;
- Очистить уведомления на плитке при выходе;
- Удалить список программ, закрепленных в меню Пуск;
- Удалить список часто используемых программ в меню Пуск;
- Отключить слежение за действиями пользователя;
- Не хранить сведения о недавно открывавшихся документах;
- Удалить меню Недавние документы из меню Пуск;
- Не отображать и не отслеживать элементы переходов в списках удаленных расположений;
- Удалить список Недавно добавленные из меню Пуск.
Если считаете статью полезной,
не ленитесь ставить лайки и делиться с друзьями.
Комментариев: 2
А если пишет файл (gpedit.msc.)не найден?
«Жмём Windows + R и в открывшемся окошке набираем recent» — поскольку recent не является внешней командой то ничего не происходит.
Restore Recent Places to Windows 10?
I agree that showing only «Recent Folders» is better and less cluttered than the «Recent Items» in Windows 10. I can tell you that Recent Folders exists in Windows 10, but it is hidden and needs to be revived. 😉
Part 1: How to get Recent Folders displaying in Windows 10 permanently:
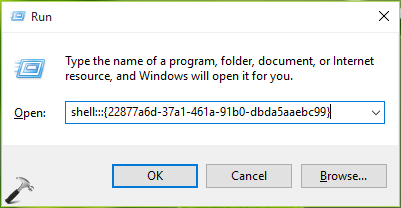
1) Start a Run dialog box by either right-clicking the Start button and choose Run, or by pressing the WinKey + R keys.
2) Copy and paste the following line into the Run dialog box, then press Enter:
shell.
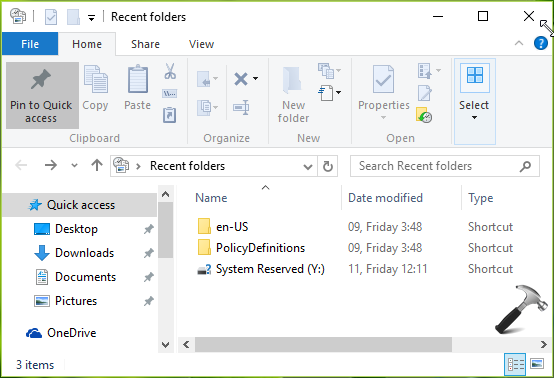
3) File Explorer will open and display the «Recent folders». You’ll see that it is located below the Recycled Bin on the left hand side of the screen.
4) Right-click «Recent folders» and select «Pin to Quick Access». You can also select «Pin to Start» if you want. When you close File Explorer «Recent folders» will remove itself from below the Recycled Bin, but will remain under Quick Access.
5) You can drag the Recent folders to any position under Quick Access now.
Part 2: The simple way to get Recent Folders working in Save As dialog boxes in Windows 10:
Recent Folders in Windows 10 has now been revived, but just like the «Recent Items» folder, by default it is hidden from Save As dialog boxes in Windows 10. (I’ve already posted a fix today — August 29, 2015 — to get Recent Items working in Save As dialog boxes for Windows 10 which you can find posted here and here.) Below is the first of two ways I’ve now figured out to get the Recent Folders to appear in «Save As» dialog boxes:
1) Within a Save As dialog box, right-click the folder name at the top and to the left of the search box. Now select «Edit Address». The path should turn into text and become highlighted blue.
2) Replace the highlighted text by copying and pasting the following line, and then press Enter:
shell.
Now you can save inside one of your recent folders!
Part 3: How to enable Recent Folders to work in Save As dialog boxes in Windows 10 permanently:
Important: The following steps are for advanced users only. It changes key permissions and settings in the registry. I’ve decided to share this because people are asking for it, and I spent the time to figure it out. Proceed at your own risk.
Below are the steps for the second and permanent way to get Recent Folders to work in Save As dialog boxes in Windows 10.
1) Perform a System Restore point backup of C drive prior to starting
2) Complete all the steps in «Part 1: How to get Recent Folders displaying in Windows 10 permanently» above
3) Open the Registry (regedit.exe) with Administrator privileges
4) Navigate to the following registry key:
5) Right-click ShellFolder and select Permissions
6) Click Advanced
7) At the top, click Change
8) Type in ADMINISTRATORS and then click Check Names
9) Click Ok and then Ok
10) Within the «Group or user names:» section, select Administrators so that it is highlighted blue
11) Tick the box corresponding to Allow Full Control
12) Click Ok to close the Permissions box
13) On the right side of the Registry Editor, now double-click «Attributes»
14) Replace the existing Hexadecimal number of 20040000 with 70010020 and then press Ok
15) Now navigate to the following registry key:
HKEY_CLASSES_ROOT\Wow6432Node\CLSID\<22877a6d-37a1-461a-91b0-dbda5aaebc99>\ShellFolder
16) Repeat steps 5 to 14 once again but this time for this particular ShellFolder registry key
17) Close the Registry Editor
That’s it. Now all Windows 10 software applications will allow you to Save As in the «Recent Folders» under the Quick Access menu.
Windows 10 – How to disable Recent Items and Frequent Folders history
When you open files or folders Windows 10 keeps a history so it can list your ‘Recent Items’ (recently opened files) and ‘Frequent Folders’ (folders you use a lot).
These are listed under ‘Quick Access’ in File Explorer– which happens to be the default folder when you open the File Explorer, as well listing the ‘Frequent Folders’ in the navigation pane.
![]()
There are two options available for manging these lists — manually clearing the history (leaving the history still working), completely disabling the feature, and if you have Windows 10 Pro you can completely disable it using the registry editor.
Method 1: Manually clear the Recent Items and Frequent Folders history
To manually clear the history
- Press the Windows button + R on your keyboard — this will open the Run window
- Copy in the following path and click ‘OK’
- Now select all and delete all items — remember to empty the Recycling Bin if you don’t want this history to be easily restored.
Method 2: Disable the Recent Items list
This is the process Windows 10 Home users will need to use.
Note: It will only disable the ‘Recent files’ list — NOT ‘Frequent folders’.
- Click on the Windows Start button then open ‘Settings’ (the cog icon)

- Click on ‘Personalisation’
- Click on ‘Start’ in the left hand menu
- Scroll to the bottom of the list of settings and turn ‘Show recently opened items in Jump Lists on Start or the taskbar’ to ‘Off’
- You can now close the window

Method 3: Disable the Recent Items and Frquent Folders list using the Registry Editor
Note: this will only work for Windows 10 Pro — the registry editor is not built into Home edition.
- Press the Windows button + R on your keyboard — this will open the Run window
- Copy in the following command and click ‘OK’
- Navigate to the following path
- UserConfiguration -> Administrative Templates -> Start Menu and taskbar
- In the list of settings, find ‘Do not keep history of recently opened documents’
- Double click to edit and change to ‘Enabled’
[How To] Restore Or Add Recent Folders To Windows 10 File Explorer
Published: October 14, 2015 · 02:59 PM \\ Applies to: How To, Windows 10
In recent editions of Windows prior to Windows 10, we all have used Recent folders link in the Explorer window. However, Microsoft removed the Recent folders link for Windows 10 File Explorer. Due to this you can’t locate recently browsed folders list. But, the Recent folders is not actually removed and its simply hidden by default. In this article, we’re going to share the steps to enable and restore Recent folders in Windows 10.
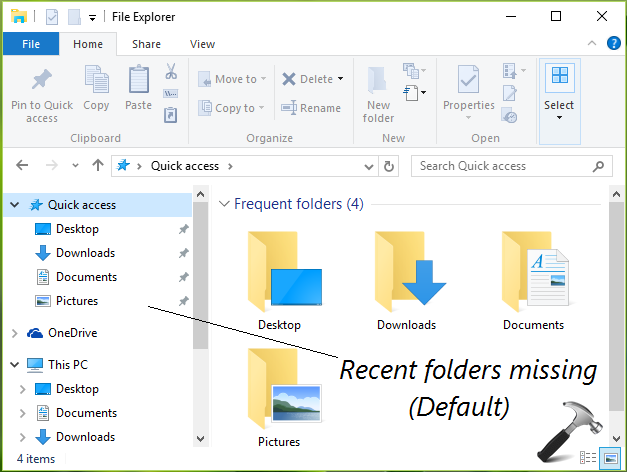
In the above shown screenshot, you can see there is Quick Access section by default. We can pin the hidden Recent folders list folder to this Quick Access, so that it will be easy for us to locate recent items in the File Explorer.
There are two ways which you can use to add Recent folders to Windows 10 File Explorer. Here are they:
How To Restore/Add Recent Folders To Windows 10 File Explorer
Method 1 – Using Recent Folders CLSID
We’ve earlier shared the complete list of shell command and CLSIDs for Windows 10 in the following article:
In that list, the CLSID corresponding to Recent places will help us here. Please proceed with these steps to use the CLSID:
1. Press  + R and type shell. in Run dialog box to open Recent folders.
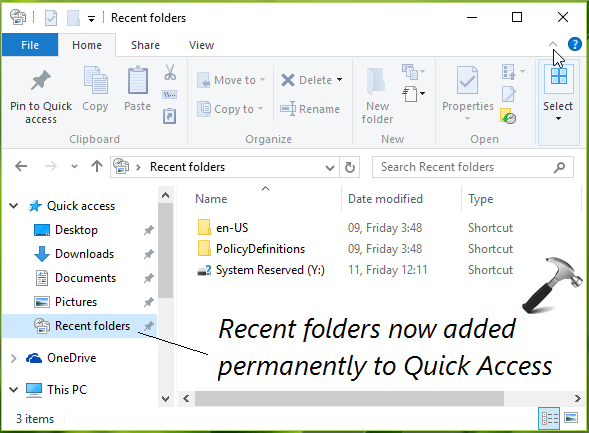
2. In the Recent Folders window, you have to click Pin to Quick Access option in the ribbon. This should permanently pin the Recent folders under Quick Access section.
So in this way, you can click Recent folders anytime, irrespective of where you’re in File Explorer. The link should take you to browse Recent items on the go.
If you want to let Recent folders also appear on Save as window for your installed programs, you can try the registry manipulation discussed below.
Method 2 – Using Registry Editor
Registry Disclaimer: The further steps will involve registry manipulation. Making mistakes while manipulating registry could affect your system adversely. So be careful while editing registry entries and create a System Restore point first.
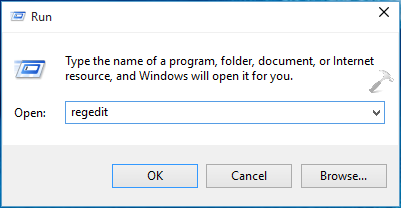
1. Press + R and put regedit in Run dialog box to open Registry Editor (if you’re not familiar with Registry Editor, then click here). Click OK.
2. In the left pane of Registry Editor, navigate to following registry key:
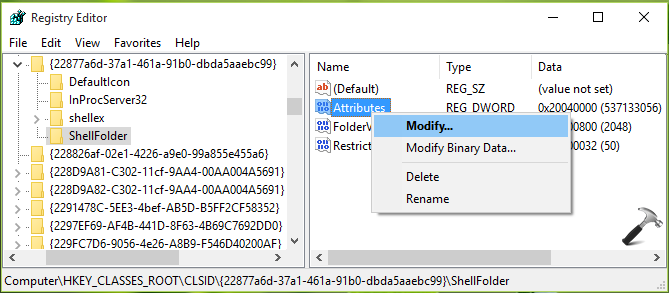
3. In the left pane of above shown Registry Editor window, take the ownership of ShellFolder registry key. For taking ownership, either you can use this manual method or use RegOwnershipEx . Once you’ve taken the ownership of key, come to its corresponding right pane. In the right pane, right click on Attributes named registry DWORD and select Modify.
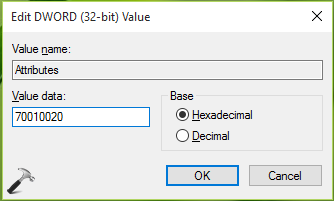
4. Finally, in the Edit DWORD Value box, change the Value data to 70010020 from 20040000. Click OK. You can now close Registry Editor and reboot to make changes effective. After restarting your machine, the Recent folders should be visible in Save as window while saving files in various programs.

About Kapil Arya
Kapil is presently a Microsoft MVP in Windows IT Pro expertise. He is Windows Insider MVP as well, and author of ‘Windows Group Policy Troubleshooting’ book. In 2015, Microsoft India accomplished him as ‘Windows 10 Champion’. Being passionate Windows blogger, he loves to help others on fixing their system issues. You can follow him for news/updates and fixes for Windows.
8 Comments
Thanks for this helpful guide, Kapil. However, I found it was not complete. You actually must change the attributes of two registry keys, not just the one you mention, to get this to work.
^^ If you’re on 64-bit edition Windows, you need to follow step 3 & 4 (additionally) for HKEY_CLASSES_ROOT\Wow6432Node\CLSID\<22877a6d-37a1-461a-91b0-dbda5aaebc99>\ShellFolder key. But, if you’re on 32-bit Windows, steps mentioned in article are sufficient. Thanks for your insights! 🙂
Ninety-nine percent of Win10 users are not experienced enough to do the tweaking(s) explained above. Is there a good explanation WHY Microsoft doesn’t write a patch to the problem and send it as an update?
^^ I don’t think Microsoft will deploy this again via updates. IMO, the registry fix is quite easy to follow!
So I’m not a tech. Do folks recommend I do the registry thing? Is it possible to undo if I screw up? Frankly without the Recent Places link I’m lost for any work involving files.
^^ You can try FIX 1 instead, if you’re not comfortable with editing registry. If FIX 1 fails, create a System Restore point and tweak the registry 🙂
Thank you so much! You just saved me from going MAC!


