- Fix Computer Slow after Windows 10 Update | Speed Up PC in 6 Ways
- Issue — Computer Slow after Windows 10 Upgrade
- Causes — Why Is PC Slow after Windows 10 Update
- Solutions — Fix Windows 10 Update Slow Computer Issue, Speed Up PC
- Method 1. Extend System C Drive to Speed Up Windows 10 PC
- Method 2. Delete Windows.old, Clear Windows Update Cache
- Method 3. Run Disk Cleanup to Speed Up PC
- Method 4. Optimize Disk Performance
- Method 5. Install the Latest Windows Update — New PCs after 2010
- Method 6. Perform System Restore, Revert to the Previous Version — Old Pcs before 2010
- Conclusion
- People Also Ask About PC Slow after Windows 10 Update
- Windows 10 very slow and unresponsive [Quick Solutions]
- What can I do if Windows 10 is too slow?
- 1. Update your drivers and software
- DriverFix
- 2. Check for viruses
- Bitdefender Antivirus Plus
- 3. Disable heavy performance processes
- 4. Enable a faster startup option
- 5. Check for slow services
- 6. Disable blur effects and transparency
- 7. Perform a clean Windows 10 install
- Run a System Scan to discover potential errors
- 8. Use CCleaner
- 9. Stop Windows Module Installer service
- 10. Disconnect all peripherals
- 11. Defragment your drive
- 12. Adjust the size of virtual memory
Fix Computer Slow after Windows 10 Update | Speed Up PC in 6 Ways
It’s being over 5 years since the publishing of Windows 10 Operating System. About 57% or even more people are using Windows 10 now around the world. However, the issue of computer slow after Windows 10 upgrade is still bothering worldwide users.В
Don’t worry if your computer slows down after Windows 10. On this page, you will learn:
Practical fixes with detailed tutorials will be presented here to guide you successfully speed up PC and optimize its performance with ease.
Issue — Computer Slow after Windows 10 Upgrade
«Hello, does upgrading to Windows 10 slow down my computer?В I installed a new Windows 10 update on my computer today, and the process is quite smooth. No problem occurred. I felt so lucky.В
Somehow, some apps and basic programs cannot respond soon when I click to use them. Instead of faster and improved performance, it seems that my computer slows down after Windows 10 update. Will Windows upgrade slow down the computer? How do I fix this issue?»
According to the Microsoft community and some Windows forums, it’s being a common issue that sometimes PC and computers may slow down after updating to the latest Windows 10. How come does this issue occur and how to resolve this problem so as to speed up the computer?
Continue reading and all your concerns will be addressed in the next two parts.
Causes — Why Is PC Slow after Windows 10 Update
Note that if your computer is running slow after installing Windows 10, it indeed takes some time for the computer to boot up and get used to the new Windows operating system. It’s a normal process and all you need is just let it be.
But if you have boot up the computer several times, it’s still extremely slow, like there is a lag out bug,В
So what can you do if Windows 10 update slow down your PC? The first thing is to learn the reasons why your computer becoming slow. Here is a list of causes that will explain why your computer runs so slow:
- The system C drive is out of spaceВ — the main cause
- The system disk is with low disk
- The existing bugs in Windows 10 update slow down the computer
- Computer is too old to install new Windows 10 updates
So how to speed up your computer after upgrading to the latest Windows 10? Follow the offered solutions in the next part, you’ll successfully speed up your PC with ease.
Solutions — Fix Windows 10 Update Slow Computer Issue, Speed Up PC
Here is a list of resolutions for you to apply and fix the Windows 10 slow down computer performance issue:
Note that some of the presented methods, especially Fix 2, 3, 6, may cause data loss, therefore, remember to back up your data on the C drive in advance. Let’s start to optimize your computer performance now:
Method 1. Extend System C Drive to Speed Up Windows 10 PC
Windows update often takes certain storage space on the system C drive. And ifВ the system C drive is out of space after Windows 10 update, the computer running speed will slow down.В
Extending the system C drive will effectively fix this issue. How to increase C drive? ProfessionalВ partition manager softwareВ — EaseUS Partition Master is the easiest tool that you must try.
It enables you to enlarge C drive within only a few simple clicks. No data loss will occur and it even works even if you don’t have unallocated space on the system disk.
Let’s see how to extend the C drive on Windows 10:
Step 1.В Add space to the System C drive
Right-click on the System C: drive and select «Resize/Move».

Step 2. Add space to C drive
Drag the system partition end into the unallocated space so to add space to the C: drive. And click «OK».
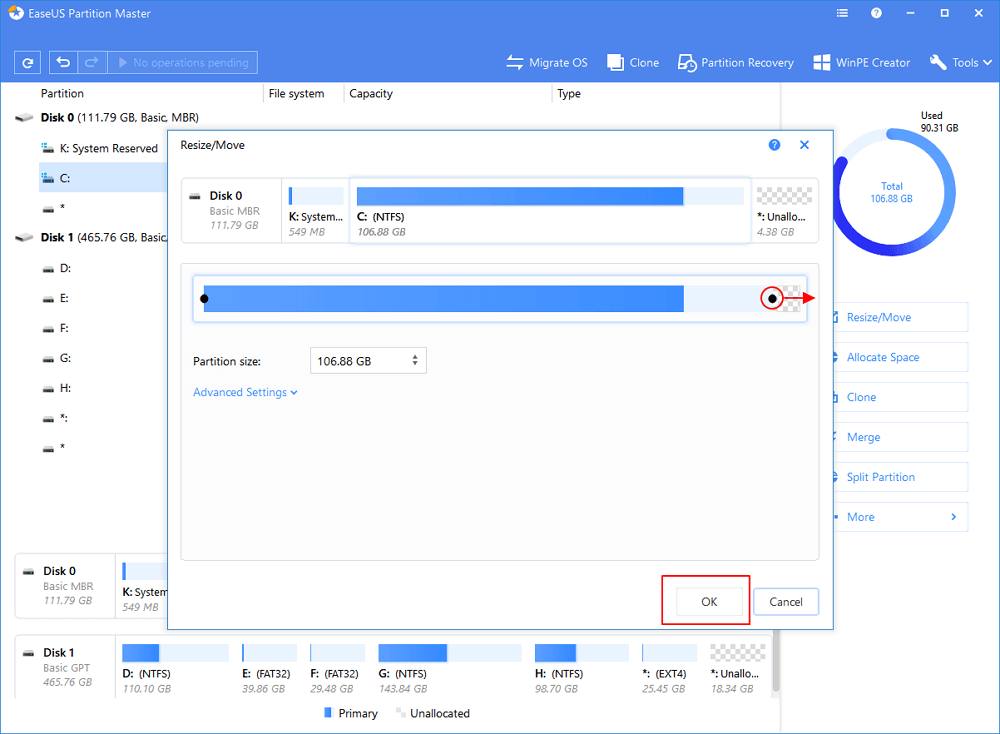
If there is not enough unallocated space left on your disk, try this option: Click «Advanced Settings» > Select another big partition with enough free space > Drag the C drive panel into unallocated space > Click «OK».
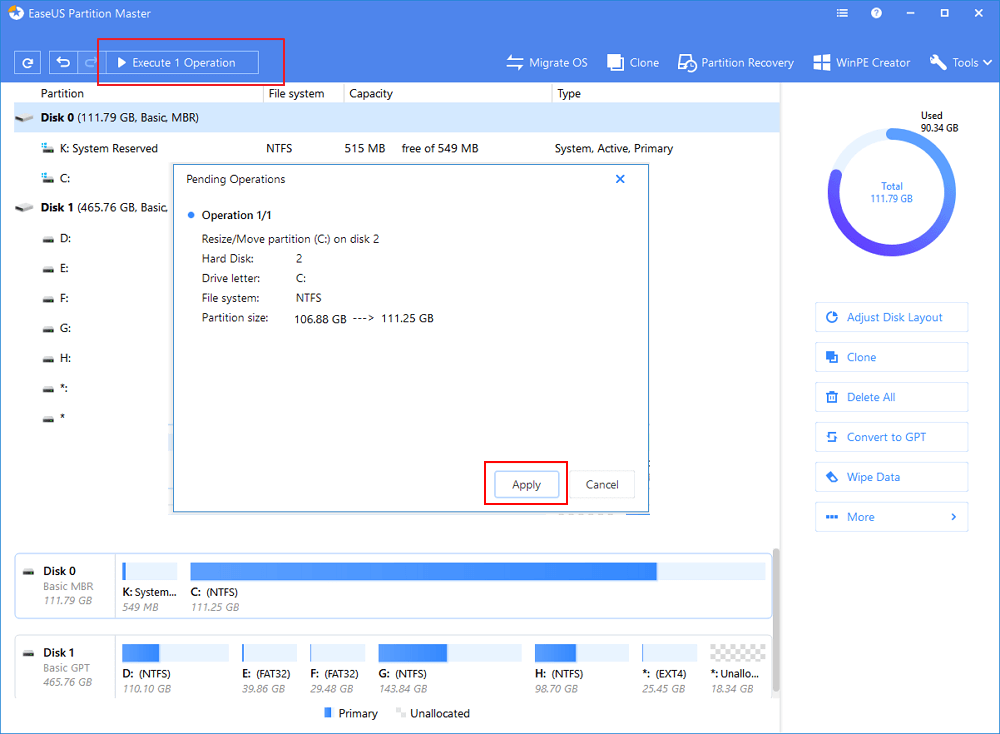
Step 3: Confirm to extend system C drive
Click the «Execute Operation» button, it will list the pending operations, and click «Apply» to execute the changes and extend the C drive.
Actually, if this operation is taken before Windows 10 update, it works even better as you won’t have the computer slow issue anymore.
Method 2. Delete Windows.old, Clear Windows Update Cache
When you install a new Windows update, a Windows.old folder will be automatically granted and saved in the C drive as a backup of the old Windows OS. This will take a high space on the system C drive. Also, the Windows update cache will also take a certain space in the system C drive.
So here are steps that you can follow to delete Windows.old folder and clear Windows update cache so as to speed up Windows 10 PC:
Delete Windows.old FolderВ
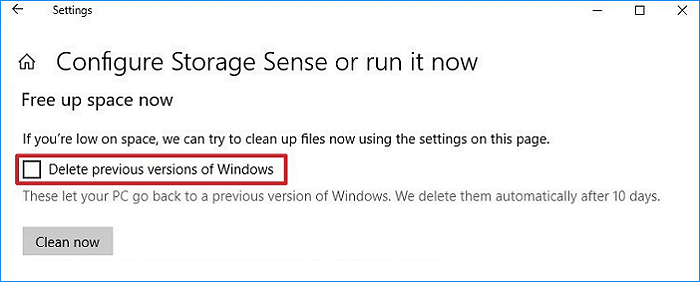
Step 1. Open Settings, go to System, and clickВ «Storage»
Step 2. Click «Change how we free up space automatically» under Storage Sense.
Step 3. Check «Delete previous version of Windows» and click «Clean now».
Clear Windows Update Cache
Step 1.В TypeВ servicesВ in Windows search, click «Services» to open it.
Step 2.В Right-click on Windows Update, and select «Stop».
Step 3.В Close the service window, press Windows + R keys to open the Run dialog.
Step 4.В TypeВ c:\windows\SoftwareDestributionВ and click «OK».
Step 5.В Open the Download folder, select and delete all existing files in the folder.
![]()
There, all the problems will be solved and you are good to go. Restart your PC, it will regain a fast running speed.
Method 3. Run Disk Cleanup to Speed Up PC
Step 1.В Open Windows File Explorer, right-click on the C drive.
Step 2.В Click «Properties» and go to the General tab.
Step 3.В Click «Disk Cleanup», check the items that are taking huge space on C drive.
Step 4.В Click «Clean up system files», and «OK» to complete.
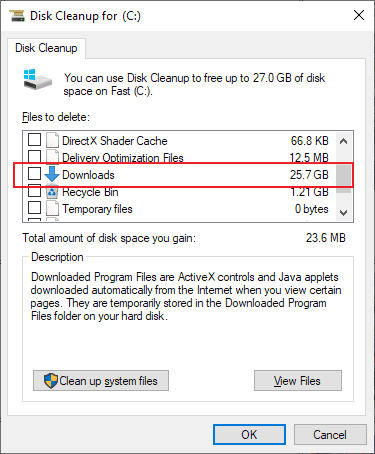
Repeat the process so as to cleaning other exiting partitions on your computer.
Method 4. Optimize Disk Performance
Using the Windows built-in tool to optimize disk performance may also help to improve computer speed at a certain extend. Here are the steps to optimize your disk:
Step 1.В Open Windows Device Manager, expand Disk drives.
Step 2.В Right-click on the system disk and select «Properties».
Step 3.В Go to the Toos tab, clickВ «Optimize» under Optimize and defragment drive.
Step 4.В Select the System C drive and click «Optimize».
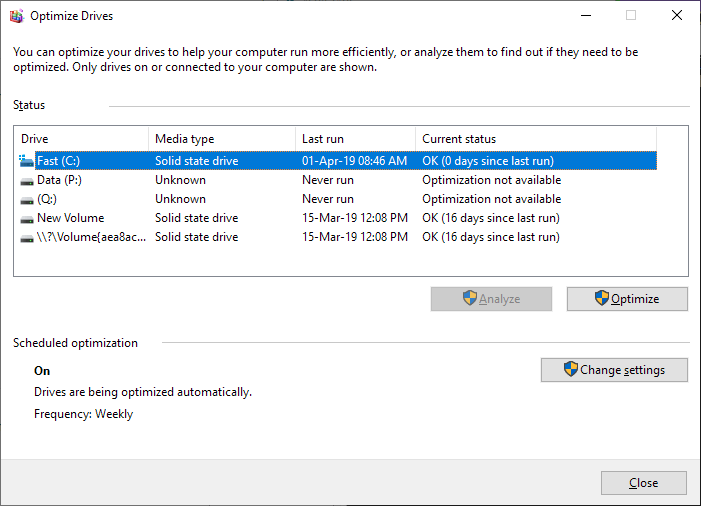
Repeat the steps to optimize all partitions so as to speed up the computer performance. If it’s an SSD disk, refer to Optimize SSD Performance for help.В
Method 5. Install the Latest Windows Update — New PCs after 2010
Applies to: Computers and laptops that were produced after 2010.В
Sometimes, if the new Windows 10 update contains bugs, it will slow down and even freezes computers. Normally, once a serious bug is found, Microsoft will publish new updates to fix the bugs.
So the best way is to install the latest Windows 10 update:
Step 1. Go to Settings, click «Update & Security».
Step 2.В Click «Windows Update», select «Check for Updates».
Step 3.В Click «Update Now» if a new update is available.
Wait for the computer to download and install a new Windows 10 update.В
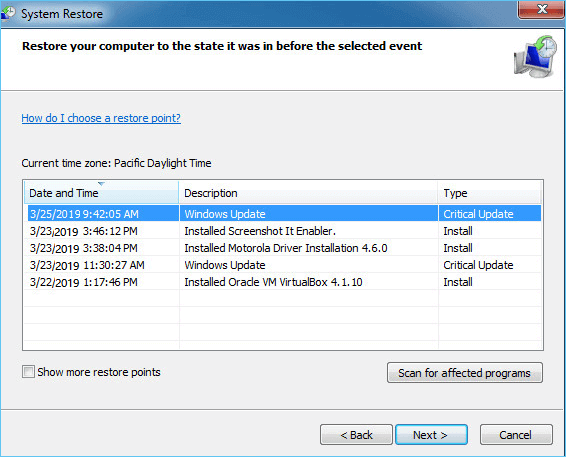
Method 6. Perform System Restore, Revert to the Previous Version — Old Pcs before 2010
Applies to: Old computers that were produced before 2010, especially Windows XP, Vista, 7.
Sometimes, the reason why your computer is slow after install the new Windows 10 update is that your computer is too old. It’s normal that the new Windows 10 operating system cannot run very fast on old computers, especially on Windows 7, Vista, and XP.В
So the best way to fix computer slow issue on those old PCs is to perform a system restore, reverting the OS to a previous version:
Step 1.В Press Windows + R keys to bring up the Run dialog.
Step 2.В TypeВ rstrui.exeВ and hit Enter to open up System Restore.
Step 3.В Select «Choose a different restore point» and click «Next».В
Step 4.В Select a previous created Windows restore point, click «Next».
Follow on the onscreen instruction to complete the system restore process.
Conclusion
On this page, we explained why the computer slows down after Windows 10 update and how to fix Windows 10 slow down computer performance issue with 6 powerful methods.
Mostly, low C drive disk space and the Windows update caches are the top two factors that stop your computer from running fast. Therefore, when your computer becomes slow after installing new Windows 10 update, extending C drive and clear Windows update cache will do most of the jobs.
If you still have some questions on Windows 10 computer slow down, check the answers below. You may get a clue.
People Also Ask About PC Slow after Windows 10 Update
1. Why is my Windows 10 upgrade taking so long?
Usually, Windows 10 updates will take 30 minutes to 1 hour or even longer. The reason why it takes so long is that the bigger the update is, the larger files and features will be added to the system.
Also, to optimize Windows performance and fix bugs, the larger system file will be. As a result, it will take a while for the computer to download and install the update.
2. Why is my laptop so slow?
There are many reasons that will make your laptop slow. Here is a lost of common reasons that will cause your laptop slow:
- The dust inside your laptop
- Malware or virus infection
- Very slow startup
- Low disk space
- Outdated or failing hardware
- Windows update problems
So how to fix this issue? You may refer to Lenovo Laptop Running Slow for help.
3. Windows 10 suddenly slow, how to fix?
When your Windows 10 computer suddenly slows down, don’t worry. Here is a list of all practical fixes that you can try so to speed up the PC:
- Reboot computer
- Scan for malware and virus
- Close background programs
- Install Windows update
- Delete temp files
- Free up Windows disk
- Increase C drive
- .
For a step-by-step guide, please follow Windows 10 Slow Suddenly for a try.В
Windows 10 very slow and unresponsive [Quick Solutions]

- Windows 10 can run really slow or turn unresponsive altogether after an update.
- There are a lot of possible fixes that anyone can try, so keep reading.
- If you’re looking for solutions to other OS issues, you’ll find the answers in the Windows 10 Troubleshooting page.
- For even more advice on improving your device performance, find excellent recommendations in the Tools section.

- Download Restoro PC Repair Tool that comes with Patented Technologies (patent available here).
- Click Start Scan to find Windows issues that could be causing PC problems.
- Click Repair All to fix issues affecting your computer’s security and performance
- Restoro has been downloaded by 0 readers this month.
Microsoft has promised improved performance with Windows 10. Even though a lot of progress has been made, some users claim that Microsoft’s most recent OS has slowed down their system.
Adding to this, they mention that after upgrading, Windows 10 proved very slow and unresponsive not just on startup, but also when opening programs or folders.
On certain occasions, the operating system freezes altogether, sometimes after automatic updates.
What’s more, even File Explorer shows a delayed response.
So in today’s article, we’ll go through possible causes and solutions, hoping to give your OS a boost so that you get full control over your device.
What can I do if Windows 10 is too slow?
1. Update your drivers and software
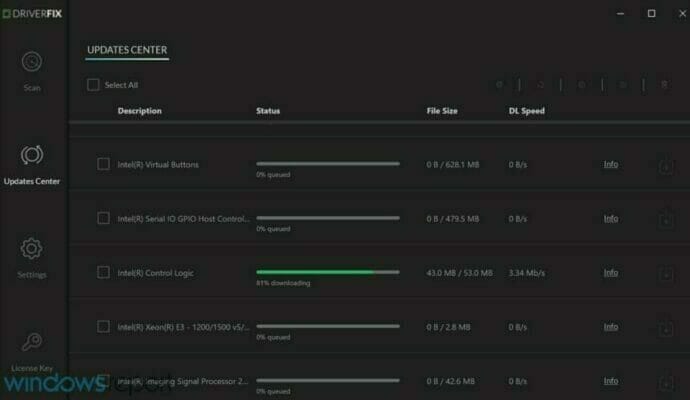
Sometimes your Windows 10 can become slow if your essential components or applications are out of date.
While updating applications is easy, outdated drivers can be problematic if you don’t know what to download.
Installing the wrong driver version will cause permanent damage to your system, so we strongly recommend DriverFix to get just the necessary drivers for your device.
With just one click, the tool scans your PC, finds the problematic software, and recommends several replacements from a huge database it uses.

DriverFix
2. Check for viruses

Just like any other software, Windows 10 is vulnerable to viruses, so make sure that your system is clean. You can download any free antivirus software and do a full system scan just to be sure.
If you want to ensure that your PC is continuously safe and protected from malware, you might want to consider the best program right now, Bitdefender.
The tool uses next-gen technology to detect the most recent malware signatures known in the industry. The top scores in detection rates added to the ease of use and overall user-friendly design, make Bitdefender the best option to ensure your device’s protection.
Besides, this antivirus comes with an optimization feature that will scan your device for unnecessary files and registry items, unused programs or apps that can be removed, and so on, to declutter the system and boost its performance.
Bitdefender Antivirus Plus
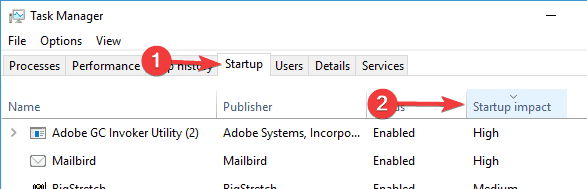
3. Disable heavy performance processes
- Open Task Manager by pressing Ctrl + Shift + Esc on your keyboard.
- Go to the Startup tab. Sort the processes by their Startup impact rating.

- Disable processes in the High category, but don’t disable crucial programs such as your antivirus.
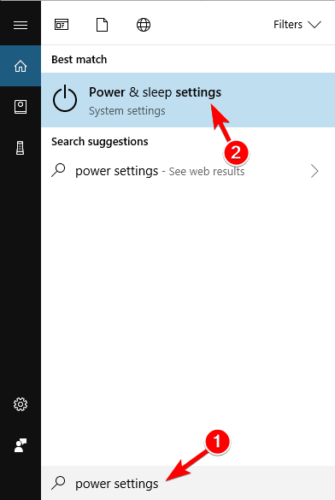
4. Enable a faster startup option
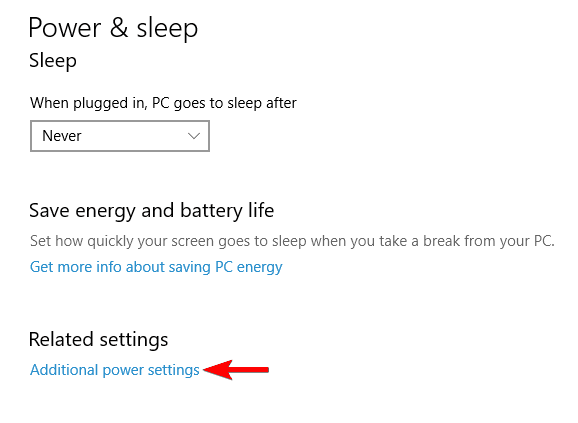
- Press Windows Key + S and enter power settings. Select Power & sleep settings.
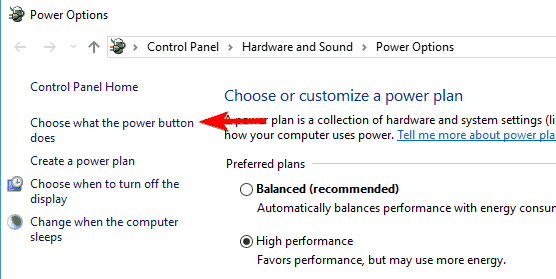
- Click Additional power settings.
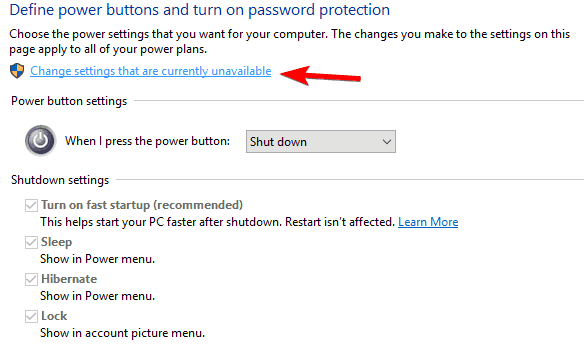
- Click on Choose what the power button does from the menu on left.
- Now select Change settings that are currently unavailable.
- Make sure to check Turn on fast startup (recommended).
- Save your changes and you’re good to go.
This feature is called Hybrid Startup and Shutdown and it puts your PC into a hibernation state. It improves the startup and shutdown process.
5. Check for slow services
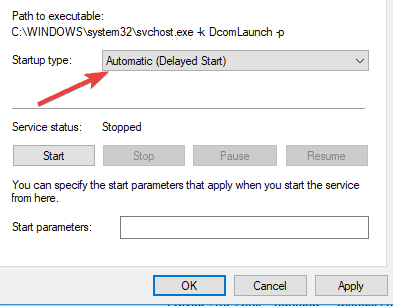
- Press Windows key + R and type services.msc and press Enter.
- In the list of all services that start along with your Windows 10, look for any services that take too long to launch.
- Right-click each service and change the settings from Default to Delayed Start.
- Save your changes and restart.
6. Disable blur effects and transparency
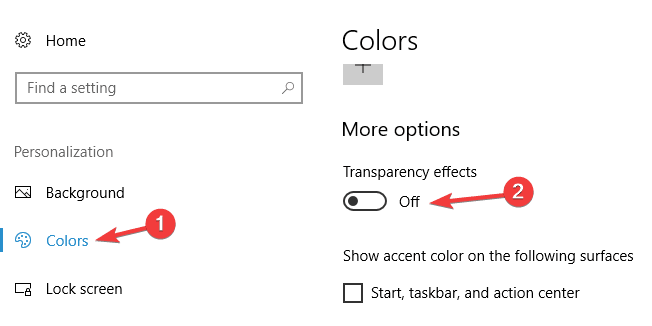
- Open the Settings app.
- Then click on Personalization.
- Next click on Colors. Set Transparency effects to Off.

7. Perform a clean Windows 10 install
Sometimes there are software issues when you upgrade from Windows 8 or Windows 7 to Windows 10, or even when installing the latest Windows 10 updates.
Run a System Scan to discover potential errors


So it’s advised that you perform a clean install of Windows 10. Just be sure that you backup your important files before doing this.
8. Use CCleaner
If your Windows 10 is slow, the problem might be your temporary files or your registry.
You can easily fix this problem simply by removing these files from your PC. Doing that manually can be a tedious process, but you can automatically delete these files as well.
One of the best applications that can remove temporary files and optimize your registry is CCleaner. It’s not only efficient and intuitive but also free to use with the basic features.
9. Stop Windows Module Installer service
- Press Windows Key + R and enter services.msc. Now press Enter or click OK.
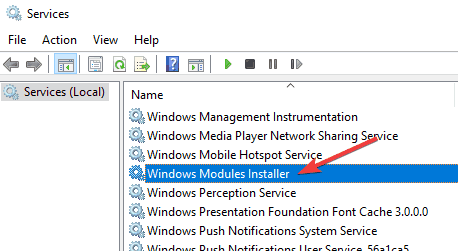
- Locate Windows Module Installer on the list and double click it to open its properties.
- Check the Service status, if it’s set to Running click the Stop button to stop the service.
- In addition, you can also change the Startup Type to Disabled if you want to permanently disable this service.
- Now click on Apply and OK to save changes.

After disabling this service, check if the problem is resolved.
Note: By disabling this service you might not be able to receive Windows updates, so be sure to enable it back, to avoid any other problems.
10. Disconnect all peripherals

Sometimes your hardware can cause Windows 10 to become slow. To fix that problem, you need to disconnect all peripherals from your PC.
This includes all USB devices, such as printers, hard drives, cameras, etc.
For instance, several users reported that the issue was caused by USB speakers. After disconnecting the device, the issue was completely resolved.
11. Defragment your drive
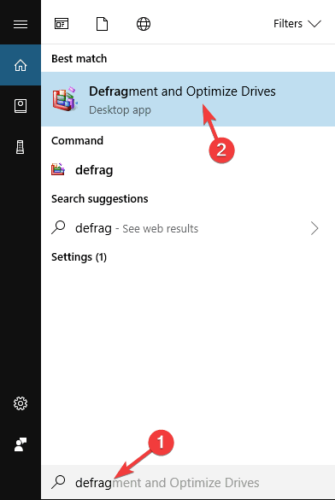
- Press Windows Key + S and enter defrag. Now choose Defragment and Optimize Drives.
- When Optimize Drives window opens, select the desired drive and click on Analyze.
- After scanning the drives, select the fragmented drive and click on Optimize.
- Wait while Windows defragments your drive.
- Repeat this process for all your drives.

Once the defragmentation process is finished, check if the problem is resolved.
It’s worth mentioning that there are many other great third-party defragmentation tools that offer various advanced features. If you’re looking for more features, we recommend you try Smart Defrag.
12. Adjust the size of virtual memory
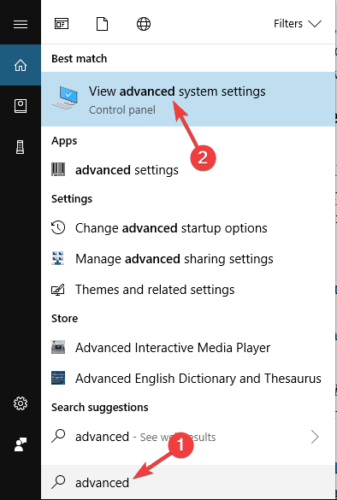
- Press Windows Key + S and enter advanced. Select View advanced system settings.
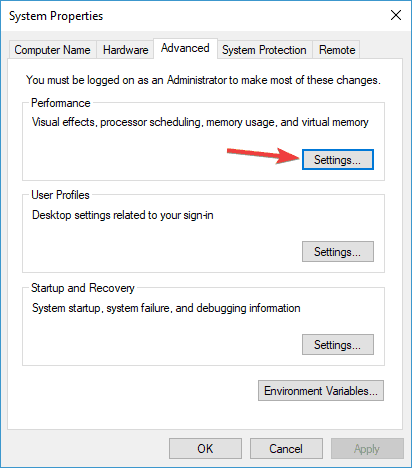
- Click the Settings button in the Performance section.
- Go to Advanced tab and click on Change button.
- In the Virtual Memory window, uncheck Automatically manage paging file size for all drives.
- Then, select Custom size, and enter Initial Size and Maximum size. Now click on the Set button and OK to save changes.

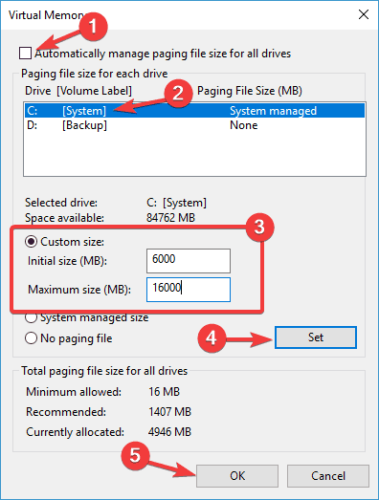
After doing that, you’ll set the size of virtual memory for that drive. You might have to set the manual size for all your drives.
As for the size, the size of your virtual memory is related to the size of your RAM.
As a general rule, the Initial size should be at least 1.5 times larger than the amount of RAM memory on your PC. As for Maximum size, it should be up to 4 times larger than the amount of RAM on your PC.
We believe that after trying out these solutions, any slowdown problem should be completely resolved.
We’ve got a similar troubleshooting article, dedicated to slow desktops that you might want to check out.
On the other hand, if you have any other suggestions on this topic, feel free to reach us using the comments sections.


