- Open Snipping Tool and take a screenshot
- Snipping Tool в Windows 10/8/7: советы и подсказки для захвата скриншотов
- Snipping Tool для Windows
- Захватывать скриншоты в Windows
- Open Snipping Tool с помощью горячей клавиши
- Win + PrntScr в Windows
- Снайперский инструмент Сочетания клавиш
- Отключить белое наложение
- Захват контекстного меню с использованием Snipping Tool
- Захват частей Windows 8 Пуск Экран
- Захватить часть экрана с помощью горячей клавиши
- How to take and annotate screenshots on Windows 10
- Take a screenshot
- Annotate snips with Snip & Sketch
- How To Use Windows Snipping Tool Shortcuts In Windows 10
- What Is The Windows Snipping Tool?
- What Is Windows Snip and Sketch?
- Windows Snipping Tools Shortcuts
- Snip and Sketch Keyboard Shortcuts
- Putting It All Together
Open Snipping Tool and take a screenshot
To use the Snipping Tool when you have a mouse and a keyboard:
Select Start , type snipping tool, and then select it in the search results.
To take a new screenshot using the same mode you used last, select New. Or, to choose the type of snip you want, select Mode (or, in older versions of Windows, the arrow next to New), and then choose a capture mode. When making free-form or rectangular snips, use your mouse to select the area that you want to capture.
Use the Save and Copy buttons at the top of the snip to save or copy it to the clipboard.
The available snipping modes are Free-form, Rectangular, Window, and Full-screen Snip.
To use the Snipping Tool when you only have a mouse:
To open the Snipping Tool, press the Start key, type s nipping tool, and then press Enter. (There’s no keyboard shortcut to open Snipping Tool.)
To choose the type of snip you want, press Alt + M keys and then use the arrow keys to choose Free-form, Rectangular, Window, or Full-screen Snip, and then press Enter. ( Alt + M is available only with the latest update to Windows 10). When making a rectangular snip, hold down Shift and use the arrow keys to select the area you want to snip.
To take a new screenshot using the same mode you used last, press Alt + N keys.
To save your snip, press Ctrl + S keys. To copy it to the clipboard, press Ctrl + C keys.
Snipping Tool в Windows 10/8/7: советы и подсказки для захвата скриншотов
Как и Windows 7 и Windows 8, Windows 10 также включает в себя Sn ipping Tool , который позволяет делать снимки экрана на компьютере с Windows 10. Этот Snipping Tool или SnippingTool.exe находится в папке System32 , но к нему (ярлык) также можно получить доступ из следующего местоположения:
C: \ ProgramData \ Microsoft \ Windows \ Пуск \ Меню \ Программы \ Стандартные
Snipping Tool для Windows
Давайте посмотрим, как эффективно использовать Snipping Tool в Windows 10/8/7.
Захватывать скриншоты в Windows
Находясь в пользовательском интерфейсе Metro или на начальном экране , вы можете щелкнуть плитку «Инструмент для разрезания», чтобы открыть ее. Инструмент откроется, и вы сразу окажетесь на рабочем столе. Находясь в режиме рабочего стола , вы можете открыть его, набрав Snipping Tool в панели поиска Charms. Если вы используете его регулярно, вы также можете создать его ярлык на рабочем столе , чтобы получить к нему легкий доступ.
Чтобы закрепить его как плитку, на стартовом экране Windows 8 щелкните правой кнопкой мыши на экране (не на плитке). Нажмите на «Все приложения». В панели, которая появляется в нижней части экрана, вы увидите Snipping Tool во всех приложениях. Просто щелкните по нему правой кнопкой мыши и выберите опцию «Прикрепить к началу», чтобы поместить его на начальный экран в виде плитки.
Когда вы делаете снимок из браузера и сохраняете его в виде файла HTML, URL-адрес отображается под фрагментом. Чтобы предотвратить появление URL-адреса, откройте «Параметры» и снимите флажок « Включить URL-адрес ниже фрагментов (только HTML) ».
Open Snipping Tool с помощью горячей клавиши
Если вы часто пользуетесь Snipping Tool, вы можете создать для него горячую клавишу . Для этого откройте папку System32 и щелкните правой кнопкой мыши файл SnippingTool.exe (или его ярлык в папке «Программы/Стандартные»). Выберите Свойства. Здесь вы можете установить горячую клавишу для этого. Я в качестве примера выбрал F5. Таким образом, чтобы открыть инструмент, все, что мне нужно сделать в следующий раз, это нажать F5.

Снайперский инструмент позволяет делать скриншоты четырех разных типов:
- Фрагмент в свободной форме позволяет рисовать и захватывать любые нерегулярные части экрана
- Прямоугольный фрагмент позволит вам перетаскивать курсор вокруг объекта, чтобы сформировать прямоугольник
- Window Snip позволит вам выбрать открытое окно, такое как окно браузера или диалоговое окно, и позволить вам его захватить.
- Полноэкранный фрагмент захватит весь экран при выборе этого типа фрагмента.
После того как вы изменили настройки в соответствии со своими требованиями, вы можете нажать «Создать» или Ctrl + PrtnScr , чтобы сделать снимки.
Win + PrntScr в Windows
Нажав на Win + PrntScr в Windows, вы сможете сделать снимок экрана в соответствии с настройками. Изображение автоматически сохраняется в папке «Изображения».
Снайперский инструмент Сочетания клавиш
- Alt + M – выбрать режим снайпера
- Alt + N – создать новый фрагмент в том же режиме, что и последний
- Shift + клавиши со стрелками – переместите курсор, чтобы выбрать прямоугольную область отсечения
- Alt + D – задержка захвата на 1-5 секунд
- Ctrl + C – скопировать фрагмент в буфер обмена
Отключить белое наложение
Когда Snipping Tool открыт и активен, появляется белое наложение. Если вы хотите отключить его, вы можете сделать это через его Параметры. Снимите флажок с Показывать наложение экрана, когда активен Snipping Tool .
Чтобы сохранить изображение , нужно нажать кнопку Сохранить фрагмент . Дополнительной функцией Windows 8 является то, что полноэкранные снимки автоматически сохраняются в папке «Изображения».
Если вы хотите поделиться фрагментом , нажмите кнопку со стрелкой на кнопке «Отправить фрагмент» , а затем выберите в меню параметр (электронная почта).
Snipping Tool обычно не работает на стартовом экране. Вы сможете захватить только полный стартовый экран, используя кнопки Win + PrntScr, а не часть стартового экрана. Если вы нажмете назначенную горячую клавишу, когда на стартовом экране, ваши окна автоматически переключатся в режим рабочего стола с открытым инструментом для резки. Но для этого есть хитрость, которую мы увидим чуть позже!
Захват контекстного меню с использованием Snipping Tool
Если вы хотите сделать снимки экрана своего контекстного меню, запустите Snipping Tool и нажмите Esc . Затем щелкните правой кнопкой мыши на рабочем столе, в файле или папке, а затем нажмите Ctrl + PrntScr .Это позволит вам захватить контекстное меню правой кнопкой мыши. В Windows 7 вы также можете захватить меню «Пуск» с помощью этого трюка.
Захват частей Windows 8 Пуск Экран
В Windows 8, чтобы захватить часть вашего начального экрана, откройте Snipping Tool , нажмите Esc. Далее нажмите клавишу Win , чтобы перейти в меню «Пуск». Экран, а затем нажмите Ctrl + PrntScr . Теперь переместите курсор мыши вокруг нужной области. Это позволит вам захватить часть вашего начального экрана Windows 8. Чтобы захватить весь начальный экран , можно, конечно, нажать Win + PrntScr.
ПРИМЕЧАНИЕ. Windows 10 позволяет устанавливать временные задержки для создания снимков экрана .
Захватить часть экрана с помощью горячей клавиши
В Windows 10 Creators Update и более поздних версиях вы можете захватить часть экрана с помощью сочетания клавиш – WinKey + Shift + S . Вы даже можете создать ярлык на рабочем столе, используя команду snippingtool/clip в поле Расположение.
Если вам известны какие-либо дополнительные советы или подсказки по инструменту Snipping Tool, поделитесь ими в разделе комментариев.
Вы также можете воспользоваться нашим средством захвата экрана Windows , которое позволяет захватывать весь экран, выбранную область экрана, окна, веб-страницы и многое другое. Вы также можете добавить водяные знаки на снятый скриншот или отредактировать изображение, используя его основной редактор изображений.
ОБНОВЛЕНИЕ . Ознакомьтесь с новым инструментом Microsoft Snip Screen Capture Tool.
How to take and annotate screenshots on Windows 10
Sometimes the easiest way to make a copy of something is to take a snapshot of your screen. While you can already capture your screen using your keyboard’s PrtScn button, you can now press Windows logo key + Shift + S to open the new modern snipping experience (also called the snipping bar), then drag the cursor over the area you want to capture.
Here are some common ways to take and annotate screenshots in Snip & Sketch on Windows 10.
Take a screenshot
Option 1: Using the Snip & Sketch app
Press the Start button and enter Snip & Sketch in the search field.
Press the New button to start snipping with the snipping bar.
The snipping bar allows you to capture the following types of snips:
Rectangular snip. Drag the cursor around an object to form a rectangle.
Free-form snip. Draw a free-form shape around an object.
Full-screen snip. Capture the entire screen.
Once you snip an area of your screen — the snipped image is added to your clipboard and you can paste it immediately in another app. A screen prompt will also allow you to annotate, save or share it using the Snip & Sketch app.
Option 2: With the Print Screen key
While the PrtScn key already captures your full screen and sends it to your clipboard, opening the snipping bar provides you with more snipping tools you can use for precise snipping. For better control of your screen capturing options, you can opt to have your PrtScn key open the new snipping bar instead of having to type Windows logo key + Shift + S.
To turn on the new snipping feature keyboard shortcut Select Start > Settings > Ease of Access > Keyboard
Option 3: With the Window logo key + Shift + S shortcut
Pressing the S key + Windows logo + Shift keys down initiates the snipping bar at any time.
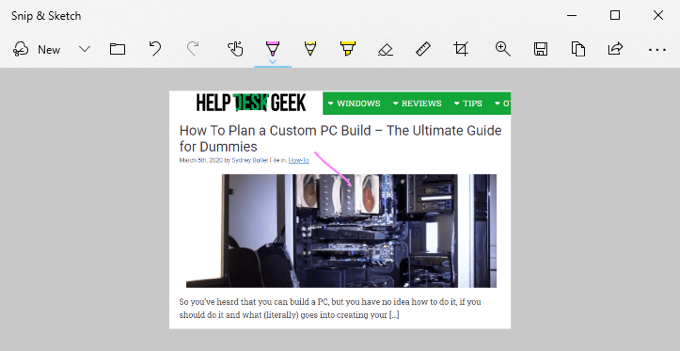
Annotate snips with Snip & Sketch
Opening images for editing with Snip & Sketch
To open an image from Snip & Sketch, select Open File or drag and drop an image from apps like File Explorer or Photos in the Snip & Sketch window.
Annotating images with Snip & Sketch
Snip & Sketch provides a few tools for annotating images, namely pen, pencil and highlighter. Once you click a tool to select it, you can click it again to change its color or thickness.
The tools work better with a pen device, but they can also be used with mouse or touch if you select the Touch Writing button icon.
Use the Eraser tool to remove specific strokes or click it twice to get the option to erase all ink.
Use the ruler or protractor tools and draw straight lines or arches.
Press the ruler/protractor button again to hide the ruler/protractor
Reside or rotate the ruler/protractor by using two finger touch gestures (if the Touch Writing button is selected) or with the mouse wheel.
Use the crop tool to crop the annotated image.
To undo cropping, select the crop tool again and press Cancel to restore the image to its full original area.
Panning the view
Some of the images you annotate might be larger than the size of the Snip & Sketch window. You can use the scroll bars to pan the view, but you can also pan the view with touch input (if the Touch Writing button is not selected) or by dragging with your mouse button while holding the Ctrl key down.
Zoom in and out of screenshots to make them easier to mark up using the magnifying glass icon. You can also zoom in and out of screenshots by pressing the Ctrl key down and tapping the + or — buttons.
Sharing and saving snips
Snip & Sketch copies the annotated snip to your clipboard when you open it and every time you make edits. Snip & Sketch allows you to save the annotated image to a file, share it or open with another app, or print it on paper or to a pdf file.
Using keyboard in Snip & Sketch
While annotating is best done using a pen or mouse — Snip & Sketch provides a lot of keyboard shortcuts you can use. Access keys are activated if you press and hold the Alt key.
How To Use Windows Snipping Tool Shortcuts In Windows 10
A cool tool you may not even know existed
Using keyboard shortcuts with either the Snipping Tool or Snip and Sketch just makes life easier. Both Snipping Tool and Snip & Sketch, which can be used to take screenshots of the computer screen, are already part of your Windows 10.
We can also take screenshots using OneNote, if we have it. Keep in mind that these two tools might not be ideal for every situation. Check out our ultimate guide to taking screenshots for more information.
What Is The Windows Snipping Tool?
For a Windows utility that’s been around for 17 years, lots of people still don’t know it exists. It’s a simple, easy to use, screenshot utility. You can use it to capture an entire window, a rectangular part of your screen, or use the freeform tool to draw around things and capture just that uniquely shaped part of the screen.
The newest version even has a delay feature. This makes it easier to capture pop-out or right-click menus.

You can take the capture and make notes or draw on it to really highlight what you want to show. From there, sharing it is easy too. You can copy and paste it into a document or email, or just email it to someone directly from the Snipping Tool.
What Is Windows Snip and Sketch?
Since Windows Snipping Tool is 17 years old, Microsoft decided to put together a similar but updated screen capture tool. Snip and Sketch came out with the Windows 10 October 2018 Update. If you don’t have it, you can also get Snip and Sketch from the Windows Store.
Windows Snipping Tools Shortcuts
For these shortcuts to work, Snipping Tools must be open and be the app that has the focus. It can’t be open and behind anything, or the shortcuts do not work. There is no keyboard shortcut to open Windows Snipping Tools. We could make a keyboard shortcut to open Snipping Tools, though.
In the list of shortcuts below, Alt + N means to press the Alt key and the N key at the same time. If it says Alt + T then P that means press the Alt key and the T key at the same time and release, then press P.
| Keyboard Shortcut | What it Does |
| Alt + N or Ctrl + N |  Starts a new screen capture Starts a new screen capture |
| Alt + M |  Set the screen capture mode. Use ↑ and ↓ arrow keys to choose from: Free-form snip, Rectangular tool, Window snip, Full-screen snip. Then press Enter to commit the choice. Set the screen capture mode. Use ↑ and ↓ arrow keys to choose from: Free-form snip, Rectangular tool, Window snip, Full-screen snip. Then press Enter to commit the choice. |
| Alt + D |  Set the delay for starting the capture. Use ↑ and ↓ arrow keys to choose from: No delay, 1 Second, 2 Seconds, 3 Seconds, 4 Seconds, 5 Seconds. Then press Enter to commit the choice. Set the delay for starting the capture. Use ↑ and ↓ arrow keys to choose from: No delay, 1 Second, 2 Seconds, 3 Seconds, 4 Seconds, 5 Seconds. Then press Enter to commit the choice. |
| Ctrl + S |  Save the screen capture Save the screen capture |
| Ctrl + C |  Copy the screen capture Copy the screen capture |
| Ctrl + E |  Edit in Paint 3D Edit in Paint 3D |
| Ctrl + P | Print the screen capture |
| Alt + F | Access File menu |
| Alt + F then T then E | 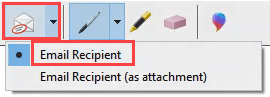 Send as an e-mail. Requires Outlook installed. Send as an e-mail. Requires Outlook installed. |
| Alt + F then T then A | 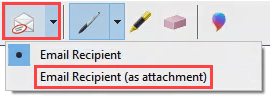 Send as an attachment in an e-mail. Requires Outlook installed. Send as an attachment in an e-mail. Requires Outlook installed. |
| Alt + T then P |  Select Pen tool Select Pen tool |
| Alt + T then P then R | 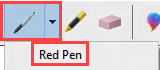 Red Pen Red Pen |
| Alt + T then P then B | 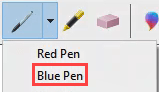 Blue Pen Blue Pen |
| Alt + T then P then L | 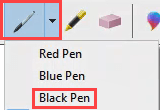 Black Pen Black Pen |
| Alt + T then P then P | 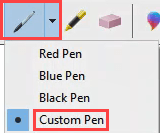 Custom Pen Custom Pen |
| Alt + T then P then C | 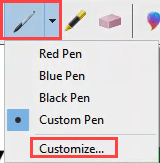 Customize Pen Customize Pen |
| Alt + T then H |  Select Highlighter tool Select Highlighter tool |
| Alt + T then E |  Select Eraser tool Select Eraser tool |
| Alt + T then O | Set Snipping Tool Options |
| F1 | Snipping Tool Help |
| Esc | When in the middle of getting a screen capture, Esc cancels it out, by escaping. |
Snip and Sketch Keyboard Shortcuts
Snip and Sketch can be opened using a keyboard shortcut, which makes it very handy to use. Make note of that. Unfortunately, there aren’t Windows snipping tool shortcuts to choose the delay time or type of snipping tool to use.

Once we’re in a tool, like the Highlighter tool, use the keyboard shortcut combination again to access the tools options. We can navigate through options using the arrow and Tab keys, and use Enter to make selections.
| Keyboard Shortcut | What it Does |
| Shift + Windows Key + S |  Opens Snip and Sketch screen capture bar. This only allows for taking the screen capture.It does not open the full Snip and Sketch app for editing. Opens Snip and Sketch screen capture bar. This only allows for taking the screen capture.It does not open the full Snip and Sketch app for editing. |
| Ctrl + N or Alt + N |  New screen capture New screen capture |
| Ctrl + O or Alt + O |  Open a file for editing Open a file for editing |
| Ctrl + P |  Print screen capture Print screen capture |
| Ctrl + Z |  Undo edit Undo edit |
| Ctrl + Y |  Redo edit Redo edit |
| Ctrl + T or Alt + T |  Toggle Touch Writing on and off. For use with touch screens. Toggle Touch Writing on and off. For use with touch screens. |
| Ctrl + B or Alt + B |  Ballpoint pen tool Ballpoint pen tool |
| Ctrl + C or Alt + I |  Pencil tool Pencil tool |
| Ctrl + H or Alt + H |  Highlighter tool Highlighter tool |
| Ctrl + E or Alt + E |  Eraser tool Eraser tool |
| Ctrl + R or Alt + R |  Crop tool Crop tool |
| Ctrl + Z or Alt + Z |  Zoom tool Zoom tool |
| Ctrl + S or Alt + S |  Save capture Save capture |
| Ctrl + C or Alt + C |  Copy capture Copy capture |
| Ctrl + A or Alt + A |  Share capture Share capture |
| Ctrl + M or Alt + M |  Opens See more menu Opens See more menu |
| Esc | When in the middle of getting a screen capture, Esc cancels it out, by escaping. |
Putting It All Together
Screen captures are a great way to tell a story. Whether it’s for helping someone else out, asking for help, or just sharing something interesting or funny, screen captures are great.
Take the time to try all of the key combinations and you’ll find that you can do almost anything you want with these tools without touching your mouse. That’s faster and easier on the hands.
Got any good screen capture tips or other favorite tools? We’d love to hear about it in the comments below. Know someone who isn’t sure how to explain what’s on their screen? Send them a link to this article. Help them out.


