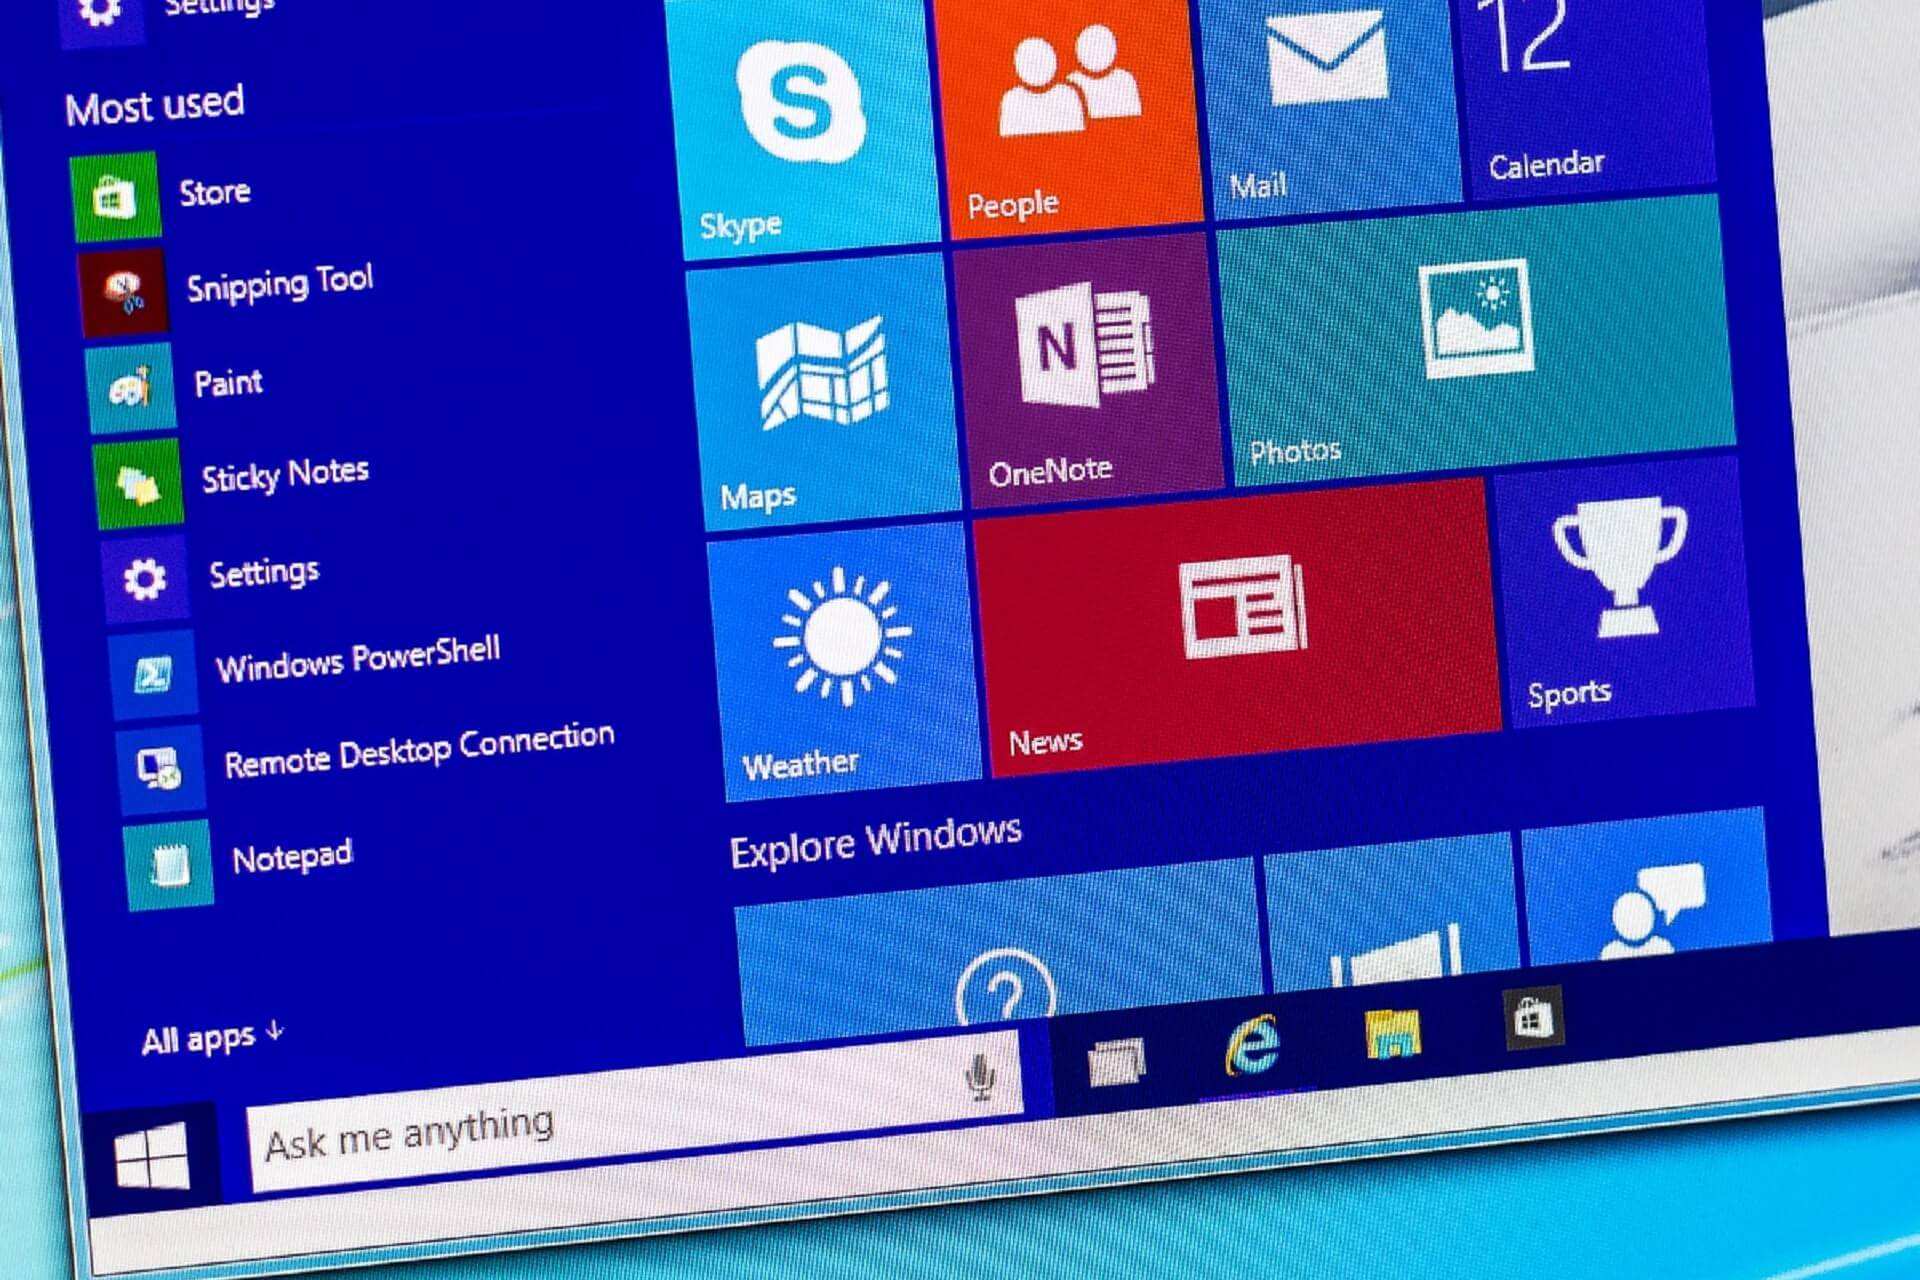
- Как создать кнопку выключения на рабочем столе в Windows 10
- Пишем команду для выключения компьютера
- Меняем дизайн нашей кнопки
- Закрепляем ее на панели инструментов
- Windows 10 start button not working
- Replies (156)
- Windows 10 start button not working [Fixed]
- How do I fix problems with the Start Menu in Windows 10
- 1. Check for Windows updates
- 2. Use the PowerShell to fix this issue
- 3. Sign out of your account
- 4. Restart Windows Explorer
- 5. Use Command Prompt
- Run a System Scan to discover potential errors
- Solution 6 – Modify your registry
- 7. Create new values in your registry
- 8. Enter Safe Mode
- 8. Create a new user account
Как создать кнопку выключения на рабочем столе в Windows 10
Если по какой-то причине вас не устраивает стандартная кнопка выключения компьютера, вы можете добавить свою собственную на рабочий стол или в панель инструментов. Вот как это делается.
Пишем команду для выключения компьютера
Как и в любой другой операционной системе, в Windows 10 есть командная строка, с помощью которой можно управлять компьютером. Существует и отдельная команда для выключения. Речь идет о команде shutdown. Если ввести ее в командную строку, то компьютер выключится, а из команды можно сделать полноценную кнопку, придав ей некое внешне очертание системными средствами. В общем, обо всем по порядку.
- Для начала создадим на рабочем столе ярлык, кликнув по нему правой кнопкой мыши и выбрав соответствующий пункт в контекстном меню.
Как видно на скриншоте, команду shutdown сопровождают дополнительные буквы. Это аргументы. Они нужны, чтобы задать определенные параметры до выключения:
- *Аргумент -s выключает систему без лишних вопросов.
- *Аргумент -f запрещает сторонним приложениям останавливать выключение и выдавать какие-то диалоговые окна.
- Аргумент-tуказывает, через какое время в секундах выключится компьютер.
- Также существует универсальный аргумент-p, отключающий систему без лишних вопросов. Можно использовать только его в самой команде.
- На следующем этапе вводим название нашей кнопки. Для простоты я назвал ее «Выключение», но вы можете придумать что-то более изысканное.
- Затем нажимаем на кнопку «Готово».
Меняем дизайн нашей кнопки
По умолчанию иконка ярлыка с командной выглядит не очень симпатично. Чтобы ее изменить:
- Кликаем по созданному ярлыку правой кнопкой мыши.
- В появившемся контекстном меню выбираем пункт «Свойства».
Закрепляем ее на панели инструментов
Чтобы запускать процедуру выключения не двойным, а одинарным кликом, можно закрепить его на панели инструментов. Собственно, туда, где хранятся и другие программы, которые вы часто используете.
- Просто перетяните значок на свободное месте и отпустите.
- Теперь можно запускать его прямо из панели инструментов.
Новое расположение ярлыка чревато тем, что вы однажды промахнетесь и в неподходящий момент кликните по иконке выключения компьютера. Чтобы не трепать себе нервы, лучше все-таки оставить ярлык где-нибудь в углу на рабочем столе.
Windows 10 start button not working
Replies (156)
* Please try a lower page number.
* Please enter only numbers.
* Please try a lower page number.
* Please enter only numbers.
![]()
Thank you for posting on Microsoft Communities.
I will be glad to help you with the issue you have with the computer. I understand the frustration when things don’t work the way it should.
Please follow the below methods to troubleshoot on the issue:
Method 1: Perform a sfc scan on the computer to check if there are any corruptions on the computer. Please follow the below link to perform a sfc scan on the computer.
Method 2: Try to perform a DISM commands on the computer. Please follow the below link to know how to perform DISM in Windows.
This issue can be fixed by Windows Updates. Please refer to the suggestions by Sharath Srinivasa replied on January 23, 2015 in the link given below.
Hope this information is helpful. Feel free to get back to us for any further assistance.
80 people found this reply helpful
Was this reply helpful?
Sorry this didn’t help.
Great! Thanks for your feedback.
How satisfied are you with this reply?
Thanks for your feedback, it helps us improve the site.
How satisfied are you with this reply?
Thanks for your feedback.
1. Launch Task manager
Press the [Ctrl] + [Alt] + [Del] keys on the keyboard at the same time, or right click the Taskbar, and select Task manager.
2. Run a new Windows task
When the Task manager window opens, click the More details option to expand it, then select Run new task from the File menu.
3. Run Windows PowerShell
When the Run new task dialog box opens, type powershell, tick the box for Create this task with administrative privileges and click OK.
4. Run the System File Checker
Type sfc /scannow into the window and press the [Return] key. The scan may take some time and will end with one of three results. Windows did not find any integrity violations and Windows Resource Protection found corrupt files and repaired them mean there are now no corrupt files, but Windows Resource Protection found corrupt files but was unable to fix some (or all) of them indicates a problem.
In this latter case, type (or copy and paste) DISM /Online /Cleanup-Image /RestoreHealth into the PowerShell window and press the [Return] key. This will download files from Windows Update to replace the corrupt ones and, again, this may take some time.
463 people found this reply helpful
Was this reply helpful?
Sorry this didn’t help.
Great! Thanks for your feedback.
How satisfied are you with this reply?
Thanks for your feedback, it helps us improve the site.
How satisfied are you with this reply?
Thanks for your feedback.
543 people found this reply helpful
Was this reply helpful?
Sorry this didn’t help.
Great! Thanks for your feedback.
How satisfied are you with this reply?
Thanks for your feedback, it helps us improve the site.
How satisfied are you with this reply?
Thanks for your feedback.
A treatment for the symptom would be to restart Windows Explorer every time this happens. This may allow you to use the Windows button until the next time that it freezes up.
-open task manager (alt-ctrl-del or right click on taskbar and choose it)
-find and select «Windows Explorer»
-click Restart button on bottom right
1335 people found this reply helpful
Was this reply helpful?
Sorry this didn’t help.
Great! Thanks for your feedback.
How satisfied are you with this reply?
Thanks for your feedback, it helps us improve the site.
How satisfied are you with this reply?
Thanks for your feedback.
28 people found this reply helpful
Was this reply helpful?
Sorry this didn’t help.
Great! Thanks for your feedback.
How satisfied are you with this reply?
Thanks for your feedback, it helps us improve the site.
How satisfied are you with this reply?
Thanks for your feedback.
It means log out and log back in. will restart Windows services.
I honestly don’t know how this is still a problem that Microsoft hasn’t fixed in Falls Creator edition. Seems like a flaw in pretty basic functionality.
50 people found this reply helpful
Was this reply helpful?
Sorry this didn’t help.
Great! Thanks for your feedback.
How satisfied are you with this reply?
Thanks for your feedback, it helps us improve the site.
How satisfied are you with this reply?
Thanks for your feedback.
24 people found this reply helpful
Was this reply helpful?
Sorry this didn’t help.
Great! Thanks for your feedback.
How satisfied are you with this reply?
Thanks for your feedback, it helps us improve the site.
How satisfied are you with this reply?
Thanks for your feedback.
7 people found this reply helpful
Was this reply helpful?
Sorry this didn’t help.
Great! Thanks for your feedback.
How satisfied are you with this reply?
Thanks for your feedback, it helps us improve the site.
How satisfied are you with this reply?
Thanks for your feedback.
I’m shocked. a YouTube comment fixed this problem with me. I narrowed it down to some conflict between (I believe) Dropbox and the Windows 10 Task Host Manager.
Followed this Dropbox thread here: https://www.dropboxforum.com/t5/Installation-and-desktop-app/Stuck-on-quot-starting-quot/td-p/88494/page/5
To this YouTube video: https://www.youtube.com/watch?v=ILni3TO6ITc
And the first comment says this:
After hours of searching and trying, Finally I GOT IT I found a solution that fixed the issue for me and I think it should work for you and all who suffer from the problem. It is very easy. Just by these steps : 1- Right click on start menu and click on Run. «For those who the start menu does not respond with right click, right click on taskbar — click on Task Manager — from File menu on the left upper corner select Run new task». 2-White the command regedit and click Enter. 3- Go to path [HKEY_LOCAL_MACHINE\SYSTEM\CurrentControlSet\Services\WpnUserService]. 4-Double click on Start from the right side. 5-Change the value data to 4 then OK. 6-Reboot. That’s it. Or just download the attached registry file and run it. https://drive.google.com/open?id=1AZJPia-kpxz_t2DrBKYY6xwMs5D-f9Ft
All credit to Ayman Askar
Someone else responded in the comments below and said this:
onegp I just talked to Microsoft. The 0 is «default» for the Windows Push Notification service (wpnservice) to push notifications from some corresponding WNS server. I guess that depends on your location. Changing it to 1 makes Windows get it’s notification from iCloud servers, 2, 3, 4. x, I don’t know and neither did the tech I talked to. For that you get to have access to registry service codes. So either this guy works for Microsoft or just guessed the code because Microsoft had no answer as to why entering 4 worked. If you type in the registry key directly into the search engine bar, you will get results for that service but not the codes and how they repetitively affect the system. I hope this helps.
No idea why this widely reported issue isn’t fixed yet with a proper Windows Update. Seems pretty easy to recreate.
Windows 10 start button not working [Fixed]

- The Start button is one of the most recognizable UI components that has been with Windows since the very beginning.
- The guide below will show you what to do when you encounter issues using the Start button.
- For more guides like this one, head over to our dedicated Start Menu Troubleshooting page.
- If you need more generic fix guides, we also have a specialized Windows 10 Fix page as well.
- Download Restoro PC Repair Tool that comes with Patented Technologies (patent available here).
- Click Start Scan to find Windows issues that could be causing PC problems.
- Click Repair All to fix issues affecting your computer’s security and performance
- Restoro has been downloaded by 0 readers this month.
When Windows 8 was released many people were disappointed by the lack of Start Menu, an integral part of Windows. Windows 10 fixed that because it brought back the Start Menu.
Users worldwide were excited to see Start Menu back, but sadly, some users report that the Start button doesn’t work on Windows 10, so today we’re going to explore this issue.
How do I fix problems with the Start Menu in Windows 10
1. Check for Windows updates
Microsoft is aware of this issue, and if there is a fix available it will be released via Windows Update, therefore make sure that you keep your Windows 10 up to date, and if there are any updates available download them.
Windows 10 usually downloads the missing updates automatically, but sometimes issues can occur and that can prevent updates from downloading. However, you can always manually check for updates by doing the following:
- Press Windows Key + I to open the Settings app.
- Now go to the Update & Security section.
- In the right pane, click Check for updates button.
If any updates are available, they will be downloaded automatically in the background. Once your system is up to date, the issue should be completely resolved and your Start Menu should start working again.
2. Use the PowerShell to fix this issue
If you don’t want to wait for the official patch you can try this workaround. This isn’t a permanent solution, but it gets the job done and it fixes the issue temporarily, so if the issue manifests itself again, you might need to repeat this process.
To fix the Start button with PowerShell do the following:
- Right-click on the Start Menu and choose Windows PowerShell.
- Make sure that you run it as an administrator for maximum control over your PC.
- If you don’t run it as an administrator, this process might not work, so keep that in mind.
- You can also press Windows Key + S, type powershell and run Windows Powershell as an administrator.
- Paste this into PowerShell:
- Get-AppXPackage -AllUsers | Foreach

- Get-AppXPackage -AllUsers | Foreach
- Press Enter to execute it.
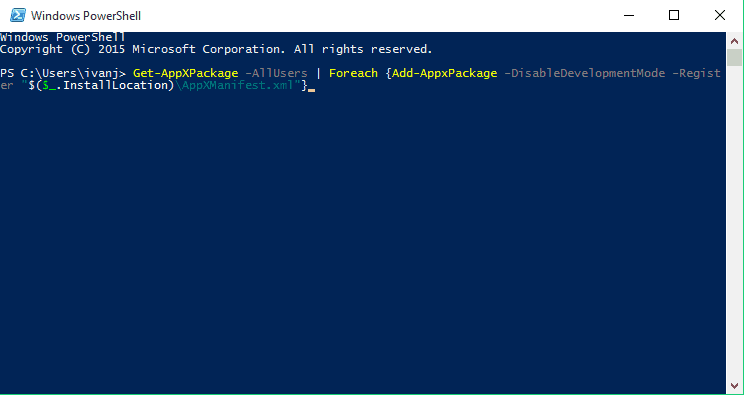
That would be all, your Start button should be working now. As we said, this solution works, but it’s not permanent so for the permanent solution make sure that you check for the latest Windows 10 updates regularly.
3. Sign out of your account
In some cases, the Start Menu button won’t work if there’s a glitch with your user account. The simplest way to fix this problem according to users is to sign out of your account and log back in.
Since your Start Menu and start button aren’t working, you’ll need to sign out by doing the following:
- Press Ctrl + Shift + Esc.
- Now click the Sign out button.
- Wait for a few moments and sign back into your account.
After signing back in, check if the problem is still there.
4. Restart Windows Explorer
Many users reported that you can fix the problem with the Start Menu button simply by restarting Windows Explorer.
Start Menu is a part of Windows Explorer, and by restarting Windows Explorer, you’ll force Start Menu to restart as well.
To do that, you just need to follow these simple steps:
- Press Ctrl + Shift + Esc to open Task Manager.
- Locate Windows Explorer on the list.
- Right-click it and choose Restart from the menu.
Once Windows Explorer restarts, the issue should be gone and your Start Menu will start working again. Keep in mind that this is a temporary solution, so you’ll have to repeat it once the problem reappears.
5. Use Command Prompt
Sometimes problems with the Start Menu button can be caused by certain Cortana files. According to users, you can fix this problem simply by deleting these files from the Command Prompt.
Run a System Scan to discover potential errors


These are just some temporary files, and your PC will recreate them, so there’s no need to worry.
To recreate these files, you just need to do the following:
- Press Windows Key + X and choose Command Prompt (Admin) from the menu.
- If this method doesn’t work, you can use any other method, but be sure to start Command Prompt as an administrator.
- When Command Prompt starts, run the following commands one by one:
- CD/d «%LOCALAPPDATA%PackagesMicrosoft.Windows.Cortana_cw5n1h2txyewy»
- Taskkill /F /IM SearchUI.exe
- RD /S /Q Settings
After the commands are executed, the damaged files will be rebuilt and you should be able to use Start Menu again without issues.
Solution 6 – Modify your registry
In some cases, issues with the Start Menu button can occur due to Dropbox. Dropbox can sometimes interfere with Windows processes and this can lead to this and many other problems.
However, you should be able to fix this problem by making a few changes in your registry. To do that, just follow these steps:
- Press Windows Key + R and enter regedit.
- Press Enter or click OK.
- In the left pane, navigate to this key:
- HKEY_LOCAL_MACHINESYSTEMCurrentControlSetServicesWpnUserService .
- In the right pane, double-click Start DWORD.
- Set Value data to 4 and click OK.
After making these changes, restart your PC and check if the problem is resolved.
7. Create new values in your registry
If you’re having issues with the Start Menu button, the problem might be related to your registry. According to users, they managed to fix this problem simply by creating new value in their registry.
To do that, just follow these steps:
- Start Registry Editor.
- In the left pane, navigate to this key:
- HKEY_CURRENT_USERSoftwareMicrosoftWindowsCurrentVersionExplorerAdvanced .
- In the right pane, right-click the empty space and choose New > DWORD (32-bit) value.
- Enter EnableXamlStartMenu as the name of the new DWORD.
After doing that, close Registry Editor and restart Windows Explorer from the Task Manager. Once the Explorer restarts, your Start Menu should be working again.
8. Enter Safe Mode
According to users, you might be able to solve this problem simply by entering Safe Mode. This is quite simple to do, and you can do it by following these steps:
- Open the Settings app and go to the Update & Security section.
- From the menu on the left choose Recovery.
- In the right pane, click Restart now button in the Advanced startup section.
- A list of options will appear. Choose Troubleshoot > Advanced options > Startup Settings. Click the Restart button.
- Once your PC restarts, you’ll be presented with a list of options.
- Select any version of Safe Mode by pressing the appropriate key.
Once you enter Safe Mode, check if everything is working. If so, restart your PC, boot back to your account and check if the issue is resolved.
This isn’t the most reliable solution, but many users reported that it works, so be sure to try it out.
8. Create a new user account
Sometimes this problem can occur if your user account is corrupted. To fix the issue, you just need to create a new user account and switch to it. You can do that by following these steps:
- Open the Settings app and go to the Accounts section.
- Navigate to Family & other people in the left pane. In the right pane, click Add someone else to this PC.
- Choose I don’t have this person’s sign-in information > Add a user without a Microsoft account.
- Enter the desired user name and click Next.
After creating a new user account, switch to it, and check if that solves your problem. If the problem doesn’t appear on the new account, you’ll need to move your personal files to the new account and check if that solves your problem.
If you have any comments, suggestions, or maybe some other solutions for this problem, write it down in the comments section.
Start Menu is an integral part of Windows, but many users reported various issues with it. Speaking of issues, here are some common problems that users reported:


