- Анализ загруженности оборудования для Windows
- Сбор информации по загруженности оборудования
- Настройка сборка данных в Performance Monitor (Windows Server 2012 R2)
- Анализ сохраненного замера
- How to Use Disk Management in Windows Server 2012?
- Content
- Overview of Disk Management in Windows Server 2012
- How to use Disk Management in Windows Server 2012?
- Windows Server 2012 DM alternative: AOMEI Partition Assistant Server
- Conclusion
Анализ загруженности оборудования для Windows
Для своевременного обнаружения узких мест в оборудовании необходимо проводить постоянный мониторинг загруженности всех основных аппаратных компонентов системы. К ним в первую очередь относятся:
- Все рабочие сервера кластера 1С:Предприятия
- Сервер СУБД
- Клиентские рабочие станции, работающие под большой нагрузкой
Для каждого из этих компьютеров необходимо настроить сбор информации по загруженности оборудования.
Сбор информации по загруженности оборудования
Во время работы системы рекомендуется осуществлять постоянный мониторинг и запись основных показателей загруженности оборудования. Для этого можно использовать разные средства, в данной статье будет рассказано, как это можно сделать с помощью Performance Monitor, входящего в состав операционной системы Windows, и ЦКК – Центра контроля качества, типовой конфигурации, входящая в Корпоративный инструментальный пакет.
Настройка сборка данных в Performance Monitor (Windows Server 2012 R2)
Для запуска Performance Monitor выберите соответствующий пункт меню раздела Administrative Tools контрольной панели Windows.
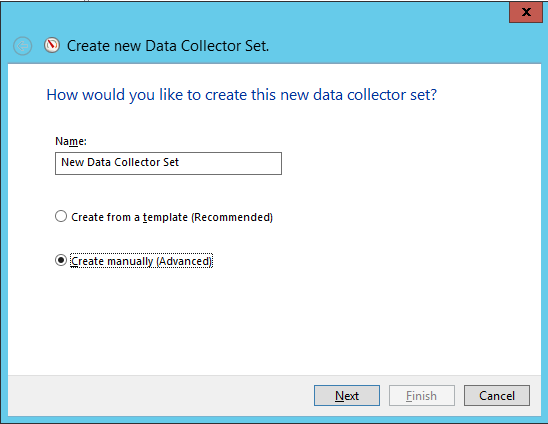
Добавьте в список наборов счетчиков (Data Collector Sets) новый набор (User Defined – пользовательский):

Настройка будет осуществляться вручную – в диалоговом окне нужно выбрать соответствующий пункт и нажать «Далее»:
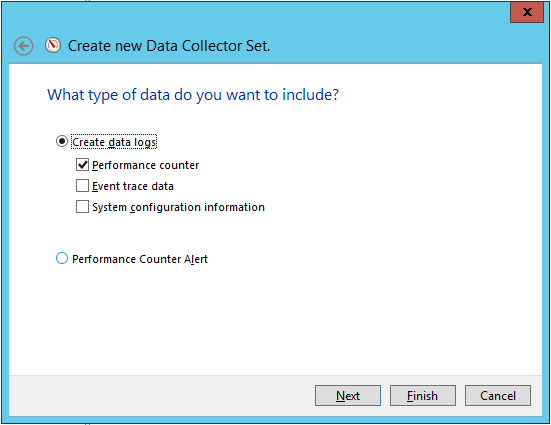
Выберите, какие именно данные будут собираться. Нас интересуют Счетчики производительности:
На следующем шаге выбираются сами счетчики, которые будут входить в набор.

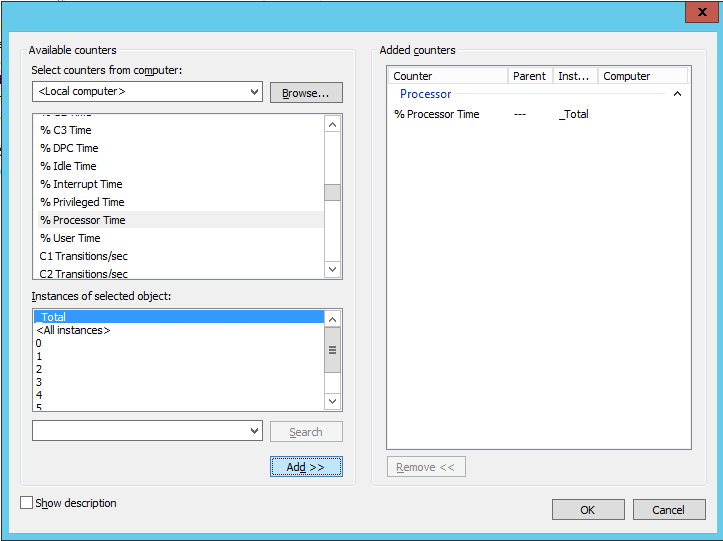
Мы рекомендуем в обязательном порядке собирать данные по следующим счетчикам:
«\Processor(_Total)\Interrupts/sec»
«\LogicalDisk(_Total)\% Free Space»
«\Memory\Available Mbytes»
«\PhysicalDisk(_Total)\Avg. Disk Queue Length»
«\PhysicalDisk(_Total)\Avg. Disk Sec/Read»
«\PhysicalDisk(_Total)\Avg. Disk Sec/Write»
«\Processor(_Total)\% Idle Time»
«\Processor(_Total)\% Processor Time»
«\Processor(_Total)\% User Time»
«\System\Context Switches/sec»
«\System\File Read Bytes/sec»
«\System\Context Switches/sec»
«\System\File Read Bytes/sec»
«\System\File Write Bytes/sec»
«\System\Processes»
«\System\Processor Queue Length»
«\System\Threads»
Состав счетчиков может меняться в зависимости от роли компьютера. Например, для сервера приложений 1С:Предприятие к перечисленным выше стоит добавить показатели работы процессов 1с:Предприятие:
«\Process(«1cv8*»)\% Processor Time»
«\Process(«1cv8*»)\Private Bytes»
«\Process(«1cv8*»)\Virtual Bytes»
«\Process(«ragent*»)\% Processor Time»
«\Process(«ragent*»)\Private Bytes»
«\Process(«ragent*»)\Virtual Bytes»
«\Process(«rphost*»)\% Processor Time»
«\Process(«rphost*»)\Private Bytes»
«\Process(«rphost*»)\Virtual Bytes»
«\Process(«rmngr*»)\% Processor Time»
«\Process(«rmngr*»)\Private Bytes»
«\Process(«rmngr*»)\Virtual Bytes»
Обратите внимание, что имена счетчиков могут незначительно отличаться в зависимости от версии вашей операционной системы
Рекомендуемая частота получения значений для рабочей системы – один раз в 15 секунд. В нагрузочных тестах рекомендуем собирать счетчики чаще, например, один раз в 1 секунду, т.к. длительность каждого непрерывного нагрузочного теста обычно не превышает десятка часов, а анализировать более детальные данные удобнее.По окончании выбора нажмите «Далее», укажите директорию хранения логов, при необходимости – пользователя, от имени которого будет запускаться процесс сборщика, и сохраните набор.
Откройте для дальнейшего редактирования его свойства (например, кликнув по нему в списке двойным щелчком мыши):

Можно выбрать формат файла логирования: бинарный удобен, если планируется анализировать графические данные, CSV – если планируется как-либо программно обрабатывать данные. В данном примере выбран бинарный.

На закладке «Files» можно настроить шаблон имени файлов и режим записи. Для сохраненного набора также можно настроить расписание и задать ограничения и условия окончания сбора.

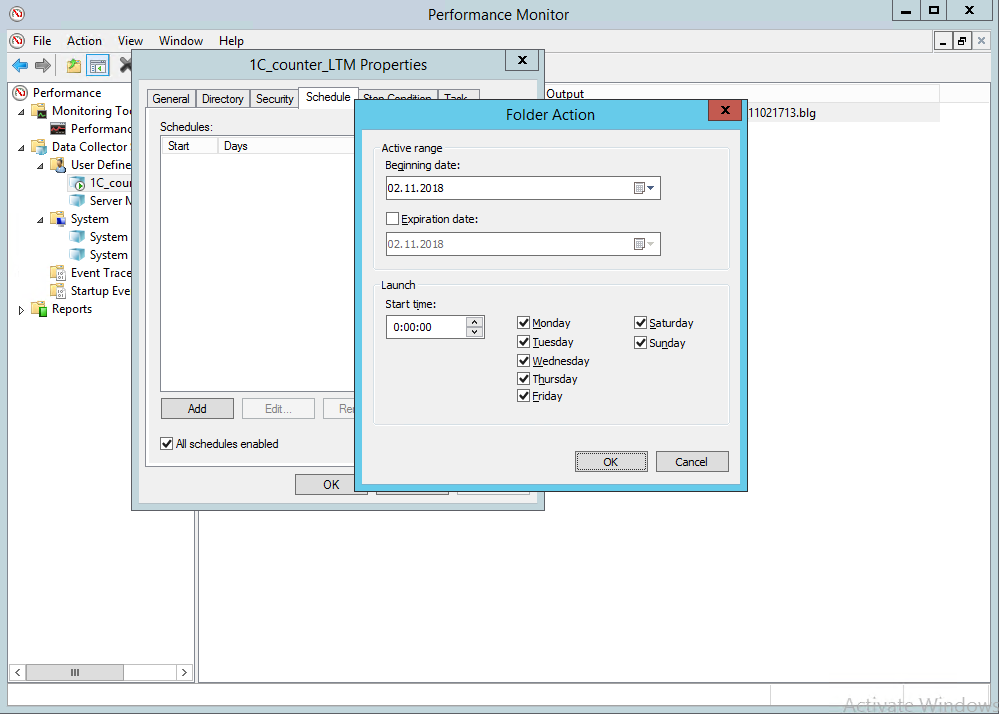
В данном случае замер не стартует автоматически, но на продуктивных площадках рекомендуется не забыть настроить планировщик задач на автозапуск выбранного счетчика, например, каждый час, если сбор данных ещё не запущен.
После сохранения можно запустить замер (при помощи кнопки Start контекстного меню).
Создать набор счетчиков Performance Monitor и управлять сбором данных можно не только интерактивно, но и при помощи консольной утилиты logman. Подробно работа с ней описана на сайте Microsoft https://docs.microsoft.com/en-us/windows-server/administration/windows-commands/logman
Команда создания набора будет выглядеть так:
logman create counter 1C_counter -f bincirc -c «\Processor(_Total)\Interrupts/sec» «\LogicalDisk(_Total)\% Free Space» «\Memory\Available Mbytes» «\PhysicalDisk(_Total)\Avg. Disk Queue Length» «\PhysicalDisk(_Total)\Avg. Disk Sec/Read» «\PhysicalDisk(_Total)\Avg. Disk Sec/Write» «\Processor(_Total)\% Idle Time» «\Processor(_Total)\% Processor Time» «\Processor(_Total)\% User Time» «\System\Context Switches/sec» «\System\File Read Bytes/sec» «\System\Context Switches/sec» «\System\File Read Bytes/sec» «\System\File Write Bytes/sec» «\System\Processes» «\System\Processor Queue Length» «\System\Threads» -si 5 -v mmddhhmm
Анализ сохраненного замера
Для просмотра данных откройте бинарный файл замера .blg, по умолчанию Windows откроет такой тип при помощи Performance Monitor:
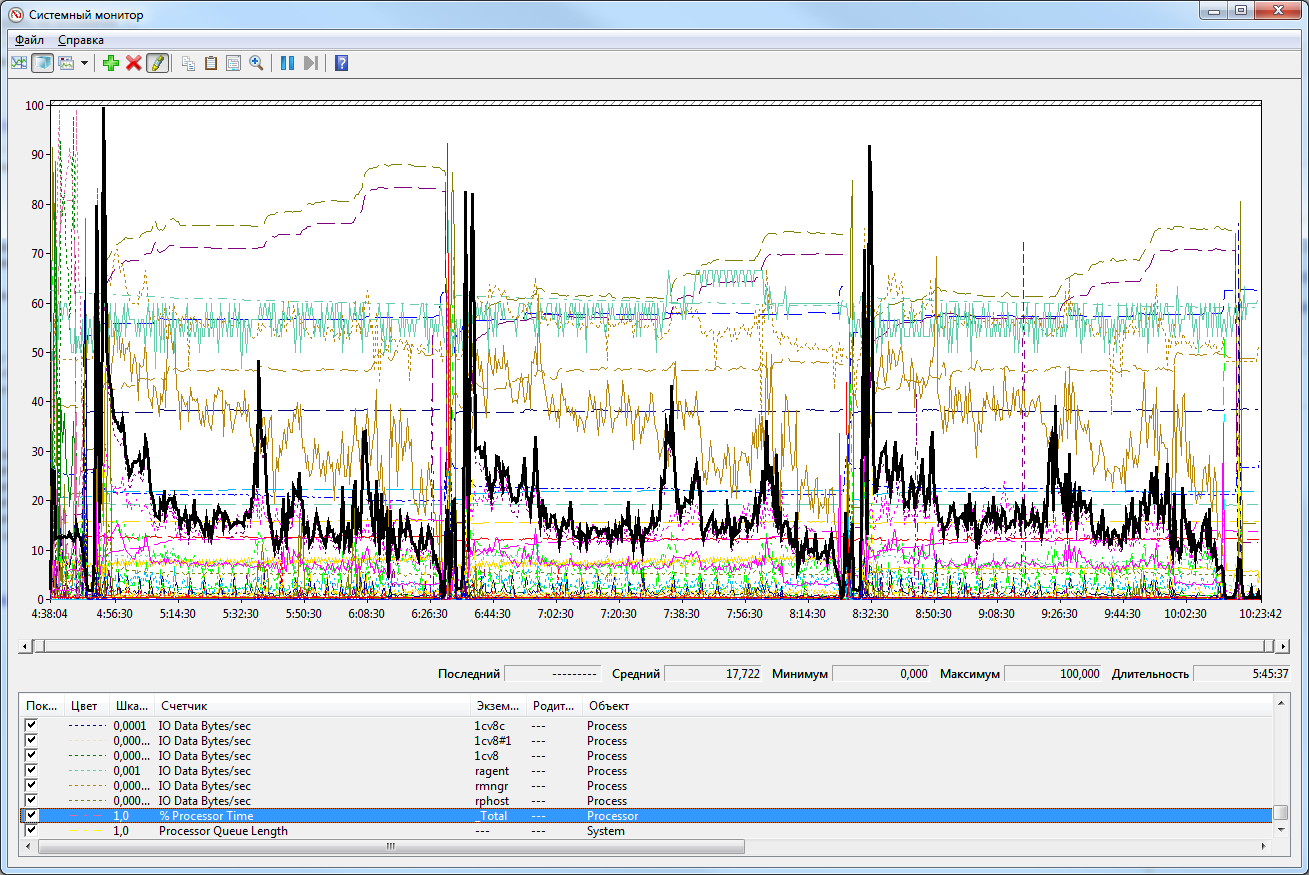
Выделить график, относящийся к конкретному счетчику, можно, встав на линию графика либо на строку счетчика в списке снизу. Для него при этом отобразятся среднее, минимальное, максимальное и последнее значение за период замера:

Интерес представляют, как правило, среднее значение и «пики» — максимум / минимум в зависимости от смысла счетчика.
Ниже в таблице приведены описания и предельные значения некоторых из них:
How to Use Disk Management in Windows Server 2012?
This article will introduce you the Disk Management in Windows Server 2012. Here you can learn how to open it and how to use it for partitioning hard drive.

By Cherry  / Last Updated August 5, 2020
Content
Overview of Disk Management in Windows Server 2012
Want to partition hard dive in Windows Server 2012 with the disk partition tool Disk Management? You need to know it before using.
Windows Server 2012 Disk Management is a built-in tool for users to manage hard drive on the Server 2012. Its main features are listed below:
Connect and initialize disks.
Create a basic, spanned, or striped partition.
Delete volumes or partitions.
Format a volume or partition with ExFAT, NTFS, or ReFS.
Convert the empty basic disk to dynamic or to GPT/MBR partition style.
Extend and shrink NTFS volumes or partitions.
With all the features, it is convenient for Windows Server 2012 users to manage hard drives. Most of the operations can be finished without reboot or interruption.
How to use Disk Management in Windows Server 2012?
But how to use Disk Management in Windows Server 2012? First, you need to open this tool. To open Disk Management in Server 2012, here provides you three different ways.
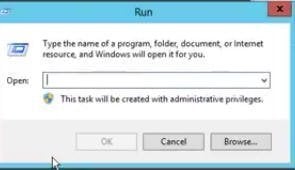
1. Right-click Start menu. Select Run program. In the Run dialog, type diskmgmt.msc and press Enter key. It will show you the Disk Management window.
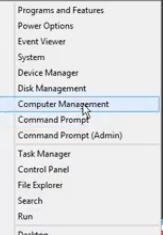
2. You can also right-click the Start menu, select Computer Management program here directly and click it. The Disk Management tool will be opened immediately.
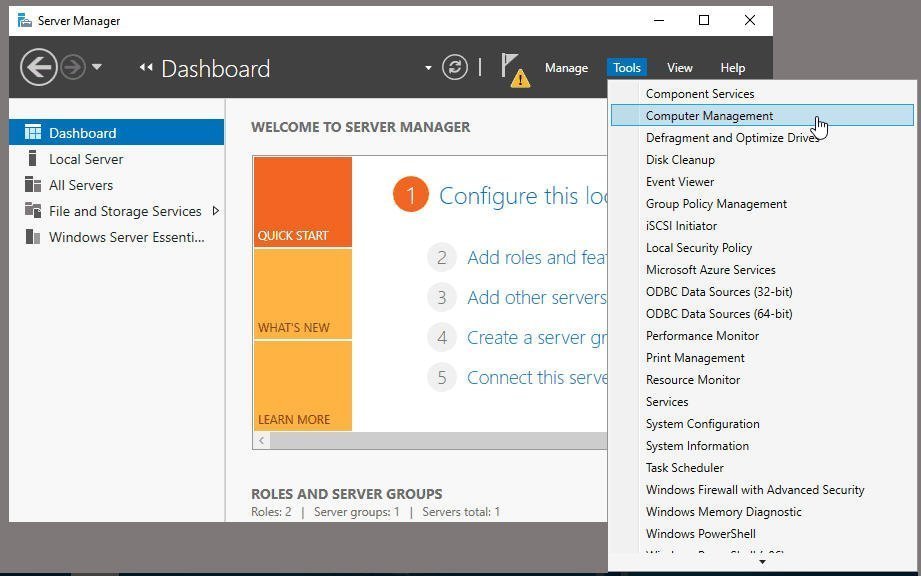
3. Or you can open the Windows File Explorer, in the following window, right-click Computer, select Manage.
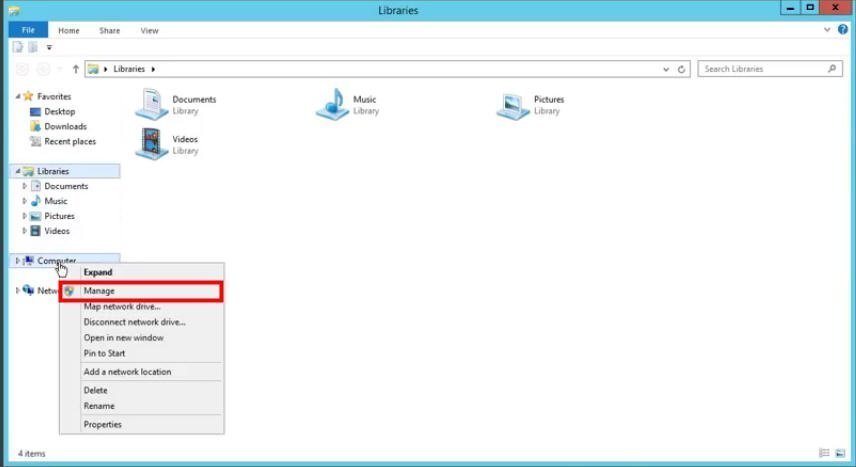
It will show you a Server Manager window, click Tools -> Computer Management to open the program.
After opening the Disk Management, you can start to use it to partition hard drive for Server 2012. You can right-click on a disk or partition, and then, it will display a menu listing all options for different operations. For example, to extend partition with Disk Management:
In the following screenshot, we are going to extend E: drive with the unallocated space behind it. Right-click E: drive, select Extend Volume.
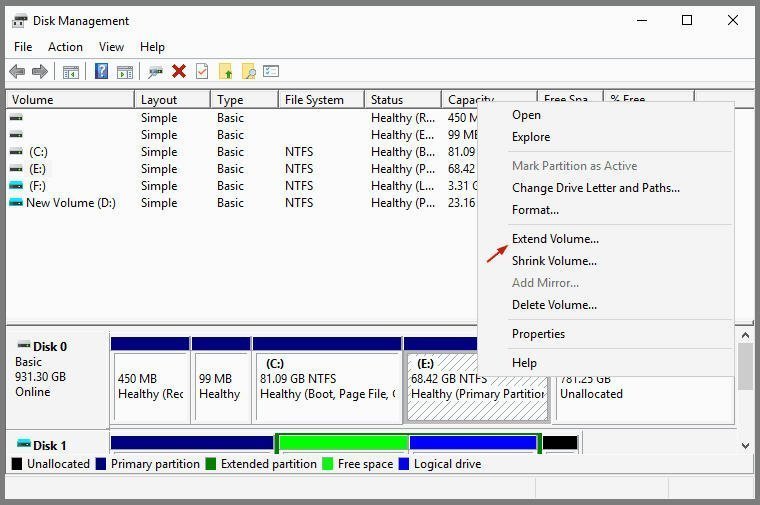
In the Extend Volume Wizard window, select the unallocated space and click Next. Then, the E: drive will be extended with the unallocated space in seconds.
However, using Windows Server 2012 Disk Management is not always so easy. Sometimes, you will find out the option greyed out. The Extend Volume greyed out, the Shrink Volume greyed out, the convert to MBR Disk option greyed out, etc. Disk Management in Windows Server 2012 still has restrictions. It can only extend a partition when there is a contiguous unallocated space on the right side of the partition that should be extended. You can only use it to convert an empty disk to MBR disk, what worse is, Windows won’t allow you to delete any system related partitions, so you can’t convert system disk to MBR/GPT with Disk Management.
Fortunately, there is an alternative to Windows Server 2012 Disk Management, the AOMEI Partition Assistant Server, which has left all restrictions of Disk Management and provides many other excellent functions.
Windows Server 2012 DM alternative: AOMEI Partition Assistant Server
AOMEI Partition Assistant Server should be the best alternative to the Windows Disk Management. It can be used on Windows Server 2019, 2016, 2012 (R2), 2008 (R2), 2003, and Windows 10/8/7/Vista/XP. Compared with Disk Management in Windows Server, AOMEI Partition Assistant Server provides more flexible and more advanced features:
Resize Partition. You can use this feature to extend/shrink partitions or volumes no matter the contiguous unallocated space is on the left or right side.
Move Partition. This function is still missing in Windows Disk Management.
Merge Partitions. Merge two partitions into one without losing data.
Wipe Hard Drive.
Convert MBR to GPT Disk/Convert GPT to MBR Disk. You can convert disk between MBR and GPT without losing data including the system disk.
Create Bootable Media.
Migrate OS to SSD.
There are so many excellent features in AOMEI Partition Assistant Server. You can download the demo version of it to have a try.
It provides you an easy-to-use interface. For example, use AOMEI Partition Assistant Server to extend or shrink partition:
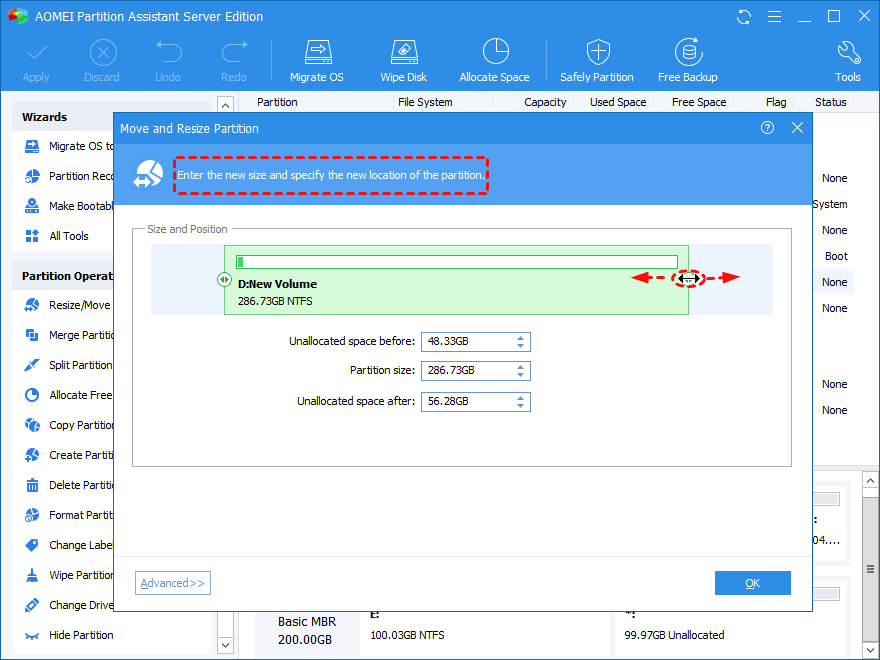
Step 1. Install the program on your Windows Server 2012 and launch it. It will show you its main interface with the basic environment of your hard disk(s). to extend or shrink a partition, here you need to right-click the partition, select Resize Partition.

Step 2. Then, you can drag the slider to move and resize the partition.
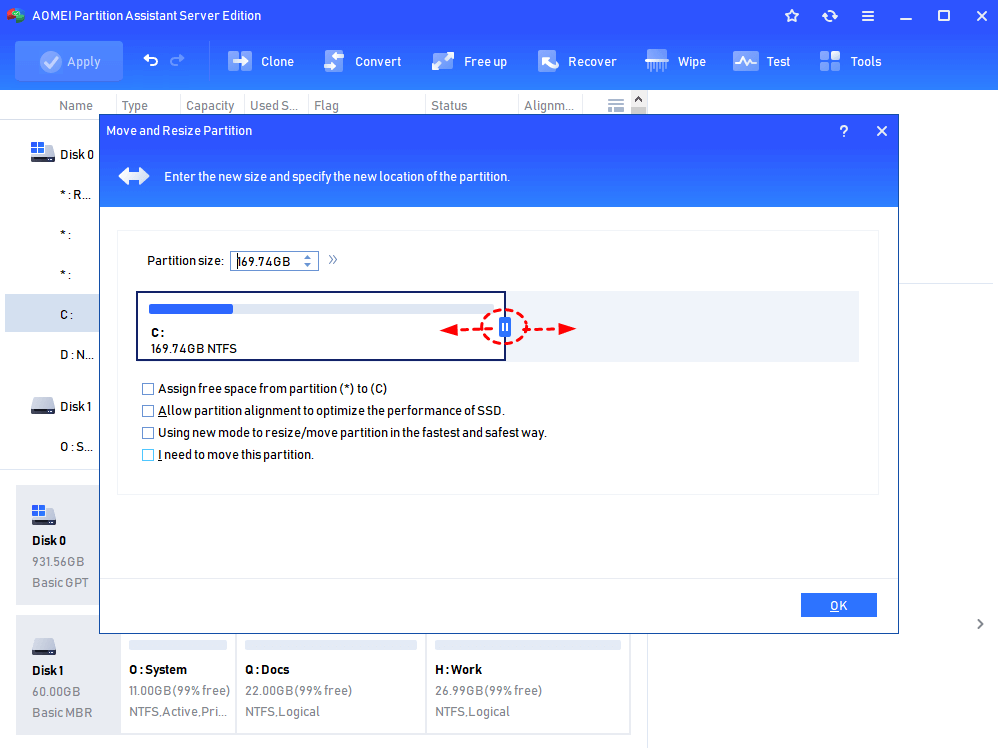
Step 3. When you get the unallocated space from resizing partition, you can use the unallocated space to extend another partition or create a new partition. Here we right-click the C: drive, select Resize Partition again.
Step 4. In the window below, drag the slider to decide how much you want to extend the partition.
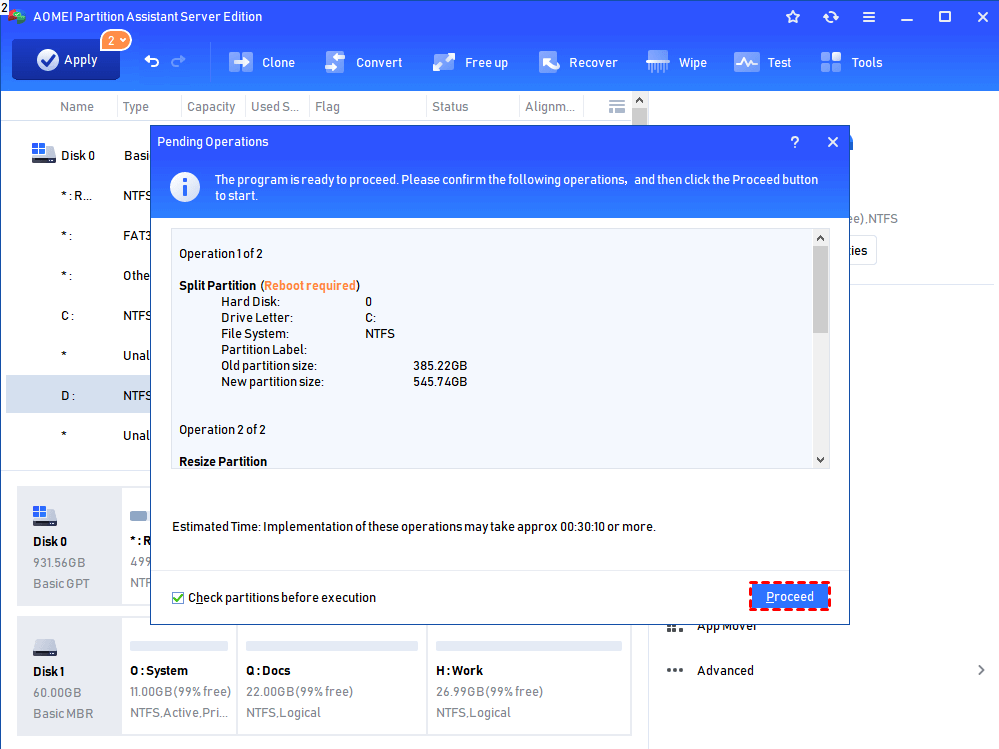
Step 5. Before executing the operation, you can preview all operations. If there is no problem, click Apply to submit.
Conclusion
AOMEI Partition Assistant Server is such a powerful disk partition tool for Windows Server. It should be the best alternative to Disk Management in Windows Server 2012. By the way, if you need to use this software for service providers to solve disk partition problem of their clients or install it on multiple PCs, you can consider the AOMEI Partition Assistant Technician edition or Unlimited edition based on your needs.


