- Настройка стартового экрана RDS в Windows Server 2012
- How to Get Start Button and Start Menu in Windows 2012, 2012 R2 Server
- Get Back the Start Button and Start Menu in Windows 2012, 2012 R2 Server
- Common Management Tasks and Navigation in Windows
- Open the Start menu
- Open the Start screen
- Shut down or restart the computer
- To shut down the computer in Windows Server Technical Preview or Windows 10 Technical Preview
- To shut down the computer in Windows Server 2012 R2, Windows Server 2012, Windows 8.1, or Windows 8
- To restart the computer in Windows Server Technical Preview or Windows 10 Technical Preview
- To restart the computer in Windows Server 2012 R2, Windows Server 2012, Windows 8.1, or Windows 8
- Lock the computer or sign out
- To lock the computer in Windows Server Technical Preview or Windows 10 Technical Preview
- To lock the computer in Windows Server 2012 R2, Windows Server 2012, Windows 8.1, or Windows 8
- To sign out from the computer in Windows Server Technical Preview or Windows 10 Technical Preview
- To sign out from the computer in Windows Server 2012 R2, Windows Server 2012, Windows 8.1, or Windows 8
- Close a Windows app
- To close a Windows app in Windows Server Technical Preview or Windows 10 Technical Preview
- To close a Windows app in Windows Server 2012 R2, Windows Server 2012, Windows 8.1, or Windows 8
- Access Settings for the current screen
- To open the Settings bar
- Access Control Panel
- To open Control Panel from the Start menu in Windows Server Technical Preview or Windows 10 Technical Preview
- To open Control Panel from the Start screen in Windows Server 2012 R2, Windows Server 2012, Windows 8.1, or Windows 8
- To open Control Panel from the desktop in Windows Server Technical Preview or Windows 10 Technical Preview
- To open Control Panel from the desktop in Windows Server 2012 R2, Windows Server 2012, Windows 8.1, or Windows 8
- To open common Control Panel tools by using typed commands
- To add Control Panel to the desktop
- Access Administrative Tools
- To access Administrative Tools in Server Manager
- To open the Administrative Tools folder from the Start menu in Windows Server Technical Preview or Windows 10 Technical Preview
- To open the Administrative Tools folder from the Start screen in Windows Server 2012 R2, Windows Server 2012, Windows 8.1, or Windows 8
- To open the Administrative Tools folder from the Control Panel
- Create shortcuts
- To create a shortcut on the desktop
- To pin a program to the desktop taskbar from the Start menu in Windows Server Technical Preview or Windows 10 Technical Preview
- To pin a program to the desktop taskbar from the Start screen in Windows Server 2012 R2, Windows Server 2012, Windows 8.1, or Windows 8
- To pin a program to the desktop taskbar from File Explorer
- To pin a program or folder to the Start screen
- Open the Run dialog box
- To open the Run dialog box
- Run a program as administrator or as another user
- To run a program as administrator from the Start screen or Start menu
- To run a program as administrator from the desktop
- To run a program as another user
- Open Server Manager
- To open Server Manager from the Start screen
- To open Server Manager from the desktop
- Start Windows PowerShell
- To start Windows PowerShellв„ў from the Start screen
- To start Windows PowerShell from the desktop
- To start Windows PowerShell with elevated user rights (Run as administrator)
- Open Remote Desktop Connection
- To open Remote Desktop Connection from the Start screen
- To open Remote Desktop Connection from the desktop
- Open Command Prompt
- To open Command Prompt from the Start screen
- To open Command Prompt from the desktop
- To open Command Prompt with elevated user rights (Run as administrator)
- Open Microsoft Management Console (MMC) and snap-ins
- To open MMC from the Start screen
- To open MMC from the desktop
- To open an MMC snap-in from the Start screen
- To open an MMC snap-in from the desktop
- To open Event Viewer
- Keyboard shortcuts
- Keyboard shortcuts that are unchanged from WindowsВ 7 or Windows ServerВ 2008В R2
- Keyboard shortcuts that are new for Windows Server 2012 R2, Windows 8.1, Windows Server 2012, and Windows 8
- Use keyboard shortcuts in a Remote Desktop session
- To apply keyboard shortcuts to a Remote Desktop session
- Use keyboard shortcuts in Hyper-V virtual machines
- To apply keyboard shortcuts to new virtual machine connections
Настройка стартового экрана RDS в Windows Server 2012
Как вы, вероятно, помните, в Windows 8 полностью отсутствует меню Пуск (Start Menu), функционал которого заменен новым плиточным интерфейсом под названием стартовый экран (Modern UI Start Screen). Этот факт касается и серверной платформы — Windows Server 2012. Это означает, что при входе терминального пользователя на сервер Windows 2012 с ролью сервера терминалов (RD Session Host) с установленной функцией «Desktop experience”, пользователю отображается не привычный рабочий стол сервера, а начальный экран Start Screen .
Соответственно, у администраторов терминальных служб появляются вопросы по настройке и управлению этим самым стартовым меню. В Windows Server 2008 R2 управление содержим меню Start осуществлялось (способ, рекомендуемый в best practice) путем перенаправления меню Start с помощью групповой политики в некую общую папку с ярлыками приложений, в которой отображение того или иного ярлыка определялось путем назначением на него NTFS прав и активного режима Access Based Enumeration. Что будет, если применить данную политику (User Configuration -> Windows Settings -> Folder Redirection -> Start Menu) к серверу с Windows 2012 RDS?

В Windows 2012 Remote Desktop при первом входе пользователя на «рабочий стол» терминального сервера он видит полностью пустой Start Screen:

Дело в том, что Start Screen просто не воспринимает политики перенаправления папки стартового меню (Start Menu), которое использовалось в Windows Server 2008 R2. Ведь по новой концепции Microsoft это не одно и то же. Вместо этого данная политика перенаправляет меню All Apps в указанный в политике каталог.
Чтобы получить доступ к списку установленных программ, щелкните правой клавишей по начальному экрану (или нажмите комбинацию клавиш CTRL-TAB.

В меню All Apps отобразится список ярлыков приложений, к которым у пользователя есть доступ (если на общем каталоге с ярлыками активна ABE и назначены NTFS права).

Из данного меню пользователь может вынести нужные ему ярлыки на начальный экран, щелкнув правой клавишей по ярлыку и выбрав пункт Pin to Start.

Таким образом, терминальный пользователь может настроить собственный начальный экран Metro UI (ака рабочий стол). Естественно, если данную операцию придется выполнять каждому пользователю сервера терминалов – это вызовет определённые проблемы и неудобства. Попробуем разобраться, можно ли экспортировать настройки стартового экрана у пользователя и групповой политикой назначить их всем остальным пользователям терминального сервера.

В Windows Server 2012 настройки стартового экрана хранятся в файле appsfolder.itemdata-ms, находящимся в каталоге %userprofile% \Default\appdata\local\microsoft\windows\appsfolder.itemdata-ms. Данный файл необходимо скопировать из профиля текущего пользователя и скопировать его в каталог C:\Users\Default\appdata\local\microsoft\windows\appsfolder.itemdata-ms. В этом случае все пользователи при первом входе на терминал получили бы новый профиль с настроенными ярлыками StartScreen.
Согласитесь, получается не очень гибкая конфигурация. К счастью в релизе Windows Server 2012 R2 (и Windows 8.1) появится новая возможность экспорта конфигурации Start Screen.
Текущие настройки стартового экрана Start Screen пользователя можно выгрузить в XML файл с помощью команды Powershell export-startlayout

В дальнейшем данный файл можно скопировать в общий каталог и распространить с помощью групповой политики Start Screen Layout, находящейся в разделе User Configuration -> Policies -> Administrative Templates -> Start Menu and Taskbar. В данной политике нужно задать путь к сохраненному xml файлу, задающему настройки Start screen.
 Подробнее о возможностях и особенностях экспорта/импорта макета стартового экрана в статье: Управление конфигурацией плиточного стартового экрана в Windows 8.1
How to Get Start Button and Start Menu in Windows 2012, 2012 R2 Server
Here is the way to get back the traditional start menu and start button in Windows 2012 or 2012 R2 server operating systems. Previously Sysprobs published an article about how to show my computer icon in same server 2012/2012R2. Like Windows 8, Windows 2012 and R2 servers also come without start button and menu. Therefore you may feel uneasy while using this OS initially. If you like to get the start button/menu back, you can follow these steps. It works well on Windows 2012 standard and data center versions.
Okay here is an important point, getting back the start button and menu in Windows 2012/2012R2 is not like showing My computer icon or installing desktop experience, which means it is not a hidden Windows feature that can be installed or enabled in OS level. It can be done by a third party software only. Therefore, before trying this method on your production Windows 2012 server, double check whether really you want this feature by installing a third party software. Somehow I do not recommend this in the production environment as these types of applications might open security holes in the server OS. Anyhow, if you are running Windows 2012 in a virtualized environment for testing or learning purpose, then you can try this method.
This small start button application built for Windows 8 desktop version, but the same one works for Server 2012 too.
Get Back the Start Button and Start Menu in Windows 2012, 2012 R2 Server
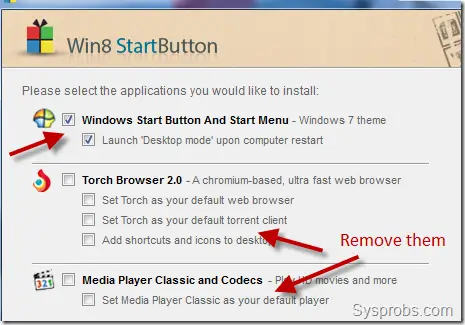
You can download Classic Shell and install on the server. I recommend to select ‘Custom installation’ as shown below.
By this custom installation method we can avoid unwanted extra programs during the installation as below. The above screenshot was taken from a similar tool built on the classic shell, but applicable for the classic shell original version.
A restart may require after the installation. Once rebooted, you can see the familiar start button and start menu in Windows 2012 or 2012 R2 server. To customize this start button and menu, you have to use the particular application settings only. Do not look for the normal Windows settings for it.
If you are looking for a similar Windows 8 start button applications, you can find them here at cnet.com, but I’m not sure how they will be working on Windows 2012 server.
I have found an interesting article on getting back some of your favorite server GUI features on Windows 2012, you can go through this guide. It explains each step nicely to work with Windows 2012 server GUI including Background Info (BGI).
I’m sure it will be big relieved to see the start button and menu on these older Windows server versions with the Classic Shell too.
Dinesh
Dinesh is the founder of Sysprobs and written more than 400 articles. Enthusiast in Microsoft and cloud technologies with more than 15 years of IT experience.
Common Management Tasks and Navigation in Windows
Applies To: Windows Server 2012, Windows Server 2012 R2
Windows ServerВ® 2012 R2, WindowsВ® 8.1, Windows ServerВ® 2012, and WindowsВ® 8 feature the new Modern user interface. This topic helps you find and open common management tools, create shortcuts to frequently-used programs, run programs with elevated user rights, and perform common tasks like signing in and out, restarting, and shutting down computers that are running Windows Server 2012 R2, Windows 8.1, Windows Server 2012, or Windows 8.
Windows Server 2016 Technical Preview and Windows 10 include updates to the Modern user interface, such as the restoration of a Start menu that includes tool and app folders.
You can install Windows Server 2016 Technical Preview, Windows Server 2012 R2, or Windows Server 2012 with a minimal user interface that is well-suited to remote management. For more information, see Windows Server Installation Options.
Use common IT Pro tools:
Open the Start menu
In Windows Server 2016 Technical Preview and Windows 10, click the Start button to open the Start menu.
Open the Start screen
The Start screen is the home of Windows apps. To open the Start screen, use one of these methods:
Press the Windows logo key. In a virtual machine, you can press Ctrl+Esc.
Hover the mouse cursor in the upper right corner of the screen, and then click Start.
On the desktop, hover the mouse cursor in the lower left corner of the screen, and click when the thumbnail of the Start screen appears.
Shut down or restart the computer
To shut down the computer in Windows Server Technical Preview or Windows 10 Technical Preview
Click Start.
On the Start menu, click the Power button.
Click Shut Down.
To shut down the computer in Windows Server 2012 R2, Windows Server 2012, Windows 8.1, or Windows 8
Hover the mouse cursor in the upper right corner of the screen, and then click Settings.
Click Power, and then click Shut down.
In the Windows 8.1 Spring 2014 release, you can shut down the computer by clicking the Power button on the Start screen to the right of your user name.
To restart the computer in Windows Server Technical Preview or Windows 10 Technical Preview
Click Start.
On the Start menu, click the Power button.
Click Restart.
To restart the computer in Windows Server 2012 R2, Windows Server 2012, Windows 8.1, or Windows 8
Hover the mouse cursor in the upper right corner of the screen, and then click Settings.
Click Power, and then click Restart.
Lock the computer or sign out
To lock the computer in Windows Server Technical Preview or Windows 10 Technical Preview
Click Start.
On the Start menu, click your user name.
Click Lock.
To lock the computer in Windows Server 2012 R2, Windows Server 2012, Windows 8.1, or Windows 8
- On the Start screen, click your user name in the upper right corner, and then click Lock. Alternatively, on the Start screen, press the Windows logo key+L.
To sign out from the computer in Windows Server Technical Preview or Windows 10 Technical Preview
Click Start.
On the Start menu, click your user name.
Click Sign out.
To sign out from the computer in Windows Server 2012 R2, Windows Server 2012, Windows 8.1, or Windows 8
- On the Start screen, click your user name in the upper right corner, and then click Sign out.
Close a Windows app
When Windows apps like Internet Explorer are open but not in use, they are automatically minimized and become inactive, freeing resources for other apps. This functionality is similar to a cell phone, tablet PC, or other mobile computer. It is not necessary to close an app, but you can follow steps in this section if you want to do so.
To close a Windows app in Windows Server Technical Preview or Windows 10 Technical Preview
- With the app active, click the X (Close) button in the upper right corner of the app.
To close a Windows app in Windows Server 2012 R2, Windows Server 2012, Windows 8.1, or Windows 8
With the app active, hover at the top edge of the screen until the mouse cursor becomes a hand. Click and drag the app to the bottom of the screen, and then release.
In the WindowsВ® 8.1 Spring 2014 release, you can close a Windows app by clicking the X (Close) button in the upper right corner of the app.
Access Settings for the current screen
To open the Settings bar
Press the Windows logo key+i to open the Settings bar for the current screen (for example, Start, the desktop, or a Windows app).
In Windows ServerВ® 2012 R2, WindowsВ® 8.1, Windows ServerВ® 2012, and WindowsВ® 8, you can also hover the mouse cursor in the upper right corner of the screen, and then click Settings.
Access Control Panel
You can access Control Panel from the Start screen or Start menu, and from the desktop.
To open Control Panel from the Start menu in Windows Server Technical Preview or Windows 10 Technical Preview
Click Start.
On the Start menu, click All Apps.
Click Windows System, and then click Control Panel.
To open Control Panel from the Start screen in Windows Server 2012 R2, Windows Server 2012, Windows 8.1, or Windows 8
- On the Start screen, click Control Panel.
To open Control Panel from the desktop in Windows Server Technical Preview or Windows 10 Technical Preview
Press the Windows logo key+i to open the Settings bar.
Click Control Panel.
To open Control Panel from the desktop in Windows Server 2012 R2, Windows Server 2012, Windows 8.1, or Windows 8
On the desktop, hover the mouse cursor in the upper right corner of the screen, and then click Settings.
Click Control Panel.
To open common Control Panel tools by using typed commands
On the Start screen (or the Start menu in Windows 10 or Windows Server 2016 Technical Preview, type one of the following, and then press Enter to open common Control Panel management tools.
ncpa.cpl to open Control Panel\Network and Internet\Network Connections.
sysdm.cpl to open the System Properties dialog box that is available at Control Panel\System and Security\System\Advanced System Settings.
appwiz.cpl to open Control Panel\Programs\Programs and Features\Uninstall or change a program.
inetcpl.cpl to open the Internet Properties dialog box that is available at Control Panel\Network and Internet\Internet Options.
For more Control Panel tool commands that you can type directly on the Start screen, see How to run Control Panel tools by typing a command.
To add Control Panel to the desktop
Open Control Panel.
In the Control Panel Search box, type desktop.
In the Control Panel Search results, in Display, click Show or hide common icons on the desktop.
In Desktop Icon Settings, select Control Panel, and then click OK.
Access Administrative Tools
The Administrative Tools folder contains links to many common Microsoft Management Console (MMC) snap-ins, including Computer Management, Event Viewer, and the management tools for installed roles or features.
The Start screen settings (accessed by pressing the Windows logo key+ i on the Start screen) include an option to allow or prevent tools in the Administrative Tools folder from being displayed in search results and on the Start screen. This setting is enabled by default.
To access Administrative Tools in Server Manager
- In the Server Manager menu bar, click Tools to access the contents of the Administrative Tools folder.
To open the Administrative Tools folder from the Start menu in Windows Server Technical Preview or Windows 10 Technical Preview
Click Start.
On the Start menu, in the Search box, start typing Administrative Tools.
Click the Administrative Tools folder when it is displayed in search results.
Alternatively, you can open Administrative Tools from Control Panel\System and Security\Administrative Tools.
If you are running Remote Server Administration Tools for Windows 10 on Windows 10, or you are running the full installation option of Windows Server 2016 Technical Preview, you can access administrative tools from the Tools menu in Server Manager.
To open the Administrative Tools folder from the Start screen in Windows Server 2012 R2, Windows Server 2012, Windows 8.1, or Windows 8
- On the Start screen, click Administrative Tools. You can also type Administrative Tools on the Start screen, and then click Administrative Tools in the list of results.
If the Show Administrative tools setting is turned off, the Administrative Tools folder and its contents will not appear in the Settings results. The Show Administrative tools setting is available when you hover the mouse cursor over the upper or lower right edge of the Start screen, click Settings , and then click Tiles .
To open the Administrative Tools folder from the Control Panel
- Open Control Panel, click System and Security, and then click Administrative Tools.
Create shortcuts
To create a shortcut on the desktop
In File Explorer, navigate to the location of the program for which you want to create a shortcut.
Right-click the executable file in the program folder, and then click Create shortcut. Because of restricted user access rights, Windows does not allow shortcuts to be created in some folders, including the Program Files folder.
Drag the shortcut to a folder of your choice, to the desktop, or to the desktop taskbar. If the shortcut cannot be created in the location of the executable file (typically because the access rights for the Program Files folder are restricted), and you are prompted to select a location for the shortcut, browse to the Desktop folder.
To pin a program to the desktop taskbar from the Start menu in Windows Server Technical Preview or Windows 10 Technical Preview
Click Start, and find the app you want to pin to the taskbar.
Right-click the app shortcut, and then click Pin to taskbar.
To pin a program to the desktop taskbar from the Start screen in Windows Server 2012 R2, Windows Server 2012, Windows 8.1, or Windows 8
On the Start screen, search for or navigate to the app that you want to pin to the desktop taskbar.
Right-click the app tile, and in the app bar, click Pin to taskbar.
To pin a program to the desktop taskbar from File Explorer
Open File Explorer.
Navigate to the folder where the program that you want to pin to the desktop taskbar is located.
Right-click the executable file in the program folder, and then click Pin to Taskbar.
To pin a program or folder to the Start screen
Open File Explorer.
Navigate to the program or folder that you want to pin to the Start screen.
Right-click the executable file or folder, and then click Pin to Start.
Open the Run dialog box
To open the Run dialog box
On the desktop, press the Windows logo key+R to open the Run dialog box.
Alternatively, on the Start screen, type Run, and then press Enter. In Windows 10 and Windows Server 2016 Technical Preview, type Run in the Start menu Search box.
Run a program as administrator or as another user
To run a program as administrator from the Start screen or Start menu
On the Start screen or Start menu, navigate to the app that you want to run as Administrator.
Right-click the app shortcut or tile, and then click Run as administrator.
To run a program as administrator from the desktop
Right-click the executable file in File Explorer, or right-click the program shortcut on the desktop.
Click Run as administrator.
To run a program as another user
Do one of the following.
Add the Run as a different user command to the app bar by enabling the following Group Policy setting: User Configuration/Administrative Templates/Start Menu and Taskbar/Show «Run as different user» command on Start. To start Local Group Policy Editor, on the Start screen, type gpedit.msc, and then press Enter.
Use the runas command from a command prompt. For more information about how to use the runas command, at a command prompt, type runas /?, and then press Enter.
Open Server Manager
By default, Server Manager starts when a member of the Administrators group signs in to a computer that is running Windows Server 2012 R2 or Windows Server 2012. If Server Manager is not already open, if you are a standard (non-Administrator) user on the server, or if administrators have changed Server Manager default settings so that it does not open automatically at sign-in, open Server Manager by using procedures in this section.
To open Server Manager from the Start screen
- On the Start screen, click Server Manager.
If the Show Administrative tools setting is disabled, the Server Manager tile does not appear on the Start screen.
To open Server Manager from the desktop
- On the taskbar, click Server Manager.
Start Windows PowerShell
To start Windows PowerShellв„ў from the Start screen
- On the Start screen, click Windows PowerShell.
To start Windows PowerShell from the desktop
- On the taskbar, click Windows PowerShell.
To start Windows PowerShell with elevated user rights (Run as administrator)
To run Windows PowerShell as an administrator from the Start screen, right-click the Windows PowerShell tile, and in the app bar, click Run as administrator.
To run Windows PowerShell as an administrator from the desktop, right-click the Windows PowerShell shortcut in the taskbar, and then click Run as Administrator.
Open Remote Desktop Connection
To open Remote Desktop Connection from the Start screen
On the Start screen, type mstsc.
In the Search Apps results, click mstsc.
To open Remote Desktop Connection from the desktop
On the desktop, press the Windows logo key+R to open the Run dialog box.
In the Run dialog box, type mstsc, and then press Enter.
Open Command Prompt
To open Command Prompt from the Start screen
On the Start screen, type cmd.
In the Apps results, click cmd.
To open Command Prompt from the desktop
On the desktop, press the Windows logo key+R to open the Run dialog box.
In the Run dialog box, type cmd, and then press Enter.
To open Command Prompt with elevated user rights (Run as administrator)
Do one of the following.
To run Command Prompt as an administrator from the Start screen on Windows Server 2012 R2, type cmd, right-click Command Prompt in the Search results, and on the shortcut menu, click Run as administrator.
To run Command Prompt as an administrator from the Start screen on Windows Server 2012, type cmd, right-click Command Prompt in the Apps results, and then in the taskbar, click Run as Administrator.
Open Microsoft Management Console (MMC) and snap-ins
To open MMC from the Start screen
On the Start screen, type mmc.
In the Apps or Search results, click mmc.
To open MMC from the desktop
On the desktop, press the Windows logo key+R to open the Run dialog box.
In the Run dialog box, type mmc, and then press Enter.
To open an MMC snap-in from the Start screen
On the Start screen, type the executable file name of a snap-in.
Example: Type gpedit.msc.
When the snap-in is displayed in the Apps or Search results, click the tile.
To open an MMC snap-in from the desktop
On the desktop, press the Windows logo key+R to open the Run dialog box.
Type the executable file name of a snap-in, and then press Enter.
Example: Type gpedit.msc.
To open Event Viewer
Do one of the following.
To open Event Viewer from the Start screen, type eventvwr.msc, and then press Enter.
To open Event Viewer from the desktop, press the Windows logo key+R to open the Run dialog box, type eventvwr.msc, and then press Enter.
Alternatively, you can open a technology-specific snap-in from the Administrative Tools folder. For information about how to access the Administrative Tools folder, see Access Administrative Tools in this topic.
Keyboard shortcuts
This section provides keyboard shortcuts that are unchanged from WindowsВ 7 and Windows ServerВ 2008В R2, and a table of shortcuts that are new for the Modern user interface in Windows 8 and Windows Server 2012.
Keyboard shortcuts require certain settings and environments to work in a Remote Desktop or virtual machine session. For more information, see Use keyboard shortcuts in a Remote Desktop session and Use keyboard shortcuts in Hyper-V virtual machines in this topic.
Keyboard shortcuts that are unchanged from WindowsВ 7 or Windows ServerВ 2008В R2
WindowsВ 7 or Windows ServerВ 2008В R2 Functionality
Windows logo key
Display or hide the Start screen
Windows logo key+left arrow
Dock active window of a desktop app to left half of screen (no effect on Windows Store apps)
Windows logo key+right arrow
Dock active window of a desktop app to right half of screen (no effect on Windows Store apps)
Windows logo key+up arrow
Maximize active desktop app window (no effect on Windows Store apps)
Windows logo key+down arrow
Restore or minimize active desktop app window (no effect on Windows Store apps)
Windows logo key+Shift+up arrow
Maximize active desktop app window vertically, maintaining width (no effect on Windows Store apps)
Windows logo key+Shift+down arrow
Restore or minimize active desktop app window vertically (no effect on Windows Store apps)
Windows logo key+Shift+left arrow
Move active desktop app window to monitor on the left (no effect on Windows Store apps)
Windows logo key+Shift+right arrow
Move active desktop app window to monitor on the right (no effect on Windows Store apps)
Windows logo key+P
Display projection options
Windows logo key+Home
Minimize all non-active windows, restore on second keystroke (no effect on Windows apps)
Windows logo key+
Open or switch to the program located at the specified position on the taskbar (Example: Windows logo key+1 to open first program.)
Windows logo key+Shift+
Open a new or additional session in the program located at the specified position on the taskbar
Windows logo key+Ctrl+Shift+
Open a new or additional session of the program located at the specified position on the taskbar, running as Administrator
Windows logo key+B
Set focus in the notification area.
Windows logo key+Break
Display the System Properties dialog box.
Windows logo key+D
Show the desktop, restore on second keystroke (no effect on Windows apps)
Windows logo key+E
Open File Explorer to display the Computer page
Windows logo key+Ctrl+F
Search for computers (if you are on a network)
Windows logo key+G
Cycle through installed Windows Desktop Gadgets
Windows logo key+L
Lock your computer (if you are connected to a network domain), or switch users (if you are not connected to a network domain)
Windows logo key+M
Minimize all windows
Windows logo key+Shift+M
Restore minimized windows to the desktop (no effect on Windows apps)
Windows logo key+R
Open the Run dialog box.
Windows logo key+T
Set focus on the taskbar and cycle through programs
Windows logo key+Alt+Enter
Open Windows Media Center
Windows logo key+U
Open Ease of Access Center
Windows logo key+X
Open Windows Mobility Center
Windows logo key+F1
Open Windows Help and Support
Windows logo key+N
Creates a new note (OneNote)
Windows logo key+S
Opens screen clipper (OneNote)
Windows logo key+Q
Opens Lync (Lync)
Windows logo key+A
Accepts incoming call (Lync)
Windows logo key+X
Rejects incoming call (Lync)
Windows logo key+Minus (—)
Zoom out (Magnifier)
Windows logo key+Plus (+)
Zoom in (Magnifer)
Windows logo key+Esc
Keyboard shortcuts that are new for Windows Server 2012 R2, Windows 8.1, Windows Server 2012, and Windows 8
Windows Server 2012 R2, Windows 8.1, Windows 8, or Windows Server 2012 Functionality
Windows logo key+spacebar
Switch input language and keyboard layout
Windows logo key+O
Locks device orientation
Windows logo key+Y
Temporarily displays the desktop
Windows logo key+V
Cycles through notifications
Windows logo key+Shift+V
Cycles through notifications in reverse order
Windows logo key+Enter
Windows logo key+PgUp
Moves Windows apps to the monitor on the left
Windows logo key+PgDown
Moves Windows apps to the monitor on the right
Windows logo key+Shift+period (.)
Moves the gutter to the left (snaps an application)
Windows logo key+period (.)
Moves the gutter to the right (snaps an application)
Windows logo key+C
Opens charms bar
Windows logo key+I
Opens Settings pane
Windows logo key+K
Opens Devices pane
Windows logo key+H
Opens Share pane
Windows logo key+Q
Opens Search pane
Windows logo key+W
Opens Settings Search app
Windows logo key+F
Opens File Search app
Windows logo key+Tab
Cycles through Windows apps
Windows logo key+Shift+Tab
Cycles through Windows apps in reverse order
Windows logo key+Ctrl+Tab
Cycles through Windows apps and snaps them as they are cycled
Windows logo key+Z
Use keyboard shortcuts in a Remote Desktop session
Before you connect to a Remote Desktop (also known as RDP) session, you can configure the session to accept Windows key combinations, whether the session is contained within a window, or occupies the full screen.
To apply keyboard shortcuts to a Remote Desktop session
If the Remote Desktop Connection dialog box is not already open, open it by typing mstsc on the Start screen, and then pressing Enter.
On the Remote Desktop Connection dialog box, click Show Options to display connection setting tabs.
In the Keyboard area of the Local Resources tab, select one of the following from the Apply Windows key combinations drop-down list.
To apply keyboard shortcuts to a full-screen Remote Desktop session, select Only when using the full screen.
To apply keyboard shortcuts to a Remote Desktop session that is contained within a window, select On the remote computer.
When you are finished configuring other settings for your Remote Desktop session, click Connect to connect to the session and start working, or click Save on the General tab to save your connection settings as an RDP file that you can use for future connections.
Use keyboard shortcuts in Hyper-V virtual machines
Before you start a virtual machine connection, you can apply Windows key combinations to virtual machine connections on a physical host computer by editing the Hyper-V settings for the physical computer in the Hyper-V Manager console.
The setting in this procedure is selected by default if the Hyper-V host computer is running Windows Server 2012 R2 or Windows Server 2012. If the host computer is running Windows 8.1, Windows 8, Windows Server 2008 R2, or Windows Server 2008, you must change the setting to apply Windows key combinations to virtual machine connections.
To apply keyboard shortcuts to new virtual machine connections
Open the Hyper-V Manager snap-in if it is not already open.
If you are running Remote Server Administration Tools for Windows 8.1 or Windows 8, or you are running Windows Server 2012 R2 or Windows Server 2012, open Server Manager, and then open Hyper-V Manager from the Tools menu in Server Manager.
On the Start screen, click Hyper-V Manager.
If the Hyper-V Manager tile is not on the Start screen, type all or part of the name, Hyper-V Manager until the Hyper-V Manager tile appears on the Start screen.
In the tree pane, right-click the physical host computer, and then click Hyper-V Settings.
In the User area of the navigation pane, click Keyboard to display keyboard shortcut settings.
Select Use on the virtual machine to allow new virtual machine connections to accept Windows key combinations from the physical computer. Click OK to save your changes and close the Hyper-V Settings dialog box.
This setting does not apply to virtual machine connections that are already open.


